
In this episode of our series on the Basics of Photography, we’re going to talk about a topic that isn’t very popular, but that almost every photographer has to deal with from time to time: noise. Or, more specifically, image noise of the kind that appears in digital photographs under certain circumstances. In this article, we’re going to look at the different kinds of digital image noise, the specific circumstances under which it appears, and how to get rid of it without compromising the overall quality of the final image.
What is Digital Image Noise?
Remember back in the old days of analog TV how all you’d see was ‘snow’ when a TV station wasn’t tuned in correctly? What you would see were, in principal, rogue electromagnetic signals that got picked up by your TV’s antenna and displayed as static on the TV. In digital photography, the noise that appears in images is a bit like that, only that the static doesn’t come from outside the sensor, but is generated in the sensor itself.
Because a digital camera’s sensor isn’t a 100% perfect machine, the electronic signals that are being used to create an image don’t always behave as they’re supposed to. They have a habit of jumping from photosite (i.e. pixel) to photosite, basically corrupting the information that will later make up each pixel’s color and brightness information. This can happen both while the image is being recorded and while the sensor’s data is being read out.
What Kinds of Digital Image Noise are There?
Digital image noise comes in various flavors, and not all of them can be controlled equally well. The most apparent kinds of noise are chroma and luminance noise, which are aberrations in brightness and color information that are usually limited to individual pixels. These two types of noise can be dealt with easily in most image processing softwares. Other kinds of noise, such as blotching and banding, are much more difficult to get rid off, and much more unpleasant to look at.
Click each image to open a full-size version.
Luminance Noise

This is the type of noise that most closely resembles the grain of analog film. Since analog film is composed of chemical substances, it consists of tiny particles that suck in the light and get stuck in the emulsion after the film is developed. Since they vary in size and shape, a developed film image, when enlarged, can show a certain amount of grain that is due to these differences in the particles that make up the film emulsion. In digital images, luminance noise describes slight differences in brightness between individual pixels.
Take for example a photograph of a clear blue sky. Instead of ending up with one uniformly blue area in the resulting image, you’ll notice that when zooming in, the individual pixels making up the sky all have a slightly different brightness. This makes the image look like it was sprinkled with tiny grains of salt and pepper–hence the designation ‘grain’. Depending on you camera’s settings, this grain can be very subtle and hardly obtrusive, or it can be very strong in which case you might want to get rid of it (more on that later.)
Chroma Noise
Where luminance noise occurs, chroma noise won’t be far. This is the color-information equivalent of luminance noise, that is small aberrations in color between individual pixels, instead of brightness. Chroma noise is most apparent in the darker areas of an image, and looks a bit like someone sprinkled multi-colored confetti all over your picture. Unlike luminance noise, chroma noise is perceived as very unpleasant by most people, but thankfully most image processing and noise reduction softwares do a great job of getting rid of it.
Blotching

Blotching is a particularly unpleasant kind of image noise. As its name suggests, blotching appears as large colored blotches in an image. Because these blotches vary in size and shape and cover larger areas of multiple pixels, they are usually very difficult to get rid of. Blotching appears mostly at higher ISO sensitivites, and is more common in compact cameras with small sensor, but it can also occasionally appear in images that were taken with mirrorless or DSLR camera sporting larger sensors.
Banding

Another unpleasing kind of noise, and also one that is difficult to cope with, is banding. Banding noise appears as horizontal streaks in a photograph, usually going from one edge of the image to another. Their location can vary from image to image, as can their size and strength. Banding can also appear either as brightness streaks, similar to luminance noise, or as colored streaks similar to chroma noise. Just like blotching, it appears mostly at higher sensitivities.
How Does Noise Occur?
We could go into the technical details of how exactly noise comes to be, but since this series is aimed at the beginner, we’re going to keep things as simple as possible. Noise happens all the time on your sensor, but as long as there is enough light available–meaning your ISO setting is low, and your shutter speed is fast–it won’t be apparent in most images. However, as soon as light gets dim, you might have to crank up your ISO, and suddenly you’ll have a lot of noise in your images.
The less light there is to fill the individual pixels on your sensor, the more the signal that comes out of the sensor needs to be amplified in order to end up with an image that is bright enough to see anything in it. When amplifying the sensor’s signal, not only does the image information get boosted, but also the noise that occured naturally while taking the photo. So basically, the more you crank up your ISO, the more noise you’ll get.
Another source of image noise can be heat. So on warm days, or when you’ve been shooting video or lots of pictures in series, your sensor might develop more noise because it has a higher temperature. Also, since noise is present in every image, even those you’ve taken under indeal circumstances, it can become more apparent as soon as you edit your pictures on your computer and boost their brightness–especially when enhancing the shadow regions of an image.
How to Get Rid of Noise
There are two ways to deal with noise. One way is to crank up the noise reduction in your camera, which is handy if you don’t want to post process your images. However, using the camera-internal noise reduction has a lot of disadvantages. Because a camera’s internal processor is nowhere as powerful as that of a computer, the noise reduction routines programmed into digital cameras don’t really do a very good job at noise reduction most of the time, so you’re left not only with residual noise, but also with lots of smeared details.
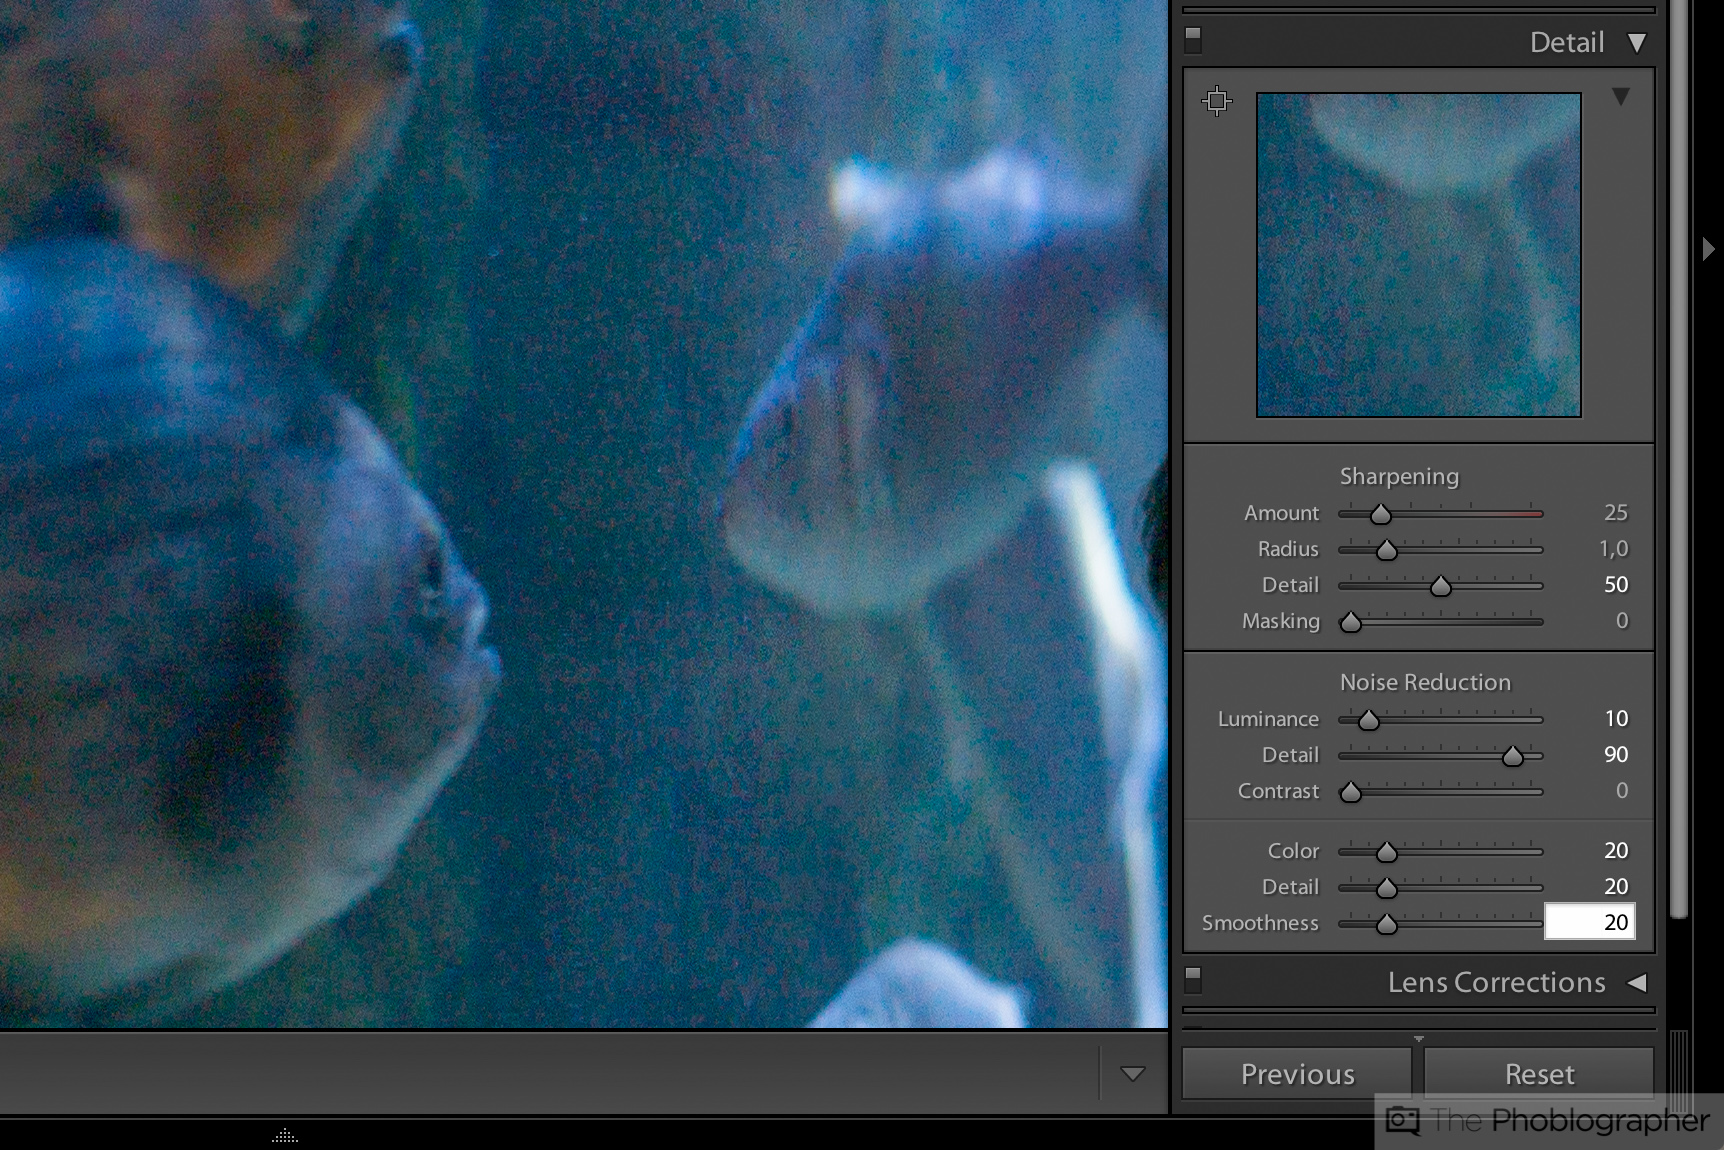
Our advice is to either tune your camera-internal noise reduction down to the lowest level or, if possible, turn it off completely. Instead, run your images to a proper processing software such as Adobe Lightroom. If you’re working with raw files, you’re going to have to do your own noise reduction anyway. If you’re working with JPEGs and don’t want to buy a dedicated processing software, there are tools such as Nosie Ninja that do a great job of reducing image noise.
As a general rule, noise should be dealt with conservatively. If you apply too much noise reduction, the fine details in your image can get lost, and the colors can end up looking wonky. Always only apply as much noise reduction as is absolutely needed in order to preserve the overall quality of your images. Depending what software you use, try playing with the sliders and settings and develop a feeling for how much noise reduction is needed under which circumstances.
And here’s another tip: try keeping your ISO as low as possible, and don’t crank it up unnecessarily. Also, try getting the exposure right in the first place, so you don’t have to brighten your images after you’ve taken them. If you stick to these two simple rules, you save yourself a lot of work and you’ll end up with much nicer images.


Be sure to check out more in the series
A: Aperture
B: Bokeh
C: Composition
E: Exposure
F: Flash
G: Grain
H: HDR
I: ISO
J: JPEG
K: Kodachrome
L: Lighting
For more, please follow us on Facebook, Google+, Flickr and Twitter.
Get rid of the ads!
Did you enjoy reading this article as much as we enjoyed writing it? There's a way to support us and our reporting, getting ad-free navigation and more as a bonus. Subscribe to us for less than a coffee per month —just $3.99— or take advantage of our yearly subscription with a hefty discount for only $25.- An ad-free experience
- A free mystery box for Lightroom or Capture One
- All the books in our store
- 20% discount on Capture One
- 30% discount on Imalume Photo Theft Protection
- 20% off Herbs and Kettle Tea Company.
- 20% off your order from MPIX printing services.
- 5% off Viltrox Products via their eCommerce store.
- 10% off all film developing, printing and scanning services from Blue Moon Camera and Machine
- 15% off 7Artisans products: The lens and accessory maker is offering a sweet discount for Phoblographer's readers.