When stepping up from a smartphone camera or a simple point-and-shoot, one of the first things any novice photographer will notice on their advanced camera is the mode dial that comes with all sorts of confusing settings. While many will simply leave it set to the automatic mode and have it do all the thinking, the fun really begins when you switch to one of the more advanced modes and start making use of the full capabilities of your camera. In this part of our Basics of Photography series, we explore the various shooting modes many cameras come with.
The Mode Dial
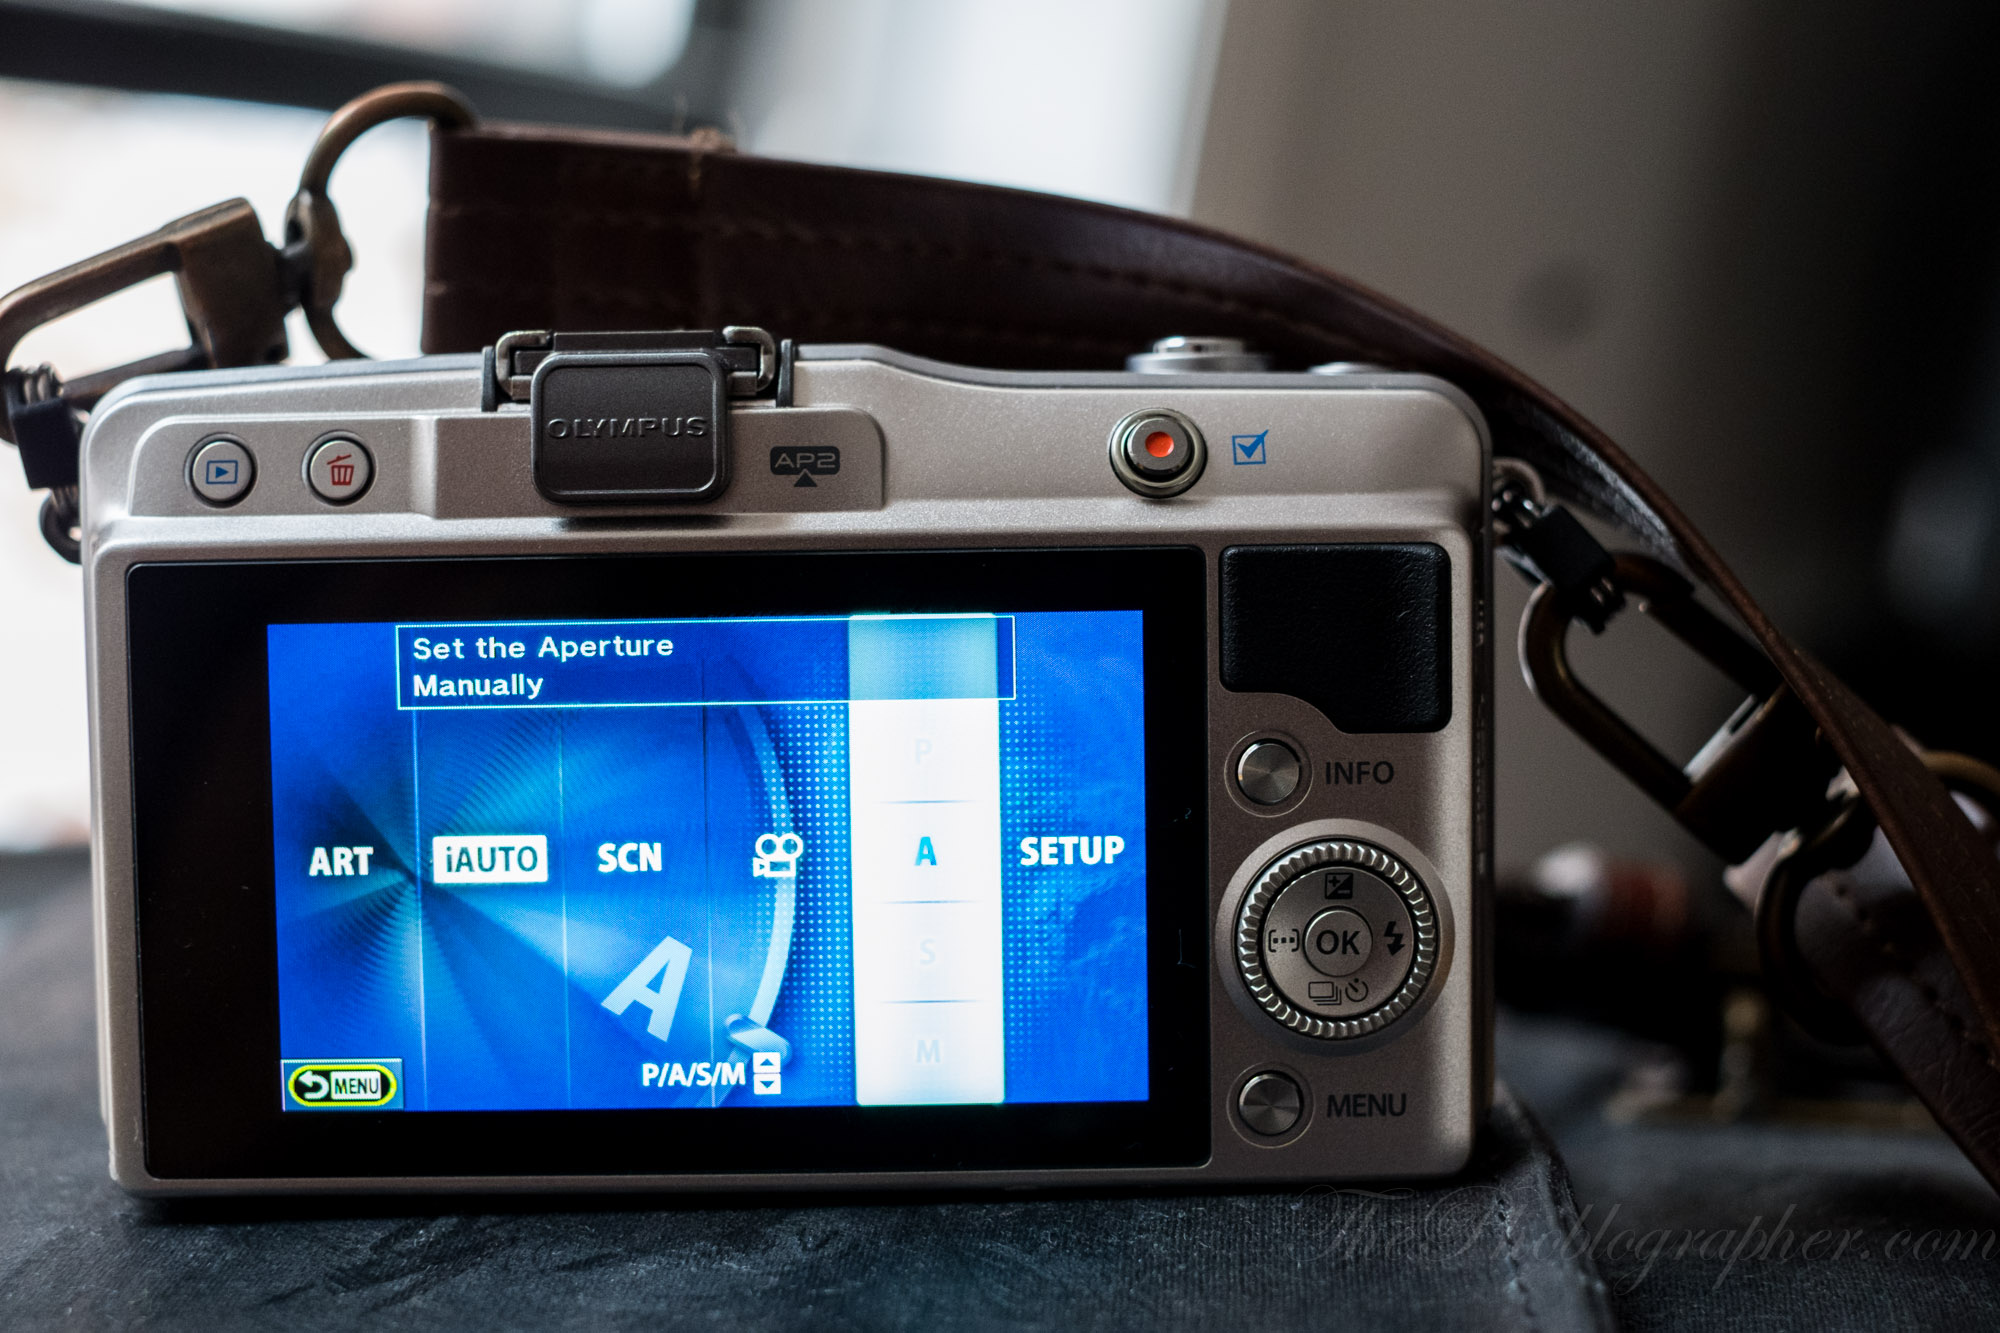
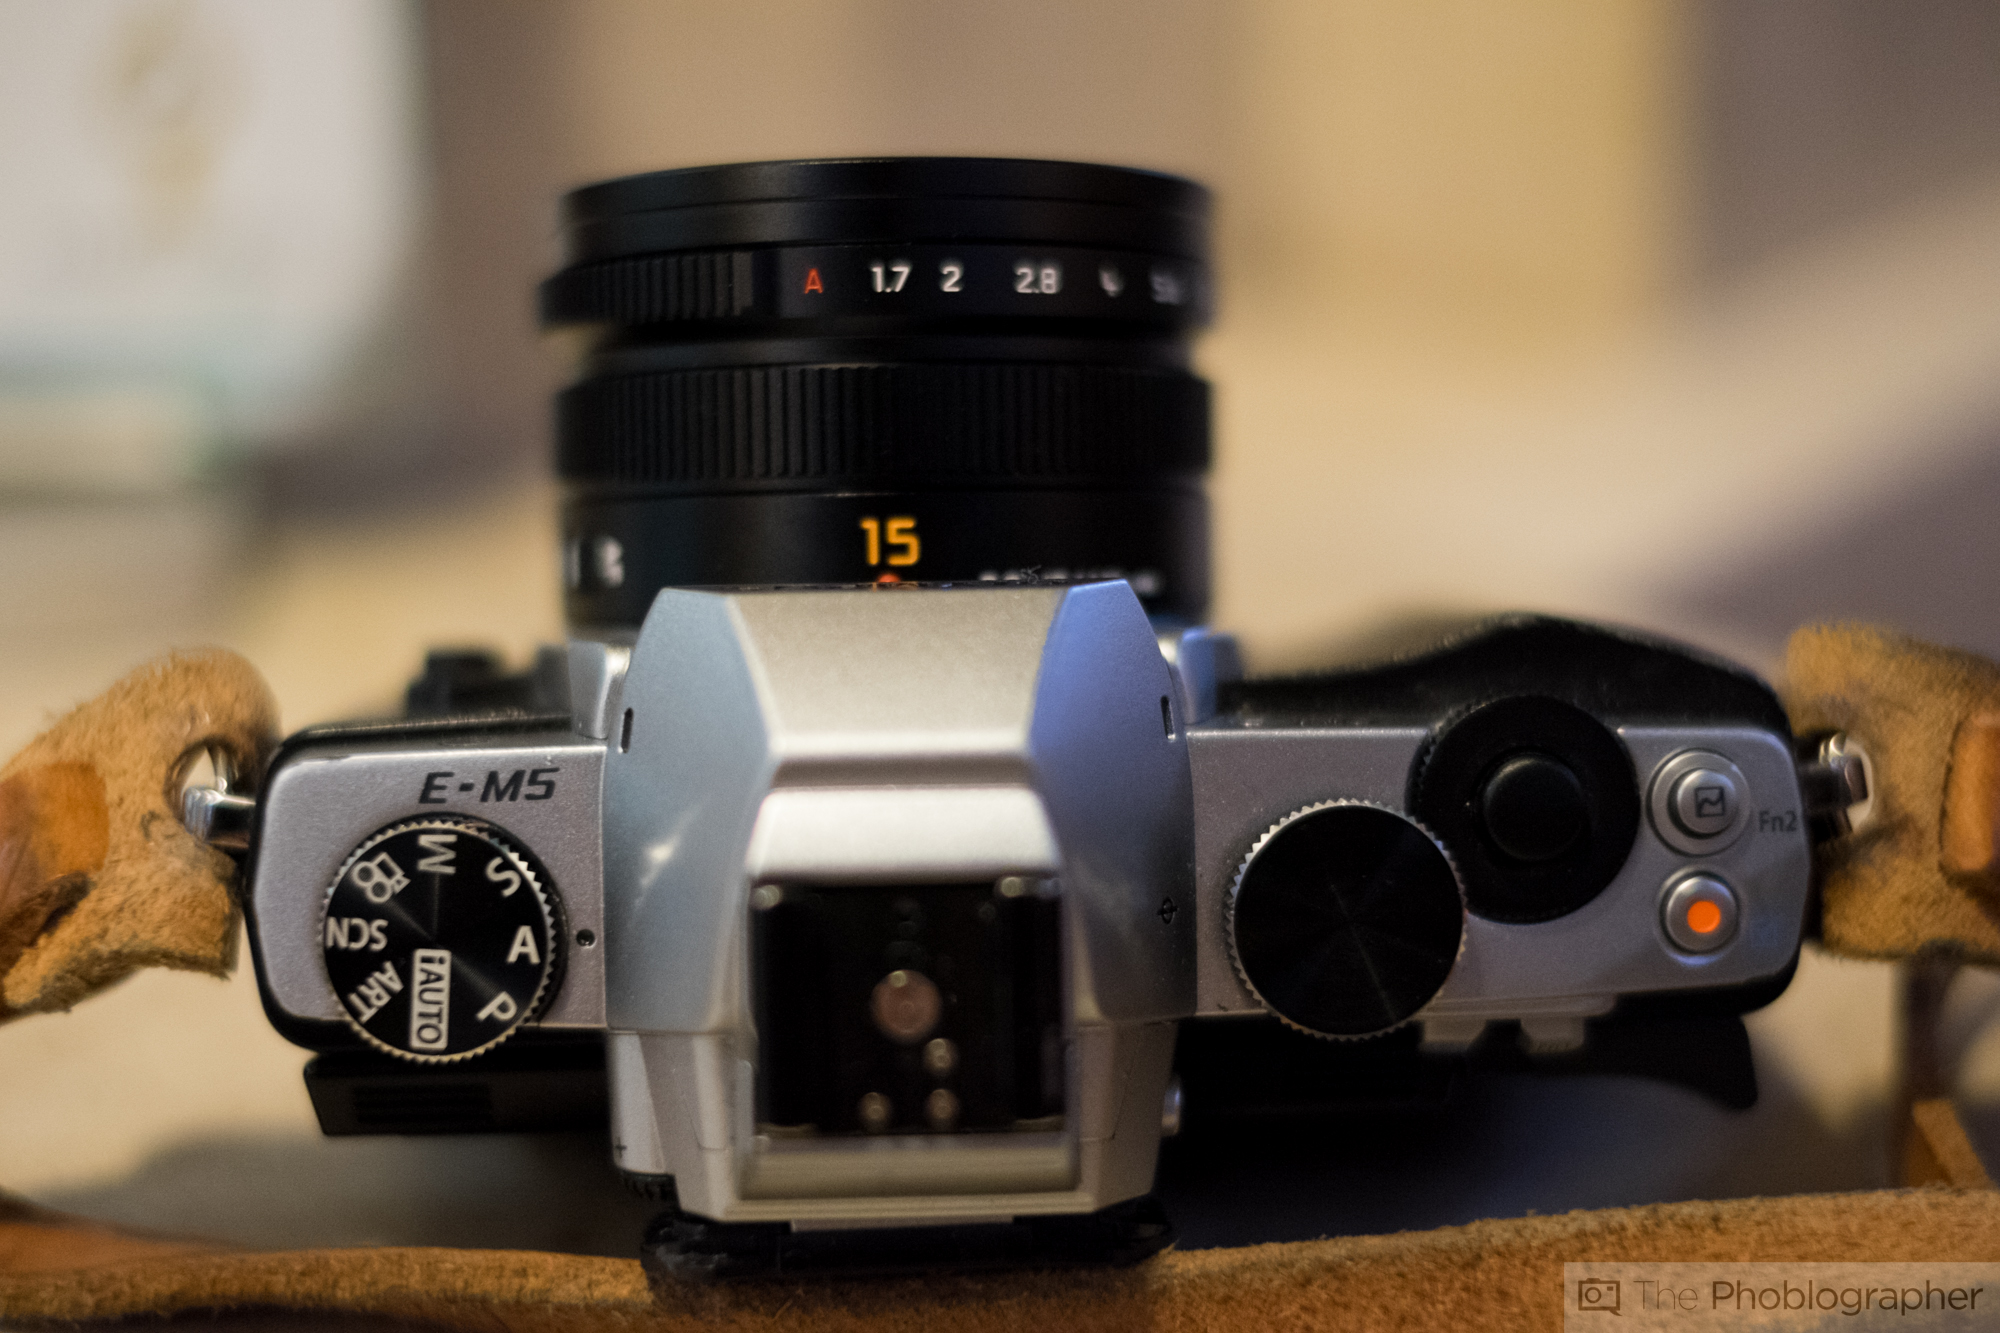
Historically, most cameras have their mode dial somewhere on the top, though these days some smaller models also feature it either on the back or within their touch-operated menus (see for example the lead image above.) Either way, there is usually a standard set of shooting modes that all cameras share, plus some extra settings that vary between manufacturers and models. So here’s a quick breakdown of what you’ll usually find on a camera’s mode dial.

- Auto mode: Mostly labelled ‘Auto’, ‘iAuto’ or ‘A’, this is the shooting mode that will have the camera do all the thinking for you. In essence, it lets you operate even the most advance DSLR like a point-and-shoot camera–no fiddling with any settings needed. Also, these days most automatic modes do a pretty good job at judging a scene and choosing the best settings for snapshots that can be used right out of the camera.
- Advanced shooting modes: The standard set of advanced shooting modes usually includes a program mode, an aperture priority mode, a shutter priority mode and a manual mode. What all of these have in common is that they let the user customize more of the camera’s settings than the auto mode. While the program mode still does the thinking when it comes to aperture and shutter speed, the manual mode requires the user to dial in all the settings by themselves.
- Scene modes: Most cameras these days also come with a set of scene modes, that contain pre-defined settings for various photographic scenarios. Usually, these contain a portrait scene mode, a landscape scene mode, a night photography scene mode, and so on. These modes will help you achieve good results in the respective scenarios they were designed for, and work just like the auto mode in that they’ll do most or all of the thinking for you.
- Custom settings modes: Some cameras will also feature custom settings modes that will let the user save a set of custom paramters. If you encounter specific scenarios frequently, which require specific camera settings to be changed each time, it is a lot easer to save these settings to a custom mode instead of going into the menus each time you want to take a specific kind of photograph.
- Video mode: Not all cameras feature a dedicated video mode. For those who do, switching to this mode will enable video recording as well as offer video-specific settings in the menus. In other cameras, video recording is started simply by pressing the video button.
The Automatic Mode
In this mode, the camera will do all the thinking for you, which essentially means that you can use it like a point-and-shoot, even if it’s a DSLR. While using the automatic mode is the most comfortable way to operate a camera, it also has some major downsides. Because just like with a point-and-shoot, you won’t always get the best results depending on the situation. While most automatic modes these days use some clever algorithms that can recognize a plethora of scenes and choose the appropriate settings, most are far from perfect, and you may still encounter situations where the camera’s brains are simply not flexible enough.
For example, an automatic shooting mode will easily be fooled by a scene with strong contrast, such as a cityscape or a backlit portrait. In such a case, you’ll often end up with an image that is either partially overexposed or partially underexposed, meaning that your subject and/or the environment may turn out far too bright or far too dark. If possible, dialing in exposure compensation will help you achieve a properly exposed image, but this isn’t possible with all cameras.
Another scenario that most automatic modes can’t cope with are low light situations where your subject is far away, such as landscapes in twilight or concerts. Typically, automatic modes will activate the camera’s built-in flash in such a situation, which will serve you little because its reach isn’t far enough to light a landscape or the stage of a concert all. In these cases, you’ll end up with strongly underexposed images and little to see.
In good light, though, many auto modes do a great job of delivering usable snaps straight out of the camera. So for example when you’re on vacation and don’t want to waste your time with fiddling with you camera’s setting, the auto mode could be your best friend.
The Advanced Shooting Modes
Now this is where things get interesting. As soon as you leave the auto mode, most cameras will offer you a vast number of settings to fiddle with. These include the aperture setting of the lens, the shutter speed, the ISO value, the exposure compensation, and many more. In order to make the best use of these settings, you need to know a bit or two about your camera. In the following sub-sections, we’ll take a look at the four advanced shooting modes most cameras feature, and at the most important settings that you can tweak.
Also read: The Basics of Photography: A for Aperture and The Basics of Photograpy: I for ISO
Program Mode
The ‘program’ mode is designated by the letter ‘P’ on most cameras’ mode dials, and isn’t too unsimilar to the automatic mode. Just like the auto mode, the program mode will do most of the thinking for you, by selecting the best combination of aperture and shutter speed depending on the light available in a scene. However, unlike the auto mode, the program mode won’t recognize specific types of scenes, and it will not automatically change all the settings of your camera. Instead, it offers you to tweak settings such as ISO speed, metering and other image quality parameters yourself. The choices available depend on the maker of the camera and the camera model.
How program mode works is that it offers you pre-determined pairings of aperture and shutter speed settings by taking into account the amount of light available in any given scene. This is where it’s similar to the automode. On top of that, using one of the dials on your camera dedicated to setting either of these values, you can flip through these pairings depending on what kind of scene you’re shooting: a landscape that needs a small aperture, a portrait that needs a large aperture, or an action shot that needs a fast shutter speed. Or, if you’re lazy and don’t want to think about aperture and shutter speed, you can just let the camera pick a setting.
Aperture Priority Mode
Aperture priority mode, abbreviated either ‘A’ or ‘Av’ on most cameras, lets you choose an aperture setting and will automatically determine the best shutter speed depending on how much light there is available in a given scene. This is the preferred mode of many enthusiats and professionals, who choose their aperture setting depending on how large or shallow a depth-of-field they want to achieve (think portrait with blurred background vs. landscape where everything is in focus,) but don’t want to fiddle with the shutter speed as well. However, as soon as critical exposure is important, such as in studio situation, you might want to consider switching over to manual mode.
Shutter Priority Mode
The shutter priority mode, abbreviated either ‘S’ (for shutter) or ‘Tv’ (for time value,) is the counterpart of the aperture priority mode that lets you select a specific shutter speed, while the camera selects the best aperture value depending on the lighting situation. This is the mode to choose when you want to either freeze or capture motion. A situation where you want to freeze motion could be an action shot, for example a sports game. Here, you want a very fast shutter so you don’t get motion blur. On the other hand, if you want to capture motion such as that of flowing water, you need a slow shutter speed (and ideally a tripod so you don’t get shake-induced blur.)
Manual Mode
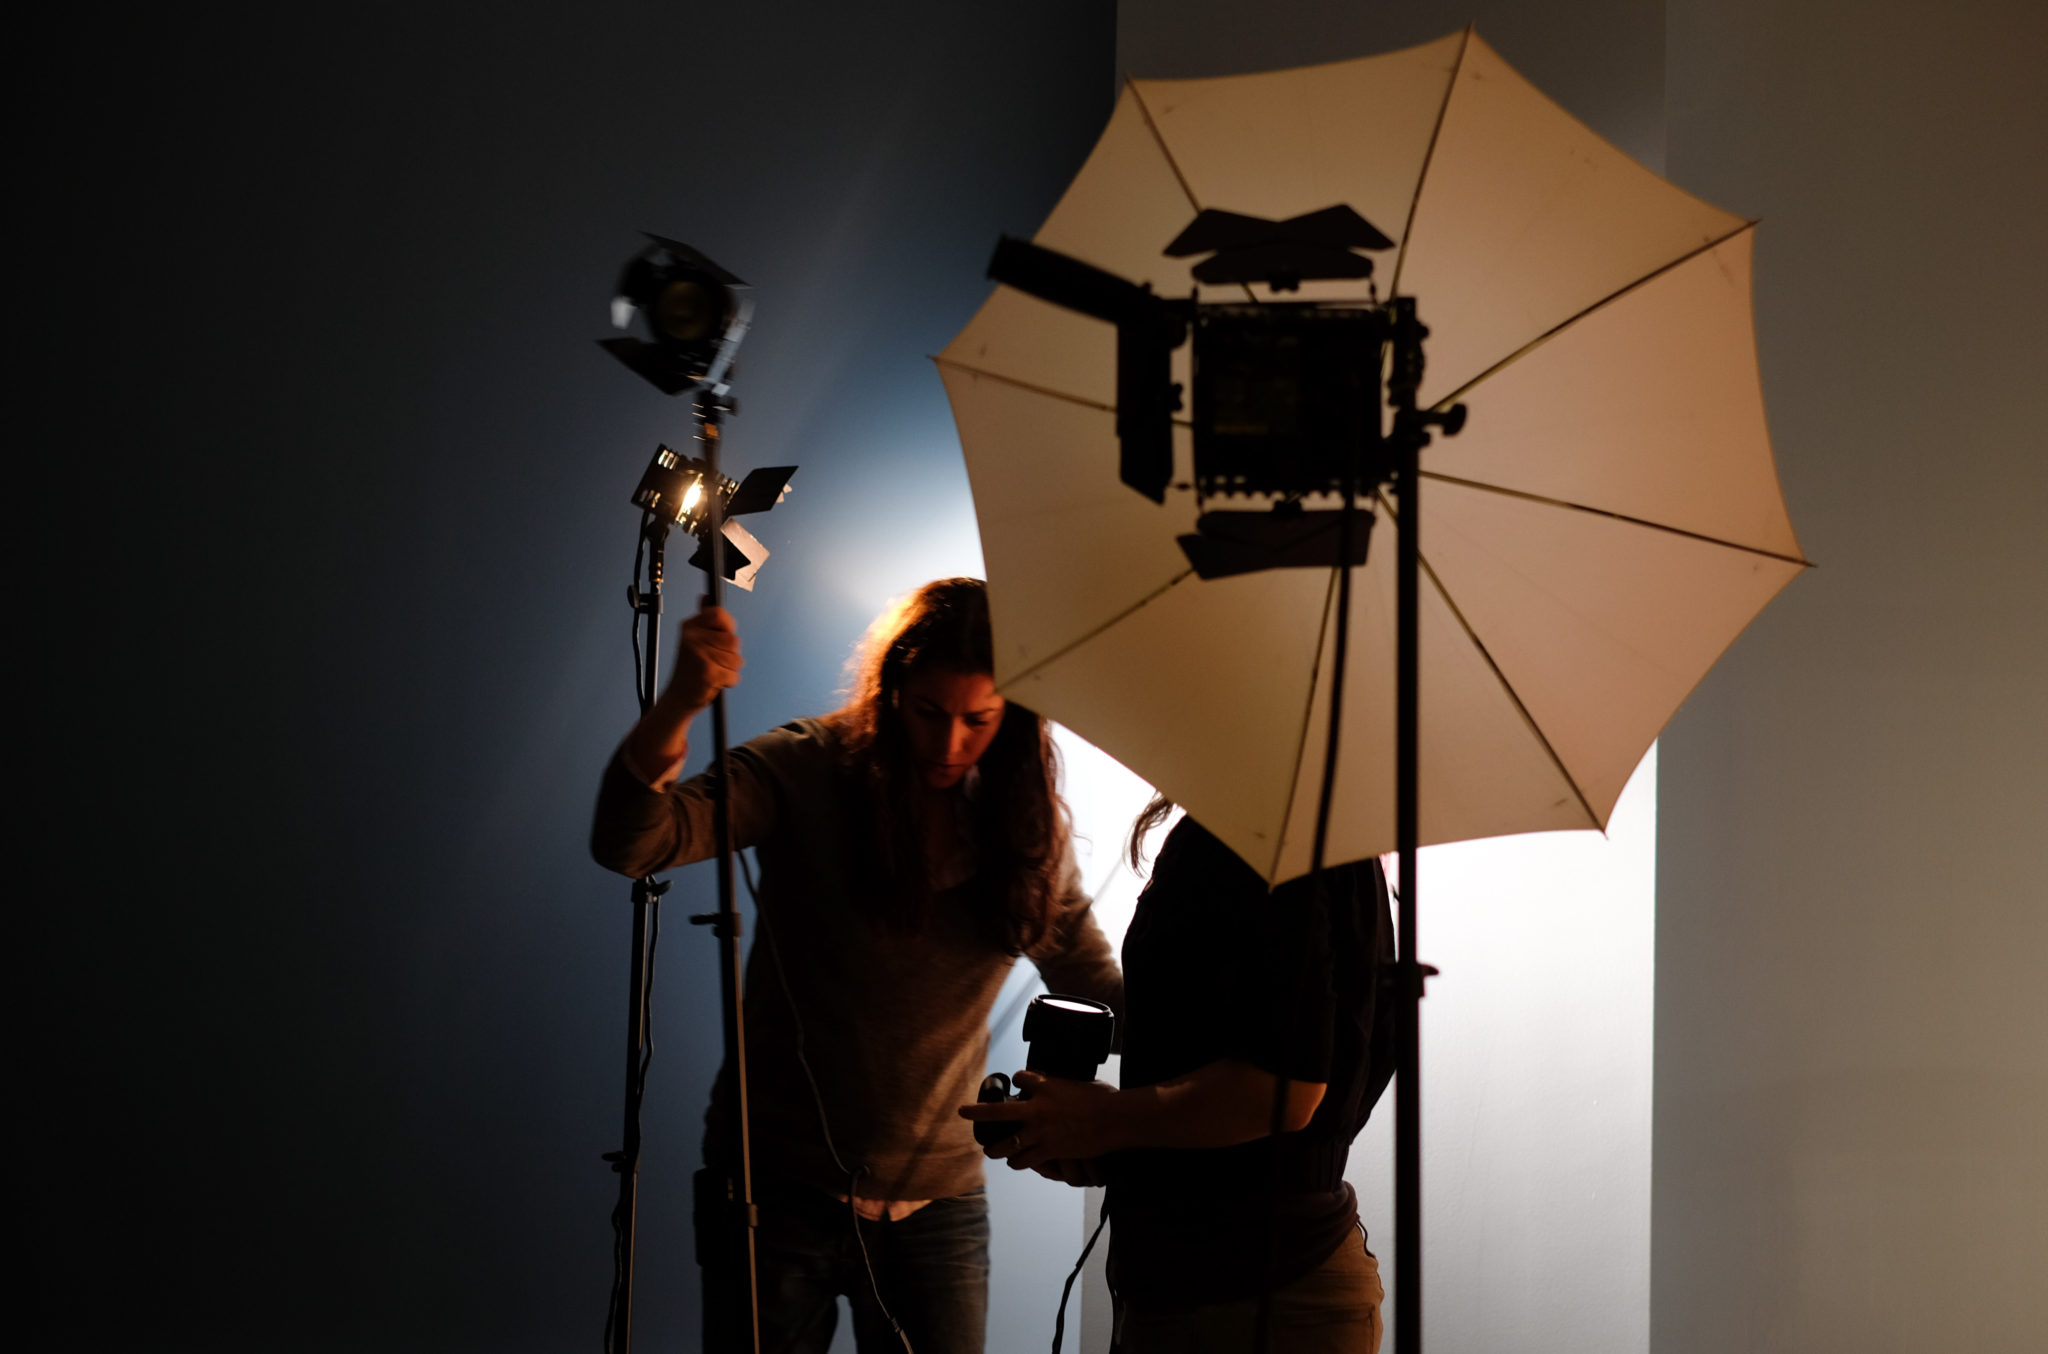
This is the mode that many professional photographers rely on, and the one that requires solid knowledge about how aperture, shutter speed, ISO setting and metering relate to each other. Abbreviated ‘M’ on most cameras, this mode basically lets you tweak all the settings by hand, and is the one that has the greatest potential for ending up with a bad exposure if you’re not absolutely confident about what you’re doing. It is often used when a photograph is lit by a flash and precisely metered ahead of the exposure, either in-camera or with a hand-held meter. Our pro tip: don’t fiddle with this unless you know what you’re doing.
Settings to Keep Track of When Using the Advanced Shooting Modes
As mentioned above, the advanced shooting modes not only let you fiddle with your aperture and shutter speed settings, but also with a number of other settings that are unaccessible in auto mode. The most important of these are ISO speed and metering, because both of these have a direct influence of the exposure of your image.
The ISO speed setting determines the sensitivity of your sensor, and is basically a way of making an image brighter than it really is when it hits the sensor. Back in the day of film, the ISO sensitivity would determine whether a fim could be used only in daylight, or also in low light such as indoors or at night, when there is little light available.
As a general rule, the higher the ISO value, the less light you need and the brighter your resulting image will turn out. Most cameras offer an automatic ISO mode, where the camera will choose the best ISO value depending on the light available and the aperture and shutter speed settings chosen. But you can also set the ISO value yourself if you’re confident enough.
The metering mode of your camera determines which part of the scene will be used in order for the camera to choose an exposure setting that includes aperture, shutter speed and ISO. Most cameras offer at least spot metering, center-weighted metering and integral metering.
Spot metering will meter, as the name suggest, in only one spot in the center of the image. If that spot is very bright, the camera will darken the rest of the image so that the center spot is exposed correctly. If that spot is very dark, the camera will brighten up the rest of the image. Spot metering is most useful when you want to make sure that either the brightest parts of a scene aren’t overexposed, or the darkest parts aren’t underexposed.
Center-weighted metering meters in a larger area in the center of the frame, and will take into account not only the center spot but also the area immediately surrounding it. So if the center spot is very dark but the area surrounding it is a bit brighter, the camera will not boost the exposure as much as it would in spot metering mode. This is probably the most useful metering mode if you have a single subject that you want to be exposed correctly.
Integral metering, also called matrix metering, will determine the best exposure by looking at the distribution of light across the whole image. This mode is most useful when you want to achieve a balanced exposure and don’t mind occasional blown-out highlights or blocked shadows. In order to prioritize either brighter or darker parts of a scene when using this metering mode, you will have to dial in exposure compensation.

Also read: The Dark Art of Metering
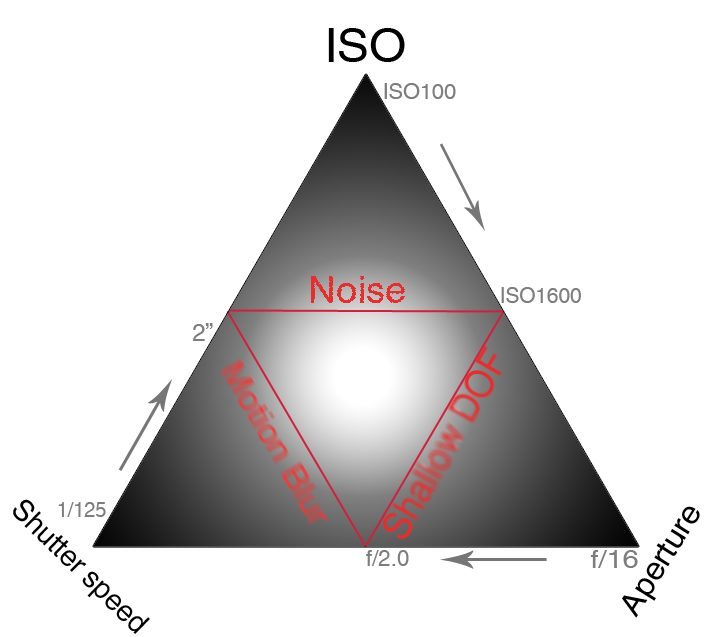
Finally, you’ll need to understand how aperture, shutter speed, ISO setting and metering mode all influence a resulting image at the same time, so here’s a quick breakdown.
- Aperture: small value (e.g. f1.4) means aperture is larger and more light comes in. At the same time, depth-of-field will be reduced. Great for emphasizing a subject by blurring the background. Large value (e.g. f8) means aperture is smalelr and less light comes in. More will be sharp in the resulting image. Great for landscapes.
- Shutter speed: small value (e.g. 1/30 of a second) means more light comes in, but motion or shake-induced blur is possible. Large value (e.g. 1/1000 of a second) means less light comes in, and motion will be frozen.
- ISO value: lower setting (e.g. 100) means more light is required for a proper exposure. Higher setting (e.g. 1600) means less light is required for a proper exposure.
So, when closing down the aperture to a larger value such as f8, you will need more light to hit the sensor in order to achieve a balanced exposure (always depending on your metering mode.) More light can be gathered by lowering the shutter speed. Alternatively, ISO speed can be boosted to make the image brighter.
When you want to freeze action with a fast shutter speed, for example, you’ll also need lots of light to hit the sensor. This can be achieved by opening up the aperture, or by boosting the ISO speed to make the image brighter. In a situation where there is a lot of light available, such as a bright and sunny day, you will need a smaller aperture (= larger value,) fast shutter speed and low ISO setting. When there is little light available, you will need a larger aperture (= smaller value,) slower shutter speed and higher ISO setting.
Also read: How ISO, Shutter Speed and Aperture All Relate to One Another
Scene Modes and Custom Modes
The scene modes that many cameras come with are basically automatic modes that are pre-configured for specific photographic scenarios. For example, a portrait scene mode will choose a larger aperture, and at the same time a shutter speed and ISO value that will make sure the person photographed is properly exposed. A landscape scene mode will choose a small aperture for a large depth-of-field, and will usually meter across the whole scene to achieve a balanced exposure. Finally, an action scene mode will choose both a fast shutter and small aperture so that the subject is guaranteed to be sharp and in focus, which will often require a higher ISO setting.
The custom modes, where available, often work similar to the advanced shooting modes, with the difference that they can be used to quickly select a number of pre-defined settings. For example, when you shoot a lot of portraits with flash, you can set one of the custom modes to select a large aperture, a shutter speed that supports the use of a flash, and an ISO value that reflects the fact that the flash adds extra light into the scene. Also, you can select picture modes in some cameras that will tweak the colors so that skin looks as natural as possible, and you can set your camera to record raw files so that you can tweak the images during post-processing.
Conclusions
As you saw in this article, your camera has much more to offer than just point-and-shoot-like operation. While the scene modes help you to achieve great results in different scenarios (not all of which the auto mode will be able to recognize,) the advanced shooting modes let you tweak most, if not all of the settings your camera has to offer, and take total control over all the parameters that influence the look of the final image. However, these require a certain amount of knowledge about how the settings such as aperture and shutter speed influence the look of an image, and confidence in selecting the correct ones.
In the end, what is most important is that you choose a shooting mode that you feel comfortable with. If you want to be in control of what your camera does and know what you’re doing, you’ll want to go for the advanced shooting modes. If you don’t want to think about settings and just want to take pictures, the auto mode might be the best choice for you. If you want your camera to adapt to specific scenarios, but don’t feel confident choosing the settings yourself, the scene modes will do a great job for you. And if you frequently switch between specific settings and don’t want to have to dial them in each time, you might want to make use of the custom settings modes.
Be sure to check out more in the series
A: Aperture
B: Bokeh
C: Composition
E: Exposure
F: Flash
G: Grain
H: HDR
I: ISO
J: JPEG
K: Kodachrome
L: Lighting
For more, please follow us on Facebook, Google+, Flickr and Twitter.
Get rid of the ads!
Did you enjoy reading this article as much as we enjoyed writing it? There's a way to support us and our reporting, getting ad-free navigation and more as a bonus. Subscribe to us for less than a coffee per month —just $3.99— or take advantage of our yearly subscription with a hefty discount for only $25.- An ad-free experience
- A free mystery box for Lightroom or Capture One
- All the books in our store
- 20% discount on Capture One
- 30% discount on Imalume Photo Theft Protection
- 20% off Herbs and Kettle Tea Company.
- 20% off your order from MPIX printing services.
- 5% off Viltrox Products via their eCommerce store.
- 10% off all film developing, printing and scanning services from Blue Moon Camera and Machine
- 15% off 7Artisans products: The lens and accessory maker is offering a sweet discount for Phoblographer's readers.