Last Updated on 01/18/2014 by Felix Esser
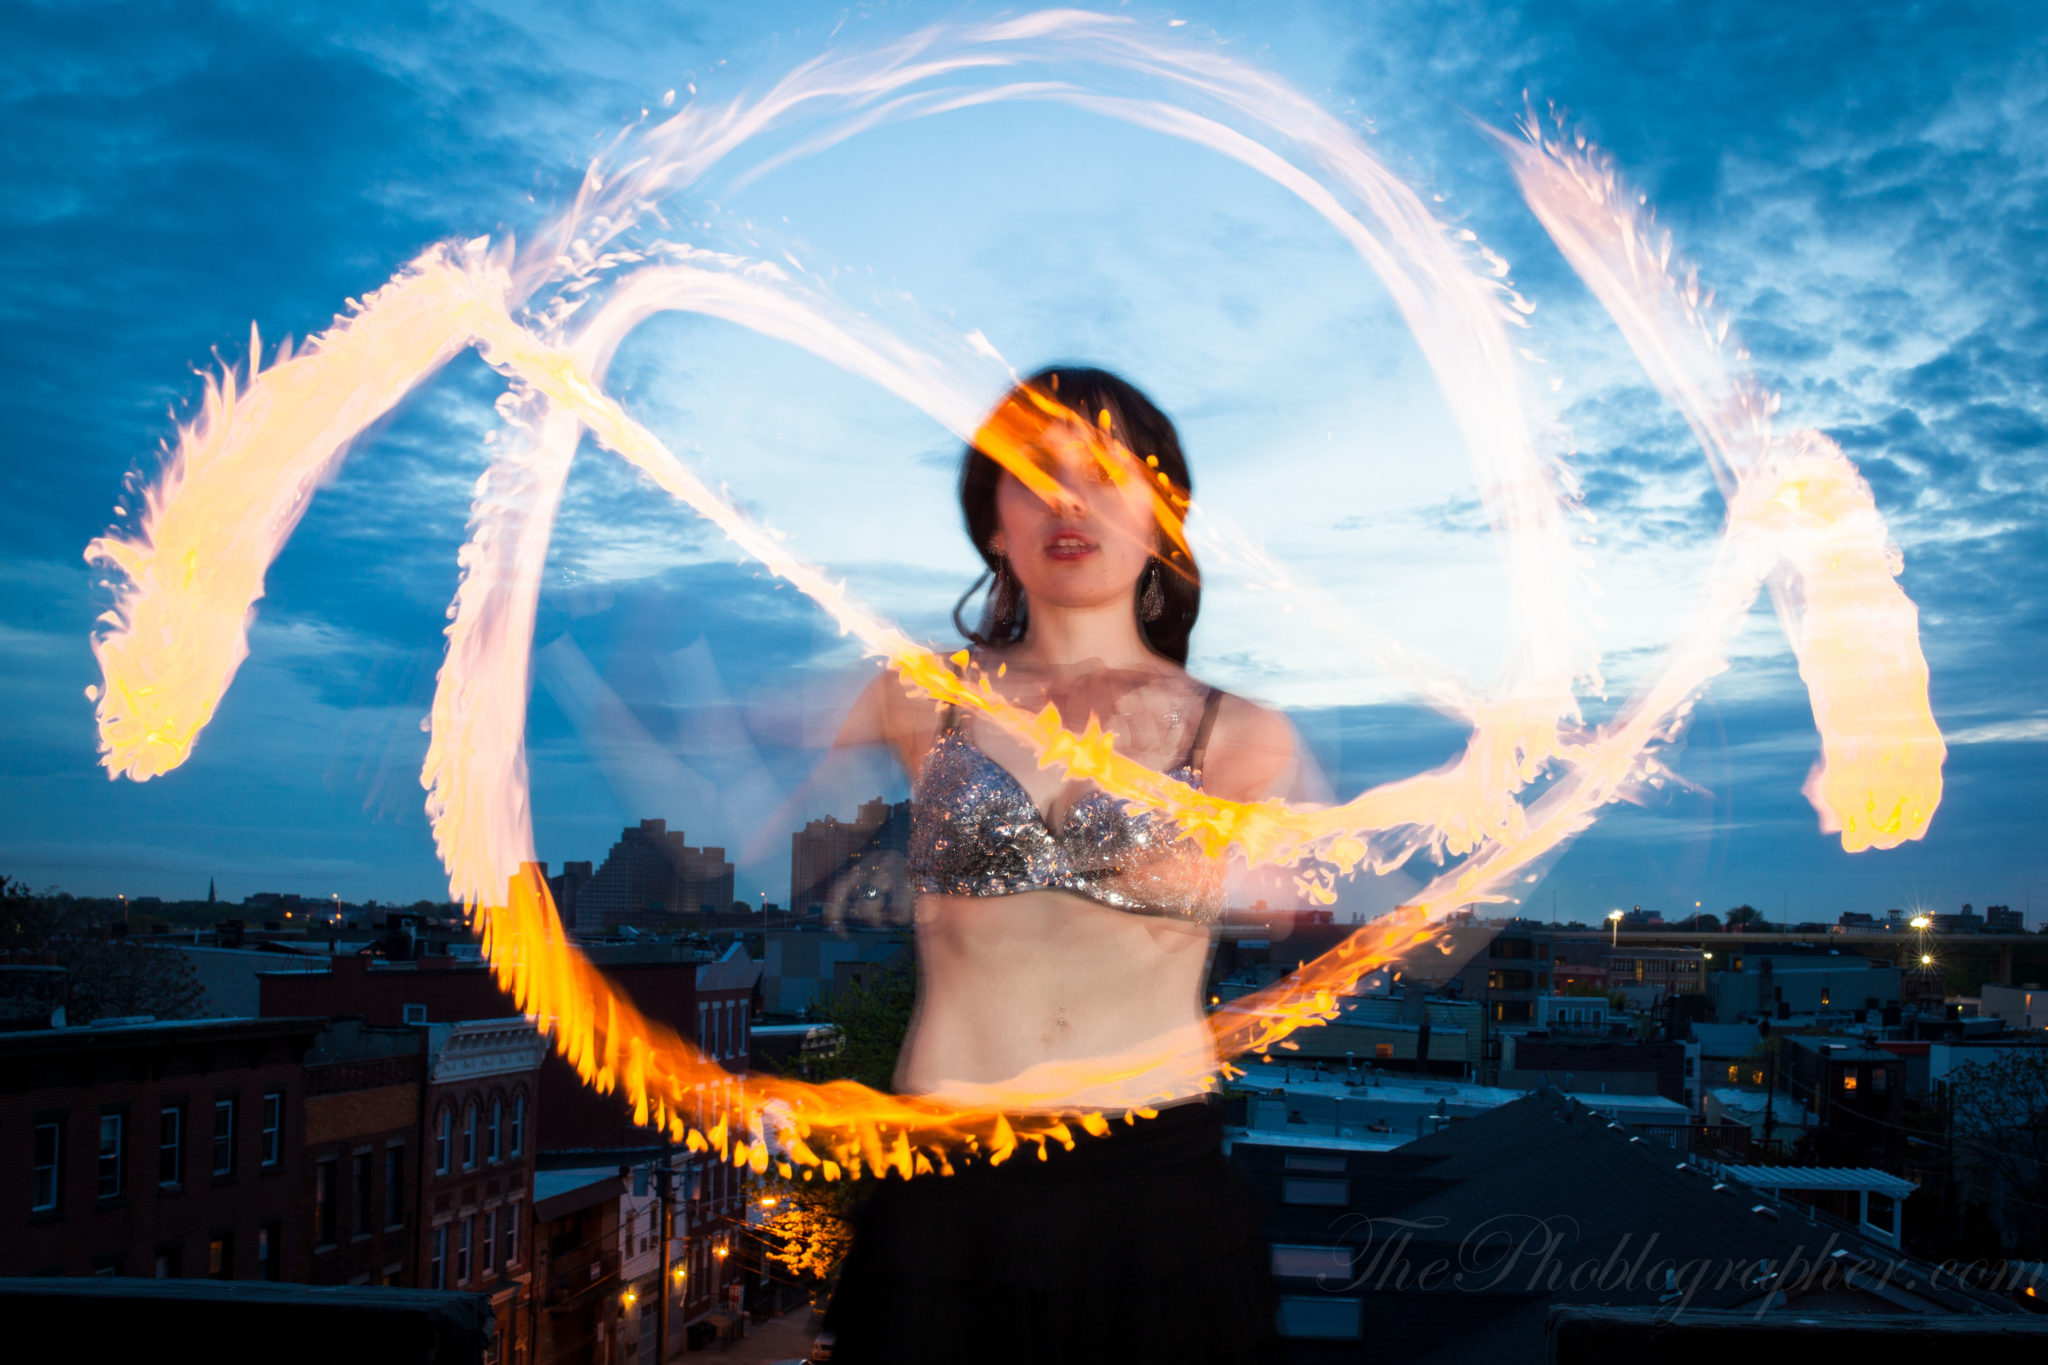
In continuing with our Alphabetical explanations of key photography terms, we’re now at the letter, “F.” And the biggest thing that comes to mind besides film is the thing that many photographers fear: flash. Yes, marketing departments will tell you that their high ISOs are so good that you don’t need a flash. But that’s silly marketing speak–especially coming from a guy that used to work in Social Media Marketing for the photo industry. Flash is all about creating your own light and should be used as a creative tool that can supplement the available light in a situation.
But what exactly is flash?
Brief History of the Flash
In the super early days of photography, the ISOs were incredibly low and in order to get anything at all in focus one needed to stop down their apertures quite a bit due to the fact that many photos were what we would consider large and medium format. Before we go any further, let’s explain this to you:
– When it comes to photography involving a flash, the shutter speed is directly related to the ambient light in an area, the ISO is the overall sensitivity, and the aperture/f-stop controls how much of the flash’s light affects the image.
With that in mind, when you had an image of somewhere around ISO 8 and maybe an fstop of f64, one could either do a super long exposure or add some extra light to it. And in order to add that light a derivative of gun powder was created: but it was called flash powder. Yes, that indeed means that early photographers did flash photography with some explosive results.
Fast forward ahead and the technology changed out to flash bulbs. After each use, the bulb needed to be replaced. Then came flash cubes, which worked exactly how the video below shows.
And all of that brings us to modern day flashes and strobes, which are all designed using an electronic charge that sets off a rather bright reaction with a gas inside a tube.
That’s the Sparknotes version of it, and in fact it’s far more complicated than that. But you don’t care about it. You care about how to use the damned thing.
How to Use Flash
Before we even get into how to use flash, know that there are two different main types: TTL and Manual. TTL is what most folks aim for because it is easier to use. When the flash is connected to your camera’s hot shoe or when synced via infrared or radio and is of the same system, the flash will automatically meter itself to give you the best exposure based on your camera’s aperture an ISO setting.
Then there is manual flash, and that means that you’re controlling it all by yourself. Many strobists and professionals prefer manual flash the same way that they prefer to set their camera’s exposure. But TTL has essentially dominated the wedding and event market–and for great reason, too.
Quick Tips and Techniques
– We don’t encourage using flash with it aimed directly at the subject unless that is the look that you’re going for. It is a highly valued look in the flash industry, but otherwise there is much more to it.
– Try to bounce your flash off of a surface like a ceiling or a wall. Our guide to bounce flash tells even more about this.
– Use the zoom head. Your flash can zoom typically from 28mm to 102mm. The wider the zoom, the more coverage it will have. The more narrow the zoom, the longer the flash throw and the narrower it will be.
TTL
In order to have TTL flash, you need to have the right communication contacts.
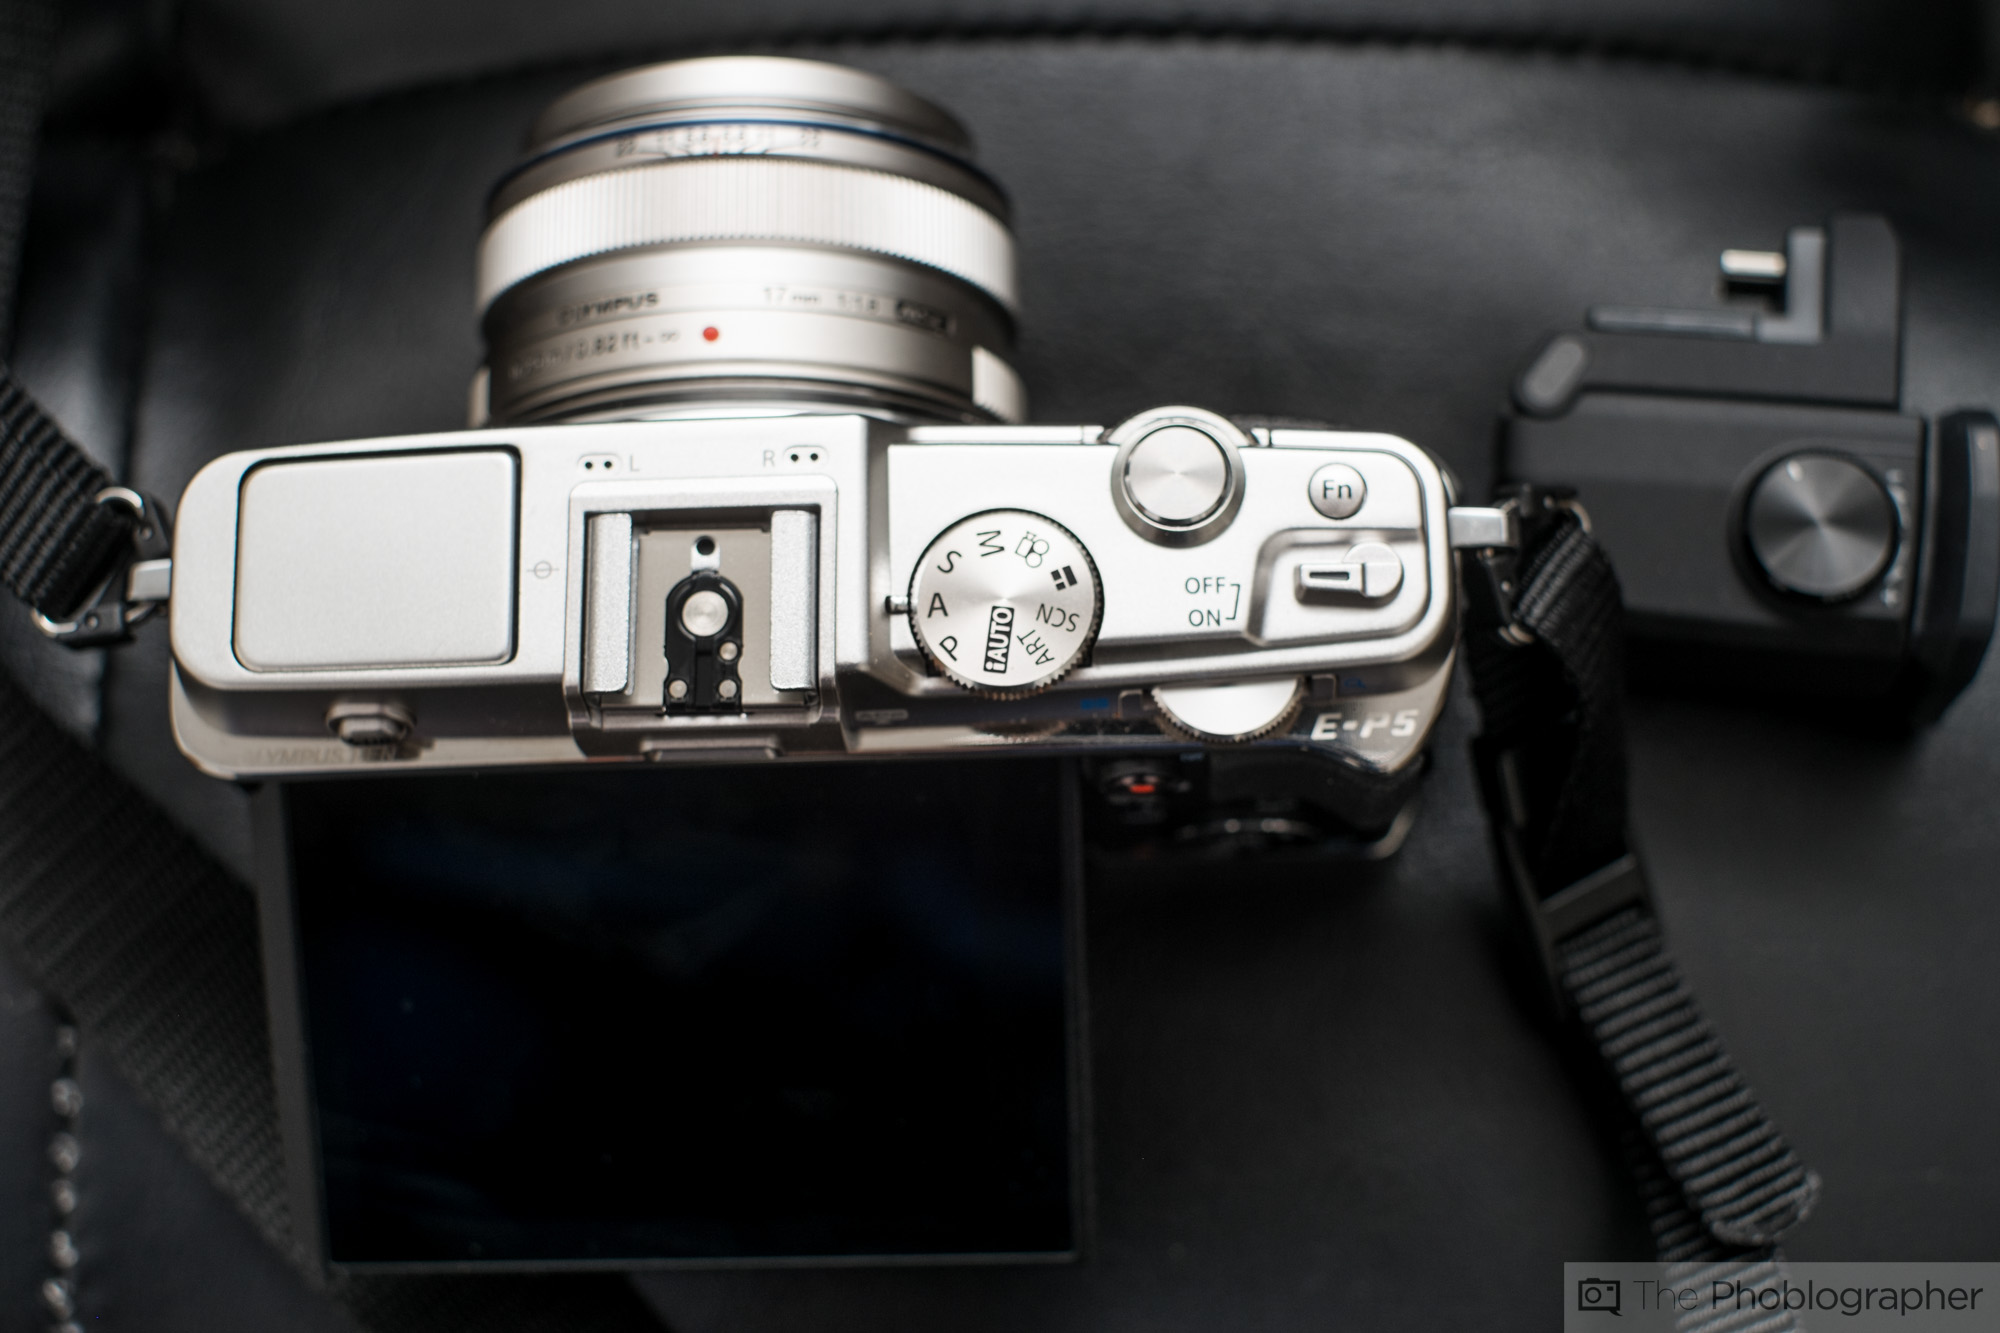
Let’s take a look at something like an Olympus EP5 for example. See the hot shoe? See those little circular contacts inside? In order for TTL to possibly work, the flash needs to have the according male contacts to connect to the according female contacts on the flash.
That way there is full communication between the flash and the camera.
And for what it’s worth, every camera system has their own TTL communication contacts: so that means that Canon flashes won’t communicate via TTL on a Nikon camera.
TTL flashes don’t have to be made from a first party: there are loads of third party options out there such as Rokinon, Nissin, Metz, Phottix and more. Want a budget option? See our guide.
With TTL flash comes exposure compensation. If you think that the flash isn’t outputting enough light, you can tell it to overexpose or underexpose accordingly. But note that at some point or another you’ll probably need to mess with your ISO levels or aperture settings.
Though the masters and film users may absolutely never use flash above ISO 400, digital high ISO results are so good these days that if you need to use a flash at ISO 6400 (which surely can happen) then you might as well go for it. Though it may sound weird, it is totally valid.
Manual
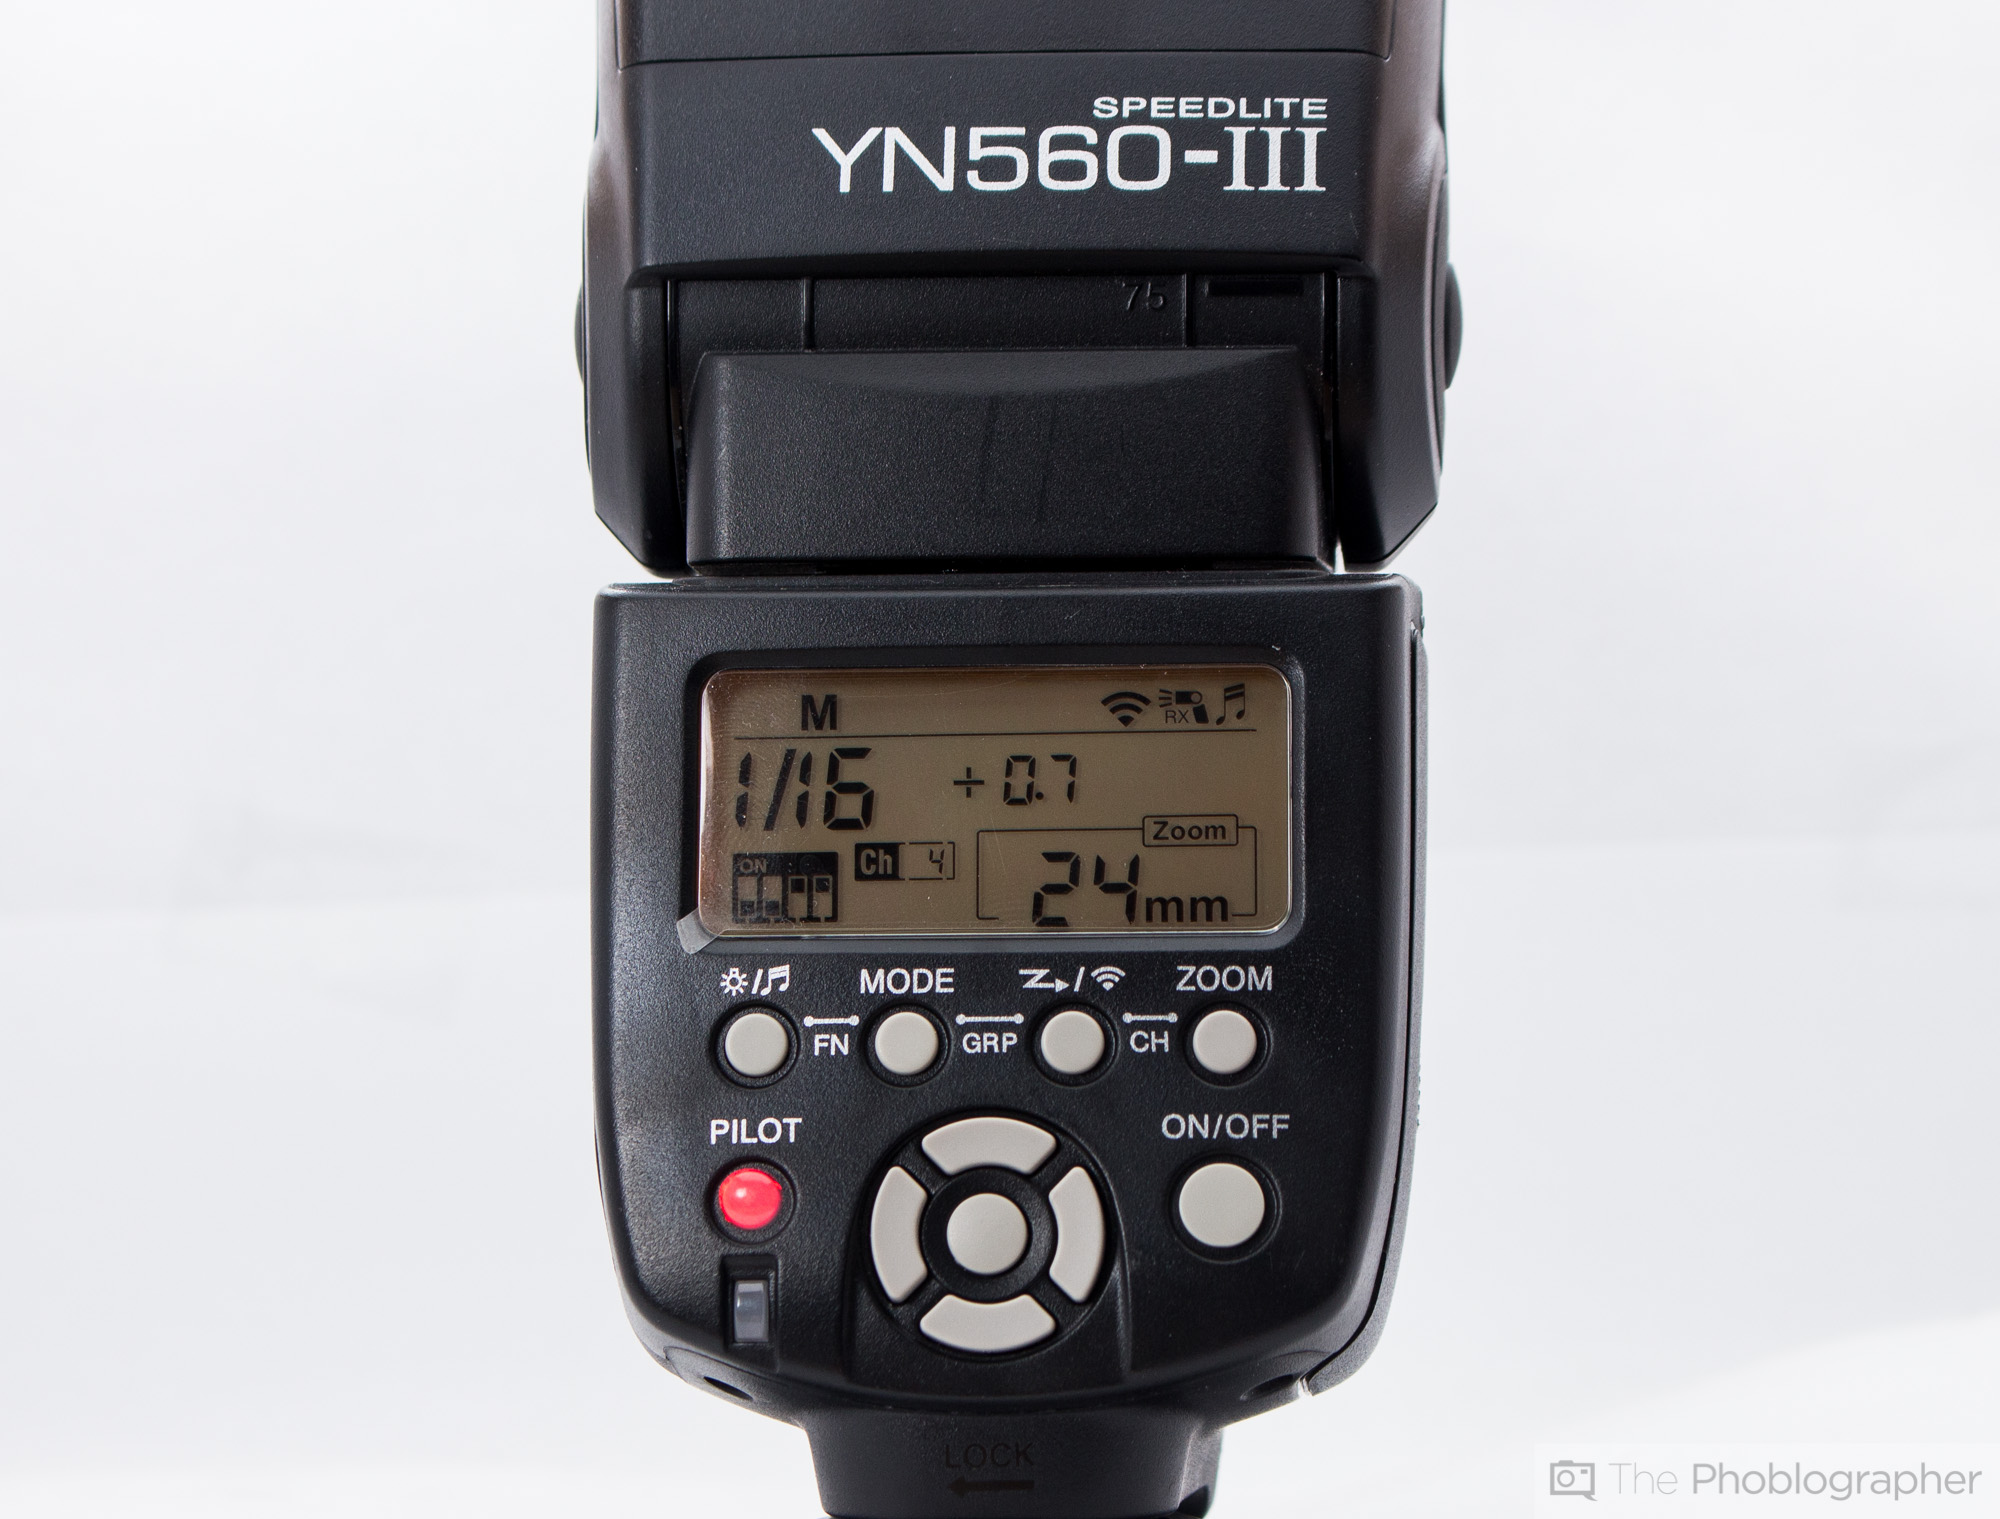
Manual flash is the selection of many professional and experienced photographers. Manual flash output has to do with power. While most flashes are rated for power in terms of a guide number, many manual flashes and the system/industry in general is trying to go more towards the tried and true studio strobe standard: watt seconds. Basically, the higher the watt second number, the more powerful the flash output.
Flash output is measured in fractions. Let’s say that your flash has an output value of 100 watt seconds.
So that means:
1/1: 100 watt seconds
1/2 power: 50 watt seconds
1/4 power: 25 watt seconds
1/16 power: 12.5 watt seconds
and so on and so on.
So why does any of this matter? It all has to do with light modifiers.
Using Flashes with Light Modifiers
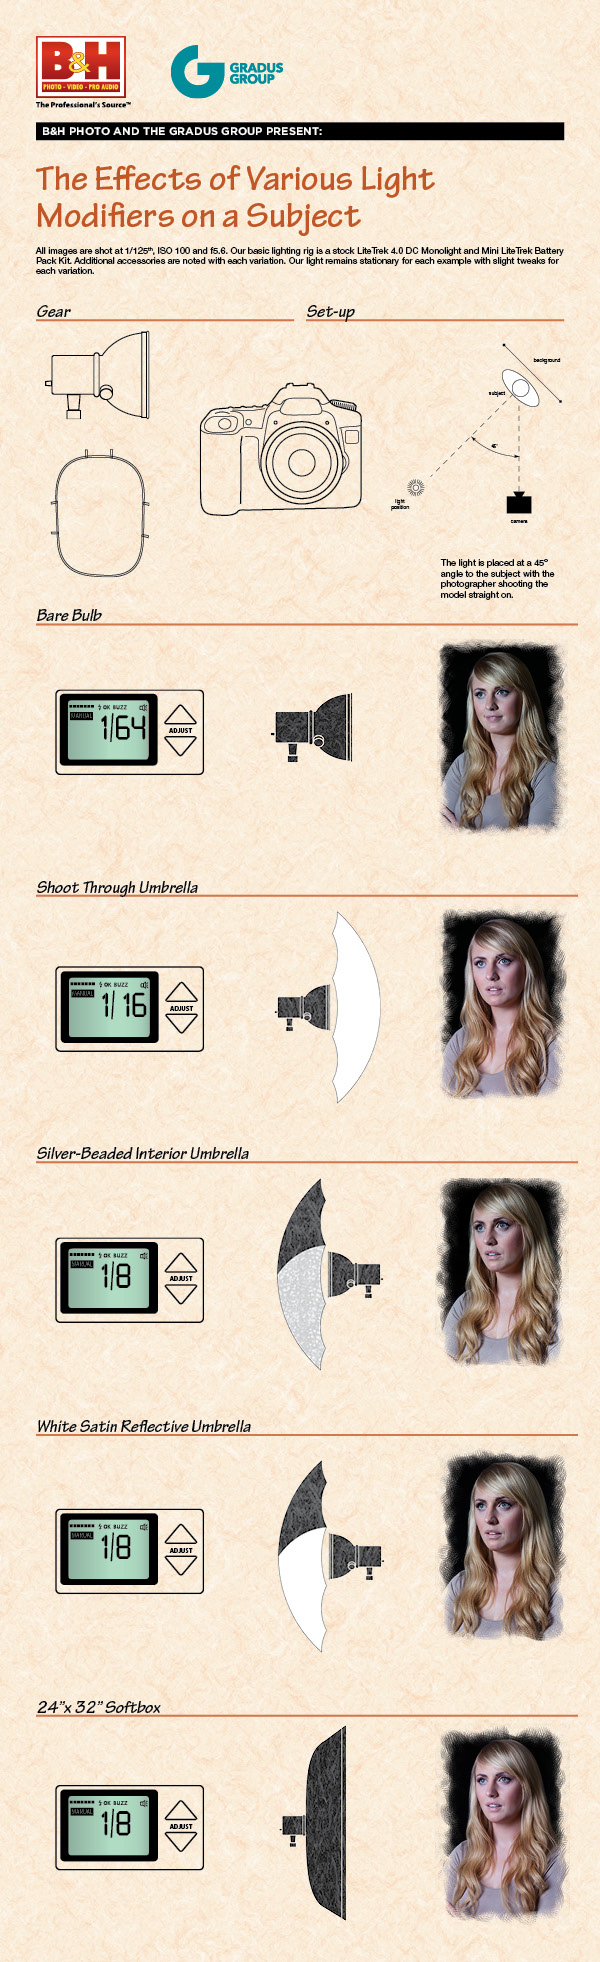
Here is an infographic I lead the creative design on when I worked at B&H Photo. But for even more and if you want to take your photography further, we recommend checking out our entire guide to lighting modifiers.
Please Support The Phoblographer
We love to bring you guys the latest and greatest news and gear related stuff. However, we can’t keep doing that unless we have your continued support. If you would like to purchase any of the items mentioned, please do so by clicking our links first and then purchasing the items as we then get a small portion of the sale to help run the website.
Also, please follow us on Facebook, Flickr and Twitter.
Get rid of the ads!
Did you enjoy reading this article as much as we enjoyed writing it? There's a way to support us and our reporting, getting ad-free navigation and more as a bonus. Subscribe to us for less than a coffee per month —just $3.99— or take advantage of our yearly subscription with a hefty discount for only $25.- An ad-free experience
- A free mystery box for Lightroom or Capture One
- All the books in our store
- 20% discount on Capture One
- 30% discount on Imalume Photo Theft Protection
- 20% off Herbs and Kettle Tea Company.
- 20% off your order from MPIX printing services.
- 5% off Viltrox Products via their eCommerce store.
- 10% off all film developing, printing and scanning services from Blue Moon Camera and Machine
- 15% off 7Artisans products: The lens and accessory maker is offering a sweet discount for Phoblographer's readers.