Last Updated on 01/18/2014 by Felix Esser
We’ve been slowly going through the alphabet defining key terms for each letter, and today we’re at the letter E. E is for exposure–and at its very basic form, it has to do with the brightness of your image. In the automatic modes, your camera often sets all of these parameters for you, but in the more expert modes (Program, Aperture, Shutter, and Manual) you’ve got more control to make them all your very own.
There are different types of exposures: balanced, underexposed, and overexposed. And there are four major parameters that affect exposure: ISO, Shutter Speed, Aperture, and in some cases, flash output.
What the Heck Does All This Mumbo Jumbo Mean?
It’s really quite simple. Think of it this way as a quick cheat sheet:
– Underexposed = darker image in terms of how bright it is. Think about being in a dark hallway and trying to see the details of what is around you.
– Balanced = just the right amount of balance between dark and light to capture details and all nearly the way that you see it
– Overexposed = too bright. Think about going out in the high afternoon sun and driving into it–without sunglasses.
Now to understand all of this first, you’ll need to understand the way that your camera’s meter works first.
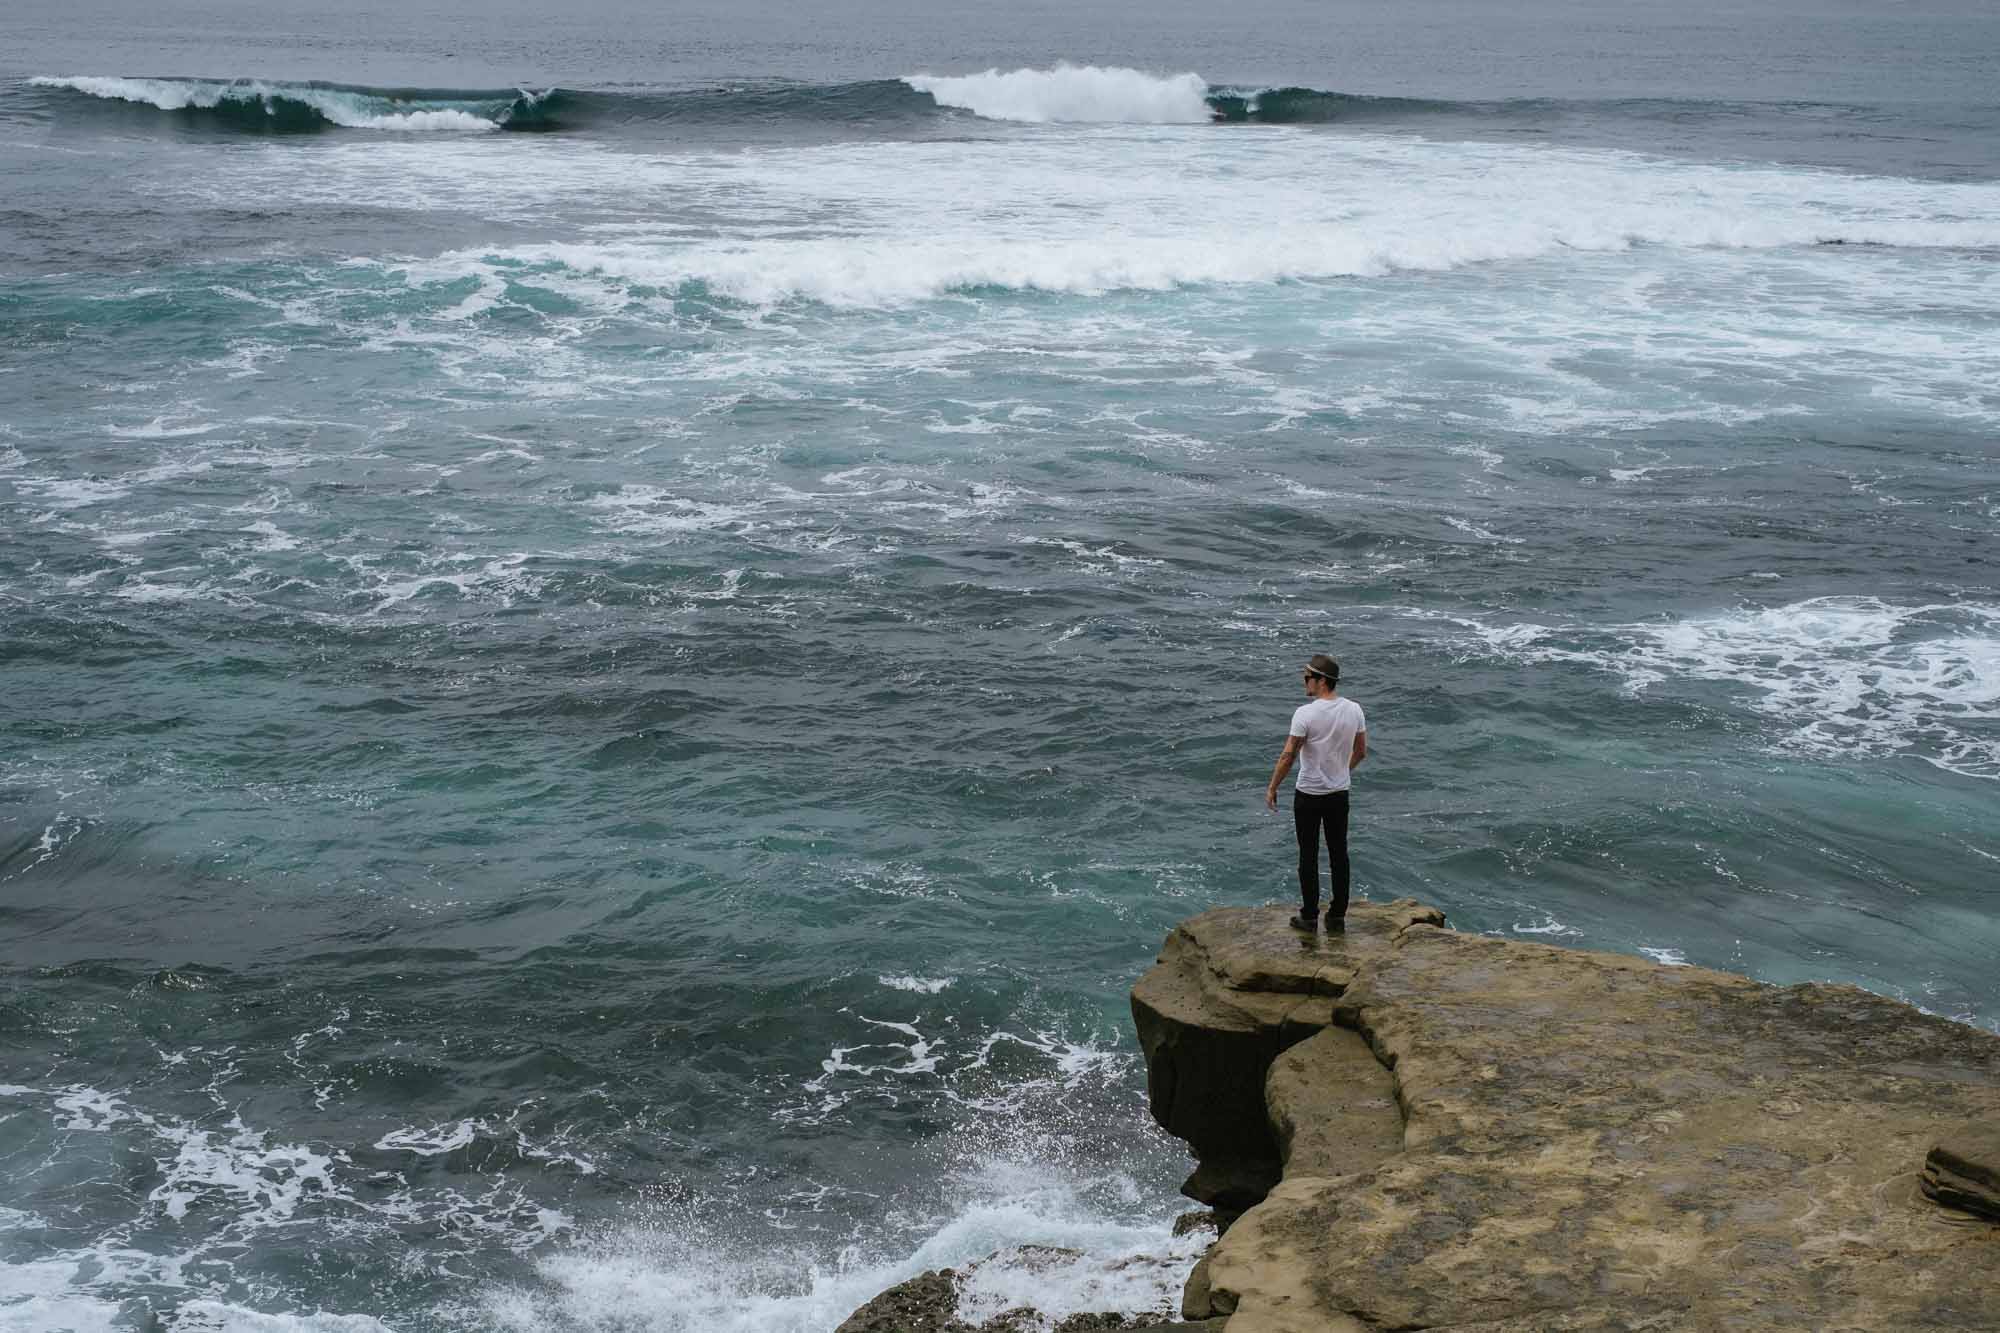
Underexposed
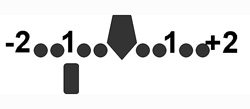
When your camera’s meter is showing a value towards the left side of the scale, it’s telling you that the image is going to be underexposed (dark). Depending on the scene, you may want to dial in a small amount of underexposure (SMALL, don’t overdo it) to create a darker tone or mood to your image.
Balanced
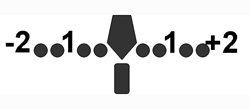
This is when your meter is reading right in the middle, this is considered a good exposure (in most cases). In all but the most complex of scenes, you should aim to have your exposure be balanced because you will wind up with the most detail and recoverable information (if you have to edit your image).
Overexposed
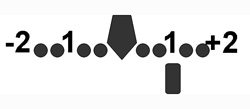
When your camera overexposes, everything is going to look like a nuclear warzone. That being said, there are some cameras out there that need some overexposure to actually create a balanced exposure (I’m looking at you 5D Mark II). An intentionally overexposed image will have a high-key feel which can be really nice for portraiture; additionally you want to dial in some overexposure when your subjects are backlit.
How Do You Do It?
The way that you control all of your technical factors that define exposures has to do with what goes into actually creating the image. First off, take your camera off of auto mode and put it in Manual mode clearly detailed by the, “M”. Next there will be three major settings (and one bonus one) to control to completely manage your exposure. Now, I’m sure you’re thinking “Why should I worry about changing the settings when my camera can figure it all out for me?” Well the short answer is: camera’s may be chock-full of computers today, but they’re still dumb. Controlling your camera is far easier than you might think.
Shutter Speed
One of the main three tools most every camera provides for controlling exposure is a variable shutter speed setting. The shutter speed controls how much light winds up actually hitting the sensor during exposure and most typical cameras will have a variable setting between 30 seconds and 1/4000-8000 of a second. Naturally, the faster the shutter speed, the less light you actually have entering the camera, so this function directly ties in with our next tool…
Aperture
Represented on your camera as f-stops, the aperture controls the volume of light passing through your lens (which also controls the depth of field in your image). A larger aperture setting (think f1.4-2.0) will require a very fast shutter speed because it is allowing a lot of light to pass through the lens. Don’t be at all surprised to see a number like 1/4000-1/8000 if you are shooting in daylight with a fast aperture! In contrast, a very small aperture (f8-11) allows very little light to pass through the lens, so your shutter speed is going to need to be significantly longer to wind up with a correct exposure. However, our third tool is another factor for controlling the overall exposure to your liking…
ISO
ISO in digital photography is a reference to sensitivity to light; before digital, when we all used film, each film had its own “speed” or sensitivity rating, and often we would have numbers like 50, 100, 200, 400, 800, 1600, 3200 (sound familiar?). These numbers translated into how “fast” or sensitive to light a particular film-stock was, the larger the number, the less actual light one would need for a correct exposure. In digital photography, we no longer have film in our cameras, but this sensitivity rating remains adjusting the output of our sensors. As we crank up our ISO settings, we can shoot sharper images in lower light, and when combined with a really fast aperture you can get away with almost no light at all! Do not overlook the importance of selecting the correct ISO for your given lighting condition; for instance, bright sunny days are well suited to a low ISO such as 100-200, and the darker it gets, the higher your setting needs to be. Late afternoons to early evening is a choice time to use 400, and late evening onwards is ISO 800+ territory.
Flash Output
An extra resource for controlling your exposure is to utilize a flash for boosting the amount of available light and allowing you to have a fast enough shutter speed. This is also a handy tool to have available if you don’t have access to a large aperture lens as you can compensate with pumping a blast of a light onto your unsuspecting victims (err.. subjects, I meant subjects). Additionally, a flash can be a lifesaver if you have a strong backlight on your subject, you will be able to get a correct daylight exposure, and use the flash to fill in additional light onto your subject, creating the perfect balanced exposure.
Please Support The Phoblographer
We love to bring you guys the latest and greatest news and gear related stuff. However, we can’t keep doing that unless we have your continued support. If you would like to purchase any of the items mentioned, please do so by clicking our links first and then purchasing the items as we then get a small portion of the sale to help run the website.
Also, please follow us on Facebook, Flickr and Twitter.
Get rid of the ads!
Did you enjoy reading this article as much as we enjoyed writing it? There's a way to support us and our reporting, getting ad-free navigation and more as a bonus. Subscribe to us for less than a coffee per month —just $3.99— or take advantage of our yearly subscription with a hefty discount for only $25.- An ad-free experience
- A free mystery box for Lightroom or Capture One
- All the books in our store
- 20% discount on Capture One
- 30% discount on Imalume Photo Theft Protection
- 20% off Herbs and Kettle Tea Company.
- 20% off your order from MPIX printing services.
- 5% off Viltrox Products via their eCommerce store.
- 10% off all film developing, printing and scanning services from Blue Moon Camera and Machine
- 15% off 7Artisans products: The lens and accessory maker is offering a sweet discount for Phoblographer's readers.