
If you have recently made a move from Lightroom to Capture One 20, these tips will bring you up to speed.
We’re huge fans of Capture One 20 here at the Phoblographer, in fact, all of the staff use it to edit their pictures thanks to just how much more we can get out of our RAW files. Now, if you have just made the switch to Capture One 20 as well, and you’re still trying to figure things out, you might be interested in this YouTube Video from Michael Comeau with OnPortraits. Join us after the break to see his top 20 Capture One 20 tips.
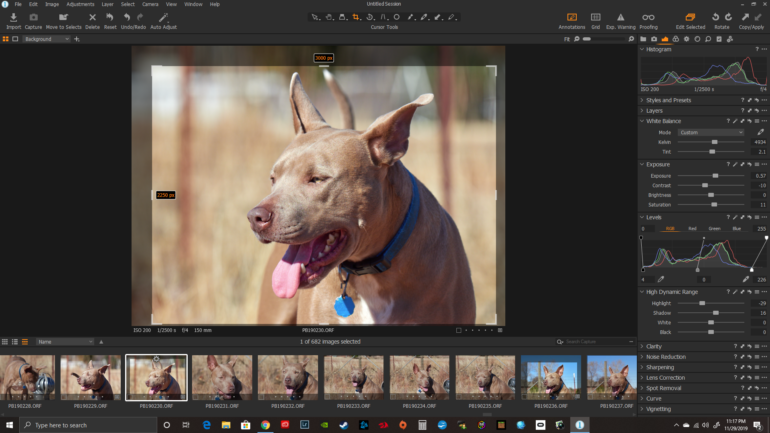
We reviewed Capture One 20 back when it launched in late 2019, and we touched on a few of the items that you will be able to find in the new video from OnPortraits. Perhaps one of the most jarring things to come to terms with is just how different Capture One looks compared to other photo editing software out there. So, there’s little surprise that the number one tip is to customize Capture One to your liking. Trust me when I say you can set it up just how you like. The customization options are limitless. You can even make it look like Lightroom if you wish.
As you go through the just under the 20-minute long video that Michael has put together, you will learn many new tricks. You’ll see how to use pinned areas, how to backup your catalogs, basic Capture One 20 keyboard shortcuts, how to use styles and presets, and how to use luma curves, layers, masks and so much more. This video is packed full of great tips.
Check out the video above if you have just switched, or heck, even if you have been using the software for a while; I guarantee you will learn something. I know I did. It’s always great to get other users advice on a piece of software because there are just so many features to learn, and honestly, some of the smallest, yet most powerful tools can go unnoticed unless you watch videos like this. Pull up a chair, fire up Capture One, and follow along with Michael as he explains things in the video.
Get rid of the ads!
Did you enjoy reading this article as much as we enjoyed writing it? There's a way to support us and our reporting, getting ad-free navigation and more as a bonus. Subscribe to us for less than a coffee per month —just $3.99— or take advantage of our yearly subscription with a hefty discount for only $25.- An ad-free experience
- A free mystery box for Lightroom or Capture One
- All the books in our store
- 20% discount on Capture One
- 30% discount on Imalume Photo Theft Protection
- 20% off Herbs and Kettle Tea Company.
- 20% off your order from MPIX printing services.
- 5% off Viltrox Products via their eCommerce store.
- 10% off all film developing, printing and scanning services from Blue Moon Camera and Machine
- 15% off 7Artisans products: The lens and accessory maker is offering a sweet discount for Phoblographer's readers.