")
Small, yet highly impactful changes make Capture One 20 better than ever.
Capture One has been trying to chip away at the dominance of Adobe’s Lightroom and Photoshop in the photo editing space for a while. When Capture One 12 was released last year, huge strides were made over previous editions–and the software became more compelling than ever. The staff here at The Phoblographer switched to Capture One 12 because of the greatly enhanced results we were getting from it with our own images. Capture One is incredibly powerfully; there’s simply no denying that it can do more than Lightroom can, and can get more out of RAW and DNG files. But, Capture One 12 still wasn’t perfect. Phase One has been hard at work, and they listened to the feedback that poured in from users around the globe. Their efforts to create the ultimate photo editing software have culminated in Capture One 20. Has Phase One done enough to make Capture One 20 more accessible and easier to use?
In our review of Capture One 20, we will not be covering every aspect of the software because the review would become too long. Instead, we will be focusing on the improvements that have been made since Capture One 12. The main bulk of the program has remained untouched, but Phase One implemented a handful of small changes and some new algorithms that add up to big things in Capture One 20. In full transparency, this review is based on the BETA version of Capture One 20, so there might be some small tweaks here and there in the full release version of the software.
Table of Contents
Pros and Cons
Pros
- The new crop tool is a pleasure to use
- The noise reduction algorithm has been reworked and provides excellent results
- The sheer amount of customization options
- Shadow and Highlight recovery continues to beat all other editing suites on the market
- Enhanced DNG support is a nice touch and makes Capture One 20 a better option to use with cameras that aren’t officially supported
- The ability to be able to edit with layers is what sets Capture One apart from the rest of the crowd
- The updated basic color editor makes editing colors far less daunting
- You can own it outright for $299 which is perfect for those who hate subscriptions
Cons
- The amount of cameras and lenses that have profiles still pales in comparison to Lightroom
- Importing and generating previews takes longer than the competition even with GPU acceleration enabled
- Despite improvements, the user interface still looks cluttered and is not as visually appealing as Lightroom
- The cataloging tool is still far behind the competition
- Current owners of Capture One products must pay $159 for what amount to incremental updates
New Features in Capture One 20
This information was taken from Capture One 20 press release:
Scrolling Tools
Work quickly and intuitively – scroll through all your tools with ease and pin your favorites to the top for instant access.
New Basic Color Editor
Edit colors faster with a new Basic Color Editor that’s compact and easy to use. Click anywhere on the photo and drag to adjust the hue, saturation, and lightness of any colors – or edit with intuitive sliders. For more control, the Advanced Color Editor and Skin Tone tools are as powerful as ever.
Improved Noise Reduction
Retain colors and details like never before when shooting with high ISO. With improved noise reduction, start your editing with better quality images.
High Dynamic Range
Do more with contrast and tone thanks to the new High Dynamic Range tool. Recover highlights, boost shadows, darken the blacks, or boost the brightest areas of your photo – all in one tool.
New Crop Tool
Easily visualize and transform your crops thanks to the visible handles in the new Crop tool. Instantly crop from the center, rotate the crop, or lock the aspect ratio using modifier keys.
Improved copy/apply of Layers
Easily copy specific layers between photos – including photos with different formats and sizes – without replacing the existing layers on the destination photo.
Improved DNG Support
Get the most accurate colors and sharpest details out of any camera model, drone, or smartphone capturing DNG files.
Other improvements include automatic switching to the next image after rating, adjustment clipboard improvements, toolbar text, which makes it easier to locate the tools you want. You’ll also notice that it’s easier to find masking tools. There are changeable background colors, increased thumbnail resolutions, and a better white balance picker.
New Camera Support
- Olympus E-M5 III
- Canon EOS M6 II
- Canon EOS 90D
- Leica V-LUX 5
- Pentax K-1 II
- Ricoh GR III
- Panasonic Lumix DC-S1H
- Nikon Z 50
- Generic GoPro RAW support
System Requirements
PC
- Windows Windows 7 SP1 64-bit, Windows 8.1 64-bit, or Windows 10 64-bit
- Intel or AMD CPU with 2 cores 10 GB free disk space
- 8 GB of RAM
Mac
- MacOS 10.13, 10.14, or 10.15
- Intel CPU with 2 cores 10 GB free disk space
- 8 GB of RAM
System Tested On
- Windows 10 64-bit
- 24GB RAM
- AMD Ryzen 2600
- GTX 1660Ti
Ease of Use
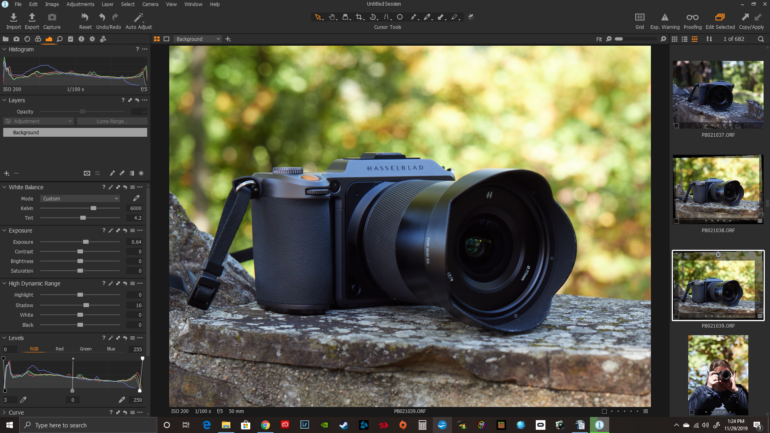
If you’re familiar with Capture One 12, then you will feel right at home with Capture One 20. The software’s interface honestly hasn’t changed a great deal, but if you’re coming to this editing suite from Camera RAW or Lightroom, you might be taken back. Capture One is a vast departure from the likes of Lightroom when it comes to aesthetics, and, on the surface, the editing suite can look quite intimidating. But, you really have nothing to worry about. The great thing about Capture One 20 is that the layout can be altered and customized in just about any and every way imaginable. Out of the box, Capture One 20 doesn’t come across as a very user-friendly, or workflow-friendly piece of software. But, if you spend the time to set the software up and tailor it, you will find that it is, hands down, the most powerful editing software available.
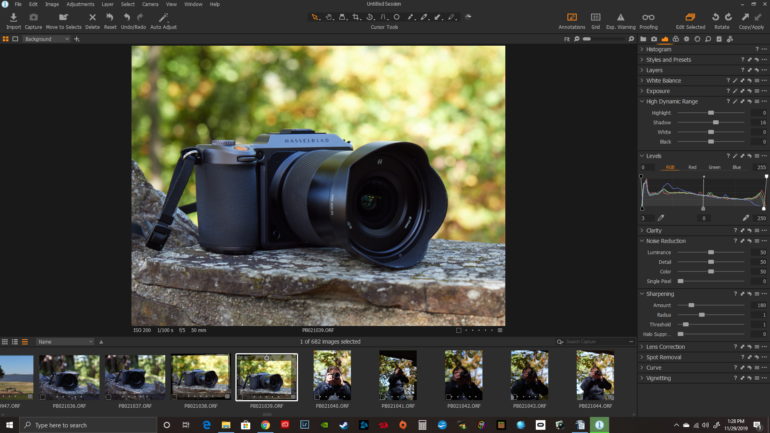
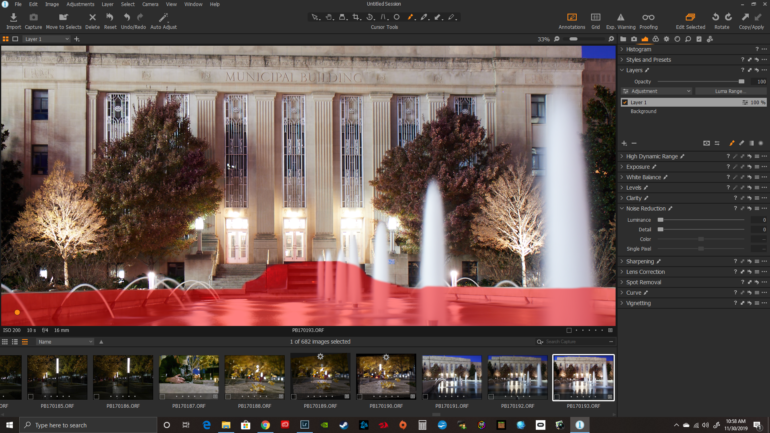
If switching to a new editing suite scares you because you don’t want to invest a lot of time learning new layouts and menus, have no fear. Thanks to the sheer amount of customization options in Capture One 20, you can make it look like Lightroom, which is great if you want a more familiar workflow and layout (see the image above). If you do not like the idea of jumping between menus to find tools, you can create one huge master tool list too. You simply drag and drop the tools you want from each submenu into the edit panel and, boom – everything you need is in one place.
One of the Best Features of Capture One 20
In terms of ease of use, all the tools work the same way as any other editing software, so there is nothing inherently tricky here. The exposure settings, noise reduction settings, highlight and shadow recovery tools, and so on all work in the same way as anything else out there. The best feature, in my opinion, is the fact that you can use multiple layers when editing an image. This makes Capture One 20 one of the most powerful pieces of editing software available.
Once you have the workspace set up how you like it, and you find your groove, there will be no stopping you. How easy or hard Capture One 20 is to use really comes down to you and how you set it up. One area where Capture One still falls far behind the likes of Lightroom, though, is when it comes to cataloging your image collections. This is one area desperately in need of a revamp, so if you rely heavily on a feature like this, please take it into consideration before you make a switch.
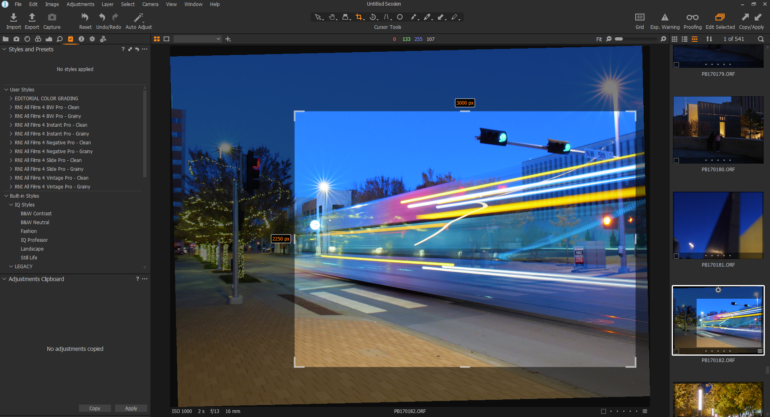
The New Crop Tool Is My Favorite Thing
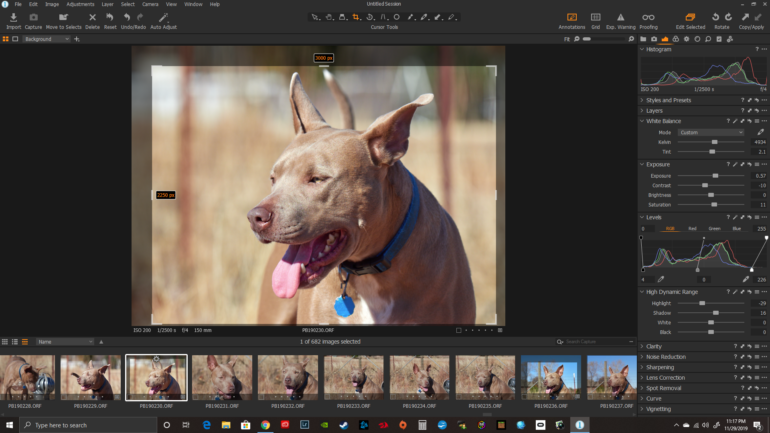
Personally, the new crop tool is perhaps my favorite new feature. It’s hard to imagine just how a crop tool can be improved upon, but trust us when we say that the crop tool in Capture One 12 wasn’t great. The problem is that the crop box had no markers on the corners, the sides, or on the top and bottom of the box. Trying to find the edges of the crop box in that version was difficult in some scenarios. In Capture One 20, Phase One did the smart thing and added indicators around the edge of the crop box. As simple as that may sound, it makes a world of difference when using the tool. Now, the corners and edges are easy to see, and cropping your image is much easier. It’s really crazy how such a small change can have such a dramatic impact on the overall user experience.
High Dynamic Range
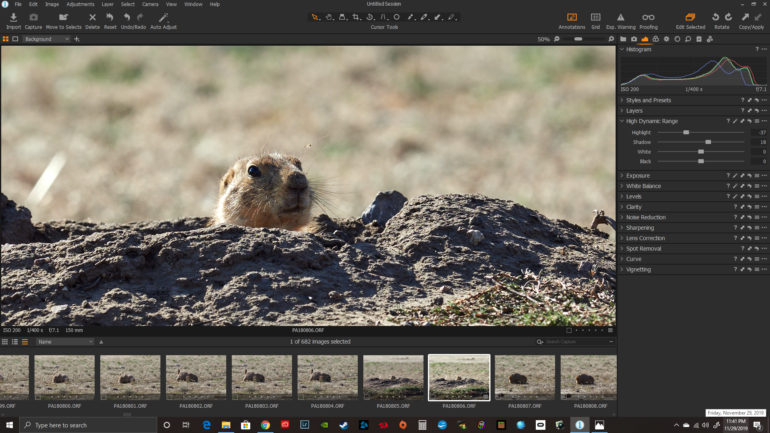
One area where Capture One has been beating the competition is in both highlight and shadow recovery. The algorithms Phase One uses are nothing short of spectacular, and I am pleased to say that the excellent work they have done in previous versions has only been improved upon in Capture One 20. In previous versions, the shadow and highlight sliders had a starting point of zero, and the slider was positioned all the way to the left. When sliding to the right, it could be increased to 100.
The new slider starts off with a base setting of 0, and the control starts off in the middle of the slider. The slider can now be moved down to -100 and up to + 100. As you can imagine, this gives you far more fine control when tweaking your highlights and shadows. The new white and black sliders in this panel also provide the user with more control over contrast in your images. If you’re coming from Lightroom, you will find this very helpful as that software has had controls like this for a very long time; again, another small and seemingly insignificant change, but it pays off in a big way.
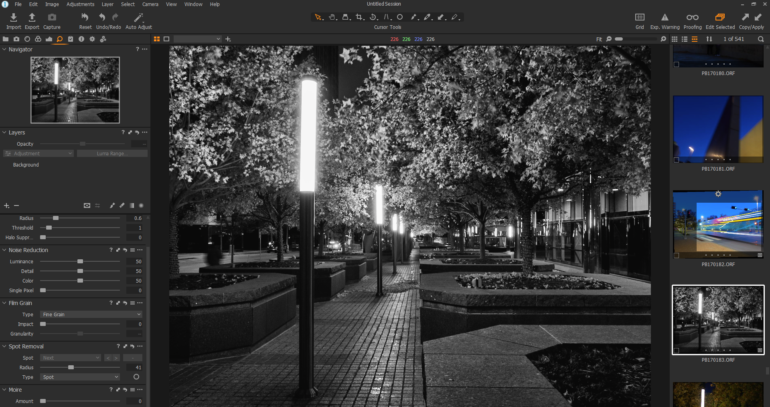
Improved Noise Reduction
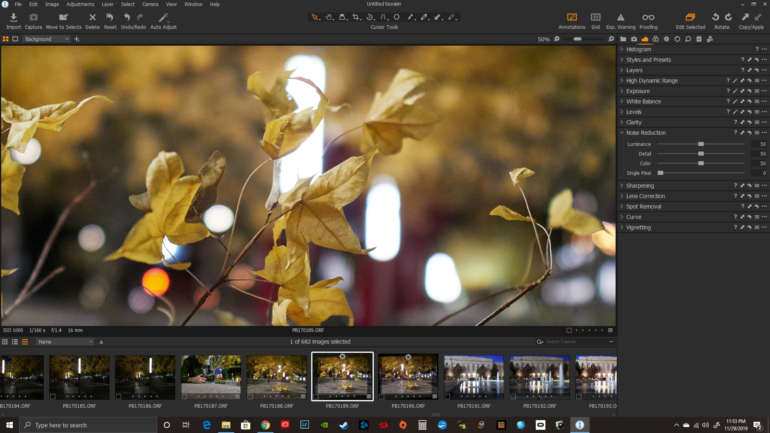
The new Noise Reduction slider works in much the same way that the new High Dynamic Range sliders work. The new slider will automatically adjust the amount of noise reduction applied to your images based on what ISO you shot your image at, which is really pretty cool. You get the same range of -100 to + 100 as opposed to the old slider that just went from 0 to 100. It’s clear to me that there is an improvement in the amount of detail retained in images compared to Capture One 12.


The amount of noise and detail kept is also better than Lightroom too. The two images above were both changed to have the same white balance; otherwise, they are untouched. It’s interesting to see how Lightroom and Capture One both render colors differently, but that’s beside the point. You can see in these two images how Capture One 20 does a slightly better job at retaining detail in the leaves, and the noise is better controlled too. The difference isn’t huge, but it is noticeable in certain areas. Overall, the new noise reduction algorithms and the new slider get a thumbs up.
New Layer Tools
The ability to use layers in Capture on is what sets it apart from most other image editing software. It’s also one of the features which scares photographers who are unaccustomed to using them. Once you embrace layers, though, you will never look back. Layers provide the ability to have more control over your images, and if you mess up, you don’t have to start from scratch, you can simply redo the layer you’re working on. This feature has always worked well in Capture One, and the new layer tool in Capture One 20 makes the feature even better. The tool works the same way as before. You either brush on a mask to a specific part of your image, or you can drop a gradient mask over a portion of your pictures. Layers are also used to remove blemishes from your image with healing masks, and so on. What’s changed is what you can do with those layers.
Previously, you could not copy specific layers to other images in your collection; you either had to copy all of your layers and edits or nothing at all, which was really inconvenient. Not only can you now duplicate individual layers and copy them to other images, but they also will not replace other layers you may have already made for the new image. Again, another small feature with a dramatic impact on the overall usability of the layer tool. This will really speed up your workflow, whereas before, it slowed you down. This tool is more powerful than ever, and if you fully embrace it, you will be amazed at what you can do with your images in Capture One 20.
The Basic Color Editor
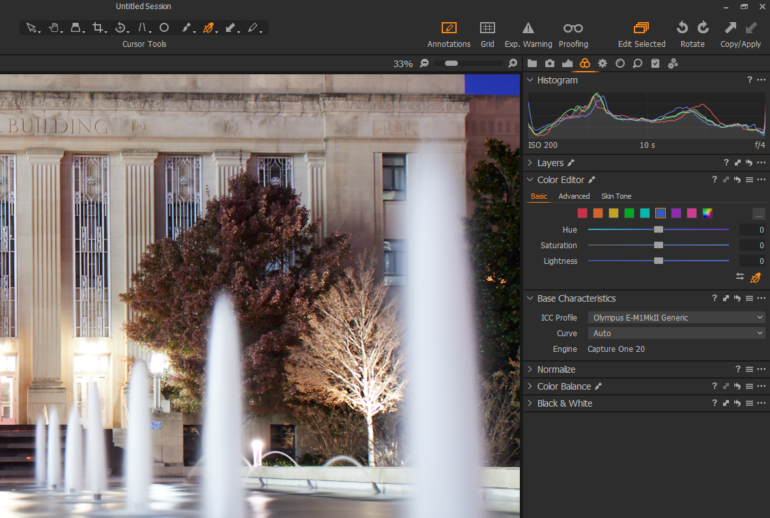
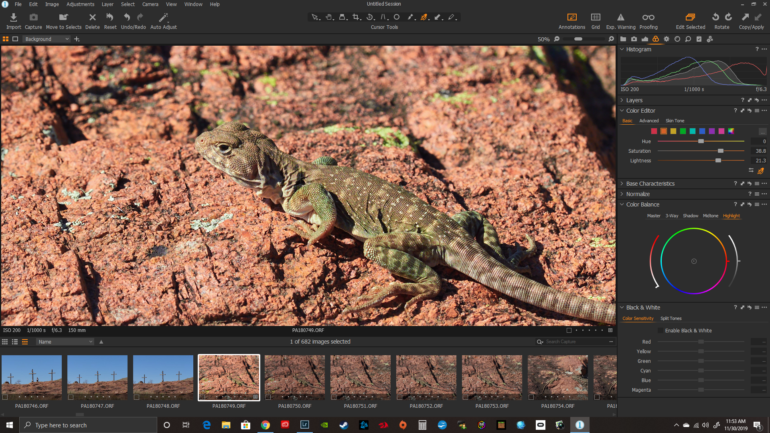
The basic color editor is my second favorite improvement in Capture One 20. Capture One gives users more control over color than just about any other editing software. Using the main color tool, you can make such pinpointed color corrections and changes that it can honestly be a little overwhelming, and this is where the basic color editor comes into play. The basic color editor works in the same way that HSL sliders in Lightroom work.
In the panel, you will see the most frequently used colors, and underneath, you will see the slider for that color so that you can make changes. One of the changes in this version of Capture One is that the slider now has a gradient bar, which helps give an excellent visual representation of the changes you are making to that specific color in your image. The basic color editor is what most people will use while in Capture One 20. This tool has been refined nicely, and unless you need to make pinpoint corrections to things like skin tones, there is no real need to use anything but the basic editor to make color corrections. It’s quick, easy, and powerful, and it makes editing colors painless.
Overall RAW Editing
When it comes to editing your RAW files in Capture One 20, I have to say that it’s an enjoyable experience. There is a caveat, though. To get the most out of Capture One, you must set up the workspace so that it matches your individual workflow. Once you have the workspace designed to work for you, you will likely find you can plow through a batch of images in record-breaking time. The algorithms Capture One 20 uses really do help you get more out of your pictures and the tools are easy to use. Using layers to attack an individual section of your image is a blessing and should be fully embraced. Once you get used to it, you’ll wonder just how you have made it through image editing without it.
I have used Capture One 20 with RAW files from various cameras, and in all instances, I have been able to recover more highlight and shadow details, and have been able to create more pleasing colors than I could in other editing suites with the same files. If you put the time into Capture One 20, you will find editing is far more enjoyable than with other programs.
Conclusions
Likes
- The new crop tool and the basic color editor are fantastic compared to older versions of the tools
- Being able to copy individual layers to other images is a welcome addition
- The amount of highlight and shadow recovery you get are light years ahead of the competition
- The new noise reduction algorithm is great
Dislikes
- Importing and generating previews takes far too long
- Although the updates are helpful and they perform well, they’re incremental and don’t warrant a new software package
- Cataloging really needs to be improved as this is a feature many photographers rely upon
Capture One 20 has made some critical changes, so the experience of switching over from Lightroom is far less jarring than it has been in the past. I have to admit that, out of the box, Capture One 20 is not the most intuitive program to use. But, the sheer amount of customization options allows you to set up the software precisely how you like it. The new enhanced tools are nice, and they make using the software easier than before, which is great because complaints about usability are what I hear the most from those who try switching over to the program.
I do have some issues with Capture One 20. I cannot figure out why importing images and generating previews takes so much longer than other available software. There needs to be some tweaks to that process. To really win the hearts of the masses, Phase One needs to concentrate on cataloging and image sorting. As much as I try, my library of images becomes a mess quite quickly. I can imagine that this would soon become a nightmare for wedding photographers.
Perhaps the biggest issue is that Capture One 12 owners are getting somewhat shafted. Capture One 20 is fantastic, and for those looking to make the switch from Lightroom, or any other editing suite, Capture One 20 is a no-brainer. You can buy Capture One Pro 20 outright for $299, or you can subscribe to Capture One 20 for $15 per month ($8 per month for Sony and Fujifilm versions). Capture One Pro (for Sony) and Capture One Pro Fujifilm are available to buy for $129. The issue is that, overall, the program is not different enough from Capture One 12, and the updates to the tools are only incremental. Current Capture One owners can upgrade to the new version for $159. This price makes recommending it a little harder for existing owners. Honestly, these new tools could have been rolled out as an update to Capture One 12 quite easily. In this respect, Capture One 20 feels a little like a cash grab.

Capture One 20 receives four out of five stars. If you’re looking to ditch the monthly subscription fees and want to own image editing software outright, it’s really hard to go wrong with Capture One 20 Pro. It’s powerful and more user-friendly than ever before. You can download a free 30 day trial of Capture One 20 from the official website.
Get rid of the ads!
Did you enjoy reading this article as much as we enjoyed writing it? There's a way to support us and our reporting, getting ad-free navigation and more as a bonus. Subscribe to us for less than a coffee per month —just $3.99— or take advantage of our yearly subscription with a hefty discount for only $25.- An ad-free experience
- A free mystery box for Lightroom or Capture One
- All the books in our store
- 20% discount on Capture One
- 30% discount on Imalume Photo Theft Protection
- 20% off Herbs and Kettle Tea Company.
- 20% off your order from MPIX printing services.
- 5% off Viltrox Products via their eCommerce store.
- 10% off all film developing, printing and scanning services from Blue Moon Camera and Machine
- 15% off 7Artisans products: The lens and accessory maker is offering a sweet discount for Phoblographer's readers.