Last Updated on 11/29/2018 by Mark Beckenbach
We’ve been waiting patiently for Capture One 12; it’s finally here.
I’ve made a conscious effort in the past few years to move away from Adobe Lightroom Classic CC in every way possible. With today’s release of Capture One 12 I can say with certainty that it does most of what Lightroom does even better. There is a big emphasis on most, but the truth is Capture One 12 will do everything better than Lightroom does for most photographers. In that previous sentence there is a HUGE emphasis on everything. With today’s announcement integrating into Capture One 12 the addition of plugins, a variety of masks, and the long awaited Fujifilm Film Simulation additions, there are lots of major reasons why Capture One 12 is the best version yet.
At the same time though, it still isn’t the most perfect program out there.
Editor’s Note: we were playing with the Beta available to us a day before release.
Pros and Cons
Pros
- We finally have Fujifilm Film simulations and they’re done in a really simple way
- Combine previous statement with C1’s fantastic RAW processing abilities
- Masking abilities should eliminate a major reason to use Photoshop unless you want to do a lot of retouching
- Softer looking menu and interface is very inviting
- Still faster than Lightroom in every way possible
- Luma Masks will surely help landscape photographers
- Radial filters are a nice addition even though I’m not sure how often they’ll really be used
- Capture One continues to show me how much better it is at processing RAW files vs Lightroom
Cons
- If you want some sort of Cloud computing solution the best option is still Lightroom
- Still can’t do the “export” option and export an image with a watermark on it. “Process” is still the only way, and arguably more annoying.
- The new menu system will take a bit getting used to if you’ve been a Capture One user for a long time, but the search tab will help
- If you care about it, there is still no Dehaze tool. But Capture One’s editing lets you do the same thing without it.
Features
This was taken from the press release:
Powerful, refined interface
Capture One 12 introduces a newly re-designed, contemporary interface, designed to make Capture One easier to use during long editing sessions and to make discovery, experimentation, and customizability easier than ever. New iconography better conveys tool functionality, and the new slider design, the spacing of the tools, and font size increase improves both the look and the usability of the program.
The result is a new environment that feels more welcoming for new users while being more customizable for power-users.
Revamped menu system
Every menu item in Capture One 12 has been evaluated, categorized, and organized according to its logical function and grouped along with associated tasks, which makes it easier to find the desired controls and settings, and brings the Mac and Windows menu options into alignment.
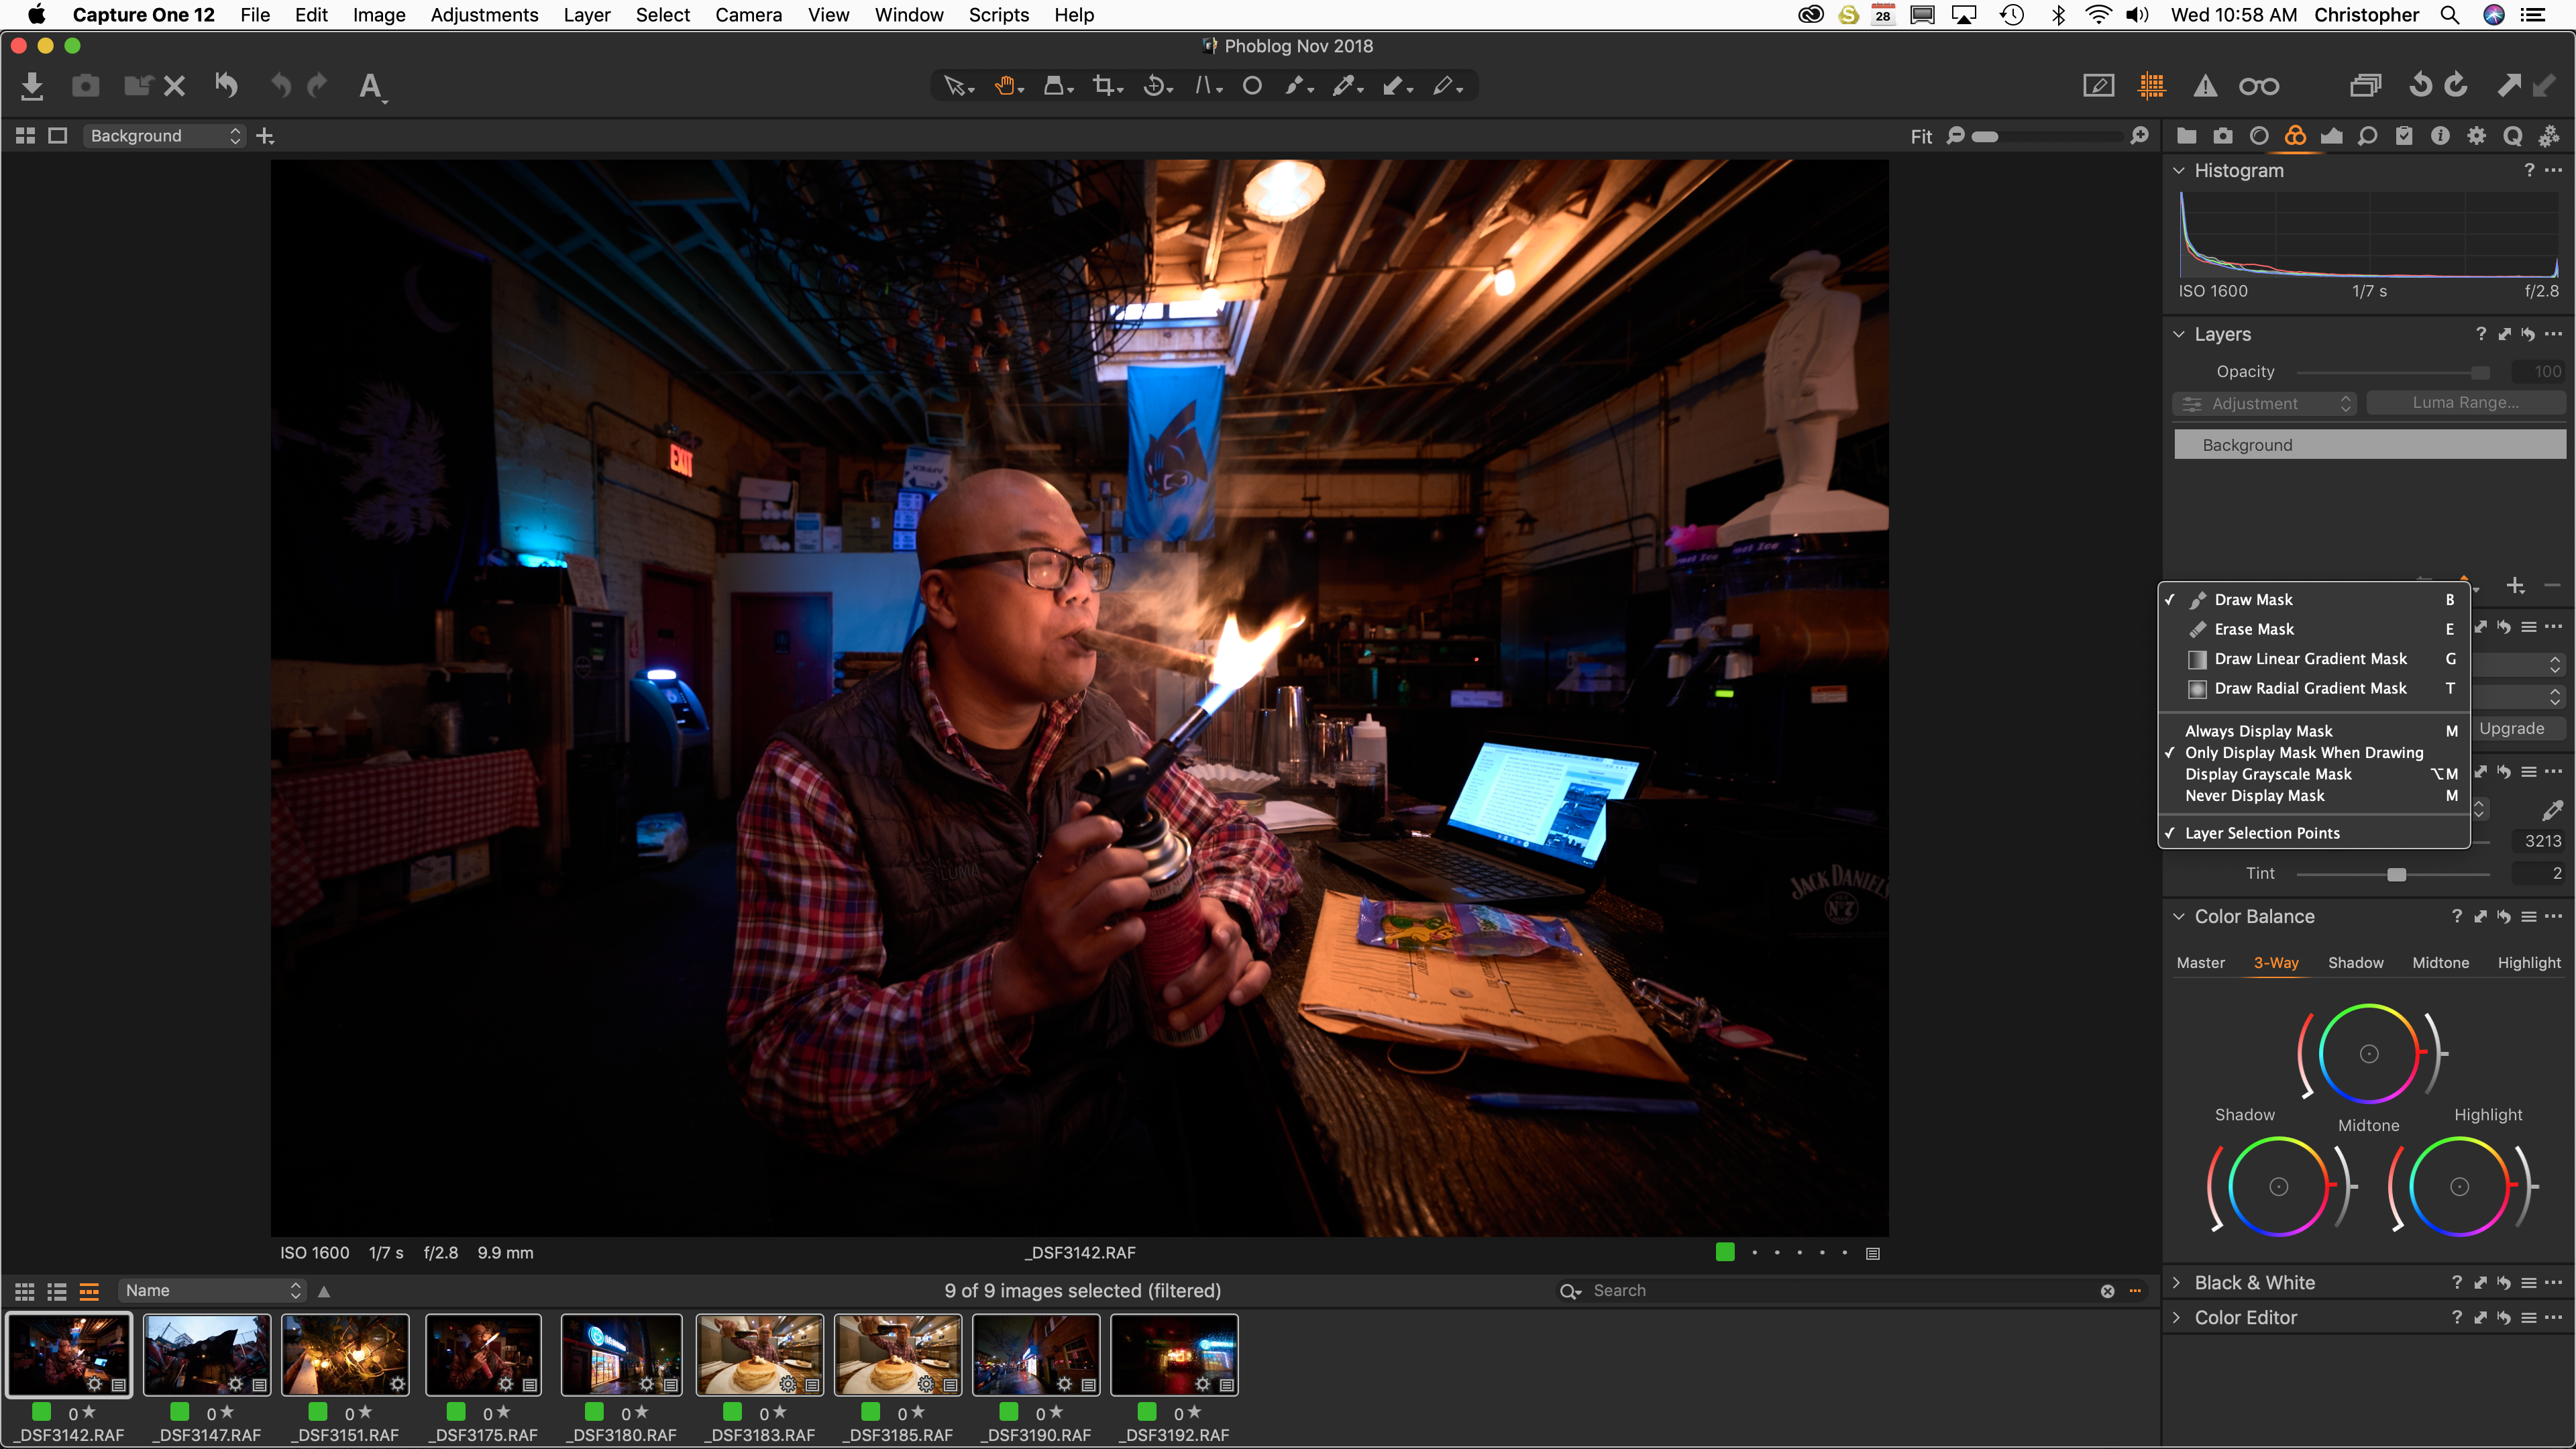
Luminosity masking
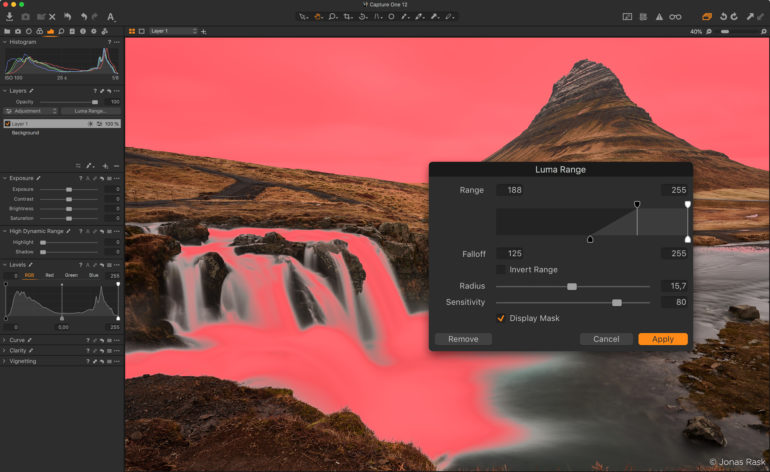
One of a trio of new masking tools, Luma Range allows users to quickly create masks based on the brightness of pixels in an image and is the most powerful luminance masking tool of its kind.
This masking technique is particularly powerful in landscapes and high-key portraits, as it allows for nearly-instantaneous masks in complex scenes based on brightness—eliminating the need to tediously paint complex masks. Once a luminance range is created and adjusted using the precision mask-adjustment tools, nearly any editing tool can be applied to the mask.
The masks created with the Luma Range tool are dynamic and can easily be tweaked and modified at any point in the workflow. Unlike a hand-drawn mask, Luma Range adjustments can be applied from one image to another, and the effect will be based on the luminance of each image. This functionality is a huge time-saver as it eliminates the need to create precision masks for each frame in a shoot.
The new Luma Range selection masks open up an incredible range of editing possibilities, from selective noise reduction to precise color grading.
Linear Gradient Mask

Capture One 12 takes gradient masks to the next level, allowing for editable, moveable, rotatable—and best of all—asymmetric gradient masks. Using a brand-new Parametric Masking Engine, Capture One allows for adjustments in the size, shape, and symmetry of the masks with simple mouse clicks and key presses, truly redefining the possibilities of linear gradients in Capture One. Rotate, feather and adjust a mask with a precision never before possible.
Radial Gradient Mask
The new Radial Gradient mask tool enables quick, flexible radial masks, useful for vignette and other adjustments with a desired falloff effect. Using the same Parametric Masking Engine as the Linear Gradient mask tool, radial masks can be adjusted, rotated and moved after creation for extreme control over desired effects.
Redesigned Keyboard Shortcut manager
Capture One is known for its ability to custom-assign and custom-configure virtually every task to a keyboard shortcut. With more than 500 individually-assignable and customizable commands, it’s essential to be able to find the exact shortcut, without having to hunt through hundreds of choices.
Users can now search by the specific menu command, or by the assigned keyboard shortcut, making it easy to find and manage shortcuts. To unify the interface between the Mac and Windows versions the new menu system has been moved to the same location on both platforms, making it easier for workgroups to stay in sync.
New plug-in ecosystem
To address the needs of photographers and creatives looking to share, edit and collaborate on their images, the new Capture One plug-in ecosystem will allow for powerful third-party extensions. The new Capture One SDK will allow any developer to create custom solutions to expand Capture One, and to transform Capture One into an open ecosystem.
Users of Capture One will be able to extend the platform with the upcoming addition of plug-ins that allow for sharing, editing, and that can connect Capture One to a variety of specialized editing tools.
For developers, the Capture One Plugin SDK—available as a free download—will provide access to the broad base of passionate professional and enthusiast photographers that use Capture One. Developers are now able to create solutions that leverage the image-editing and organizational prowess of Capture One, and the added capabilities of third-party resources.
The initial Capture One Plugin SDK allows for plugin development, and can be leveraged for common tasks like sharing, sending files to external editors, and allowing images to be opened in other applications, and more.
Fujifilm Film Simulation support
Fujifilm X-Series and GFX-series cameras feature Film Simulations, which are in-camera tonal adjustments that faithfully reproduce the color and tonality of classic Fujifilm photographic films. Sixteen Film Simulations are available, ranging from color stocks like Provia and Velvia to black and white film like Acros. These simulations give Fujifilm users the ability to digitally capture images with the feel of beloved photographic films.
Thanks to the collaboration between Capture One and Fujifilm, photographer’s using Fujifilm’s renowned X-Series and GFX-series cameras will be able to edit photos complete with Fujifilm Film Simulations. These in-camera settings have been faithfully reproduced in Capture One, to provide an identical experience when working with files, resulting in images that appear the same as if the Film Simulation picture profiles were applied in-camera.
Extended AppleScript support
Users of Capture One on Mac OS can take advantage of extended AppleScript support for automation and workflow streamlining. More than a dozen of Capture One 12’s areas and properties can now be directly modified with AppleScript, adding to the existing, robust AppleScript support in previous versions of Capture One.
New camera and lens support
Capture One provides users with the most accurate and powerful image editing available, and the wide-ranging support of cameras and lenses is a hallmark of the software. For enthusiasts and professionals alike, Capture One continually evolves to handle the newest cameras and lenses.
Phase One carefully evaluates and interprets each camera’s RAW formats, allowing Capture One to present images with the utmost fidelity, often bringing out nuances that other programs can’t even perceive.
In addition to the RAW support for more than 500 cameras, Capture One also provides profiling and image correction support for more than 500 lenses. Like with the RAW file interpretation, Phase One carefully measures the optical characteristics of each supported lens and builds correction algorithms that compensate for the various optical imperfections of various designs. As a result, Capture One can correct for numerous common optical issues such as vignette, and chromatic aberration as needed for each of the supported lenses.
New camera support:
- Nikon Z7
- Nikon Z6
- Fujifilm GFX 50R
- Canon EOS R
- Canon EOS M50
In Comparison
Pound for pound, Lightroom often offers support for new cameras and lenses much faster than Capture One 12 does, but what do you expect from a company that profits at the massive amounts that Adobe does. There are a few exceptions where I’ve seen Capture One provide faster support, such as with the Sony a7r III. Adobe Lightroom has also had these features mentioned for a long time now. To that end, Capture One is playing catch up to Lightroom when it comes to features. Though as we’ll see, that isn’t Capture One’s biggest strength.
Capture One was always much more streamlined in terms of what it was supposed to do. But in the past few years, more photographers have been looking to C1 to do more. This is because they’re leaving Lightroom. With all those new photographers, Capture One 12 is more or less giving those photographers what they wanted.
Ease of Use
Arguably, Capture One can be more difficult to use than Lightroom simply: Lightroom puts everything that you need to edit a photo in a single panel. Capture One’s approach though makes you think more about the images you’re working on. I have to say with all candidness that if you genuinely care about your images, you’ll edit in Capture One more than you would in Lightroom. In the same way that you approach shooting a landscape or a portrait with the utmost care, celerity, and clarity, you’ll want to treat your workflow the same way.
Capture One’s editing has always been more focused on using the HSL process more so than with tweaking basic adjustments. There is, of course, an option for editing with the “basic” adjustments, but that’s never going to give you a better image that working with the HSL options.
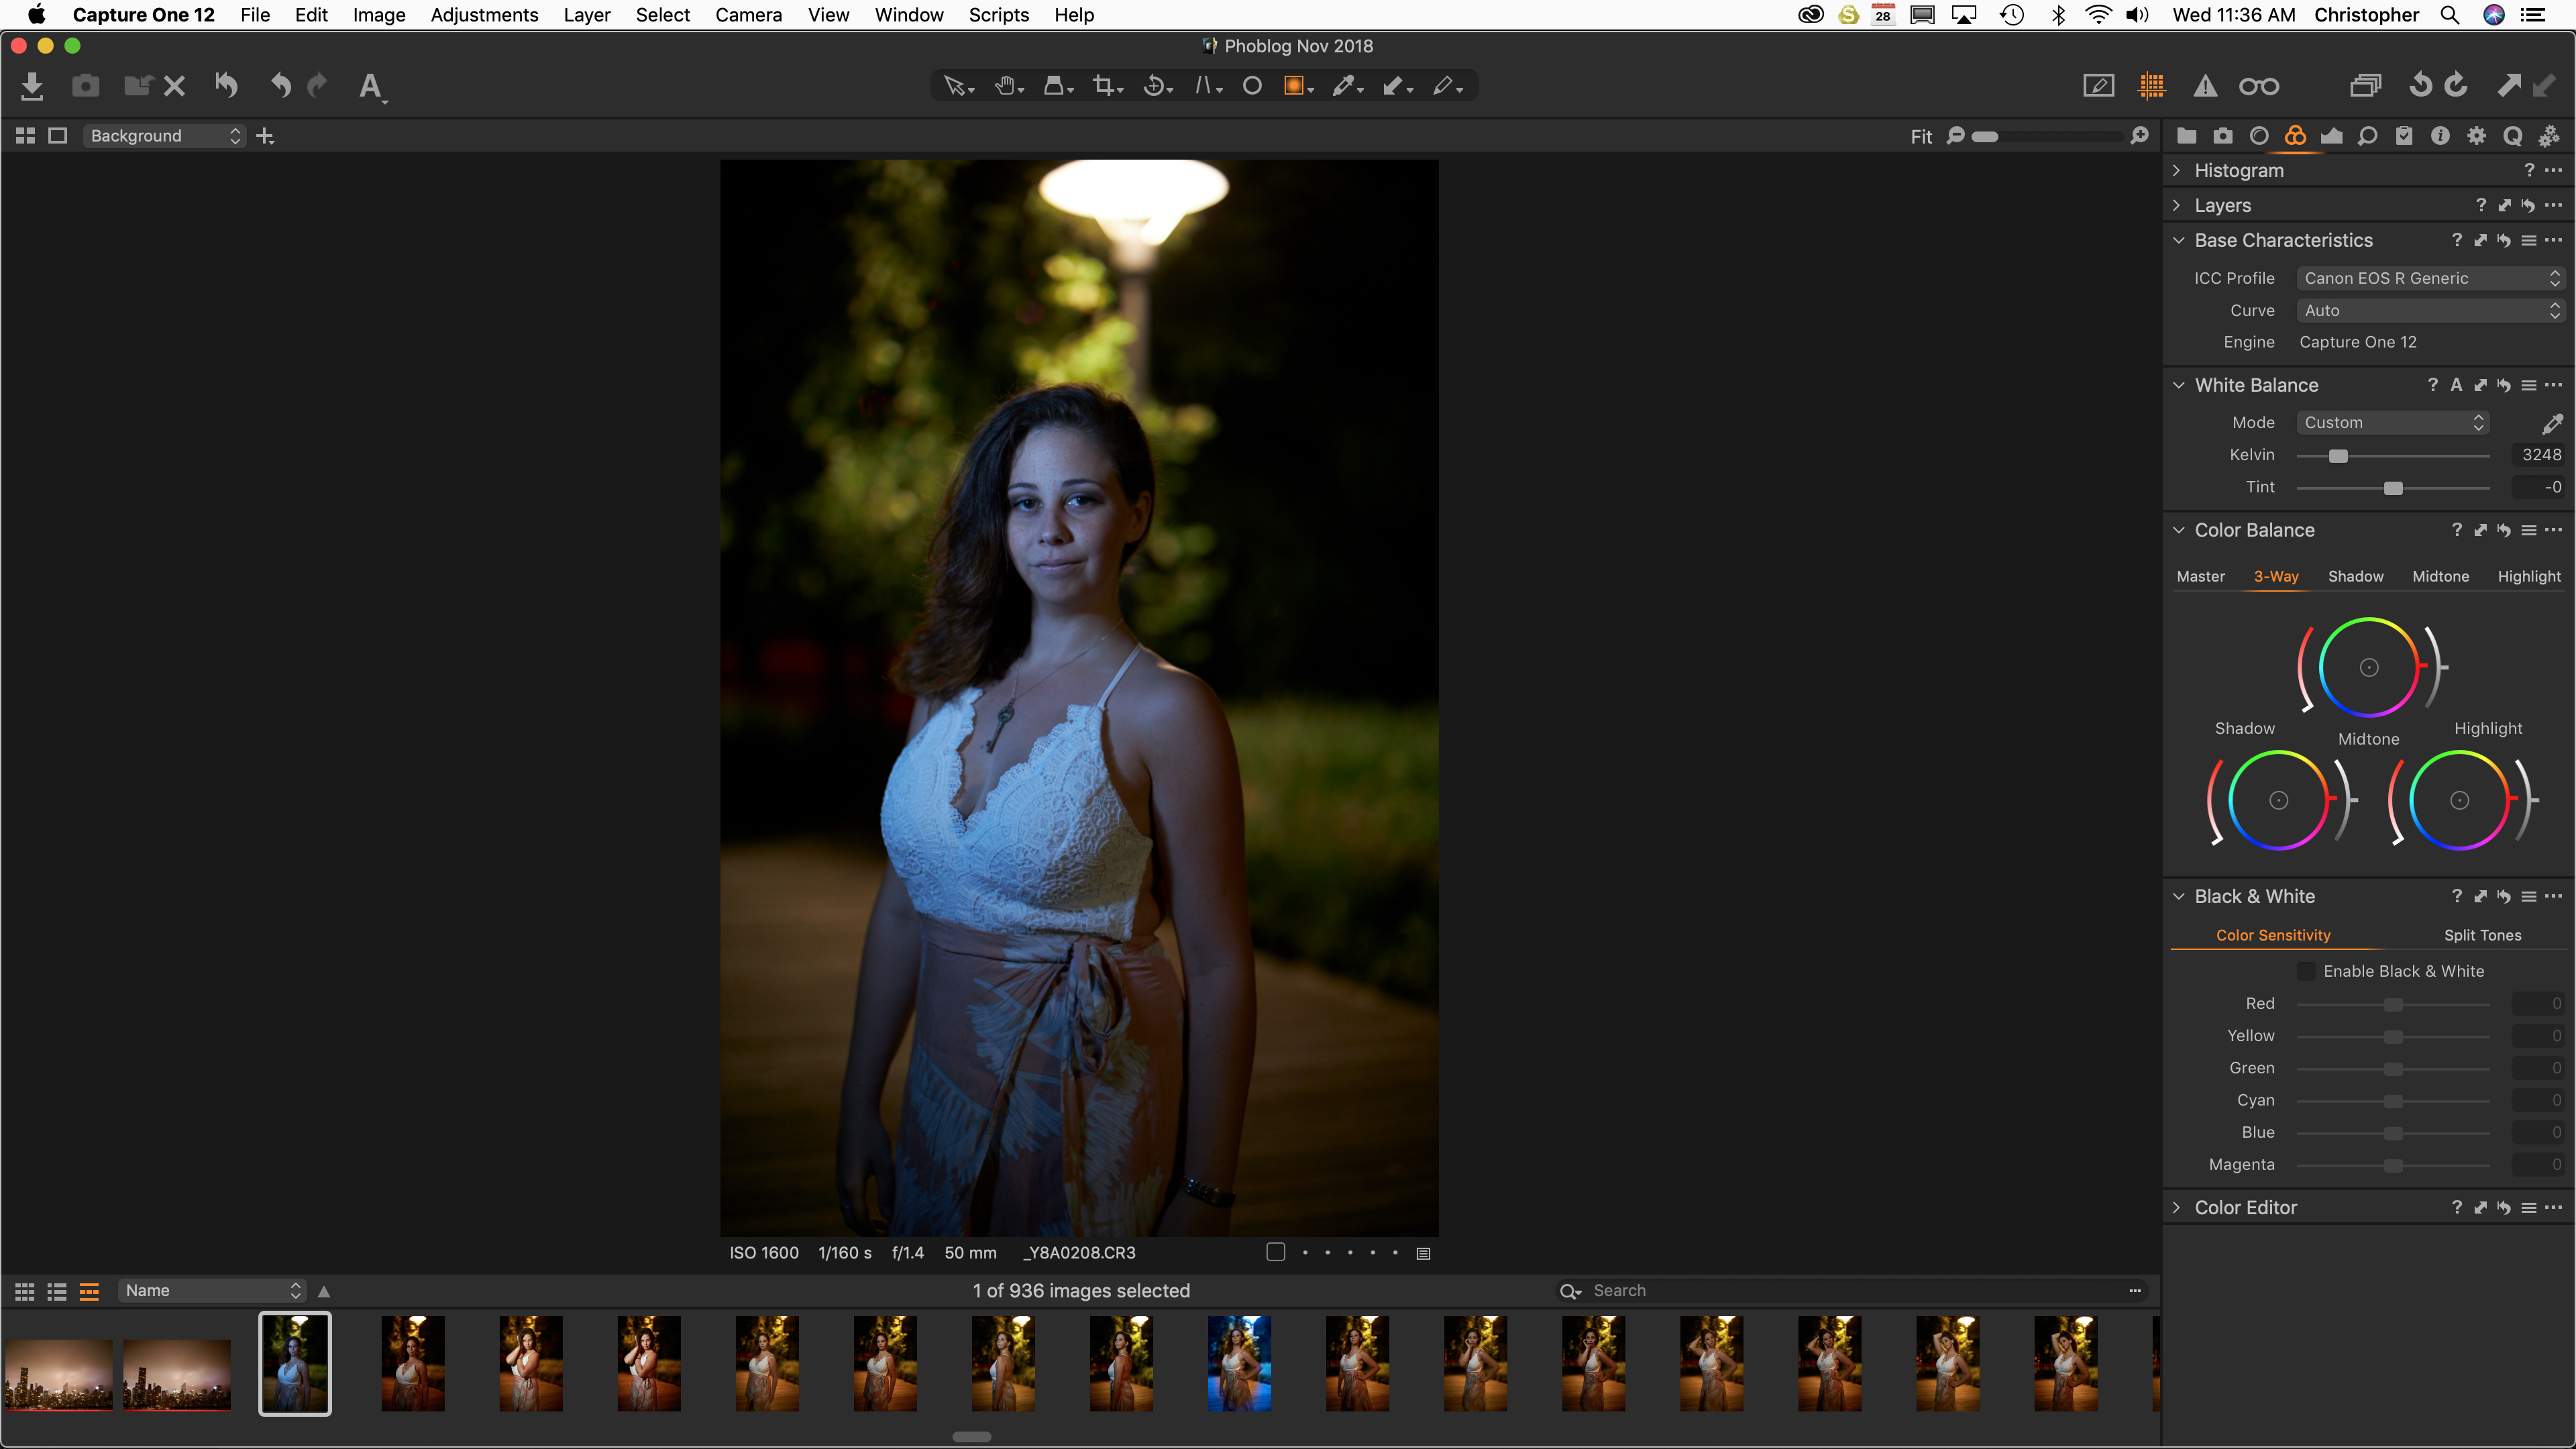
Fujifilm Film Simulation Support
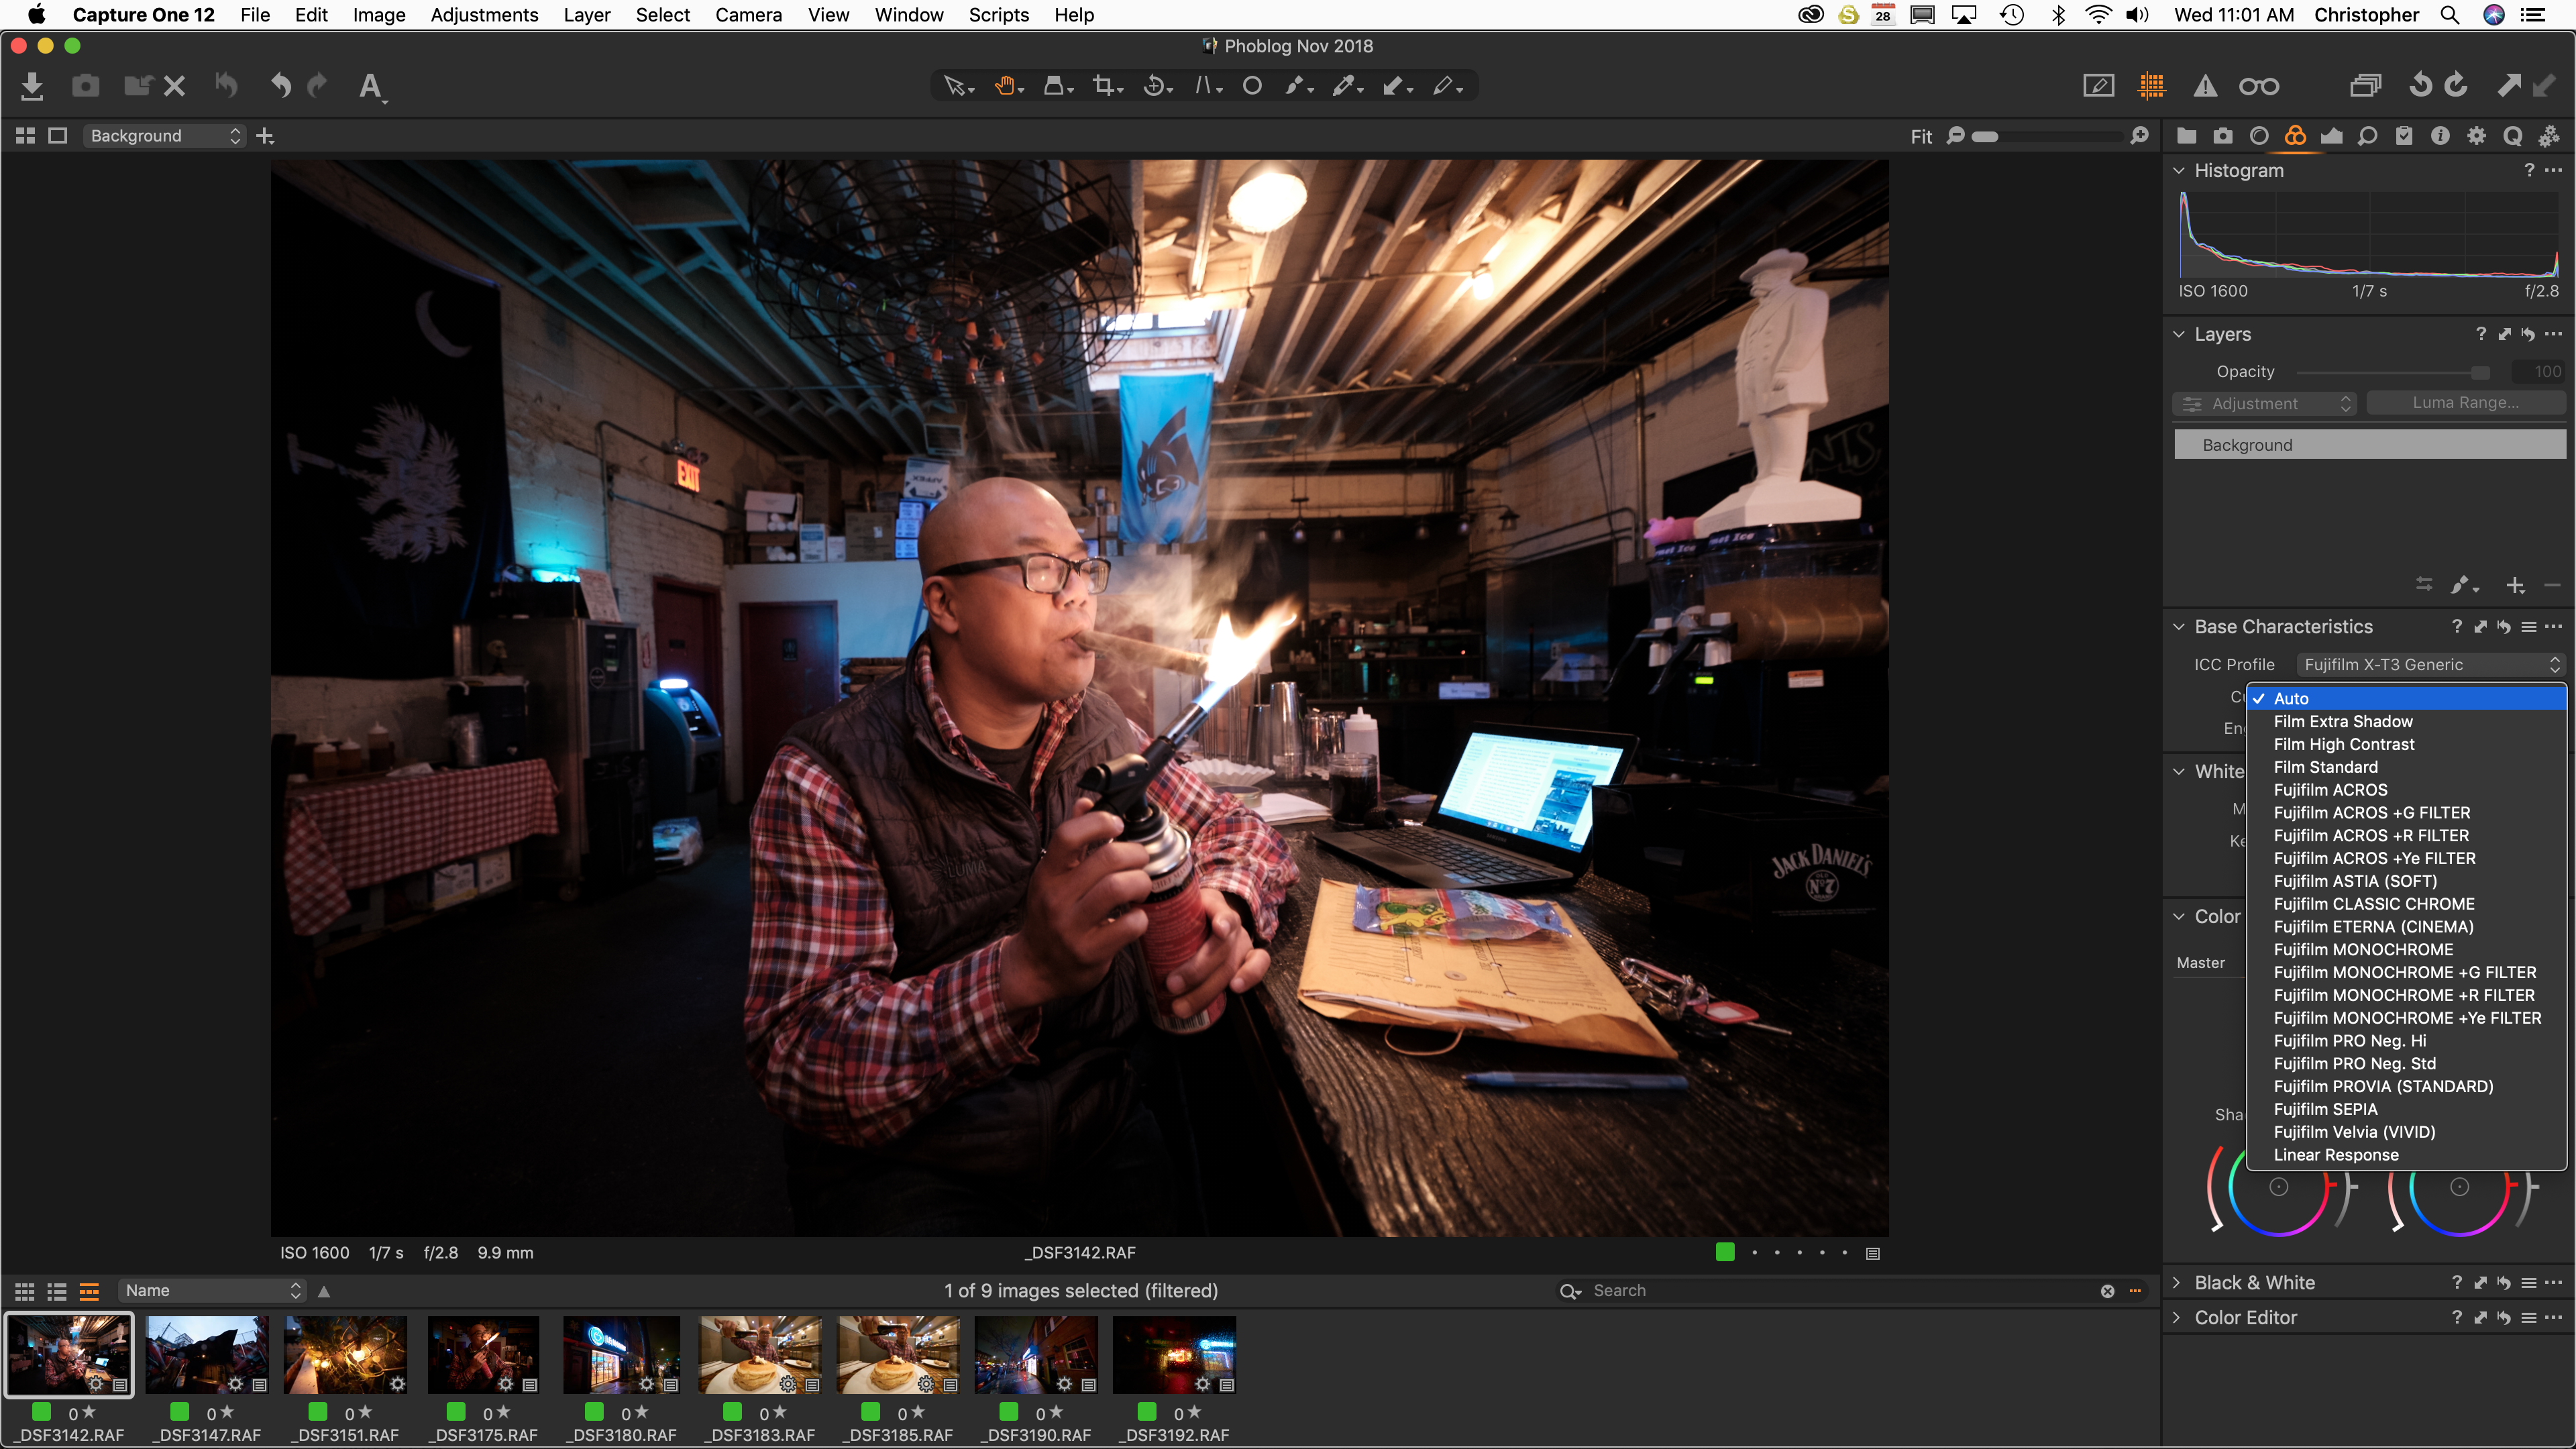
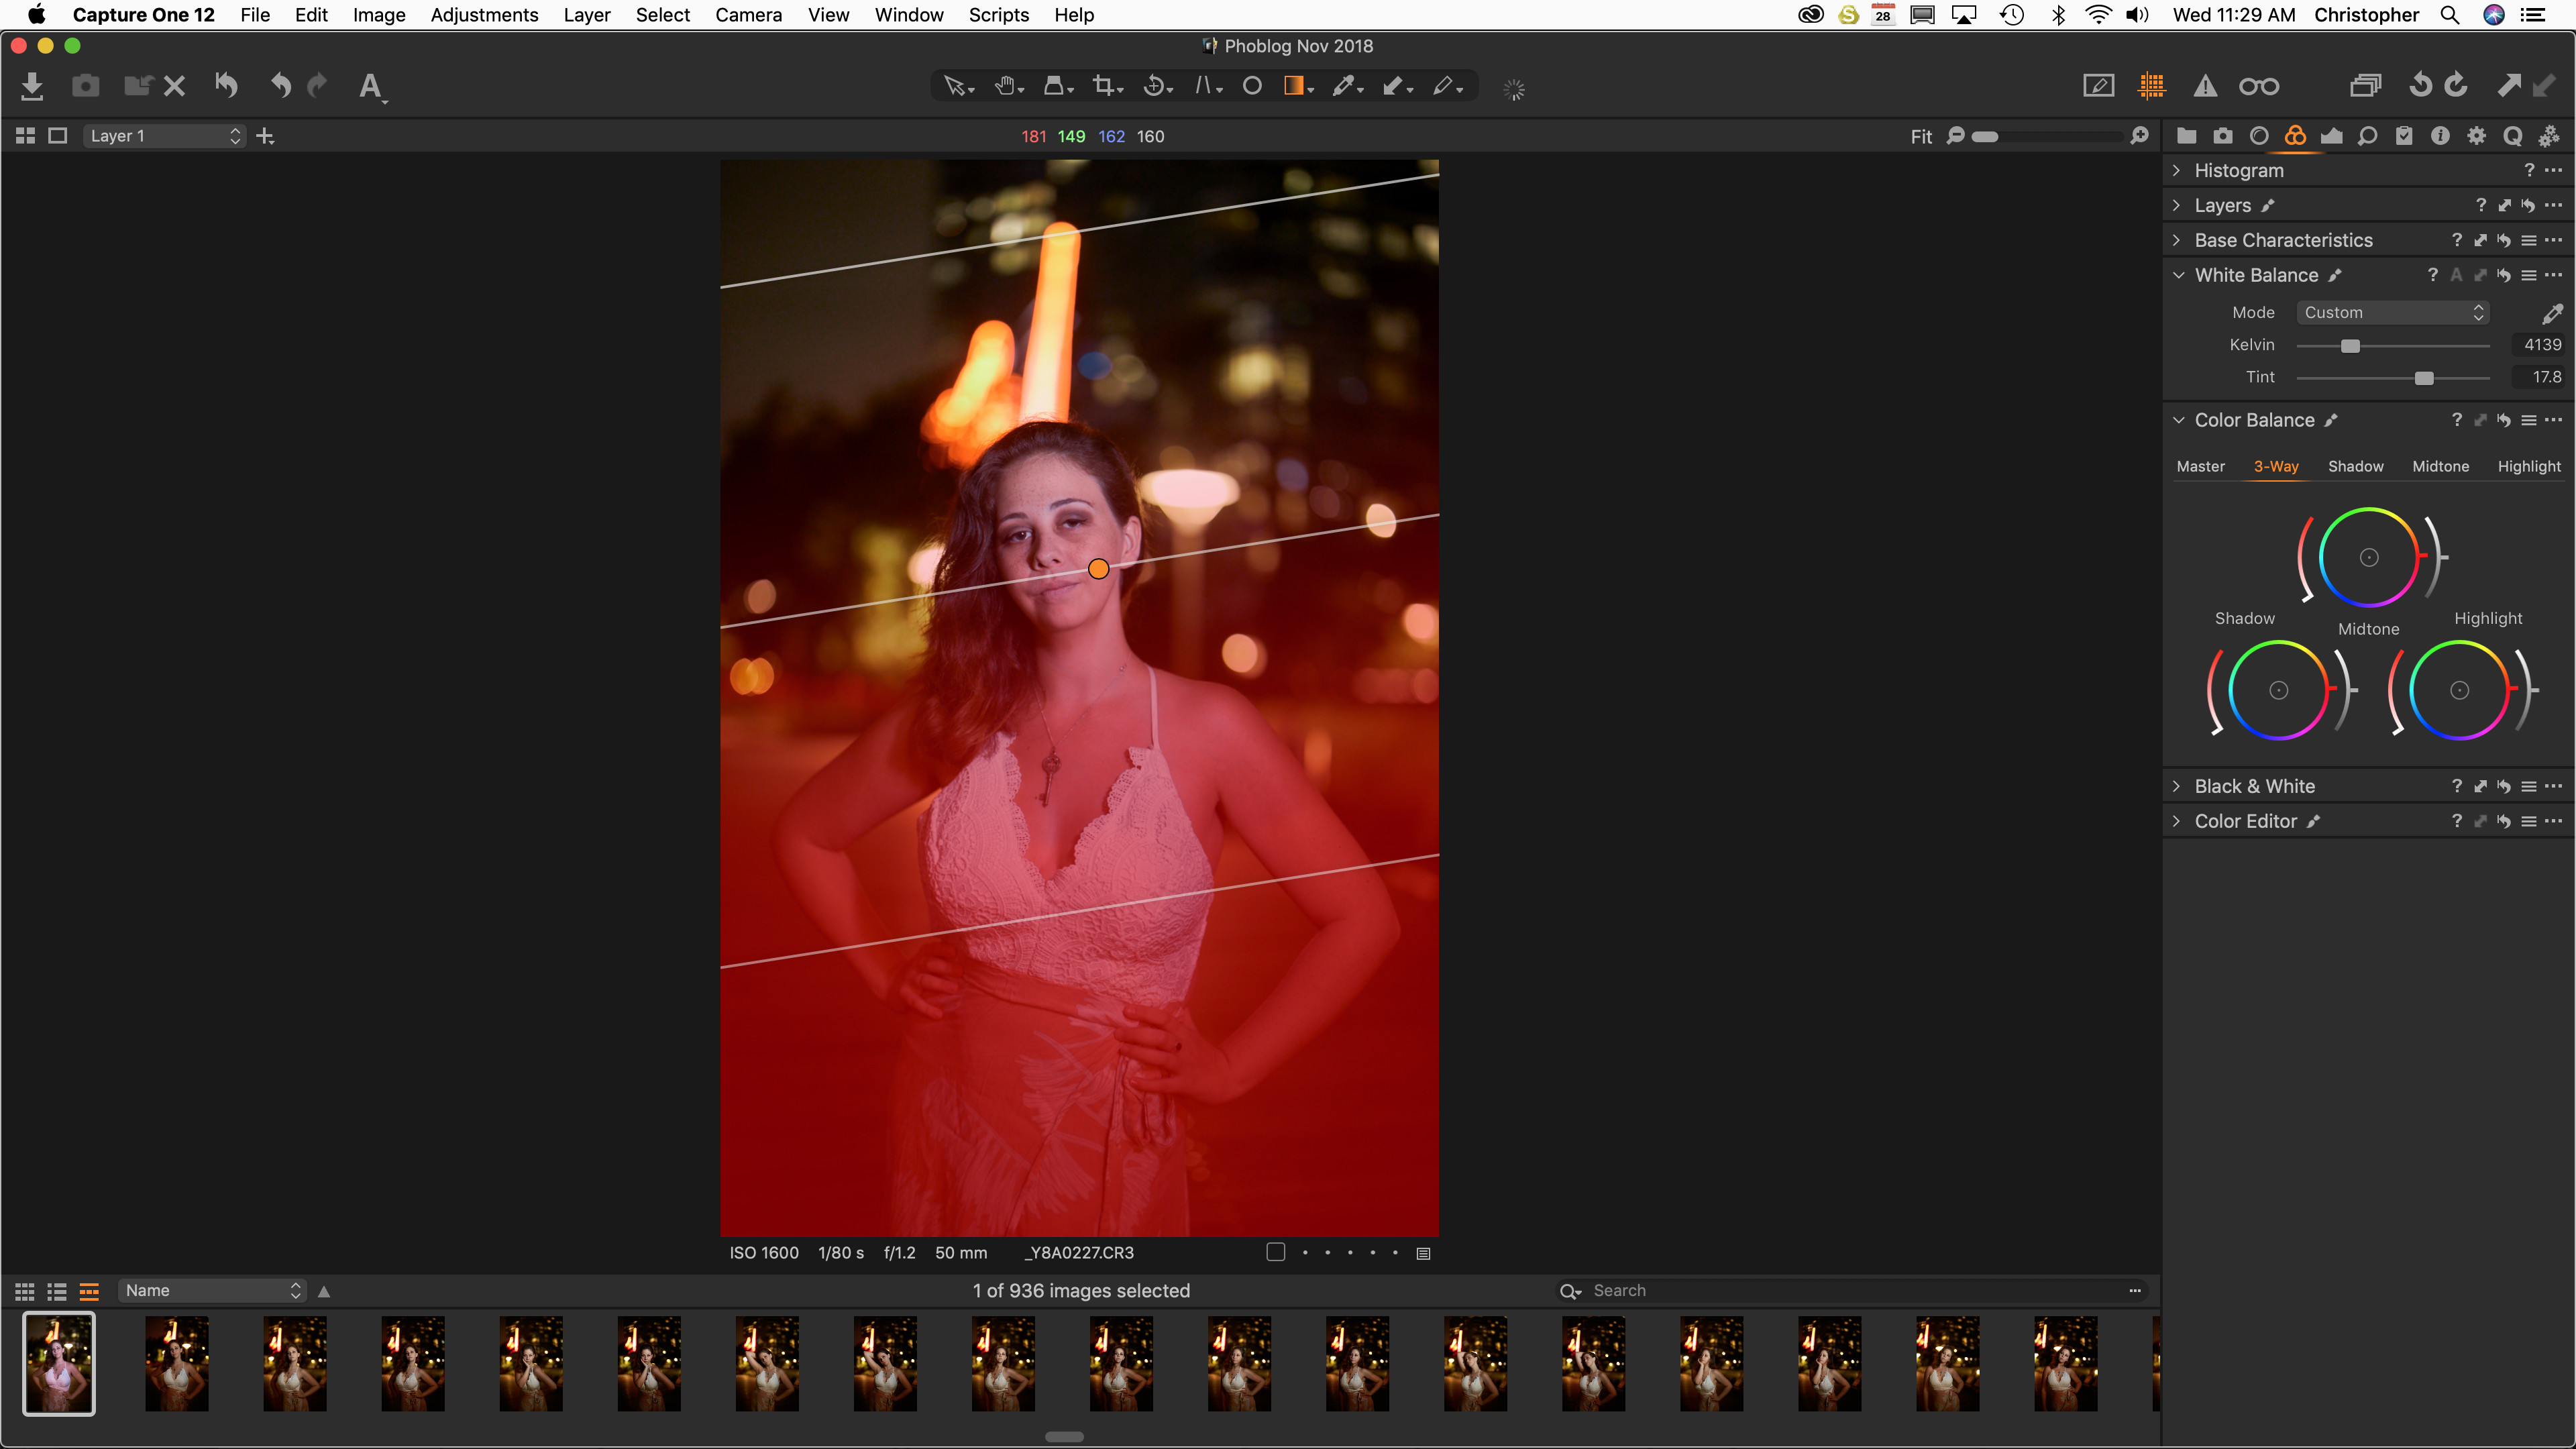
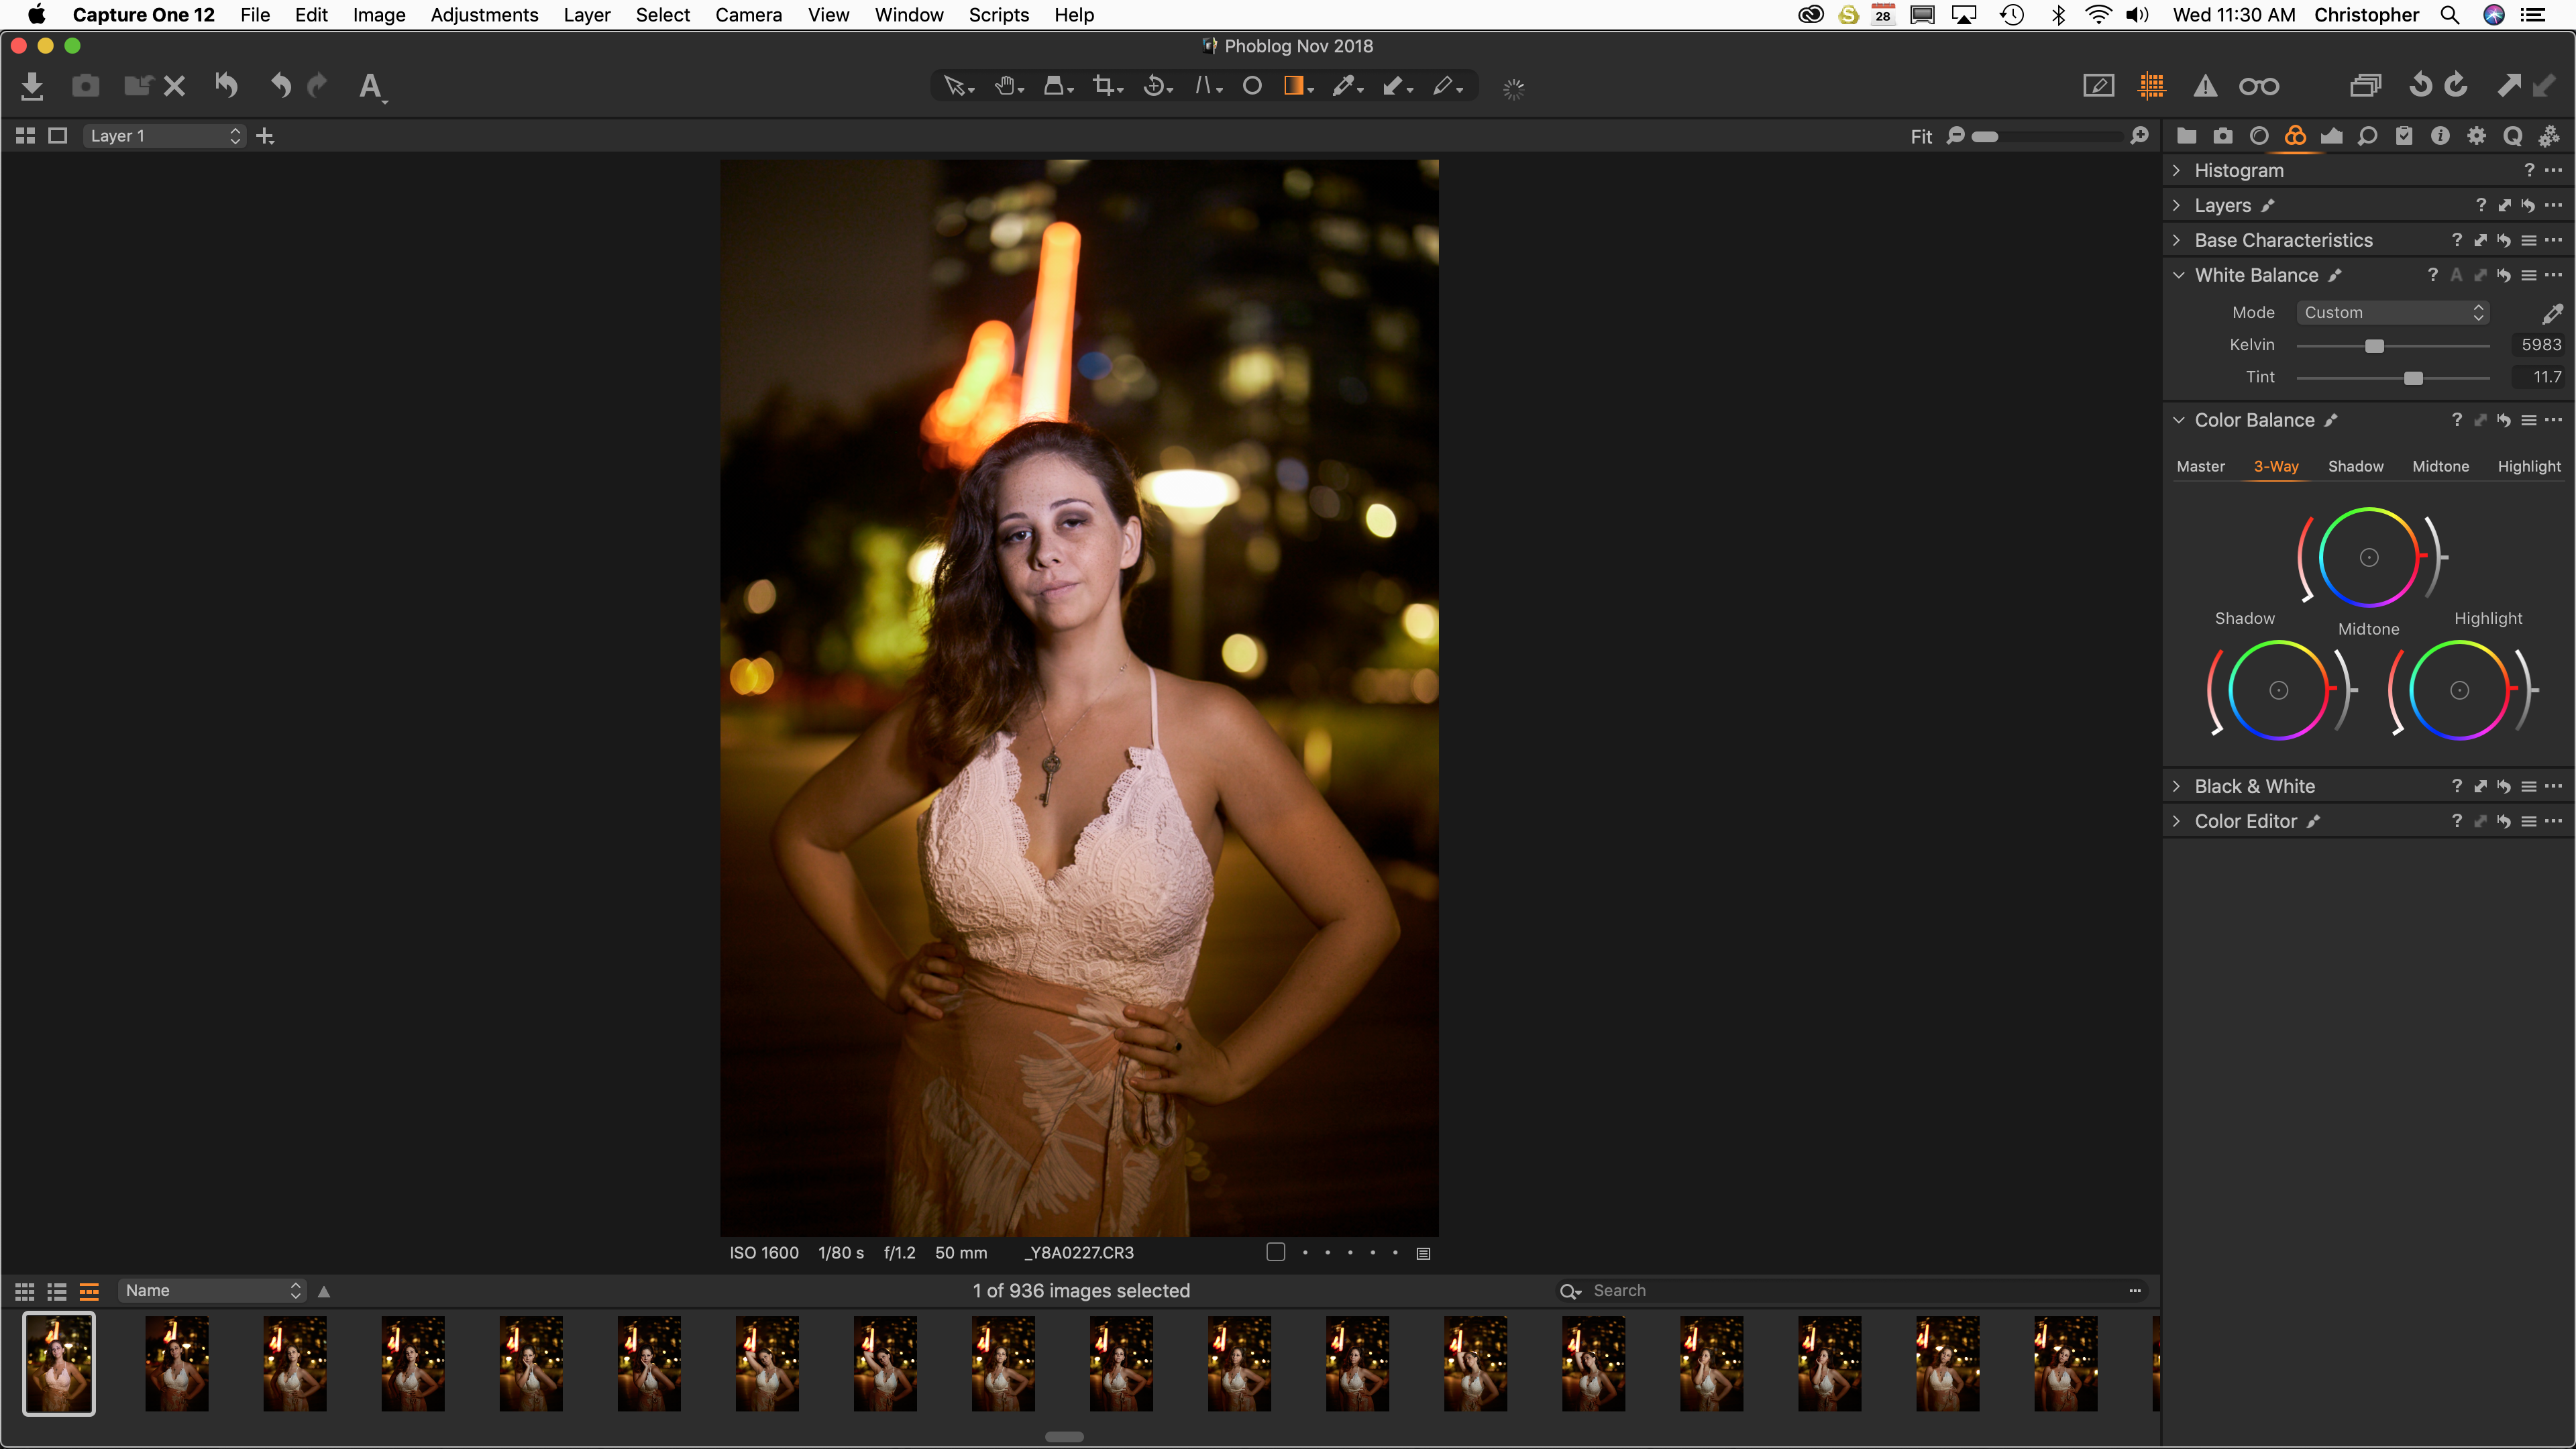
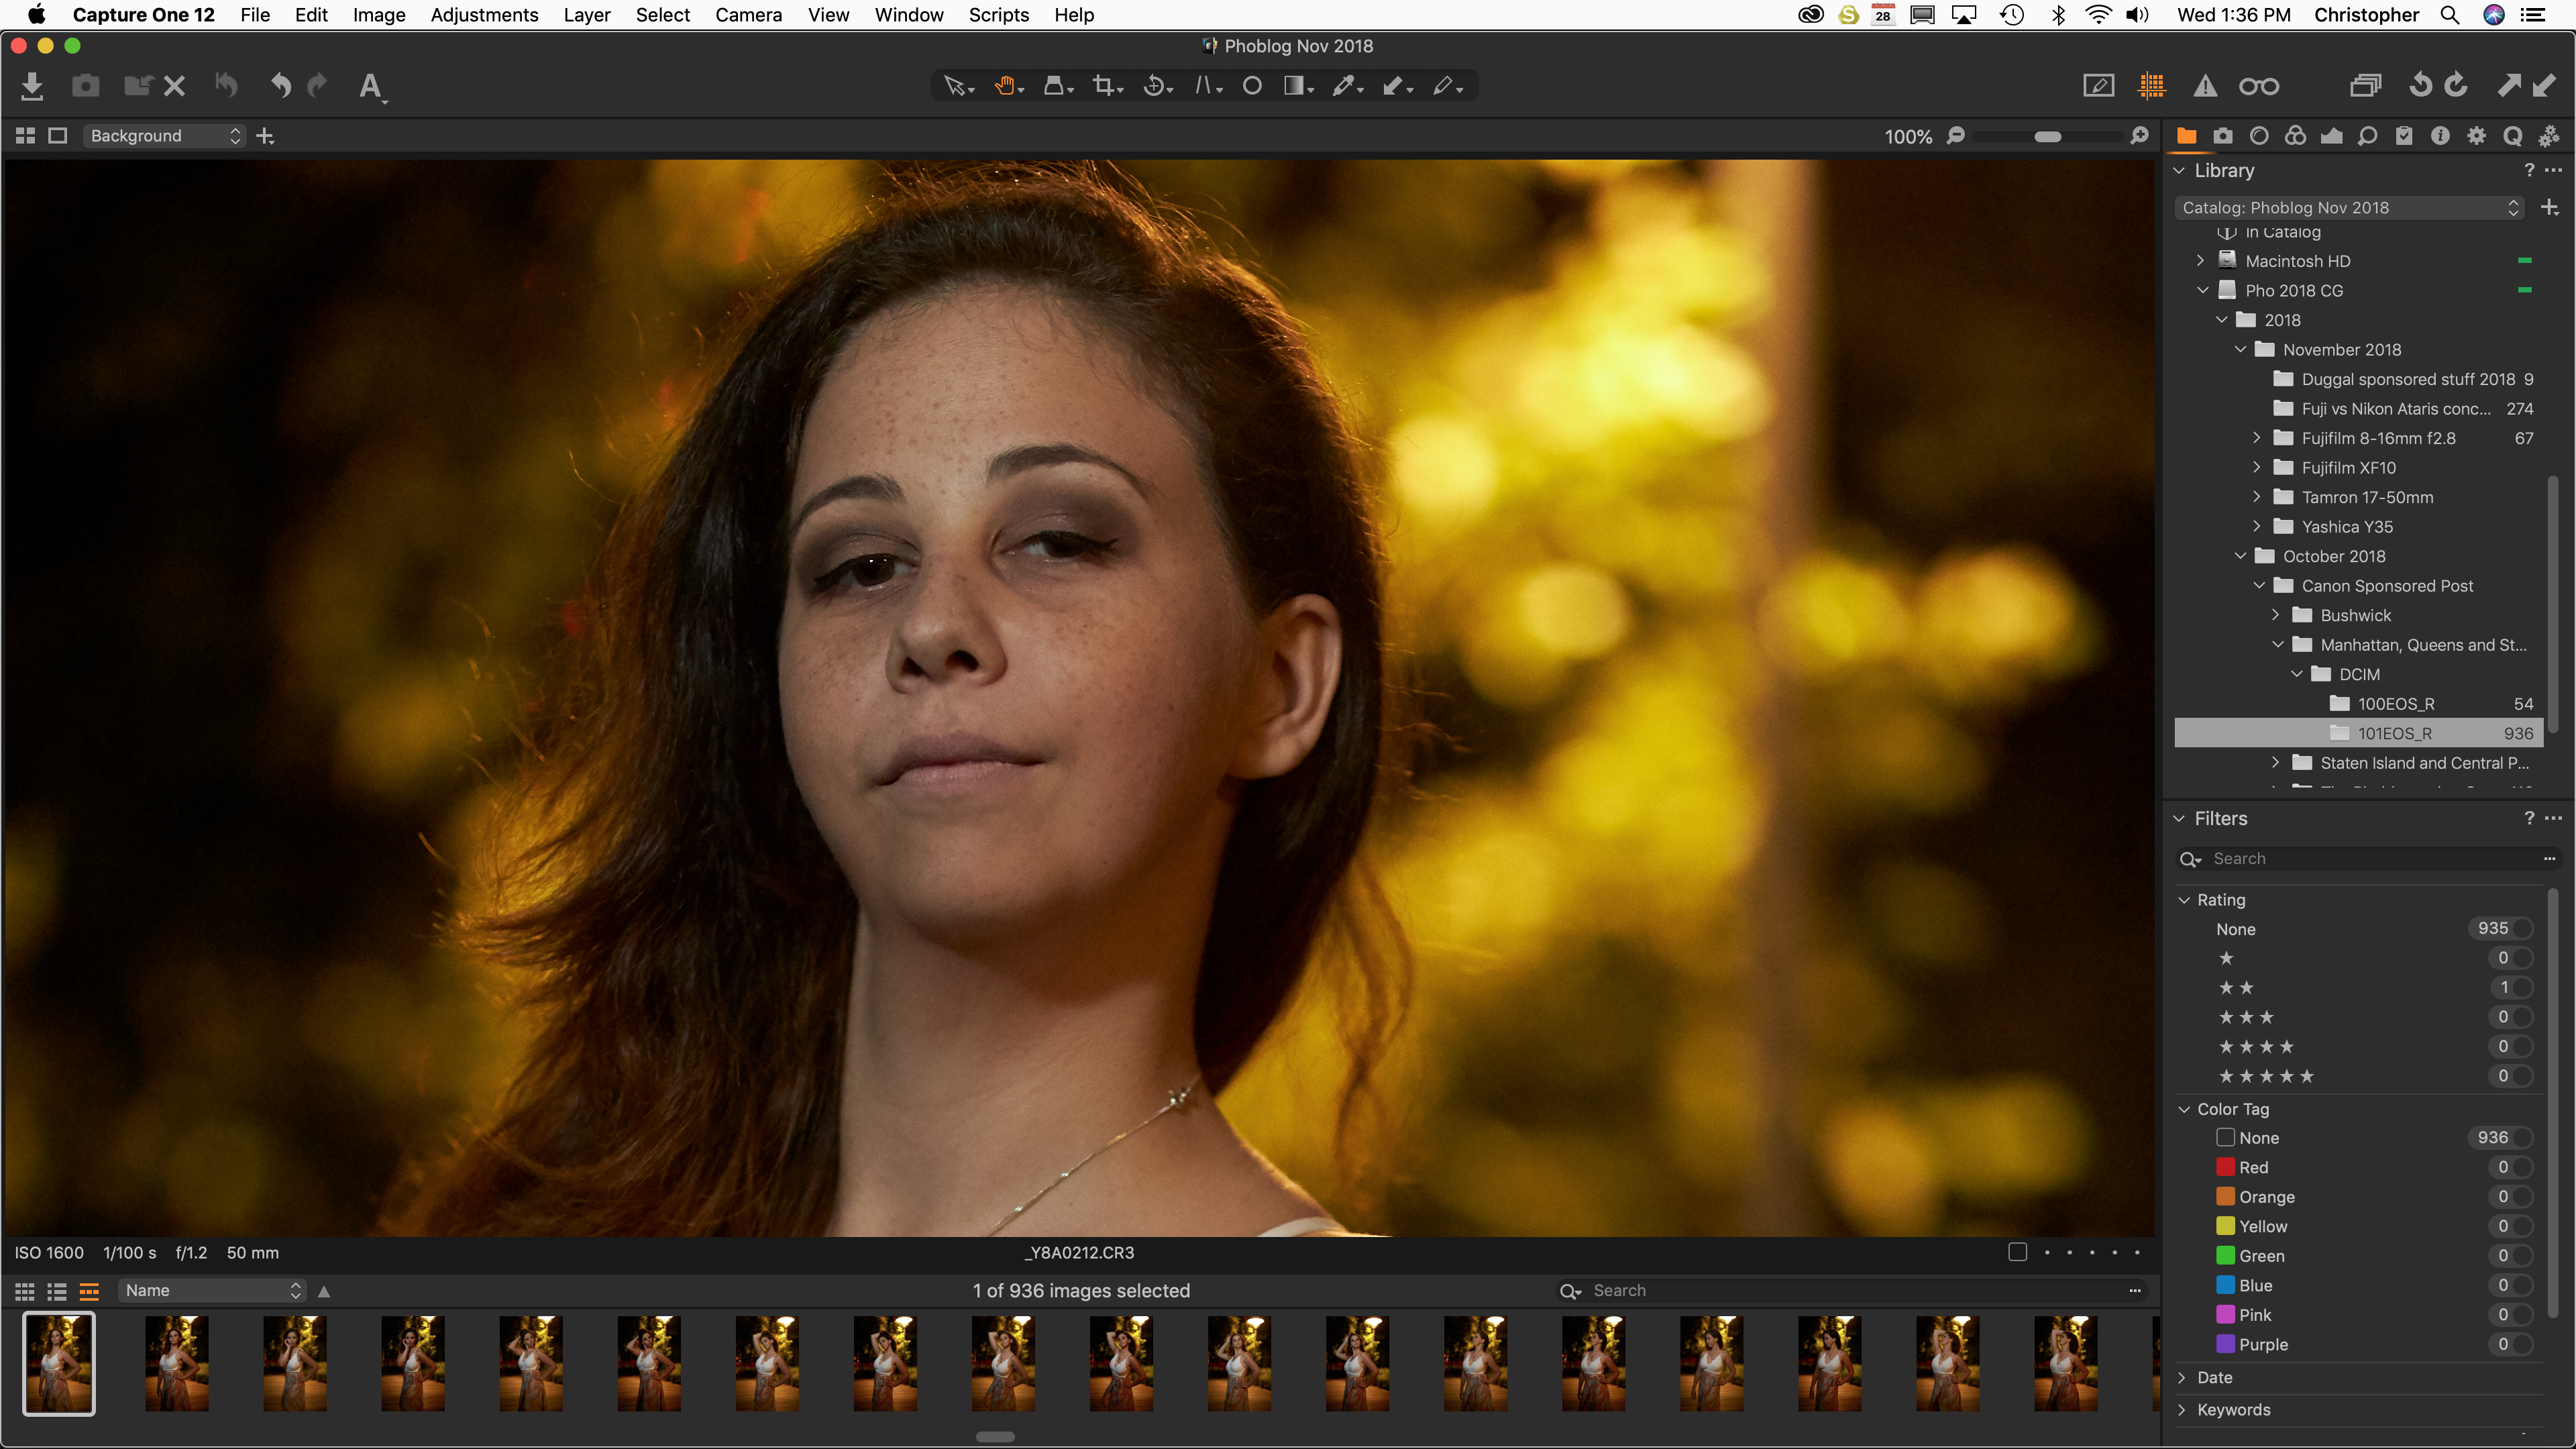
One of the biggest updates to come to Capture One 12 is the addition of Fujifilm Film simulations. This was missing from the ecosystem for years, and with the recent announcement at Photokina 2018 we now have it. To access the film simulations, the editor will choose Base Characteristics under the color tab and then choose a parameter for the curve. Then the dropdown menu suddenly becomes super long and adds in a variety of different Color profiles that Fujifilm makes available on their cameras.
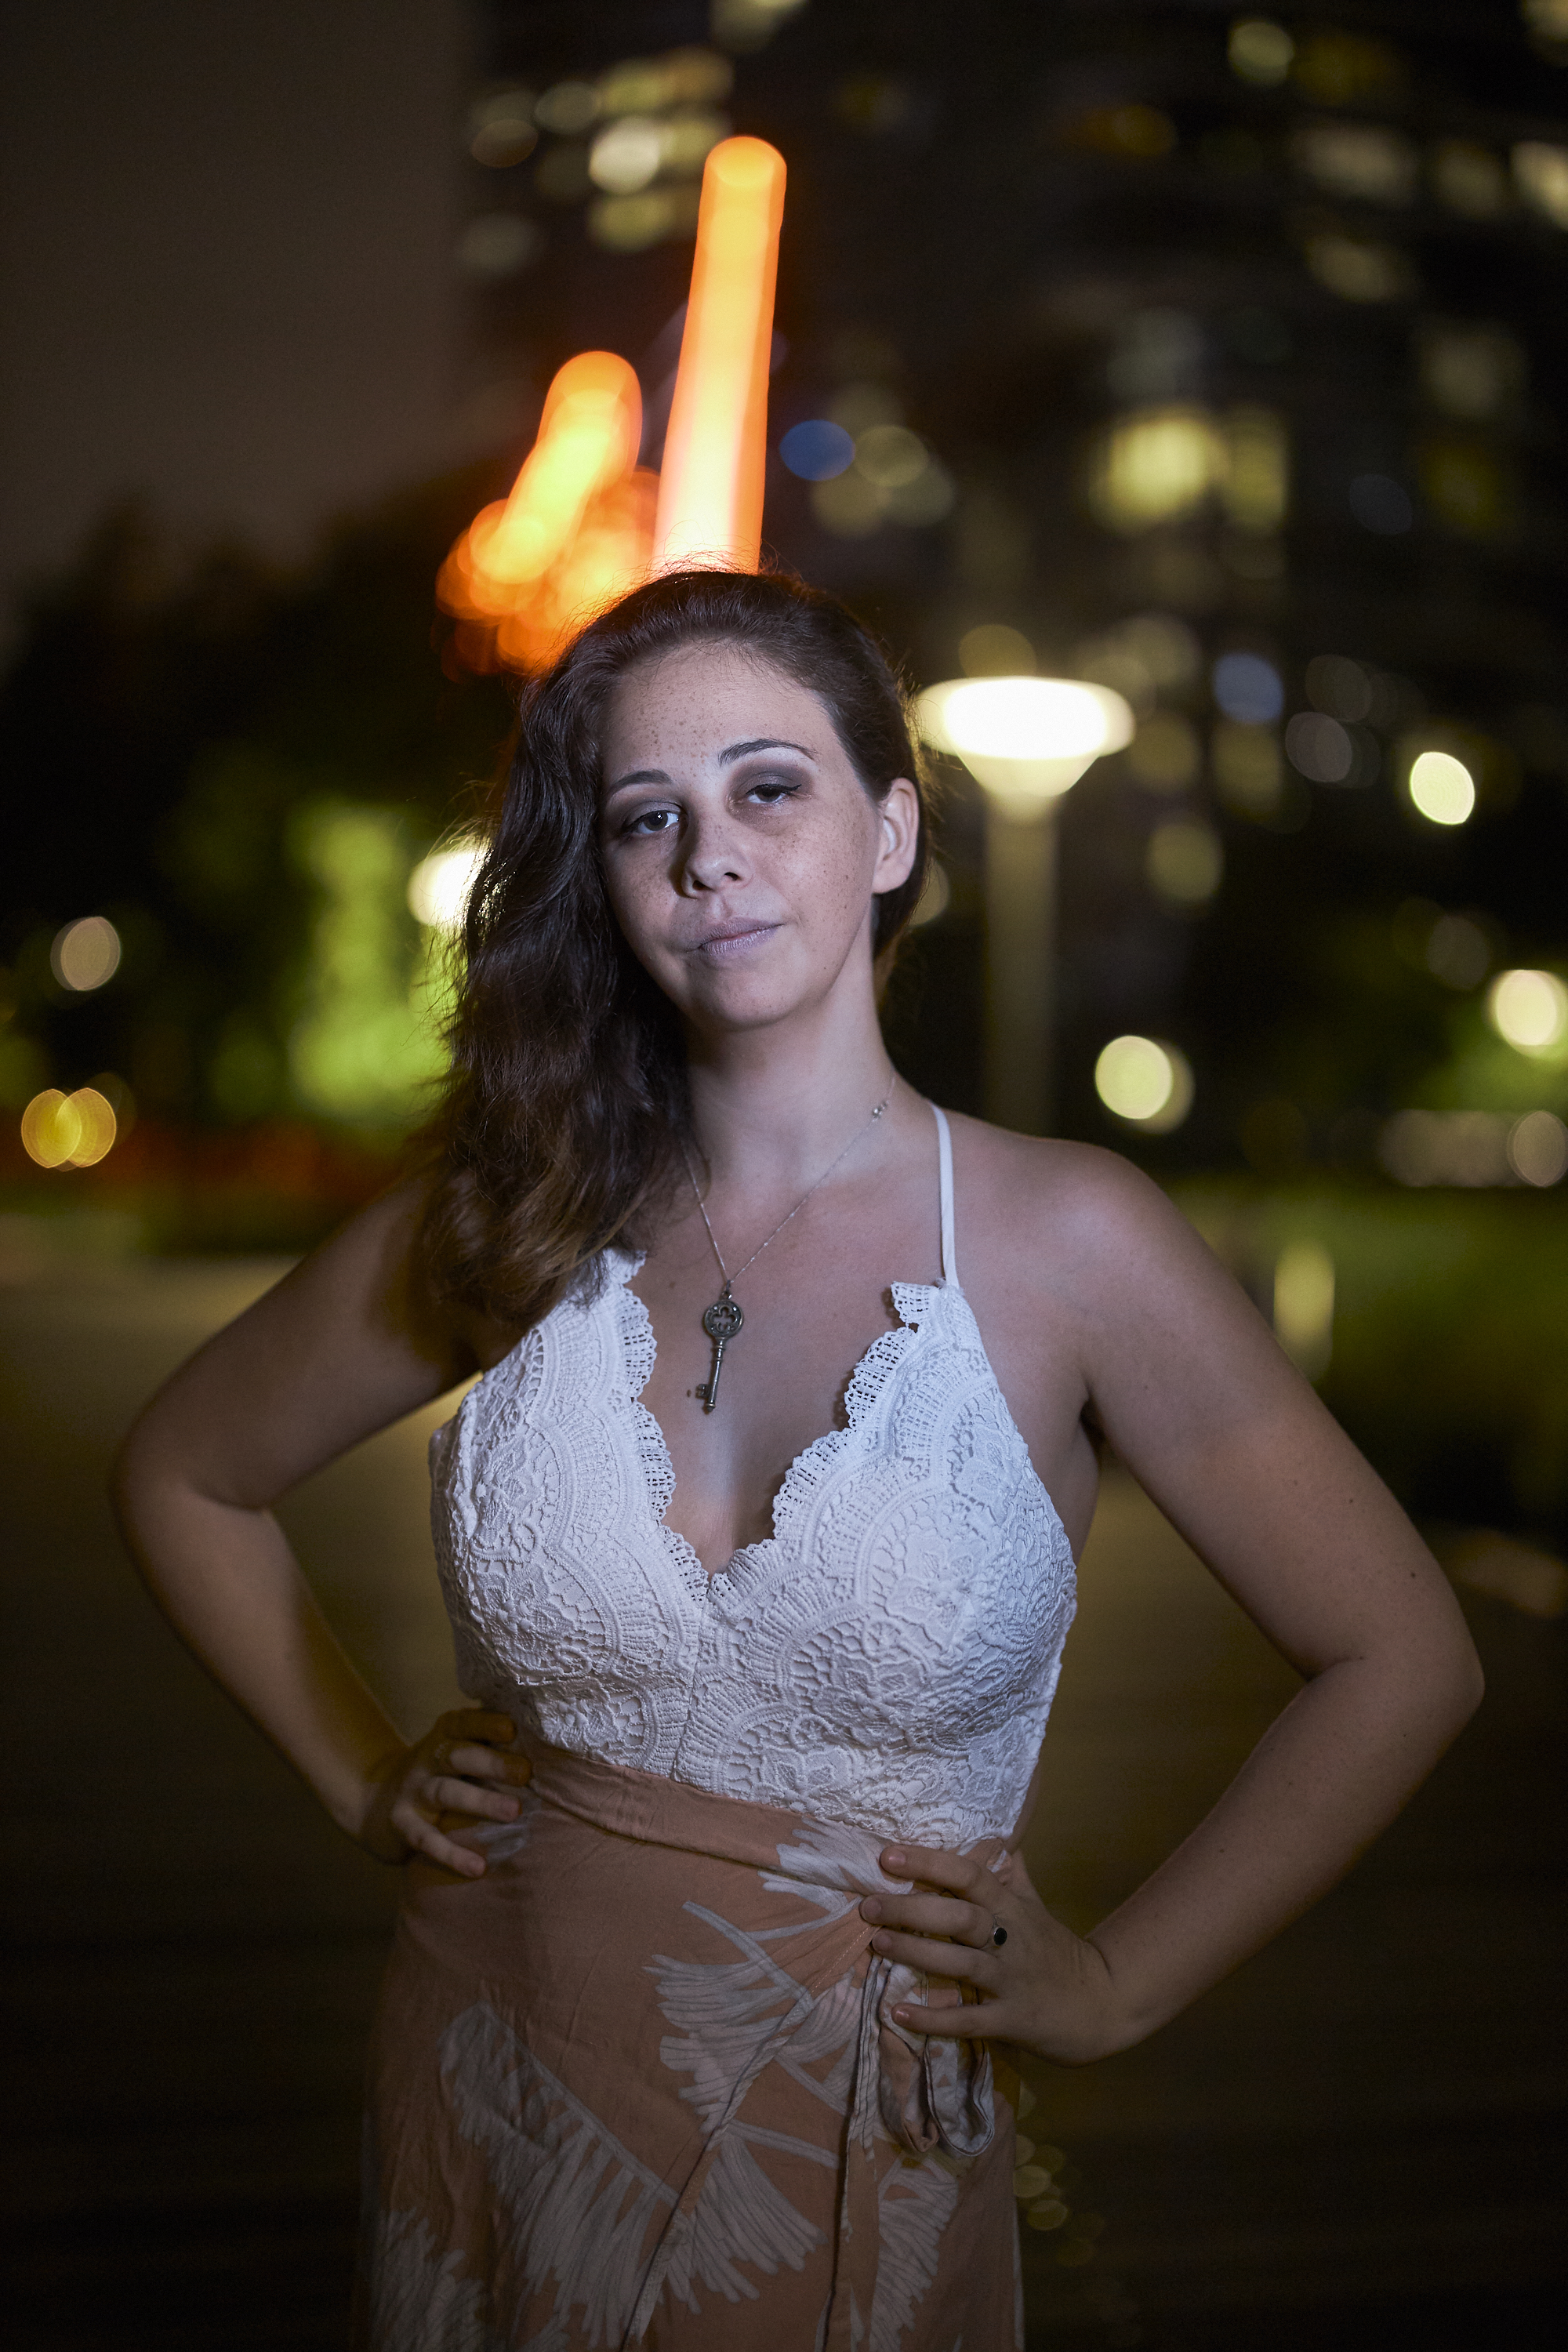
Below is a comparison of Capture One and Lightroom’s renderings. All that was done to the images was applying Classic Chrome: both Lightroom and Capture One rendered the white balance of the scene in a different way.


The renders are almost identical in my eyes. When looking at the image as a whole, it’s difficult to see the differences. But if you look at the images side by side in two tabs, you’ll see that Lightroom applies more correction to the lenses than Capture One does. Capture One doesn’t have a profile yet for the 8-16mm f2.8 that I shot this photo with. Capture One is bound to catch up. But if you’ve been enjoying the way that C1 edits RAW files, then you’ll know that this new and welcome addition will really help you out.
New Menu System
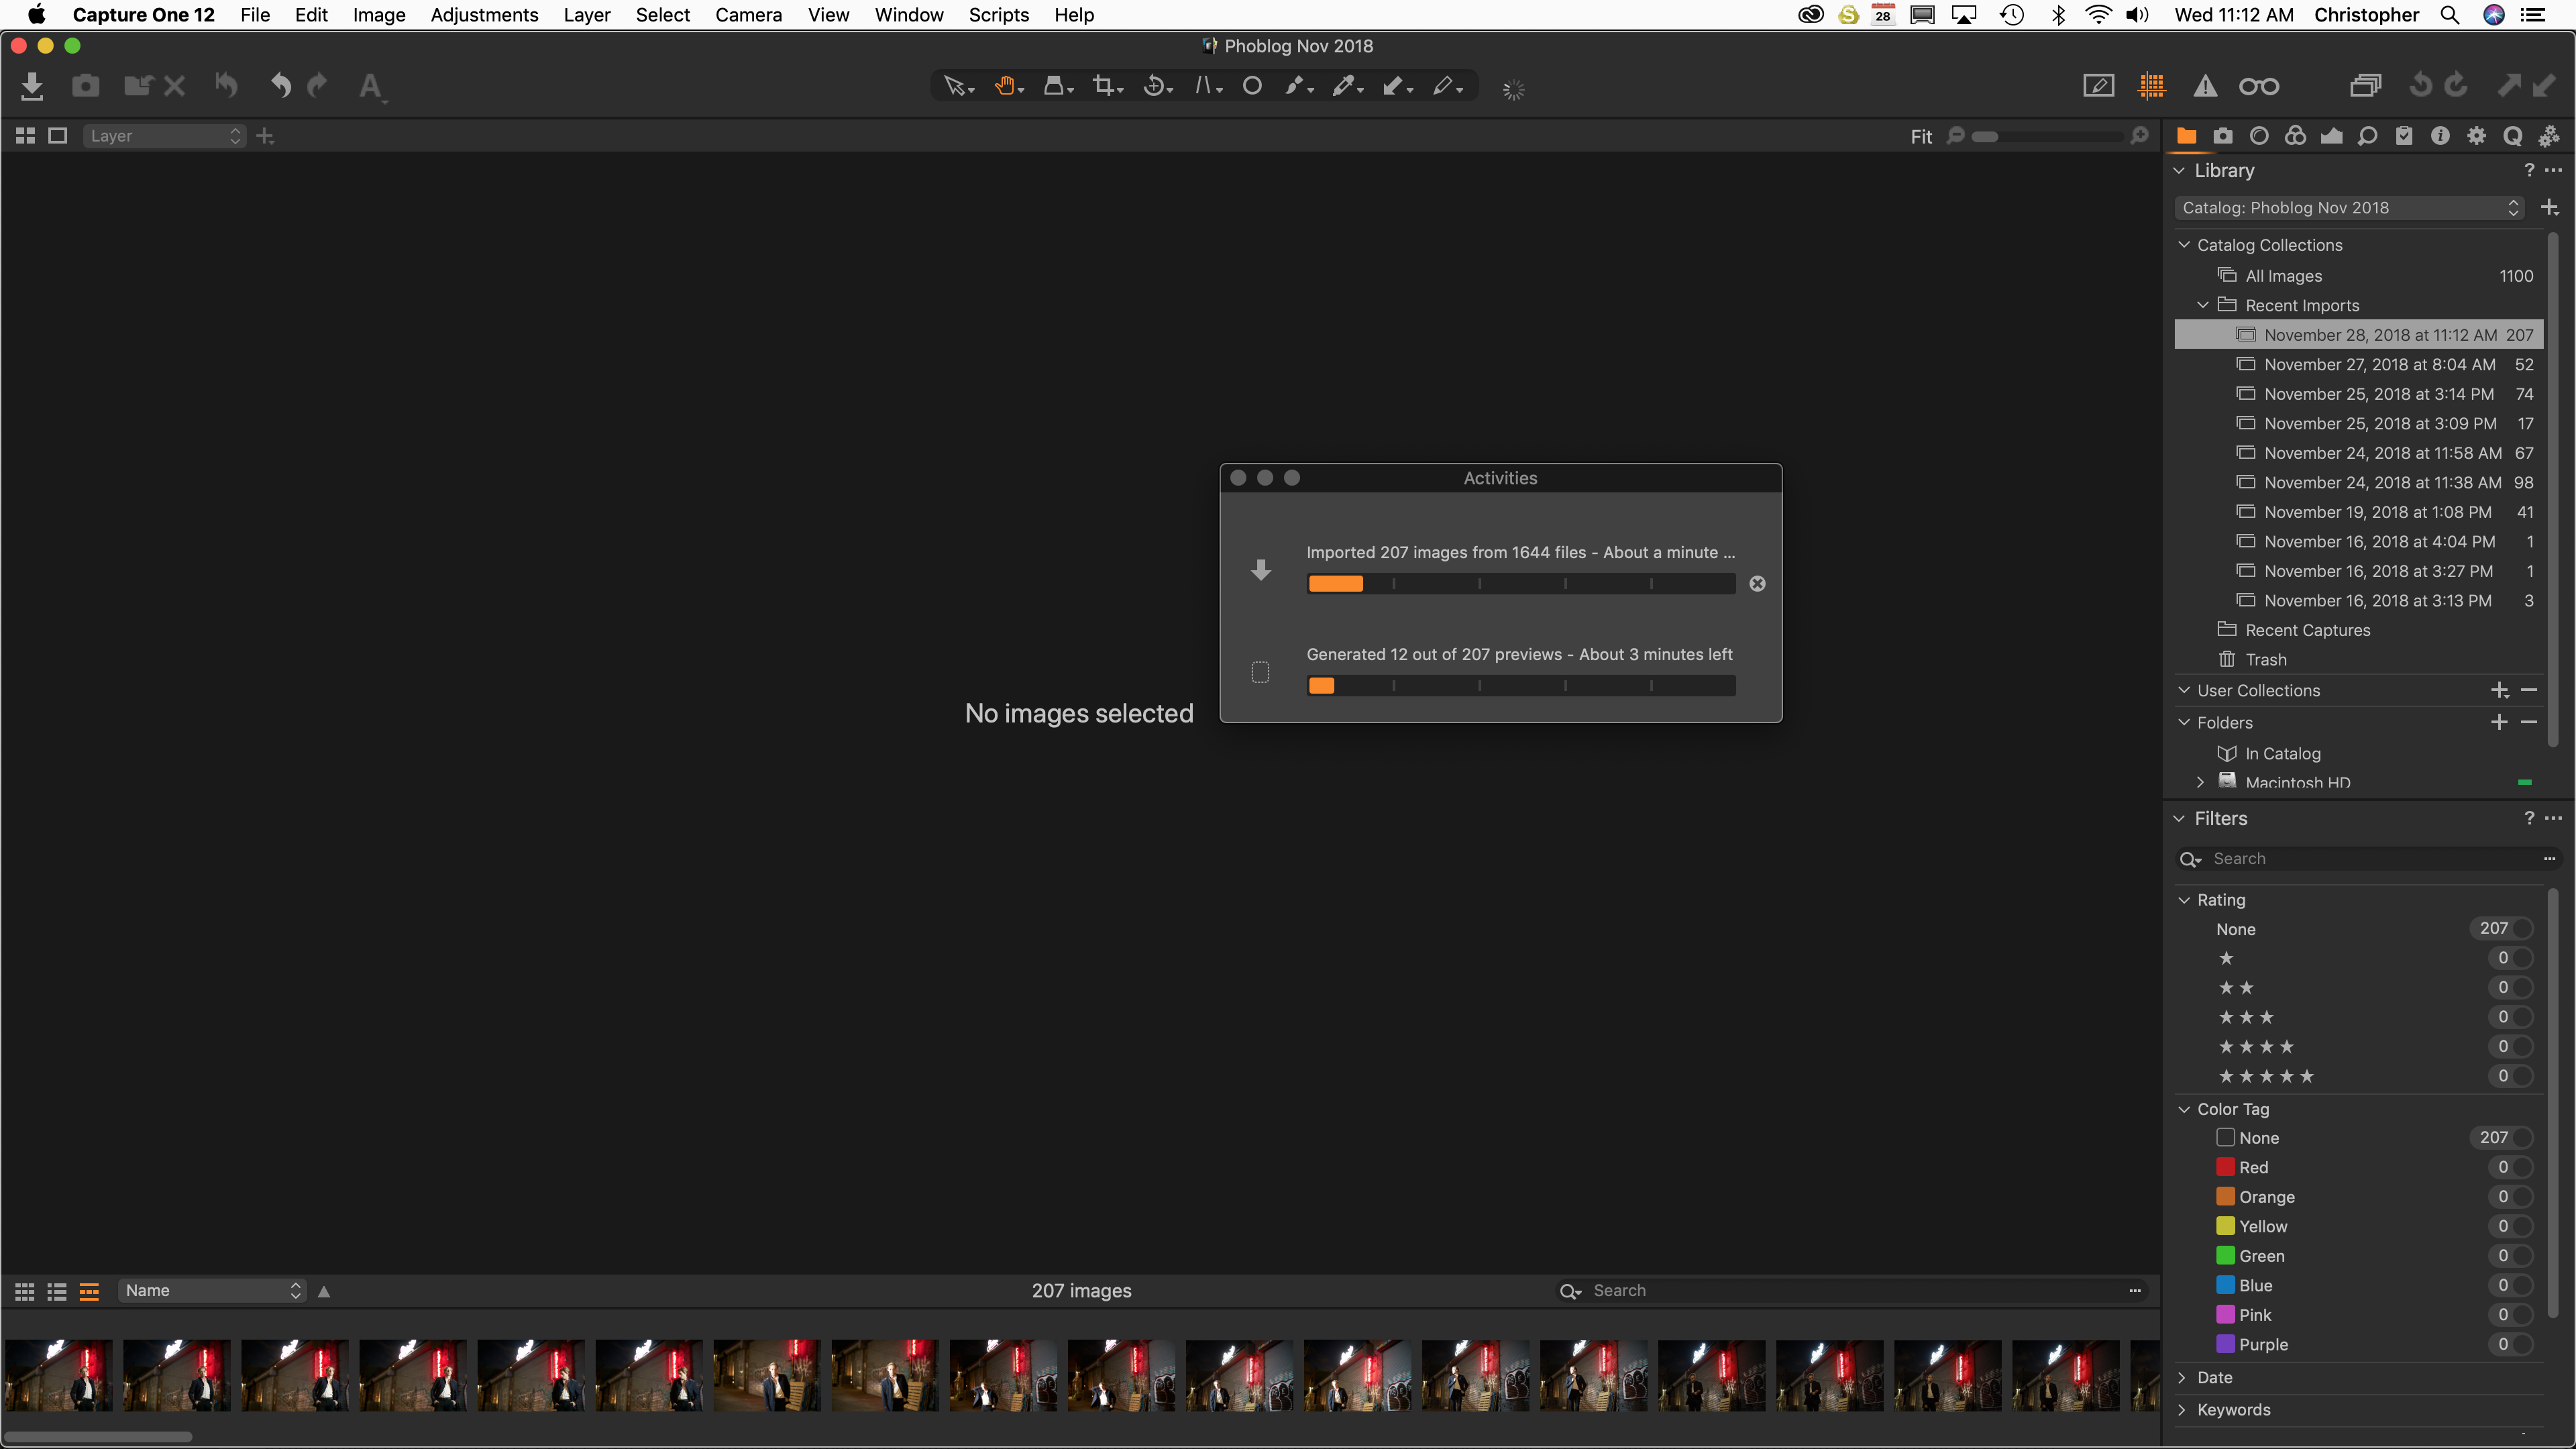
Capture One 12 does a few new things to the menus. Some things are in different places and other things are added in. Until you fully understand it though, the search tab will greatly help you. All your keyboard shortcuts are still the same though, so no worries there.
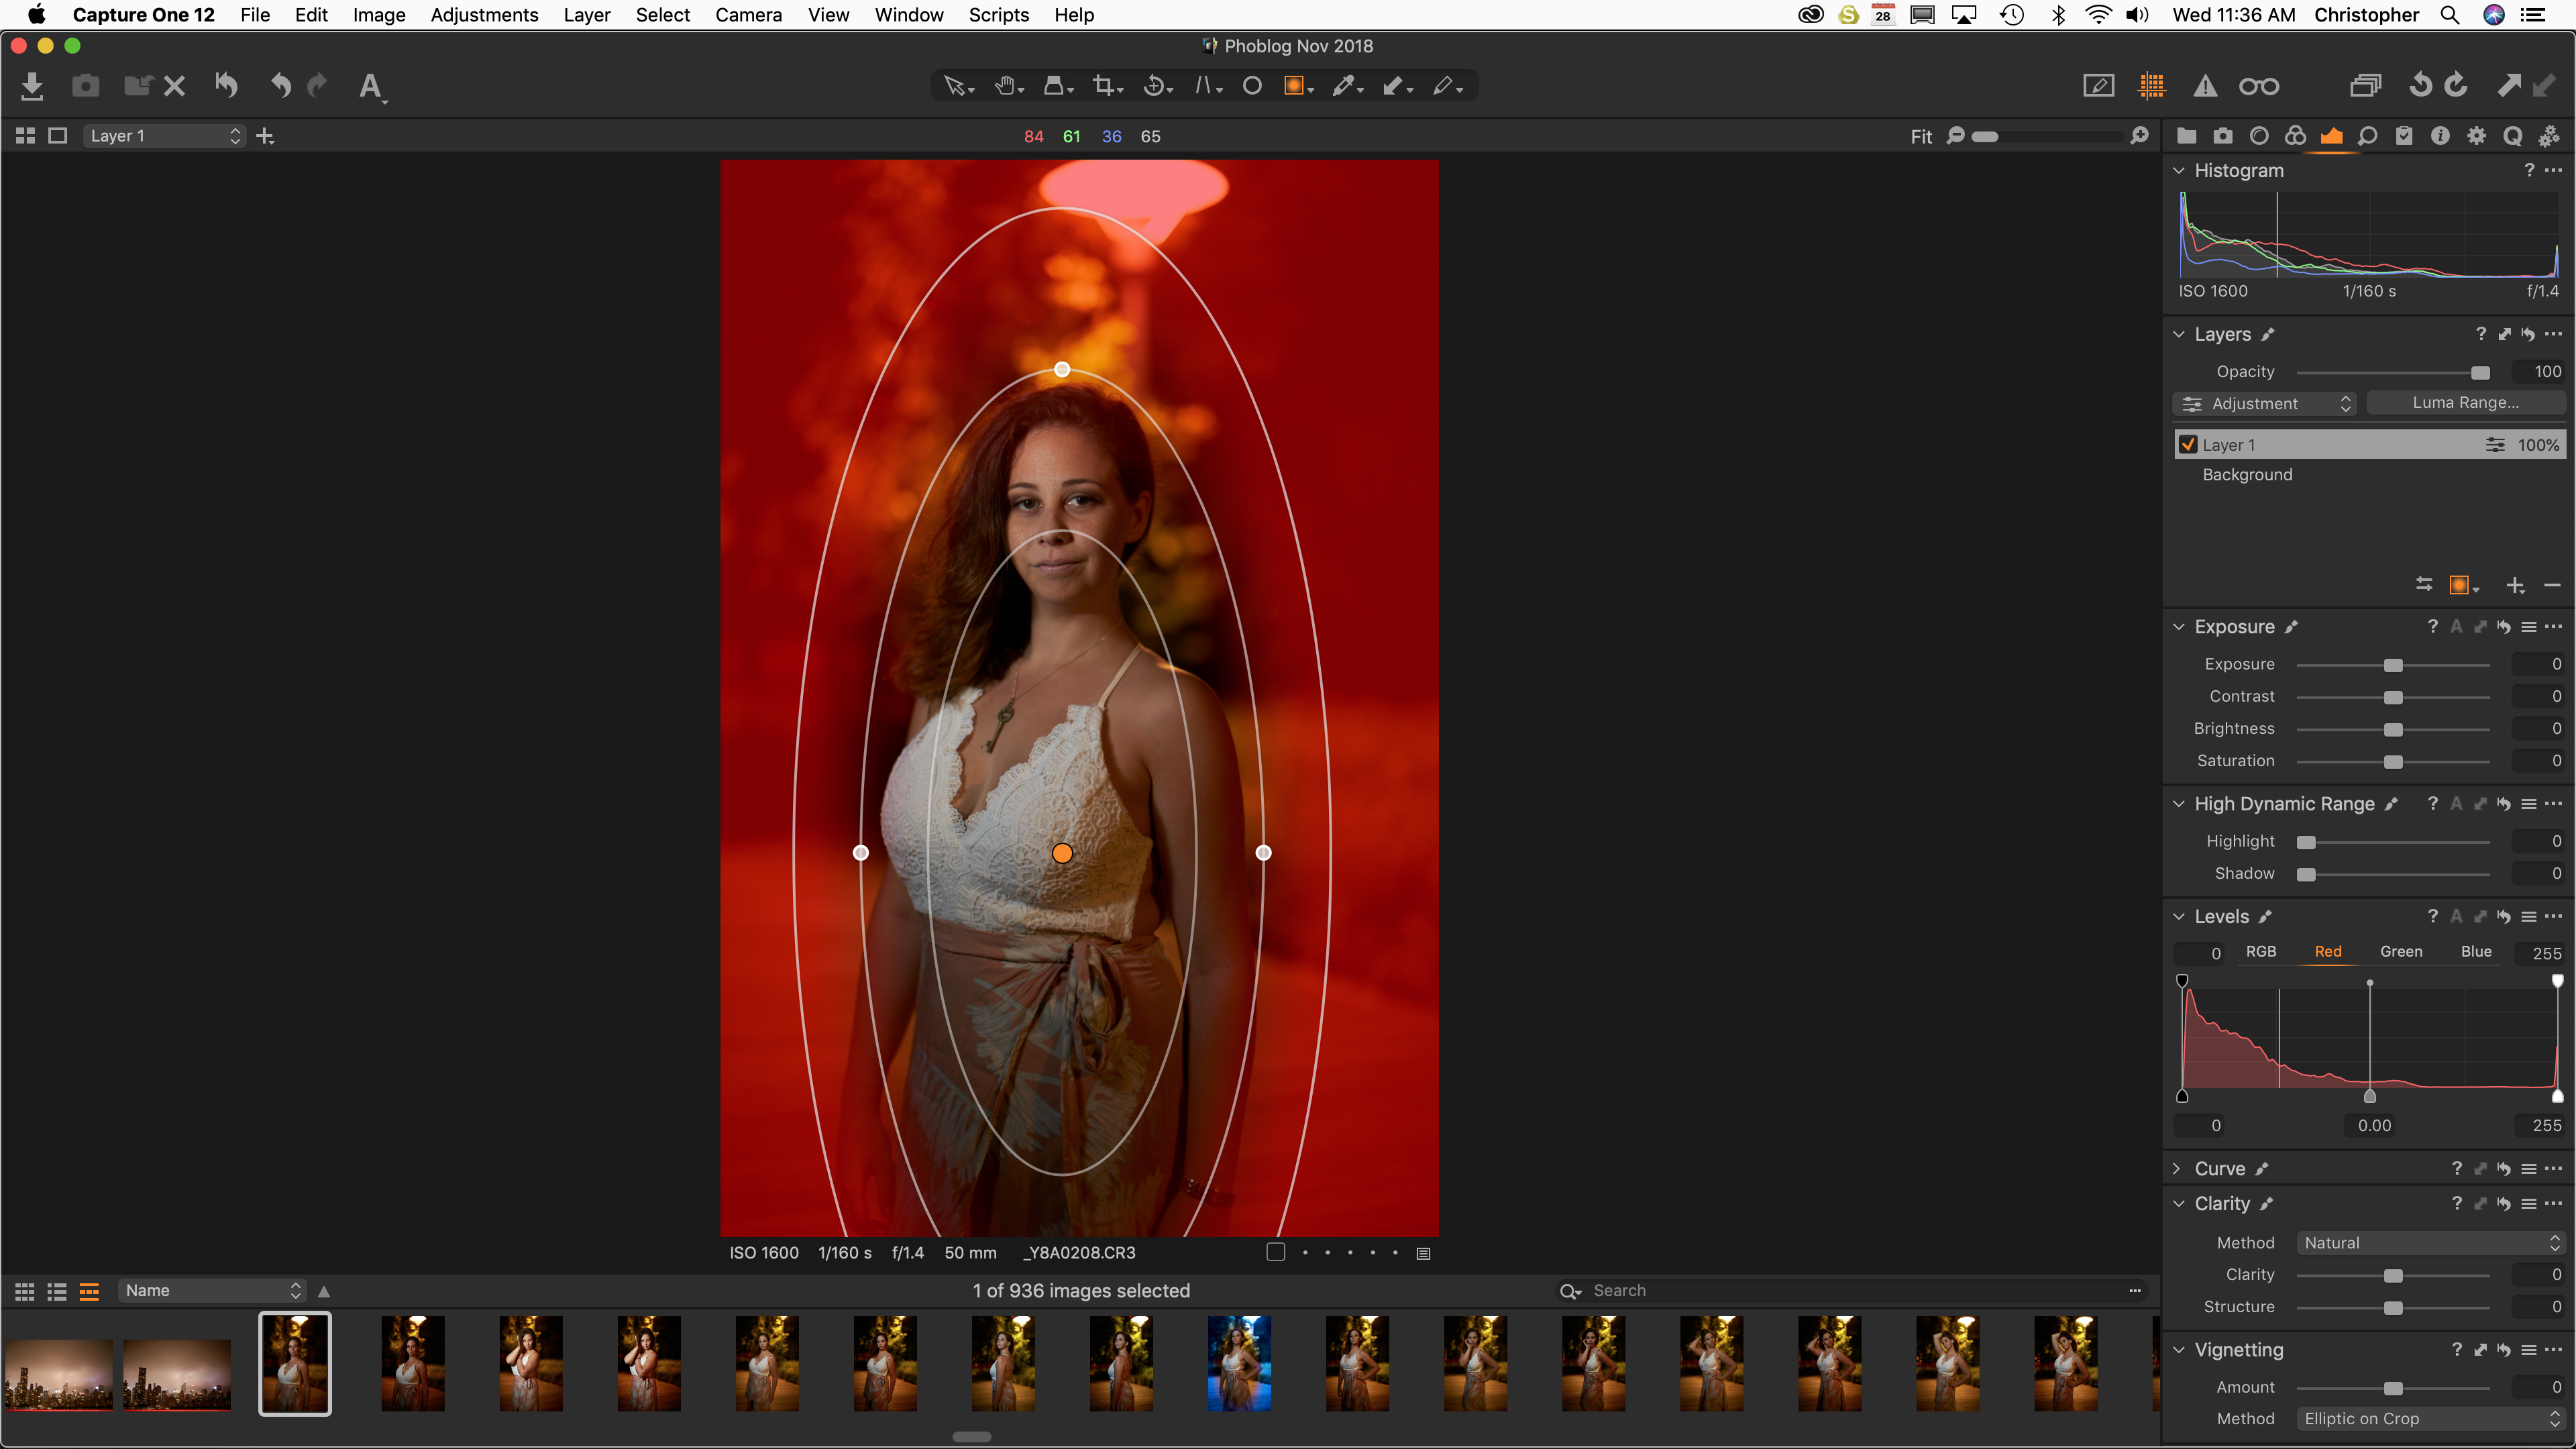
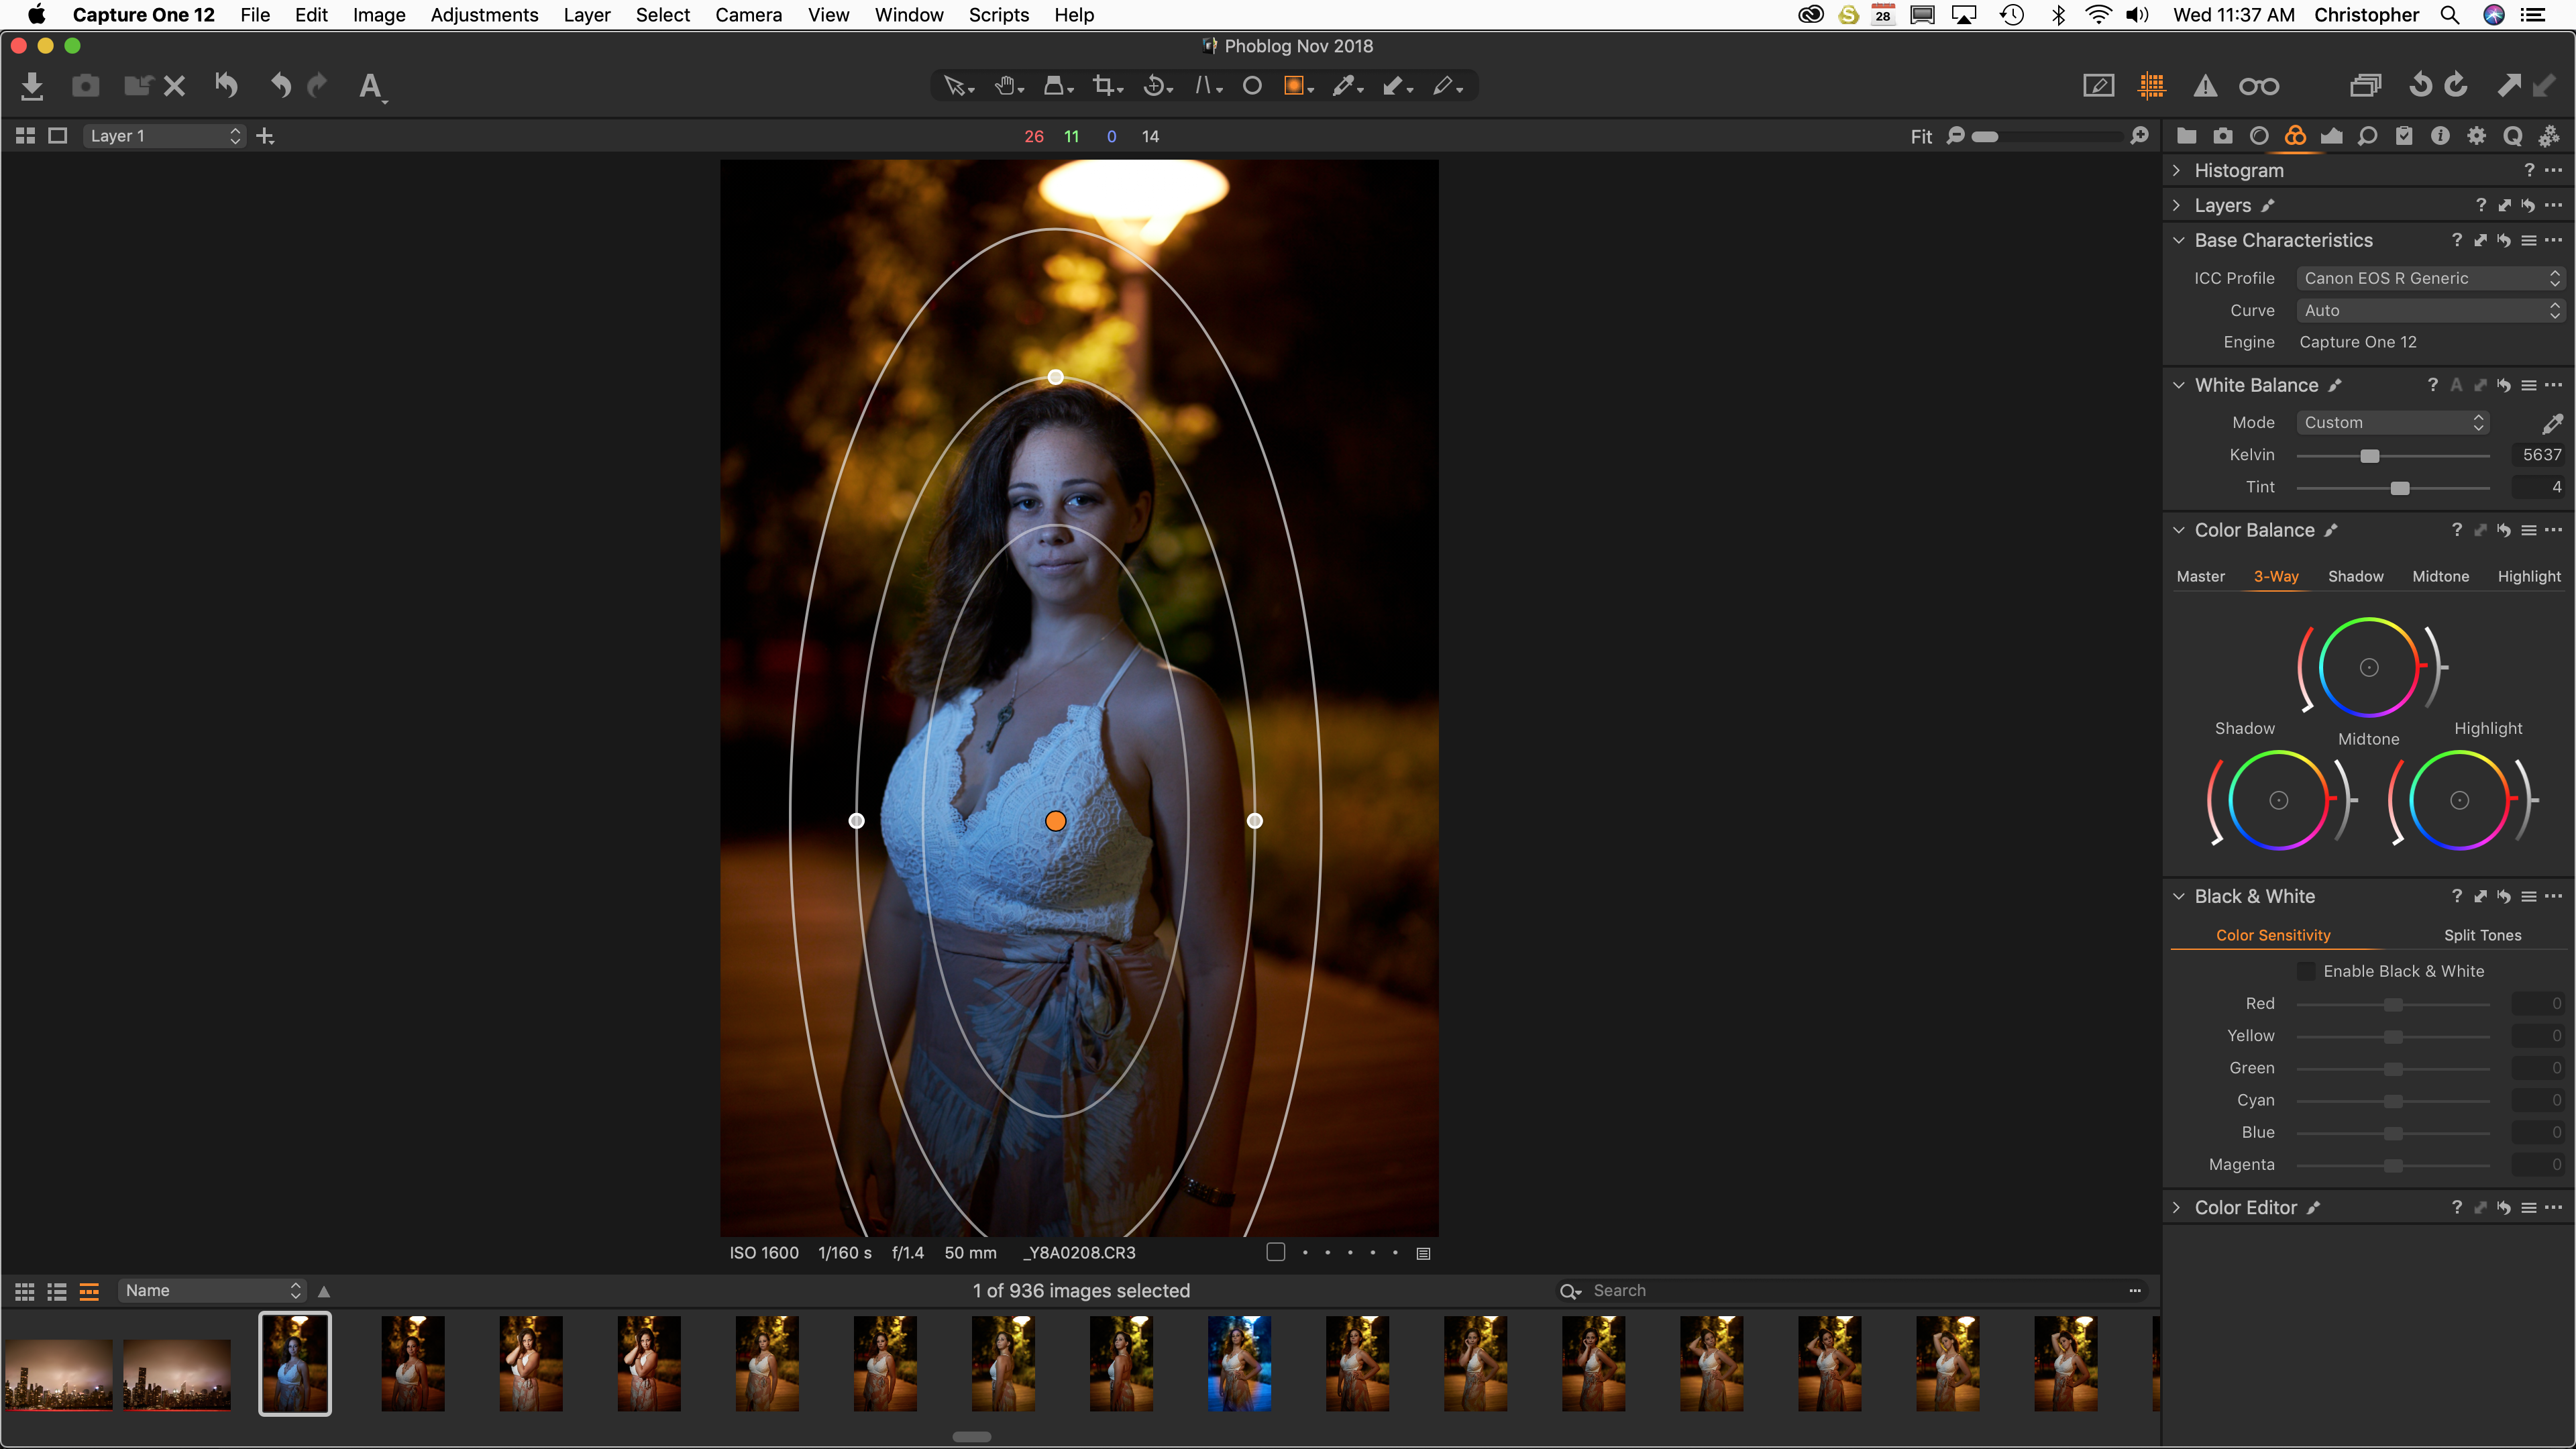
Luma Range (Luminosity) Masking
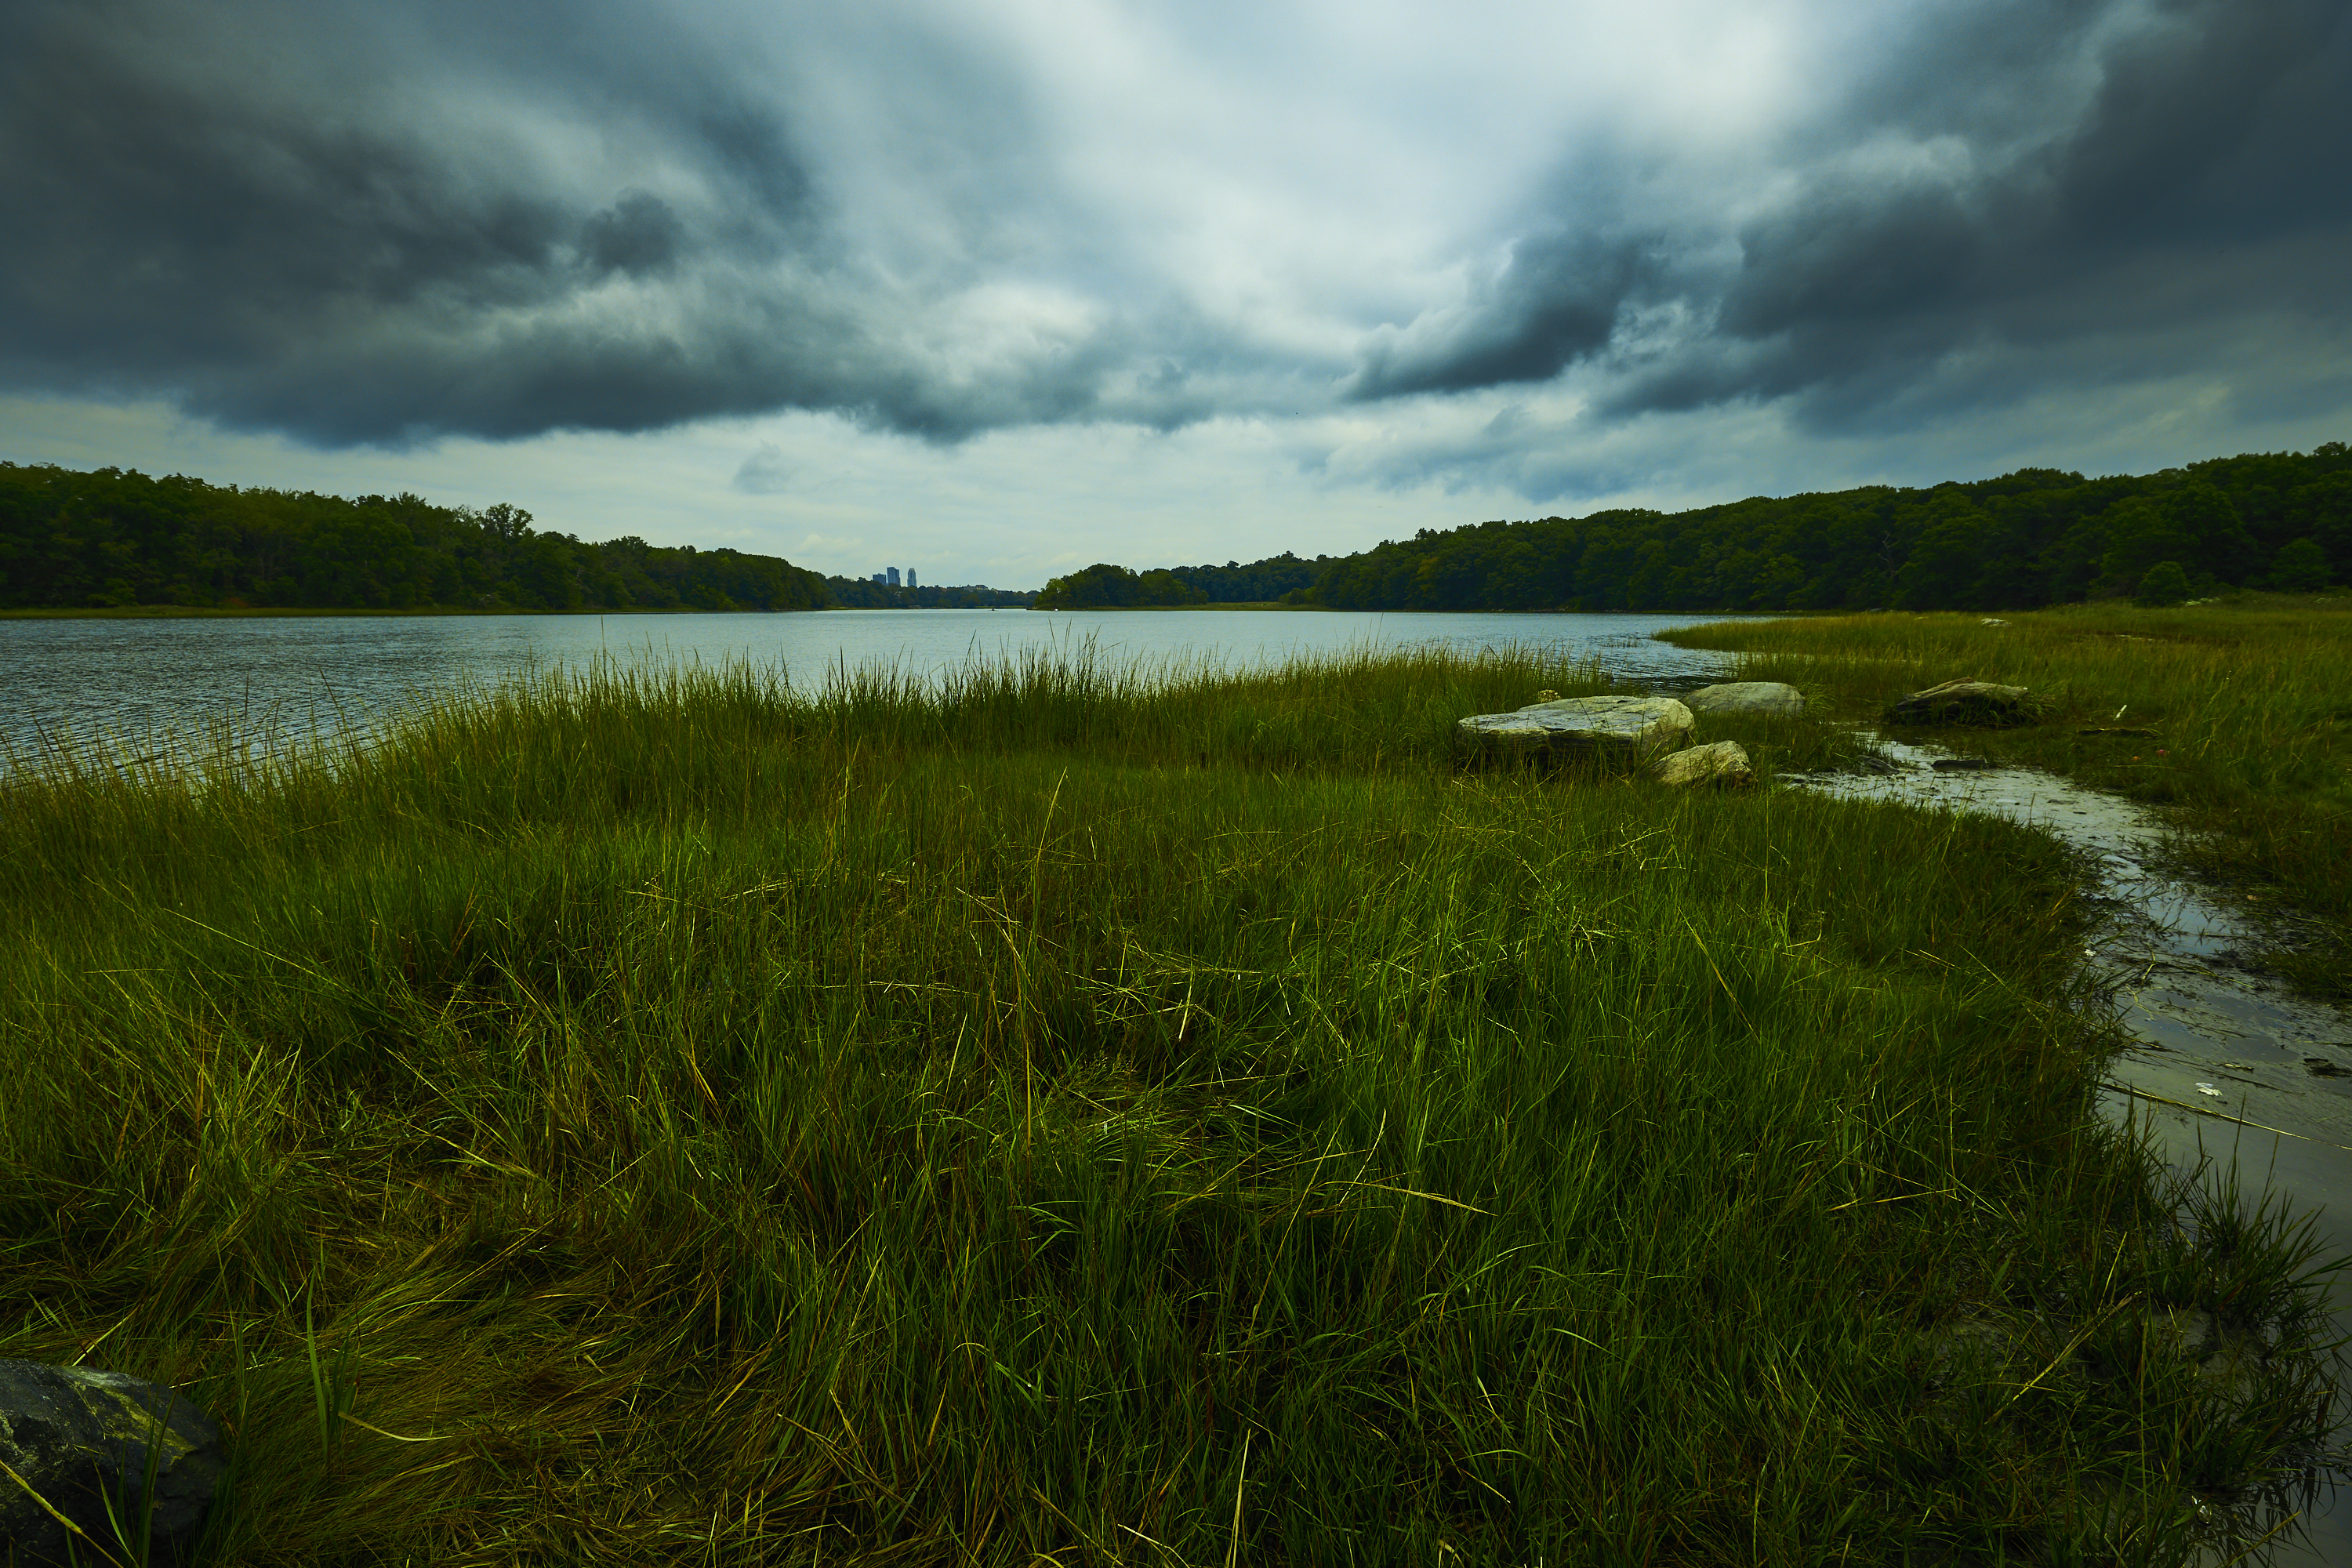
The Luminosity Range mask is an interesting one that I think will only really help with landscape photographers and, in some situations, natural light portrait photographers. In the image above, the Canon EOS R’s range of colors and dynamic editing is really shown off.
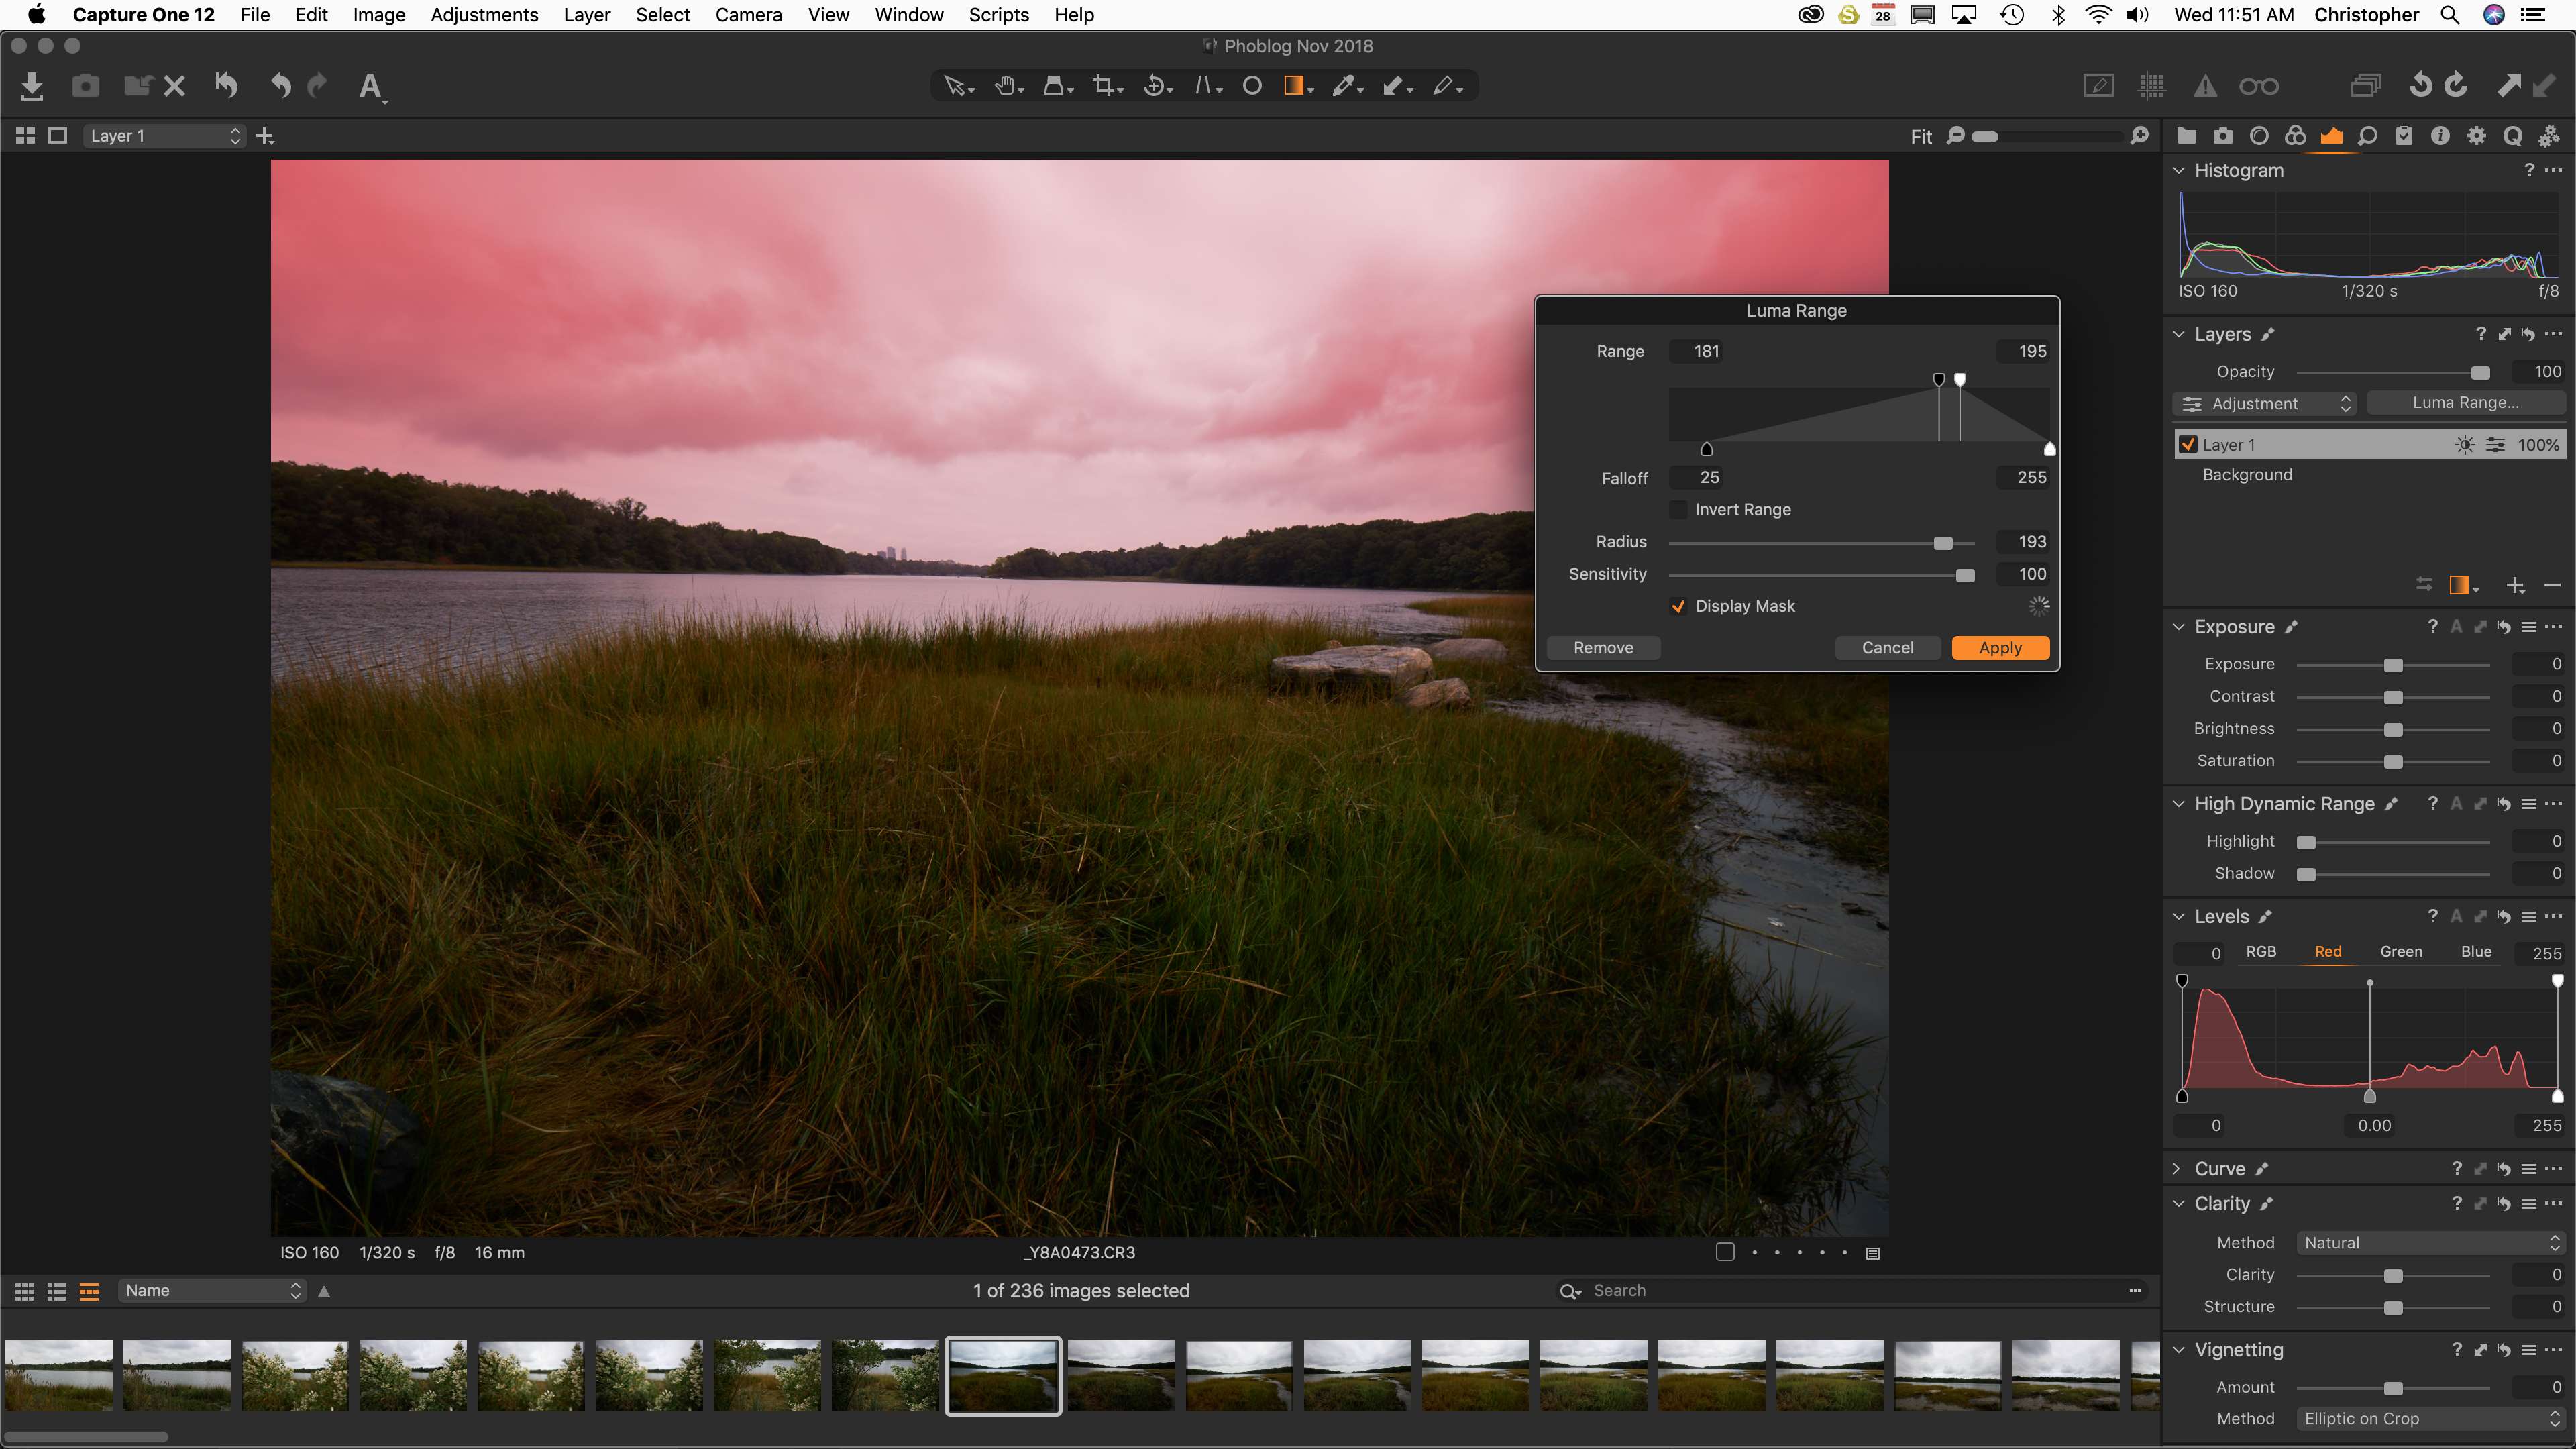
To create a Luma mask, you’ll need to first create a mask. Then go to help, type in Luma, and you’ll get the above editing parameters. When you edit, you’ll get a little indicator that Capture One 12 is processing the mask and the image. If your mask display is set accordingly, you’ll see what areas are really being affected. In a situation like this, it’s a good idea to play around until you get what you want.
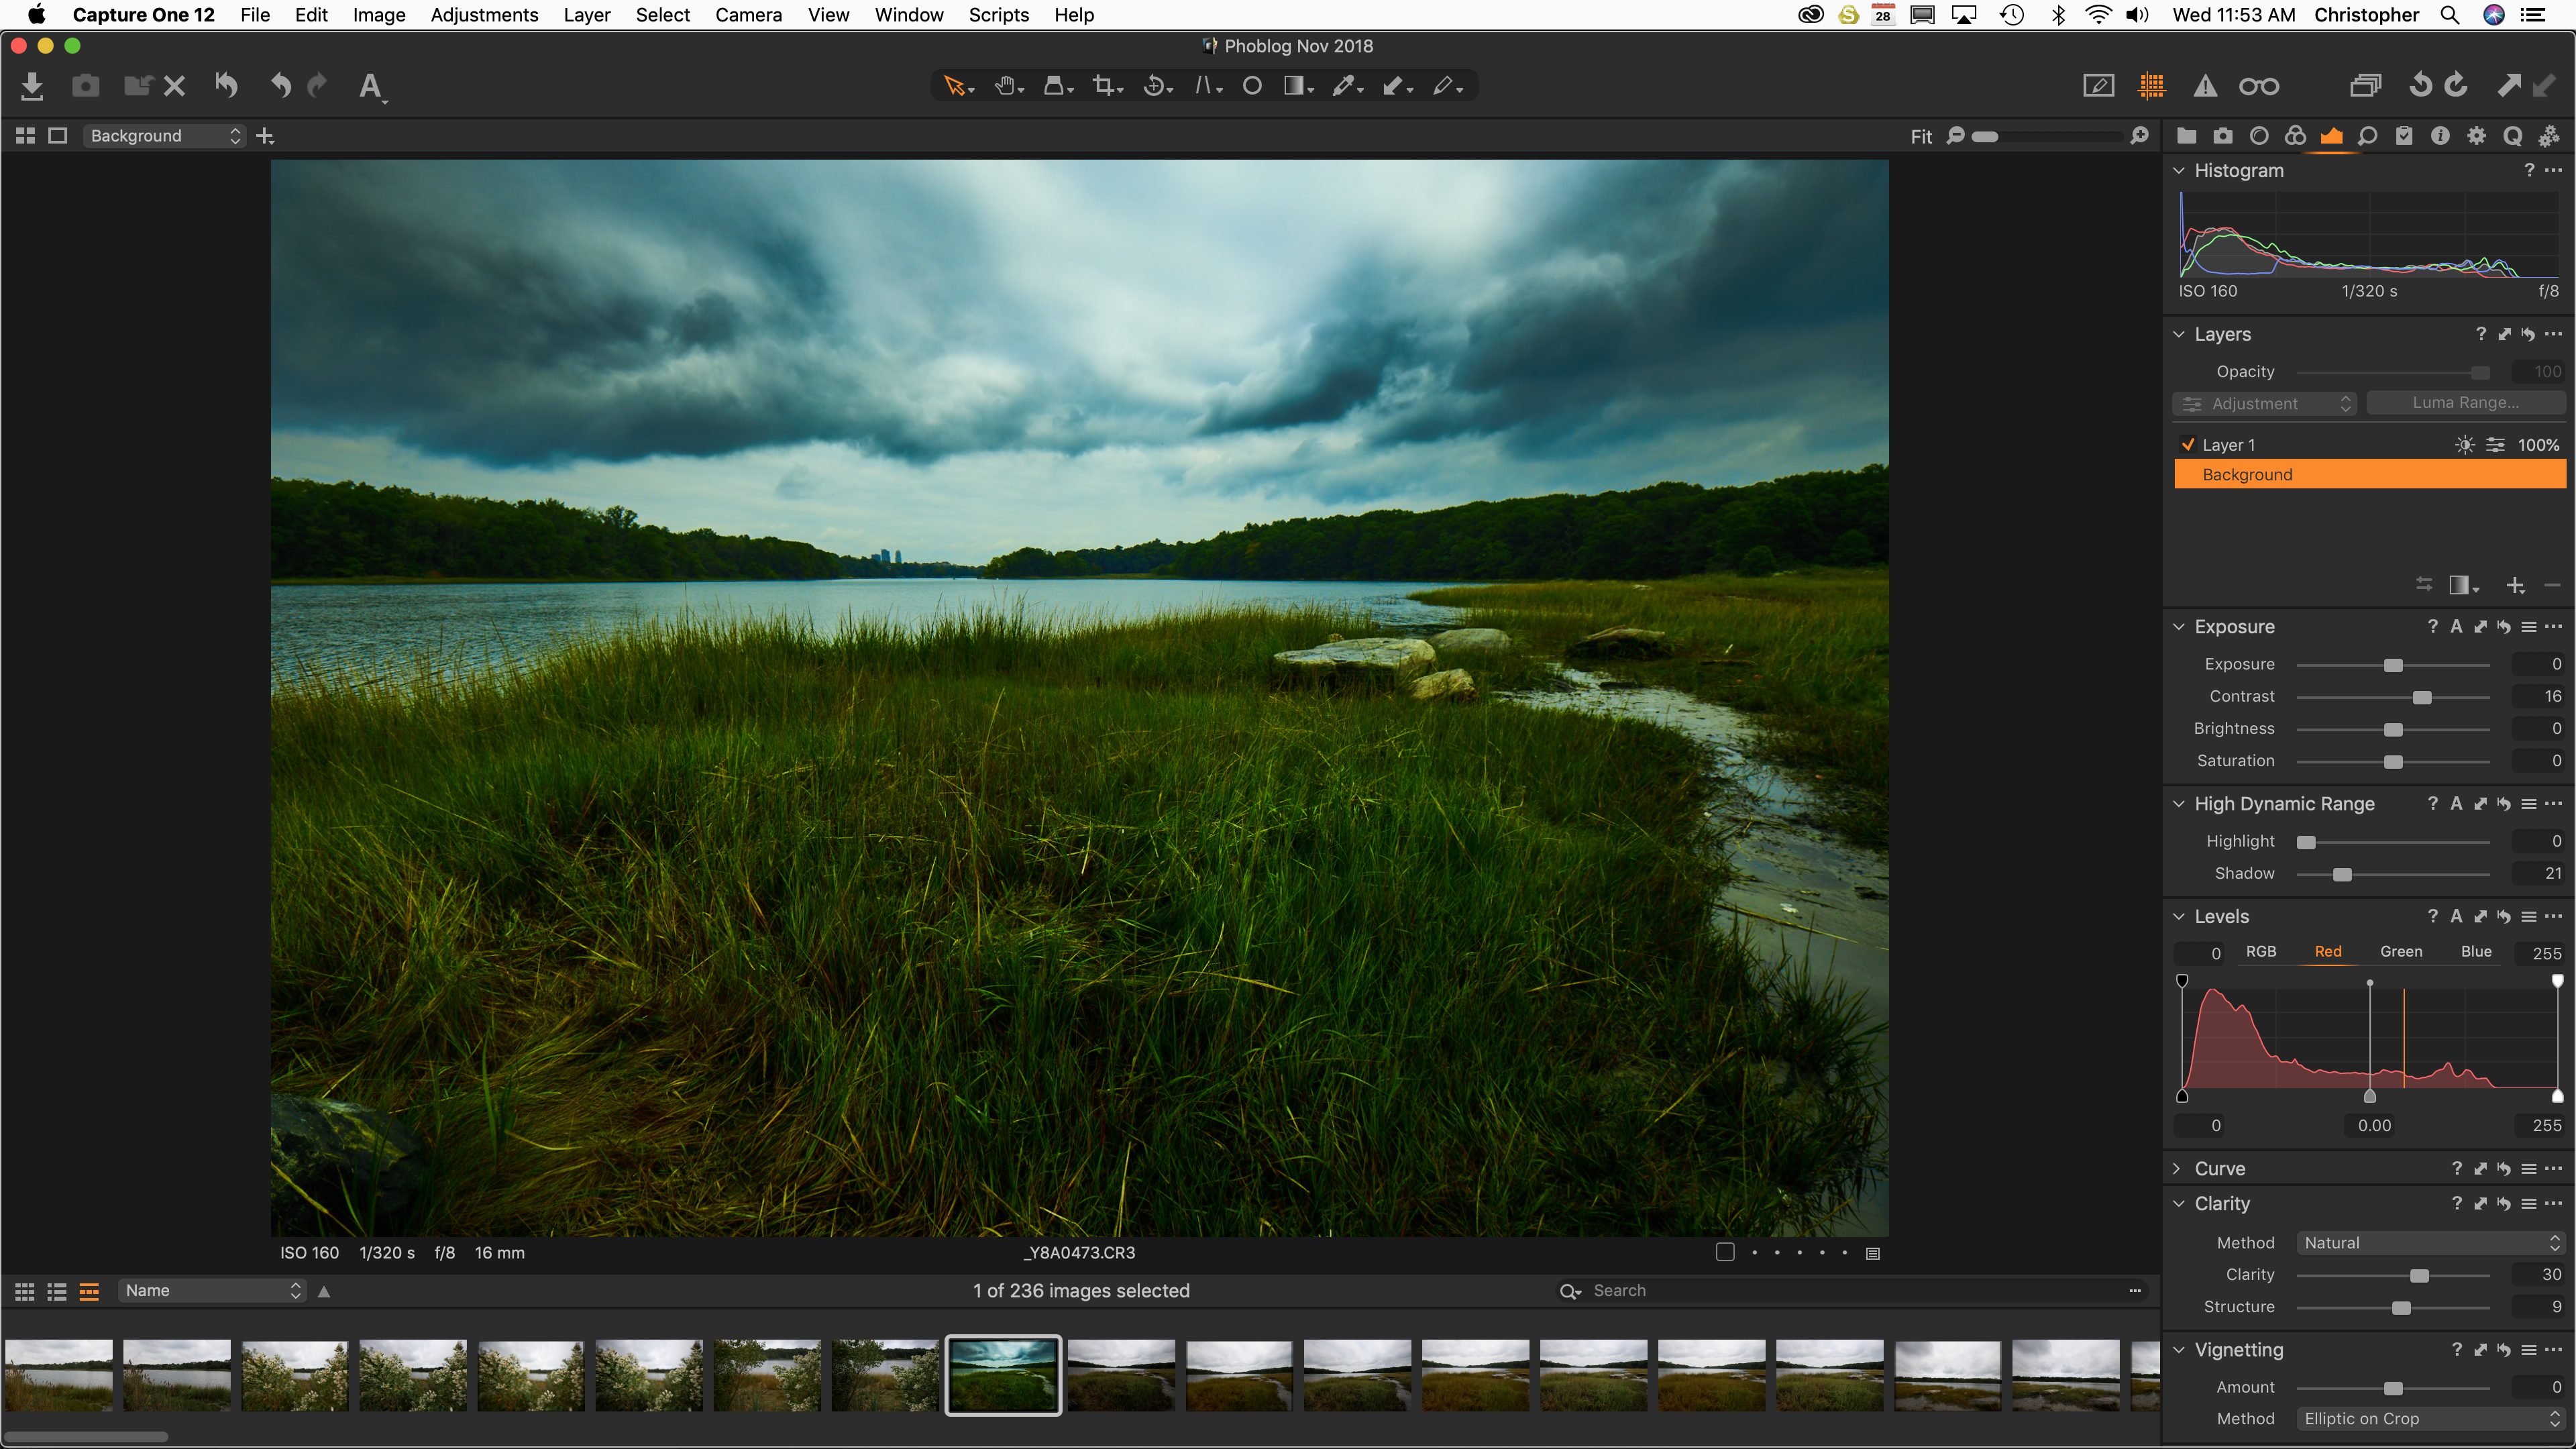
After that I recommend editing the background image (not the masked layer) to balance out the shadows and color overall. Then you can export your beautiful photo.
Linear Gradient Masking
Linear Gradient Masking can be used for a number of things. I’ve used it a lot to create the look of sunsets, but it can also be used for other things involving color, white balance, exposures, etc.
To do this, you create a Linear Gradient mask as you can see above. Then you carefully place it afterwards.
From there, it works like any other mask. As long as the layer is selected you can manipulate what happens in just that area. It’s nice and works just the way that it’s supposed to.
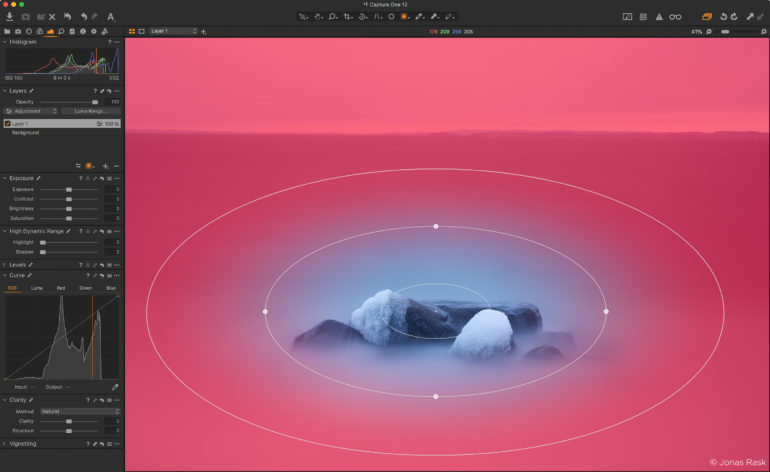
Radial Gradient
Radial Gradients are some of the weirdest to me and I’ve only ever used them maybe once a year. But you can do the same thing as you would with a linear gradient, except that this one is radial.
In this image, I changed the white balance of the affected area and then manipulated the white balance of the overall image to get the separation in the subject and the scene. This then makes editing the specific color channels much easier.
I genuinely wish this had an ability to be more specific about the feathering process. Simply adjusting it is nice, but extra fine tuning would be a feature that puts it over the top.
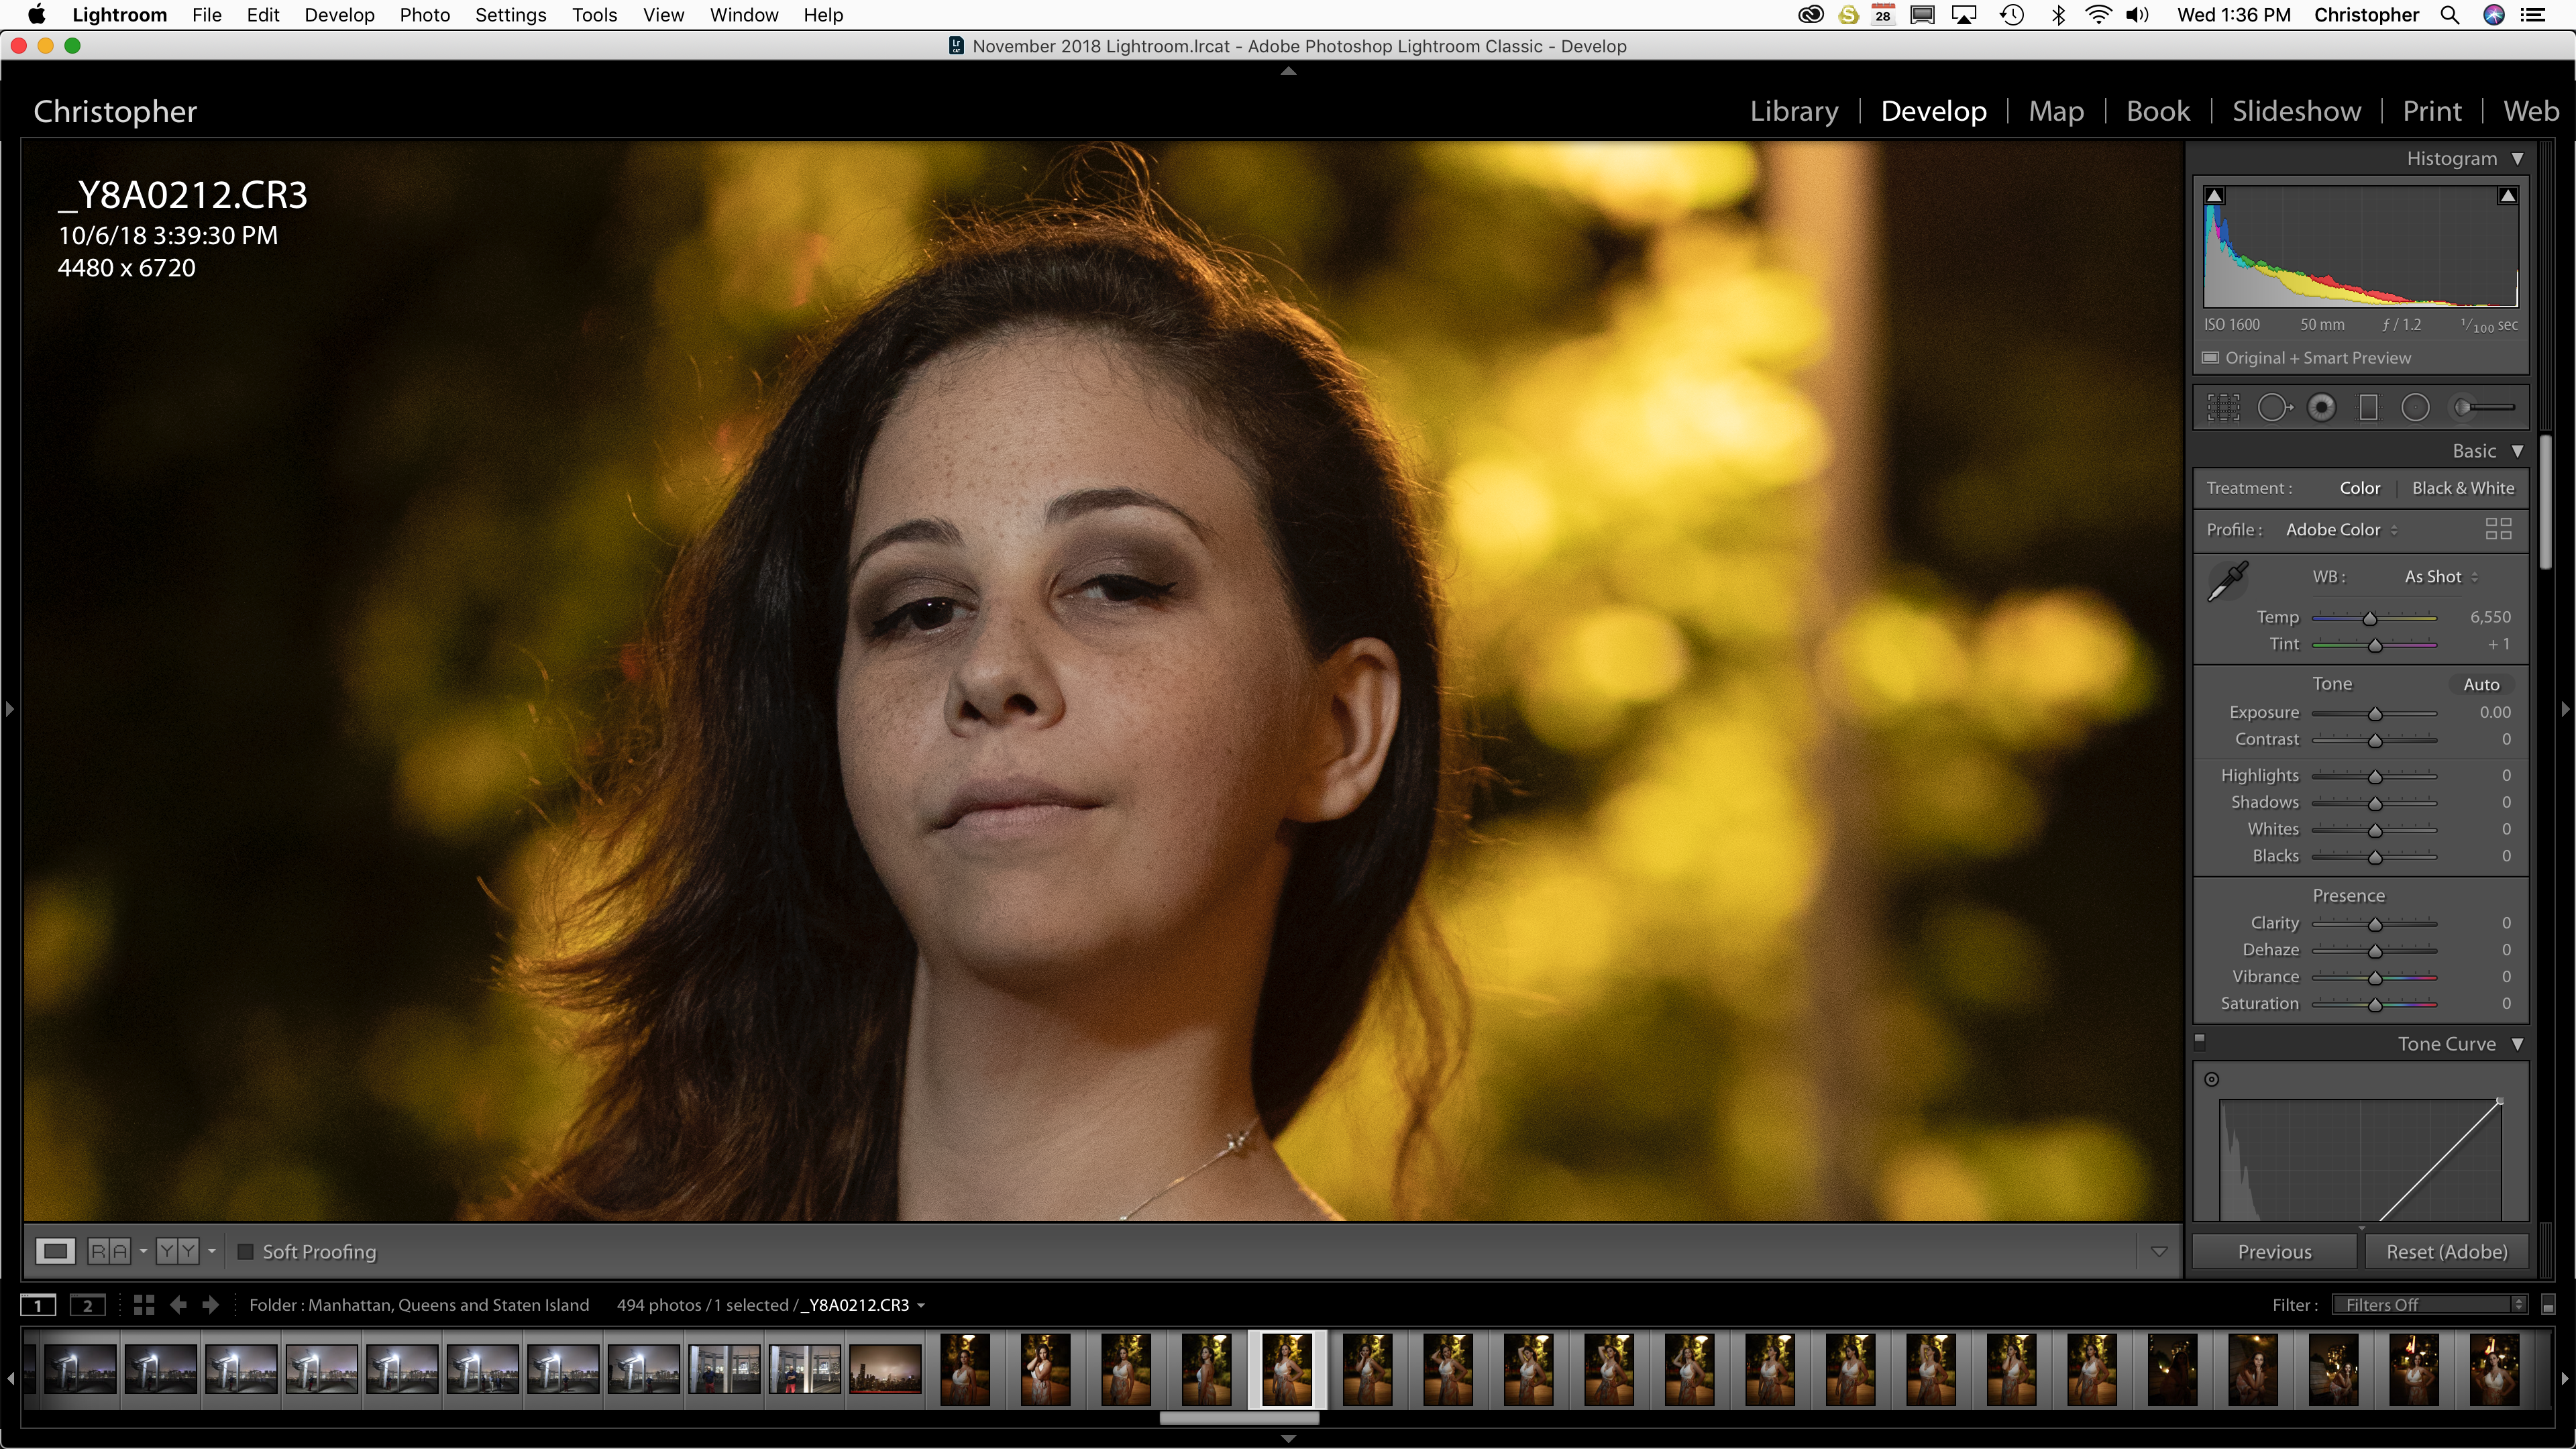
RAW Editing

RAW Editing in Capture One has always been the major advantage over Adobe Lightroom, and I’m very ecstatic to say that it still is. The algorithms and the way colors are rendered seem to be almost night and day. While I’ll admit that Lightroom has improved in certain ways, I still feel like with adjustments to colors and dynamic range, Capture One is still head. Where Lightroom I feel is taking the edge is with noise editing in regards to luminance. I tried this with Fujifilm films and Canon files. The Canon files I felt rendered more details in Capture One though with a bit more noise. In Lightroom, the noise looked more film-like.
If you take a look at the two images above you’ll see that Capture One nerfs the noise less and so all you need to do is kill the noise a bit. But in Lightroom, you’re losing details at the expense of less noise. If you’re like me, I’d rather try to work with the details that are there to begin with rather than not have them at all.
Out of the camera I feel like Capture One 12 renders a better RAW file overall and gives you a better place to start when it comes to editing RAW files. And to that end, I genuinely think it could potentially take even more work to get the results to be what you want in Lightroom.
To see how both programs render RAW files, we printed the above photo using the Canon ProGraf 1000 printer and Canon Semi-Gloss Pro Paper at 17×22 inches. The results? Capture One 12 was minutely cleaner; but you only see this detail when going right up to the print.
In Comparison
It’s very fair to say that Capture One 12 has been playing the game of catch up with Adobe Lightroom. And that’s still the case even with the release of this latest version. What I’m mostly happy about though is the fact that we have much more of what we’ve been asking for with an arguably better RAW processor in skilled hands.
Conclusions
If I were to start completely from scratch in a choice of Capture One 12 or Lightroom, I’d go with Capture One 12 if I were a more serious photographer who doesn’t need to be editing across a number of platforms and devices. If color and color accuracy really mattered to me, then Capture One 12 would be the software to work with. If I were really big on deadlines, then perhaps it would make more sense for me to work with Lightroom due to how the cloud atmosphere can work.
Capture One 12 freezes less than Lightroom, is a faster RAW processor and editor, can do things quicker overall, and can now do most of what Lightroom said that it could over Capture One. In our testing of cameras and lenses, we tend to print from Capture One, and even that interface is arguably easier to use now than Adobe’s.
![]()

We strongly recommend Capture One 12, and we’re awarding it our Editor’s Choice rating and five out of five stars. Despite this, we wish that it would continue to make the RAW processing even better, perhaps add a Dehaze tool, and make watermarking even simpler.
Get rid of the ads!
Did you enjoy reading this article as much as we enjoyed writing it? There's a way to support us and our reporting, getting ad-free navigation and more as a bonus. Subscribe to us for less than a coffee per month —just $3.99— or take advantage of our yearly subscription with a hefty discount for only $25.- An ad-free experience
- A free mystery box for Lightroom or Capture One
- All the books in our store
- 20% discount on Capture One
- 30% discount on Imalume Photo Theft Protection
- 20% off Herbs and Kettle Tea Company.
- 20% off your order from MPIX printing services.
- 5% off Viltrox Products via their eCommerce store.
- 10% off all film developing, printing and scanning services from Blue Moon Camera and Machine
- 15% off 7Artisans products: The lens and accessory maker is offering a sweet discount for Phoblographer's readers.