
Astrophotography is one of the most rewarding genres of photography, and it’s really not as difficult as you might think.
When we think about astrophotography, we often think about creating a sense of wanderlust and awe that we’re all experiencing when we see the photos. I mean, have you ever wanted to be able to capture stunning pictures of the night sky but weren’t really sure what you needed to do, and didn’t really know what equipment you would need? If so this beginner’s guide to astrophotography is for you. In this guide we will take a look at the basics of astrophotography and will cover things such as camera settings, the 500 rule, how to stack images, and we will take a look at the gear you’ll need to create out of this world Milky Way and night sky images.
What is astrophotography? Astrophotography is most commonly associated with images of the Milky Way, but really astrophotography encompasses all images of the night sky. Capturing the Milky Way for the first time though is a magical experience. Pointing your camera to the stars, dialing in the settings, and then waiting to see what your camera has captured is electrifying. In the past astrophotography was really only available to those who could afford expensive cameras and high dollar prime lenses, but thanks to advances in technology and fast prime lenses that don’t cost a fortune, astrophotography is accessible to all. This guide is designed for photographers who have never dabbled in the art of capturing the beauty of the night sky before. The hints, tips and gear listed below will allow you to get on your way to taking stunning images of the night sky.
The Gear You’ll Need
There are really just a few requirements when it comes to the gear that you will need for great astrophotography. A camera that handles high ISOs well, wide angle prime lenses that have an aperture of at least f2.8, a tripod, and a light pollution filter if you can’t get far enough away from city lights. These are the basic items you’ll need, and you honestly don’t need to spend a fortune on these items either if you don’t want to.
There are so many options out on the market when it comes to cameras, lenses, tripods, and filters that it can honestly be an overwhelming experience when it comes to buying gear. The great thing about astrophotography is that you don’t have to break the bank to be able to start playing this game. Entry level cameras can be used just as successfully as cameras that can cost six times as much. The same can be said about lenses too. You don’t have to go out and buy the most expensive weather sealed prime if you don’t want to as weather sealing is really not needed, and there are super sharp lenses that are cheap and can do a great job. It really will all come down to personal preference in what gear you like, or what manufacturers you prefer.
Ultimately your own budget, and your list of wants and needs will determine what you end up with, but just know that any camera, and any fast, wide angle prime lens can really do the job. It really just depends on how serious you plan on getting with this genre of photography.
Cameras
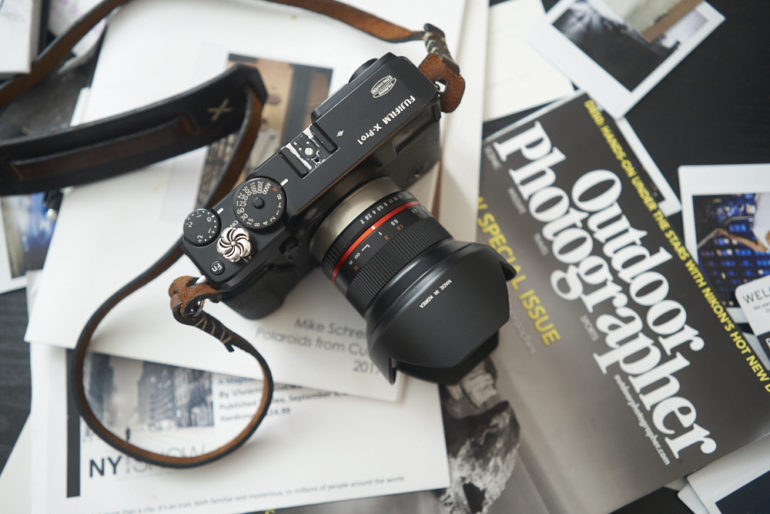
While you can use any camera for astrophotography, some are more suited to the genre than others. Any camera that can handle ISOs up to ISO 3200 (ideally ISO 6400) will be great for astrophotography. You can use cameras that aren’t as good with higher ISOs, it will just take a few extra steps in post to achieve the desired results. High ISOs have to be used as you’ll need to capture as much light as you possibly can in some of the darkest scenarios you’ll ever find yourself in. Full Frame, APS-C, and even some Micro Four Thirds cameras will work; it honestly doesn’t matter what size sensor the camera has as long as you’re confident in its ISO performance.
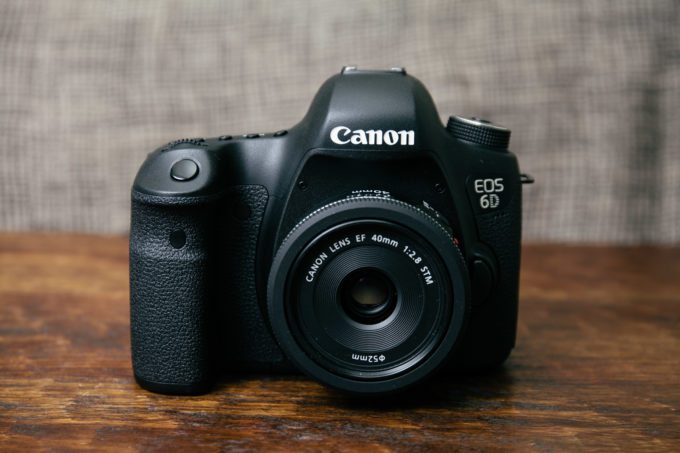
One of the very best cameras you can use for Astrophotography is the original Canon EOS 6D ($999). This camera has reached legendary status in the astrophotography world thanks to its amazing high ISO performance and the colors it can produce. The Canon 6D Mk II ($1,499) is another great choice. Along with great ISO performance and color rendition, the addition of a fully articulating touch screen makes it easier to frame your shot. This comes in handy if you want to capture an image from a unique angle.
The same can be said for the $998 Sony A7 II. It is more than good enough to capture stunning astrophotography shots thanks to the great sensor that it has, but it you want better high ISO performance and less work in post the Sony A7 III ($1,998) would be great too. These cameras when paired up with some of Sony’s wide angle primes become astrophotography beasts. If you have the budget, spring for the more expensive camera, but if not, don’t worry as you can still capture amazing images with the more affordable cameras too.
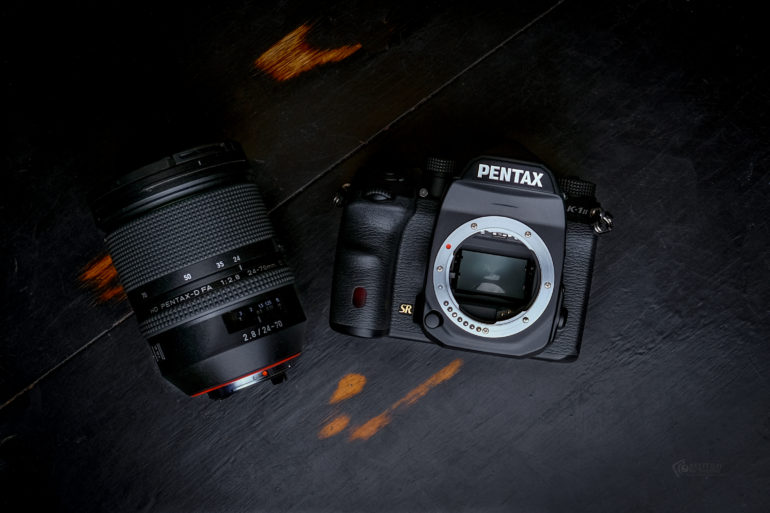
If you are really serious about astrophotography though the Pentax K1 (from $1,399) and the K1 Mk II ($1,796.95) are probably the cameras you will want to look at. These two cameras are incredible for this line of work as they feature an AstroTracer feature that uses the cameras built-in GPS. The camera can track the movement of the stars and will move around the sensor to compensate for the rotation of the earth. This feature will allow to get stunning, sharp images of the night sky, and your work in post will be cut down significantly.
Remember though, cameras from Canon’s Rebel line can work, as can entry level cameras from Nikon and others. Having a good camera is nice and it can make things a little easier, but when it comes to astrophotography nothing is as important as good technique and fast glass. Check out our round up of cameras that are perfect for astrophotography.
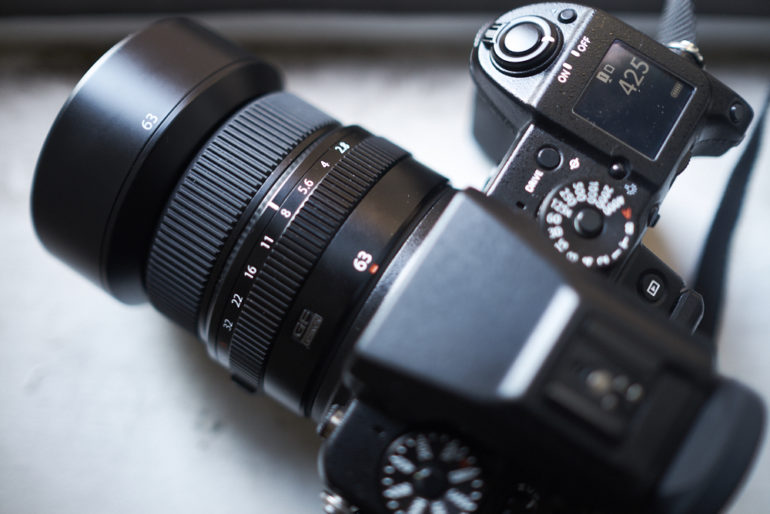
Lenses
You really don’t need to spend thousands of Dollars on lenses for astrophotography if you don’t want to. Seeing as you don’t need weather sealing (you simply cannot shoot astro images in anything other than perfectly calm weather), and the fact that you will be manually focusing, you can look at cheaper lens options on the market. Rokinon make some great manual focusing lenses and they usually cost around $300. A few of my all time favorite lenses for Astrophotography are the Rokinon 12mm f2 ($299), along with the Rokinon 14mm f2.8 for Canon, Sony and Nikon. ($299) These lenses are cheap, easy to use. they’re well made, and they produce razor sharp images.
The Sigma 18-35mm f1.8 (from $629) for APS-C cameras is one that should not be overlooked either. This lens has become legendary in the astrophotography world because of it’s versatility and it’s overall performance. It is simply one the sharpest APS-C lenses on the market.
If you would prefer some more robust lenses that feature weather sealing, and some of the best optics around, the Sigma 14mm f1.8 ($1,269), and the Sony 24mm f1.4 G Master ($1,398) are capable of capturing some truly glorious astrophotography shots too. All of these lenses are nice and wide which means you’ll be able to create gorgeous starscapes with foreground interest. For a more comprehensive look at lenses that are great for astrophotography check out our astrophotography lens roundup.
Tripods
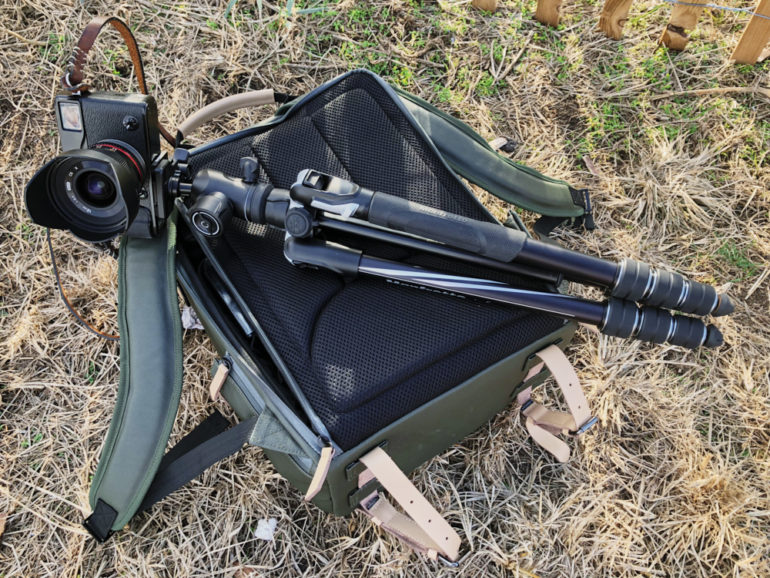
Another absolute must have item is a tripod. You’re going to be shooting at shutter speeds that won’t allow you to hand hold your camera, so a solid, sturdy tripod is an absolute must. When buying a tripod you need to look for a few key things. First of all make sure that the tripod that you buy is capable of holding the weight of your equipment, the last thing you want to do is overload it. Make sure you get a tripod that has a center column hook so that you can apply more weight to the tripod. This will ensure the tripod won’t blow away if a sudden gust of wind comes your way. Lastly I would highly recommend buying a tripod with a Ball head. Ball heads allow much finer adjustments to be made in regards to the position of your camera. You will be able to frame your shot much more easily with one of these compared to a pan and tilt head.

There are so many good tripods on the market, but some of our favorites include the Vanguard VEO2 235CB ($198), the Vanguard Alta Pro 2+ 263CT ($193), and the Manfrotto BeFree Compact Travel($189.88). All of these tripods can hold a significant load, they are easy to use, and they can be planted firmly on the ground which will give you peace of mind. You certainly don’t want to skimp when it comes to buying a tripod.
Filters
You may find that you will need to use filters to help you get the best possible astrophotography shots. Unfortunately light pollution is a major issue, and the city lights that we rely on have a devastating effect on the night sky. Fortunately there are filters out there can help. Light pollution filters like this one can help remove the orange glow in the sky that’s caused by sodium lamps (the most common type of street light). If you cannot get away from the glow of the city buy one of these to cut out the orange cast in your images. Intensifier filters can help produce richer colors in the night sky and are perfect to use if you will find yourself in a nice dark location where light pollution won’t be an issue. You absolutely do not have to use these, but if you want to give yourself an edge, they are a worthwhile investment.
Setting up Your Camera
There are just a few things to remember in regards to camera settings for astrophotography. Once you get these down and remembered, you’ll be out snapping Milky Way photos like a champ. The best way to shoot is in manual mode, so make sure you’re familiar with your camera, and are comfortable changing settings by yourself. I promise that if you are not used to this don’t worry. It’s really not as daunting as it may seem. Also make sure that you are shooting in RAW format. You will need to work on your files in post and you’re going to want as much data to push andpull around as possible. Follow the guide below and you will be just fine.
The 500 rule
The 500 rule dictates how long your shutter speed can be in relation to the focal length of your lens. Divide 500 by the focal length and you’ll get your maximum shutter speed. For example, if you have a 14mm lens your max shutter speed would be 35.7 seconds (500 /14). Here are a few examples for common focal lengths used in astrophotography:
- 12mm: 500/12 = 41.6 secs
- 14mm: 500/14 = 35.7 secs
- 18mm: 500/18 = 27.7 secs
- 24mm: 500/24 = 20.8 secs
If you are shooting with a crop sensor camera you’ll need to multiply your focal length by x1.5 (x1.6 for Canon), and then divide by 500. For example if you shoot with a 14mm lens on a Canon APS-C camera your focal length would be 14 x 1.6 which equals 22.4mm, then just divide 500 by 22.4 and you’ll get your max shutter speed which would be 22.32 seconds. Just remember that you don’t always have to use the maximum shutter speed. Your actual shutter speed may be quite a bit less depending on how much ambient light you have around you.
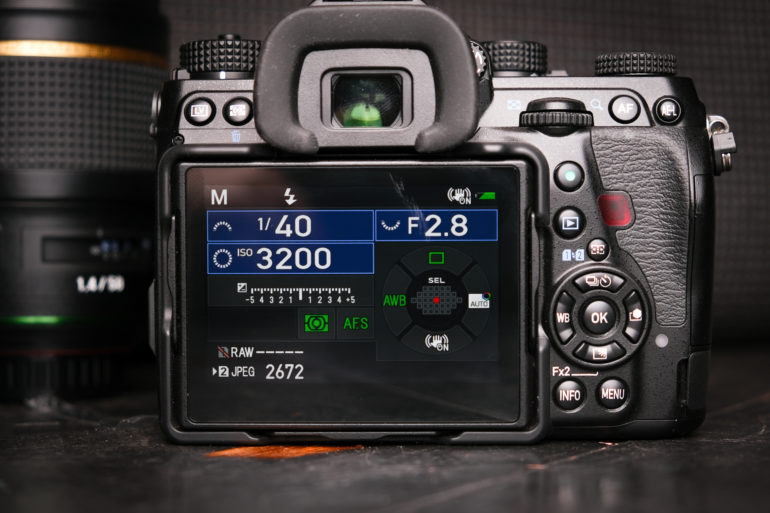
ISO Settings
You can’t be afraid to crank the ISO up. I know, I know, you’re thinking that this will introduce noise into your image, and you’re right, it will, but there are ways to remove that in post. You need to use a high ISO so that your camera can pick up as many stars in the night sky as possible.
A good starting point is ISO 2000. Take a test shot and see how it looks. Usually I end up between ISO 3200 and ISO 6400 in really dark areas, and around 1600 to 2000 if there is ambient light. Use these numbers as a base and play around. Don’t be scared of the ISO dial though.
Aperture Settings
Aperture settings for this genre are as easy as pie. Just set your lens as wide open as it will go. Have an f1.8 lens, set it at f1.8, have an f2.8 lens, well you know what to do. Let all of that glorious starlight in! This is one setting that just needs to be set and forgotten about.
Over and Under Exposing

If you are in an area with light pollution you’re actually going to want to expose to the right (ETTR). This of course refers to you exposing so that your histogram is off to the right hand side. Just be careful that you don’t push so much that you clip your highlights though. In post you can bring the exposure back down. You will find that this will actually result in you capturing more of those twinkling stars in the sky. If you’re in a dark location do not over or under expose. You will find that this will give you amazing results.
Focusing
Manual focusing is the only way to go here. You can either set your lens to infinity during daylight hours so you can ensure focus, or you can focus on a distant light on the horizon at night. At night, when turning the manual focus dial make the light you’re trying to focus on become as small as possible and you’ll be good to go. If you set focus ahead of time, use some electrical tape to hold the focus ring in place so that it won’t move. That’s really all there is to it when it comes to focusing.
In Camera Noise Reduction
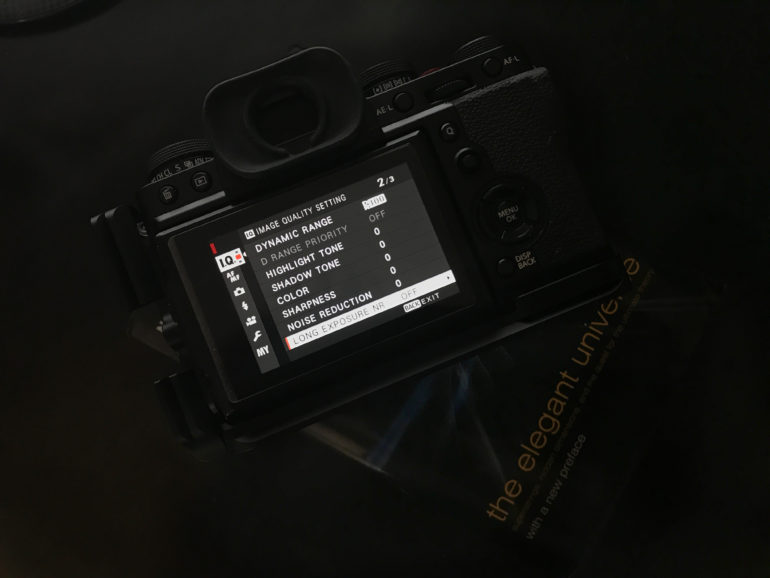
You’re going to want to make sure you have this feature turned off as it will slow you down in a big way. What your camera will do is shoot a completely black image after your long exposure has finished, and then your camera will merge your RAW file with the black image to try and eliminate noise. The problem is that if you’re shooting 30 second exposures, your camera will becoming inoperable for another 30 seconds after capturing your while it does its thing. This becomes an issue when you’re trying to take images back to back for stacking purposes.
How to Get the Shot
This is where the fun begins! Your camera is set, and you’re ready to push the shutter, but wait! Where’s the Milky Way? When’s the best time to go and shoot? Don’t worry as there are lots of tools that will make getting the shot super easy.
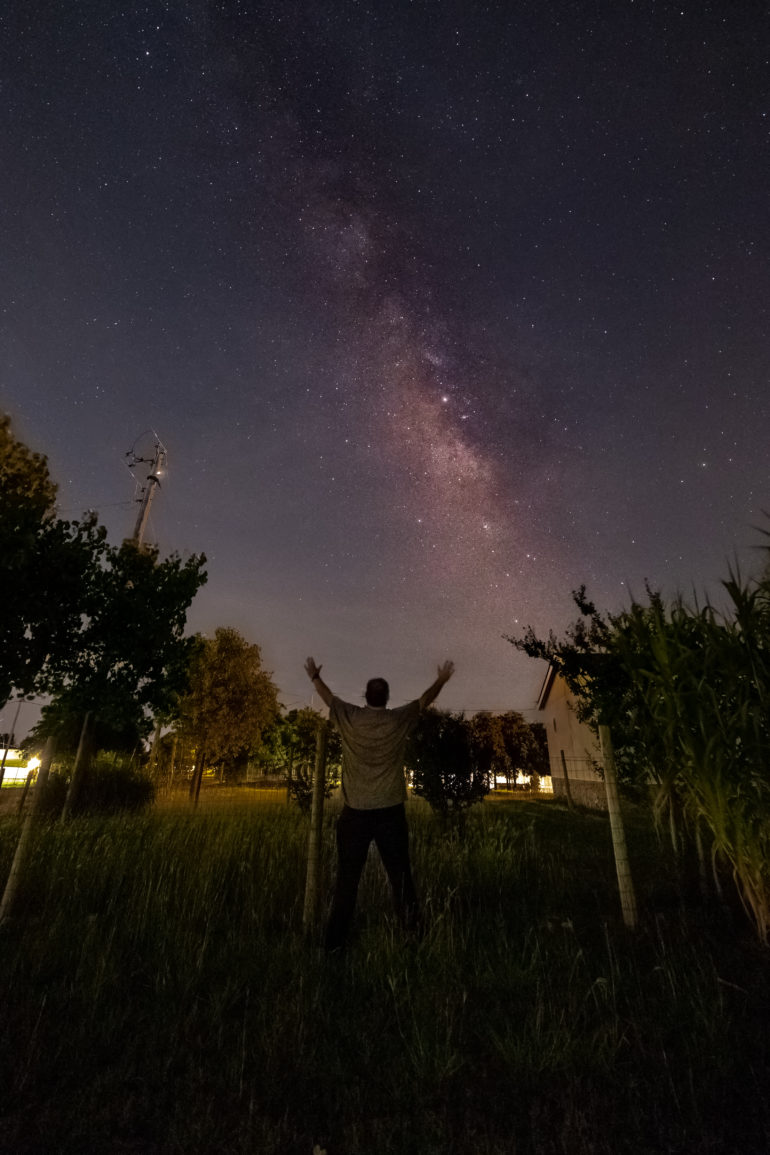
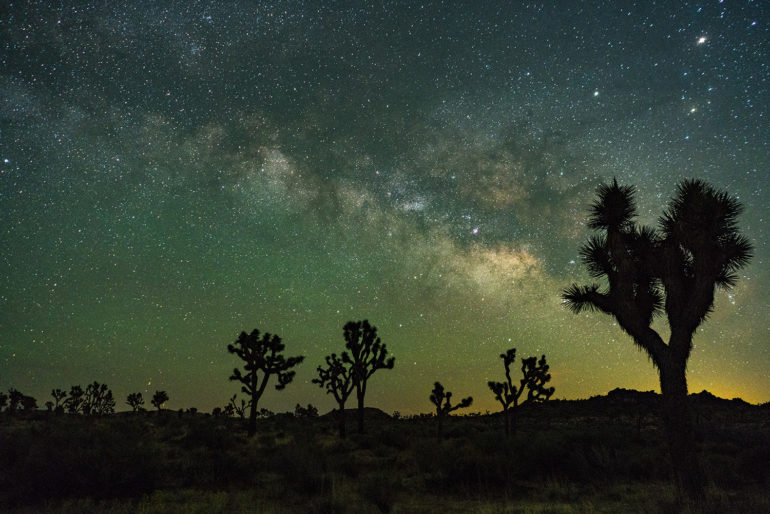
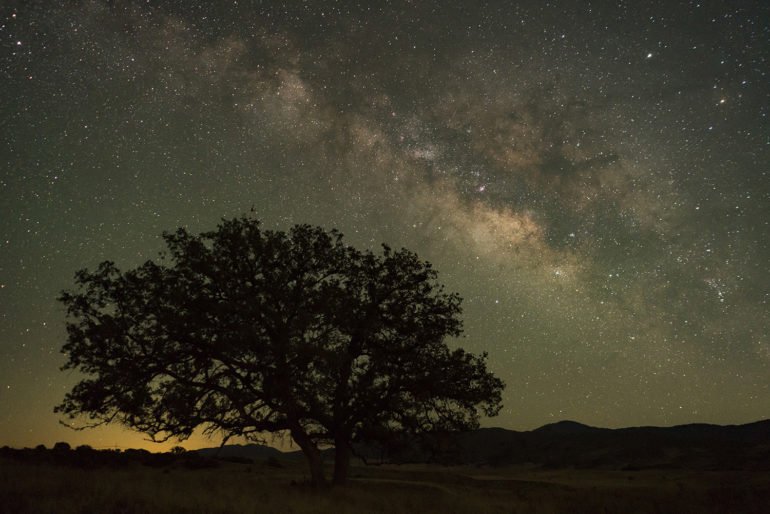
What does a typical astrophotography image look like though? Ideally you will want to include objects in the foreground so that your shot can have some interest. By including foreground objects you can give a grand sense of scale. You can spice things up a bit by trying your hand at light painting too. Shining a light on your foreground objects during the long exposure can add some incredible depth to your image. Placing yourself in the image is always fun too. There is of course nothing wrong with just capturing the magnificence of the Milky Way by itself, but any time you can include other items you should. Play around and have fun with it; the extra effort will pay off in a big way.
Ideal Conditions
It will be very rare for you to get absolute perfect conditions, but with a little patience and planning you can time things to where conditions are pretty close to being spot on. The first thing you need to keep in mind is the phase of the moon. Any hint of the moon in the sky will drastically reduce your chances of getting good Milky Way shots. The moon is simply too bright and it will wash out the stars in the sky, so plan accordingly and know your moon phases. No moon is absolutely the best.
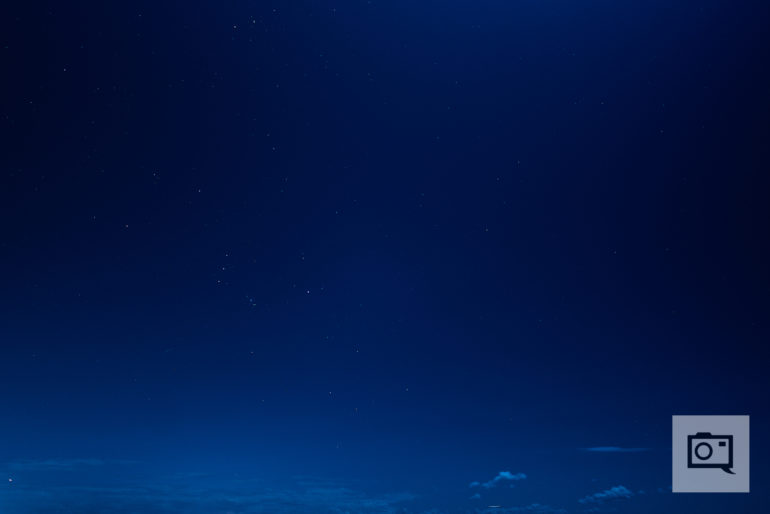
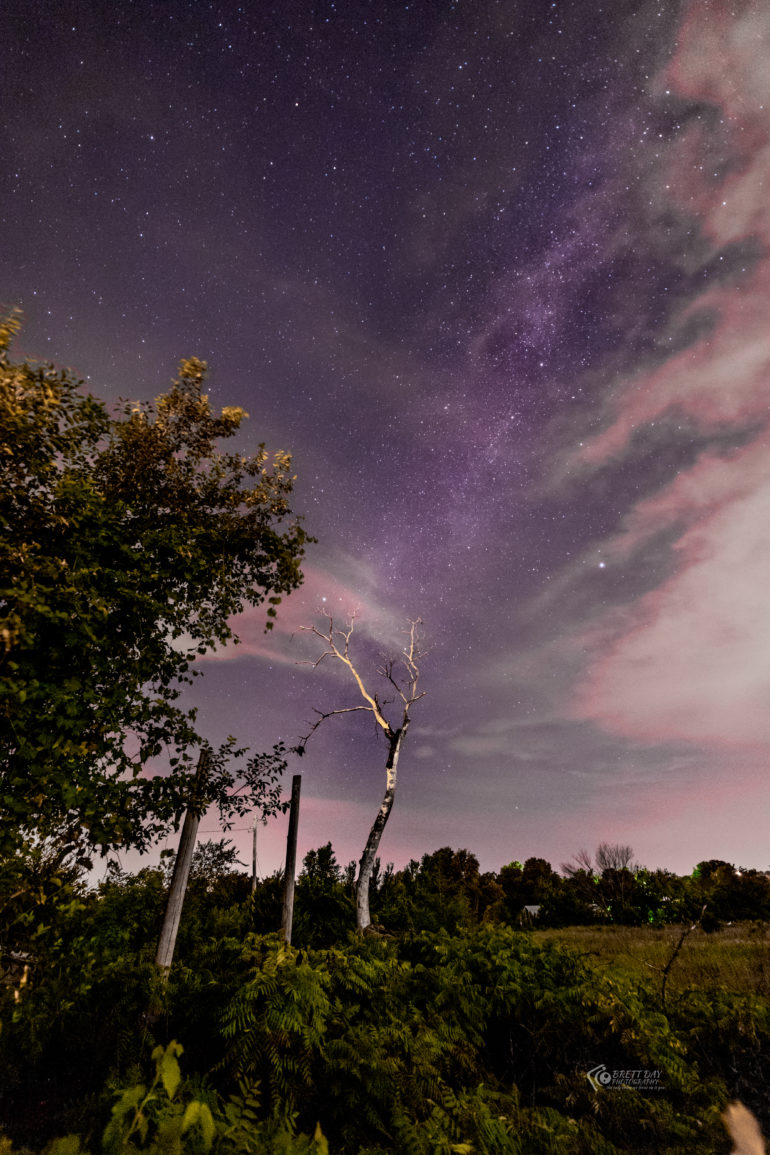
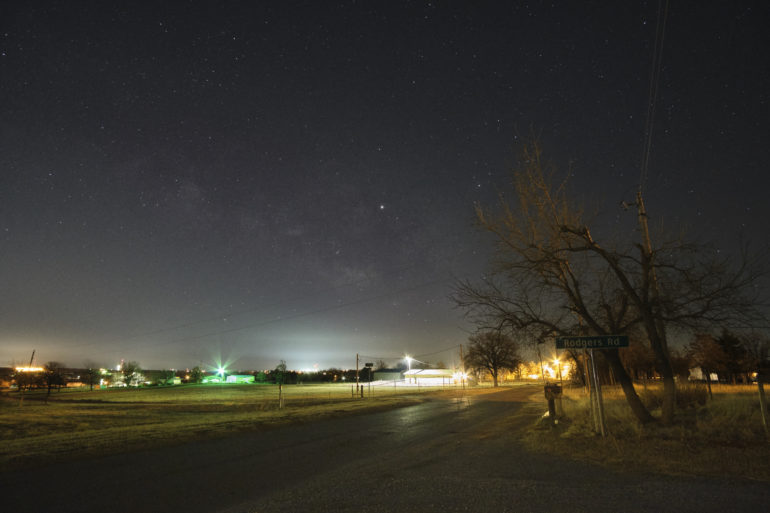
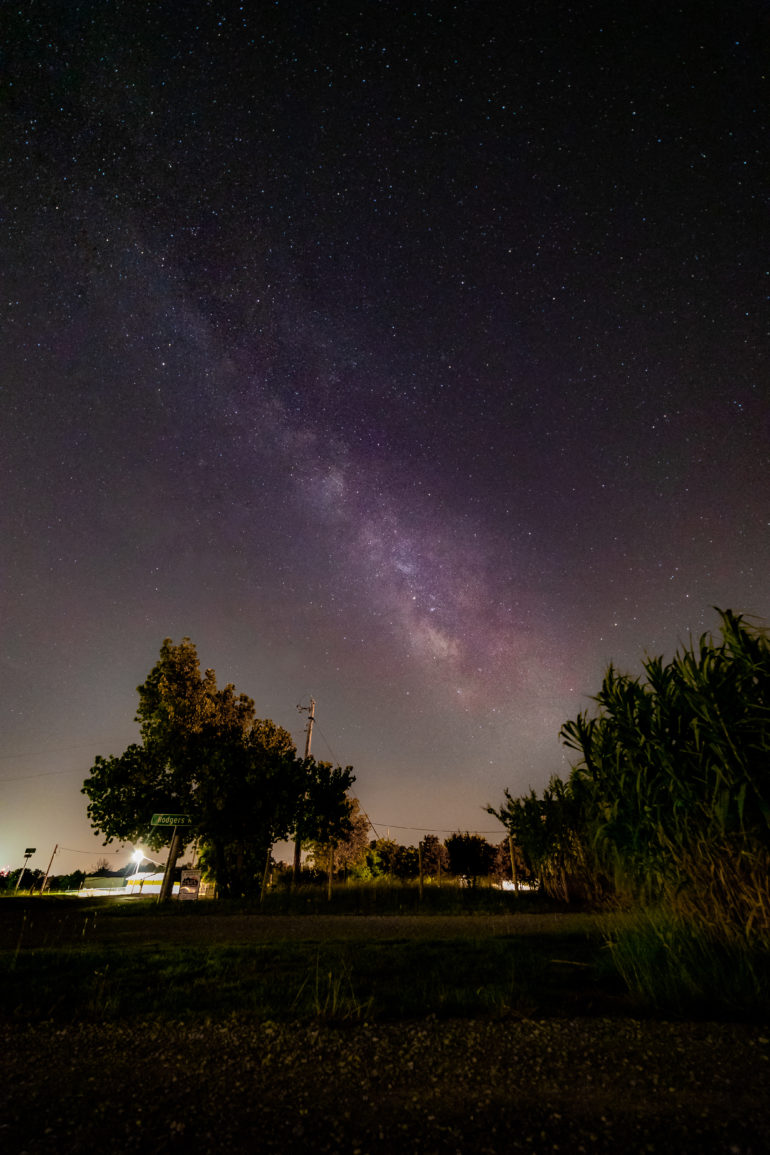
You need the winds to be low, ideally no more than 5-6 mph. You’re going to be using a tripod for long exposures and any movement from the wind will ruin your shots. You also need the sky to be cloud free so that you have unrestricted views of the galactic center. Clouds in the sky will also reflect ambient lighting from surrounding cities too.
As you you can see in the two shots above, city lights greatly reduce the visibility of the Milky Way. You need to go to the darkest place possible so that you can really capture stunning shots. Use the Dark Site Finder to see how far you will need to travel to get away from city lights. You can also use light pollution filters that are designed to block out the orange glow of sodium lamps (the most common type of street light) of nearby cities. To give yourself the best chance of getting a spectacular shot, get as far away from the city as you possibly can. It’s well worth the effort.
Locating the Milky Way
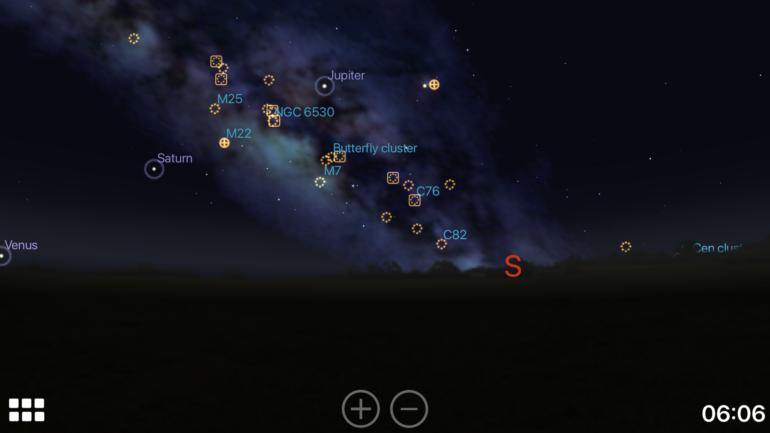
Thanks to smartphones locating the Milky Way is easier than ever. You can use apps like Stellarium and PhotoPills to see exactly where the Milky way is at any time. Simply load the app, hold your phone up to the sky and the Milky way will be overlayed onto the screen. Hold the phone above your camera and rotate your tripod’s head until your camera is pointing in the right direction. All that’s left to do is release the shutter.
Take Multiple Images
Shooting at high ISOs can create quite a bit of noise. You can negate the problem by taking multiple images and them stacking them in post. The more shots you take, the more natural noise reduction will occur. If you’re going to do this take at a minimum 10 shots. Be careful not to move the camera in between shots though as this will really make things hard on you.
The stars are constantly moving through the night sky as the earth tumbles through space, so over a 5 minute period of getting 30 second exposures the stars in your images will of course be in different locations. There are some really amazing pieces of software that can help with this though.
Seqautor is a free star stacking program for Windows based PC’s that will take in to account your location, the rotation of the earth, and the position of the stars. The software will then realign all of the stars for you so that you end up with razor sharp images, and because you have multiple files, the software will average out the noise in your images and will leave you with beautiful, noise free images. All you’ll have to do then is edit the image to your liking.
Astrophotography may seem incredibly daunting at first, but as you can see there really isn’t a whole lot to it. Set your aperture as wide open as possible, find your max shutter speed, and adjust the ISO. It’s as easy as one, two, three.
Great astrophotography is all in the planning. It’s about finding a great location, and it’s about knowing the right time to go and shoot, and the conditions that are needed. Having the right gear will surely help you get some beautiful shots, but putting the effort into getting away from city lights and committing to being an early riser, or being a night owl depending on the time of the year will pay off in a big way. Get out there and see the beauty of sky. I guarantee you’ll be hooked instantly.
Get rid of the ads!
Did you enjoy reading this article as much as we enjoyed writing it? There's a way to support us and our reporting, getting ad-free navigation and more as a bonus. Subscribe to us for less than a coffee per month —just $3.99— or take advantage of our yearly subscription with a hefty discount for only $25.- An ad-free experience
- A free mystery box for Lightroom or Capture One
- All the books in our store
- 20% discount on Capture One
- 30% discount on Imalume Photo Theft Protection
- 20% off Herbs and Kettle Tea Company.
- 20% off your order from MPIX printing services.
- 5% off Viltrox Products via their eCommerce store.
- 10% off all film developing, printing and scanning services from Blue Moon Camera and Machine
- 15% off 7Artisans products: The lens and accessory maker is offering a sweet discount for Phoblographer's readers.