Want more Useful Photography Tips? Click here.
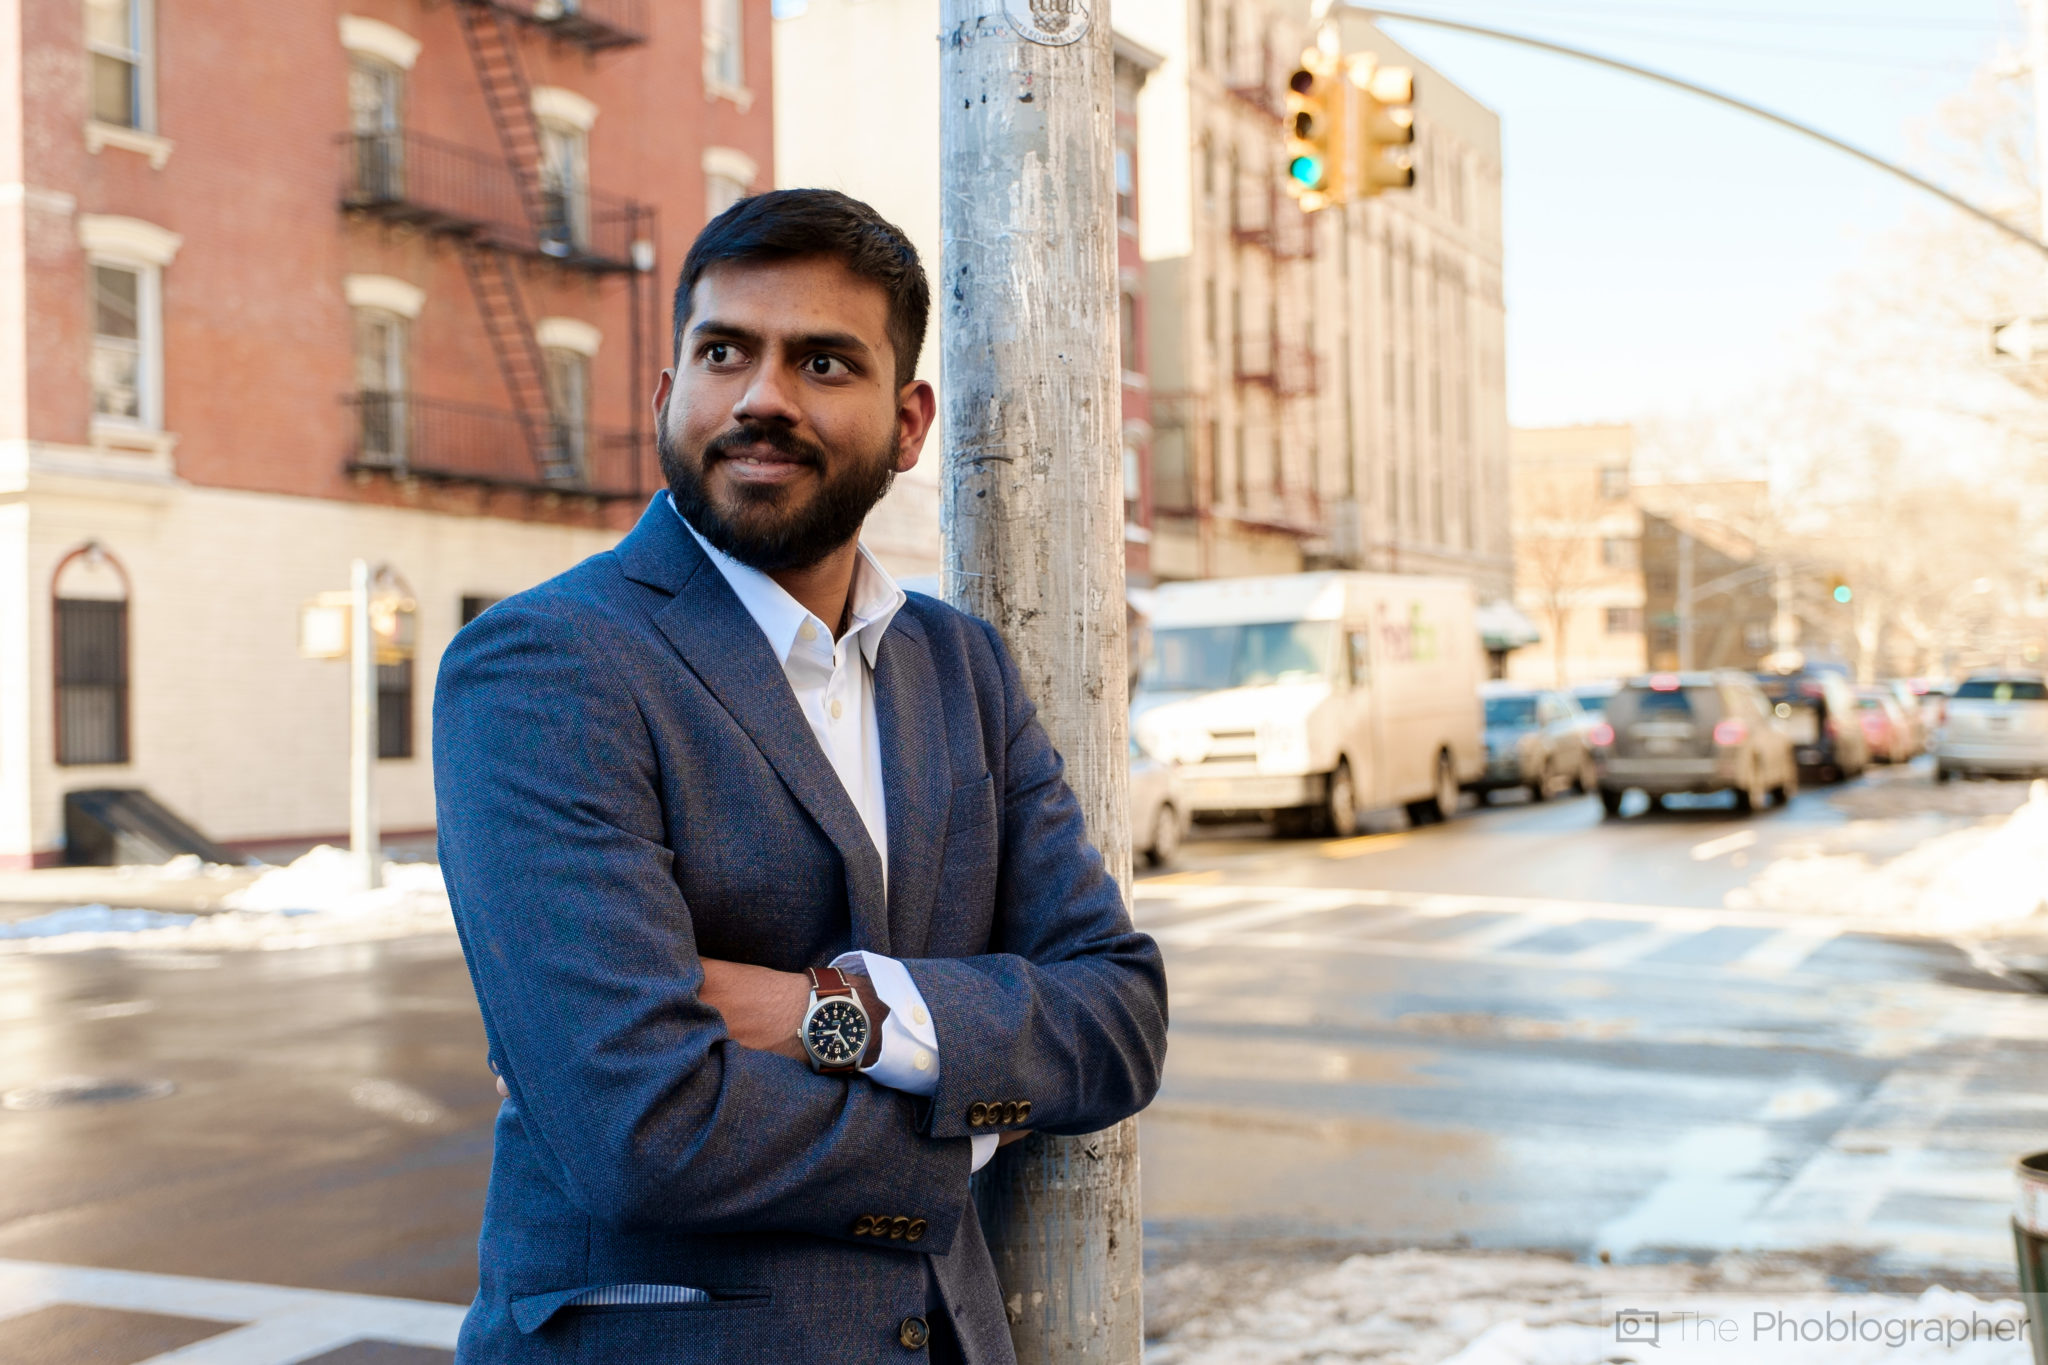
The image above didn’t originally look like that. Originally, the warm sunlight was only on the left side of the image (the pole) while the right side wasn’t touched by the light at all. Instead, it looked very blue and presented a mixed lighting situation. It didn’t look so great.
The way to fix mixed lighting situations when dealing with natural light has to do not only with proper white balancing, but also with gradients in Adobe Lightroom in order to correctly color balance other parts of a scene.
Gradients allow you to do a whole slew of things: add in extra lights, make those lights look like they are gelled, change white balances, add sharpening, etc.
This is a but of a longer Useful Photography Tip, so hit the jump to see what we’re talking about.
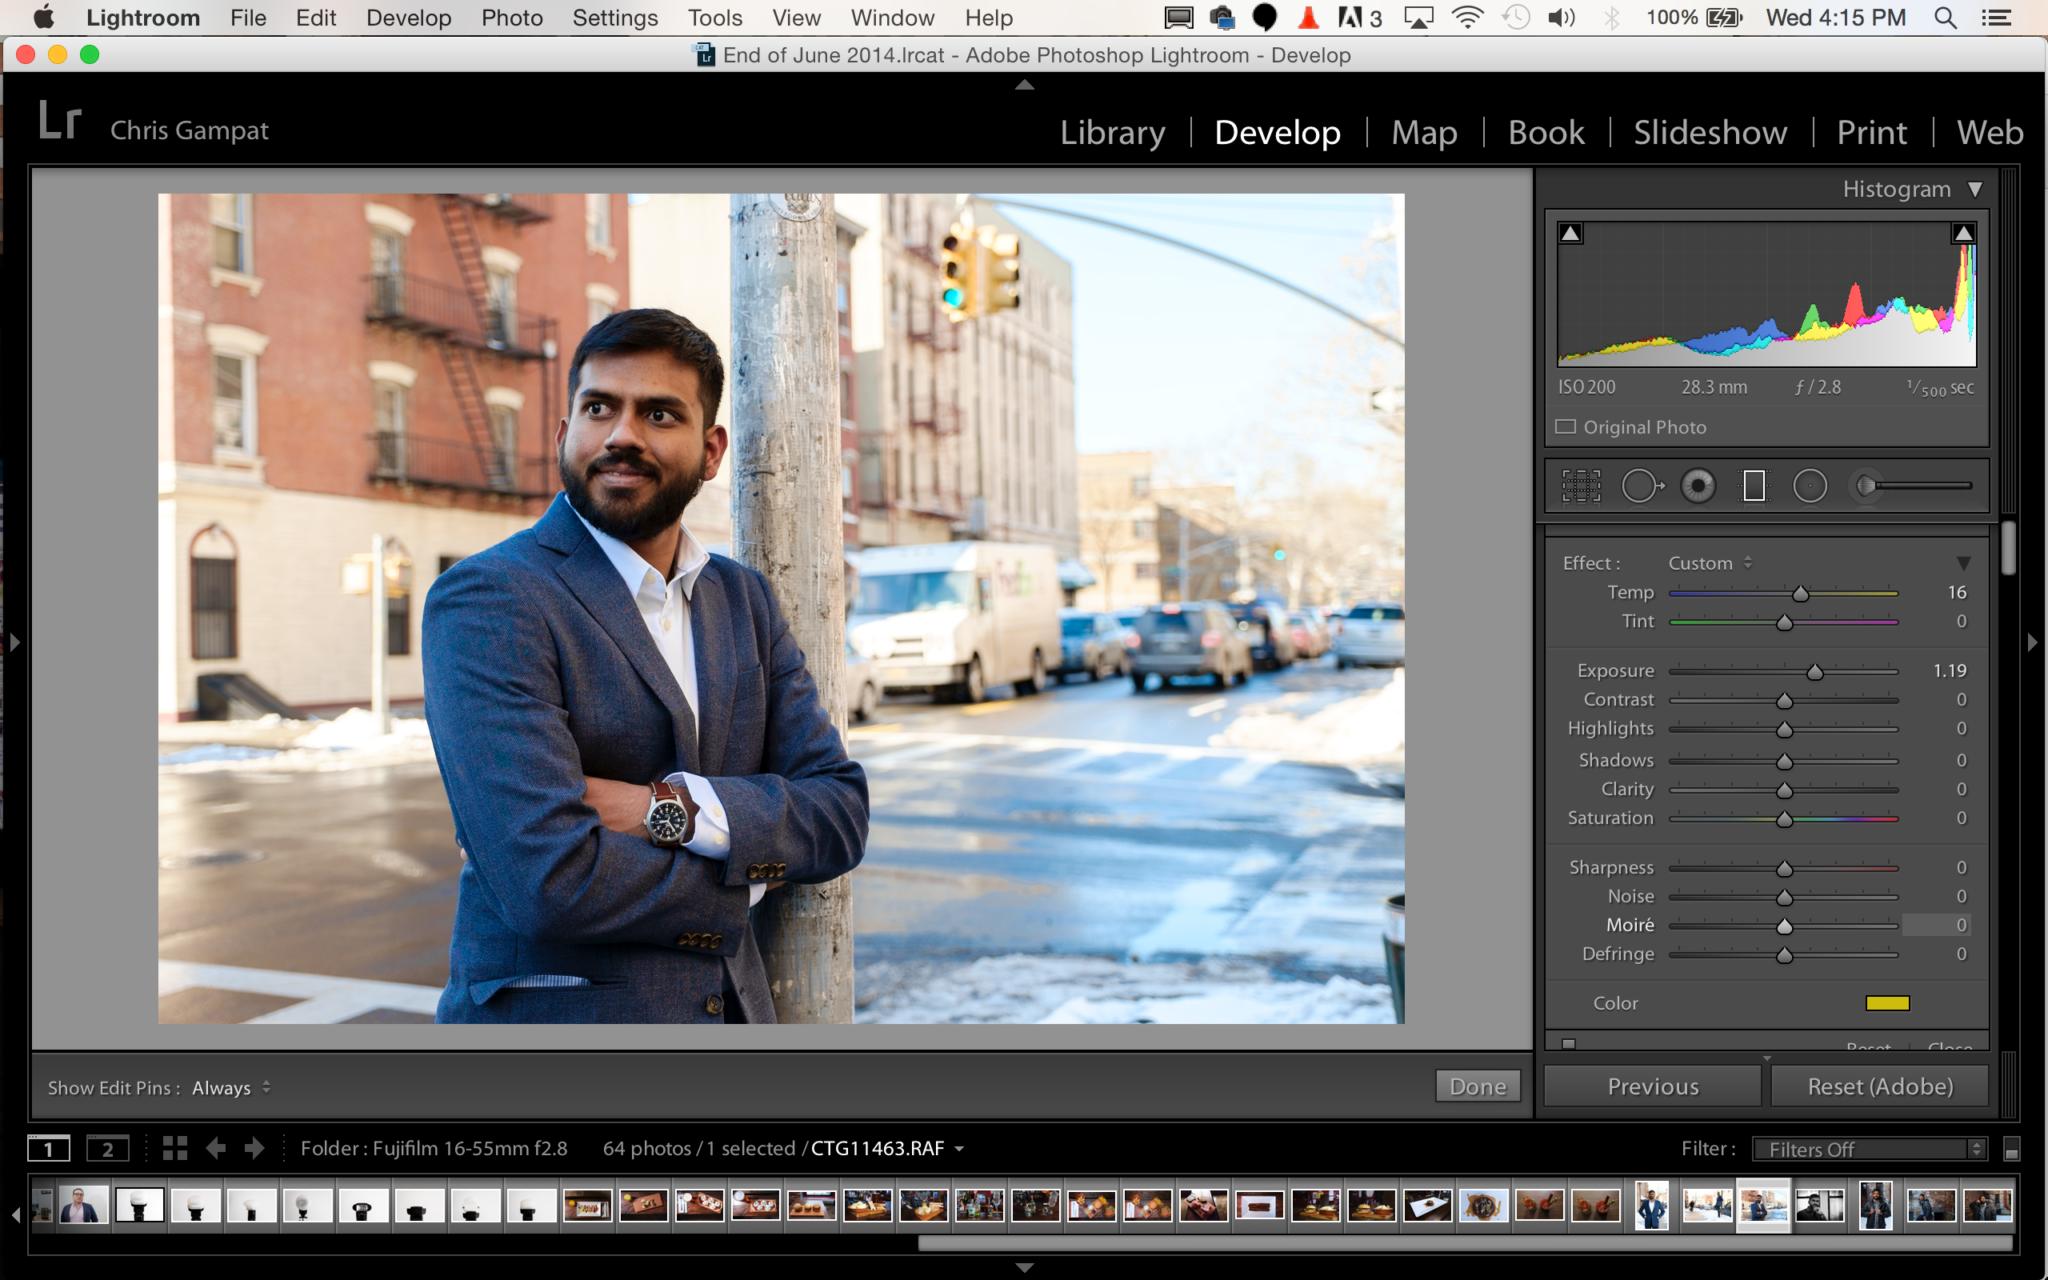
Without the gradient, the scene looked like this. The left side was very warm and the right side is very cool. It looks a bit odd and not really natural. To fix that, the best thing to do is to add a gradient. Why?
– Warming the color temperature up will affect the entire scene.
– Working with the blue channels will affect the model’s jacket and it isn’t necessarily the route that you want to take.
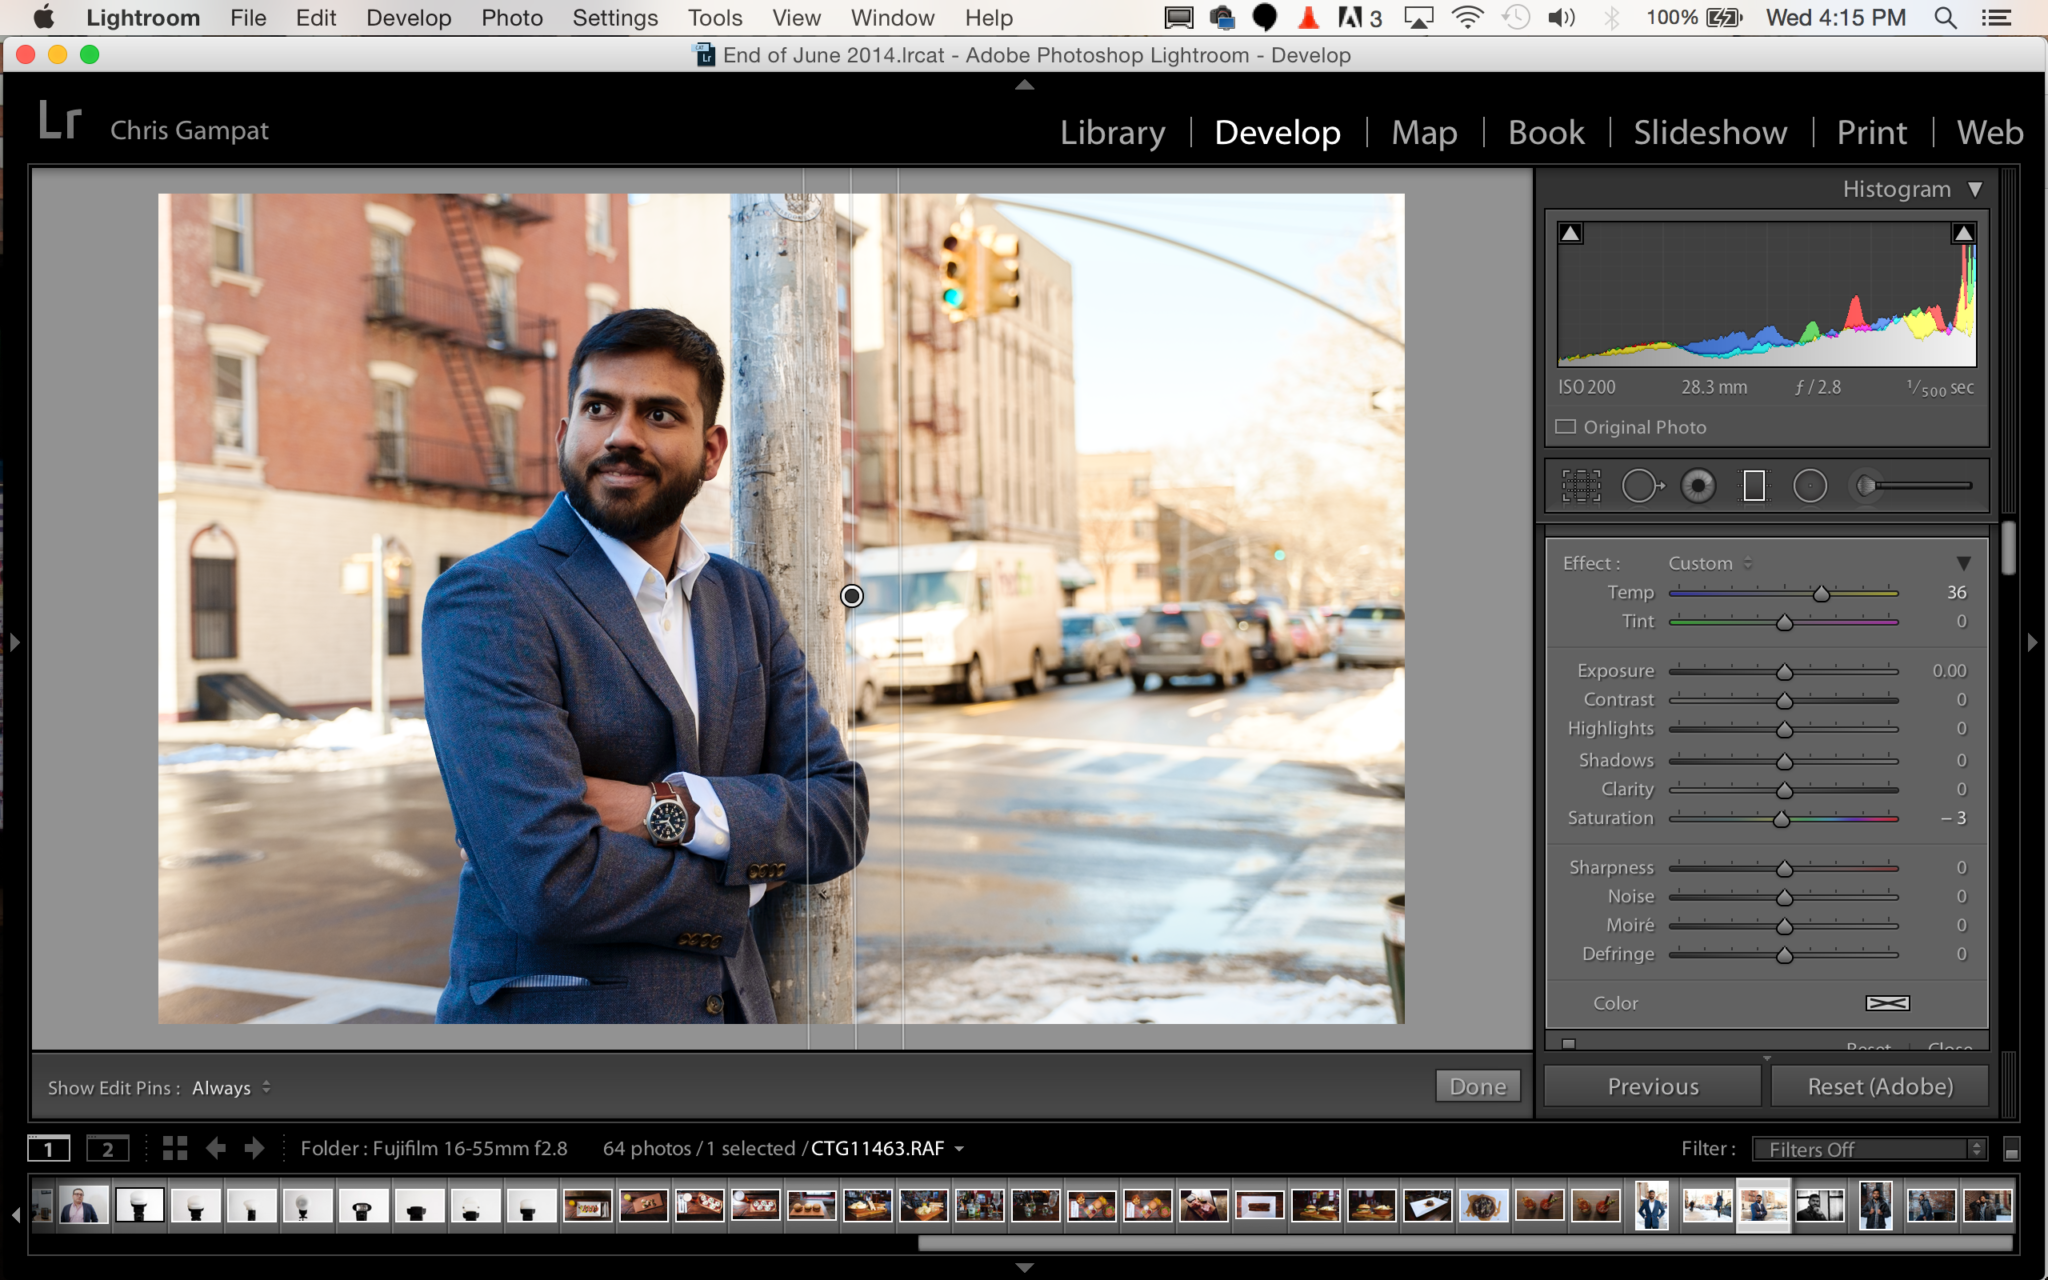
By adding in a neutral colored gradient and matching the color temperature to the left side, we were able to create a more balanced looking scene. Now the blues aren’t so dominant on the right side and the scene looks more natural overall.
Get rid of the ads!
Did you enjoy reading this article as much as we enjoyed writing it? There's a way to support us and our reporting, getting ad-free navigation and more as a bonus. Subscribe to us for less than a coffee per month —just $3.99— or take advantage of our yearly subscription with a hefty discount for only $25.- An ad-free experience
- A free mystery box for Lightroom or Capture One
- All the books in our store
- 20% discount on Capture One
- 30% discount on Imalume Photo Theft Protection
- 20% off Herbs and Kettle Tea Company.