
There are tons of tutorials out there for shooting portraits. But many don’t get into the specifics that help you truly love the portraits you shoot. So we dove into our archive of original cheat sheets and infographics to find exactly this sort of stuff. How many of you use the three-color portrait method? Alternatively, what do you know about placing a nose in a portrait? Or lighting?
View this article with minimal banner ads in our app for iOS, iPad, and Android. Get no banner ads for $24.99/year.
Well, guess what! Over the years, we produced all these photography cheat sheets ourselves. And we’re helping you find exactly what you want by assembling a select few. We hope you get all you need for shooting portraits right here.
Table of Contents
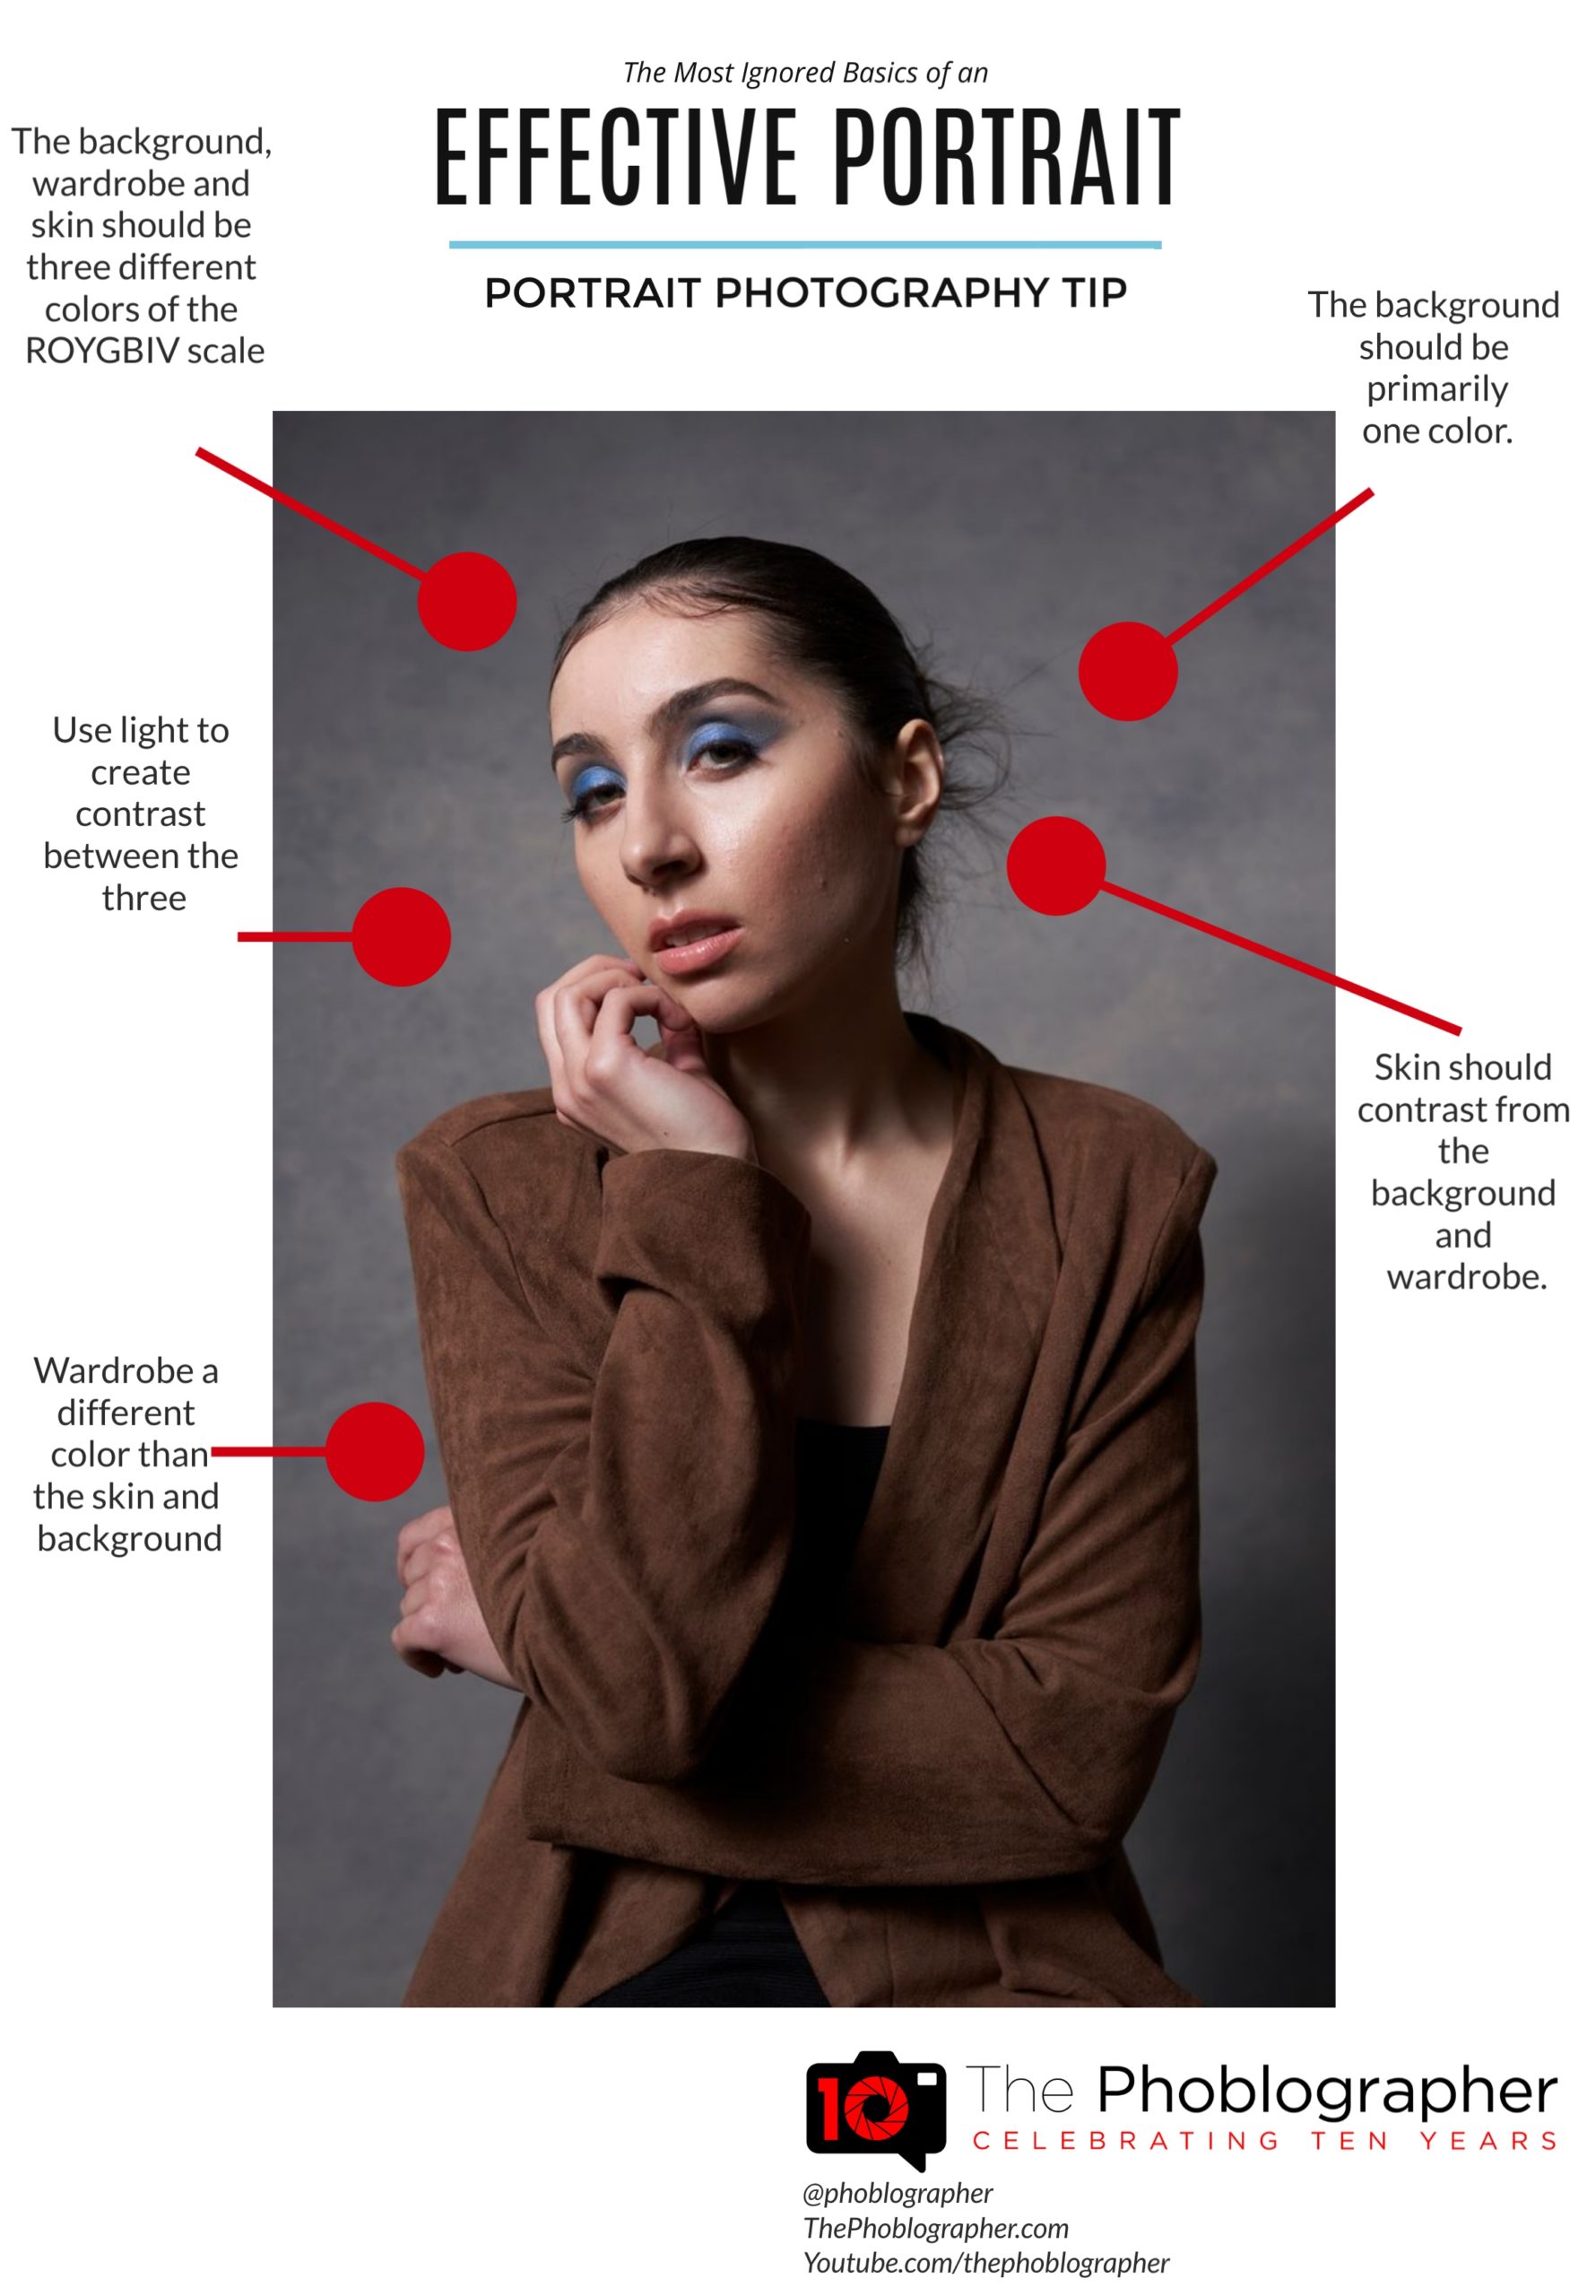
The Three Color Portrait Method
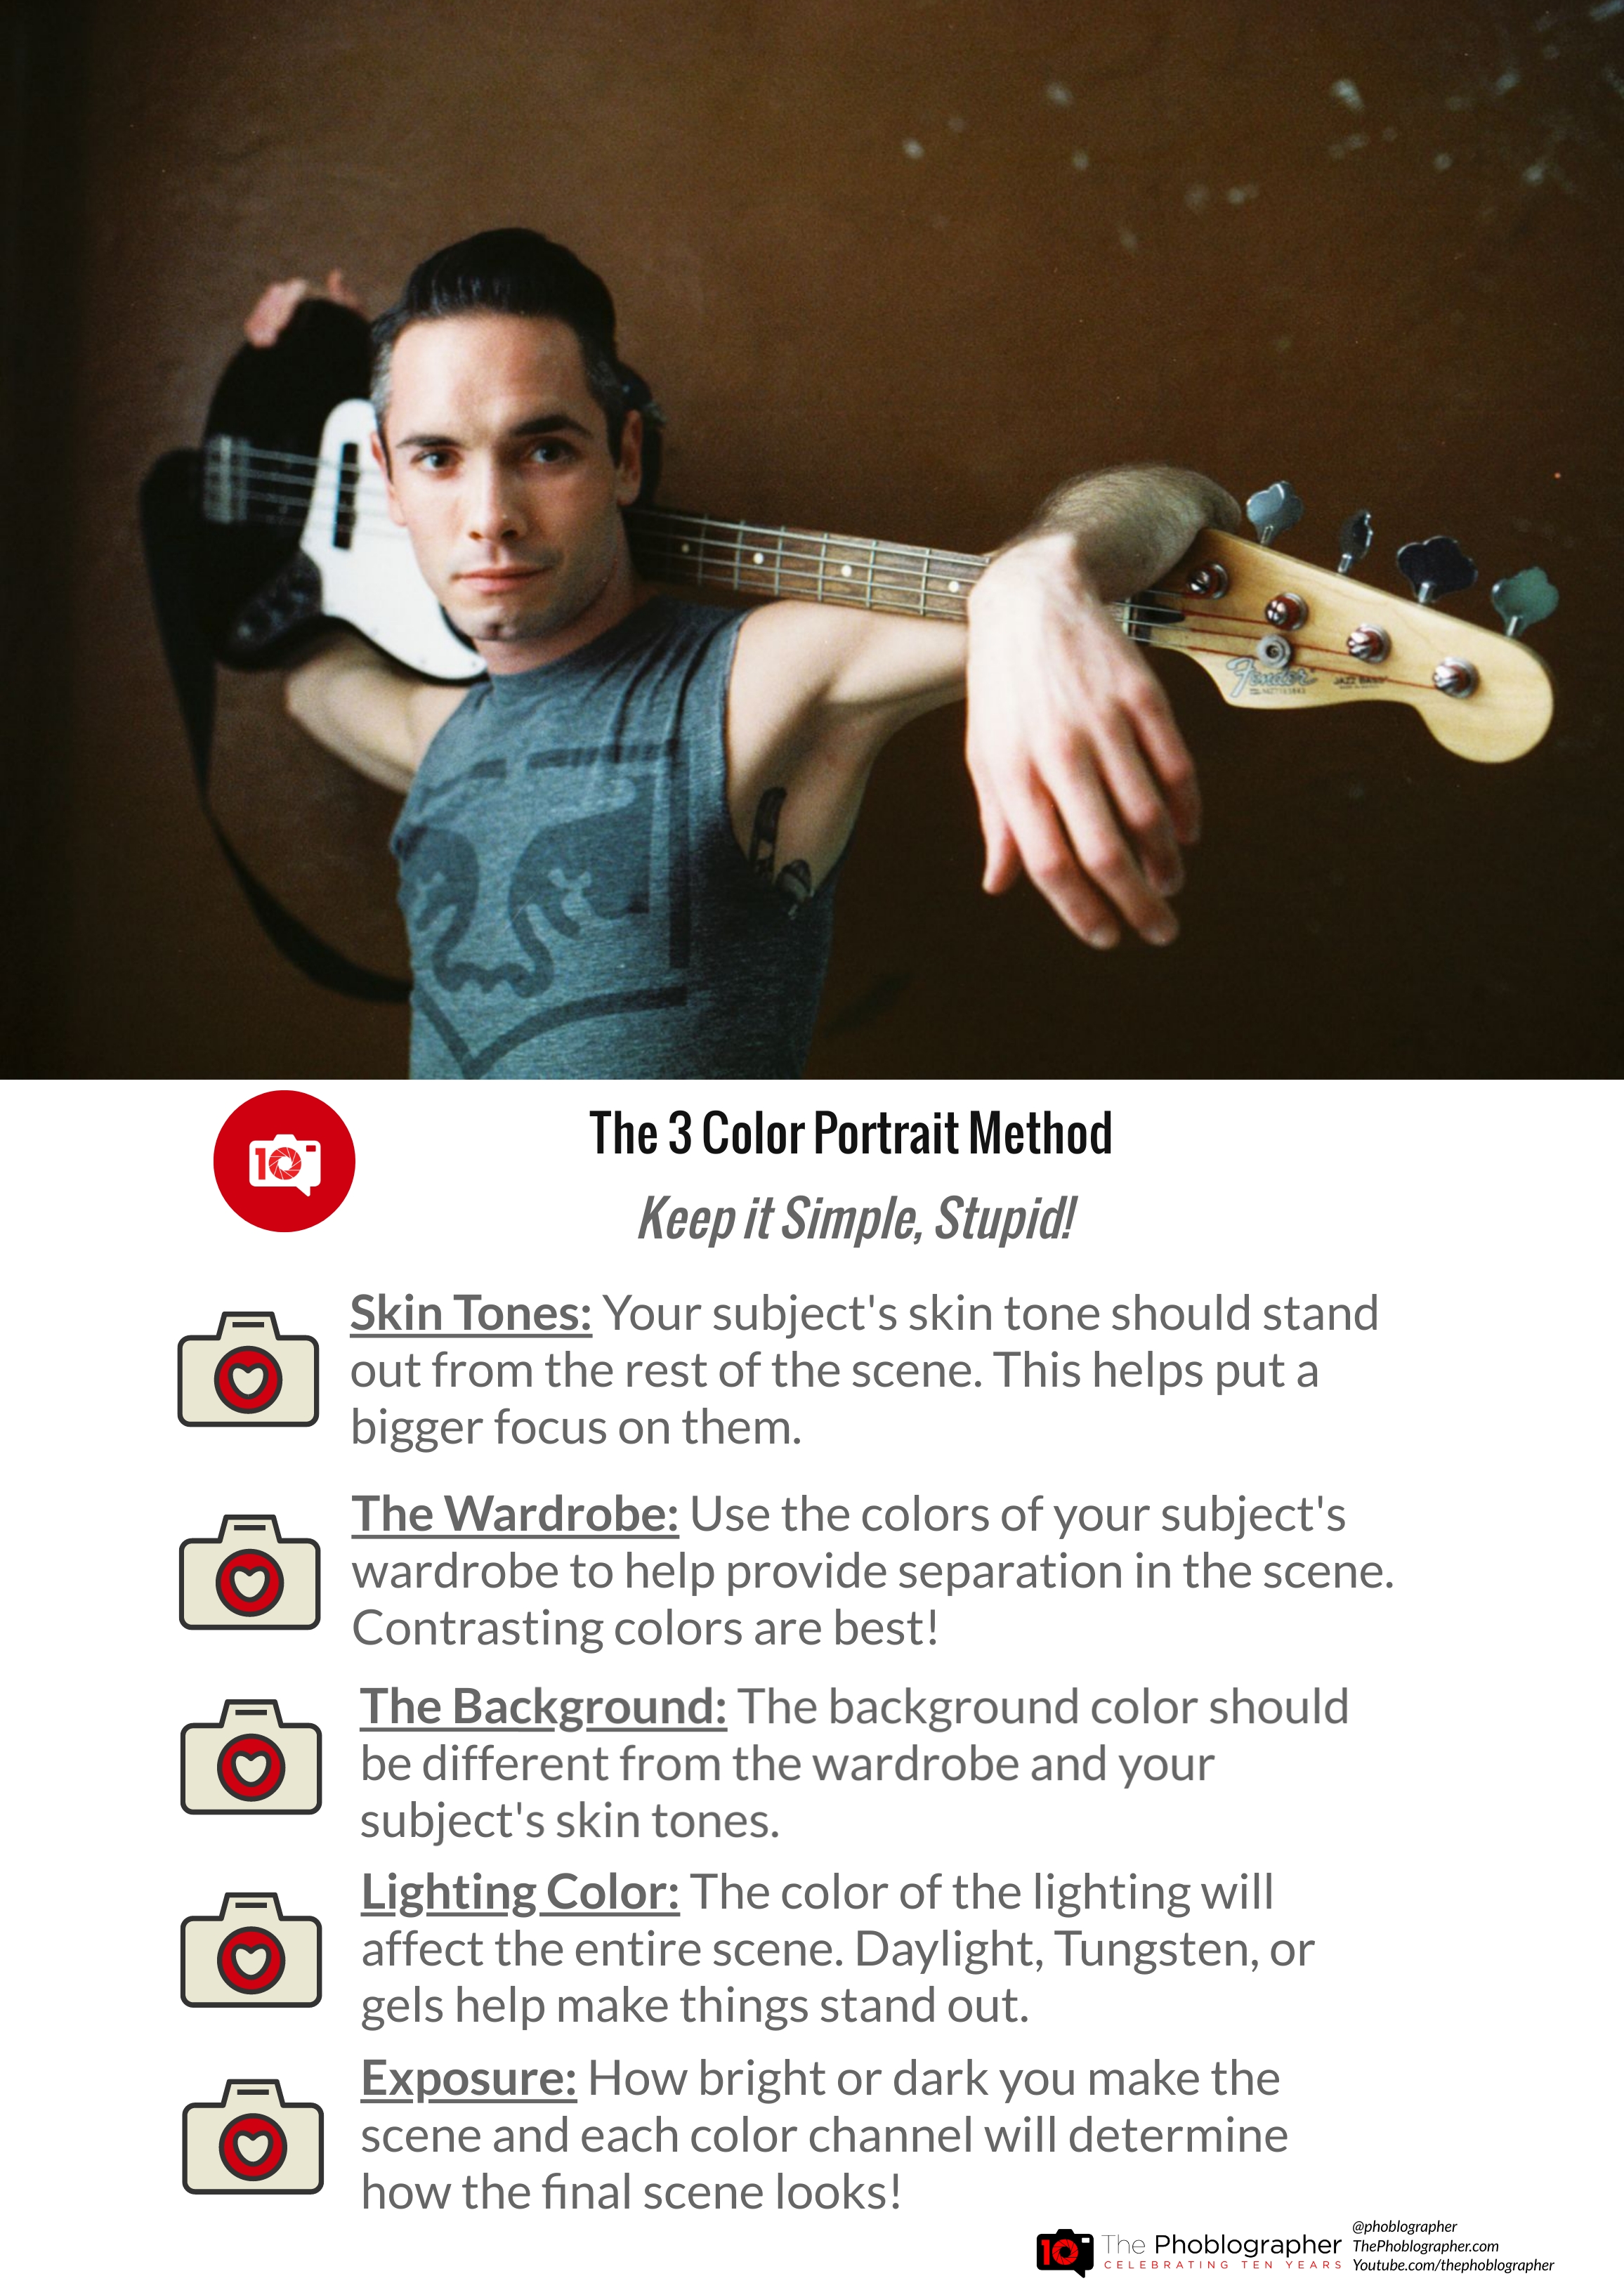
“The approach for many portrait photographers is arguably lazy. Instead of genuinely creating, many rely on the model to do something. But besides giving them instruction, try giving wardrobe input. Using the Behance platform to develop storyboards and mood boards helps a lot. It can dictate things like lighting and more. Plan to go above and beyond by using the three color portrait method. Add props into the scene to give the model something to do. Try flowers or candles. Create a story. Don’t just sit there capturing a model vibing in front of a camera. Those photographers tend to do nothing else but copy the work of others. If you’re looking to create work to feed the Instagram algorithm, stop. Put the camera down, thumb through a few photo books, and get inspired.”
Check out more in our blog post!
Shooting Portraits with an f1.2 Lens
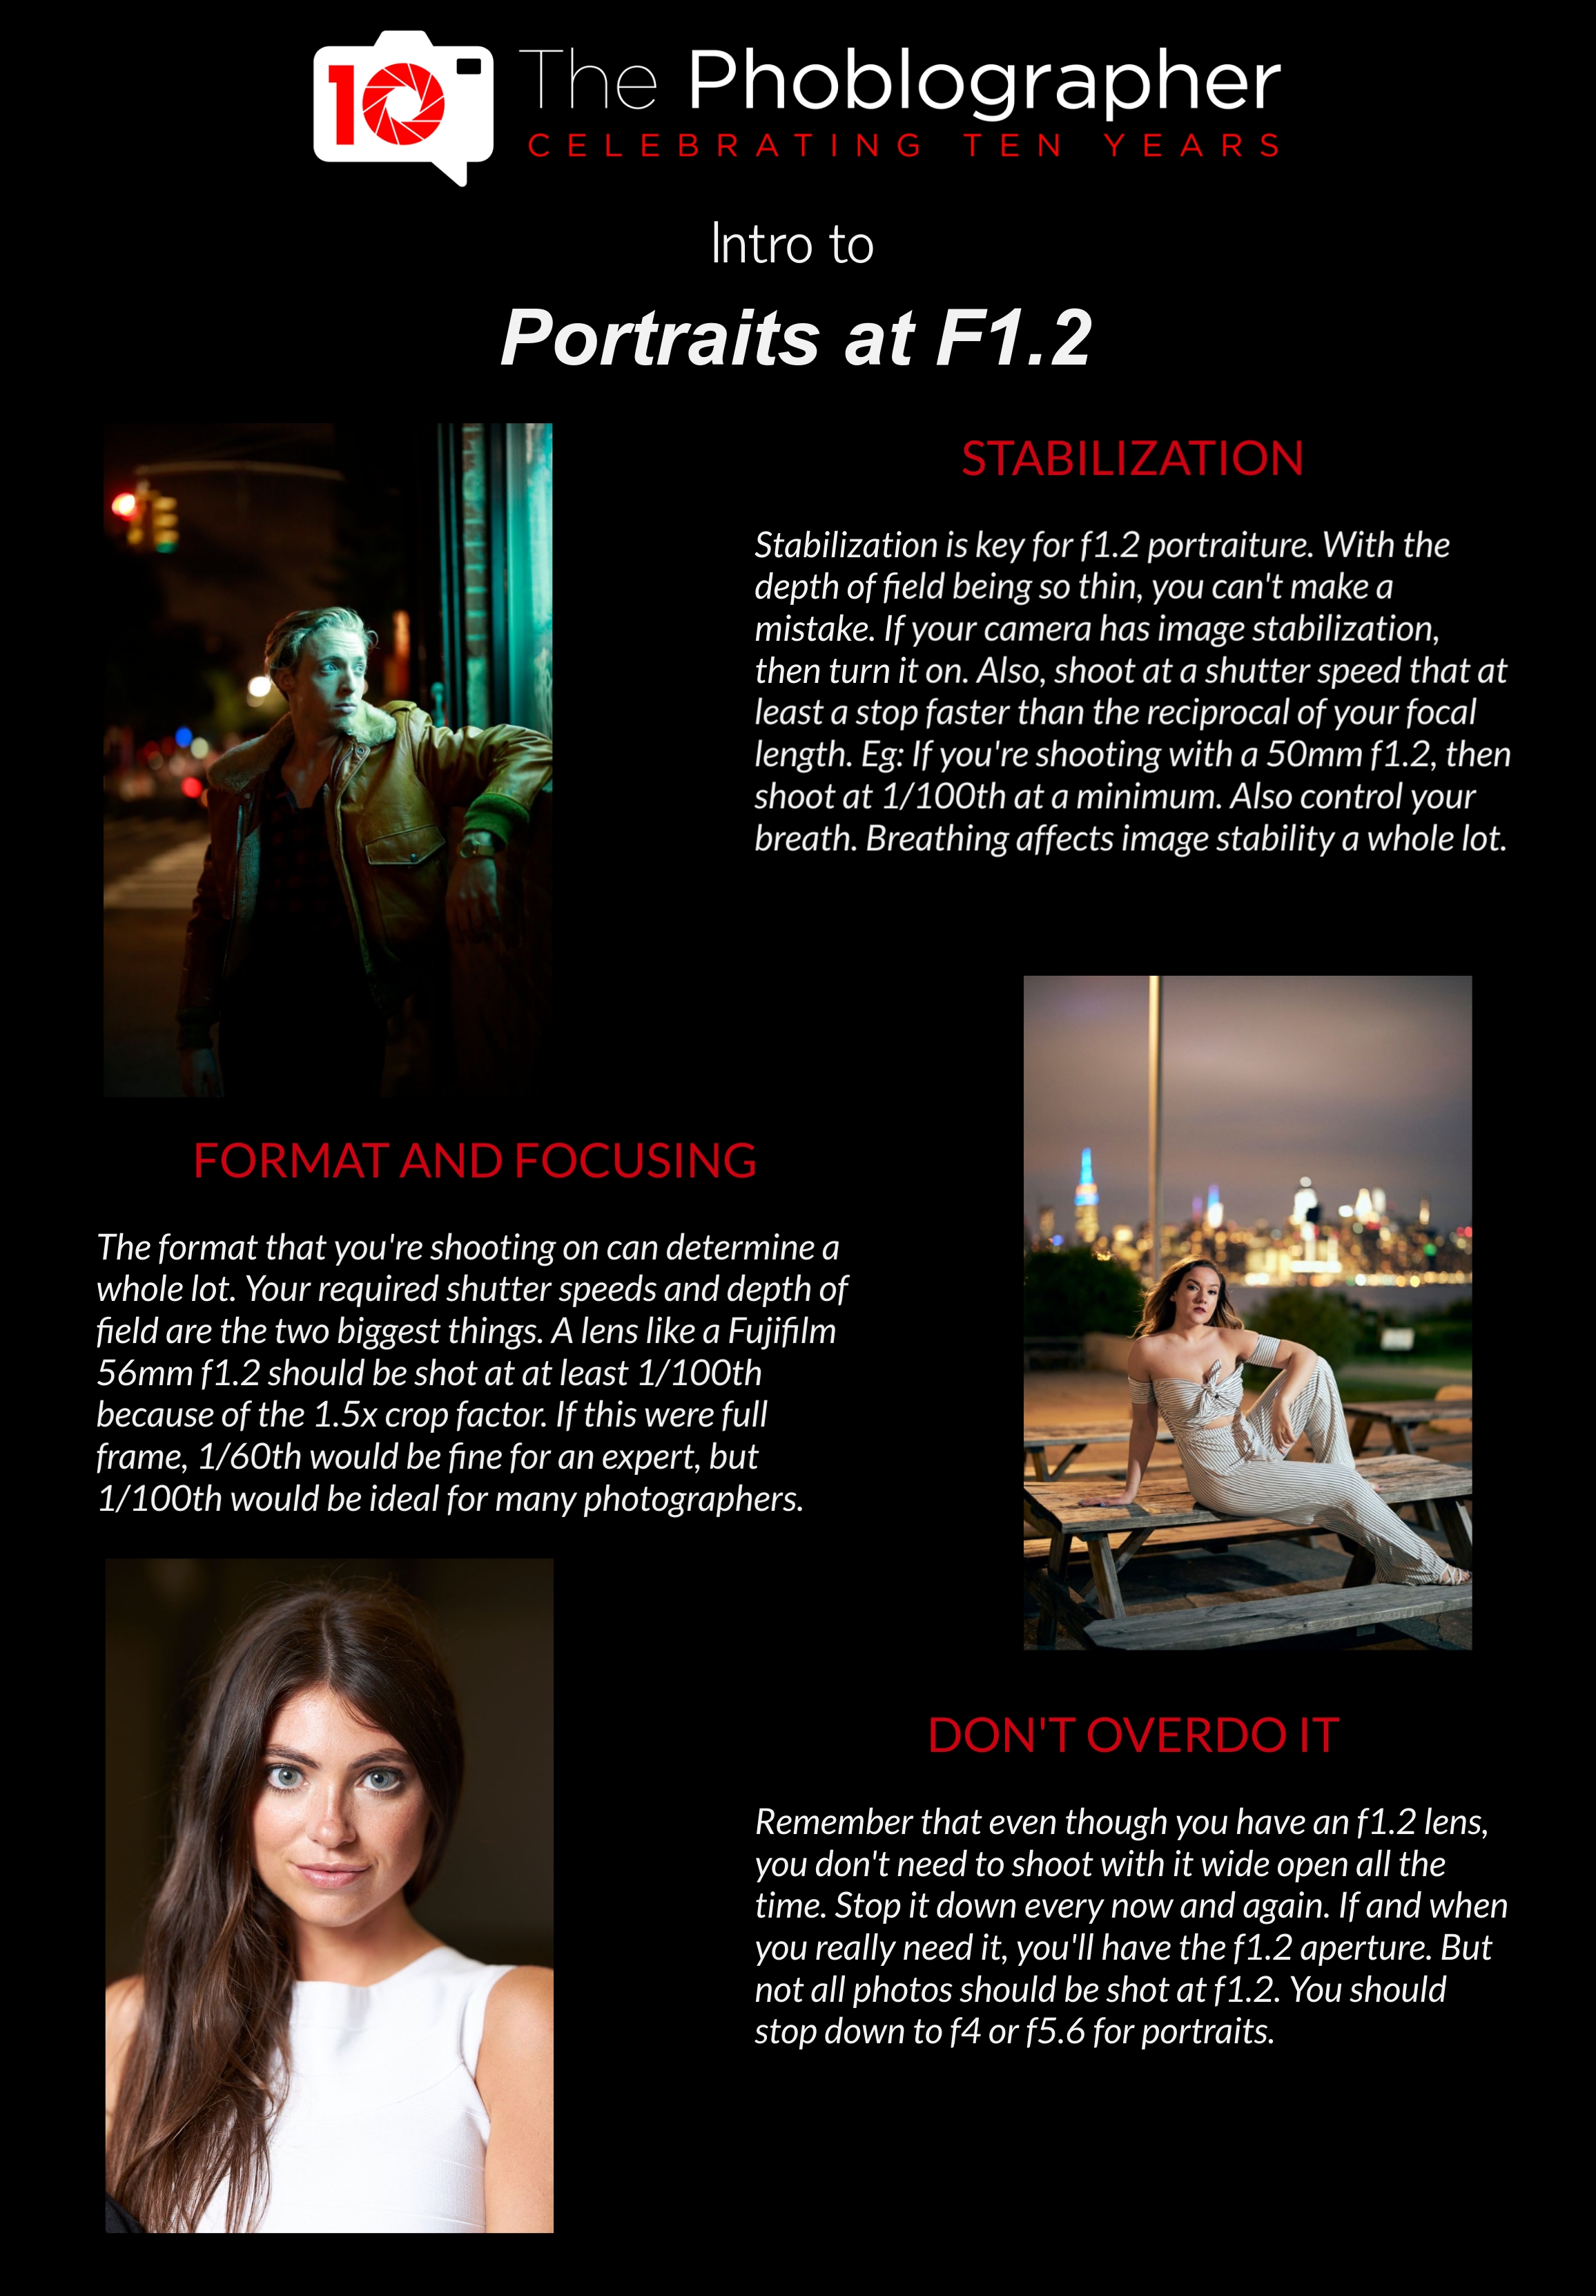
“When shooting wide open with an f1.2 lens, you’ll get a sharp yet soft look. This soft look makes everyone appear lovely and it’s very addicting. But you can deliver more sharpness by just stopping down a tad. We already talked about this, but the ultimate point is to find the balance. Personally, I like the softer look with a Polarizing filter on the the lens, which enhances the colors and contrast more. It’s a similar tactic to what many f1.2 lenses have with their APD variants. With these variants, there is an extra element that brings even smoother bokeh to the photos. Give it a shot!”
Check out more in our blog post.
Positioning the Nose While Shooting Portraits
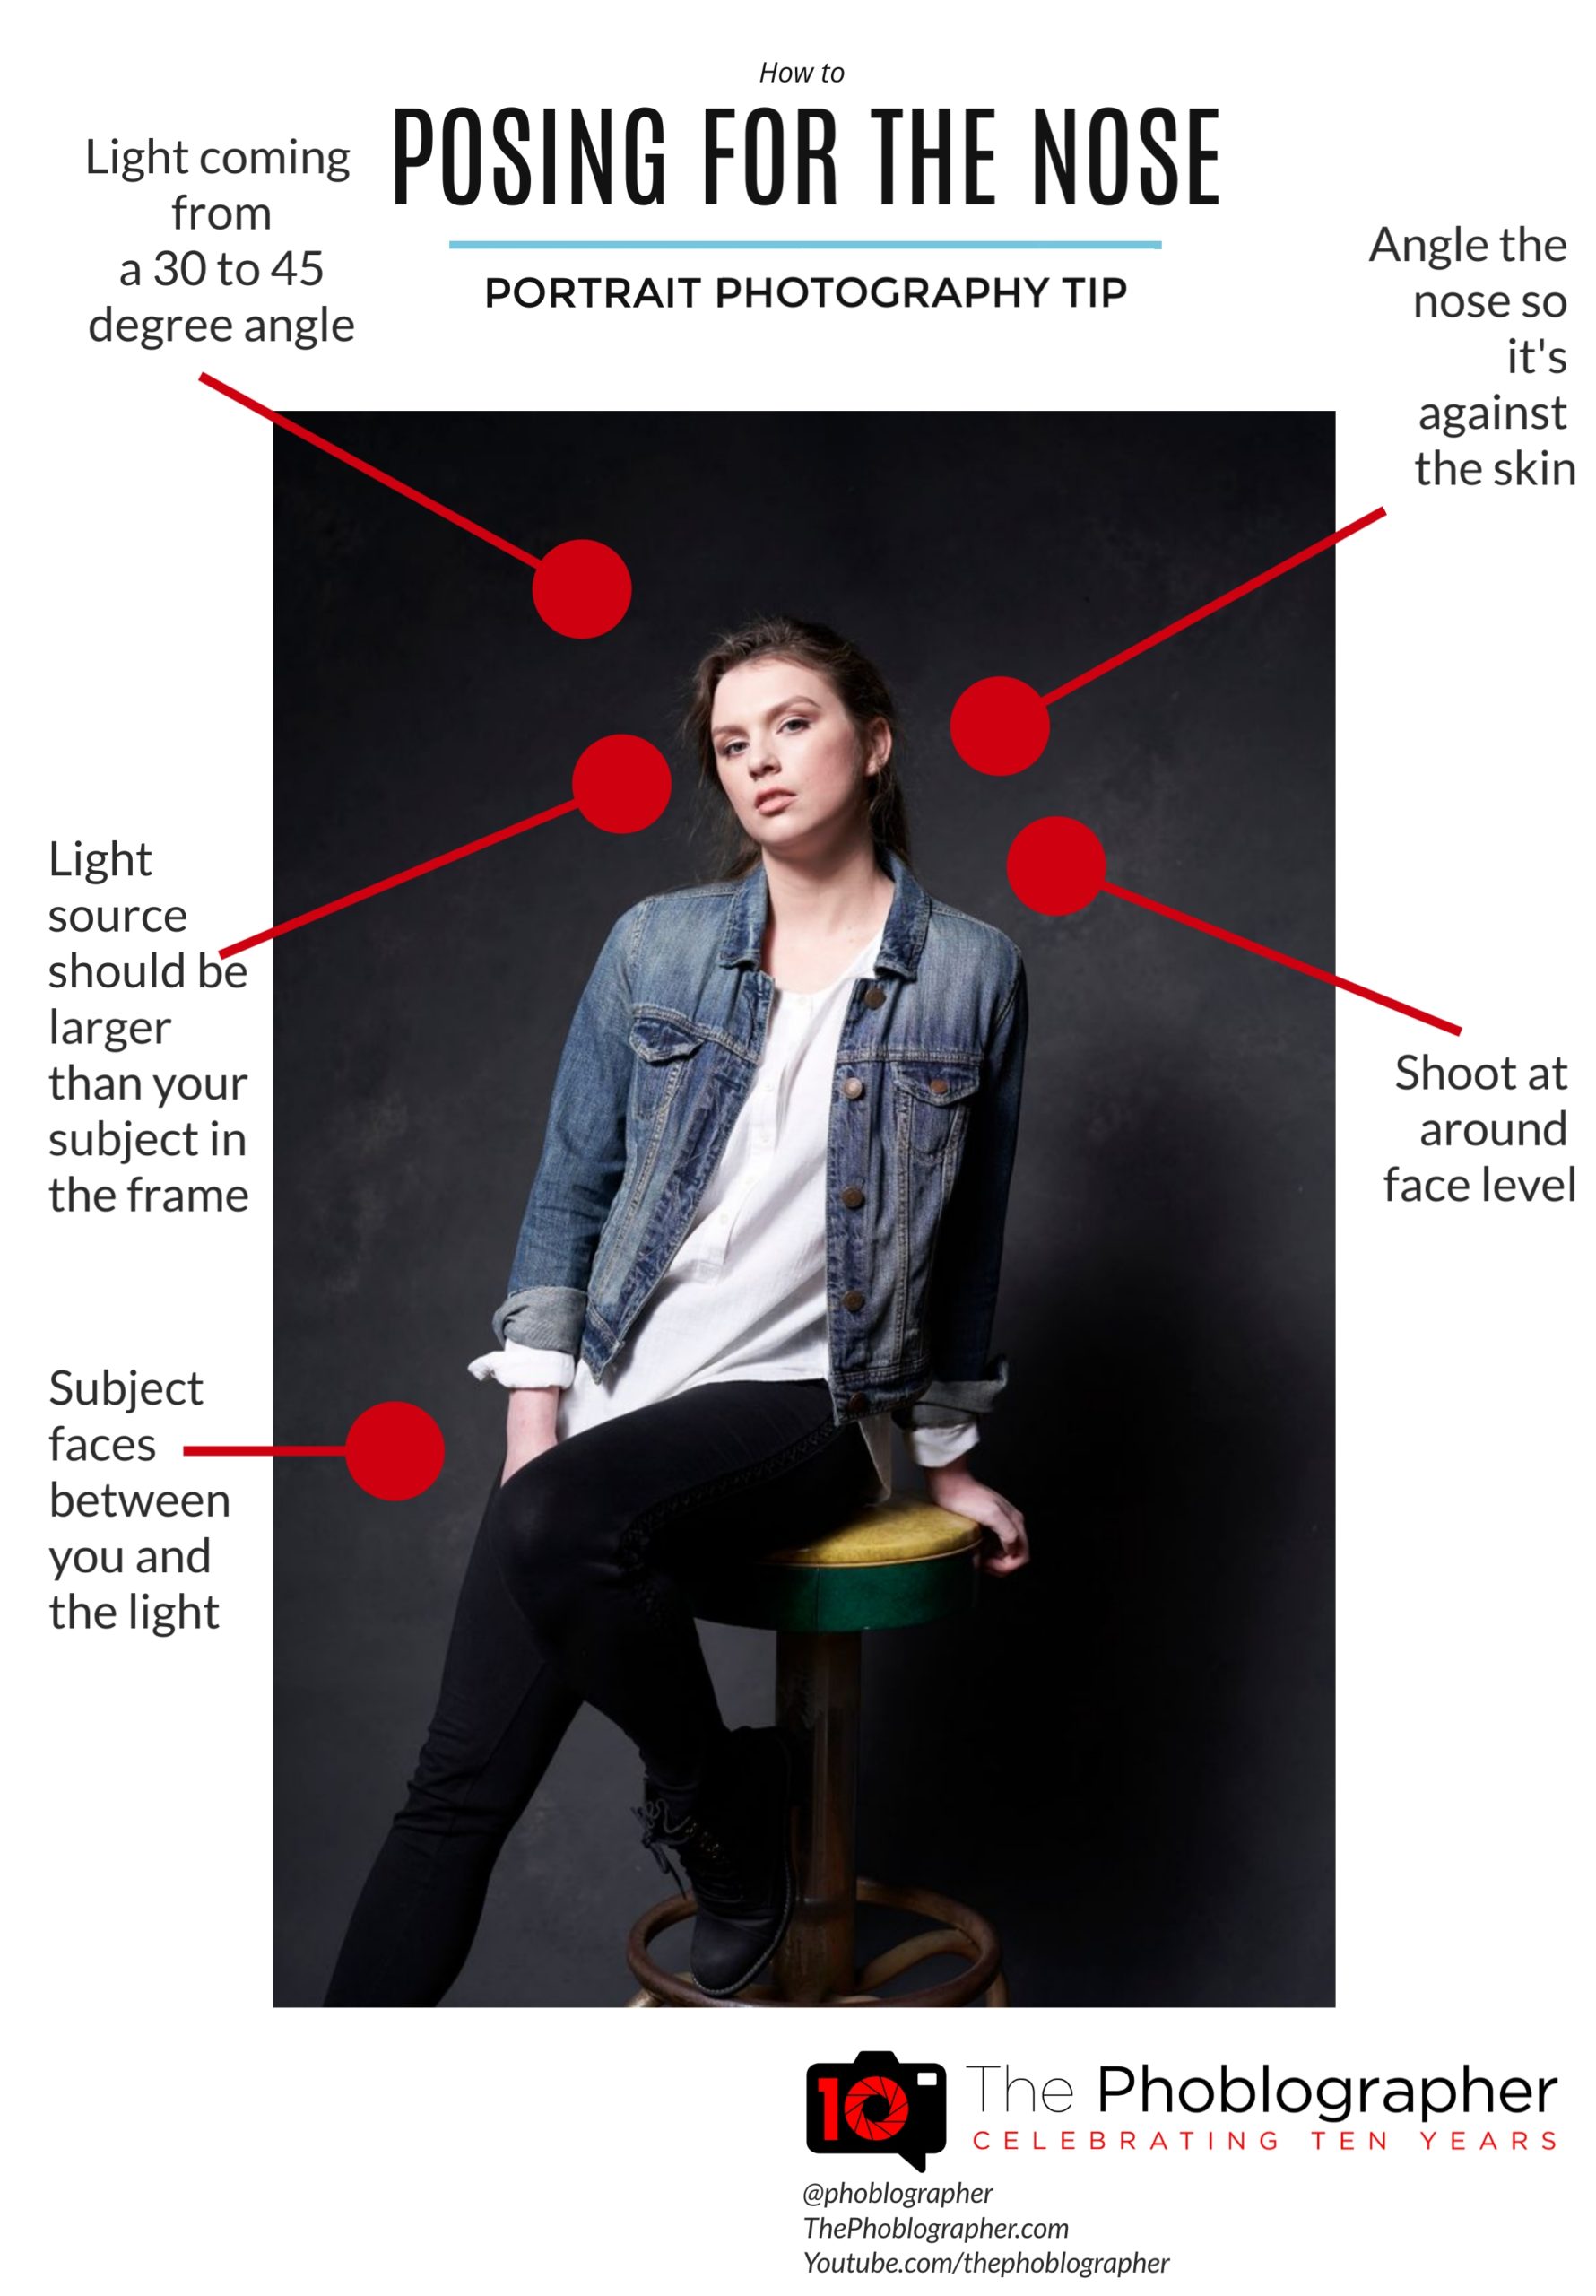
“In addition to this, give the nose a background. By that, we mean to place it against the skin. Notice how, in the image above and our lead image, the nose is against the cheek? That’s what you need to do. This makes the nose pop out less and makes it look more flattering. From here, you’ve got a variety of techniques and poses you can use. You can fold their arms, put their arms down, etc., but our focus here is the face, and it’s best to adjust this last. Don’t worry, that still means you’ve got a whole lot of posing options. Your subject’s face just needs to be posed a specific way.”
Read more in our blog post.
Backlit Portraits
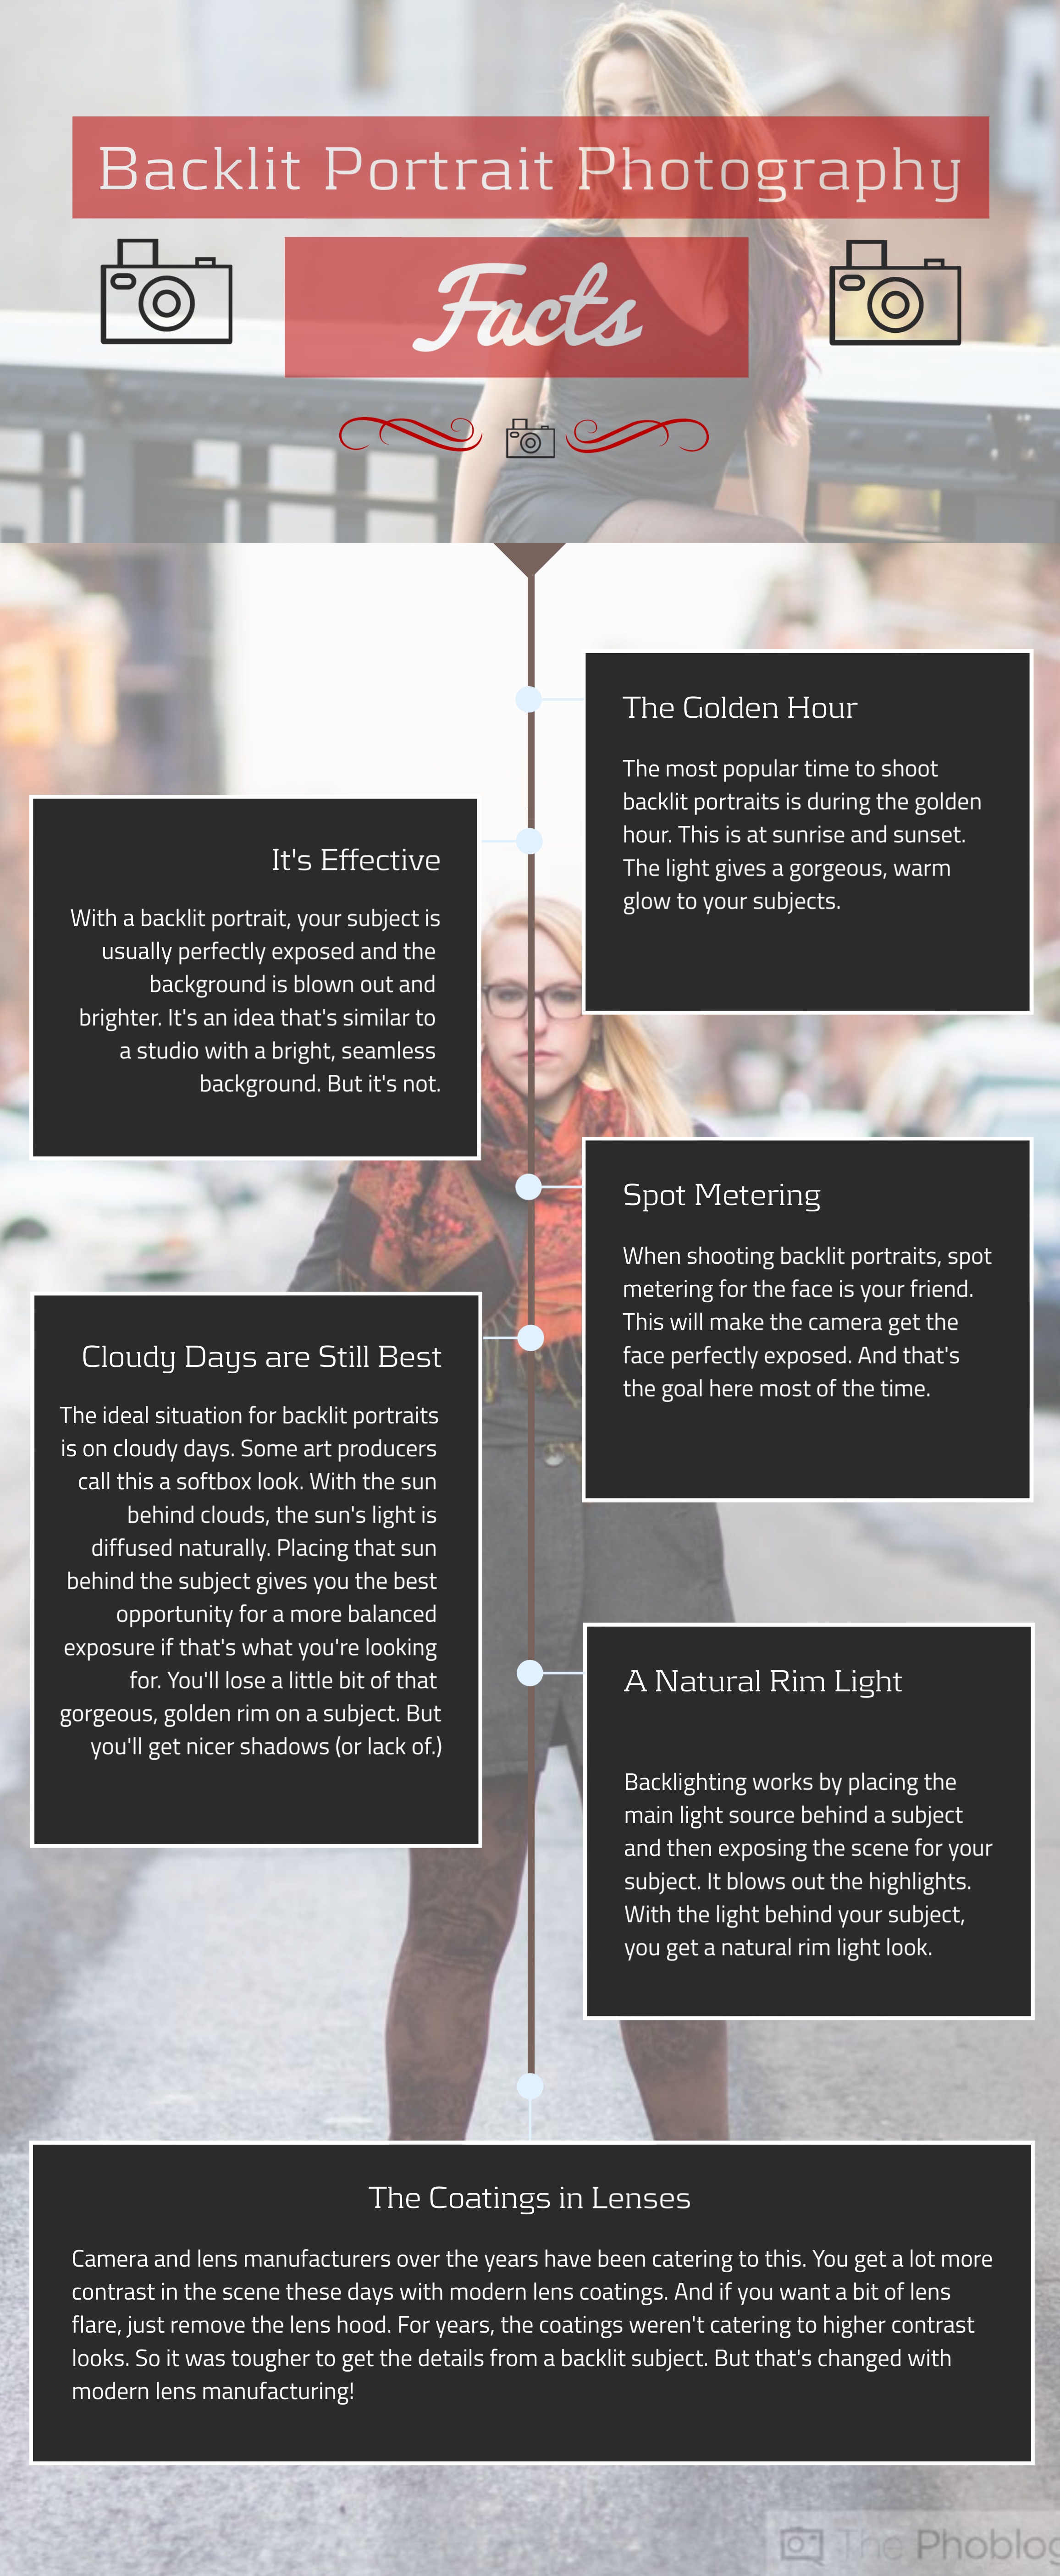
“One of the most important elements in creating a great backlit portrait is to make sure your subject is properly exposed. The default metering mode for most cameras will meter the entire frame rather than focus on your subject. For the best results, set your camera to spot metering and meter for your subject’s face to ensure it’s properly exposed.”
Read more in our blog post.
Important Elements of Portrait Photography
“In my experience of shooting folks of every race, everyone is rendered by cameras in the orange and red channels. Those are typically associated with the skin. You need to find a color that contrasts with the skin. You’ve got five other colors or so to pick from. Once you’ve gotten that, figure out the background. A person shot against a red brick background will inevitably be affected by the red light reflecting off the background. If it’s your intention to get that effect, cool, move forward, but chances are it’s not. Lastly, you need to separate the person from the background. That’s typically done using lighting, wardrobe, and depth of field.”
Read more in our blog post!
Get rid of the ads!
Did you enjoy reading this article as much as we enjoyed writing it? There's a way to support us and our reporting, getting ad-free navigation and more as a bonus. Subscribe to us for less than a coffee per month —just $3.99— or take advantage of our yearly subscription with a hefty discount for only $25.- An ad-free experience
- A free mystery box for Lightroom or Capture One
- All the books in our store
- 20% discount on Capture One
- 30% discount on Imalume Photo Theft Protection
- 20% off Herbs and Kettle Tea Company.
- 20% off your order from MPIX printing services.