
This photography cheat sheet will teach you about the nose – a pretty sensitive subject for portraits.
A friend of mine used to joke with me that her mother called her nose, “The map of Israel.” Joking or not, it’s a real concern of many portrait subjects. So finding a way to make noses look better means posing, lighting, and working with subjects correctly. If you’ve ever been in front of the lens, you know that nothing is more disheartening than the photos coming out not looking great. Of course, to each their own, but if you don’t feel great about your own portrait, then it can really hurt you. In today’s photography cheat sheet, we’re revisiting something that lots of you probably forgot about, some of you never learned, and that everyone will benefit from.
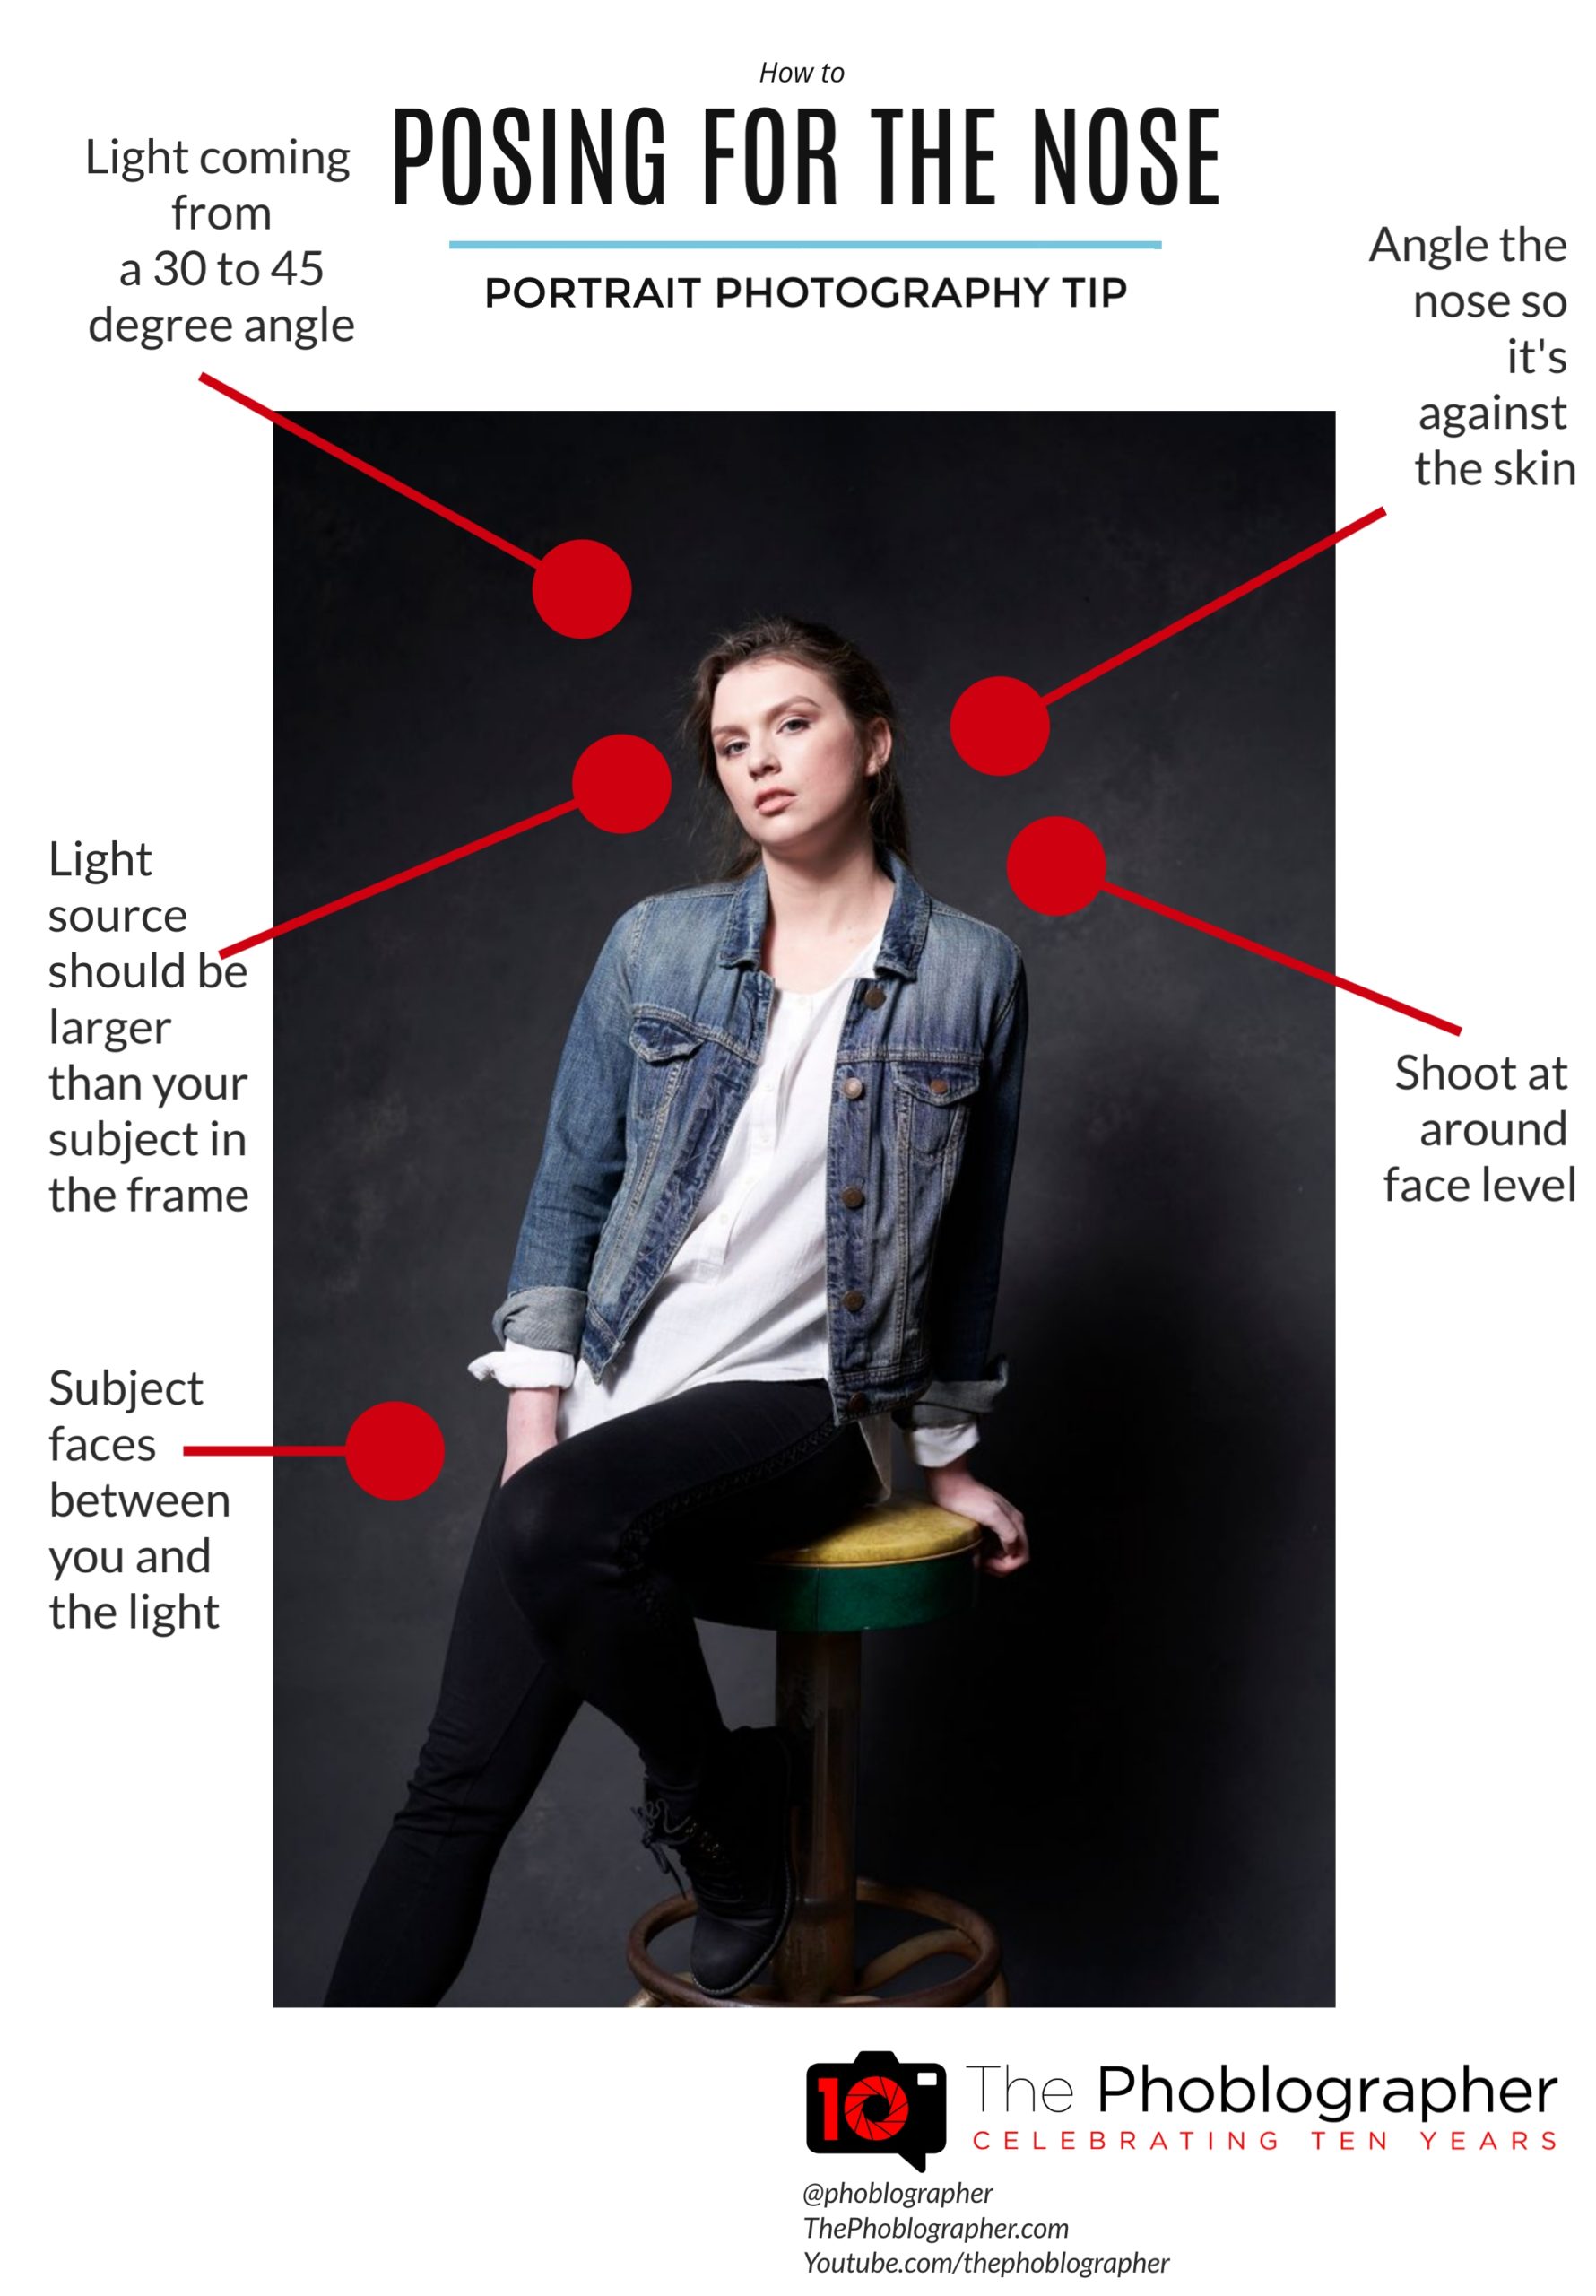
Your Lighting Counts Big Time
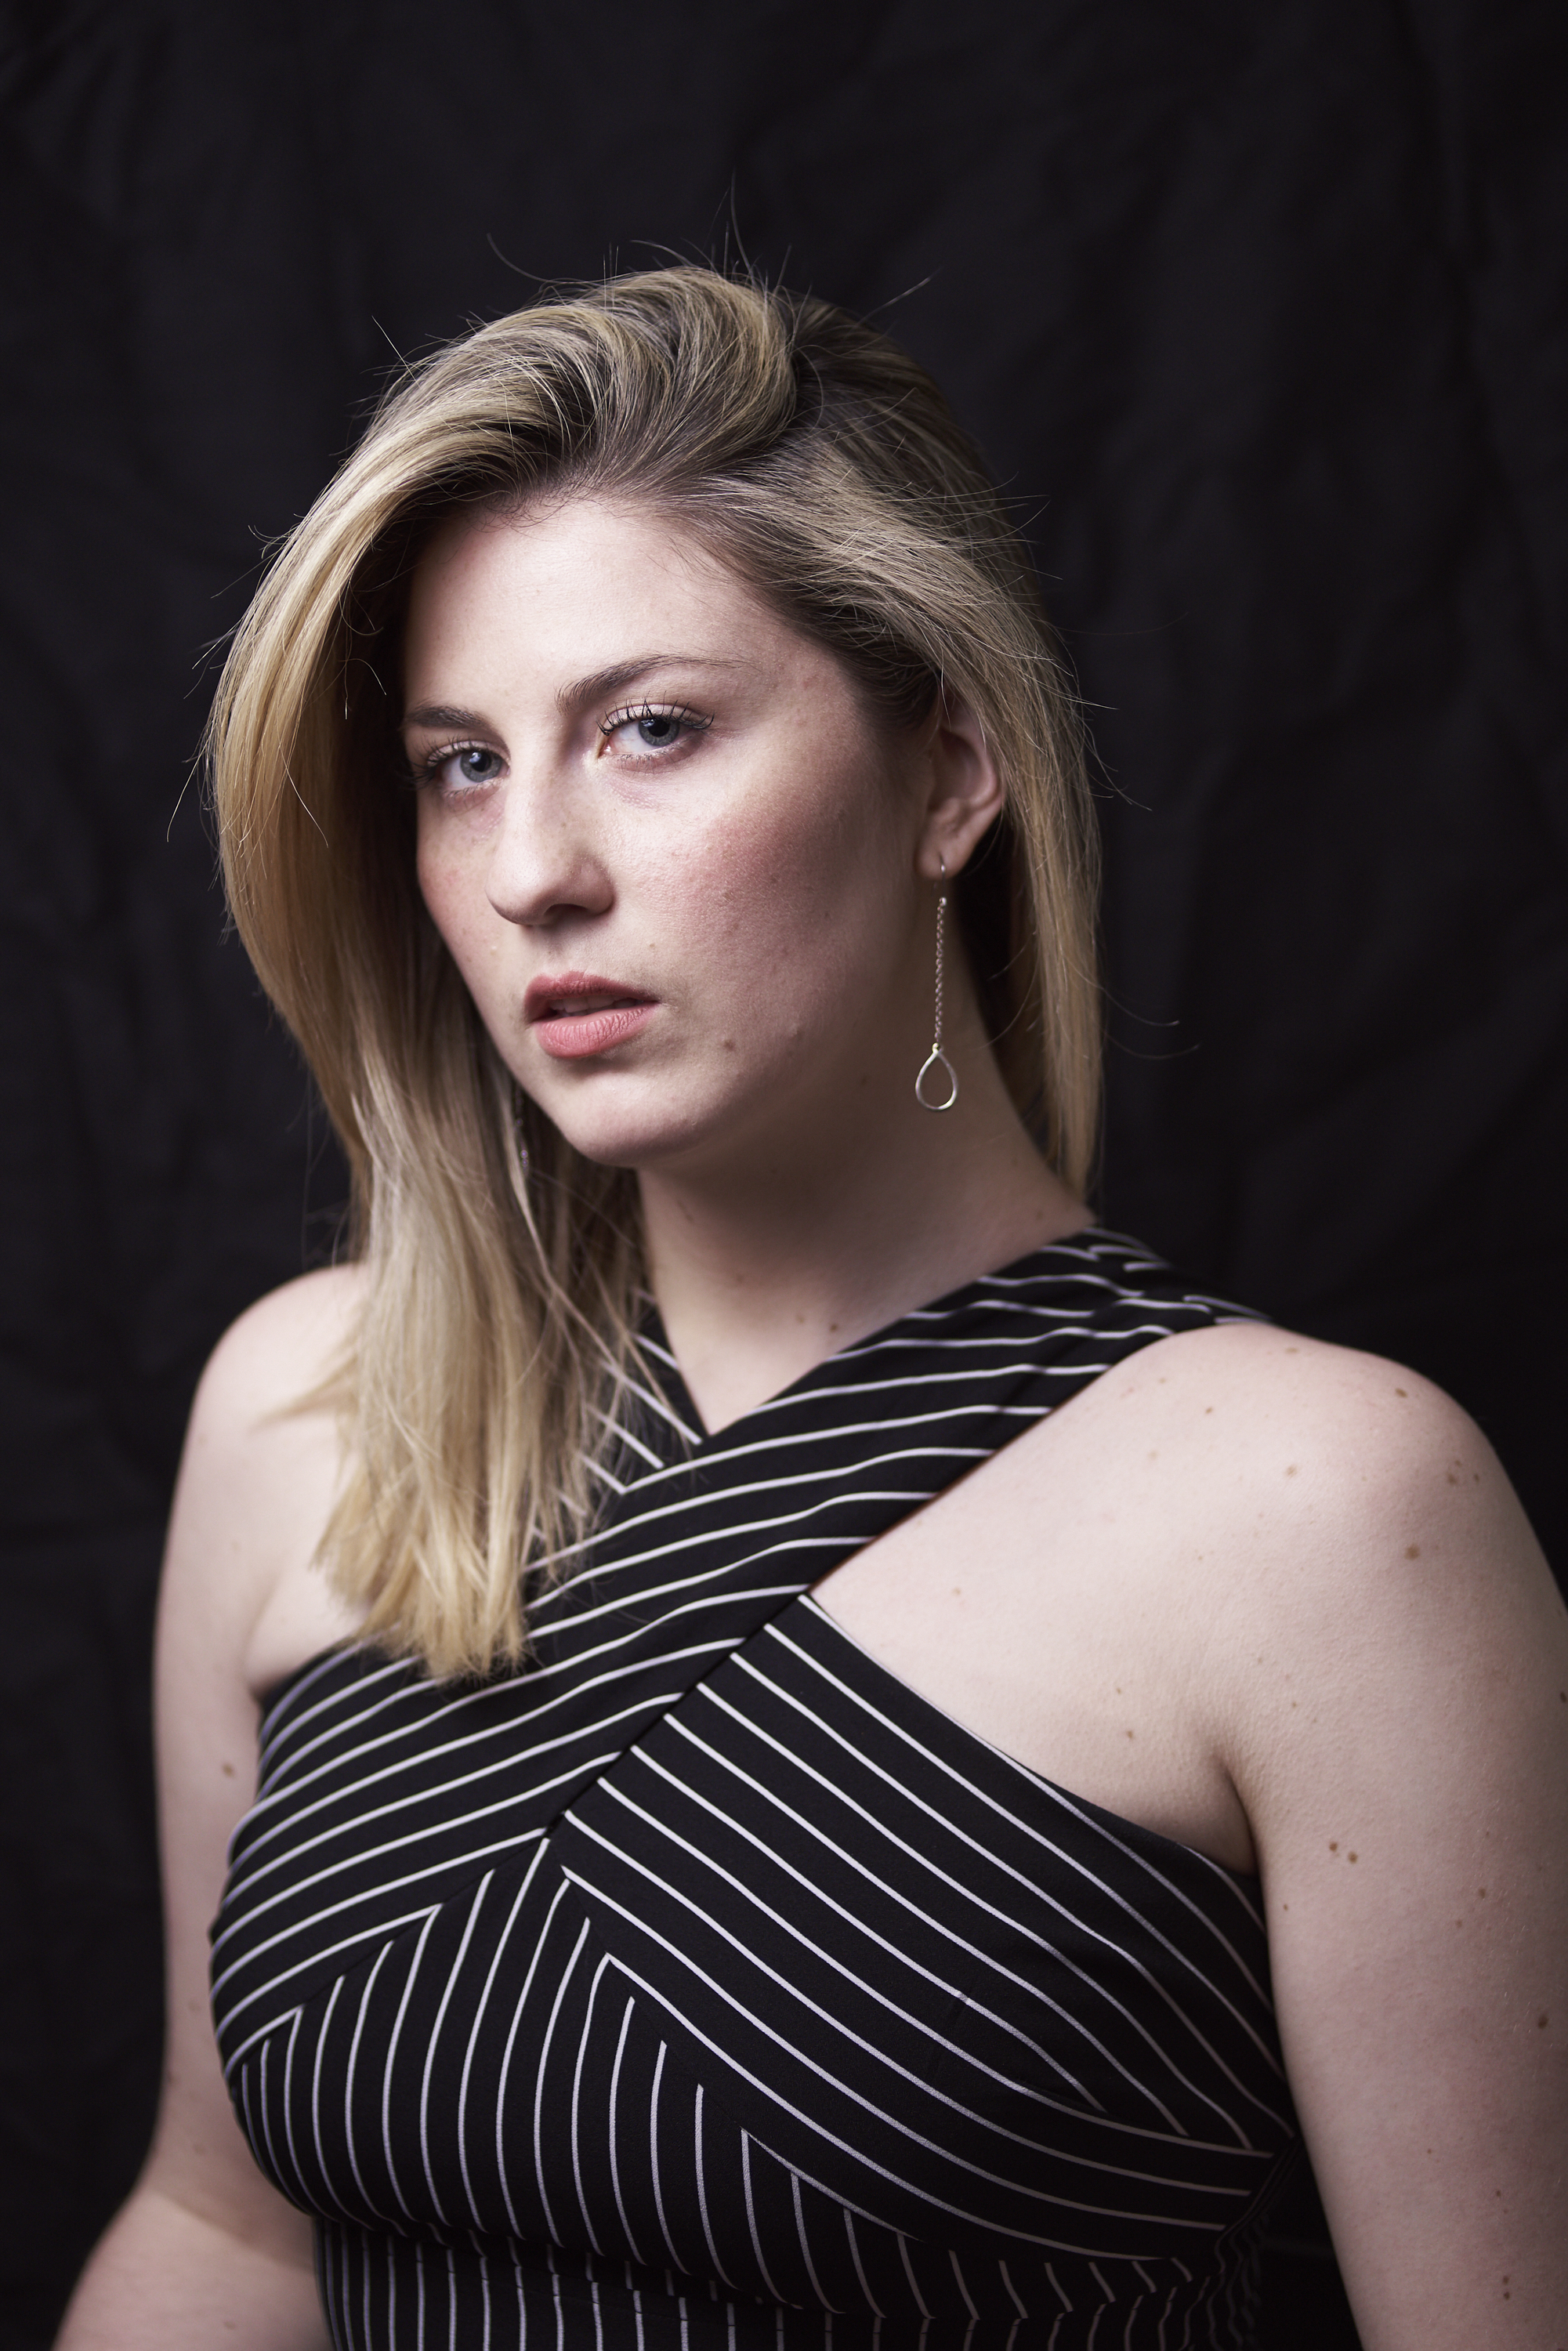
Pro Tip: Look at how large my nose looks in the image above because I wasn’t posed correctly.
Your lighting counts big time here when it comes to creating an image where a nose doesn’t look enormous. You’ll need to use a technique called wrap-around lighting. To do this, you need a light source that’s larger than your subject in relation to the area in your camera’s framing. The light needs to wrap around them and cover them on various sides. Think of it almost like a blanket. Of course, it’s not a literal blanket of light, but you need to make sure the light covers more than just a subject’s front.
Combine this with a few other techniques like having your subject face into the wrap-around lighting and placing it above them and facing downwards at an angle.
Give the Nose a Background
In addition to this, give the nose a background. By that, we mean to place it against the skin. Notice how in the image above and our lead image that the nose is against the cheek? That’s what you need to do. This makes the nose pop out a whole lot less and makes it look more flattering. From here, you’ve got a variety of different techniques and poses you can use. You can fold their arms, put their arms down, etc., but our focus here is the face, and it’s best to adjust this last. Don’t worry, that still means you’ve got a whole lot of posing options. Your subject’s face just needs to be a specific way.
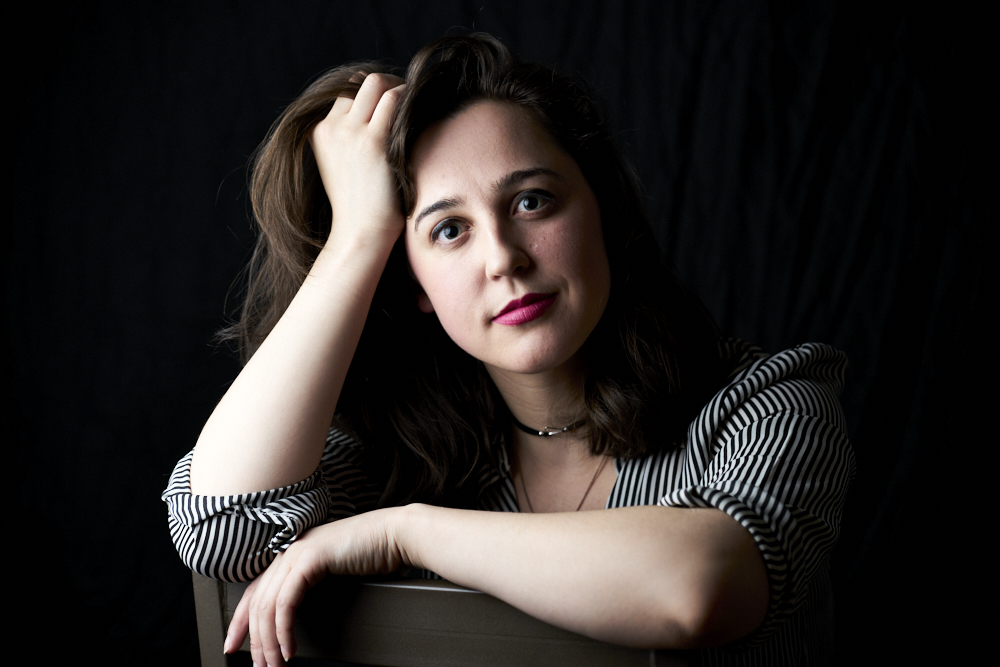
In this image, we’re displaying the exception to the rule! The workaround for this is to have multiple lights or one light and a reflector. But sometimes, if you have the light to the side in the extreme, then the shadow can create a line that makes the nose look flattering and not make anyone pay attention to it.
Eventually, you’ll learn to do this without even looking into the camera. You’ll get so used to shooting that you can think like your focal length.
What Focal Length Should You Use?
That last statement brings us to this vital question. It’s a complicated one. So because of that, we’re going to be conservative here. You may not agree, and that’s fine. But we’re not taking any risks when it comes to giving you advice:
- A proper 85mm and longer lens. Not an 85mm lens rendering. A proper 85mm.
- 90mm works fine
- 120mm works fine
- 135mm is ideal in many ways
- 105mm is excellent too!
Want more Photography Cheat Sheets? Click here!
Get rid of the ads!
Did you enjoy reading this article as much as we enjoyed writing it? There's a way to support us and our reporting, getting ad-free navigation and more as a bonus. Subscribe to us for less than a coffee per month —just $3.99— or take advantage of our yearly subscription with a hefty discount for only $25.- An ad-free experience
- A free mystery box for Lightroom or Capture One
- All the books in our store
- 20% discount on Capture One
- 30% discount on Imalume Photo Theft Protection
- 20% off Herbs and Kettle Tea Company.
- 20% off your order from MPIX printing services.
- 5% off Viltrox Products via their eCommerce store.
- 10% off all film developing, printing and scanning services from Blue Moon Camera and Machine
- 15% off 7Artisans products: The lens and accessory maker is offering a sweet discount for Phoblographer's readers.