
Today’s photography cheat sheet is inspired by a few things Steve McCurry and other portrait shooters do.
We’re getting a bit technical today when it comes to portraiture. While we’ve seen lots of beautiful portrait photos, there are a few rules that anyone can use to make their portraits more effective. It starts with you as a photographer; you need to be more than just the person who shows up and presses the shutter. You need to be involved in the lighting, the wardrobe, the location selection, etc. It’s all essential when it comes to shooting a portrait. So, if you’re an aspiring portrait photographer or you’re trying to figure out how to be even better, then try this. Below is our latest photography cheat sheet, and we encourage you to read on!
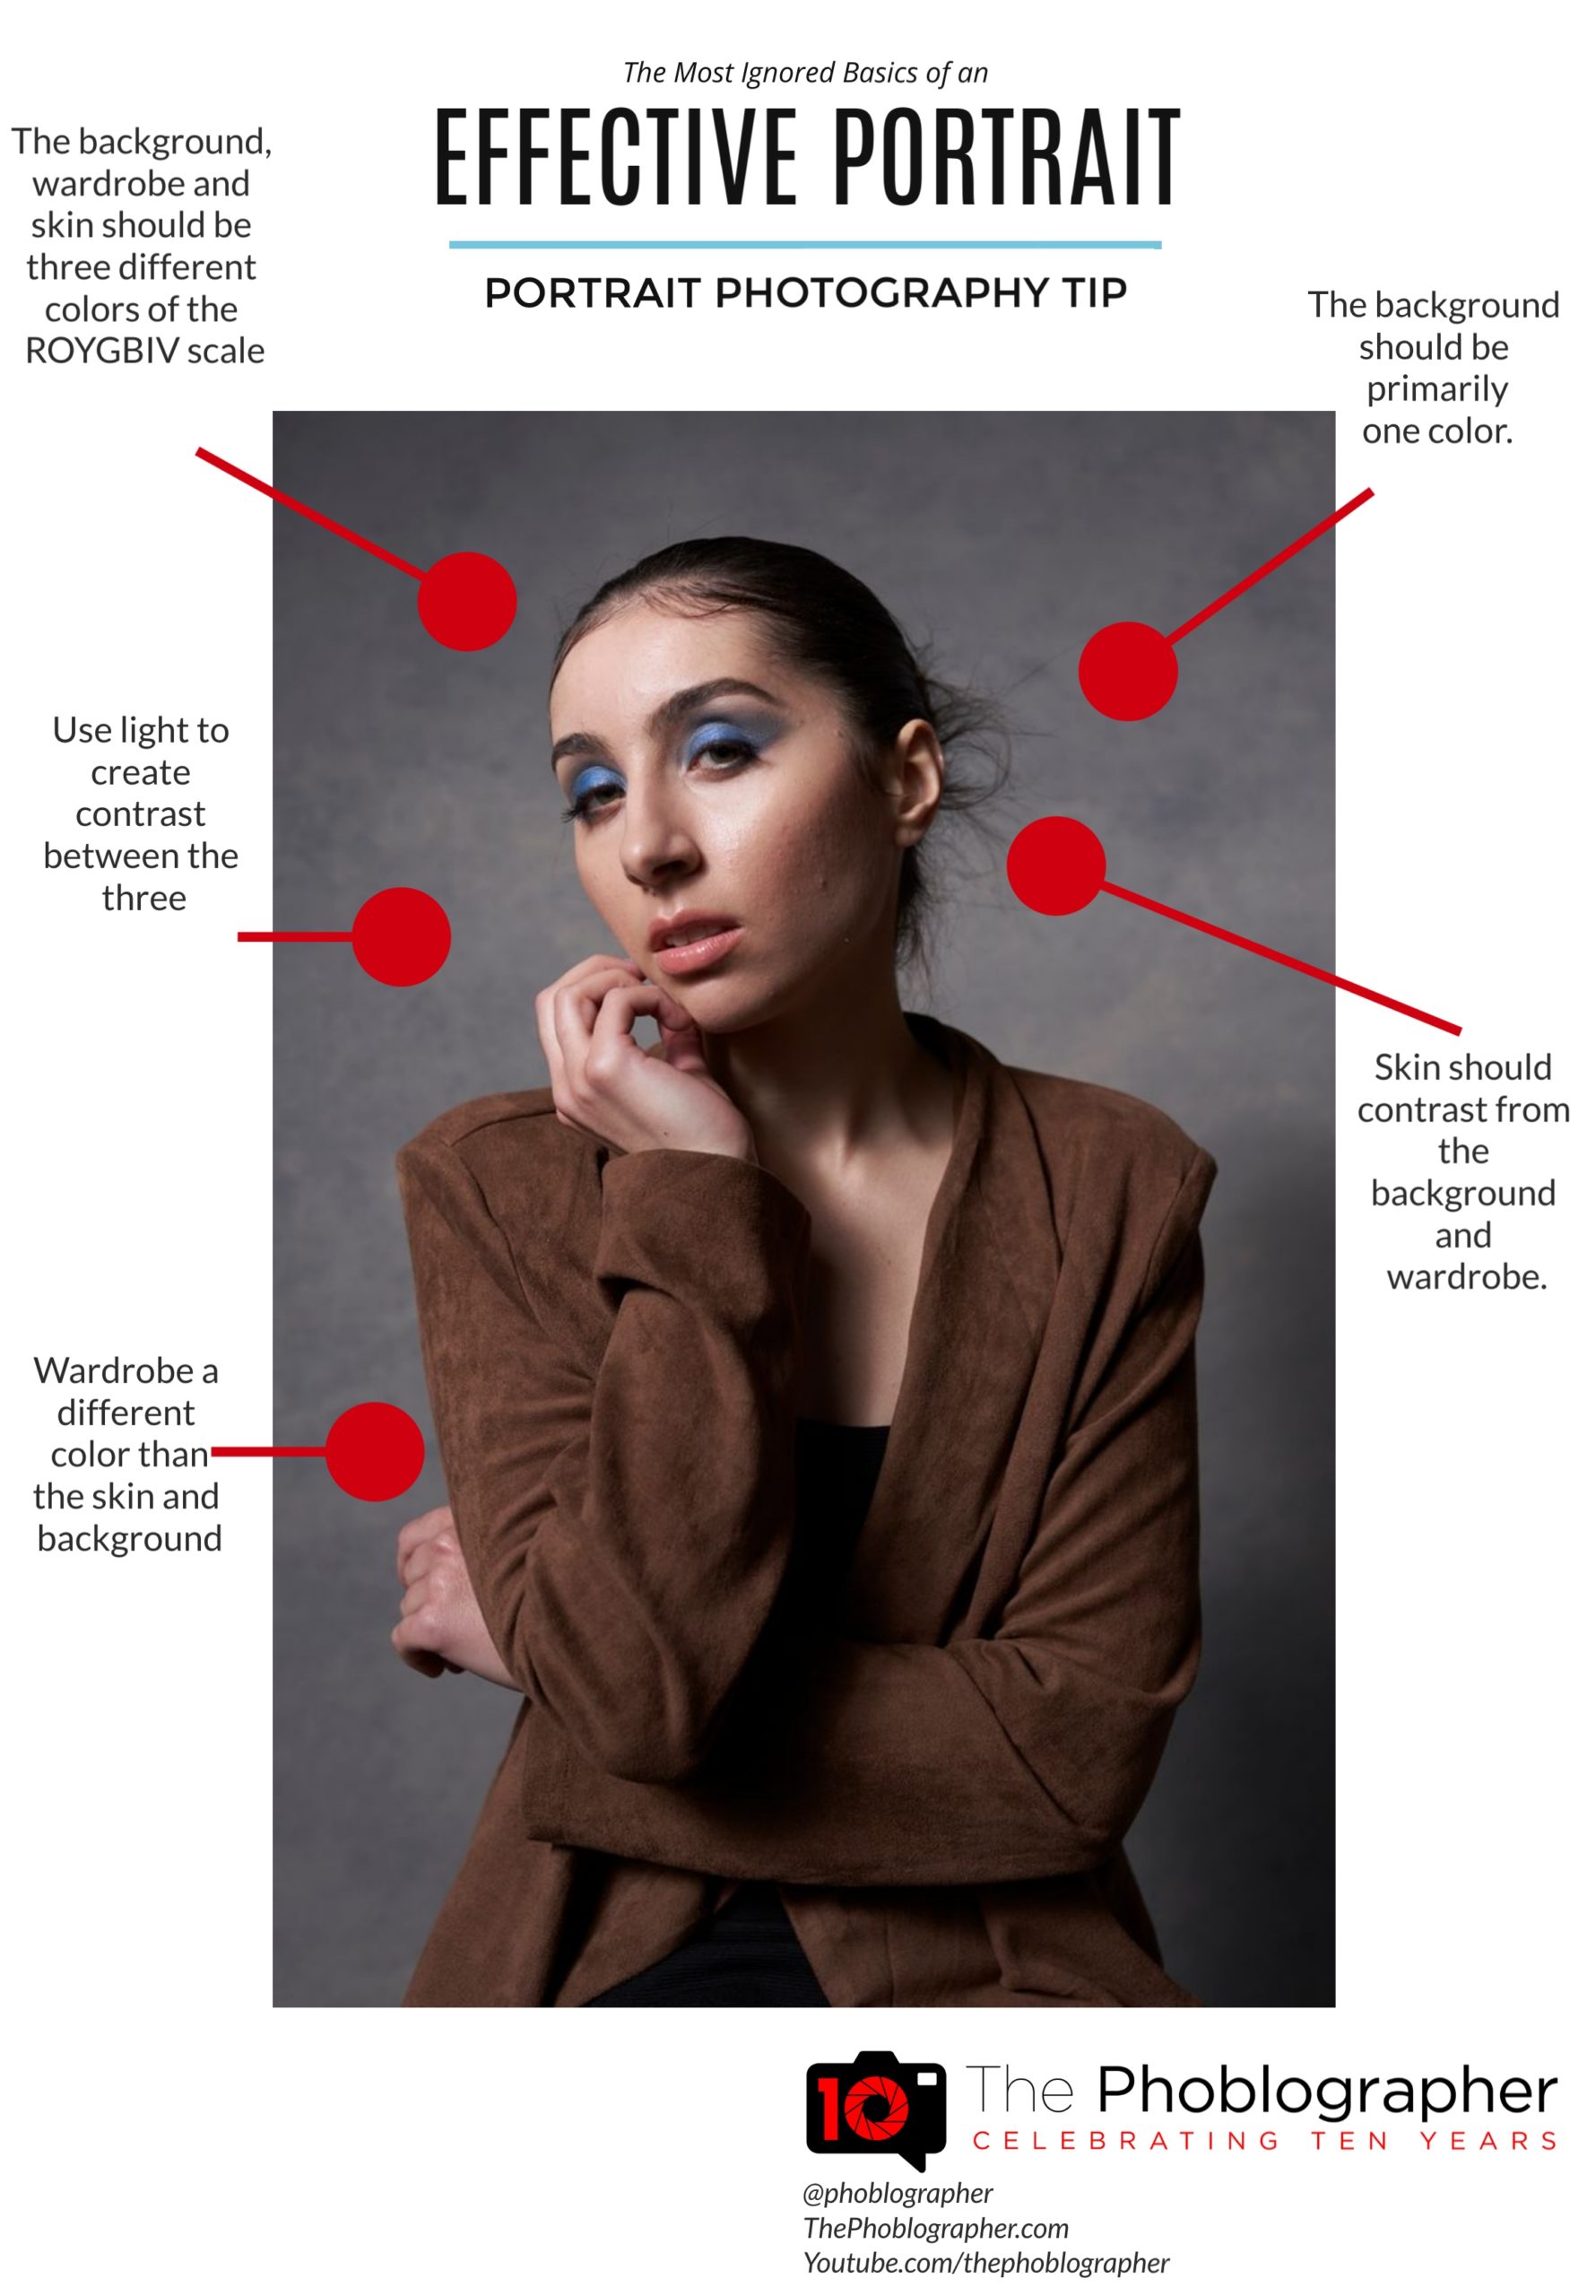
The Colors and the Contrast Between Them

The colors and the contrast in the scene should be stark. Ideally, you won’t have green on top of green, on top of green. That will just make lighting and editing a nightmare. Realistically, that won’t be the case in most situations too. The way this works is by looking at the ROYGBIV scale. That stands for:
- Red
- Orange
- Yellow
- Green
- Blue
- Indigo
- Violet
In my experience of shooting folks of every race, everyone is rendered by cameras in the orange and red channels. Those are typically associated with the skin. You need to find a color that contrasts with the skin. You’ve got five other colors or so to pick from. Once you’ve gotten that, figure out the background. A person shot against a red brick background will inevitably be affected by the red light that will reflect off of the background. If it’s your intention to get that effect, cool: move forward. But chances are it’s not. Lastly, you need to separate the person from the background. That’s typically done using lighting, wardrobe, and depth of field.
Your Lighting Controls All of This
Your lighting adds contrast to the scene. The size, shape, and power of it will affect how the colors are rendered by your camera at a given exposure. So you need to blast the scene with light. The direction will also play a pretty pivotal role here. IF you’re using ambient/natural light, then be very selective. This is why we like creating our own light because we have more control over when and where we can shoot. Strobe is still our preference even though LED lights have been improving a lot over the years. They’re still not giving the same punch as a flash with the effects of flash duration. Also, keep in mind that the larger the light source is in relation to your subject, the softer the light will be. Sometimes you need a harder light to really add definition to a scene, but not everyone looks good with harsher light. So you need to try this out yourself.
Start Here, Then Get Better
This is a starting guide. You could be brand new to this, or an experienced portrait shooter already and just haven’t seen anything like this before. We encourage you to try it. You will see that your portraits will become much more effective. Combine this with fresh ideas, and you’ll have pictures that you’ll be proud to include in your portfolio.
For more photography cheat sheets, be sure to check out our entire database.
Get rid of the ads!
Did you enjoy reading this article as much as we enjoyed writing it? There's a way to support us and our reporting, getting ad-free navigation and more as a bonus. Subscribe to us for less than a coffee per month —just $3.99— or take advantage of our yearly subscription with a hefty discount for only $25.- An ad-free experience
- A free mystery box for Lightroom or Capture One
- All the books in our store
- 20% discount on Capture One
- 30% discount on Imalume Photo Theft Protection
- 20% off Herbs and Kettle Tea Company.
- 20% off your order from MPIX printing services.
- 5% off Viltrox Products via their eCommerce store.
- 10% off all film developing, printing and scanning services from Blue Moon Camera and Machine
- 15% off 7Artisans products: The lens and accessory maker is offering a sweet discount for Phoblographer's readers.