
Last Updated on 01/01/2020 by Mark Beckenbach
To understand zone focusing, a photographer needs to understand how cameras and lenses work.
If you look at a number of tutorials on zone focusing, you’ll see lots of the same things about how to do it. Understanding the reasoning behind it all is much different. Zone focusing was used for many years, before autofocus was invented, to help a number of photographers capture iconic images that still influence photographers today. It also aided with the creation of some very famous portraits. And with autofocus being the primary use case for many current lenses and cameras, the practice of zone focusing now belongs to a niche culture of photographers. Arguably, it can be much faster than autofocus in the hands of a skilled photographer. Best of all, it’s usually very reliable.
“F8 and be there!” – Weegee
Who Uses Zone Focusing?
Zone focusing is used by a number of primary disciplines within photography:
- Landscape photographers
- Street photographers
- Documentary photographers
In the case of the latter two, many of these photographers use Leica cameras or manual focus lenses adapted to options including their Sony and Fujifilm cameras. For landscape photography, zone focus serves a similar purpose. When starting out, many photographers will simply stop their lens down all the way and focus out to infinity. That’s the wrong way of doing it, and even then you’re bound to not get everything sharply in focus. Instead, it’s a great idea to use a wider angle lens and stop down somewhere around f8 in full frame equivalency. Then focus to around the halfway point and let the physics of a wider angle lens do the rest. To double check that everything is in focus, we recommend using your camera’s Live View setting and magnifying to see the entire scene sharply. Focus peaking unfortunately doesn’t always accomplish this effectively.
“According to Professional Photography Tips on YouTube, a great starting point is to use Live View on your tripod mounted camera, then focus out to around 1/3rd of the way through the frame. At this point, you should use the digital zoom feature to see if you are in focus and sharp or not. They also recommend shooting at f8. But if that isn’t working then you need to make adjustments. If you’re using certain cameras and you switch to manual focus mode, your camera will give you focus peaking to help you discern whether you’re in focus or not to begin with.” – From How to Get Sharper Focus When Shooting Landscapes
Some of the photographers who zone focused often are some of the greats in photography history. Here are just a few:
- Henri Cartier Bresson
- Robert Capa
- Gordon Parks
- Weegee
- Ansel Adams
What Is Zone Focusing?
To understand zone focusing think about looking at something very far away. The first thing you do is squint your eyes in order to force your eyes to see it clearer. Zone focusing works similarly, except that the lens of your camera selectively allows things to be seen clearly. Essentially, zone focusing is the process of using a lens stopped down and focused to a certain distance. If you stop a 28mm lens down to f5.6 and focus around five feet away, a distance of maybe four to seven feet could be in focus. But if you do this with a 35mm lens, less of the scene will be in focus due to the longer focal length. The longer the focal length, the less of the scene will be in focus at a given aperture and distance.
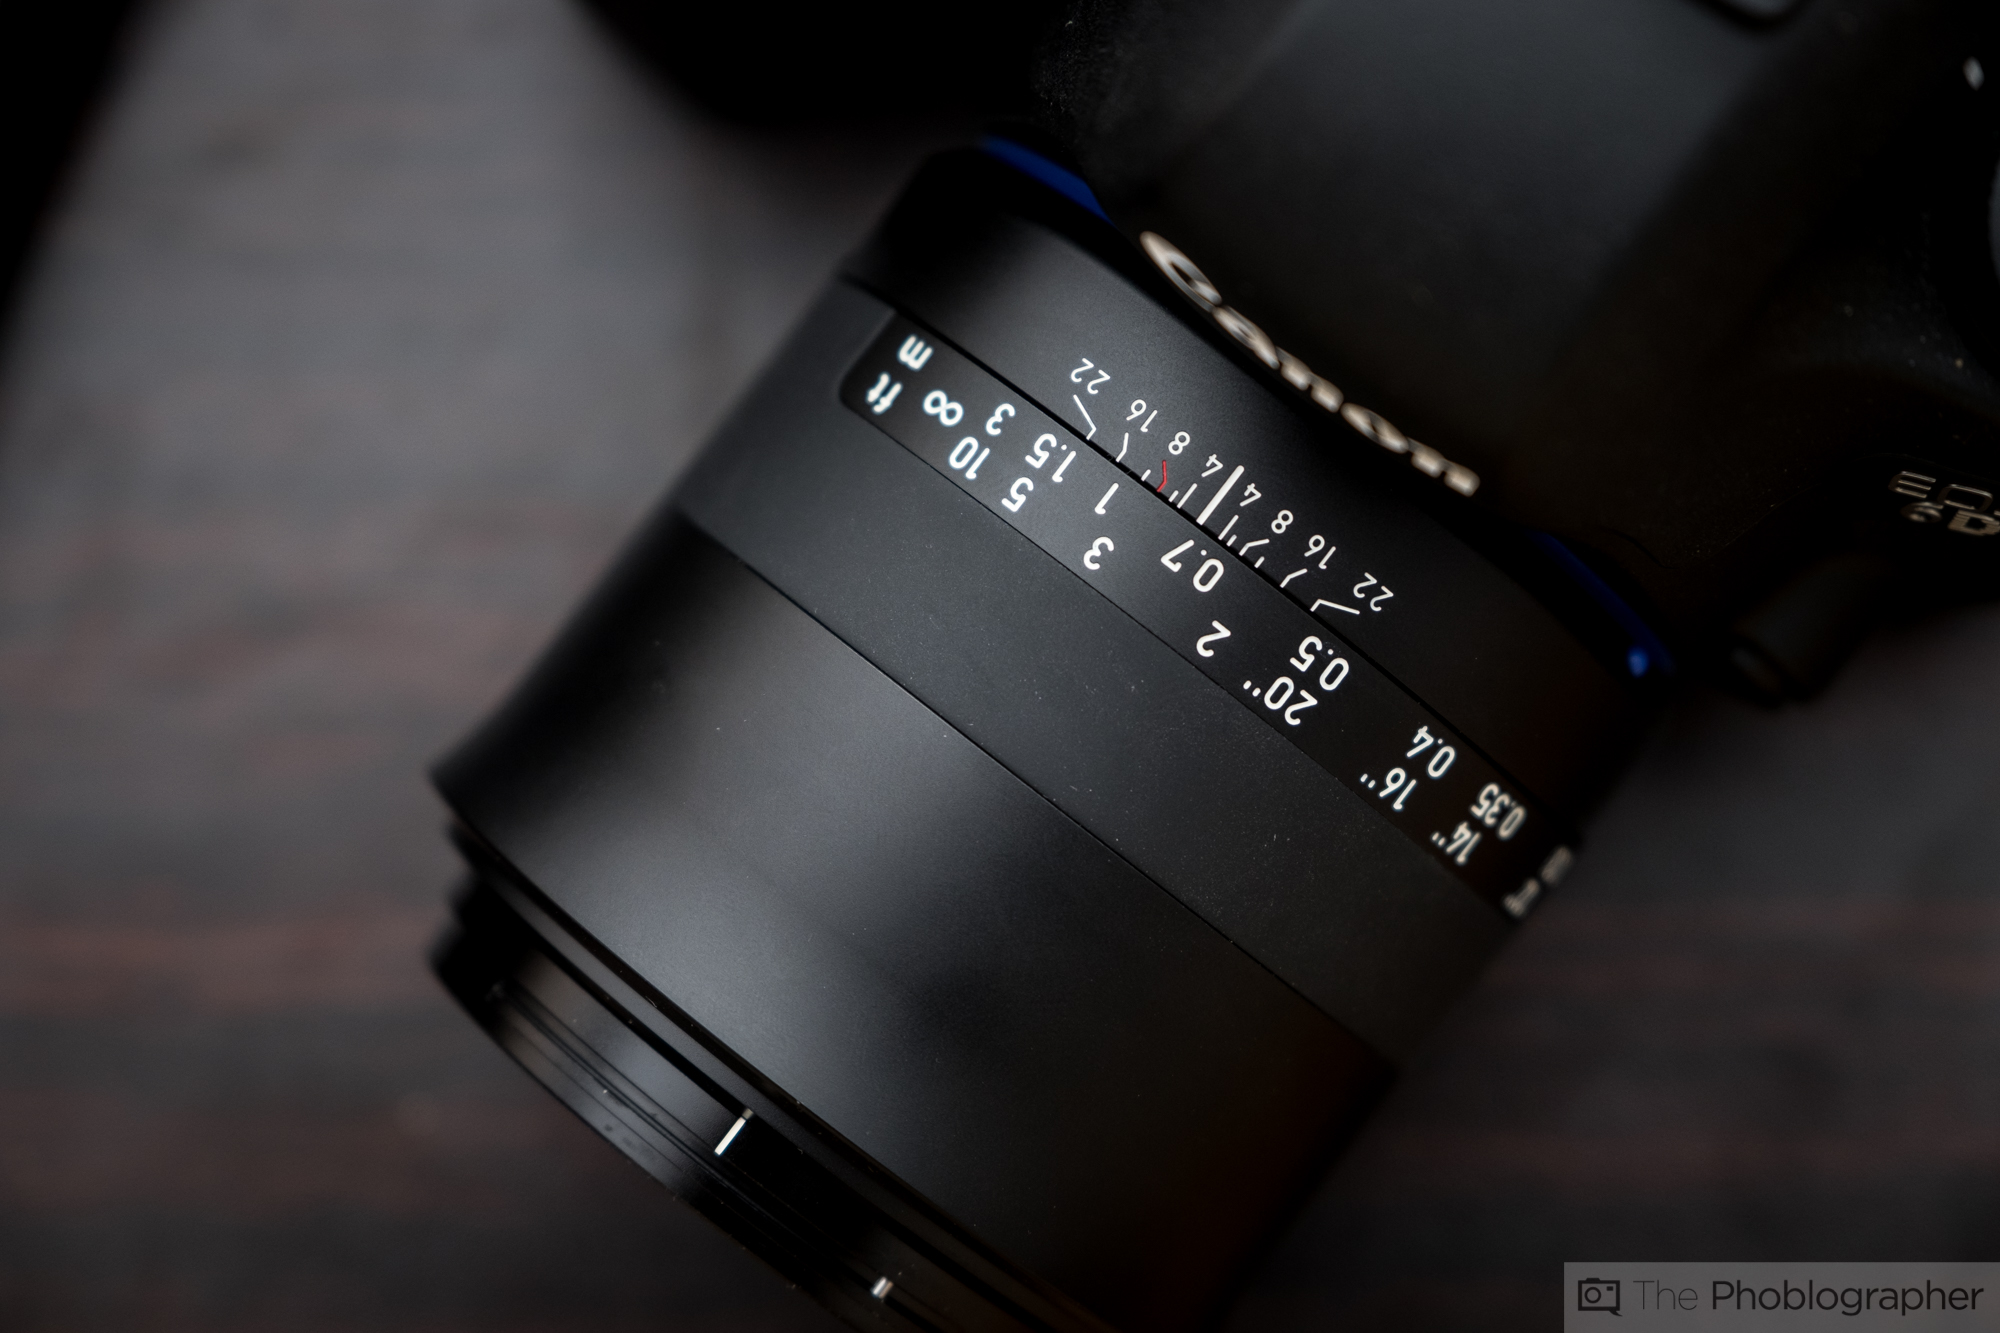
“Basically what you do is focus your lens to a set distance, let’s say you’re focused to around 2.5 feet away like the image of the lens above shows us. At that distance and before f4, very little will be in focus.”
“Remember how as you stop your lens down, more and more of a scene comes into focus? Part of this is based off you the distance away that you are focused. According to the image of the lens above, as you stop down to f8, you’ll have anywhere between 2 feet and 3 three in focus.” – From How to Use Zone Focusing to Make Capturing Photographs Easier
How Do You Zone Focus a Lens?
“To avoid any potential lag and to even help with keeping the camera active and ready to use, lock the camera to using the EVF only and not at all activate the LCD screen on the back. This will mean that when the camera is resting against your body or even in your hand that the EVF will be active and ready to shoot. Couple this with making the camera go to sleep only after a prolonged period of time, maybe say 5 minutes.” – From Useful Photography Top #192: The Essential Tip For Shooting Street Photography With a Mirrorless Camera
With Manual Focus Lenses
With manual focus lenses, observe a few things on the lens:
- The apertures
- The distance scale
- The depth of field scale
The tutorial video above explains it.
With Autofocus Lenses

Autofocus lenses make zone focusing more difficult to do accurately, as they’re primarily designed for automatic focusing. To that end, these lenses are designed to have a shorter focus throw vs the longer focus throw manual focus lenses have to allow a photographer precision. As a result, the distance scale on an autofocus lens, like Sigma’s 28mm offering, really just has something along the lines of f8 there. It’s best to use this as a guide, set the lens to manual focus, and then focus away to a certain distance by reading what the lens and zone focusing scale tell you to do.
Get rid of the ads!
Did you enjoy reading this article as much as we enjoyed writing it? There's a way to support us and our reporting, getting ad-free navigation and more as a bonus. Subscribe to us for less than a coffee per month —just $3.99— or take advantage of our yearly subscription with a hefty discount for only $25.- An ad-free experience
- A free mystery box for Lightroom or Capture One
- All the books in our store
- 20% discount on Capture One
- 30% discount on Imalume Photo Theft Protection
- 20% off Herbs and Kettle Tea Company.
- 20% off your order from MPIX printing services.
- 5% off Viltrox Products via their eCommerce store.
- 10% off all film developing, printing and scanning services from Blue Moon Camera and Machine
- 15% off 7Artisans products: The lens and accessory maker is offering a sweet discount for Phoblographer's readers.