
Double exposures are so incredibly tough to do for many photographers out there, but with patience you’ll get it. Most photographers try to do it in Photoshop but it ends up just being more annoying and a hassle than it’s worth. Some cameras have it available ready for you to use. But sometimes, it’s best to just sit there and edit on your phone than sit at a computer or try to navigate your camera’s clunky interface.
So here’s how I do it.
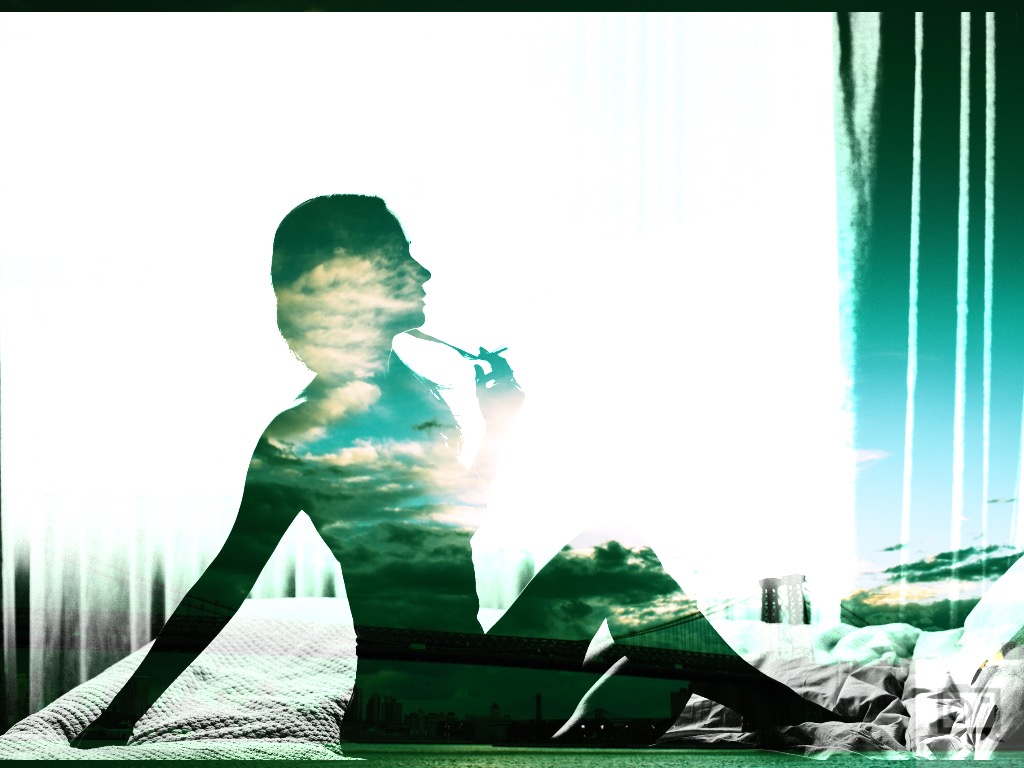
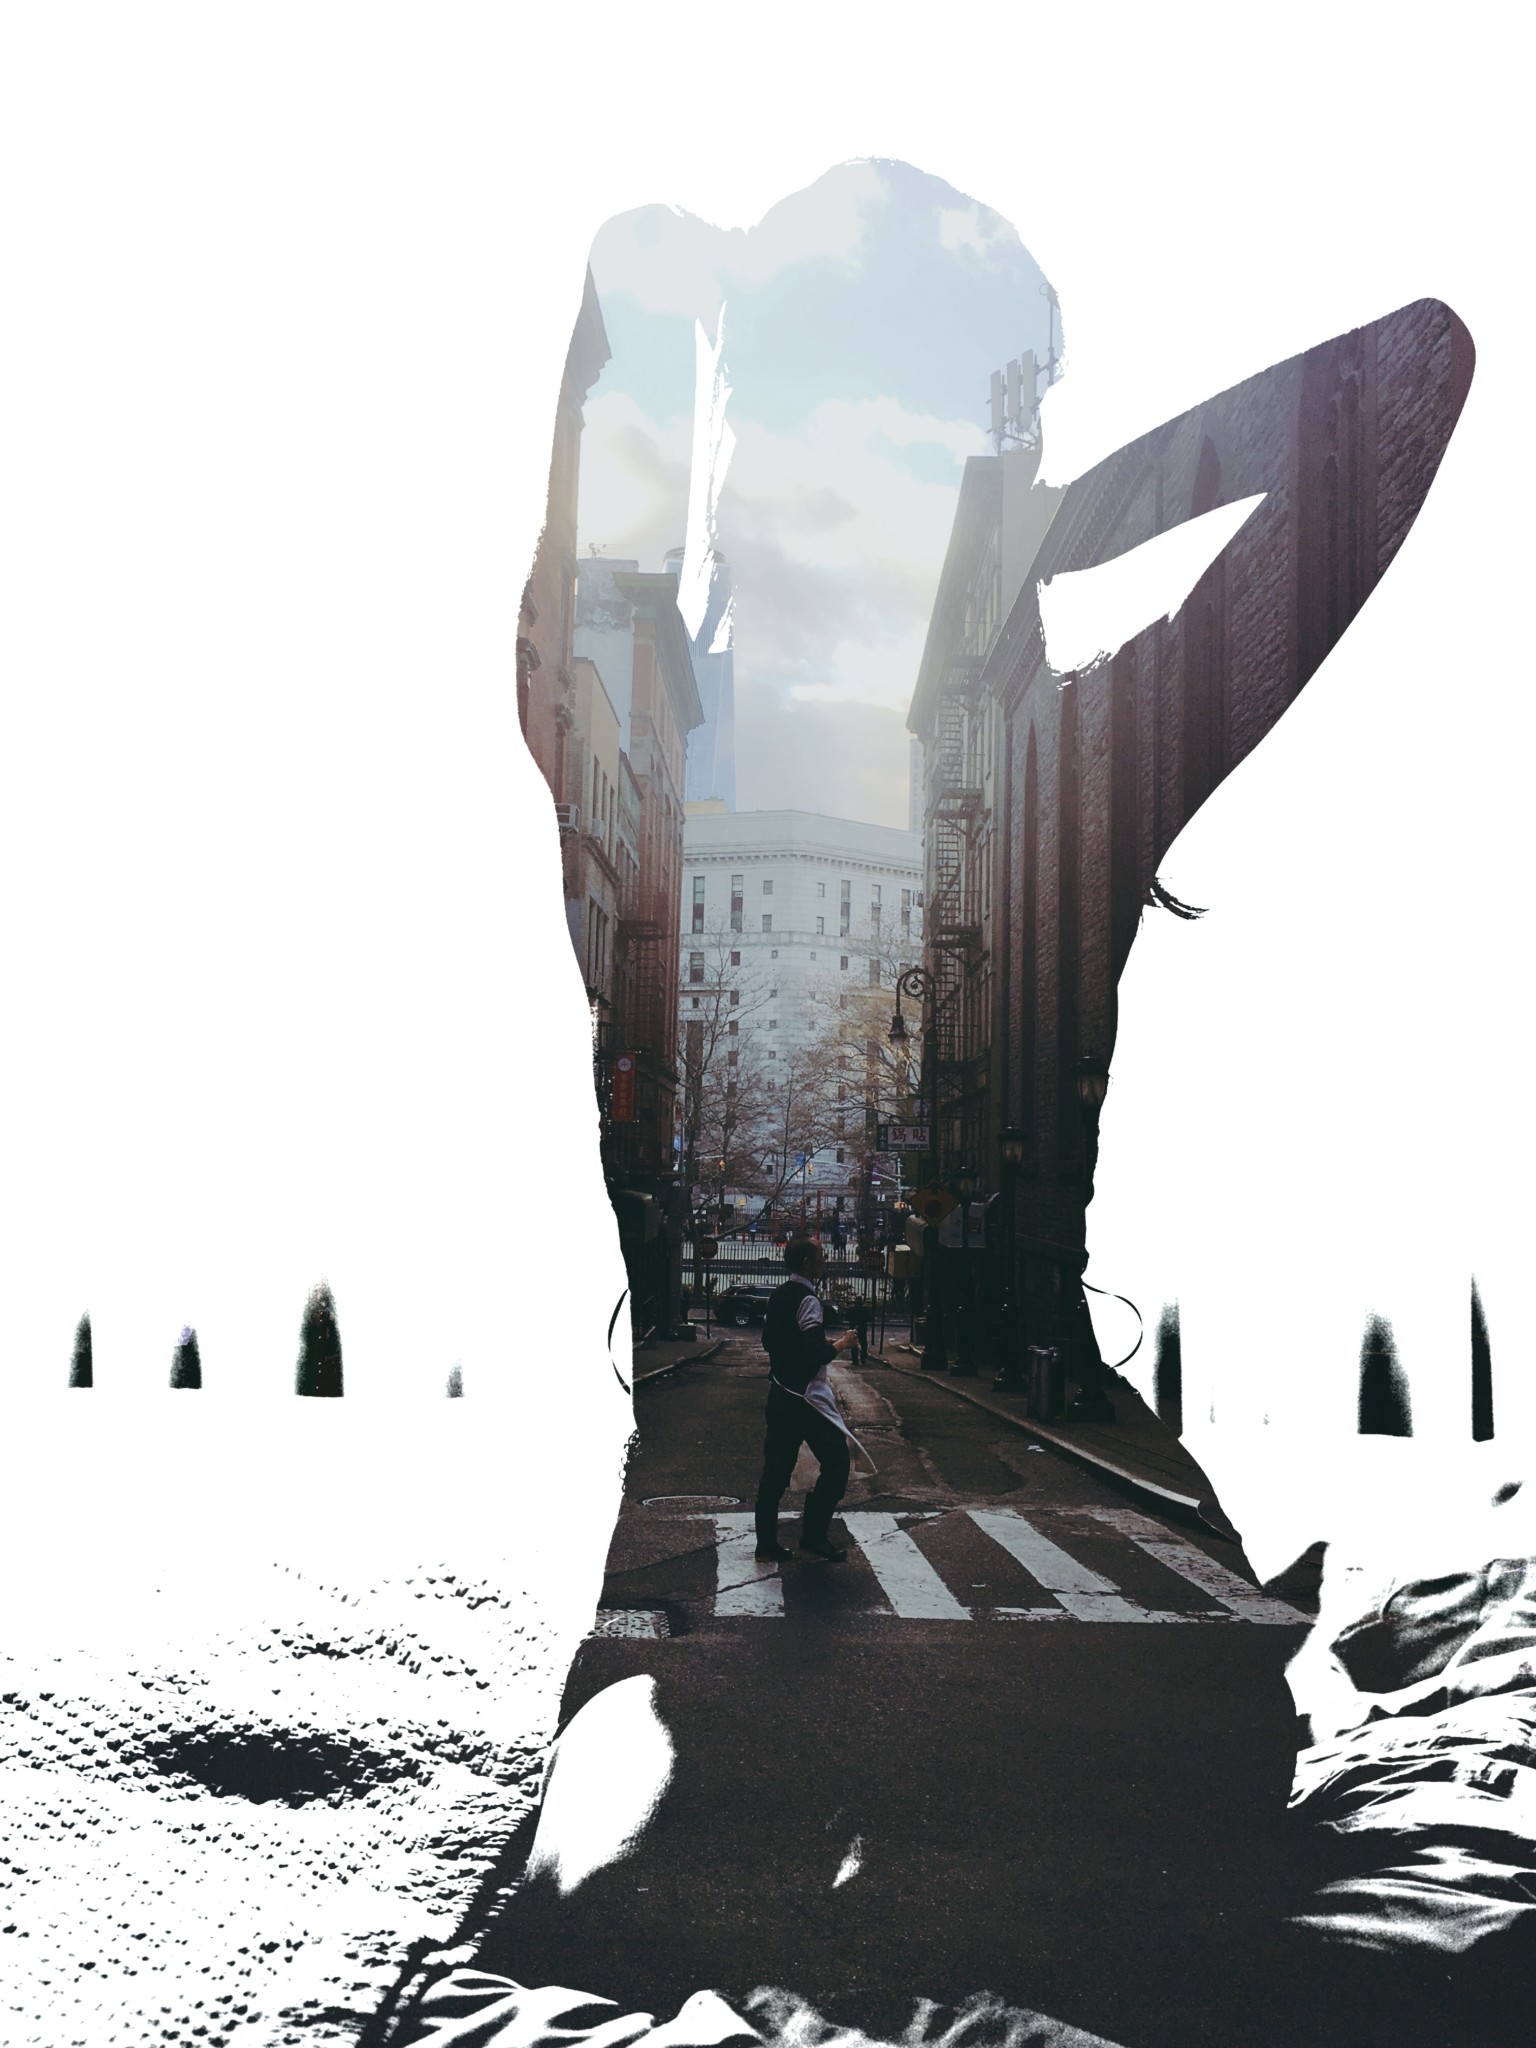
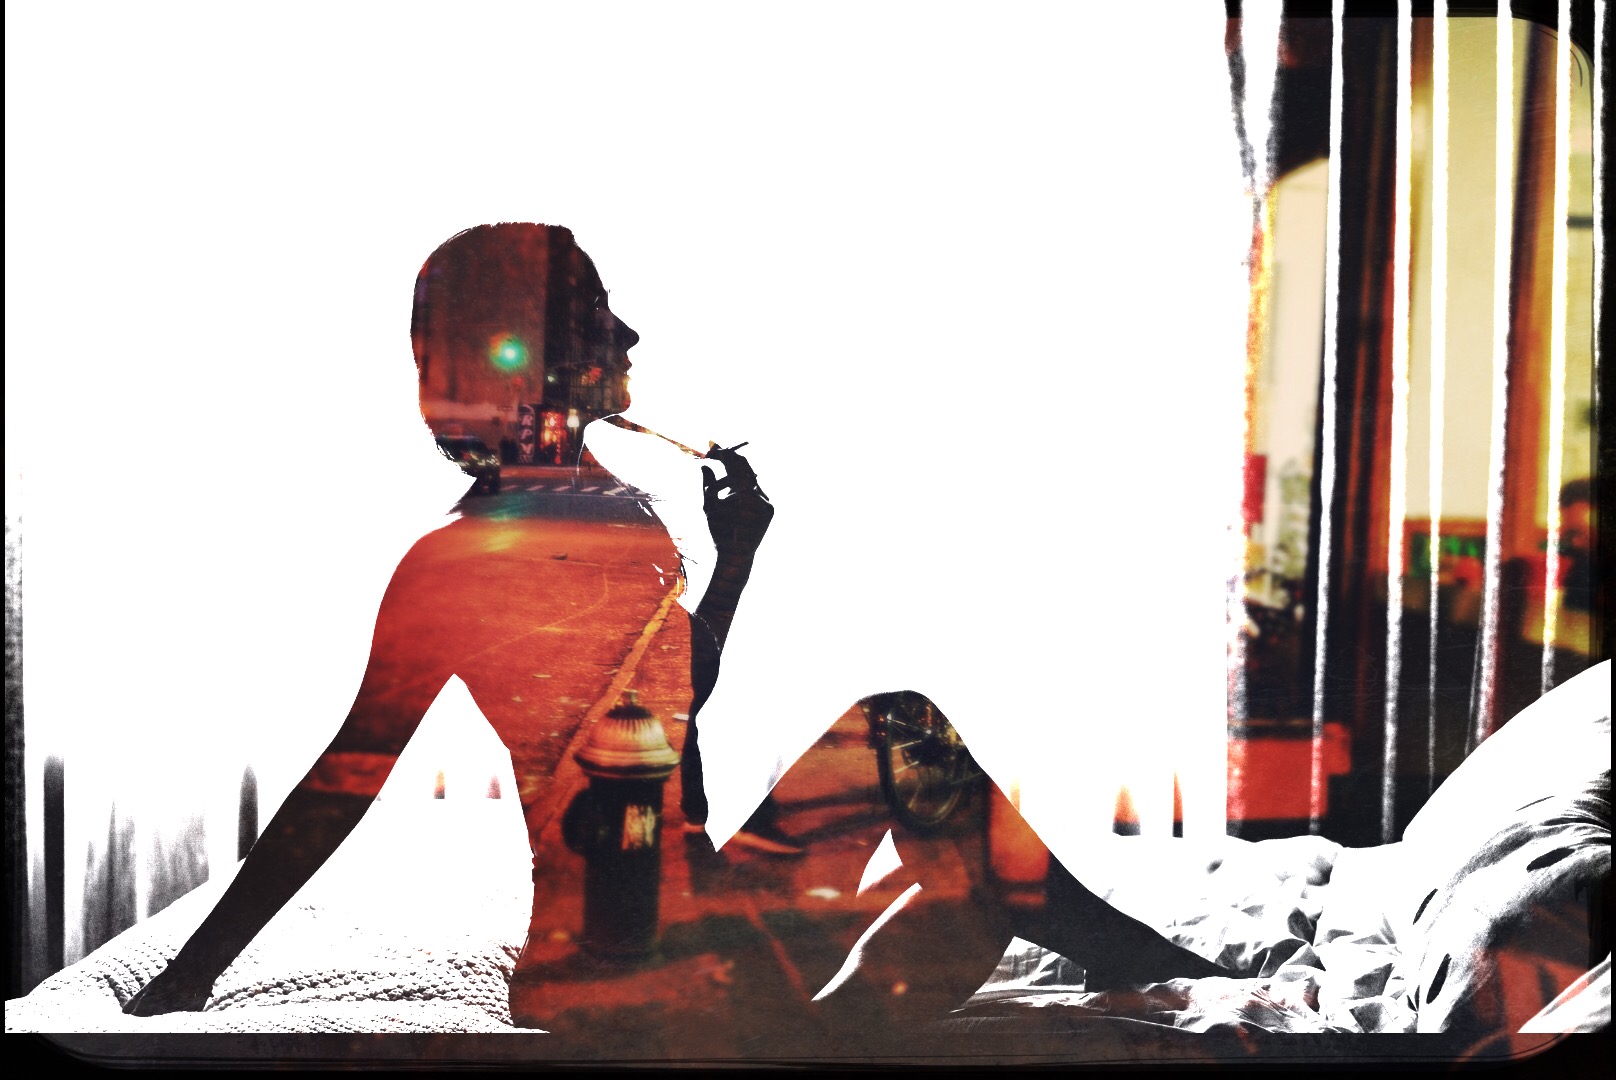
The Silhouette
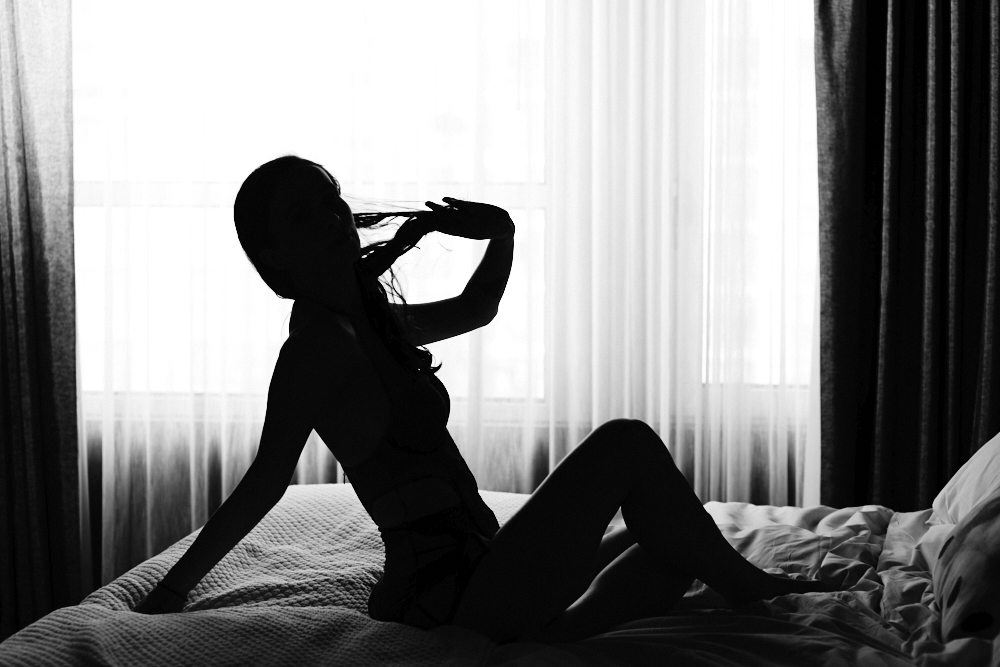
First, to really get this done you need silhouetted images. This photo wasn’t shot that way, but I converted it to that with high contrast black and white. Plus when they were being shot, it was this client’s idea to actually do this. Luckily, it worked out to my favor later on.
To create a silhouette try to maintain as bright and distraction free of a background as you can, shoot high contrast, and brighten the whites while darkening the blacks. Max it out.

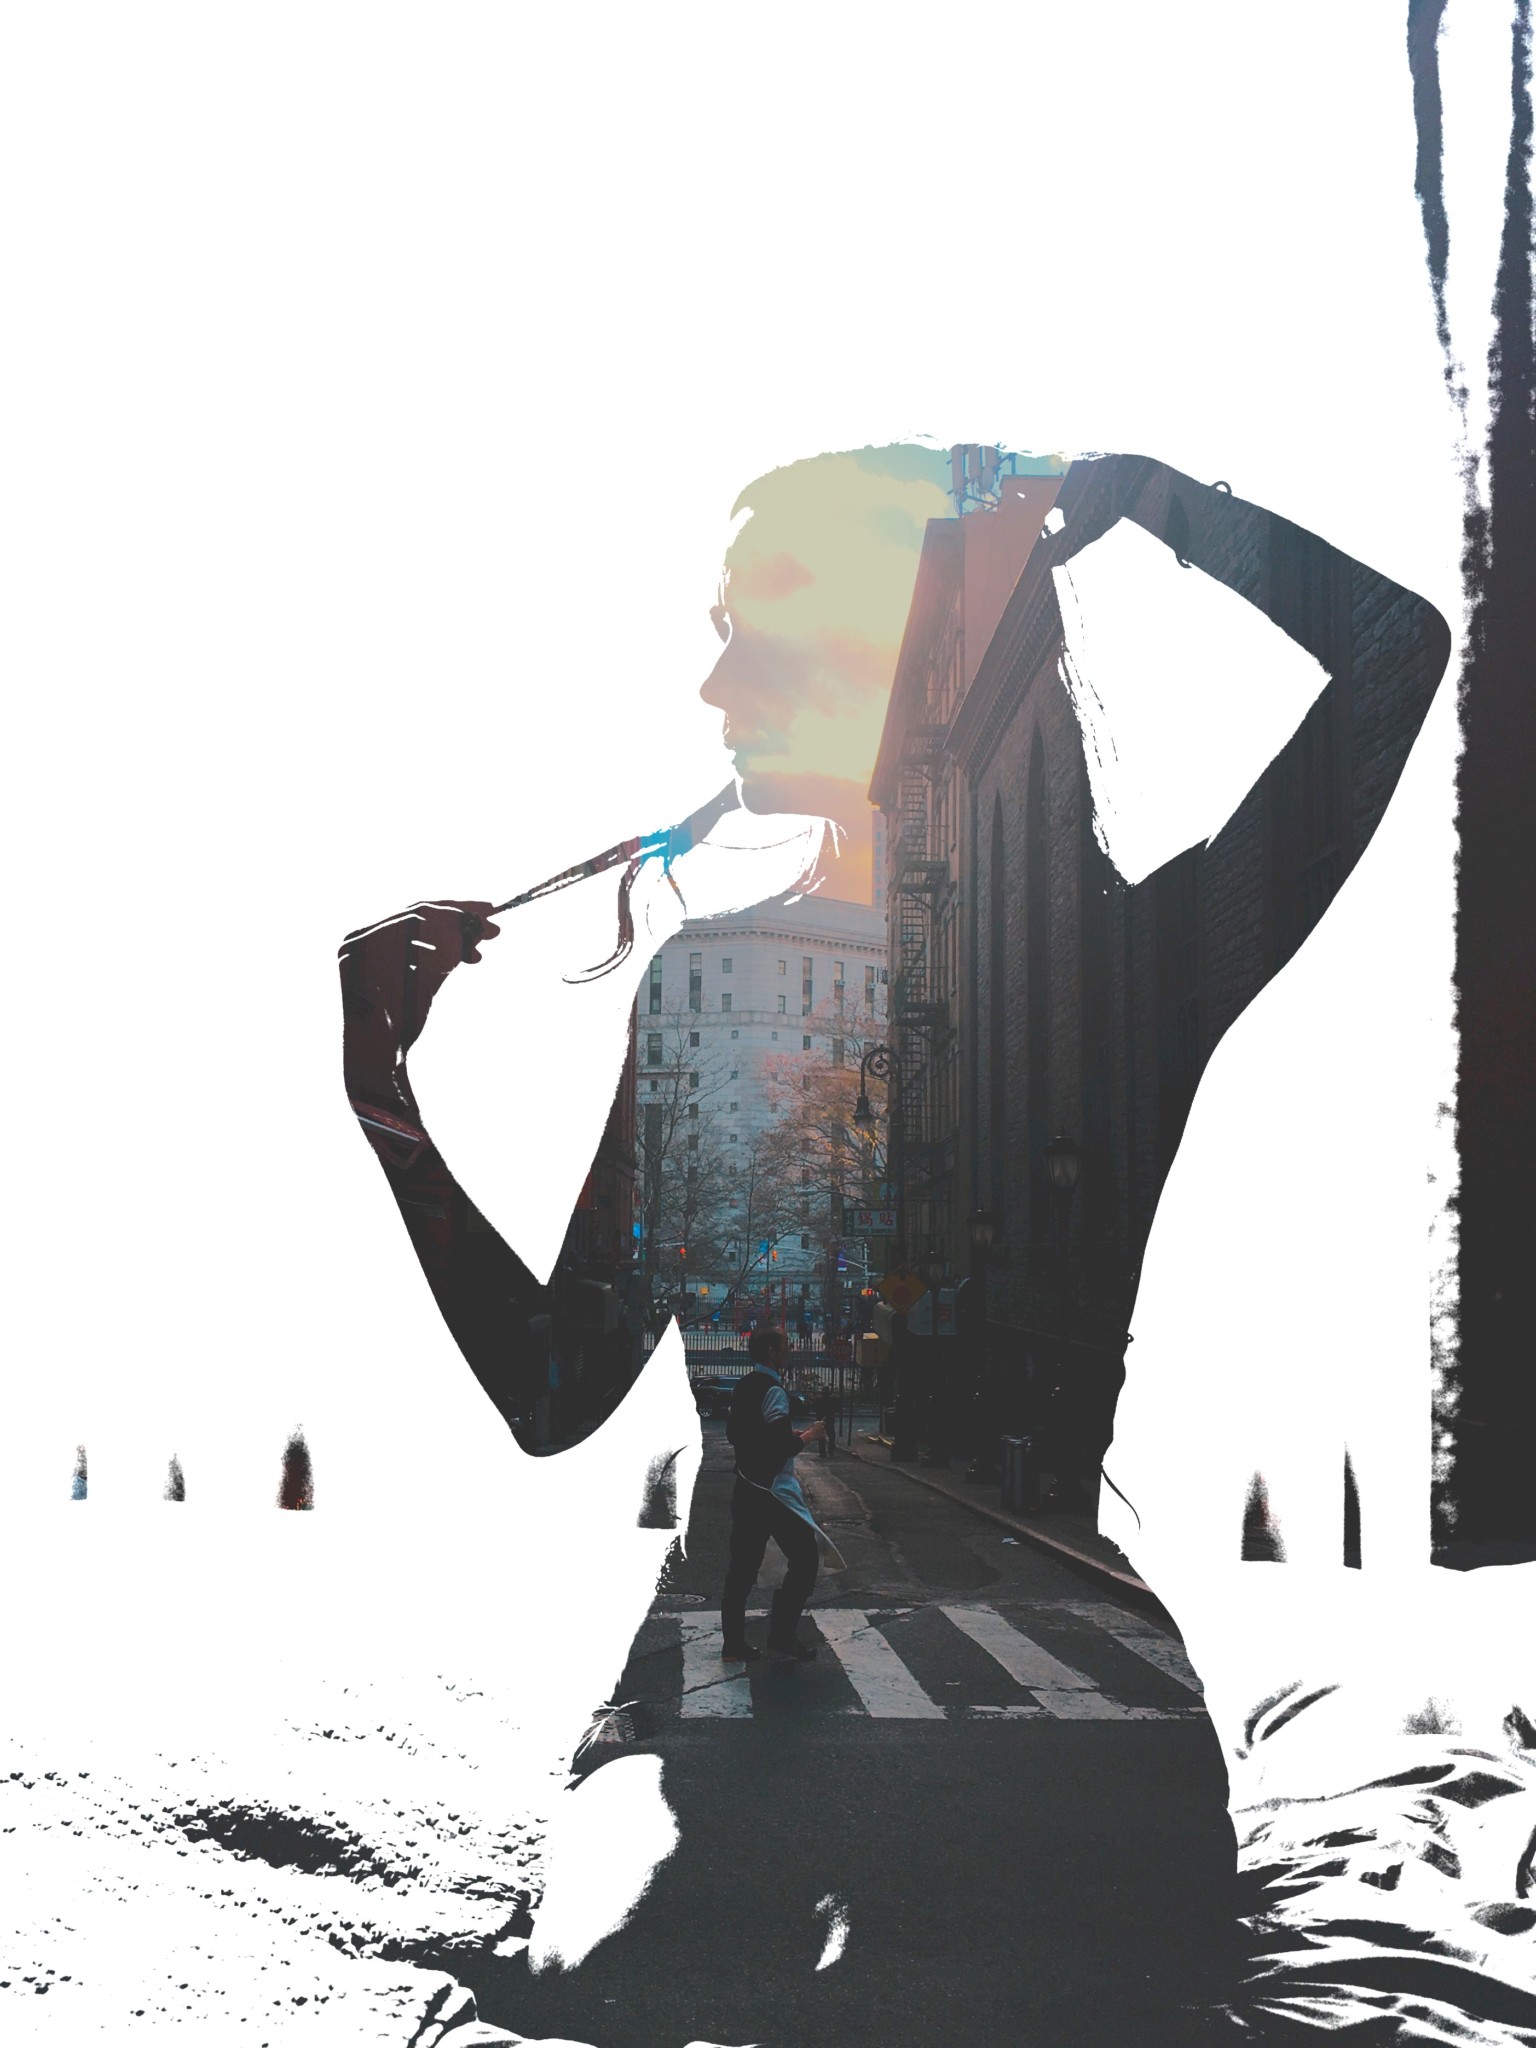
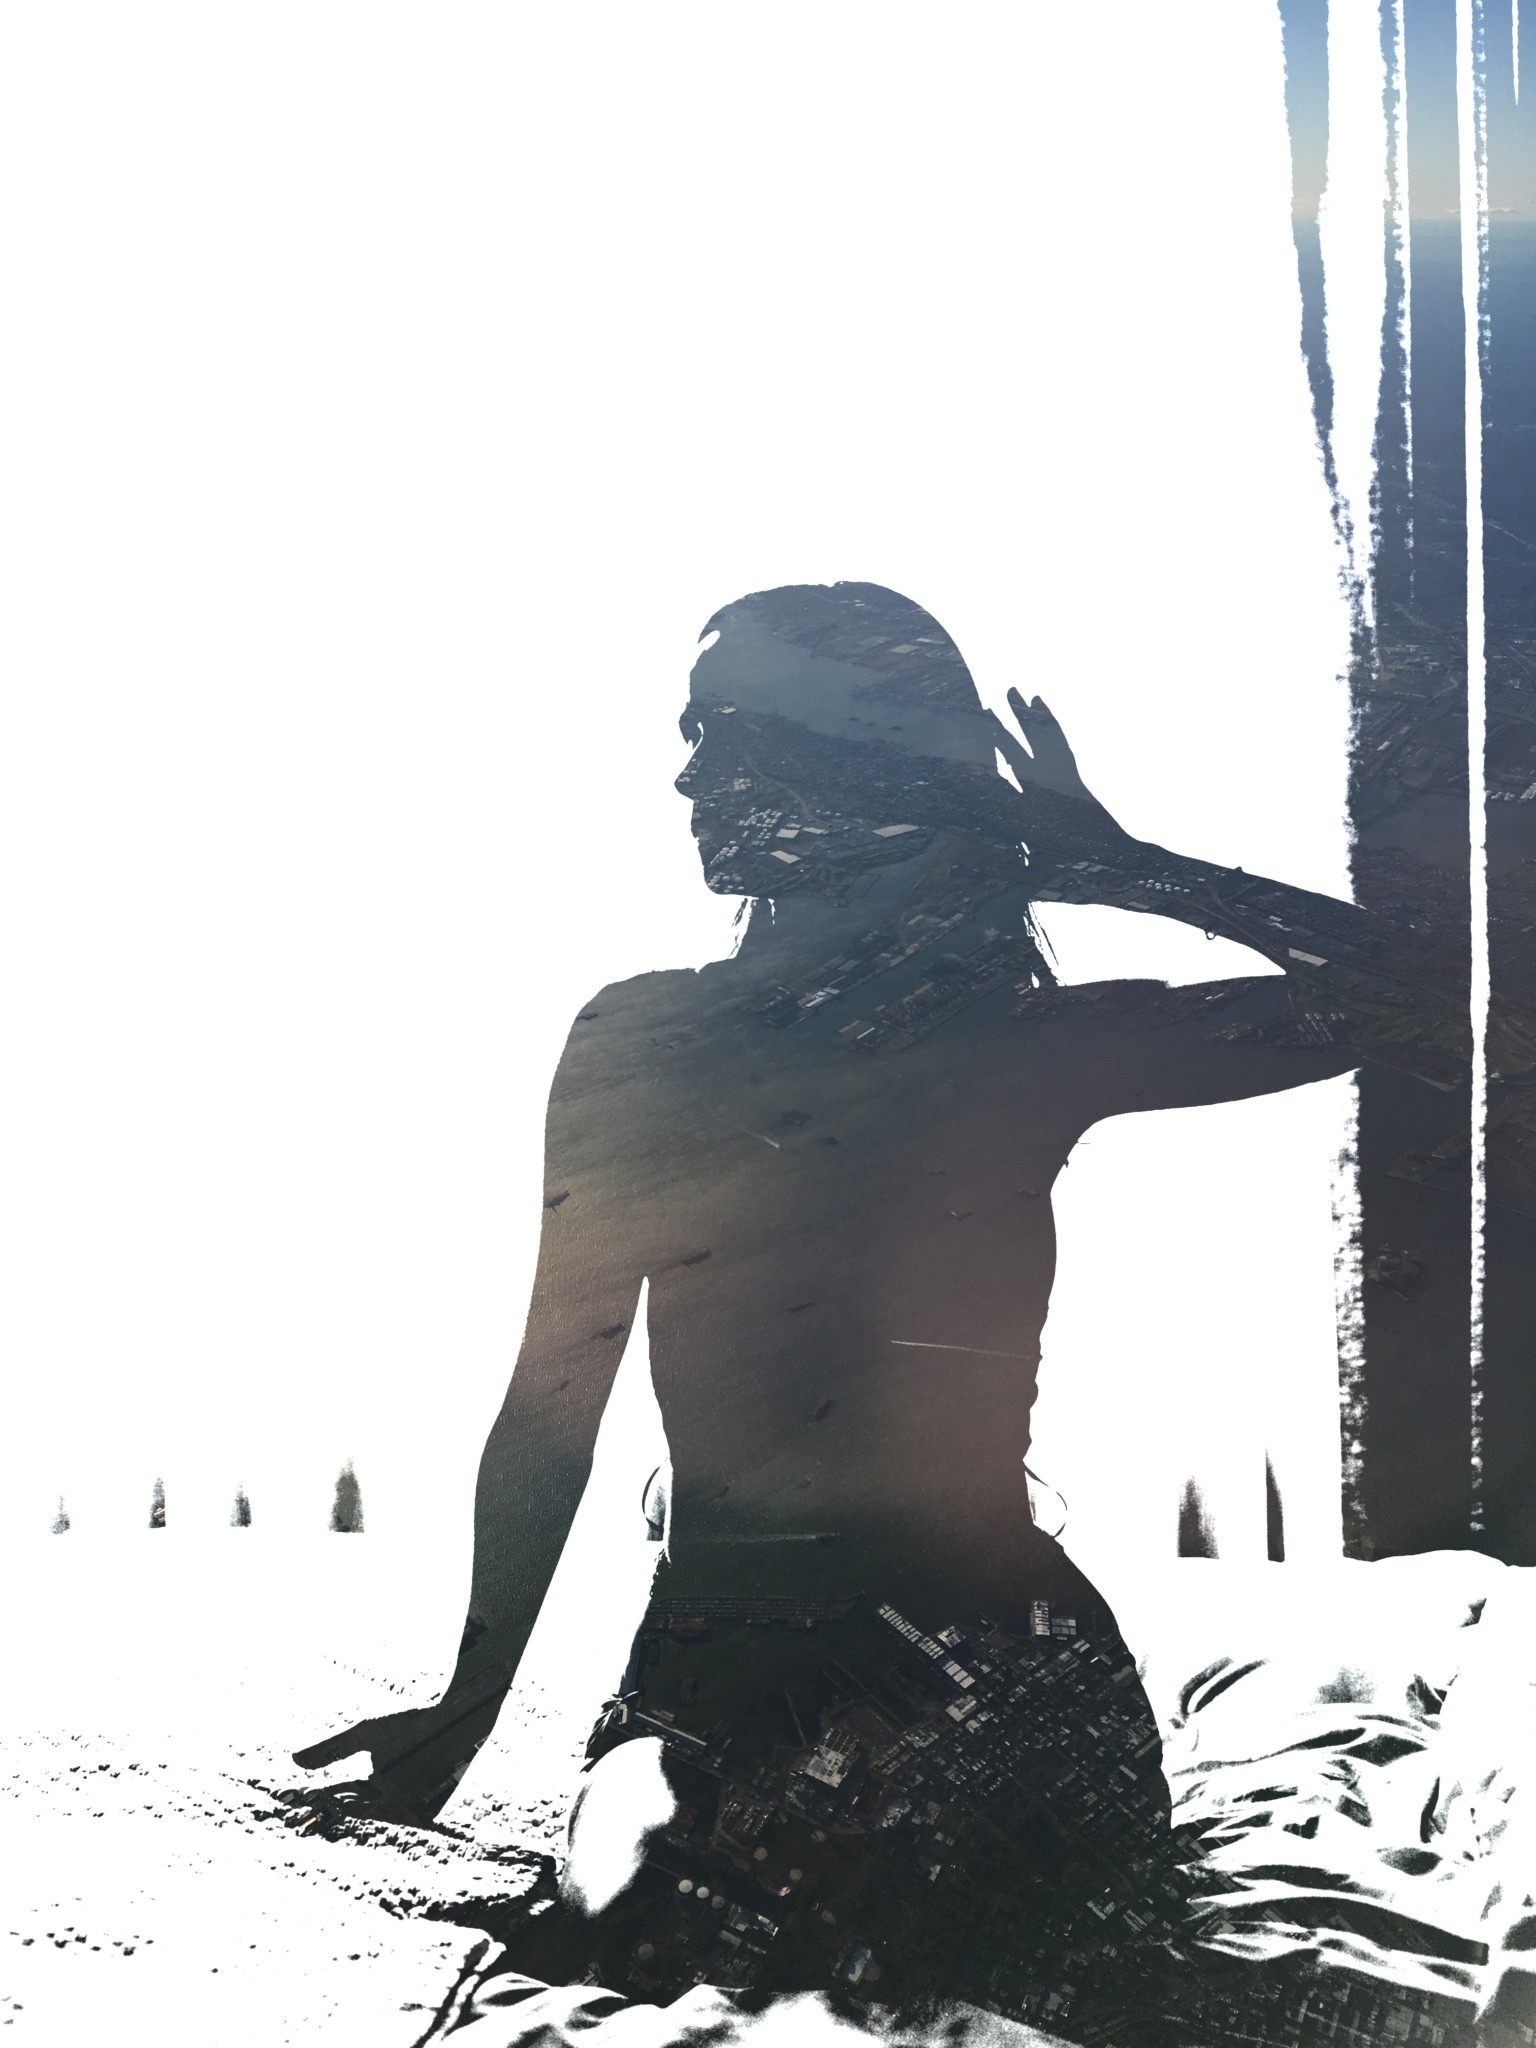
The Pattern or Background
Then you’ll need different images to work with. These work best with a variety of things like buildings, shrubbery, etc. Just try to keep both black and white out of it if you can or else it can interfere with the layers.
Some photographers specifically choose certain patterns to say something about their subjects.
The Fused App
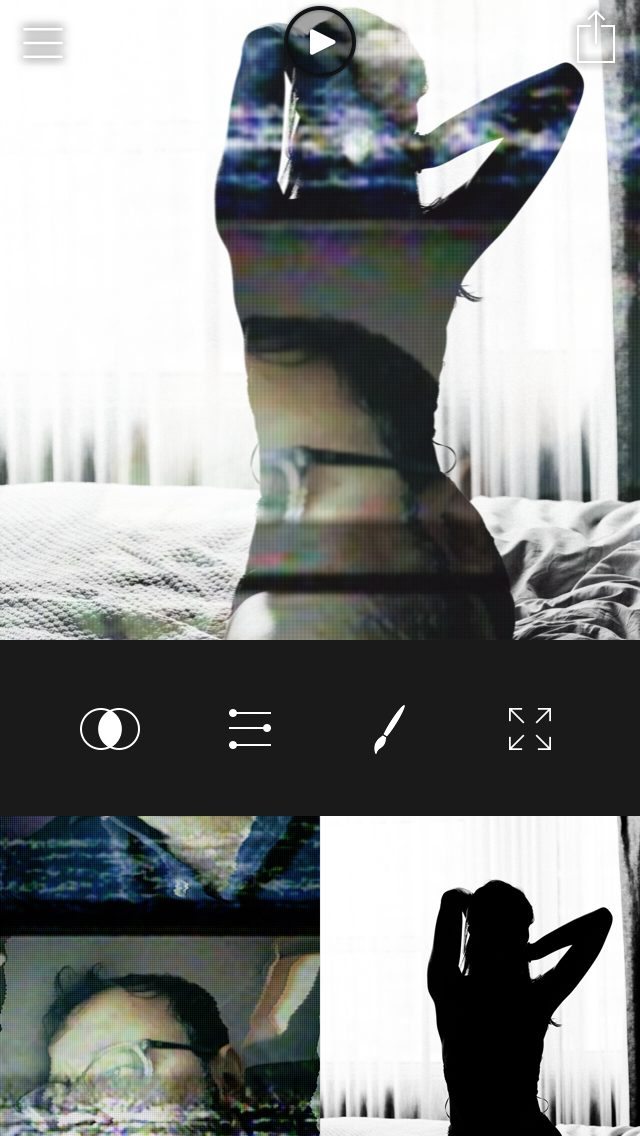
My favorite app to do this with is called Fused, and it’s on the iPhone. You can choose your foreground, background and then adjust each layer individually. Plus you can change the style that they’re layered in.
Videos
Even better, Fused lets you make one of the layers a video. So if your silhouette is a dancing woman or a dog wagging its tale, then you can have that one be in motion while your background is something stagnant.
No, this isn’t an ad for Fused. Instead, it’s just something really cool that I’ve found. I’ve been combining it with short clips that I’ve been editing to look like 90s VHS clips. So far, it’s been working.
Go! Give it a try!

Get rid of the ads!
Did you enjoy reading this article as much as we enjoyed writing it? There's a way to support us and our reporting, getting ad-free navigation and more as a bonus. Subscribe to us for less than a coffee per month —just $3.99— or take advantage of our yearly subscription with a hefty discount for only $25.- An ad-free experience
- A free mystery box for Lightroom or Capture One
- All the books in our store
- 20% discount on Capture One
- 30% discount on Imalume Photo Theft Protection
- 20% off Herbs and Kettle Tea Company.
- 20% off your order from MPIX printing services.
- 5% off Viltrox Products via their eCommerce store.
- 10% off all film developing, printing and scanning services from Blue Moon Camera and Machine
- 15% off 7Artisans products: The lens and accessory maker is offering a sweet discount for Phoblographer's readers.