
Nothing eases the stress-induced tension in my shoulders like staring at the night sky. Perhaps it’s the silence that can only be found while most of the world is sleeping. Or perhaps it’s the sheer size of the Milky Way that makes the day-to-day hurdles feel a little less significant. But one thing beats gazing up at the stars: photographing them. Taking photos of the night sky, however, isn’t as simple as slinging a camera around your neck and pressing a button whenever you feel inspired. If you head out with just a camera and some inspiration, if you point your camera at the sky without first learning how to take pictures of the stars, you’ll end up with a blurry, dark mess.
The night sky’s darkness renders both autofocus and auto exposure absolutely useless. But that’s actually one of the reasons I love taking photos of the night sky — I end up with pictures that not just anyone can take. With a tripod and an understanding of the ins and outs of astrophotography, however, you can capture photographs worth staying up late for.
Table of Contents
What You’ll Need
- A tripod. The most essential gear when photographing the night sky is a tripod. Without one, you’ll get a blurry mess.
- A camera. Most modern cameras are more than capable of taking photos of the stars. Some smartphones can even grab a starry photo good enough for Instagram. But, a mirrorless camera or DSLR will capture more detail, translating to seeing more stars and creating larger prints. That’s why, for this tutorial, we’ll focus on how to take pictures of the stars with an interchangeable lens camera. Grab an empty memory card and a fully-charged battery to go with it.
- A wide angle, wide aperture lens. The ideal lens for astrophotography is a wide-angle prime. A wide angle captures an expanse of stars. A bright aperture lens allows you to keep the ISO low. (Here are some of our favorite lenses for astrophotography.)
- A light pollution filter (optional). If the location is close to city lights, a light pollution filter will help bring out the stars with less Photoshop work.
- Post-processing software such as Capture One, Lightroom, or Photoshop (optional). You can get good astrophotography in-camera, but if you want to do something like make the Milky Way band pop, you’ll need to do some tweaking with software.
1. Scout your location.
The number of stars that appear in the sky in a photograph rides on one major factor: Light pollution. Man-made lights can cause the night sky to appear less dark. When this happens, fewer stars are visible, with the smaller pinpricks of light washed out by those other light sources. The farther away the shooting location is from cities, the more stars will dot the sky. When planning an astrophotography shoot, many photographers use a light pollution map to determine where you will see the stars most.
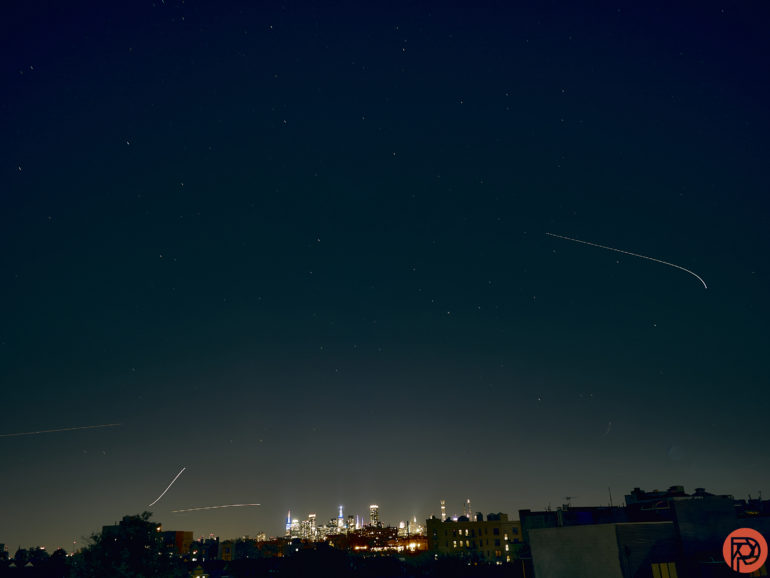
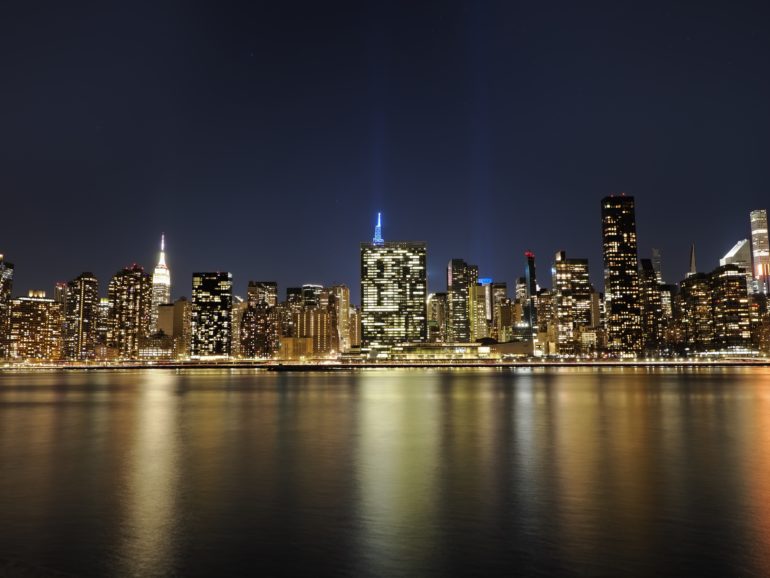
Does light pollution mean you can’t photograph the stars in major cities? Not exactly. While only the brightest stars will appear in photographs with major light pollution, it’s even possible to photograph the stars over New York City. But, light pollution does mean that only the brightest stars will be visible — and that you’ll need to do a bit more work to photograph them. If you can’t escape city lights, you’ll get the best results with a light pollution filter and composite shooting.
Similarly, natural light sources can cause fewer stars in the night sky. The light from a full moon will wash out the faintest stars. Shoot during a new moon (or when the moon is below the horizon) to see the most stars. I’ve photographed the last rays of sunset and a few stars in the same photograph. But, again, if you want to see the most stars, wait for complete darkness or astronomical twilight.
Of course, if the clouds are blocking the sky, even the areas farthest from city lights won’t have visible stars. Don’t forget to check the forecast as you plan.
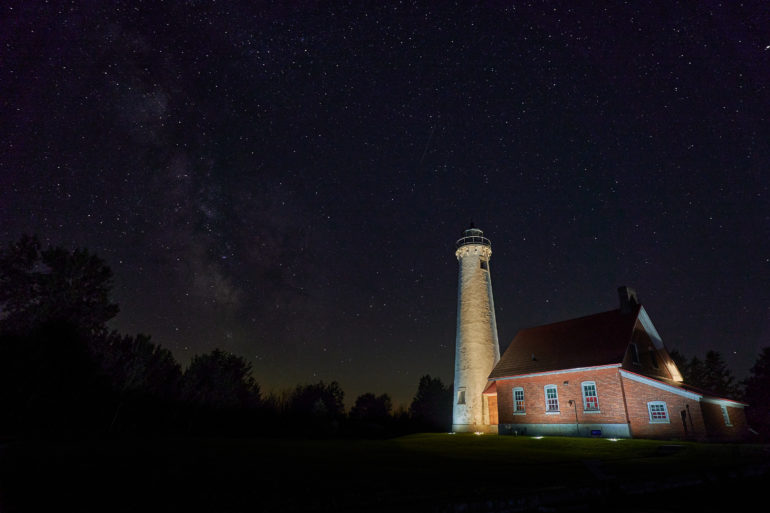
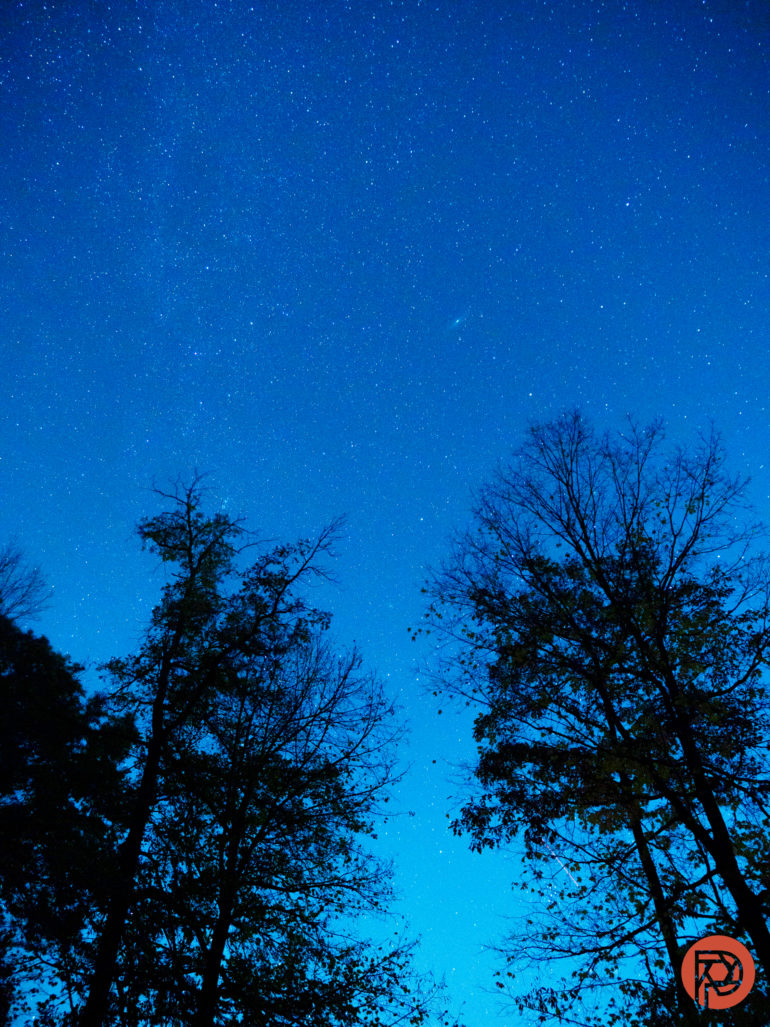
Outside of watching the skies, scout the location for scenery to add interest to the photograph, from buildings and bridges to trees and bodies of water. The most straightforward scenes to shot are dark scenes which will be silhouetted against the night sky. Locations that are lit — such as this lighthouse photo — may require multiple exposures blended together in Photoshop to properly expose both the sky and the lighthouse.
Finally, be mindful of both rules and regulations and personal safety when taking photographs in the dark. Many public parks may only be open during daylight hours — you may need to request permission to enter after hours, which was the case with the lighthouse photo above. Bring a light — and possibly a friend — along for safety. If you plan on doing a lot of astrophotography, a red headlamp or flashlight will help you see without ruining your night vision.
2. Set up a tripod and frame the shot.
The light from Alpha Centauri is already four years old when it reaches your eyes — or your camera lens. Thankfully, you don’t need exposure quite that long to capture that star. But, because you will need an exposure time that is several seconds long, a tripod is a must.
Set up your tripod and frame your shot. Seeing what the camera is seeing can be tricky when shooting in the dark. On a mirrorless camera, turning off exposure preview can help you get a better view of what’s in the frame when shooting in near darkness. If you’re not accustomed to using the meter instead of the exposure preview, some camera bodies will allow you to assign Live View to a physical button, so you can easily switch between the two views.
3. Dial in your camera settings.
I typically start with these camera settings to photograph the stars:
- Shutter speed: 20 sec.
- Aperture: As wide as the lens allows such as f1.2 or f1.8
- ISO: Balance out the exposure with ISO, but try to keep it relatively low.
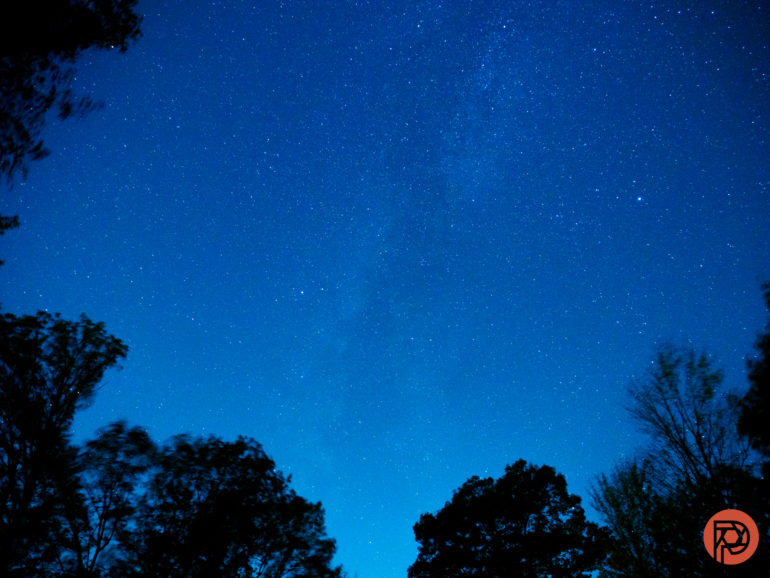
- White balance: If you want to get the shot right in camera, try a Tungsten white balance — this makes the sky a nice deep blue.
- File type: Use RAW or RAW + JPEG for more flexibility when editing.
Why those settings? First, if your shutter speed is too long, the earth’s rotation will introduce motion blur to the stars, creating star trails. I tend to notice a slight blur to the stars when I shoot for longer than 20 seconds with a wide-angle lens. There’s actually a photography rule for this called the 500 Rule. It suggests that you set your shutter speed at 500 divided by the lens’s focal length. For example, 500 divided by an 18mm lens would equal about 27.7, so you could use a 25-second shutter speed. If you are using a longer lens, such as a 100mm, you’d need to adjust your shutter speed to 5 seconds.
Math tends to suck the joy out of photography, and since I’m almost always using a wide-angle lens, I like to keep it simple and shoot at 20 seconds or faster.
If you’re shooting away from light pollution and with little moonlight, even a 20-second exposure can look a bit dark. That’s why I shoot with a wide-open aperture. Many modern prime lenses are still plenty sharp when wide open. But, if I’m using a lens I’ve never shot with before, I’ll sometimes check the sharpness after taking an image and narrow the aperture a bit if necessary, keeping it under f4.
That leaves the ISO. A grainy image can wreak havoc on the details of those tiny stars. But, if you set the ISO too low, you’ll create grain when trying to make drastic exposure changes while editing later on anyways. Set the ISO to get a balanced exposure — you’ll want the sky to be brighter than any silhouetted scenery.
4. Use manual focus (in most cases).
Most autofocus systems cannot focus on a dark sky. (One exception is the Starry Sky AF from OM System, which is currently available on the OM-1 and the E-M1 Mark III.) If you point a camera at a starry sky with autofocus on, the lens is going whir in and out before saying, “Nope, I’ve got nothing.”
Thankfully, using manual focus on the night sky isn’t as terrifying as it sounds. First, turn on manual focus mode — either located on the lens itself or a setting on the camera body, depending on which brand you’re shooting with.
Next, turn the focus ring all the way to the infinity symbol. If your lens doesn’t have the depth of field scale labeled, the scale will often pop up inside the viewfinder of most mirrorless cameras.
Some lenses capture tack-sharp stars right at infinity; others need more fine-tuning. Hit the magnifying glass icon on your camera — if you’re using a DSLR, you’ll need to turn on Live View on the LCD screen first. Zoom in on the brightest star that you can find. Then, slowly turn the focus ring until the star looks sharp. If you turn on focus peaking in the menu, the stars will also turn red (or whatever color you have turned on for focus peaking) when they are in focus. Using the zoom and focus peaking is a much better method than guesstimating.
5. Turn on the two-second timer and shoot.

Here’s the easy part: Turn on the two-second timer and hit that shutter button to take a photo of the stars. The timer prevents you from accidentally moving the camera and creating motion blur after you worked so hard to set up the tripod.
6. Analyze the photo and make changes — or get creative.
Once that 20-second exposure has passed, look at your photo and determine if you need to make any changes. Adjust your ISO if the photo is too dark or too bright. Zoom in on the stars and make sure they are sharp — if not, you may need an even shorter shutter speed or to make further adjustments to the focus. Once I’m happy with the shot, I’ll often move my tripod and try a few other compositions — especially if I can see the milky band of stars that gave the Milky Way its name.
After the shoot, you can edit the photos to help bring out the stars more. I tend to play with exposure, highlights, and shadows. Or, head into the color adjustments and watch what happens when you adjust the blues — this can help adjust the brightness of the sky so that the stars really pop.
What about star trails?

A 20-second shutter speed will freeze the stars in place — but what if you want to capture the motion of the stars across the night sky? Photographing star trails is tricky because you typically need an exposure time of at least 30 minutes. Leaving the camera shutter open that long introduces lots of noise because of heat on the camera sensor. You could follow the steps above, only set the shutter to 30 minutes instead of 20 seconds, and get some star trails. But you can get more stars and longer trails with a composite image. There’s also a lower risk of a car’s headlights or a gust of wind wiggling the tripod to ruin the entire shot.
Many star trail photos are actually composites — several photos blended together to showcase the motion of the stars without the challenges of an extremely long exposure time. This allows for less noise, more stars, and times long enough for the trails to create complete circles if you’d like.
With a camera with built-in Live Composite, you can capture star trails in-camera. Many cameras from OM System (Olympus) and Panasonic have this feature. (Sadly, not the Panasonic GH6). To shoot star trails with a Live Composite camera, you’d first follow steps above. One change is that if you want the stars to appear to create a circle rather than to streak straight across the sky, you’ll want to point the camera towards the north celestial pole or north star if you’re in the north hemisphere or towards the south celestial pole if you’re in the southern hemisphere. If you want straighter streaks of stars, then avoid pointing directly north or south.
Take a non-trail photo first, because screwing up a photo that took more than 30 minutes to create is a truly awful feeling. Then, once you’re happy with your composition and focus, turn on the Live Composite, adjust to more than 30 minutes inside the menu and shoot. The longer the shoot time, the more complete the star trail circle will be. Two hours is often excellent, but I’ve also gotten decent results shooting for 30 minutes in an area where I wasn’t comfortable leaving the camera alone for two hours. The camera will stack the images for you. You can find detailed step-by-step instructions inside the user manual for your particular camera, as the exact steps vary a bit based on what body you are using.
If your camera doesn’t have Live Composite, you can create star trail composites — they just require more work. Use your camera’s built-in intervalometer to set up the camera to take back-to-back images over at least 30 minutes, though an hour or more is often ideal for star trails. Look for “interval timer shooting” in the camera menu or the user’s manual for your particular camera. Some older cameras may not have this feature, in which case a physical interval timer accessory would be required. You’ll then need to edit the individual photos, stack them in layers in Photoshop, then adjust the opacity of each layer for all the stars to show through.
Get rid of the ads!
Did you enjoy reading this article as much as we enjoyed writing it? There's a way to support us and our reporting, getting ad-free navigation and more as a bonus. Subscribe to us for less than a coffee per month —just $3.99— or take advantage of our yearly subscription with a hefty discount for only $25.- An ad-free experience
- A free mystery box for Lightroom or Capture One
- All the books in our store
- 20% discount on Capture One
- 30% discount on Imalume Photo Theft Protection
- 20% off Herbs and Kettle Tea Company.
- 20% off your order from MPIX printing services.
- 5% off Viltrox Products via their eCommerce store.
- 10% off all film developing, printing and scanning services from Blue Moon Camera and Machine
- 15% off 7Artisans products: The lens and accessory maker is offering a sweet discount for Phoblographer's readers.