
Text and photos by David Krooshof. Used with permission.
A month after I bought an Intrepid 4×5 large format camera, I started taking down notes, then reviewed them after nine months. While very condensed compared to other writings, there are also a lot of notes for those who are eyeing to take the plunge into large format photography. It also includes some notes about what to look for in a large format camera. It’s detailed, because I like details. It’s not only technical, but also about what it means to the subject.
Photo above: Angela Davis is an American human rights activist, like my parents were in the sixties. She was very sweet and I am glad that I got this motherly smile from her. I never managed to contact her to give her this photo.
Documenting people
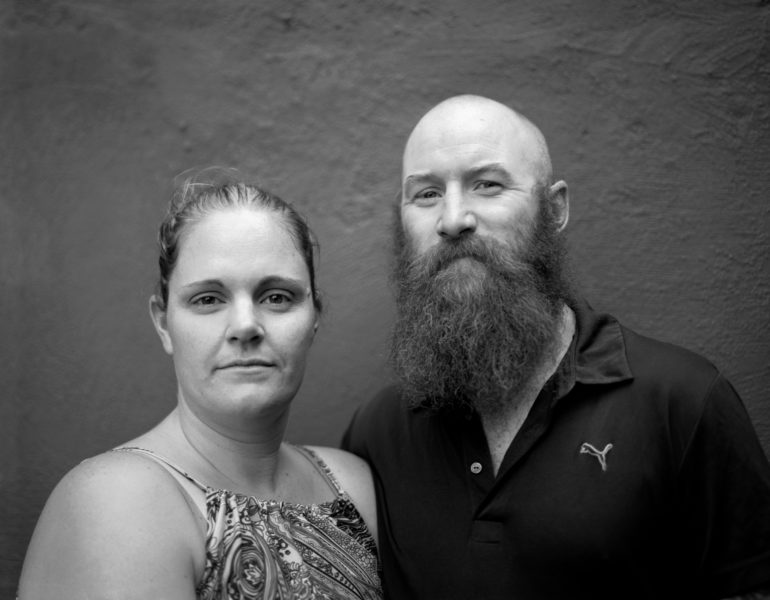
People like posing for the large format view camera way more than they do for my Mamiya m645.
After nine months, people started asking me to make portraits based on my results, rather than on my invitation or the attractiveness of my hardware. That said, I have since bought a Wista 45dx, which is way more attractive than the Intrepid 4×5 mkII. I use the same lens, so the photo is the same, but a wood and brass camera helps. It’s a starting point, and I can build on it.

The focusing process
The cover over my head needs to be light tight for better sight. I got a nice tightly woven cloth for this.
Nine months later, I found that LED balls seem help hold it in place.
To check the focus on the ground glass, I need some magnification. A loupe is not for me, as I found that composing is a pain when using it, and puts me at a distance emotionally. My eyesight is not good enough without reading glasses, which also hinders using the loupe.
A pair of cheap +4 reading glasses allow me to oversee the whole ground glass, and down the the details, with my head some 20 cm from the ground glass. So this is my method now. (I normally use +1 fore reading.)

The viewfinder
Focusing upside down is a nice abstraction that makes me compose better. It reminds me of having to put my drawings upside down in the painting class to see what I needed to change.
After nine months, I don’t even remember seeing the image upside down. It’s something that is just a given and not important anymore. Since it rotates rather than mirrors like the waist level viewfinders do, setting up the shot is less confusing than it was when I began shooting with my Mamiya m645.
I inverted my thinking about focusing. It is not something you dial into the lens. The lens is fixed. It projects a 3D image behind it, in which everything is sharp somewhere. I place my ground glass, and ultimately the film inside of this 3D projection. Only then it becomes 2D, and the location of the film plane is determines what is in focus. It would have made even more sense if the film plane was what was rolling in and out on these cameras.
Focusing very closely gives the sense of zooming in too. I heard people on YouTube going mad about the “focus drift” that their “full frame” zoom lens has. Ha, they should see what happens if you focus in on someone half a meter from your large format camera.

A fresnel
I bought an el cheapo (40 euro) fresnel for the ground glass. It’s okay. The purpose is to bend the light that is off center, towards you, reducing vignetting. It will not change the image on the film. If you do not want vignetting on your film, close the aperture a bit (and lengthen the shutter time). The fresnel is a composing tool, as you can overlook the whole focus screen in a glance. It’s not a focusing tool at all. Contrary to some guy on YouTube who made a movie that Google pushes at you when you search for fresnels, the fresnel goes on the OUTSIDE of the ground glass. It would throw your focus off if you mount it on the inside, as it would sit in between your lens and your focus screen that way. You do not want that.
Nine months later, I can now compare the el cheapo to the fresnel that came on my Wista. The Wista’s is much finer, but it does not really matter too much in practice. I’d buy it again.

Movements
On a large format camera you can move the lens up and down (rise and fall) and left to right (shift) for perspective control, and tilt/swing the lens for focus control. These are called movements. The Intrepid only has lens movements; the Wista also has tilt, swing, and shift on its back (the film plane).
I love shifting for perspective and tilting for precise focusing. I knew this from toying around with my digital mirrorless and some adapters. Lens tilt is much more intuitive then it is on my digital camera with a tilt-adapter. One reason is that because the image is not flipped right side up, I can see in my minds eye how the projection of the image works. Also, on a digital system, there is a swivel halfway between the lens and the sensor that allows for tilt. And the barrel of the lens is longer too. It works much much more intuitively when you really only tilt the film back or the lens plate, rather than bending the whole system halfway. Because then you tilt AND shift. Rotating the lens board itself is a pure tilt movement.
After nine months, I shoot so much more portraits than other things these days, that I hardly ever use shifts and rises anymore, only to fake back tilt on the Intrepid. As I expected, I use tilt and swing a lot, as to get two eyes and a mouth in focus. I really do this naturally. This why I wanted a large format field camera to begin with; I missed movements on the Mamiya SLR.
The Intrepid tilt axis runs right through the lens, while the Wista’s pivots at the base. This makes tilting the lens more intuitive on the Intrepid. That said, it is too easy to knock out of place when cocking the shutter on the Intrepid. And the focusing process with tilt is iterative on both camera’s anyway. It’s just that I do not lose focus so much while setting the tilt on the Intrepid, as I do on the Wista. On the latter, there is this moment of disconnect after deciding I need the tilt.

The workflow
The fact that you slide the film holder in after the composing and focusing is done, has an upshot. To determine when to trip to shutter is done by looking at reality, not through a device. To me, this feels more real, and thus better.
Though I ruined a few sheets, the workflow is not as bothersome as I expected it to be. But I must say I rehearsed the process in my mind a number of times before the camera arrived.
After nine months, I found that my subjects connect way more to me when I shoot this way, compared to my SLR. I might start working like this digitally too: Just stand next to my camera rather than behind it.
I am a musician and sound technician, so here’s my perspective on the workflow in sound studio terms. Contrary to the SLR, a large format camera feels like recording. I set up the mics and the volumes, I give the band my directions and focus points, they get ready, and at the right moment I punch in the recording, and from that moment on, it is just them. Photography feels the same now. I feel like I make a registration, a document. An SLR feels like barging into the recording room, rather than quietly pressing record in the control room.
I also started directing shots like I direct singers in the my sound studio. I came to the realization when Stephen DiRado told me to listen to what was there to hear, while he made a portrait of me. He is such a great help in all this, and we became good friends.
I don’t make them wait, and I will no longer wait on somebody to change anything in their expression after I just told them to freeze, while they are essentially waiting for me to go click. I give them something to do, something to think about, something to listen too and to look at. A focus point, other than their own looks. This is similar to me in the studio, going over a text with the singer, and imagining a setting, a purpose, and an audience for them to see in their minds eye when performing their song. If I wouldn’t, every recording would sound like, “He’s recording this, let’s not make any mistakes again, aaah”.
After nine months, I expanded a bit on the routine. Set focus, close lens, set shutter and aperture, fire a test shot, slide in film holder, check if lens is closed, cock shutter, open film holder, check subject, fire. All this time I keep communicating what I do, and I say “hold still” a lot. And I make jokes. People tell me I welcome and relax them. Good. Honestly, my mind is occupied with the tech side of the process too. You see, there are quite a few things I need to do between focusing and taking the picture. This is why my subject should hold still, not because the shutter times are that long.
Depth of field
Shooting large format does not make the depth of field shallower directly. But a 150mm lens has a similar field of view as a 50mm on a 35mm camera, and that long focal length comes with a shallower depth of field. It looks like a f1.4. When you shoot close ups, backgrounds go way out of focus. When you shoot at a medium distance, say 4 meters, the background still goes out of focus. You need to be very precise with selecting what you want in focus, and therefor you will need tilt and swing.
I almost always shoot wide open, f5.6 on my lens, which means I have 1 cm depth of field when I do a close-up portrait. I use the full range of the shutter from 1/400 to a full second.
Nine months later, I found that when focusing close ups, the bellow gets to be extended a lot more. This spreads the light form the lens over a larger area. You will need to double the shutter time that the meter suggests to compensate for this.
For regular scenes, the myLightMeter app is okay. For more contrasty scenes, the contrasty smartphone camera has a hard time guessing. A dedicated light meter will be better.
The negatives
I like it that you can develop per sheet, thus per frame, and adjust developing times as you go along.
I standardized the development nine months later, making light on the film the only variable, and I develop per four. That’s two film holders. I often shoot four or eight frames now. I typically carry five film holders, so I can screw up two frames and still fill two tanks. I do not ruin films that often, though.
I’m not into this because I like developing, or scanning. I develop the same evening. I postpone scanning a lot.
I like that the negative is not microscopic. As soon as you pull it from the water, you can see how it is! The size feels very normal to me now. Not at all big anymore. That happened really fast.
More notes on the quality of the cameras
It is really really important that you can lock any variable on the large format camera very securely. It is annoying that the Intrepid can be de-tuned so easily. This ruins shots. Focus may slide off when I tilt the camera back and do not thoroughly lock it. Rotation on the tripod cannot be locked well enough, causing the camera to be rotated sideways a bit when sliding in film into the rough plywood. Swing is annoyingly easy to ruin when setting the shutter dials. In these respects, the Wista is so much better.
The Wista is twice as heavy as the Intrepid. But with all the other stuff you need (tripod, dark cloth, film holders, glasses, lens, shutter release, light meter, filter) it does not matter that much.
I wanted to sell the Intrepid, but I’d hate to be the one to make the first scratch on the Wista that survived 46 years without any. So I decided to keep the Intrepid for hiking. I was worry-free when it got sanded on a black beach on Iceland and when it got rained on on Martha’s Vineyard. That’s a feature the Wista does not have.
Intrepid lens boards are NOT okay on the Intrepid 4×5 mkII! The hole needs to be lower to line the lens up with the back. The Intrepid lens board has its hole in the center, essentially shifting the lens up a bit. Also, they are too loose, maybe even leaky. There are Wista/Linhof off-center lens board copies on ebay for 10 euro each, cheaper and a better fit than Intrepid’s own!

Final notes
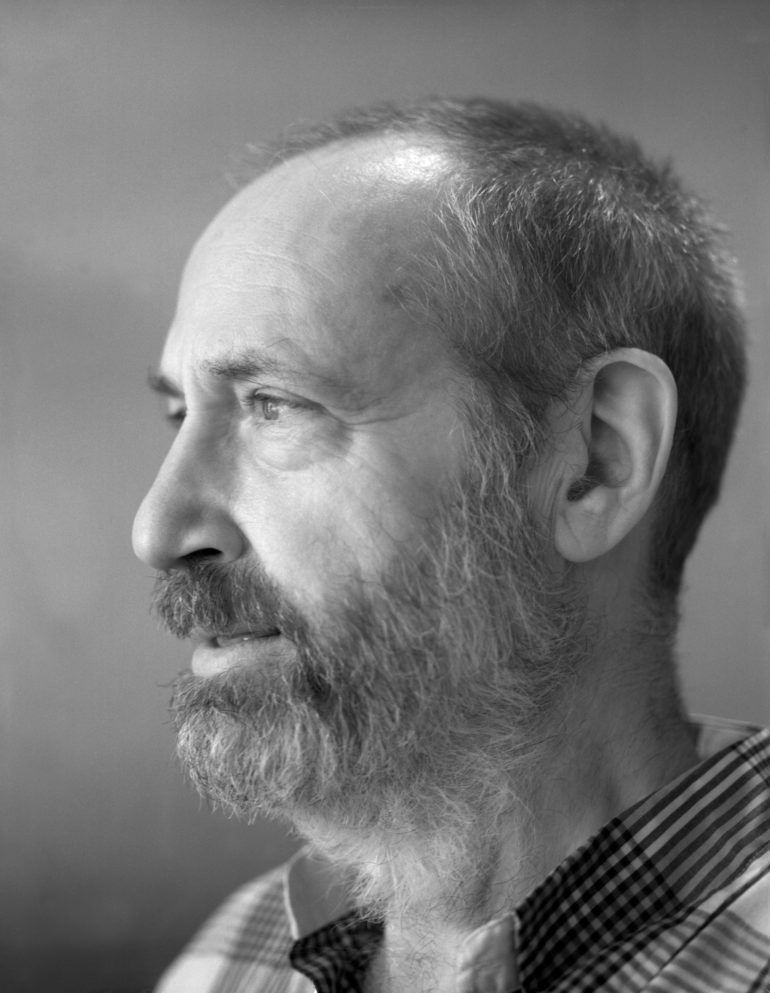
Photographing this way brought me personal contacts in a way that music never did. To me, it was a journey full of surprises. Going large format improved the quality of my portraits a lot. The size of the negative was the least relevant in that upgrade. With a 4×5 camera, I was able to make very honest and direct documents of the people that are dear to me. The tool is no longer sitting between me, my eyes, and them. It is just an extension of me, standing next to me.
Visit David Krooshof’s Facebook and Instagram to see more of his large format portraits.
Get rid of the ads!
Did you enjoy reading this article as much as we enjoyed writing it? There's a way to support us and our reporting, getting ad-free navigation and more as a bonus. Subscribe to us for less than a coffee per month —just $3.99— or take advantage of our yearly subscription with a hefty discount for only $25.- An ad-free experience
- A free mystery box for Lightroom or Capture One
- All the books in our store
- 20% discount on Capture One
- 30% discount on Imalume Photo Theft Protection
- 20% off Herbs and Kettle Tea Company.
- 20% off your order from MPIX printing services.
- 5% off Viltrox Products via their eCommerce store.
- 10% off all film developing, printing and scanning services from Blue Moon Camera and Machine
- 15% off 7Artisans products: The lens and accessory maker is offering a sweet discount for Phoblographer's readers.