Last Updated on 11/30/2017 by Chris Gampat
Capture One 11 is here now; and it’s going to push photographers in the direction they want to be in
I’ve been a Capture One convert for a while now as all our testing involves running RAW files and more through the program. It’s simply a better piece of software than Lightroom is; and at this point both versions of Adobe Lightroom feel way too pedestrian for the type of work I’m doing. In some ways, I want to relate to something that my late mother used to do. You see, we grew up in a household where my mom spent way too many hours in front of the television. So she tuned into Home and Garden TV and fell in love with doing a lot of stuff on the house. What that would mean is a whole lot of trips to Home Depot carrying many pounds of cement, plywood, sheetrock, plaster, and tons more in a 1997 Toyota Camry. It was honestly madness and it eventually drove the car to the point of breaking; literally. The fact is that a Toyota Camry wasn’t designed to do that type of work; a Toyota Tundra on the other hand can do it with no problems at all. This is synonymous to what I feel Adobe Lightroom and Capture One is; Lightroom is the paltry but reliable Camry for everyday needs while the Capture One is the Tundra designed for actual work. At a certain point, you’re going to hit walls and realize the software you’re using is rather subpar.
With the newest upgrades to Capture One 11, I feel like even more photographers should be joining the ranks. So for the past week or so, I’ve been testing the beta version of Capture One 11.
Pros and Cons
Pros
- Better color editing
- Layers are nice
- Masking improvements are VERY welcome
- Still fast when it comes to editing images
- Import Duplicates is in there now; but Capture One detected what was in your catalog to begin with anyway
- Opacity on layers is a great addition
- Monochrome mask is REALLY fantastic and useful
Cons
- Masking can be very processor heavy
- Phase One’s lack of support for the Fujifilm GFX system is absolutely maddening
- I wish it had some sort of tool like Adobe’s Upright that makes it really easy to fix perspectives and such
Features
Here are the new features according to Capture One’s newest press release.
NEW FEATURES AND TOOLS IN CAPTURE ONE 11
NEXT LEVEL LAYERS
In response to customers’ needs, masking tools have been further developed, and new features and overall performance advances have been introduced. New tools have been added to refine and feather the mask after drawing, or adjust the opacity of a layer to control the impact of local adjustments. With more tools available locally and with increased performance in masking, Layers in Capture One are now more dynamic than ever.
— Layered Workflow
— Layer Opacity
— Feather Mask
— Refine Edge
— Grey Scale Mask
MORE STREAMLINED WORKFLOW
Annotations and graphics as Overlays can be added to images and exported in PSD files as separate layers. Crops can be respected or added as a Path when exporting to PSD files, permitting the full image to be used later for retouching. An individual watermark may be included as a separate layer in an exported PSD file to permit greater control during later editing.
— Annotations (Export as a layer when using PSD)
— Overlay in output (as a layer when using PSD)
— Export Crop to Path (when using PSD)
— Watermark as a Layer (when using PSD)
DESIGNED TO ENHANCE PERFORMANCE
Capture One has been further optimized to increase overall performance. Improved color handling through re-engineered color tools helps ensure optimal layered color adjustments. Color readouts can now be viewed in LAB mode aiding customers who wish to measure image output to critical values. Improved performance in Catalogs makes for an overall better experience.
— Editing Speed
— Import Duplicate Checker
— Color Improvements
— LAB Readout
— Catalog improvements
CAMERA SUPPORT
For a complete list of supported cameras, please go to: https://www.phaseone.com/supported-cameras
Now, before we get any deeper into this, I want you all to realize that editing in Capture One is much different than Lightroom. It’s better in every single way, but you need to wrap your head around working in a different way. Photographers who have been using Capture One can go right ahead and dive into editing in the same way they’ve been doing so before. The biggest updates in many ways are out of your view unless you really specifically look for them. For example, everything you do now can be done as a layer if you wish. I’ve never had an issue with working with the background image as is, but I will surely admit working in layers has its benefits.
Ease of Use
https://www.youtube.com/watch?v=Y0WlZnhFomY&feature=youtu.be
Capture One Pro 11 (or Capture One as it’s being called too now) is still the awesome software that it was. Is it easy to use? Well, in the same way that you were patient with Lightroom when you first started out with it, you need to be patient with Capture One. Would I recommend it to a complete amateur photographer who just bought their first camera? Hell no! Would I recommend it to a photographer who has been working in Lightroom for a number of years now? Of course! In fact, I’d say it’s a fundamental part of becoming a better photographer. The good thing about Capture One Pro 11 is you can set it up to be more Lightroom-like too. My video shows that off.
The mentality for editing in Capture One has a big emphasis on taking all of the sections that you’d find in Lightroom’s Develop panels and changing the way you think about them. For example, what you’ll end up doing a lot of the time is working with specific color channels tomake your edits better. Lots of folks barely do any sort of edits in Lightroom except for working with the Basic adjustment section; but Capture One is more in depth. For sure there is a basic section, but if you’re getting Capture One then you’re doing yourself an injustice not using it to its fullest potential–which comes from the various panels.
If my overall exposure isn’t perfect, I like to touch that up just a bit before coming to the color panel. In the color panel I tend to white balance according to film standards, adjust colors, adjust highlights and shadows, etc. Each of the color channels lets you adjust the hues, brightness, saturation, etc. It’s nice and 99% of the time I get better photos. The other 1% is the time that I’m using medium format digital cameras that aren’t from Phase One.
Yes, unfortunately the Fujifilm GFX 50S isn’t compatible with Capture One yet; and that’s one of the only things that held me back from buying one.
Monochrome Masking Edits, Layers
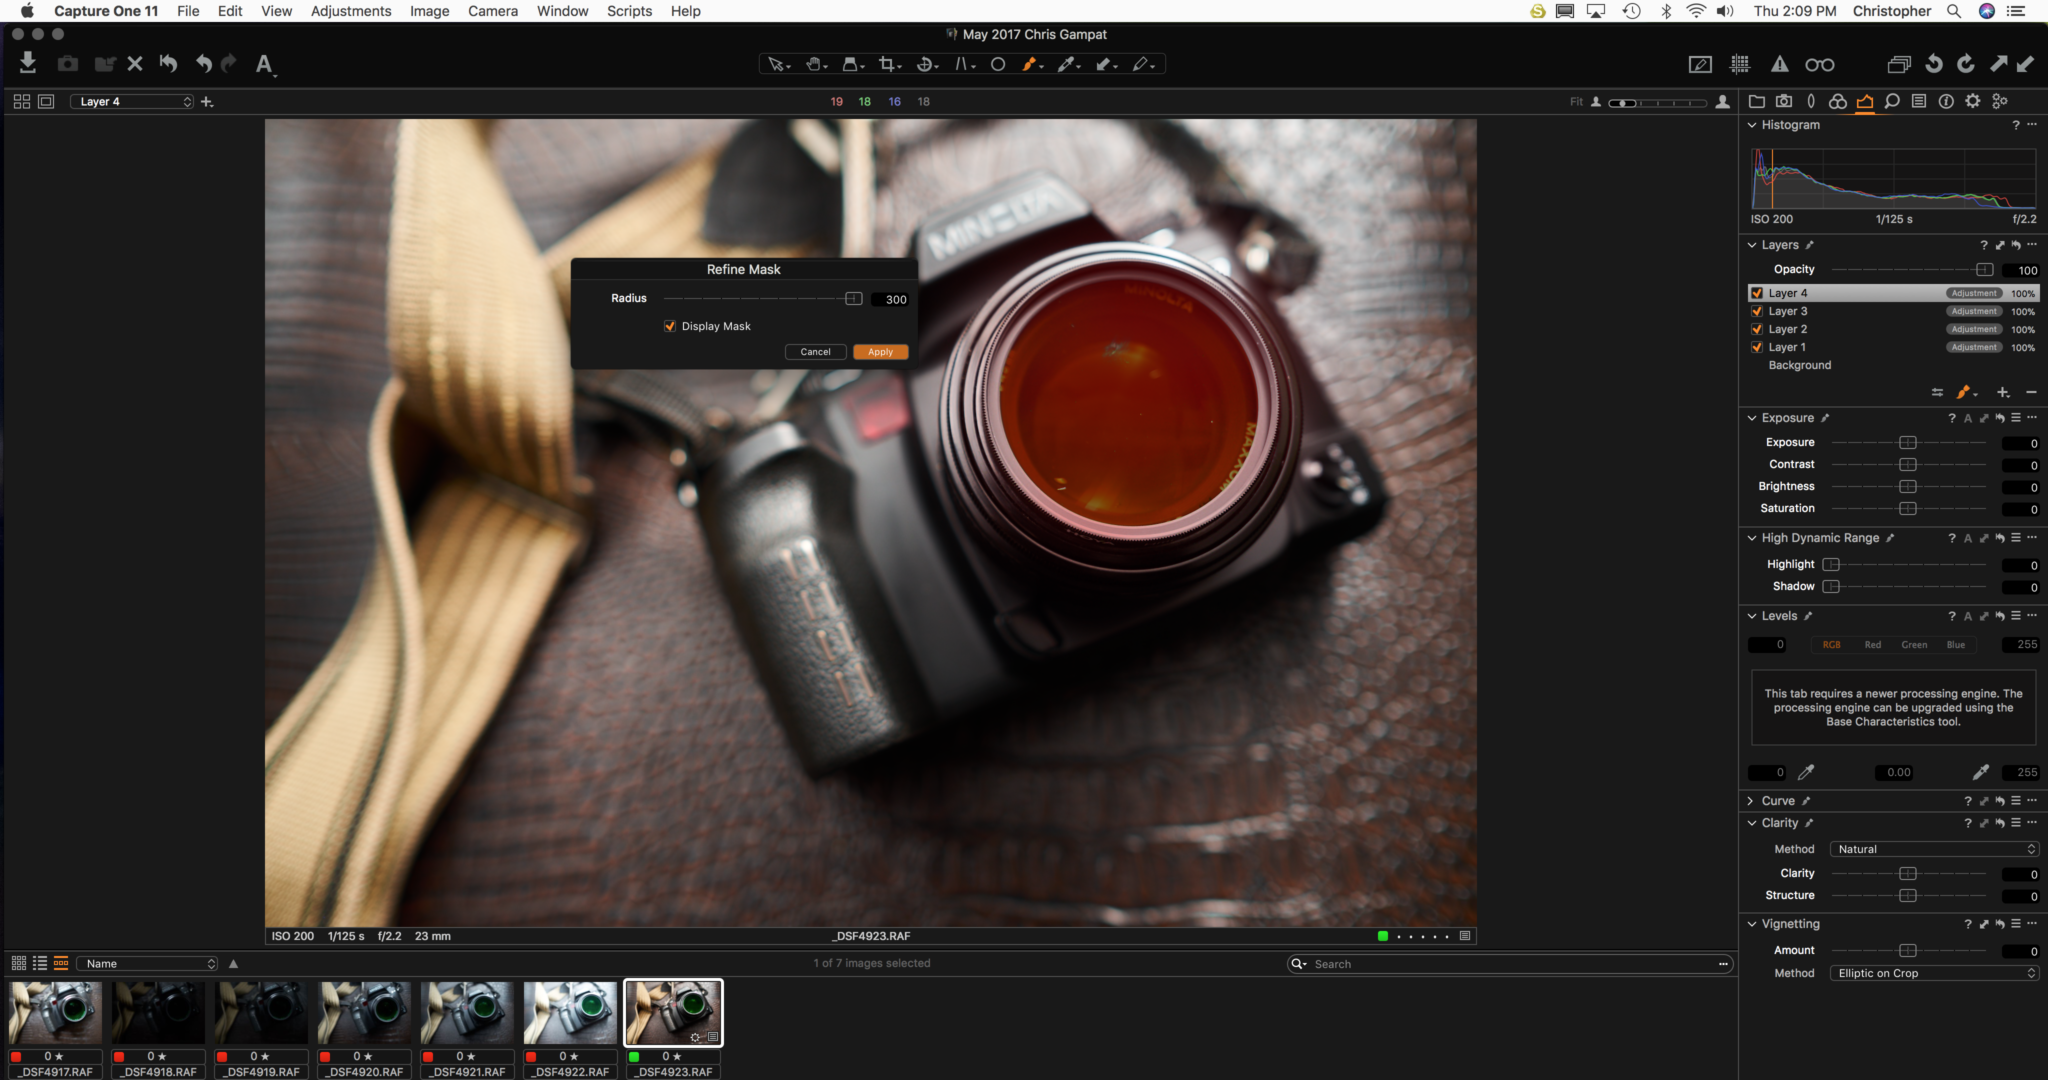 Some of the absolute biggest changes that have come to Capture One are with masks. This is something I felt was lacking a bit; at least when it comes to things like cloning, healing, etc. But with their new masks, there are big improvements. When you create a mask, you can adjust the edges and you can also refine it after you’ve drawn it out. This is a big help if you’re not getting something absolutely perfect when you draw your masks. But where you really see the big effects and changes are with Monochrome mode.
 In Monochrome mode, a photographer can see the exact adjustmentsbeing done to the mask way better. This blacks out the entire region except where your mask is affecting. Then you can see how much of an effect it will have on the scene and whether or not you want to do touchups, etc. My advice: a little bit goes a long way. Unfortunately, it’s also pretty processor heavy and at least with my version and on my iMac, it ended up taking a long time to render. Most of those times though, I was recording screen captured video; and to be fair that always demands a whole lot of memory.
Refining and Feathering Masks
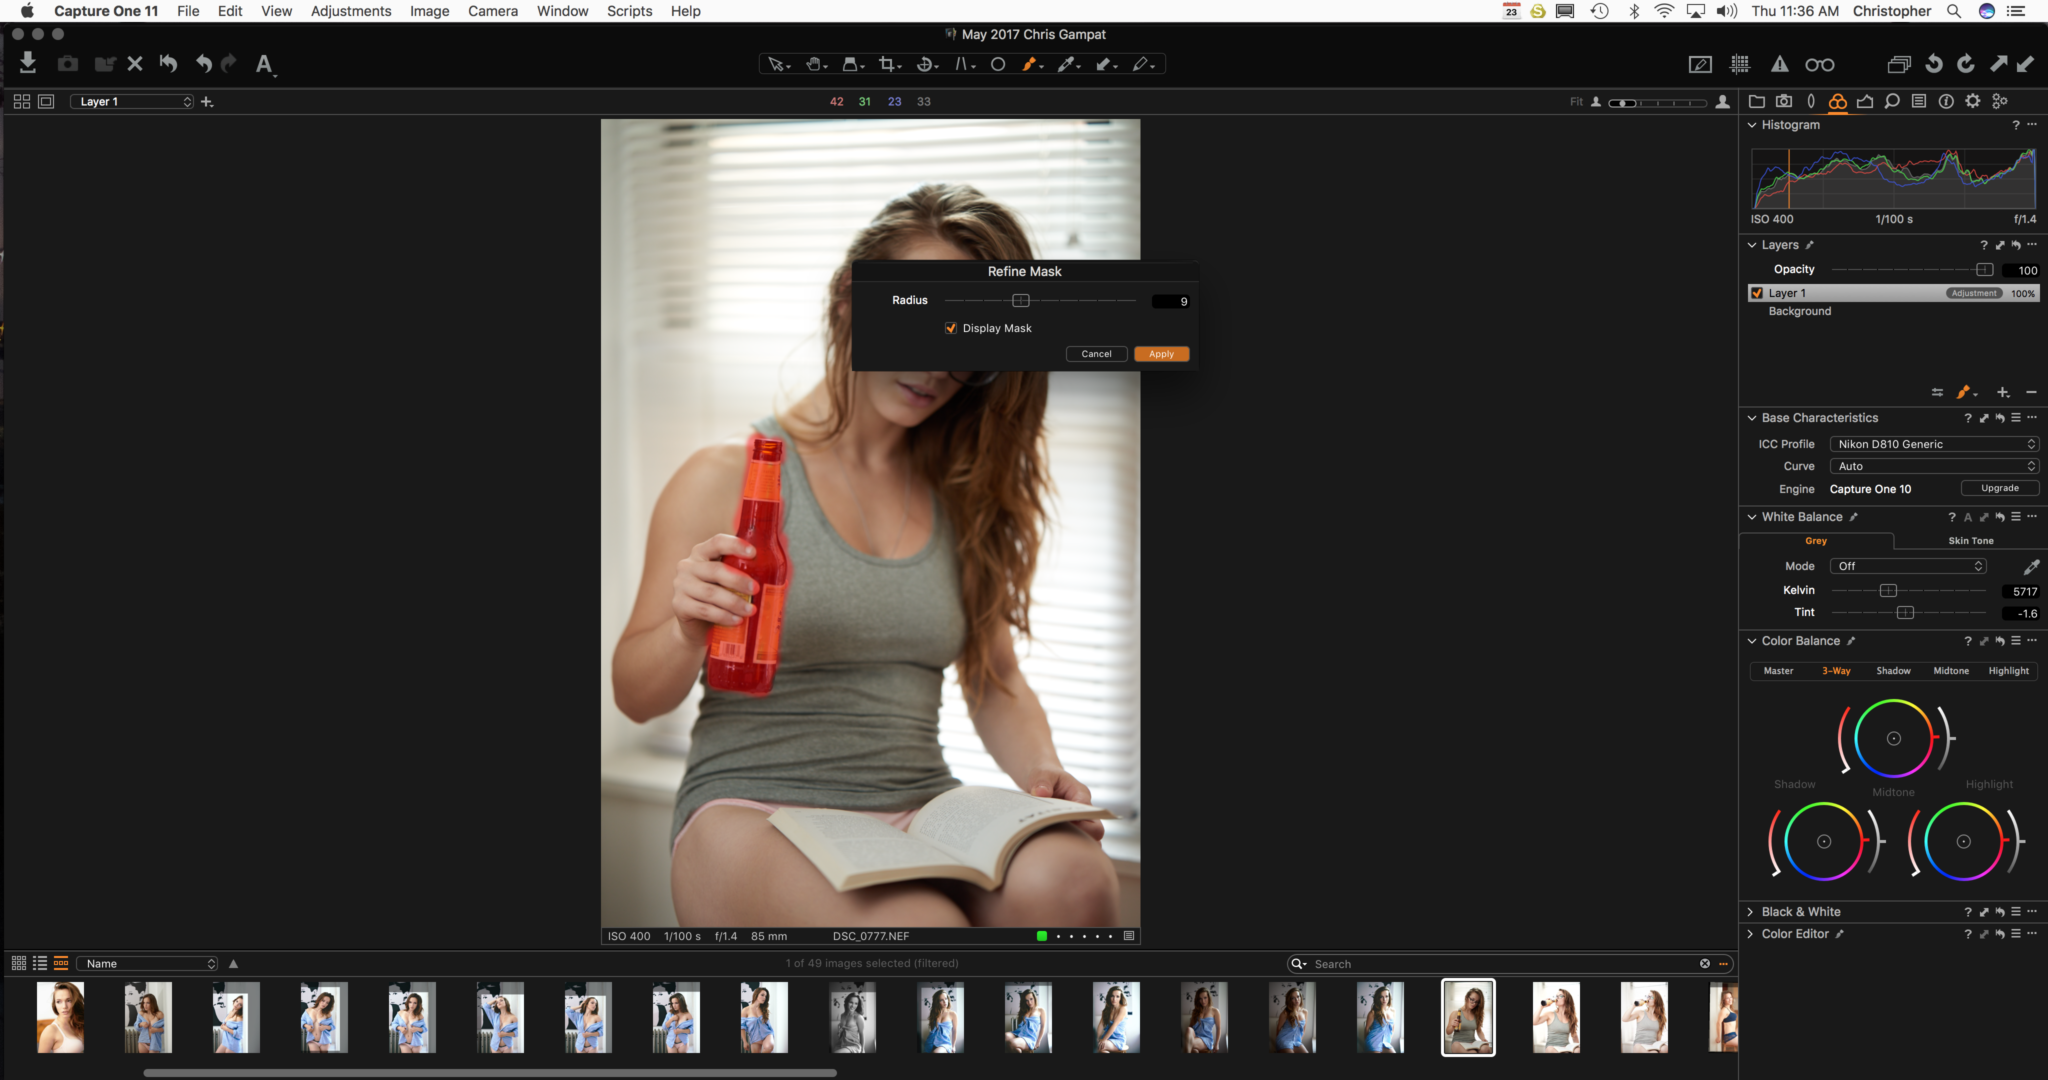 Refining masks have a whole lot of great uses. While most photographers may use it for removing hairs from a subject (like flyaway hairs) or something, I’ve always liked masks for specific editing. You see much more of this in the video. Masks make a whole lot of sense if your editing of a specific color channel isn’t working out the way you want and you don’t want to nerf all the highlights of something specifically, like the sky in a landscape. When a lot of detail is involved in the scene and when there are lots of different colors in a region, then it can also slow down a bit. In the video, this is demonstrated when I was editing the brick wall of a church here in NYC. There were blues, purples, oranges, greens, etc.
Unfortunately, you cannot make specific color adjustments to masks. By that I mean if you’re trying to adjust the red color channel vs the blue color channel it can be difficult to do.
Conclusions
Am I a fan of the new Capture One Pro 11? You bet I am. Will I be upgrading? Yes. Will I be using all of the new additions? Probably not all the time as I strive to get things as best in-camera as I can. But when it comes to doing my more conceptual work though, then masking can be very useful. But if you haven’t upgraded cameras, then you personally don’t have a reason to upgrade to Capture One Pro 11 unless you want the incorporation of masks and all the new stuff. Just as an FYI, I still use Lightroom at times, but only when I know the update for a camera’s RAW files are there and they aren’t with C1 yet. Capture One is catching up though, and soon I’ll have little to no need at all for Adobe Lightroom Classic.
![]()
 Capture One Pro 11 receives our Editor’s Choice award and five out of five stars.
Get rid of the ads!
Did you enjoy reading this article as much as we enjoyed writing it? There's a way to support us and our reporting, getting ad-free navigation and more as a bonus. Subscribe to us for less than a coffee per month —just $3.99— or take advantage of our yearly subscription with a hefty discount for only $25.- An ad-free experience
- A free mystery box for Lightroom or Capture One
- All the books in our store
- 20% discount on Capture One
- 30% discount on Imalume Photo Theft Protection
- 20% off Herbs and Kettle Tea Company.
- 20% off your order from MPIX printing services.
- 5% off Viltrox Products via their eCommerce store.
- 10% off all film developing, printing and scanning services from Blue Moon Camera and Machine
- 15% off 7Artisans products: The lens and accessory maker is offering a sweet discount for Phoblographer's readers.