
Last Updated on 07/10/2017 by Chris Gampat
“Not for the Bronica unfortunately, unless you could possibly bring the tripod mount into it, rigging something to the back to hold it in place,” says photographer Brock Saddler (follow him on Instagram) about his Bronica ETRS hack when I asked him about whether or not he’d still need to use the rubber bands. “…something for the next person to think about.” Brock is amongst the many photographers and hackers we’ve interviewed here on the Phoblographer. His hack specifically has to do with the Bronica ETRS. Last year, we interviewed him about hacking his Bronica ETRS to shoot Fujifilm Instax mini film and he was still in the process of refining it. But he got really close to making it absolutely perfect.
Brock, unfortunately, has no plans to make it commercially viable. “This was just something to do on a rainy day,” he tells us. And to that end, he’s given us permission to share his post on how he did it.
A little while ago I modded an Instax mini for use on my Bronica ETRS. Chris from The Phoblographer stumbled across it and was kind enough to ask me some questions about it (you can read it here). Since then I’ve been getting a whole lot of response from ETRS owners wanting to do the same to theirs! I never covered the build properly as at the time I was just hacking at it and destroying and didn’t really know what I was doing with it. It turned out that it worked – kind of. The main problem with it though was the focal plane distance which would throw infinity focus out so I never pursued it further. BUT the other week I found a Polaroid 300 in the thrift shop, so why not give it another go?
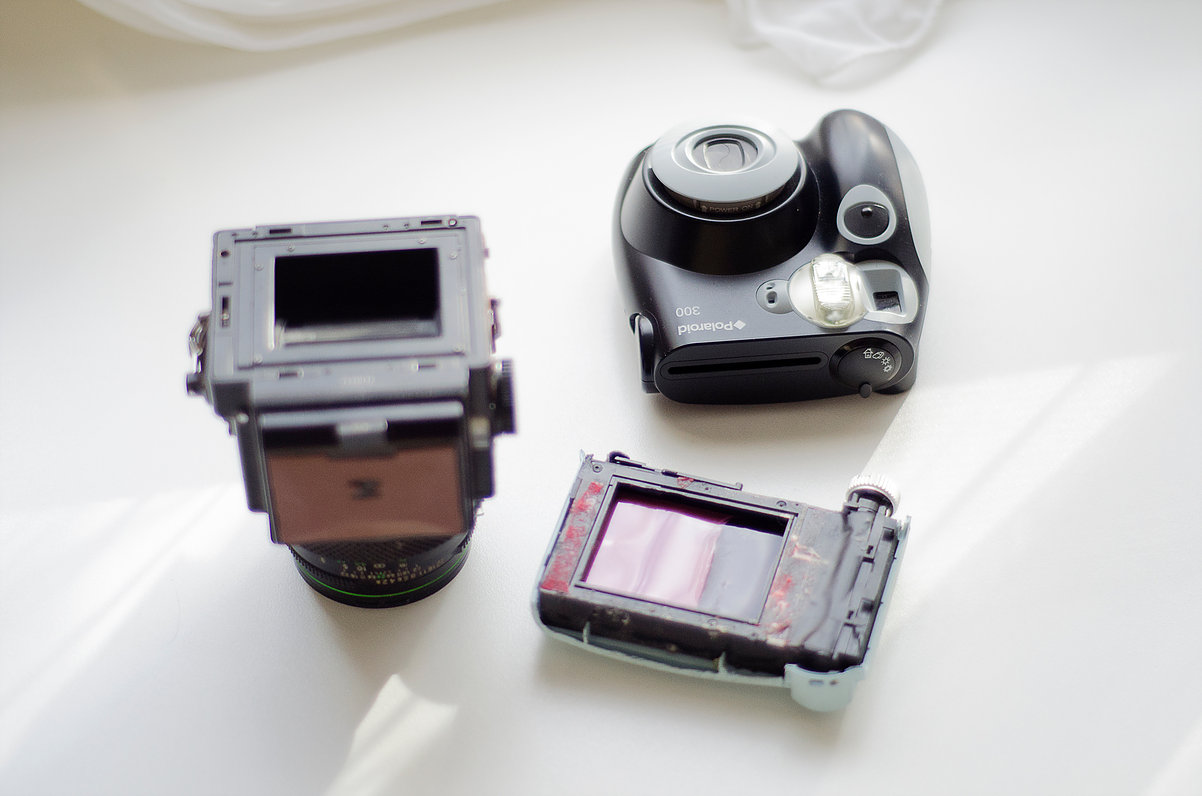
Although It’s a different camera from the original Fujifilm Instax camera I figured it would be almost the same under its shell (we can get to that later).
This time I documented it so if you want to try it as well you can see some of the trouble that I hit along the way. The first time around I spent a good rainy weekend inside unscrewing and cutting bits here and there, much cursing, and in the end went through 6 cartridges of film just testing the damn thing. Glad I got that out of the way the first time, The second was a breeze. V.2 still has focussing issues but they are tolerable and you can get away with most things at f/8. The fact that the cartridge needs to be housed is that main problem with getting it so the film plane is closer to the body. If someone else can figure it out let me know!
I chose the Bronica to be the host for two reasons. The multiple exposure lever lets you trip the shutter when there is no ‘real’ back attached and simply that it’s my favourite camera outfit! I’m sure you could use any camera as long as you have a flat film plane to hold it against.
What you’ll need-
-
Camera
-
Instax body (it can be broken! We ditch all the electronics in there)
-
Small screwdrivers
-
Felt to light seal it
-
Big rubber band (the one from an underwater disposable camera works a treat)
-
Stanley knife or razor blade
-
A rotary tool/ Dremel helped a lot
-
The rewind knob from a donor camera
-
An old Bronica back just for the hooks (not needed but is another one that helps)
-
Epoxy glue
-
Black gaffa or electrical tape to tape up light leaks
This isn’t an exact step by step, more of a walkthrough. You’ll still have to trouble shoot in some areas to make it work for you and what you have. To start the build we need the chassis of the Instax camera, so take to it with your phillips head and remove the lot.

The outer shell comes first. We don’t need the front cover but will need rear with the film door
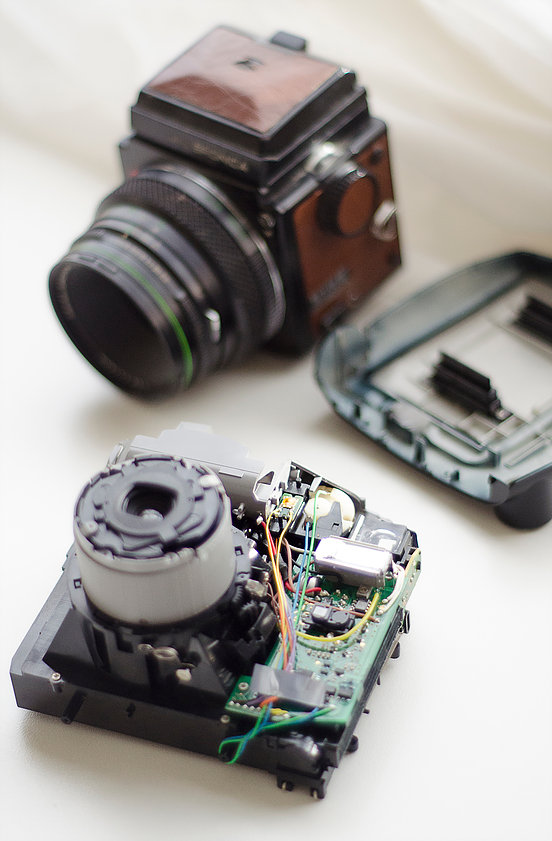
This was where I found the only real difference from the Fujifilm camera, the electronics are a more intertwined with the mechanics of the camera. Still the principal is the same, remove the circuitry and lens assembly.

*CAUTION* whenever you see a capacitor, these hold the current needed for the flash. They have a nasty little shock if you touch the prongs on the end. Never touch one unless it has been discharged. Just keep away from this guy.
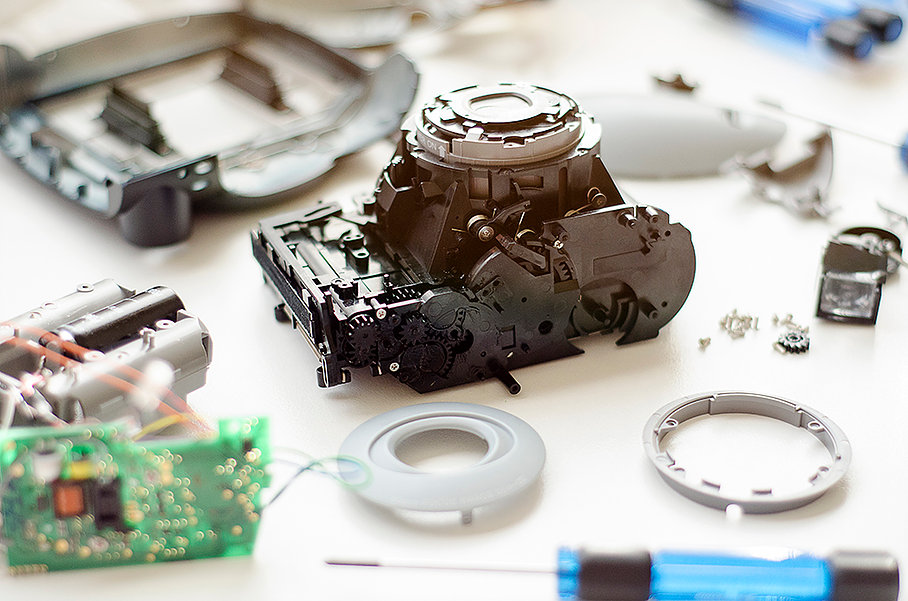
Once the circuits are gone I could take of the lens assembly.
When you get to the hook that ejects the film put it off to the side. Take note of what it looks like when it comes off and how much it sticks up past the film plane. This is the part of this puzzle that gave me the most grief, we can do it later.
Once you have the electronics and lens off you’ll be left with this-

Leave the roller assembly and the two cogs that are attached to them on the side.
Now you can start the rebuild!

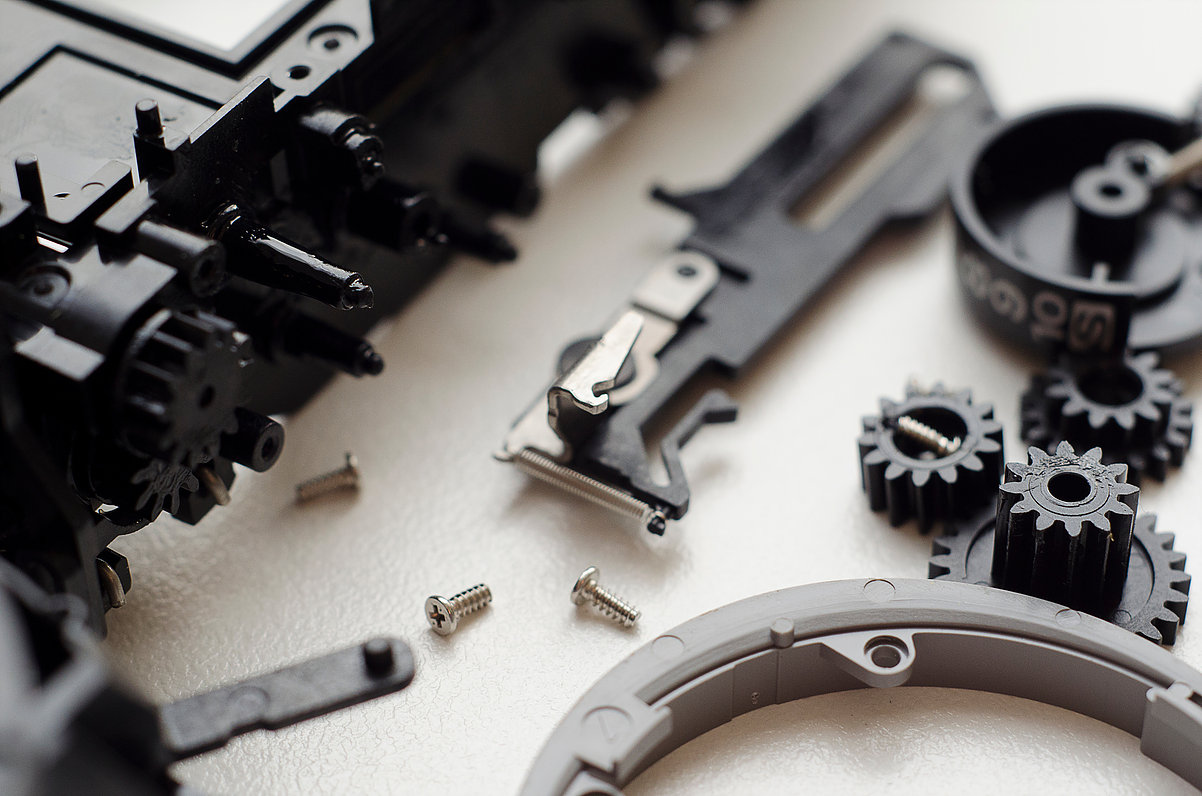
You’ll need to shave everything that protrudes out from the film plane. This is where the Dremel really helped. Keep it as smooth as possible, any dip or poke could break the light seal when attached to the camera body. Use the razor blade to scrape and smooth, or cut off small pieces. please be careful not to cut yourself.
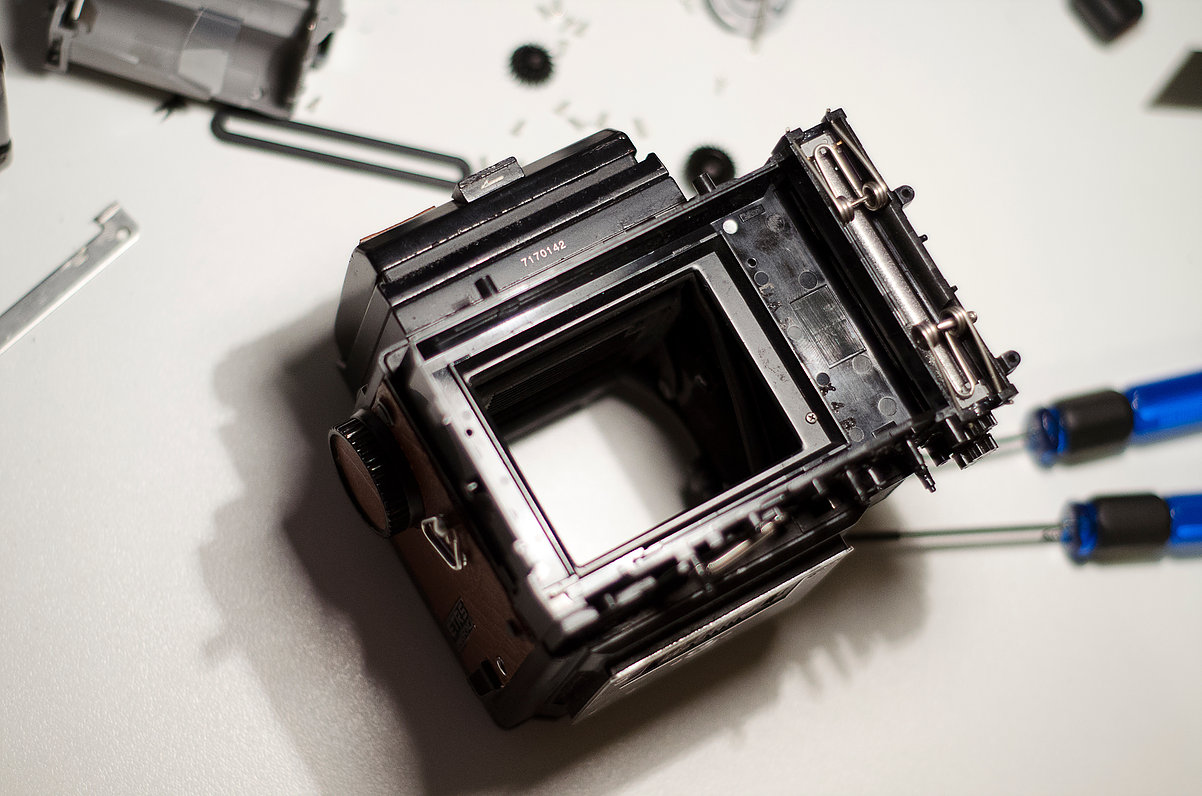
Test it by laying it flat on the body. You can see here how much area the 645 image covers on the film. Line it all up, make sure you have taken enough off the chassis.
Ok, now for that ejector hook problem. Ugh. This is the most essential part of the build. It’s the hook that grabs the film on the inside of the pack and pulls it towards the rollers before you can wind and eject it. You need to find a way to keep it from sticking up past the film plane, but still be able to slide it across enough and to grip one sheet at a time. You’re pretty much fabricating yourself a new ejection system. Mine isn’t pretty, but it works well. I flipped the plastic over, cut some off here and there and cut and re-bent the hook. Be careful with that hook, its quite fragile if you keep bending it back and forth. This hook is actually the one I used in the first version, I broke the V2 one by bending it too much. So play it safe otherwise you’ll have to make a whole new one.


Mine looks like this once it’s done. Nice and flush with the film plane. You can see I had to relocate the screw so it can slide across and the spring was moved so it can retract the hook assembly (bummer, I just noticed in this picture it has come off it’s spot, the pokey out bit above it).
Now this part isn’t needed but it sure helps hold it to the body. The hooks from a Bronica back, you might be able to machine your own from some metal sheet if you don’t have one to spare. Only the top hook though, the Instax back comes out too far and covers the bottom set hence the rubber band to keep it all together… and ghetto. Make sure you line the film area up first before you glue it. Use epoxy glue on this, let it set overnight. I foolishly used a hot glue gun on the V.2 as I was being impatient and it broke off straight away.

The other change from the the first version is the felt I used to light seal it. The first was a thick red felt, it was just something I had lying around. This time I used some thin velvet which aided in getting that film plane closer to the body.

The old rewind knob you have glues right onto one of the cogs of the rollers. The cog also likes to slip off so I glued that to the roller too.

The rotary tool helps again with cutting off the excess shell.

That’s about it. The rubber band just slings around and holds it in place nicely. It would be nice to get it to sit on by itself but this works for me. You’ll need to take the winder handle off if you have one attached to the Bronica body.

You can see here where I’ve taped up the light leaks. Mine have only leaked around where the hook assembly is.


Using the thinner felt helped immensely with the focal throw out even if it was only 1 or 2mm difference. I don’t think it would be possible to get it any closer than this without doing some serious work to the back, but you can scrape by with some added depth of field. The ejector hook is the part you will encounter the most trouble. Good luck with it if you give it a go!
This is a syndicated blog post from Brock Saddler. It and the images here are all being used with permission.
Get rid of the ads!
Did you enjoy reading this article as much as we enjoyed writing it? There's a way to support us and our reporting, getting ad-free navigation and more as a bonus. Subscribe to us for less than a coffee per month —just $3.99— or take advantage of our yearly subscription with a hefty discount for only $25.- An ad-free experience
- A free mystery box for Lightroom or Capture One
- All the books in our store
- 20% discount on Capture One
- 30% discount on Imalume Photo Theft Protection
- 20% off Herbs and Kettle Tea Company.
- 20% off your order from MPIX printing services.
- 5% off Viltrox Products via their eCommerce store.
- 10% off all film developing, printing and scanning services from Blue Moon Camera and Machine
- 15% off 7Artisans products: The lens and accessory maker is offering a sweet discount for Phoblographer's readers.