• Home
  • Reviews Index
  • Best Gear
  • Inspiration
  • Learn
  • Disclaimer
  • Staff/Contact Info
  • Media Kit
  • Membership
Bridging Tech and Creative Photography
Education Field Instructional

These Tricks Made Me a Better Photo Editor

Chris Gampat
No Comments
04/24/2016
7 Mins read
Screen Shot 2016-04-13 at 12.14.32 AM

Last Updated on 04/24/2016 by Chris Gampat

For more from Michael, Check out MPZ Photography.

As a photographer who cut his teeth on large format film, I have always tried to “Get it right in camera” and carried this mantra over to my digital photographs. With the popularity of HDR, VSCO presets, and plenty of other trends, I generally lean towards the safe side of editing. In many ways, I am a traditionalist, and until recently I haven’t been interested in altering my workflow or style. Over the past few years I have been added to a variety of Facebook Groups both locally focused (NJ/NY) and larger (like VSCO Users.) The images that started showing up on my timeline inspired me to rethink my philosophy and approach to editing. All of the awesome photographs showing up in my feed made me feel a little bummed about my “boring” work. I decided to take a crack at revisiting some of my older wedding photographs, to see if I could improve them.

From time to time I tend to revisit favorite non-wedding images, especially landscapes. Reworking landscape images comes naturally, but I never considered digging up old wedding images in my Lightroom catalogs. As I saw it, there would be always be future jobs to show off newly learned skills and experience. The wedding market in NJ/NYC is super busy and there is always a friend or “friend of a friend” looking for a photographer. However my new friends quickly taught me that consistent style and aesthetics are crucial to branding and gaining new sources of income. I have photographed many weddings as a second shooter for big studios, but only have about fifteen of my own jobs under my belt. Something needed to change. Showing varying styles of photographs across the years of my career wouldn’t be appropriate. I desperately needed to present myself in a fresh consistent manner.

Trying Presets

Screen Shot 2016-04-13 at 12.22.20 AM

Throughout my transformation I learned that it isn’t a bad thing to try presets. In the past I always thought that presets were for people following trends, making cookie cutter photos. This can be true if you just stamp every image without making any adjustments. Maybe trends are ok, after all clothes, music, and hairstyles go in and out of popularity. It is also important to note that perhaps these presets are merely a starting point for individual expression. Over the next year I hope to continue solidifying my aesthetic and vision. I tend to edit a bit darker with more contrast than most. I still enjoy raised black points, but not to the point where richness is lost. In some ways I feel that I wasted time over the past several years by playing it safe and not exploring deeper editing in Lightroom, but there is no use in dwelling on the past.

The Examples

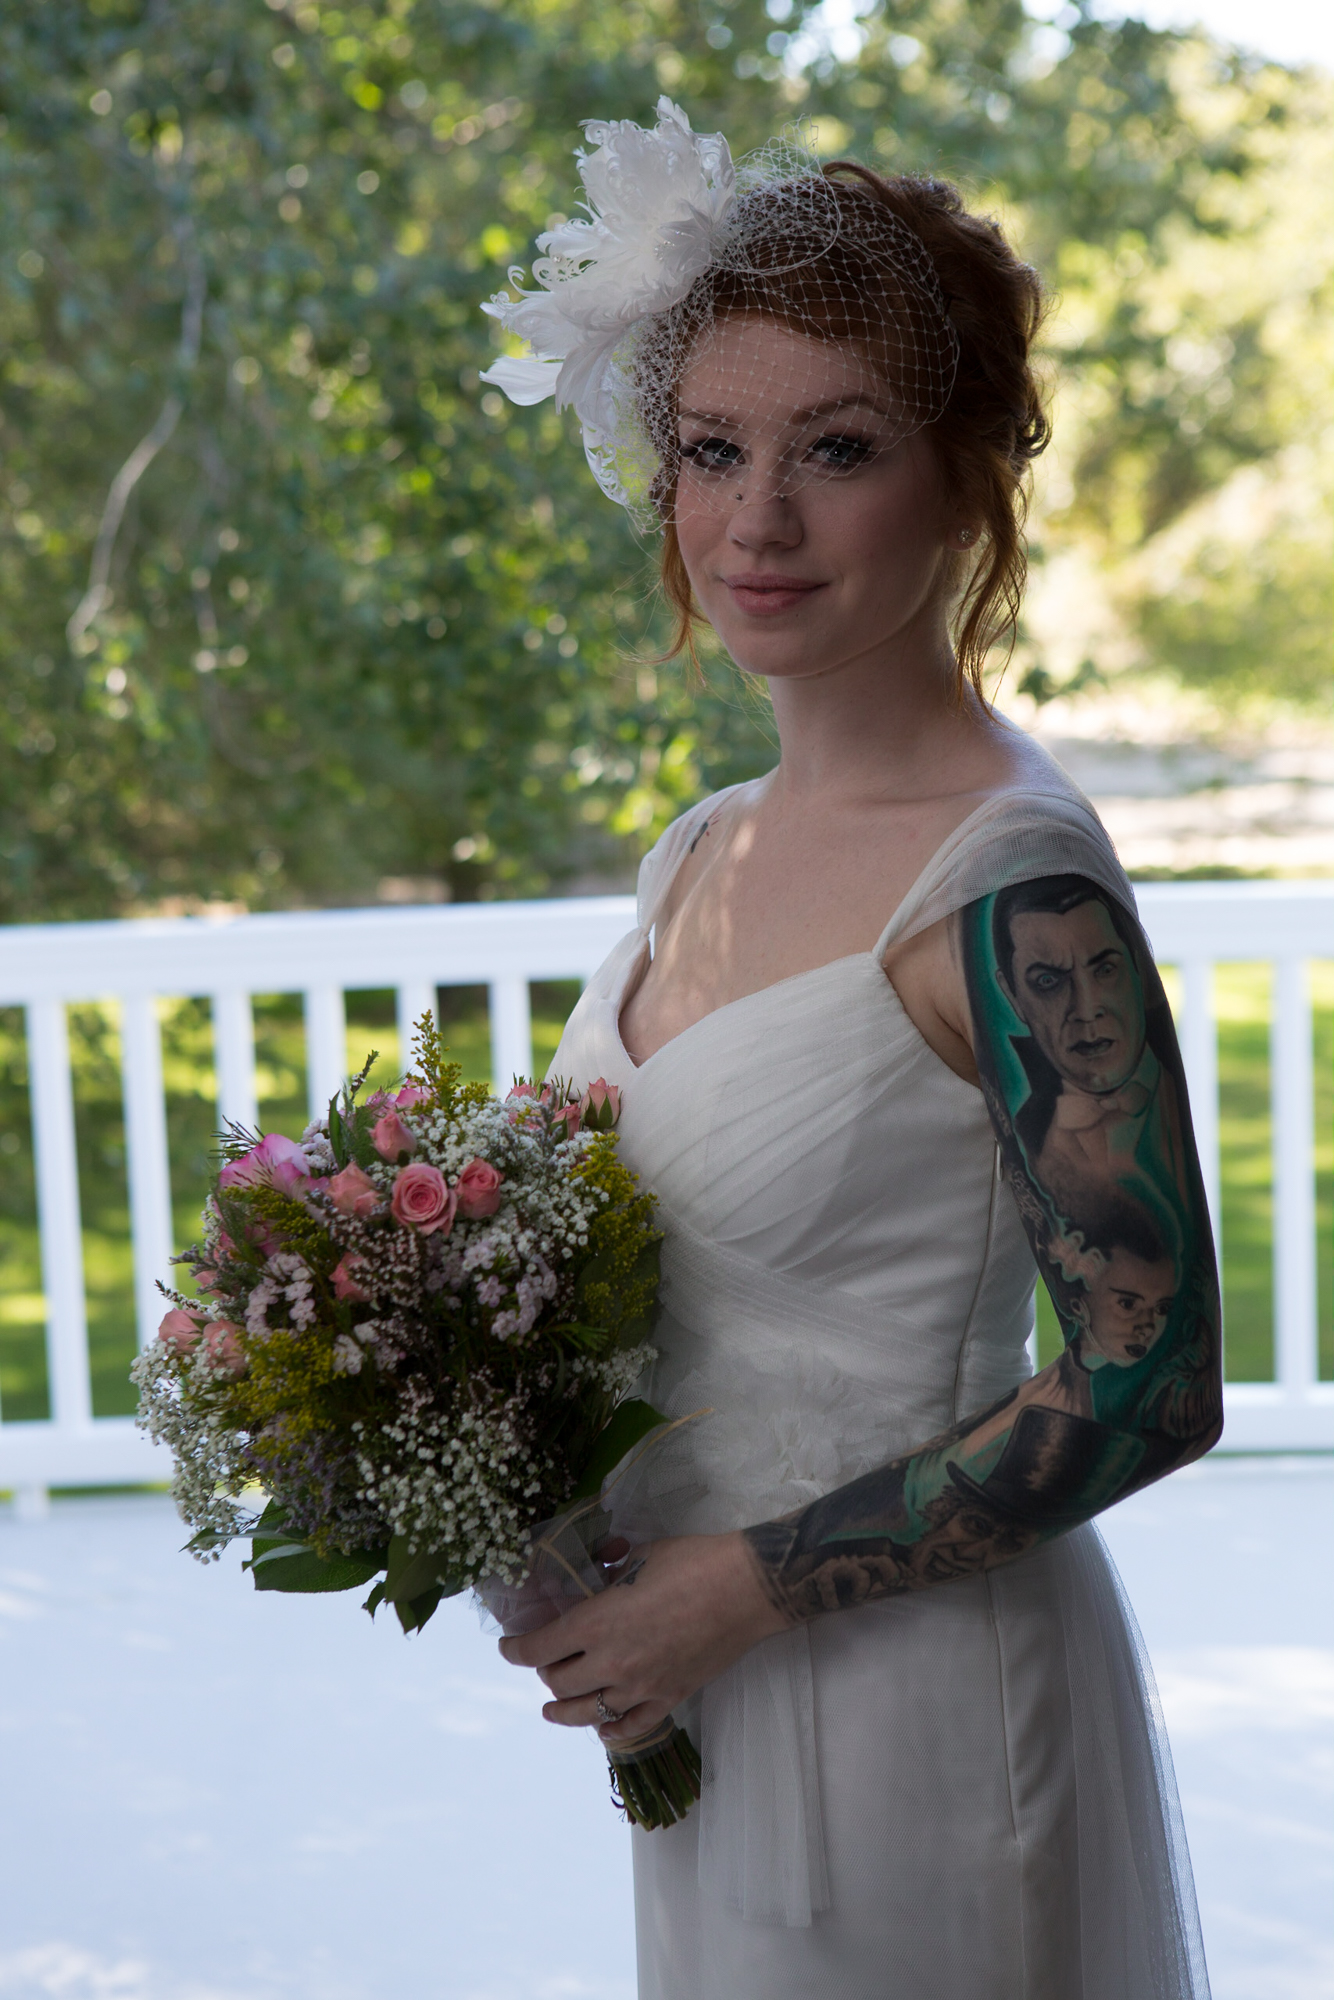
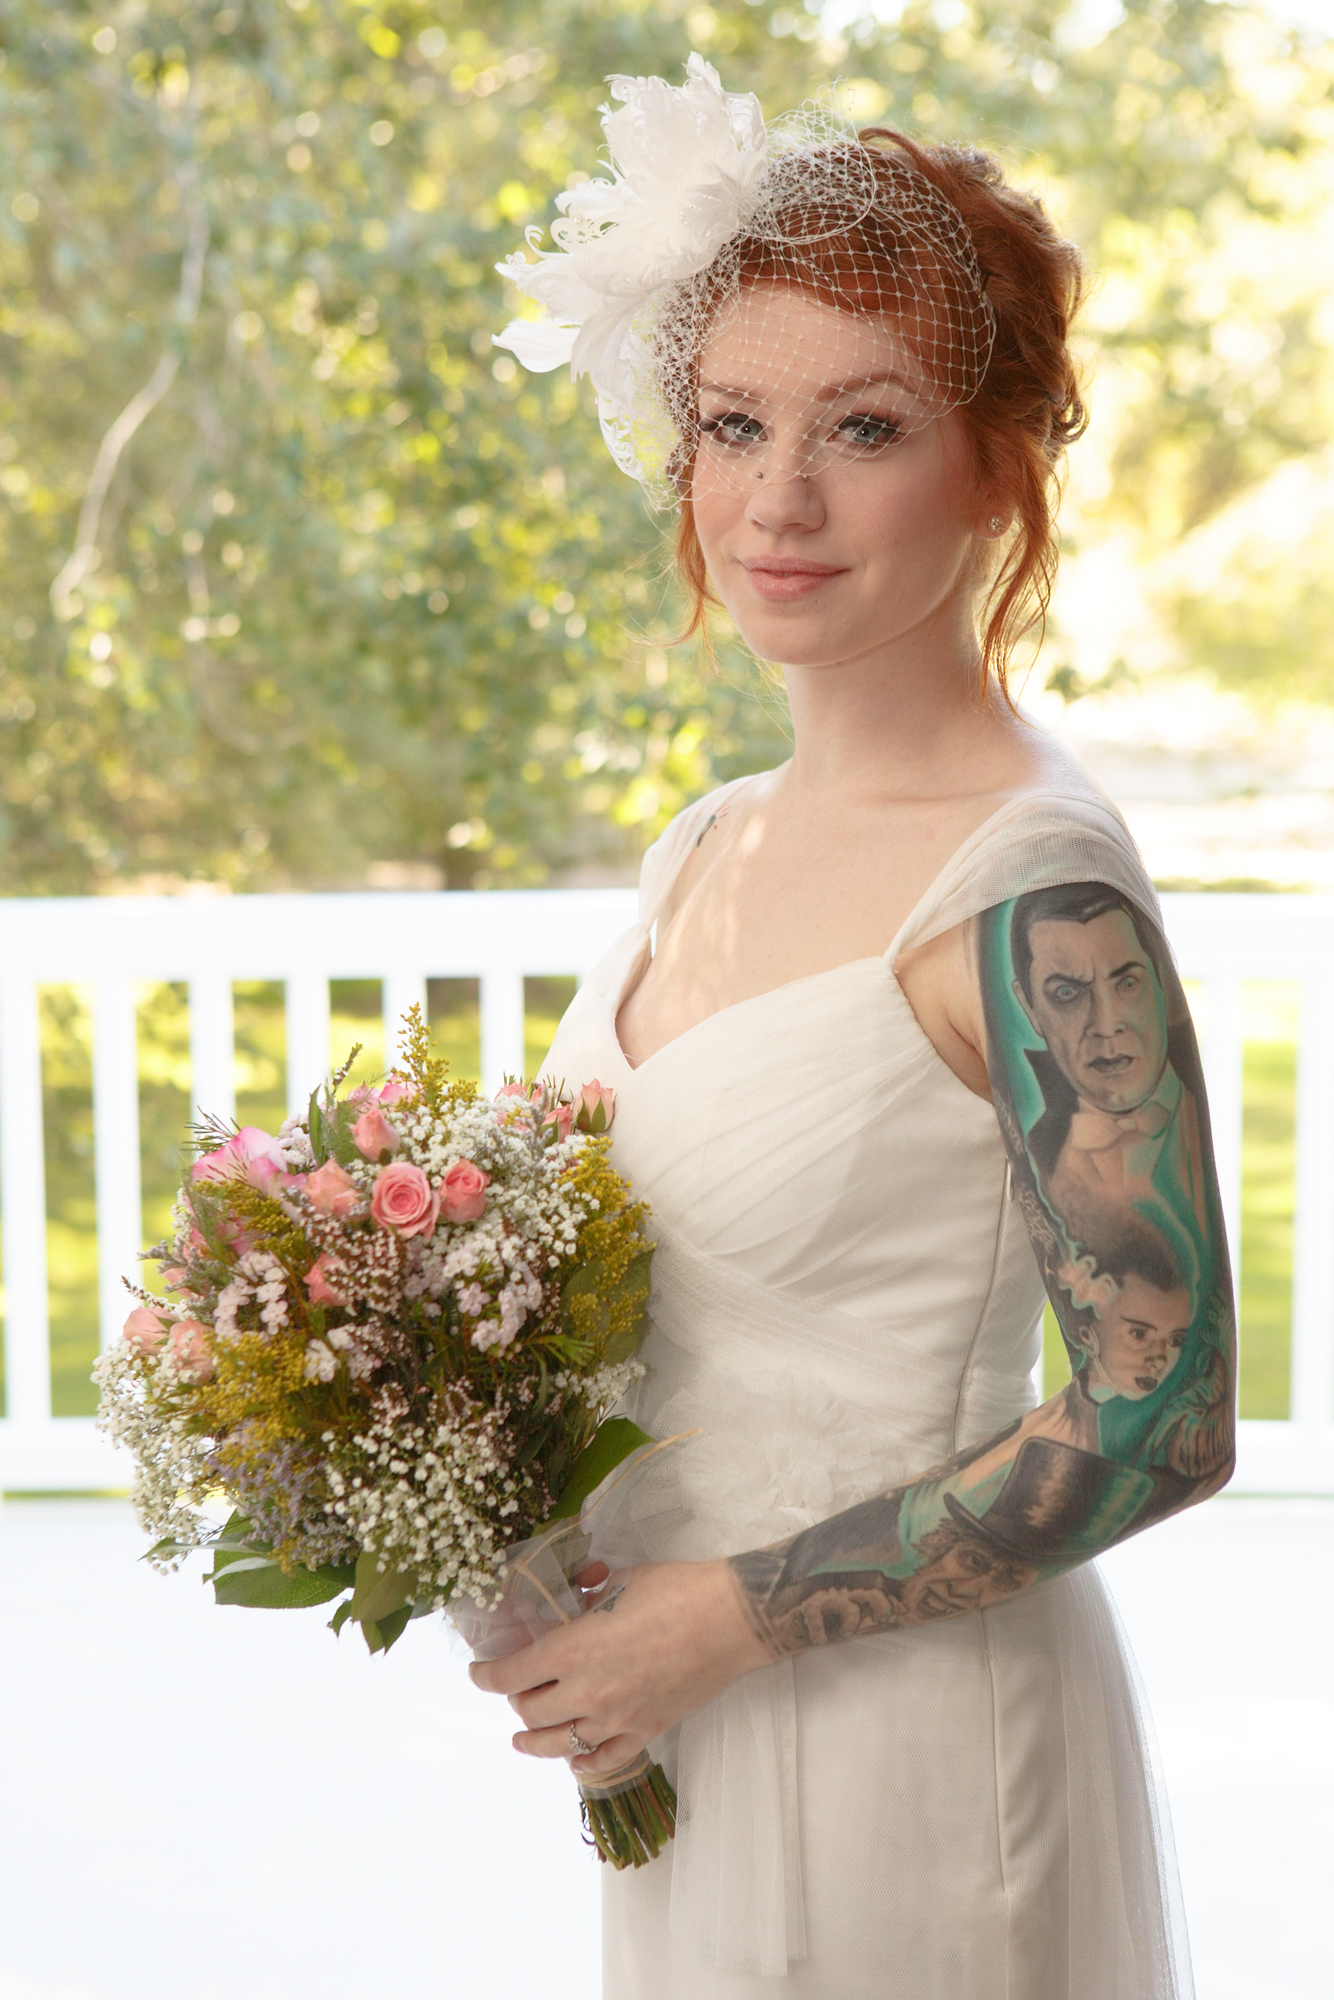
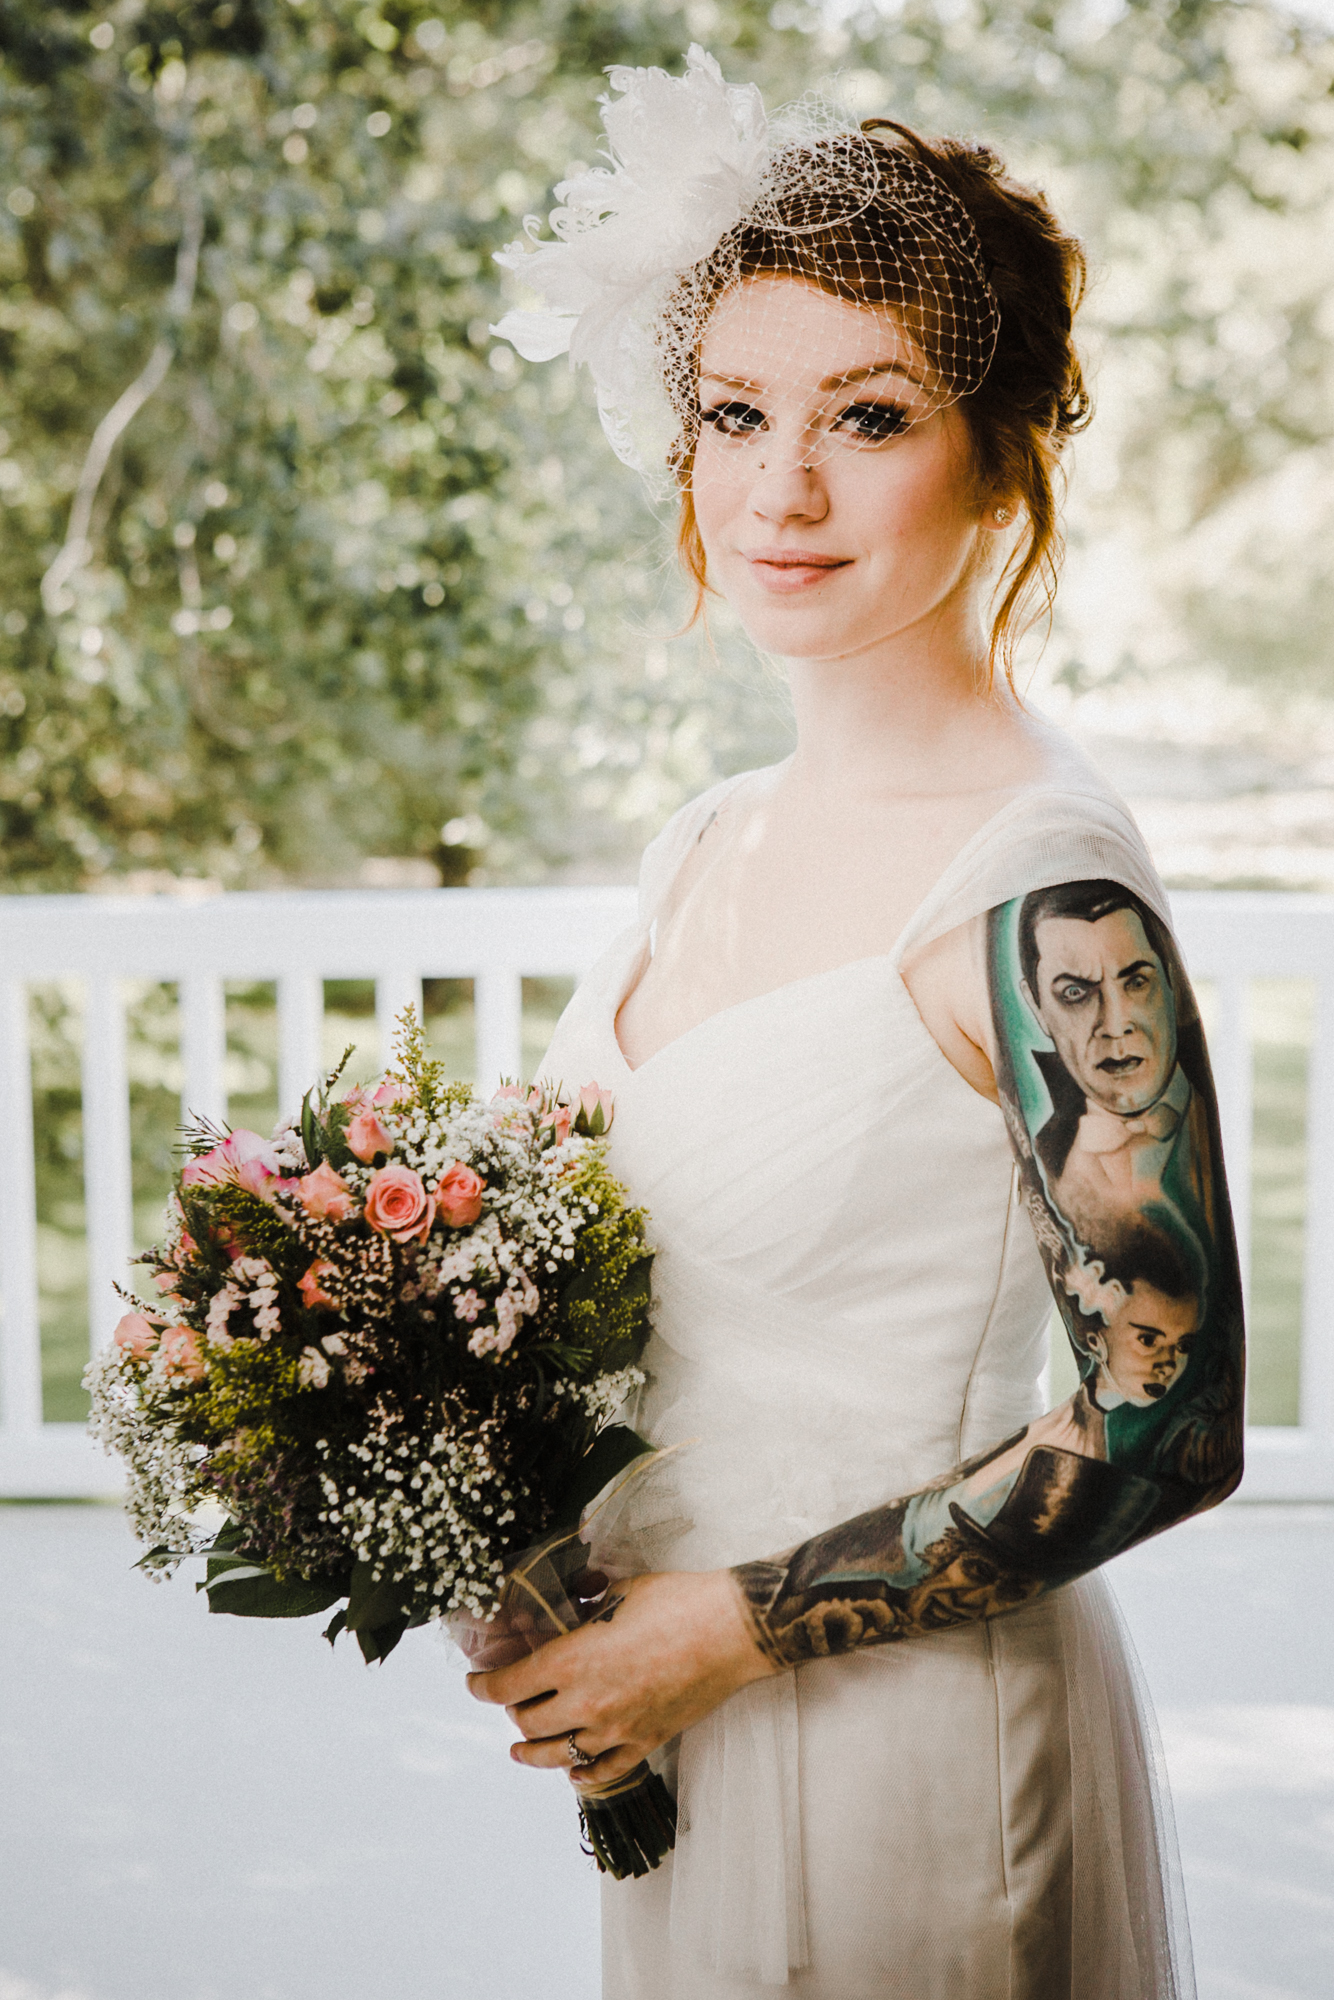
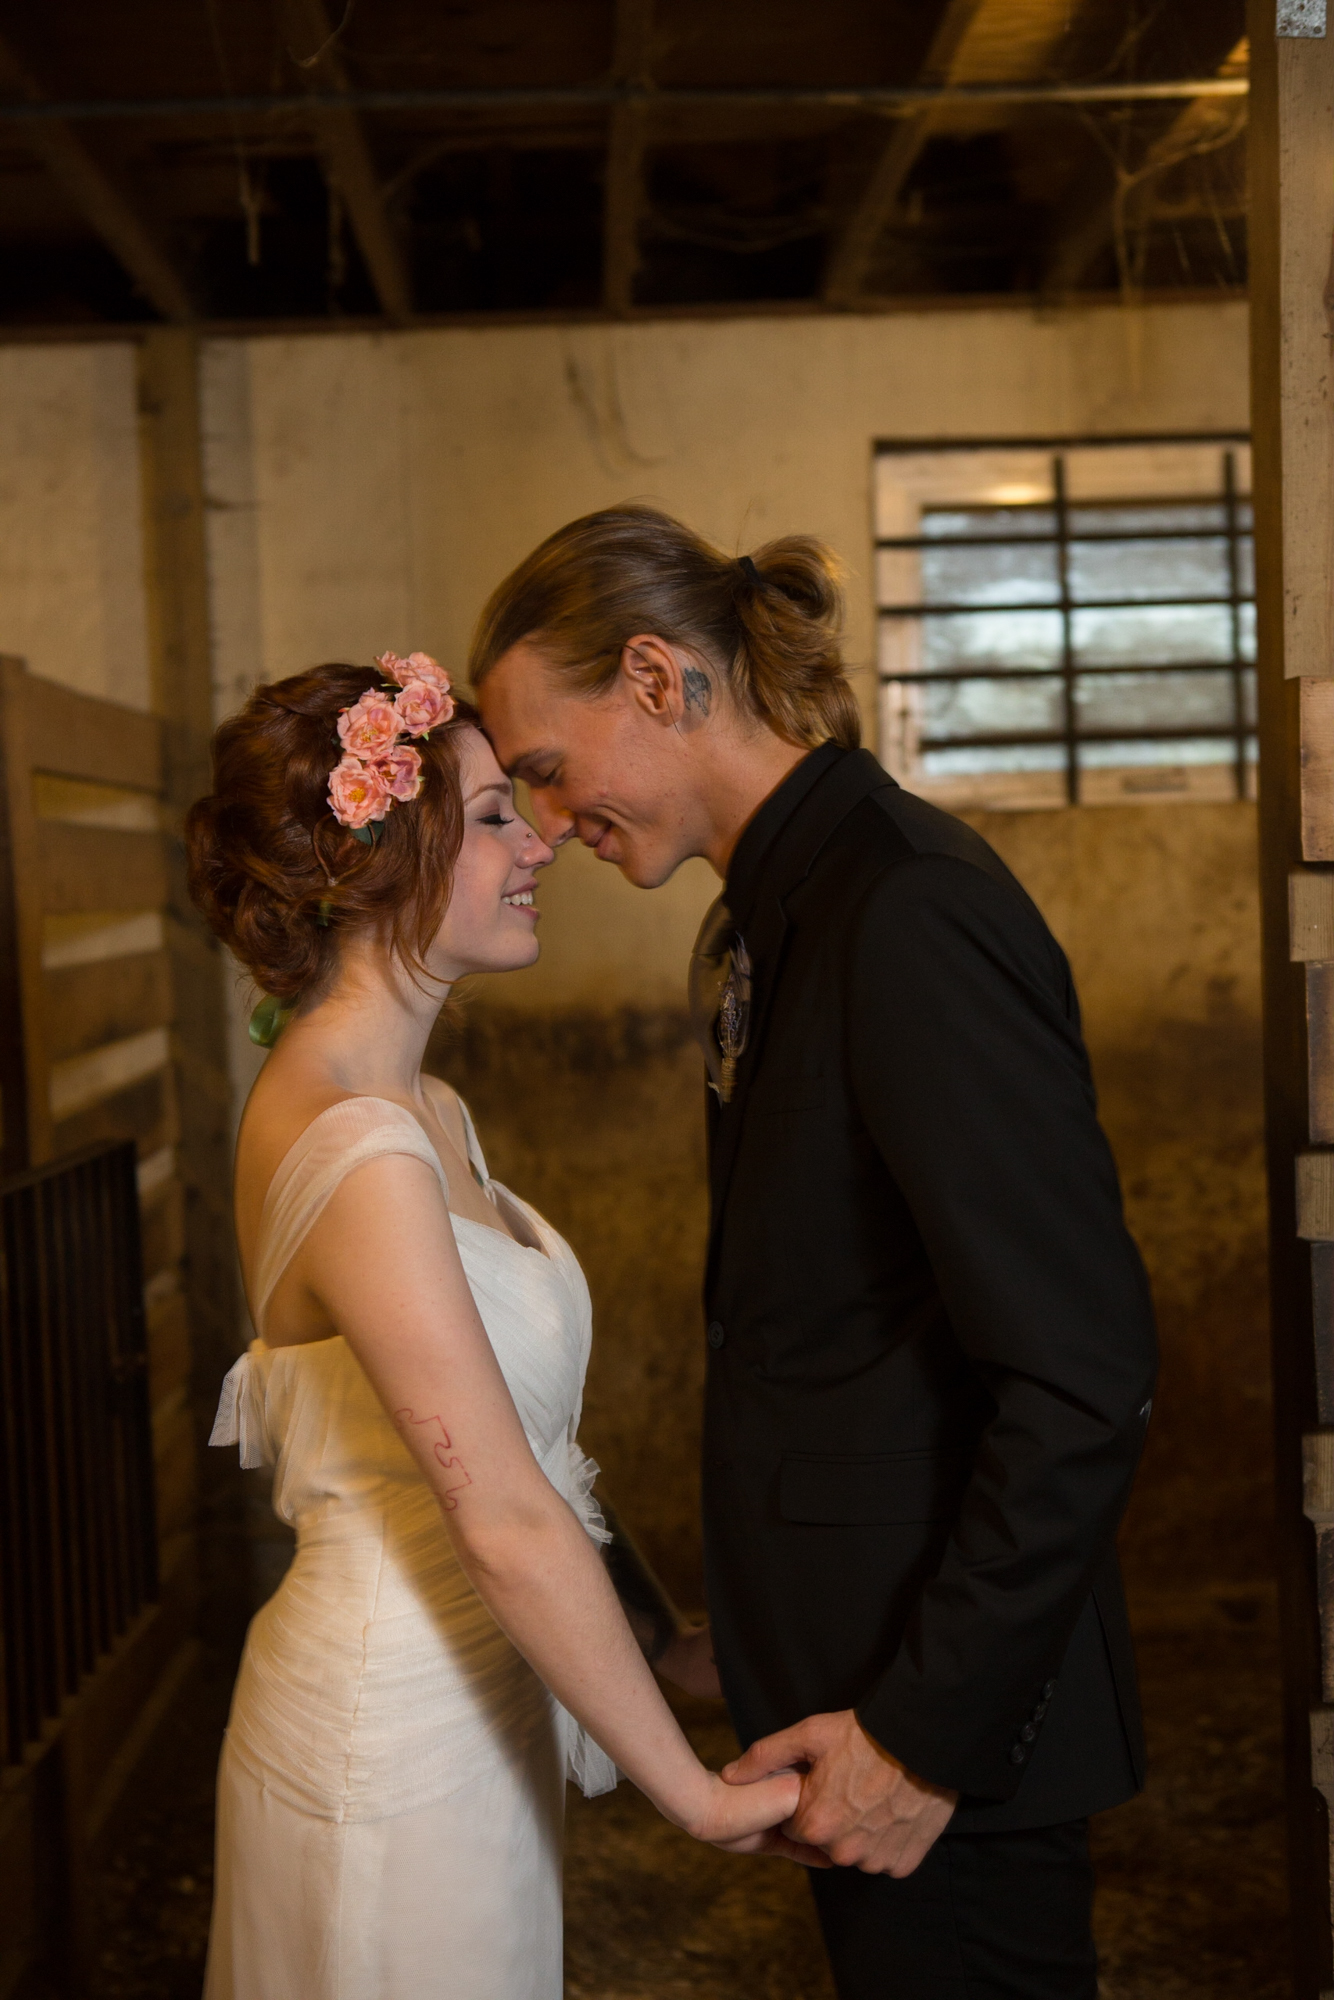
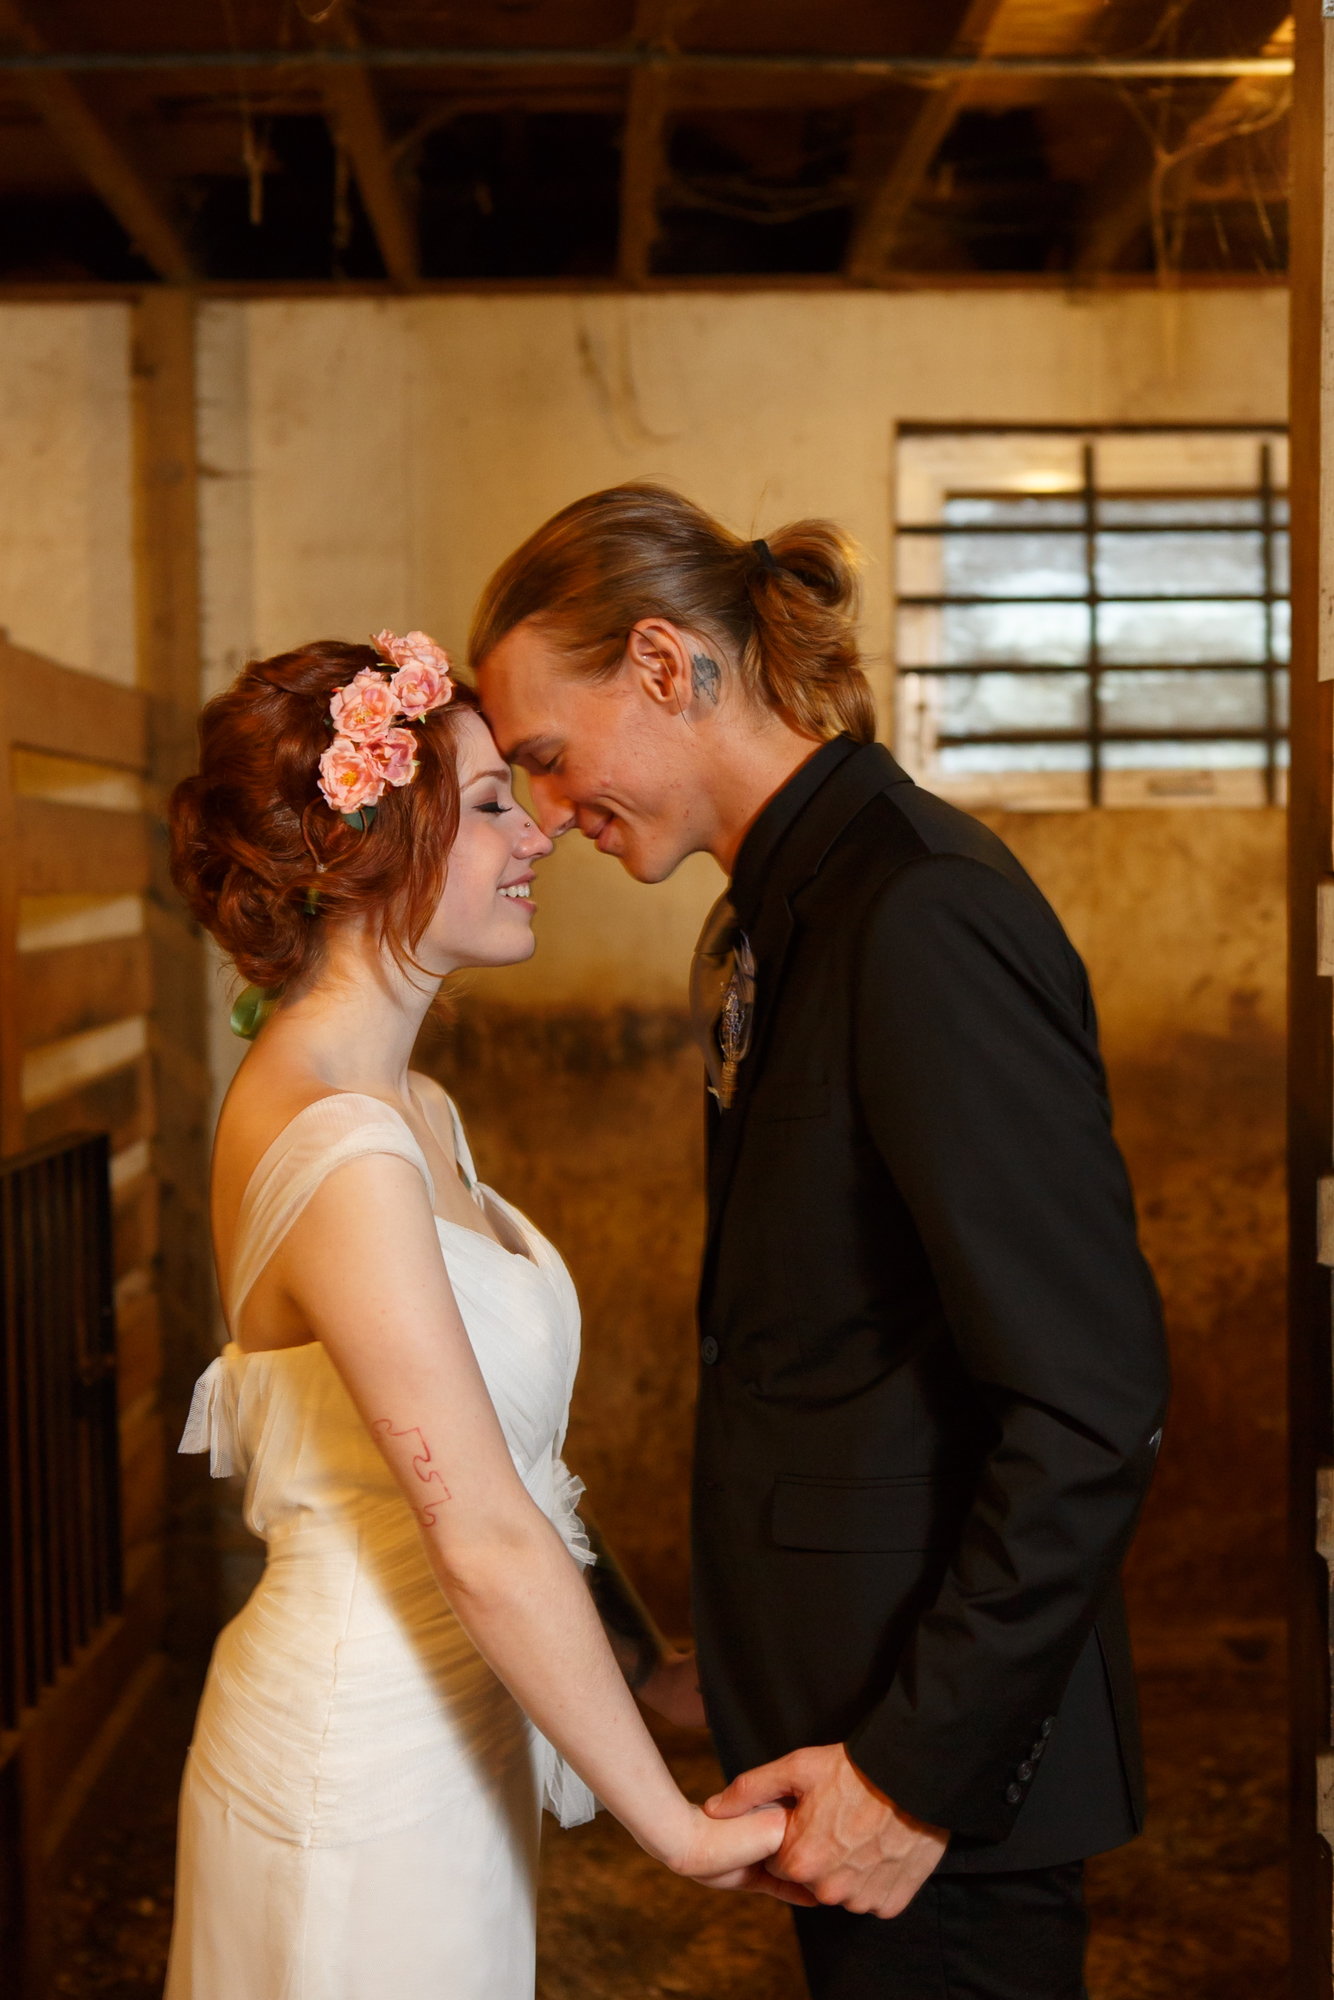
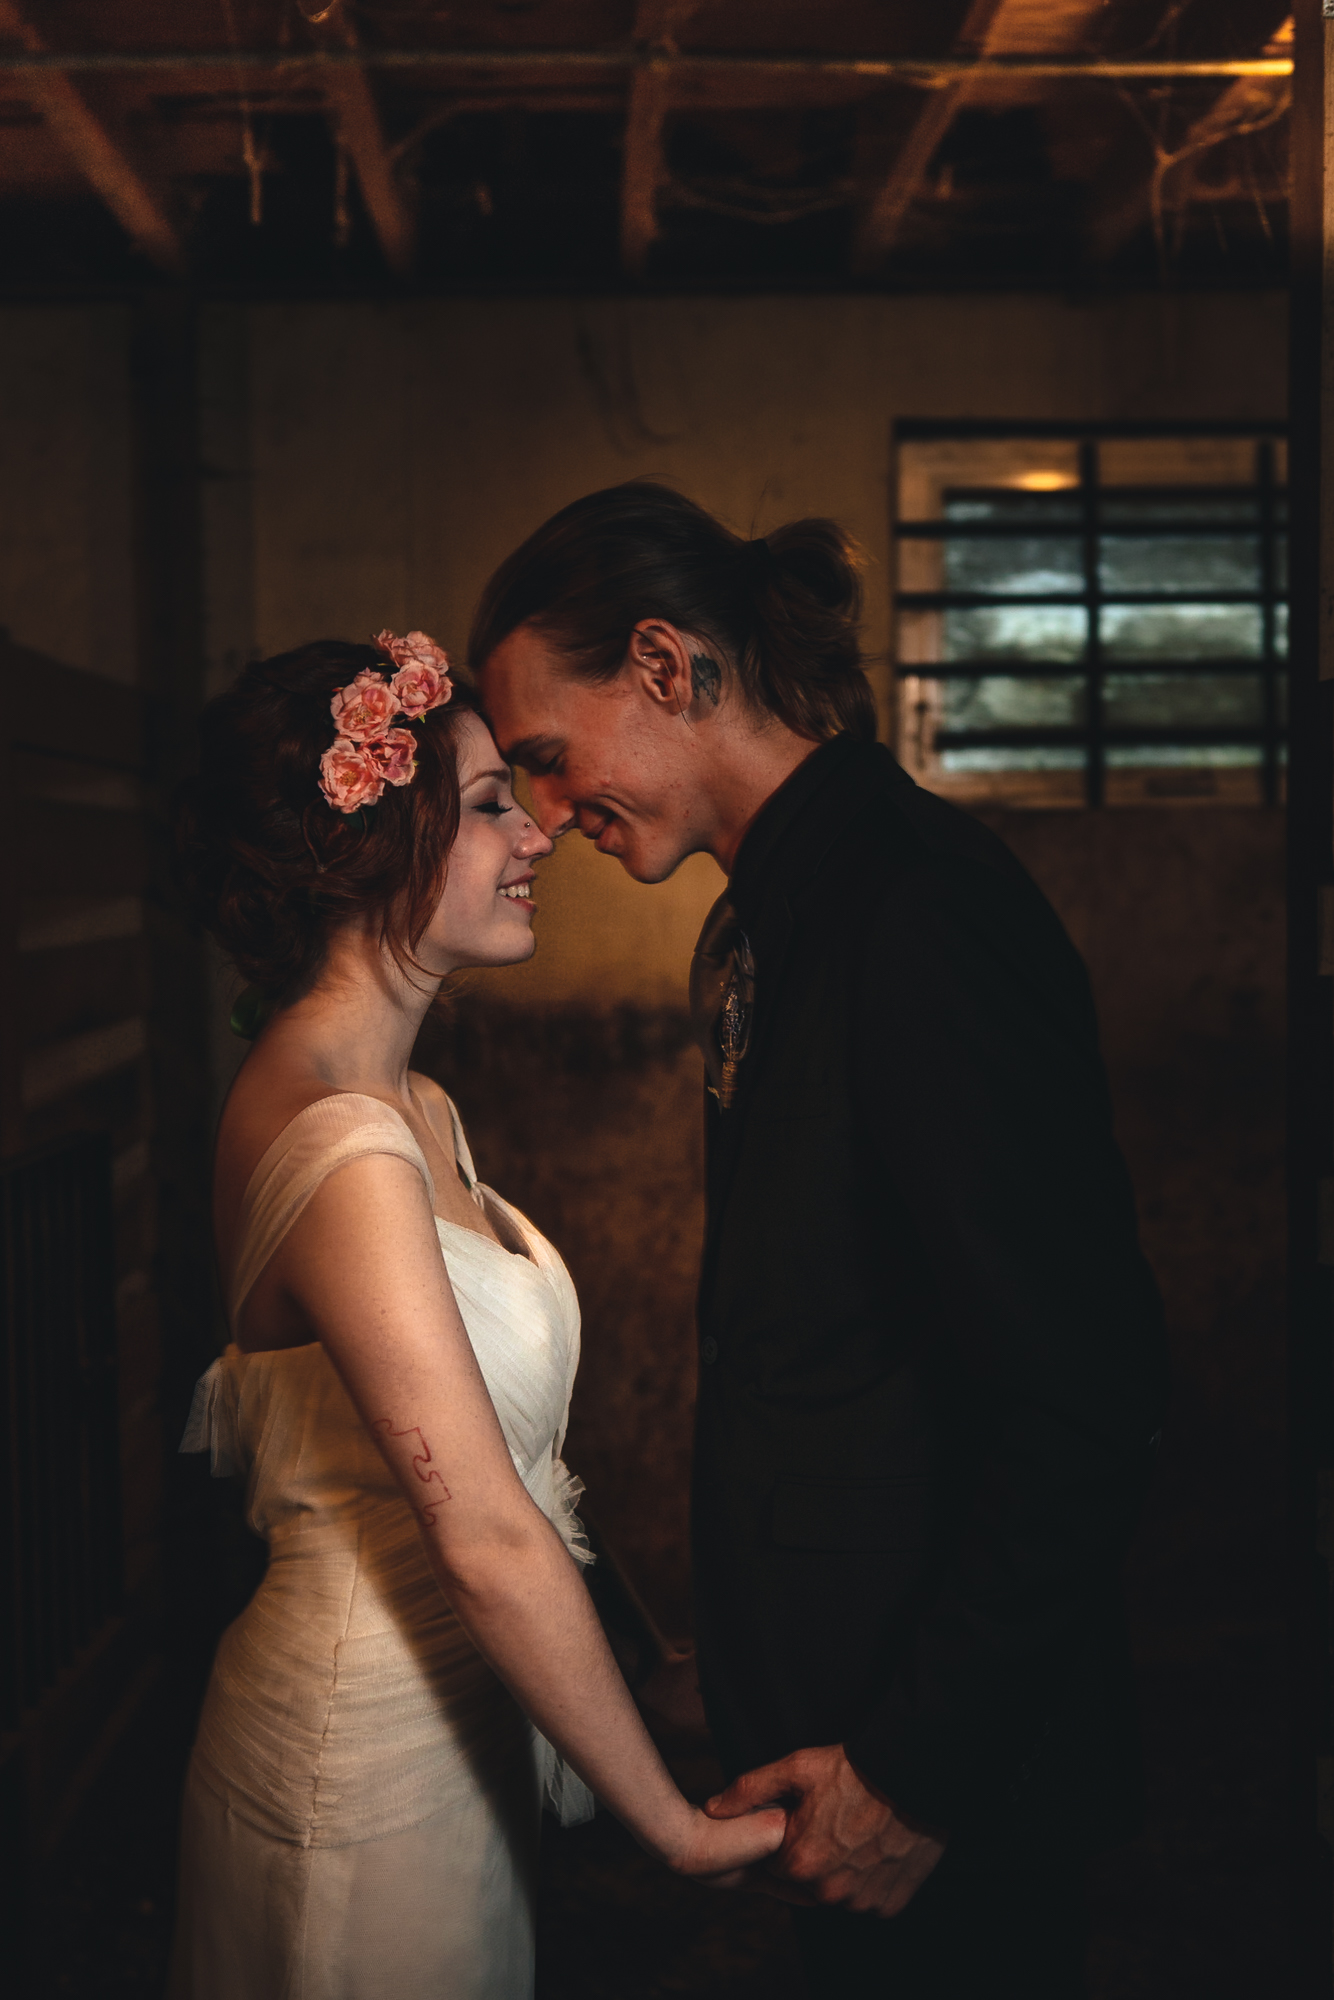
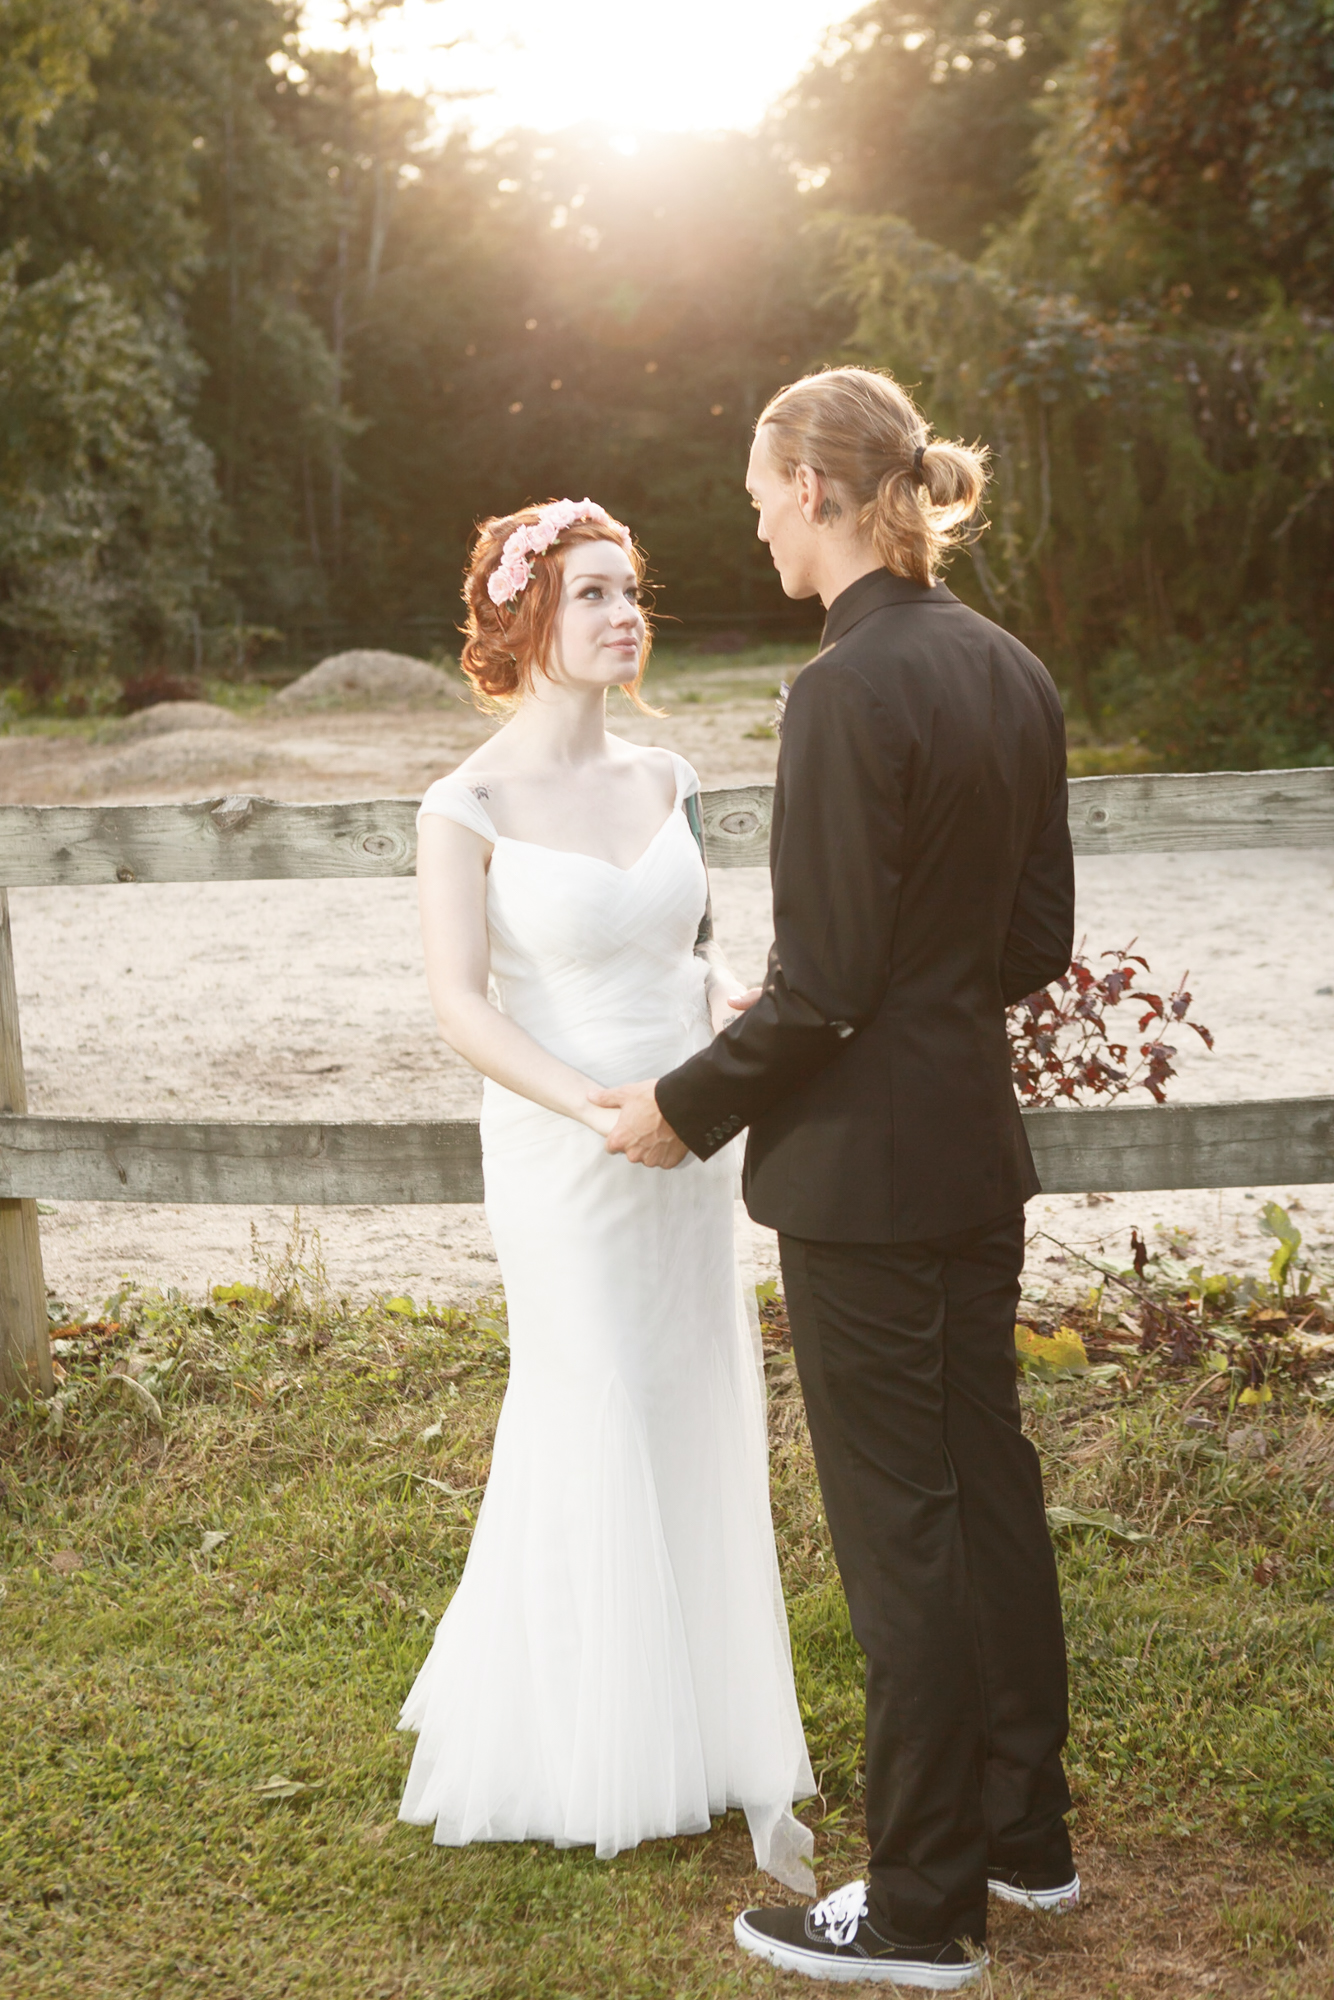
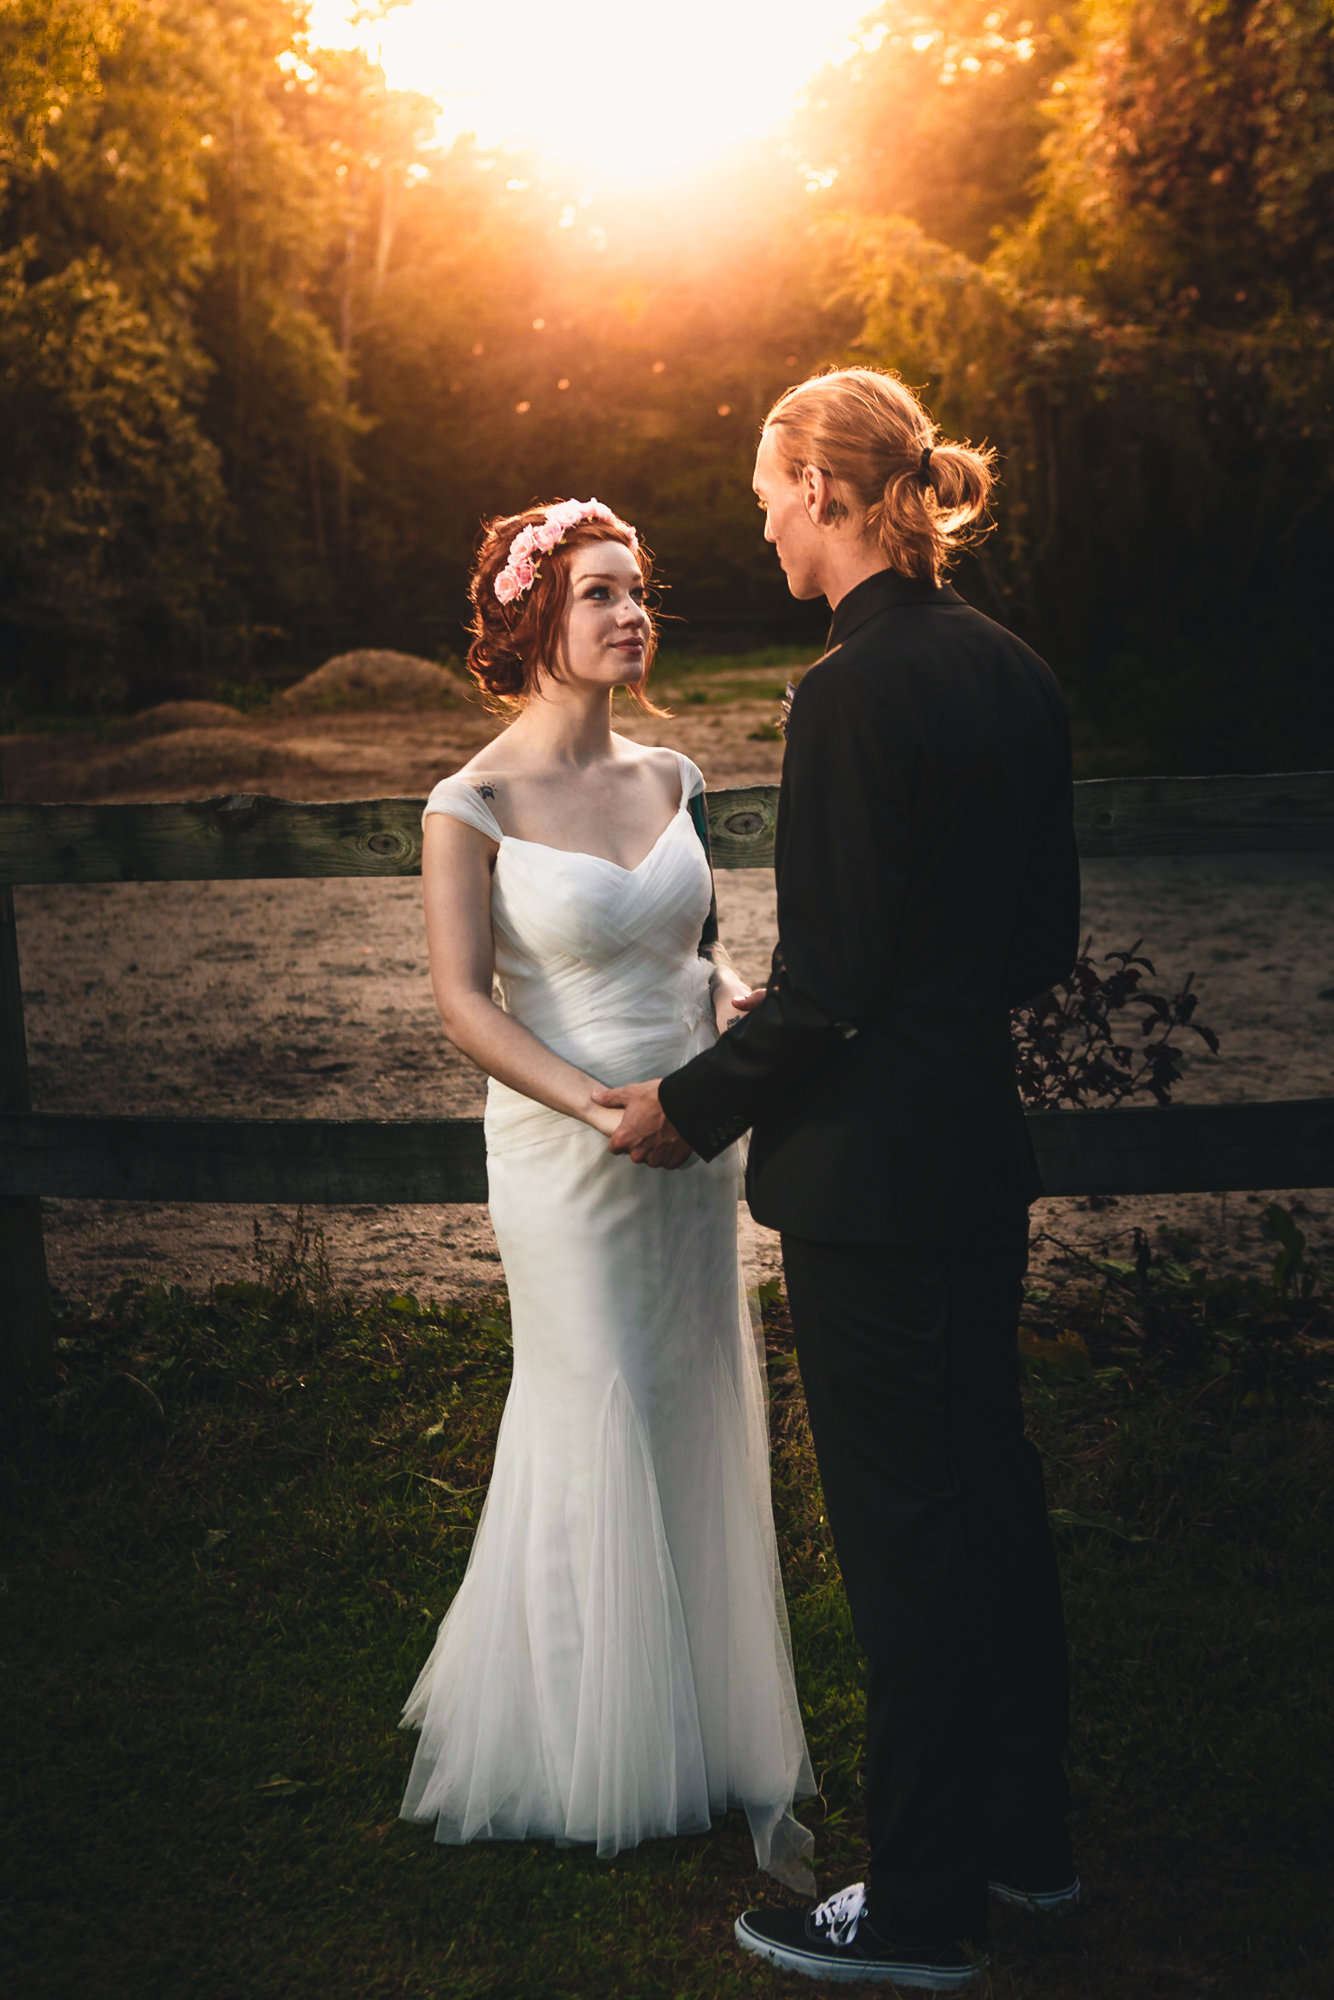
The example images in this post are from a wedding I photographed a few years ago. Up through today, I consider this wedding to be one of my most successful and interesting jobs. Everything flowed together perfectly, from the relaxed setting to working with a fun, friendly couple. I mean, how cool is that horror movie themed arm sleeve that the bride is rocking?

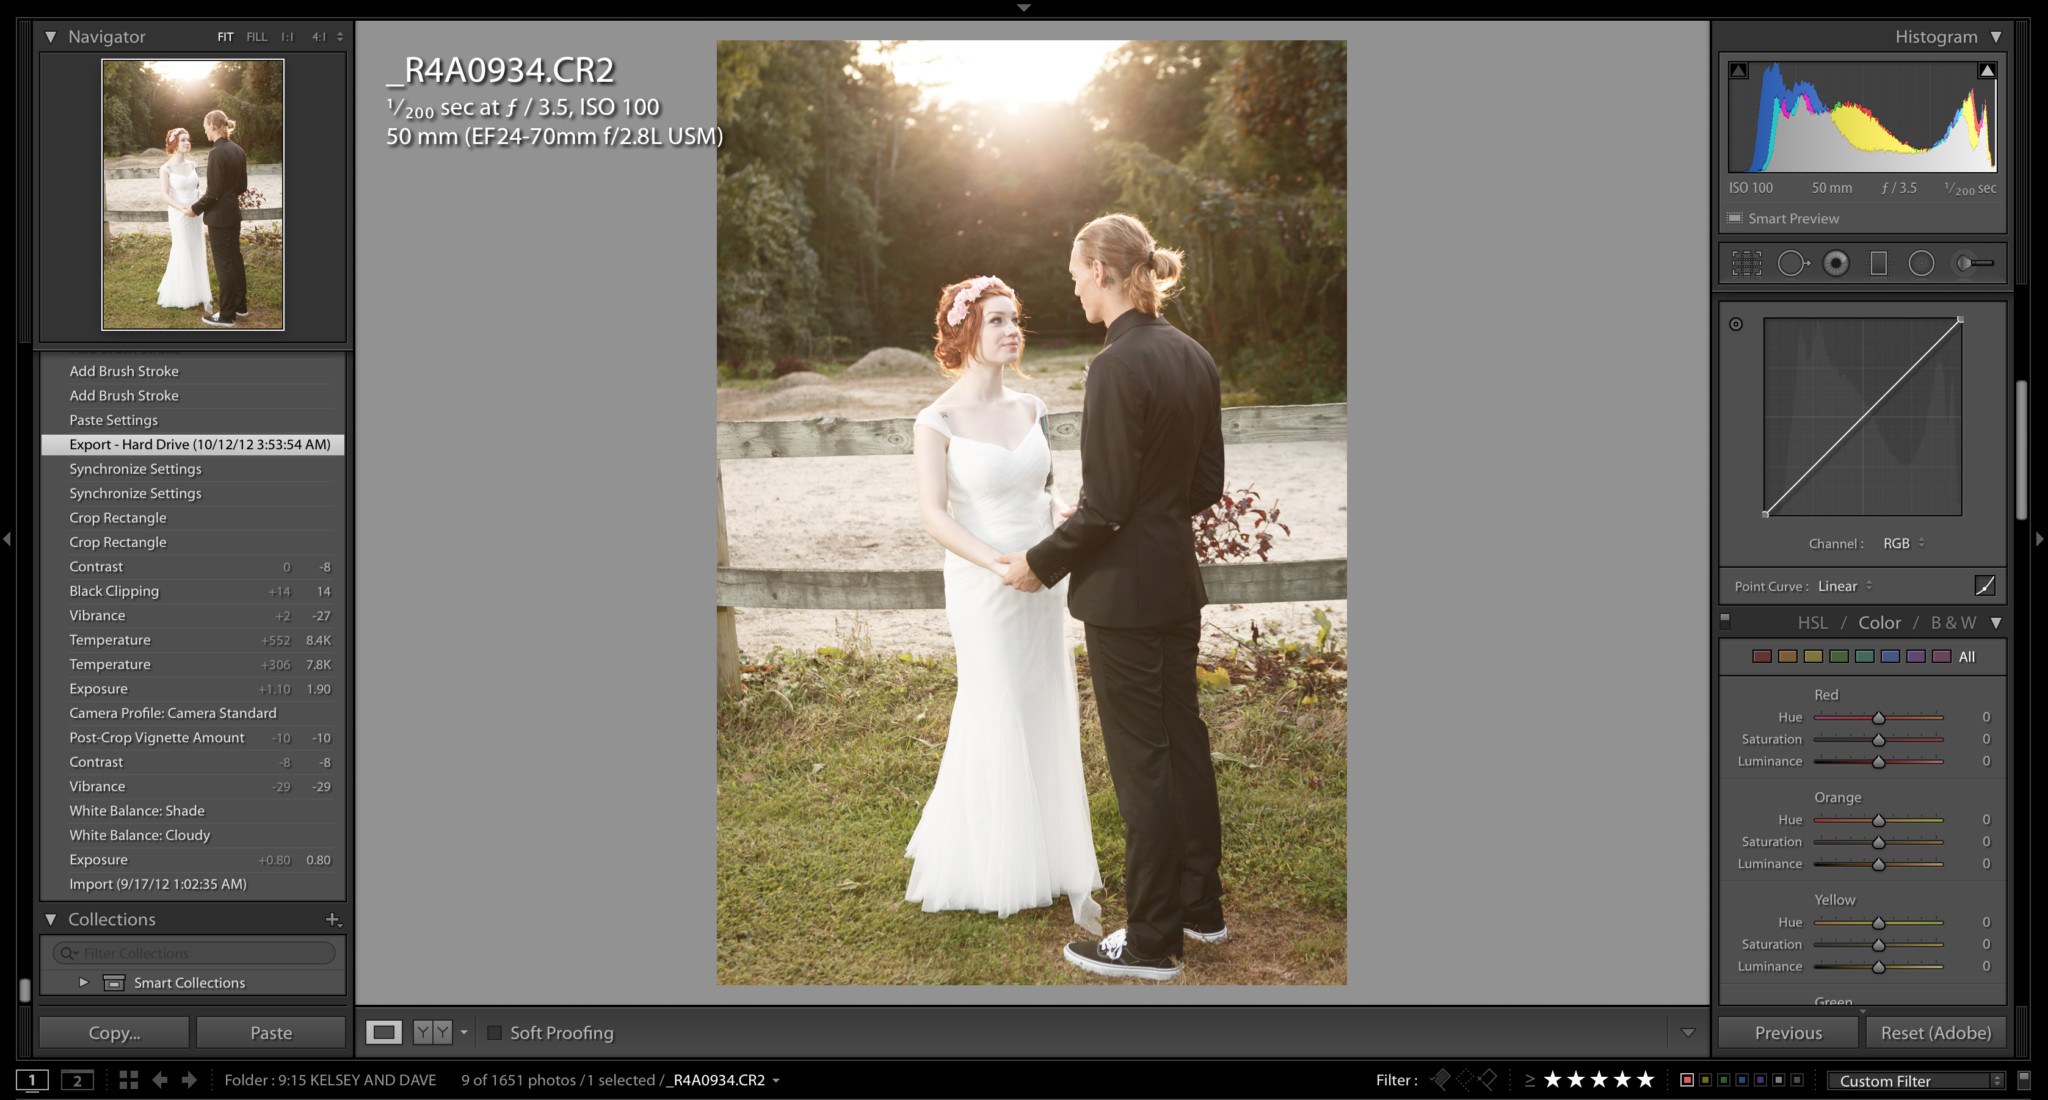
Throughout the day I used a mix of natural light and basic off-camera flash. Hesitant to stray from my traditionalist roots, I edited the job by correcting exposure and white balance. In a few images, I made a half-hearted attempt to create what I thought looked like a “hip” look, but the results were far from what I would consider cutting-edge by current standards.

The Solo Bride Portrait

Bride, Straight out of camera
The first example is a solo bride portrait. I am very happy with the composition. Her expression and pose are natural, and her tattoo is shown brilliantly.

Original Edit
Original Edit
The first time I delivered the image, I only corrected for exposure and color, which again, is the way I used to edit wedding images. To get out of my comfort zone, I first experimented with a few different film emulation presets. “Kodak Gold 100 – C” by VSCO looked good with some minor exposure adjustments, so I stuck with that. I didn’t want to reinvent the wheel with this image.

Final Edit
Final Edit
From there I added a radial filter, inverted it, and made some fine adjustments in the exposure (darker). I feathered the radial filter so the effect would have more subtle gradation. This simple and quick adjustment resulted in a dramatically different and better image than the one I originally delivered. A rather painless and effortless venture.

Editing the Couple Indoors

Straight from the camera
I originally delivered this second example image, a portrait of the bride and groom, with even more minimal adjustments than the last photo. I shot this portrait in a barn, using an on camera speedlight, and one off camera to illuminate the background.

Original edit
Original edit
In the past, this image appeared pleasing to me merely because of the photographic technique I used. The final result impressed me because of how I shot the image, not because of how it looked. Revisiting this image was just as easy and fulfilling as example #1. I used a custom preset, “MZ101” that I came up with, which is similar to many VSCO/Mastin/Tribe presets.

Final Edit
Final Edit
It has a raised black point, some HSL slider adjustments, and very slight split toning. All of these variables in Adobe Lightroom come in handy when carefully crafting an image to fit an exact taste. I used a radial filter, this time with a more intense exposure adjustment, and less feathering (darker). An adjustment brush (-¾ EV) was the finishing touch I put around the vertical edges of this image. This was one extra step from a radial filter, but it really helped bring more attention to the bride and groom, without darkening the rest of the image too much. Boom! All done. I wish I had the confidence and foresight four years ago to take this painless “next step” with my digital images.

The Couple in the Sun

Straight from the camera
Example #3 required the most complex adjustments. The SOOC image is bright and some would prefer this image as a natural, “light and airy” style photograph. Looking back, I actually prefer the SOOC image over the edit I originally delivered to my client.

Original edit
Original edit
Revisiting this image took a bit more chops than the other two. I really wanted to make the couple pop by emphasizing the backlight of the sun and the off-camera flash lighting that creates separation. I first used an adjustment brush to dodge the sun, sky, and trees on the sides of the image, followed by a strong graduated filter from the top. In the past I used graduated filters to darken skies in landscape images. However in this portrait I chose to use the graduated filter in an opposite manner.

Final edit
Final edit
The final adjustment includes an increase of over +3 EV, and a strong dose of warm color balance to exaggerate the backlight effect the sun has. In order to draw more attention to the bride and groom I used two more graduated filters on the left and ride side, both with a -1EV decrease in exposure. Making the size of the filters larger allowed for the effect to be strong, but with a more subtle gradation from dark to light. Another tall (see image) vertical radial filter with a ⅓ stop in exposure darkening and a minor contrast boost, finished the image off for me. I feature this image on my website and I am quite proud of it. I firmly believe that the extra attention to detail is worth the effort. These are the kind of results that will help you grow your brand and ultimately land future jobs.

On Editing

The ultimate irony in all of this is that I spent most of my early 20’s in the darkroom perfecting black and white silver prints. I used Ilford Multigrade filters and romantic hand gesture dodging/burning. There really is no difference when this type of skill is applied digitally. I truly respect photographers who “get it right in camera” and still firmly believe there is credence to paying attention to lighting and detail when initially making a photograph. It is also foolish to assume that post-production isn’t a major factor in creating a final result. If you can nail everything exactly right in camera, more power to you.

It is possible, but these situations are far and few between, and usually in an indoor studio setting. Using local and global adjustments in editing enables you to put a special signature touch on your images. No matter your skill level or how many years of photography experience you have under your belt, it is well worth the effort to revisit older images.

Ansel Adams, a photography legend, often revisited prints such as the iconic “Moonrise over hernandez” as his vision changed over the years. If it’s good practice for someone like Ansel Adams, it should be acceptable for us. In 2016 everyone has a great camera (iPhone to at least a basic DSLR), with the ability to apply easy edits in free software. It only makes sense that professional photographers take a few more moments to edit, and fine tune their work.

bride editing photos lightroom Michael Zawadzki wedding
Shares
Written by

Chris Gampat

Chris Gampat is the Editor in Chief, Founder, and Publisher of the Phoblographer. He provides oversight to all of the daily tasks, including editorial, administrative, and advertising work. Chris's editorial work includes not only editing and scheduling articles but also writing them himself. He's the author of various product guides, educational pieces, product reviews, and interviews with photographers. He's fascinated by how photographers create, considering the fact that he's legally blind./ HIGHLIGHTS: Chris used to work in Men's lifestyle and tech. He's a veteran technology writer, editor, and reviewer with more than 15 years experience. He's also a Photographer that has had his share of bylines and viral projects like "Secret Order of the Slice." PAST BYLINES: Gear Patrol, PC Mag, Geek.com, Digital Photo Pro, Resource Magazine, Yahoo! News, Yahoo! Finance, IGN, PDN, and others. EXPERIENCE: Chris Gampat began working in tech and art journalism both in 2008. He started at PCMag, Magnum Photos, and Geek.com. He founded the Phoblographer in 2009 after working at places like PDN and Photography Bay. He left his day job as the Social Media Content Developer at B&H Photo in the early 2010s. Since then, he's evolved as a publisher using AI ethically, coming up with ethical ways to bring in affiliate income, and preaching the word of diversity in the photo industry. His background and work has spread to non-profits like American Photographic Arts where he's done work to get photographers various benefits. His skills are in SEO, app development, content planning, ethics management, photography, Wordpress, and other things. EDUCATION: Chris graduated Magna Cum Laude from Adelphi University with a degree in Communications in Journalism in 2009. Since then, he's learned and adapted to various things in the fields of social media, SEO, app development, e-commerce development, HTML, etc. FAVORITE SUBJECT TO PHOTOGRAPH: Chris enjoys creating conceptual work that makes people stare at his photos. But he doesn't get to do much of this because of the high demand of photography content. / BEST PHOTOGRAPHY TIP: Don't do it in post-production when you can do it in-camera.
Previous Post

Pinhole Photography With a Camera Made from a Shoebox

Next Post

The Sony a7 is Available for $398 at Adorama!

The Phoblographer © 2023 ——Bridging Tech and Creative Photography
Bridging Tech and Creative Photography
  • Home
  • Our Staff
  • Editorial Policies
  • Media Kit
  • Membership
  • App Debug