Want more Useful Photography Tips? Click here.
If you’ve ever tried creating a black and white image in Adobe Lightroom, most of the advanced photographers know that you should start by converting the image using the Black and White Treatment option. But the problem here is that sometimes you don’t really get just pure black and white photos. Instead, what you’ll get is a mix of some sepias or other tones that oddly look something like Kodak Tri-X or Kodak BW400 CN.
To create images in pure black and white that instead look something like Ilford Delta 400 or Delta 100, the process is fairly simple.
- In the basic adjustment panel, move the black levels to the left a specific number. Then adjust the exposure of the image to be basically what you want.
- Move the white levels to the right the inverse number. So if your blacks are -38, move the white to +38.
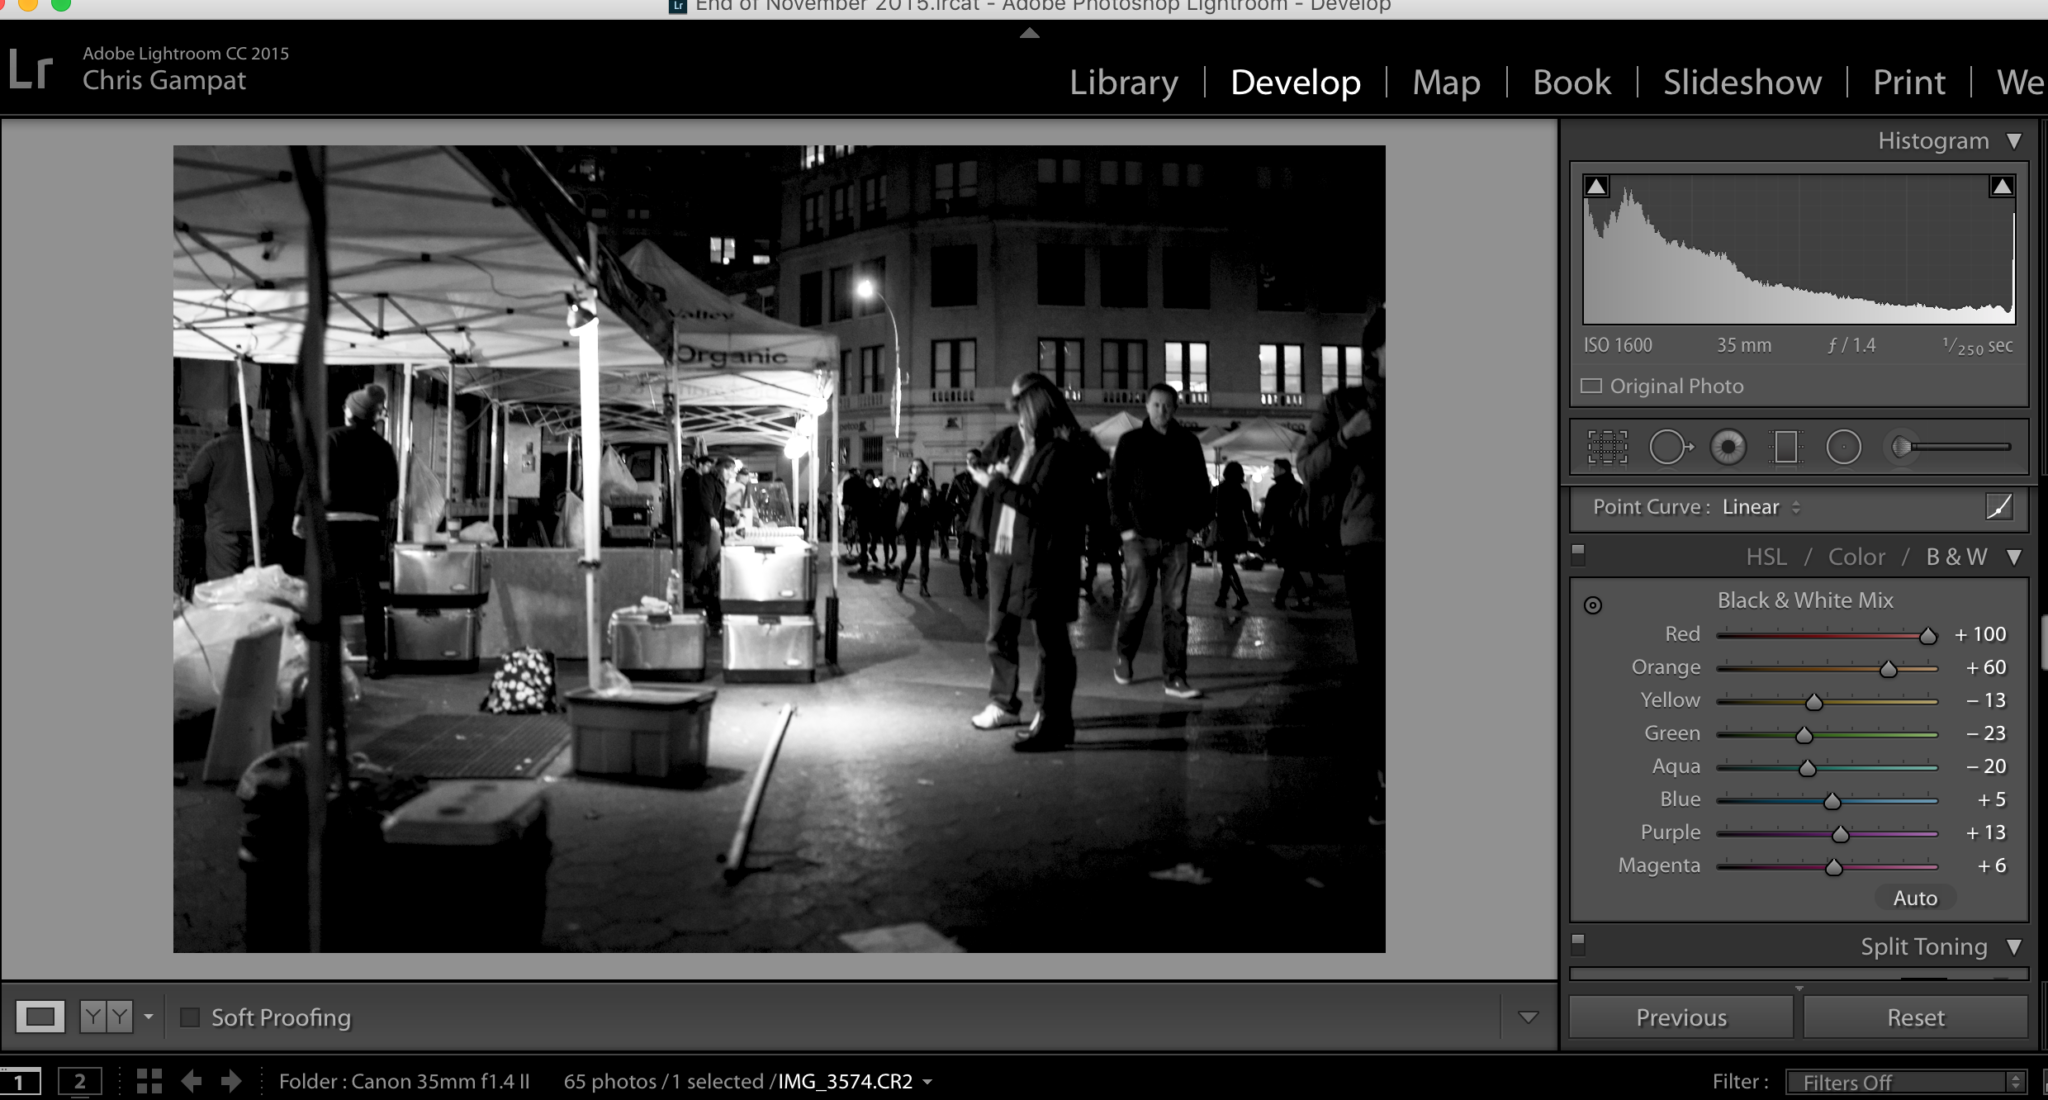
- Scroll down to the color channels and you’ll see options called Black and White mix with specific color regions and channels.
- Click the color selection tool and move the mouse pointer over areas of the image that aren’t quite either black or white. Then click and raise or lower their exposure levels.
- After this, come back to the basic adjustment panel, lower your contrast and adjust your exposure.
That’s it! That’s how you create more pure black and white photos using Adobe Lightroom and all in less than a couple of minutes.
Get rid of the ads!
Did you enjoy reading this article as much as we enjoyed writing it? There's a way to support us and our reporting, getting ad-free navigation and more as a bonus. Subscribe to us for less than a coffee per month —just $3.99— or take advantage of our yearly subscription with a hefty discount for only $25.- An ad-free experience
- A free mystery box for Lightroom or Capture One
- All the books in our store
- 20% discount on Capture One
- 30% discount on Imalume Photo Theft Protection
- 20% off Herbs and Kettle Tea Company.