Inspired by the Photoshop post that we found the other day, we went to experimenting in Adobe Lightroom to emulate the look of the Golden Hour. Granted, we’ve shot during the Golden Hour a lot, so by applying some of the same theories and principles in the video and combining it with the look that the Golden Hour gives you, we were able to effectively figure out how to make an image look like it was shot during this period.
Granted, it won’t work for every photo, but it will work for many of them.
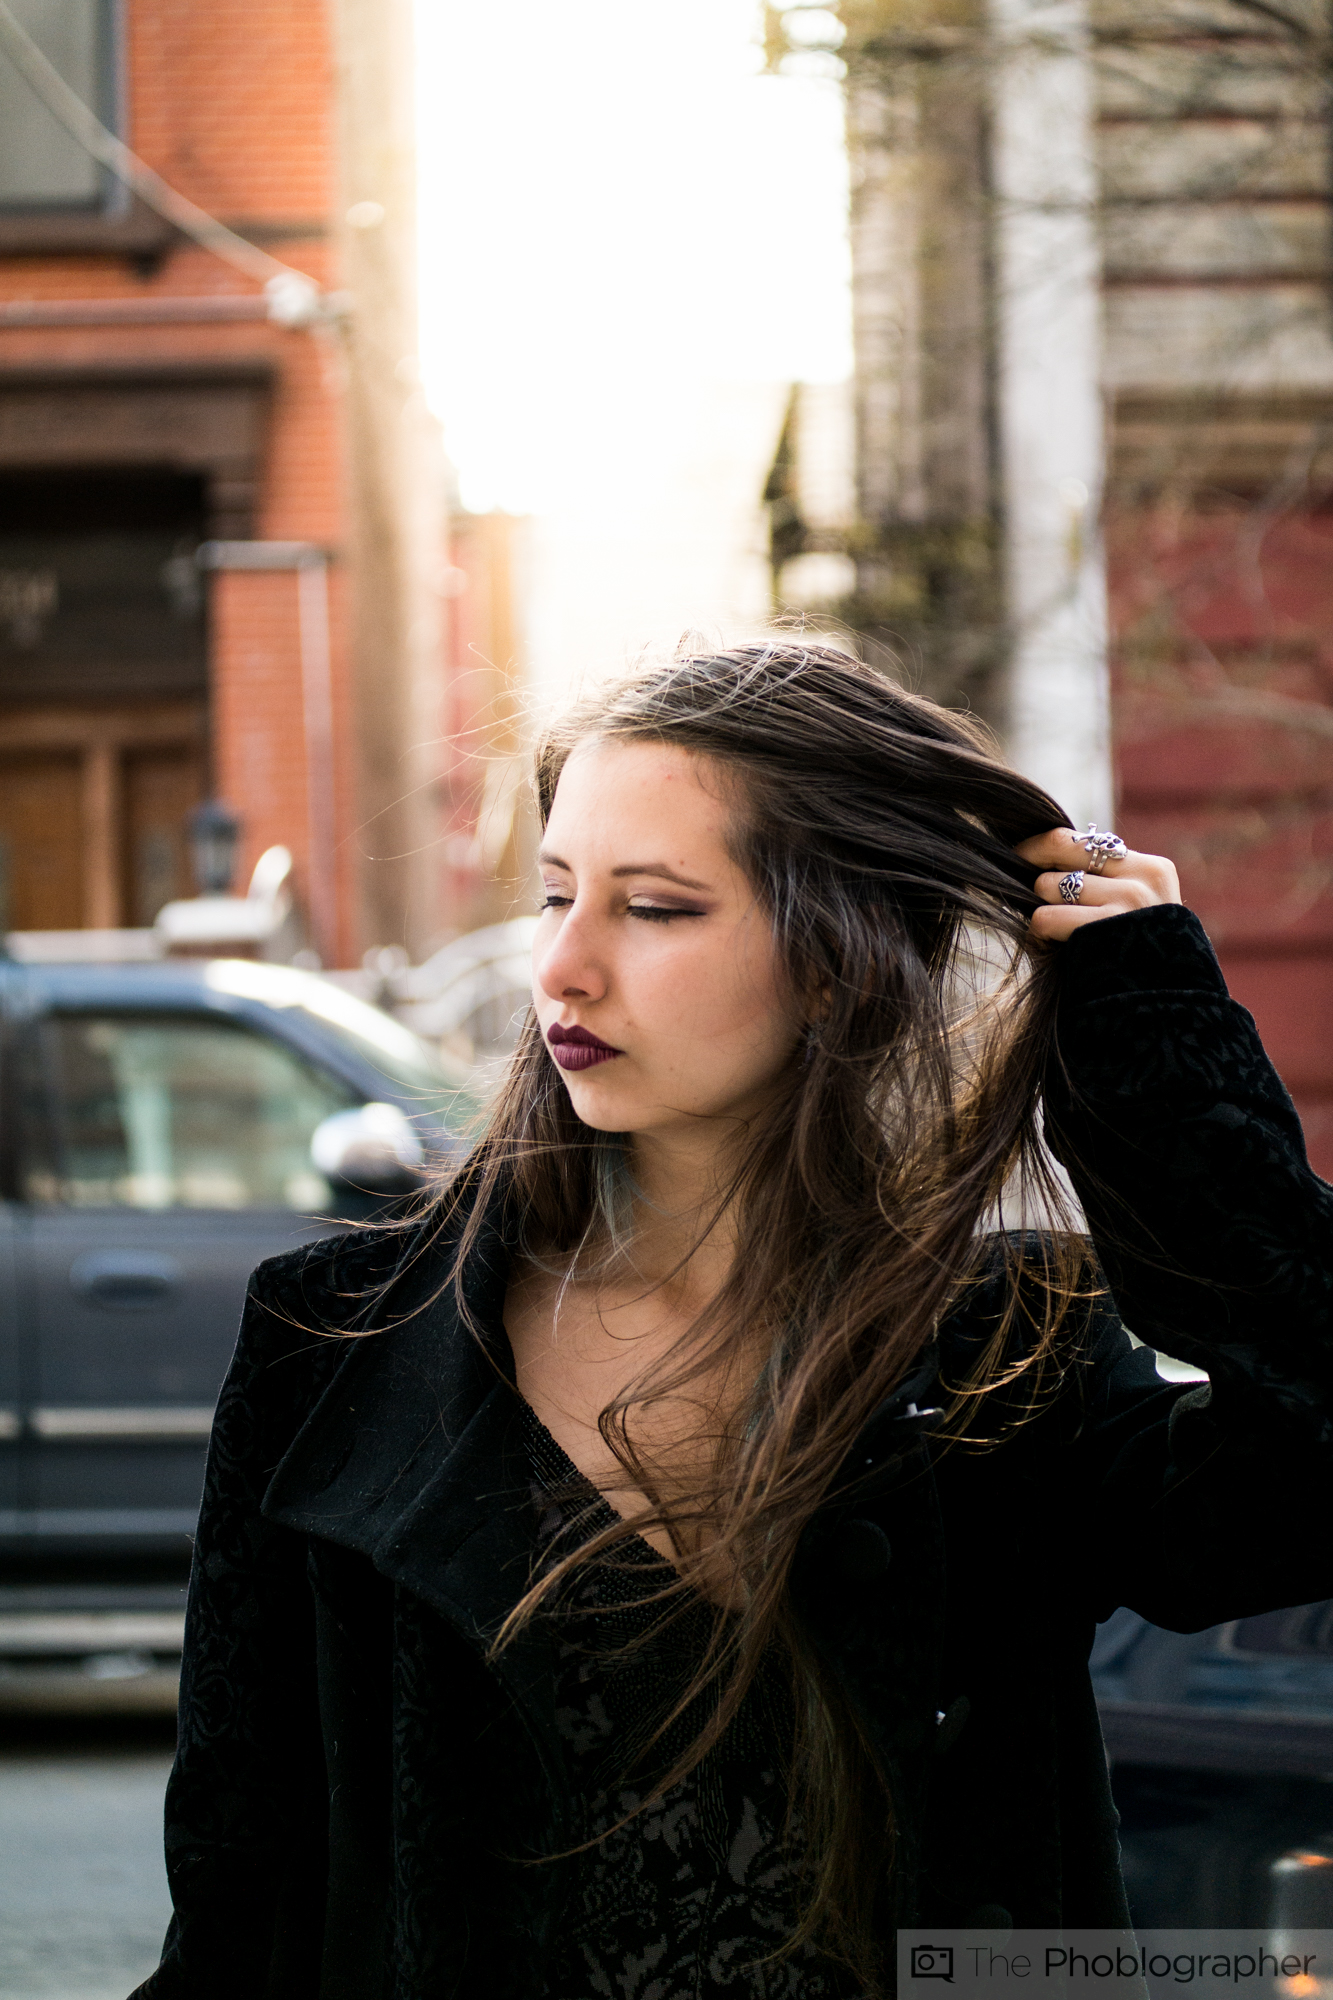
So what characterizes a golden hour photo?
– Warm golden skin tones
– Warm light
– Often radiant backlighting

Now the question is, how do we create this in Adobe Lightroom? Luckily, Adobe Lightroom 5 incorporates circular masks that can emulate the look of the sun if blended correctly. So that’s where you’re going to start.
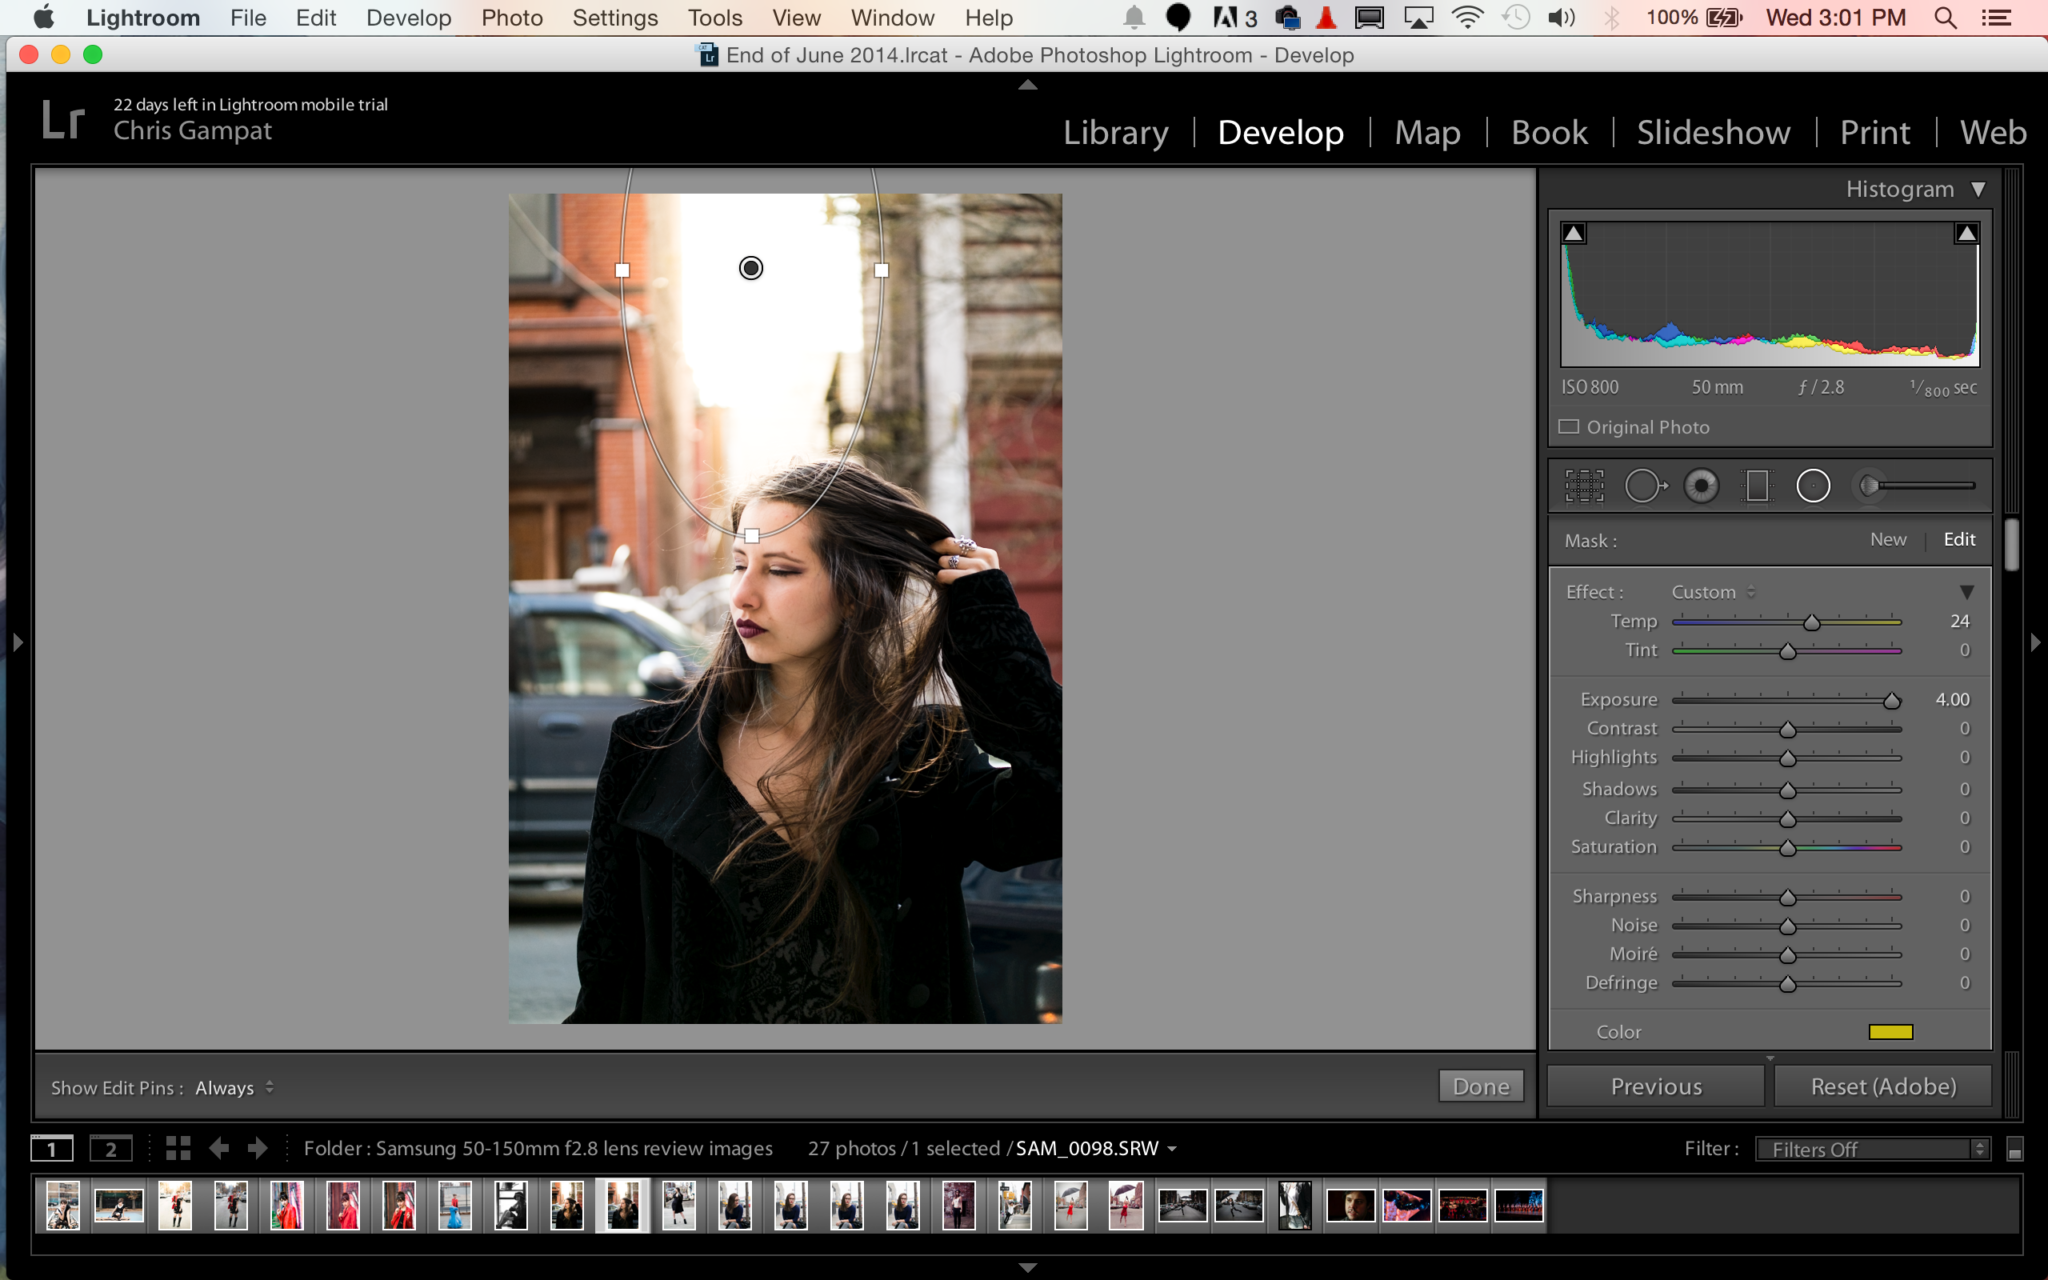
Select the circular mask tool and have it take over a large area of the sky. Choose a specific color in the orange and yellow area. To make this easier, click and drag the dropper tool to select a color you like. Then turn feathering up all the way to it look more natural, raise the exposure to the highest that you can and warm the color temperature up.
I typically like bringing the mask just to the area around the person’s head and cranking up the exposure to give them a bit of a glow.
Now you’re ready to start working with the rest of the image.
Select done on the Mask.
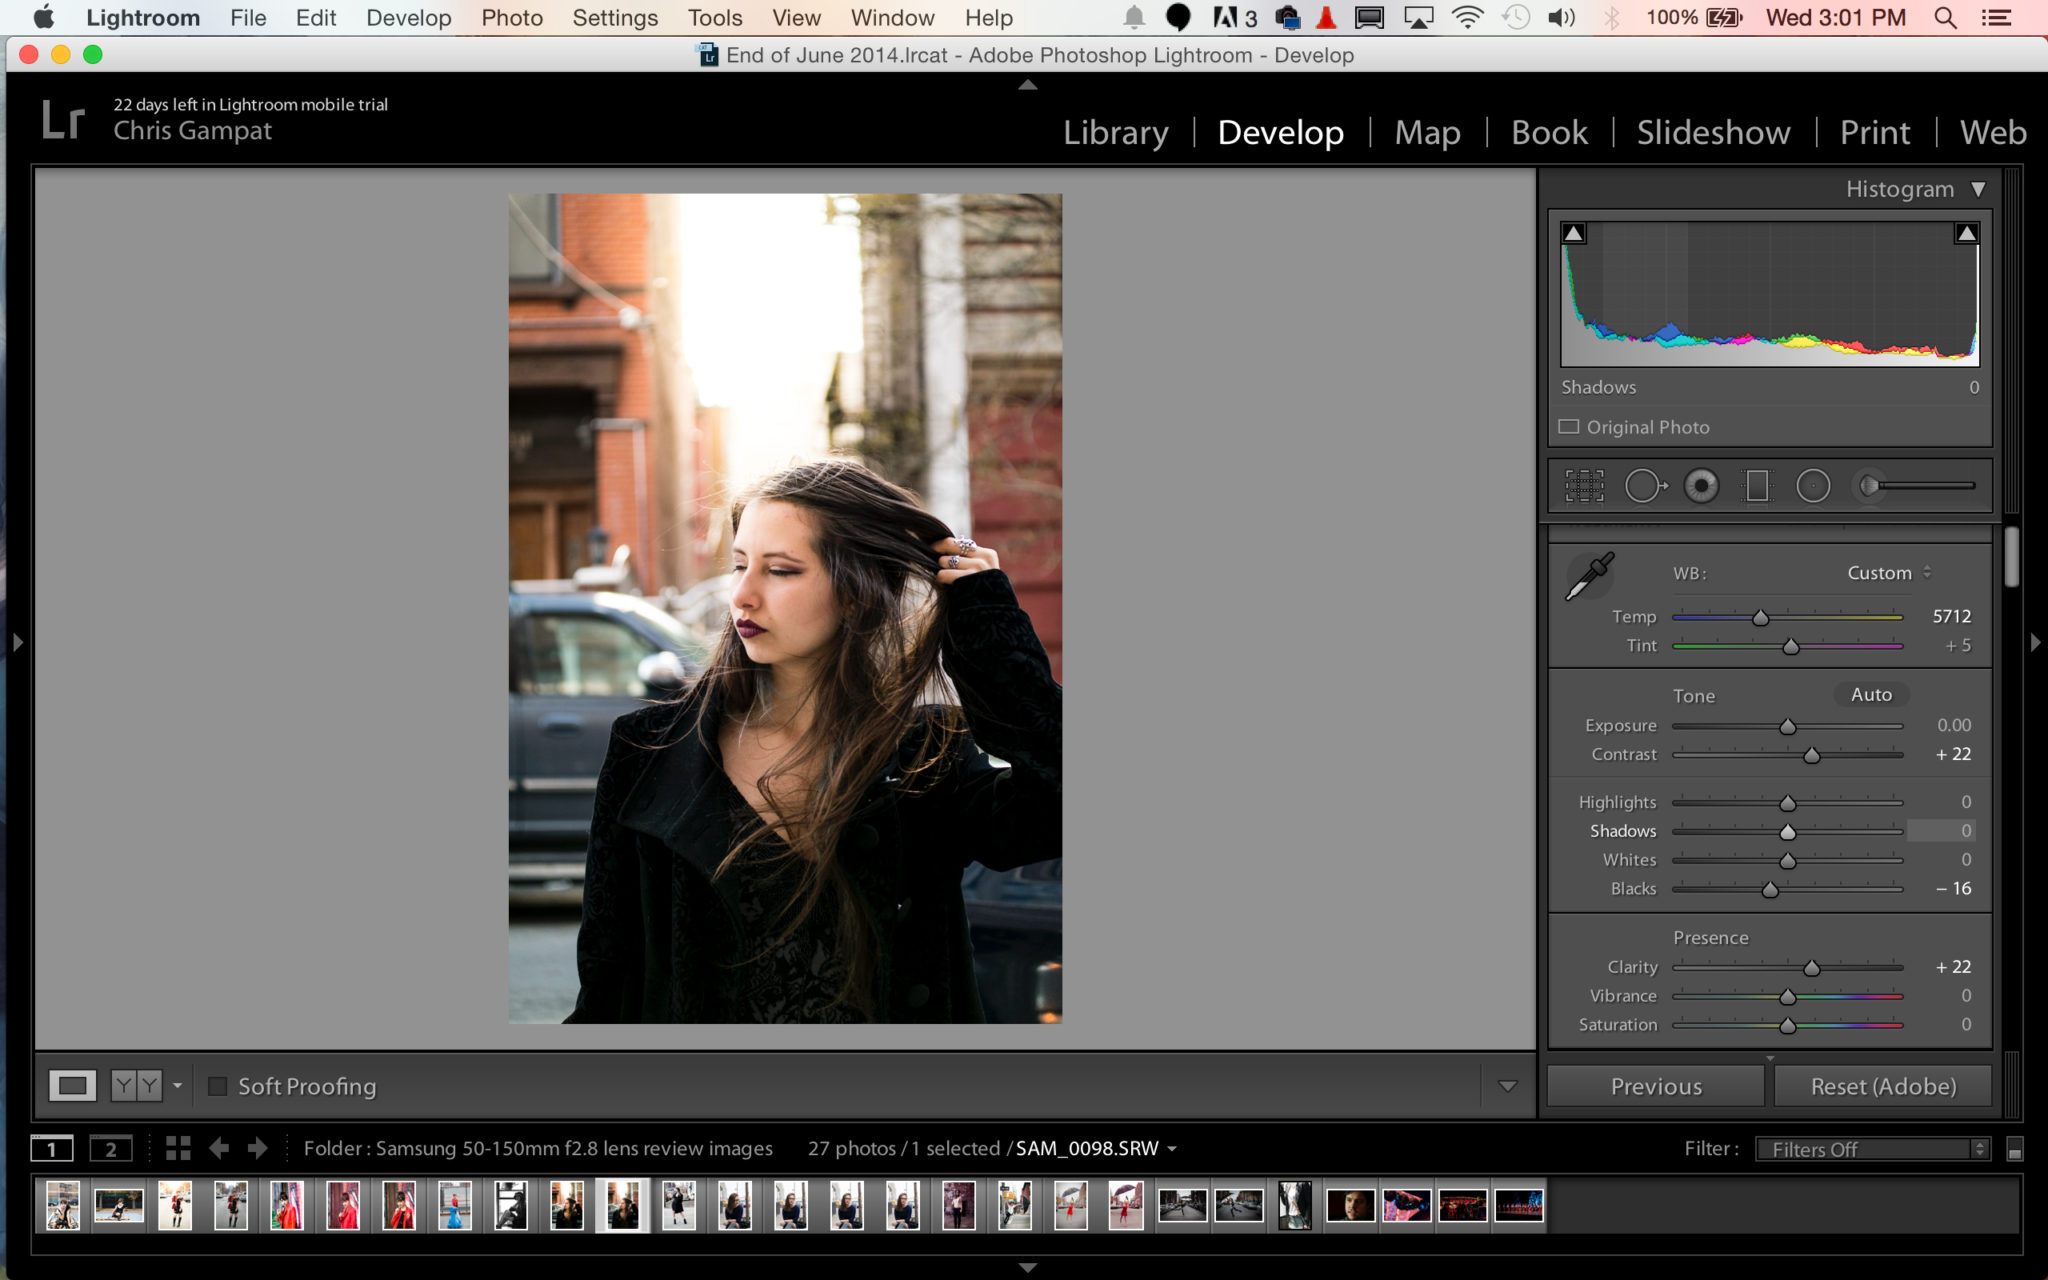
Now in the basic adjustment panel, start warming the image’s white balance, raising the clarity and adjusting the contrast to your liking until it looks like your subject is being sunkissed. When editing, take things slowly and be a bit conservative by slowing dialing up and down each slider.

Now for the finishing touches, head down to the split toning panel. You’re going to need to work with the highlights here and make them a warm color. When you choose a color you think will work, adjust the saturation and balance sliders–with both being pushed to the right. Then adjust the highlights color slider until you get a color that you feel looks natural based on your mask.
After this, just export the image. You’re all done.
Get rid of the ads!
Did you enjoy reading this article as much as we enjoyed writing it? There's a way to support us and our reporting, getting ad-free navigation and more as a bonus. Subscribe to us for less than a coffee per month —just $3.99— or take advantage of our yearly subscription with a hefty discount for only $25.- An ad-free experience
- A free mystery box for Lightroom or Capture One
- All the books in our store
- 20% discount on Capture One
- 30% discount on Imalume Photo Theft Protection
- 20% off Herbs and Kettle Tea Company.
- 20% off your order from MPIX printing services.
- 5% off Viltrox Products via their eCommerce store.
- 10% off all film developing, printing and scanning services from Blue Moon Camera and Machine
- 15% off 7Artisans products: The lens and accessory maker is offering a sweet discount for Phoblographer's readers.