Last Updated on 10/20/2011 by Travis Lawton
How many of you out there are afraid of, or intimidated by off-camera lighting? Don’t be afraid to admit it; I was in that same boat when I first began too. A favorite quote that I have accepted lately, “If you’re too afraid to try for fear of failure, you’ve failed already” – Anonymous. If anyone knows where this quote came from, let me know in the comments. Okay, back to the subject. You can read an infinite amount of material on off-camera lighting. The problem is that there is almost too much information. You might fall into the trap of info overload without actually learning for yourself with experimentation and practice. My advice would be to read enough information to learn how to get your flash off the camera and then get out there and shoot.
Editor’s Note: This is a guest blog posting by Travis Lawton, the Lawtographer
That advice is all well and good but you will eventually need to buy a light modifier.
Uh oh, more information overload.
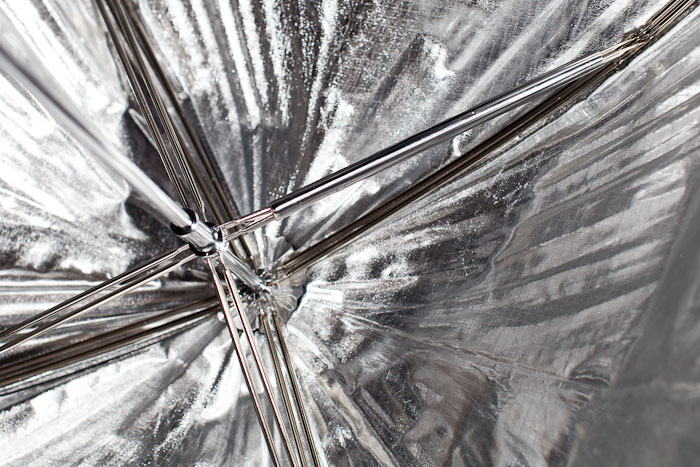
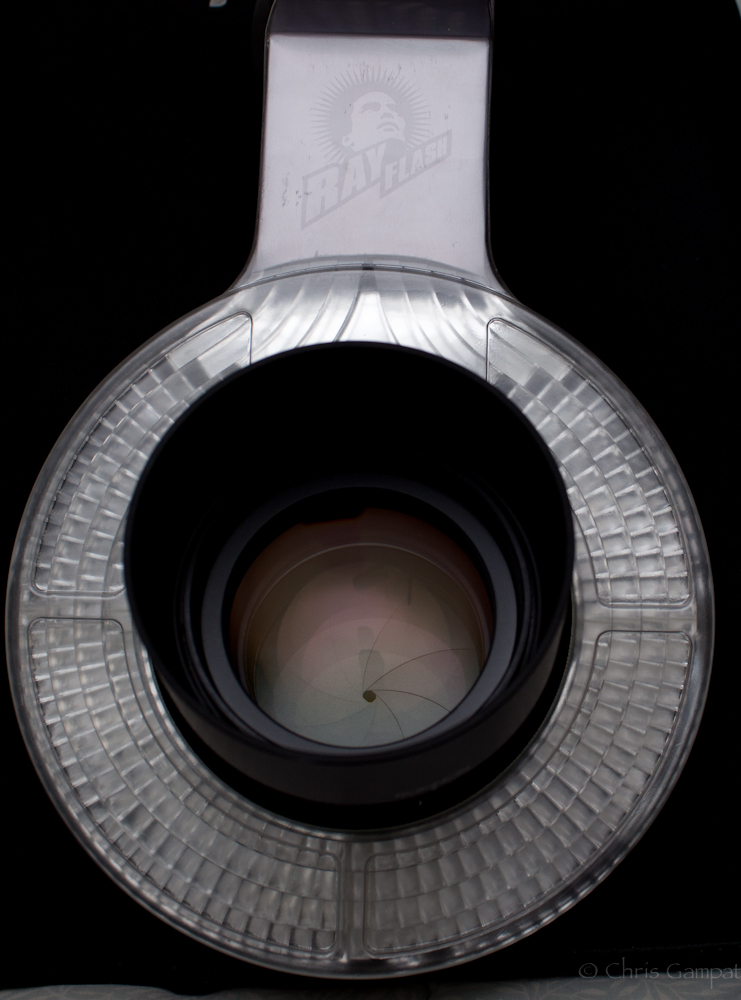
There is a ton of different modifiers out there; bare flash, bouncing the flash, shooting through a scrim, on-flash modifiers, umbrellas (bounce and shoot-through), soft boxes, strip boxes, octabanks, beauty dishes, etc. Which do you buy, and how will the light look?
I thought one thing that might help you guys is to show images taken with several of these modifiers in real world scenarios. I did not use a light meter to nail the perfect exposure because this article is about just starting in lighting and odds are you wouldn’t have purchased a light meter yet. As a result, some of the images differ in exposure (especially the outdoor ones), as we were shooting as the sun was going down and I had to continually adjust my camera settings to get a good shot.
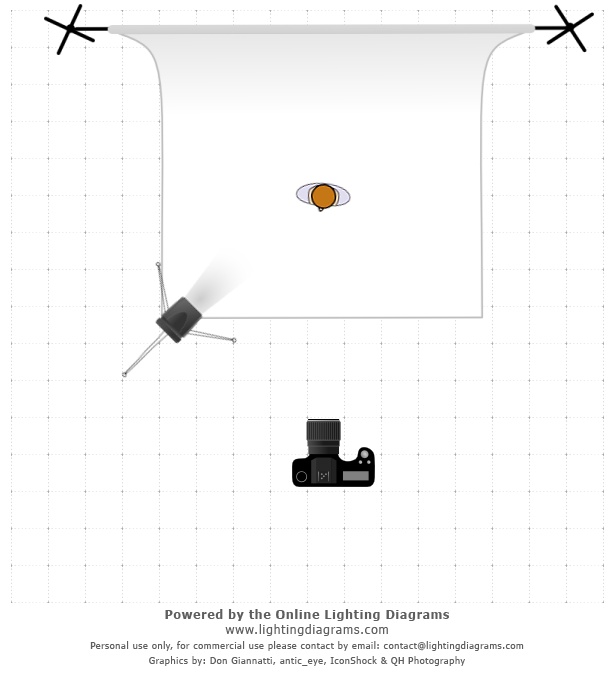
I wanted to show you the difference in the two main scenarios you would be shooting, outdoors and in studio. In studio is arguably the easier choice as you don’t have to deal with environmental factors that change without warning (such as the sun and the weather). In the studio, you can set your camera settings once and then just worry about the lighting. In fact, many pros will set their camera up on a tripod, make sure the focus is on the models eyes/face, dial in the settings and then not even touch the camera again other than to trigger the shutter. This leaves more time for them to tweak the lighting and build the relationship with the model to gets that perfect shot.
All of these images were taken using a Canon EOS 5D Mark II camera, Canon EF 70-200mm f/2.8L IS lens, and a Canon Speedlite 580EX II Flash wirelessly triggered via Pocket Wizard PLUS II Transceivers.
Conditions
All studio shots were taken at 1/200th of a second, ISO 200. The aperture was changed per image to compensate for the flash which was set on manual at 1/4 power (except for the first 3 shots when it was on-camera and set to ETTL). Typically, I would have 1 to 2 more lights for these studio shots. Usually I’d have one pointing at the background to brighten it up and one pointed at the talent’s hair or back to add some rim light. Since this article is just to show the difference in the lighting modifiers, we’re using just the one light source.
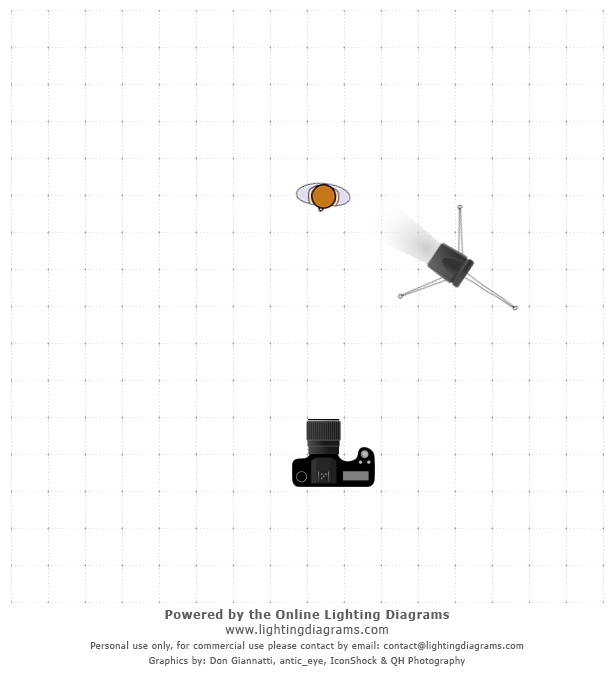
Setup 1
There is no editing on the images other than the default tweaks that Lightroom does on a RAW file import. See the lighting diagram for the setup of this shot.
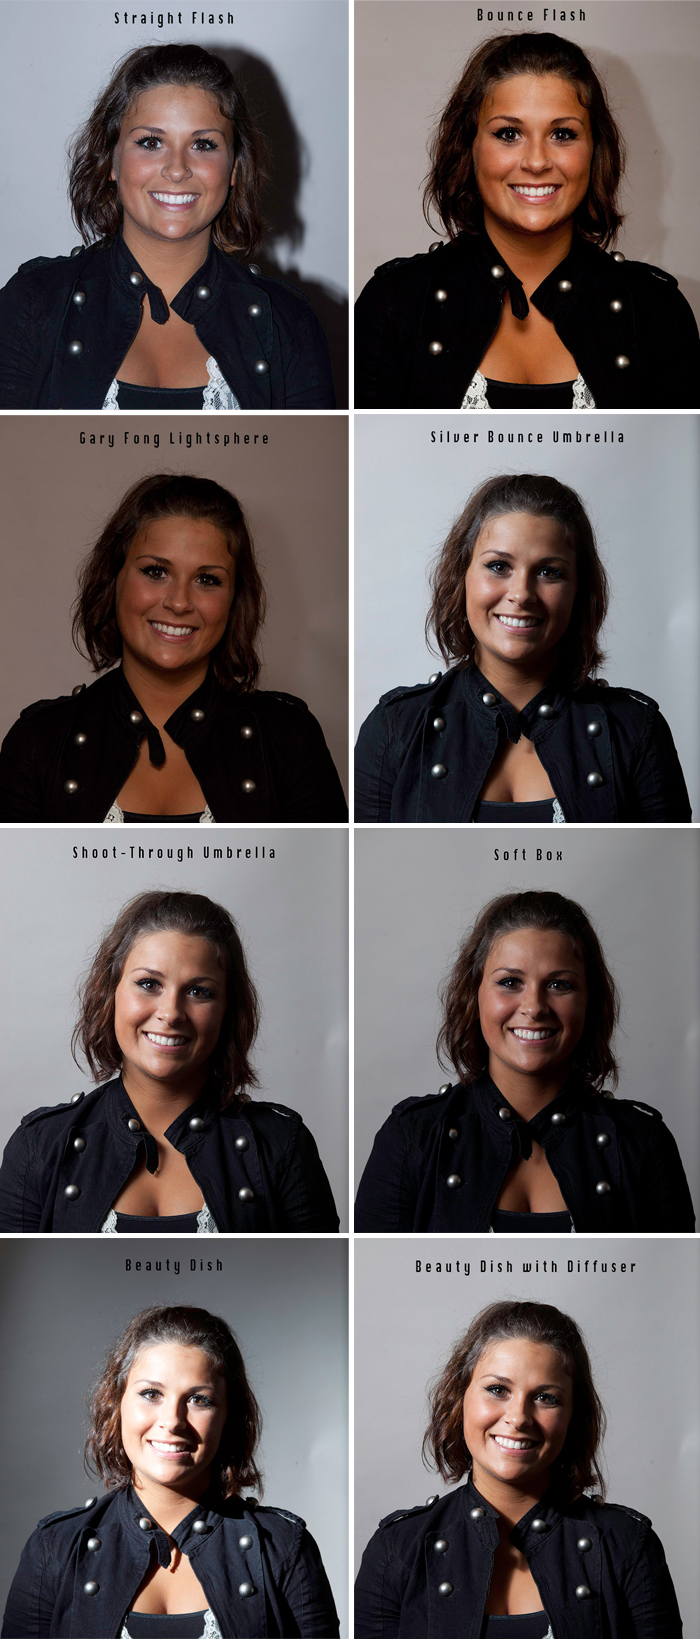
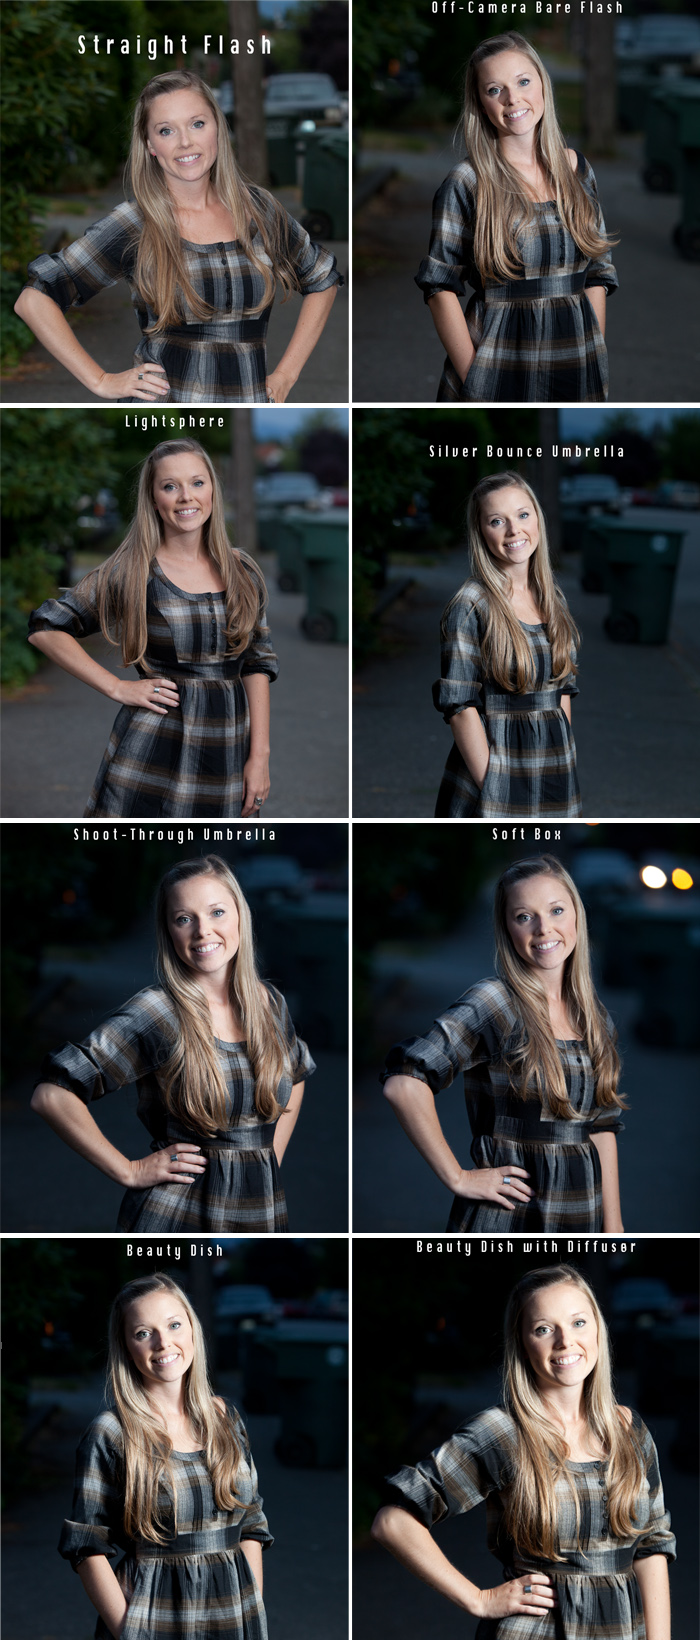
If you only take one thing out of this article, please look at the first image and promise yourself that you will never use direct flash. You do your subject such a massive disservice by hitting them straight on with flash. The light is way too harsh and any imperfection is exacerbated. Take note that the third image using the Gary Fong Lightsphere is rather dark since the camera was on flash and that diffuser steals quite a bit of light from the flash.
Without editing any of these images, I would say my favorites would either be the soft box or the beauty dish with diffuser on. The catch lights in her eyes for both are absolutely gorgeous. Which is your favorite? Let me know in the comments.
Setup 2
Just for fun, we also did a similar shoot outside as stated above.
Again, go ahead and tell me which is your favorite of this set. I will say, I was quite surprised that the Lightsphere was one of my favorites from this set, although the soft box does look pretty nice.
Image what these images could look like with just a little editing to balance the levels, smooth the skin, and help out the white balance.
Hopefully this article lessened some of the second-guessing you might have about off-camera lighting. One thing you might notice from all the sample images is that many of them actually look very similar with only very minor differences. Probably the biggest difference in most of them is the look of the catch light in their eyes. At some point you just have to pick a particular modifier, bite the bullet and buy it, and then get out there and shoot.
Please Support The Phoblographer
We love to bring you guys the latest and greatest news and gear related stuff. However, we can’t keep doing that unless we have your continued support. If you would like to purchase any of the items mentioned, please do so by clicking our links first and then purchasing the items as we then get a small portion of the sale to help run the website.
Get rid of the ads!
Did you enjoy reading this article as much as we enjoyed writing it? There's a way to support us and our reporting, getting ad-free navigation and more as a bonus. Subscribe to us for less than a coffee per month —just $3.99— or take advantage of our yearly subscription with a hefty discount for only $25.- An ad-free experience
- A free mystery box for Lightroom or Capture One
- All the books in our store
- 20% discount on Capture One
- 30% discount on Imalume Photo Theft Protection
- 20% off Herbs and Kettle Tea Company.
- 20% off your order from MPIX printing services.
- 5% off Viltrox Products via their eCommerce store.
- 10% off all film developing, printing and scanning services from Blue Moon Camera and Machine
- 15% off 7Artisans products: The lens and accessory maker is offering a sweet discount for Phoblographer's readers.