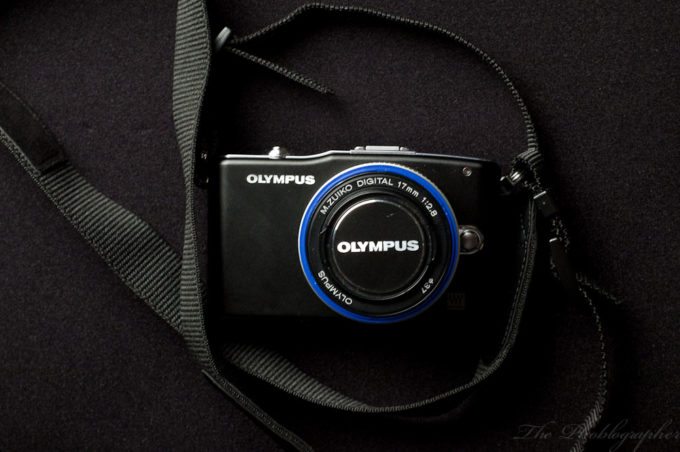
The Olympus EPM1 (or E-PM1 and EPM-1) is a camera that is seemingly targeted towards those that don’t know much about the technical aspects about photography or in some cases, not much about it at all. With this statement said, this isn’t a camera for myself or anyone on my staff—we’re all very experienced. When this camera ended up at my doorstep, I was challenged on how I could do it justice. And then…it hit me.
Today I am publishing a very special review. As many veteran photogs know, there are those of us who lean more towards the technical side of things and those that sway more towards the creative side. To do this review, I called up my friend Belinda Heiman to assist in this. She’s a growing photographer that leans more towards the creative side of things and has just restarted her business with the creation of her Facebook and Twitter pages. As a result, this review will be done from two different points of views: mine and hers. It will focus mostly on using the camera as this audience will be very happy with the image quality in general.
Tech Specs
Borrowed from the B&H Photo listing of the product.
| Type | Micro Four Thirds digital |
| Memory | SD/SDHC/SDXC/UHS-I Eye-Fi Class 6 recommended for Movie shooting |
| Lens Mount | Micro Four Thirds |
| Effective Pixels | 12.3Mp |
| Screen Size | 3.0″ (16:9) LCD, AR (anti-reflection) coating 0.7 x 0.5″ / 17.3 x 13.0mm 460,000 pixels Playback field of view: 100% Brightness control: +7 levels and -7 levels Color temperature: +7 levels and -7 levelsLive View Type: Image Sensor (High Speed Live MOS) type Field of view: 100% Display mode: Normal mode; Grid Line mode (4 types); Histogram mode; Magnified View mode; Comparable View mode; Off mode Magnification ratio: x5, x7, x10 (default), x14 Monitor information: Aperture value, shutter speed, auto bracket, AE lock, AF mode, IS, shooting mode, battery check, myset, internal temperature warning, face/eye detection, histogram, number of storable still pictures, record mode, ISO, sequential shooting, self-timer, white balance, metering mode, AF confirmation mark, exposure compensation value, spot metering area, flash mode, flash status, flash intensity control, super FP, touch panel condition, focusing length, tone control, Eye-Fi condition Face detection: Max 8 frames AF: High speed imager AF |
| Sensor | High Speed Live MOS sensor Total number of pixels: 13.1Mp Aspect ratio: 1:33 (4:3) Filter array: Primary color filter (RGB) Dust reduction: Supersonic Wave Filter |
| Aspect Ratio | 4:3(Default), 3:2, 16:9, 6:6, 3:4 Process: RAW: Aspect ratio is recorded as Exif data; JPEG: JPEG image is produced based on the aspect ratio |
| Recording Formats | Still: DCF, DPOF compatible/Exif, PRINT Image Matching III Video: AVCHD, AVI Motion-JPEG Audio: AVHCD – Dolby Digital; Motion-JPEG format / Picture with Sound: Wave Format Base (Stereo PCM/16-bit, 48KHz) |
| File Format | Still: RAW (12-bit lossless compression), JPEG, RAW+JPEG, MPO (3D) |
| Image Size | Still RAW: 4032 x 3024; JPEG: 4032 x 3024, 640 x 480 |
| File Size | RAW: 4032 (H) x 3024 (V) (approx. 1/1.5 lossless compressed) approx. 13.9MB Set 1 (LF): 4032 (H) x 3024 (V) (1/4 compressed) approx. 5.9MB Set 2 (LN): 4032 (H) x 3024 (V) (1/8 compressed) approx. 2.7MB Set 3 (MN): 2560 (H) x 1920 (V) (1/8 compressed) approx. 1.1MB Set 4 (SN): 1024 (H) x 768 (V) (1/8 compressed) approx. 0.3MB |
| Movie Modes | AVCHD Format Full HD Fine: 1920 (H) x 1080 (V), 60i recording, 20Mbps, aspect 16:9 Full HD Normal: 1920 (H) x 1080 (V), 60i recording, 17Mbps, aspect 16:9 HD Fine: 1280 (H) x 720 (V), 60p recording), 17Mbps, aspect 16:9 HD Normal: 1280 (H) x 720 (V), 60p recording, 13Mbps, aspect 16:9 Frame rate of image sensor output is 30fpsMotion-JPEG Format HD: 1280 (H) x 720 (V), 30fps (some art filters are excepted), aspect 16:9 SD: 640 (H) x 480 (V), 30fps (some art filters are excepted), aspect 4:3 (VGA) |
| Compression Ratio | Motion-JPEG format: 1/12 (HD), 1/8 (SD) |
| File Size | Video: AVCHD: 4GB max; Motion-JPEG: 2GB max |
| Maximum Recording Time | Picture with Sound: 30 seconds Movie: 29 minutes Full HD Normal, HD Fine, HD Normal: 29 minutes; Full HD Fine: 22 minutes; Motion-JPEG: HD: 7 minutes, SD: 14 minutes |
| Audio | Mic/speaker: stereo/mono |
| Image Stabilizer | System: Built-in (imager shift image stabilizer) Mode: 3 modes (IS1:2 dimensional activation, IS2:1 dimensional activation in landscape frame to vertical direction moving, IS3:1 dimensional activation in portrait frame to vertical direction moving ), OFF Manual function: Input focal length 8, 10, 12, 16, 18, 24, 28, 30, 35, 40, 48, 50, 55, 65, 70, 75, 80, 85, 90, 100, 105, 120, 135, 150, 180, 200, 210, 250, 300, 350, 400, 500, 600, 800, 1000 Shutter speed range: 2 – 1/4000 seconds (Not available in bulb) IS for movie: Shifting electronic image (Digital IS, IS1 modes) |
| Focusing | AF system: Imager Contrast Detection AF system (with with AF compatible lens) Focus mode: Single AF (S-AF); Continuous AF (C-AF); Manual Focus (MF); S-AF + MF; AF tracking (C-AF + TR); C-AF and AF tracking are not available with non-Micro Four Thirds lenses Advance AF: Available Focusing point: 35-area multiple AF with the contrast detection system (Auto, selectable in option) Focusing point selection: Auto from 35-areas; 9 Group Target areas; Auto when face detection is on; Free selection when Magnified View Mode is selected Illuminator: Available AF lock: Locked at first position of shutter button in Single AF mode Focus tracking: Available Magnified Spot AF: Available Face priority AF/Eye Detect AF: Available; Eye Detect AF: Off; Near side eye priority mode; Right side eye priority mode; Left side eye priority mode Manual focus assist: When rotation of focus ring is detected under S-AF+MF or MF mode, LV is magnified automatically |
| Exposure Control | Metering system: TTL Image Sensor metering system(1) Digital ESP metering (324-area multi pattern metering); (2) Center weighted average metering (3) Spot metering (approx. 1% for the viewfinder screen. Highlight / shadow bases are available) Metering range: EV 0-20 (Digital ESP metering, center weighted average metering, spot metering, at normal temperature, 17mm f2.8, ISO 100) Exposure mode: (1) iAuto; (2) P: Program AE (Program shift can be performed); (3) A: Aperture priority AE; (4) S: Shutter priority AE; (5) M: Manual; (6) Scene select AE; (7) Art Filter; (8) Underwater wide / Underwater macro (Selectable from menu as a function on Rec/Fn button) Scene select AE: Portrait, ePortrait, Landscape, Landscape + Portrait, Macro, Sport, Night Scene, Night + Portrait, Children, High Key, Low Key, DIS mode, Nature Macro, Candle, Sunset, Document, Panorama, Fireworks, Beach & Snow, Fisheye Conv, Wide Conv, Macro Conv, 3D ISO: AUTO: ISO 200-12800 (customizable, Default 200-1600) / Manual ISO 200-12800, 1/3 or 1 EV steps Exposure compensation: -/+ 3 EV in 1/3, 1/2, 1 EV steps selectable AE lock: Available (Using Rec/Fn button is available) Exposure bracketing: 2, 3, 5 frames in 0.3, 0.5, 0.7, 1 EV steps selectable, 7 frames in 0.3, 0.5, 0.7 EV steps selectable Metering standard value adjustment: 1/6 EV step, +/- 1 EV range |
| Exposure Control | Movie: Exposure mode: (1) P: Program AE; (2) A: Aperture priority AE; (3) S: Shutter speed priority AE; (4) M:Manual; (5) Art Filter |
| White Balance | Auto WB system: High Speed Live MOS sensor Preset white balance: 7 settings (3000K – 7500K), Lamp (3000K), Fluorescent (4000K), Daylight (5300K), Flash (5500K), Cloudy (6000K), Shade (7500K), Underwater WB White balance compensation: -/+7 steps in each A-B/G-M axis (in Auto WB/Preset WB mode/One touch WB) CWB (Kelvin setting): 1 setting can be registered at Kelvin temperature (2000-1400K) One-touch white balance: 2 custom settings can be registered White balance bracketing: 3 frames in 2, 4, 6 steps selectable in each A-B/G-M axis |
| Color Modes | Color space: sRGB, Adobe RGB |
| Picture Modes | Mode: iEnhance, Vivid, Natural, Portrait, Muted, Monotone, Art Filter Adjustment parameter: Contrast, Sharpness and Saturation level available in 5 steps for iEnhance, Vivid, Natural, Portrait and Muted, Contrast and Sharpness level available in 5 steps for Monotone, 3 effect levels are available in i-Enhance Filter effect: Yellow, orange, red, green filter available for Monotone Picture tone: Sepia, Blue, Purple, or Green tone available for Monotone Gradation: 4 levels (Auto, High key, Normal, Low key) Art filter bracketing: Available |
| Noise | Noise filter: At high ISO setting: Off, Low, Standard, High; At slow shutter speed: Off, On, Auto, On (effective when shutter speed is slower than 1 seconds); Auto (effective when shutter speed is slower than 4 seconds [at ISO 200 or higher] or 8 seconds [at lower than ISO 200]) |
| Shutter | Product type: Computerized focal-plane shutter shutter speed: 60-1/4000 seconds; Bulb: Up to 30 minutes (selectable longest time in the menu, Default: 8 minutes) Self-timer: Operation time: 12 seconds, 2 seconds (cancel available) Remote cable release: Available (Optional RM-UC1) |
| Drive | Drive mode: Single-frame shooting, sequential shooting, self-timer Sequential shooting speed: 4.1fps in sequential shooting (5.5fps in case of “I.S. Off”) |
| Flash | External flash Guide number: 10 (Fno/m) at ISO 200, 7 (Fno/m) at ISO 100 but ISO 100 is not available Mode: TTL-Auto, Manual (Full, 1/2, 1/4, 1/8, 1/16, 1/32, 1/64) Color temperature: 5500+/-400°K Wireless flash control: Available(4 channels, 4 groups) Compatible external flash: E-System Flash (FL-50R, FL-36R, FL-50, FL-36, FL-20, FL-14, FL-300R) External flash control mode: TTL Auto, Auto, Manual, FP-TTL-Auto, FP-Manual Flash mode of external flash: Auto, red-eye reduction, red-eye reduction slow sync., slow sync at 1st curtain, slow sync at 2nd curtain, fill-in, off Synchronization speed: 1/60-1/160; Super FP 1/125-1/4000 with external flash Flash intensity control: Up to +/- 3 EV in 0.3, 0.5, 1 EV steps |
| Filter | Mode: Pop Art, Soft Focus, Grainy Film, Pin Hole, Diorama, Dramatic Tone Variation/Effect: Available |
| Multi Exposure | Number of pictures: 2 frames Functions: Auto gain, Live View, Exposing on Recorded picture |
| Playback | Playback mode: Single-frame; Information display; Index display (4/9/25/100 frames, calendar); Close-up (2-14x); Movie (with sound, FF/REW/Pause); Picture rotation (manual); Slideshow (still, movie, still+movie, slide show with BGM, BGM+sound, sound); When camera is connected to HDTV with HDMI cable, 2 new slideshow effect can be selectable (still) Information display: Histogram (independent luminance/RGB available); highlight/shadow point warning, AF frame, shooting information |
| Menu Language | Japanese, English, French, German, Spanish, Italian, Japanese, Korean, Traditional Chinese, Simplified Chinese, Russian, Czech, Dutch, Danish, Polish, Portuguese, Swedish, Norwegian, Finnish, Croat, Slovenian, Hungarian, Greek, Slovakian, Turkish, Latvian, Estonian, Lithuanian, Ukrainian, Serbian, Bulgarian, Rumanian, Indonesian, Malay, Thai |
| Editing | Erasing function: Single frame, All, Selected frames (from index) Protect function: Single frame, Selected frames, All frames, Release protect (Single, All) RAW picture editing: RAW development based on settings of the camera (including Art filter) JPEG editing: Shadow adjustment, Red-eye fix, Cropping, Aspect, Monotone, Sepia, Saturation (color depth), Resize (producing another file, 1280 x 960, 640 x 480, 320 x 240), ePortrait |
| Connections | USB 2.0 (for storage through multi-connector) HDMI mini type C Hot shoe Accessory port (AP2) |
| Power Requirements | Battery: BLS-1 lithium-ion battery Sleep mode: 1, 3, 5 minutes, selectable Number of recordable pictures: 300 shots (CIPA test standard) With 50% flash light: With BLS-1 and Toshiba Class 6 SDHC 4GB card under CIPA test standard |
| Environmental | Temperature Operating: 0 to 40°F / -18 to 4.4°C; Storage: -20 to 60°F / -29 to 16°C Humidity Operation: 30 to 90%; Storage: 10 to 90% |
| Construction | Metal |
| Dimensions | 4.31 x 2.5 x 1.5″ / 11.0 x 6.4 x 3.8cm |
| Weight | 7.65 oz / 0.2kg Body only 9.34 oz / 0.3kg Battery and memory card |
Video Tour
Belinda Heiman’s Review
Editor’s Note: This is her first review and in some ways, will relate the most to the specific audience that leans more towards the creative side of the photography world. All photos in this section were shot by Belinda.
The Olympus E-PM1 is a small piece that does not weigh a lot in my hands.
The external surface of the camera is very smooth and slick. It would be nice to see this piece in the future with more grip material such as the kind you would find on an SLR. There is almost no room to hold the camera in a steady position, and it is scary to switch a lens when the exterior is so smooth. The camera could easily slip out of grip on to the ground. However, she does her job and I didn’t have many issues. (Belinda, like me, names her cameras after female names.)
What’s nice about the menu is that as one scrolls over a letter, a tab automatically pops up on the LCD screen with a description of what that letter means. What’s not so great about the menu is that there is a lot going on at once.
I was initially having an issue with my images being too blue at first. It was a matter of changing the white balance, which was not easy to find. I asked a professional photographer for some help. It took him a few minutes, and his response was, “That was not easy to find.” I was surprised that such a tiny body was so complex internally.
Even deleting a picture can be complicated at first, because the option seems to be hiding and you must scroll through a list to get to it. At first, I couldn’t help to think about a scenario where a girlfriend would be hovering over and yelling at me, “Delete that right photo now!” I then imagined getting scolded for “pretending” not to be able to find the delete option, when in fact, I really couldn’t.
The trick was figuring out that the “OK” button is the key to most places you are trying to get to on this camera. Once you master the “OK” button, she should function like a breeze. If I would have read the manual first, I’m sure we would have become friends a lot sooner. However, my objective was to see how user-friendly she was and I didn’t want a cheat sheet.
The manual focusing on the lenses is good and easy to use. The images are very sharp on the zoom lens as well, but it is not my favorite. The best lens was the 17mm.
The art options would be very cool; there is even a pinhole option. However, the effect, very disappointingly, looks like a slight vignette achievable in Adobe Lightroom. Once you chose an art option, it is hard to change it; the menu cannot easily be accessed again unless you scroll over, chose another option and then return to the art tab. I know, very complicated.
Like every new toy or tool, it takes a minute (figuratively speaking) to get acquainted. Let’s just say this Olympus E-PM1 takes 5 minutes (figuratively speaking). If you can get over the complexity of the controls, then this camera takes great sharp images. I may almost go as far as saying it is comparable to my Nikon D40 I had in college with the 18-55mm lens.
Ergonomics
The EPM1 is a small camera designed for the fashionista; and this is evident in its looks. It is sleek, smooth, and nearly button free. In the hand, it feels like an Olympus XZ-1. The styling is much more akin to a point and shoot, and designed for those that just want to shoot and not worry about any of the more technical aspects of photography.
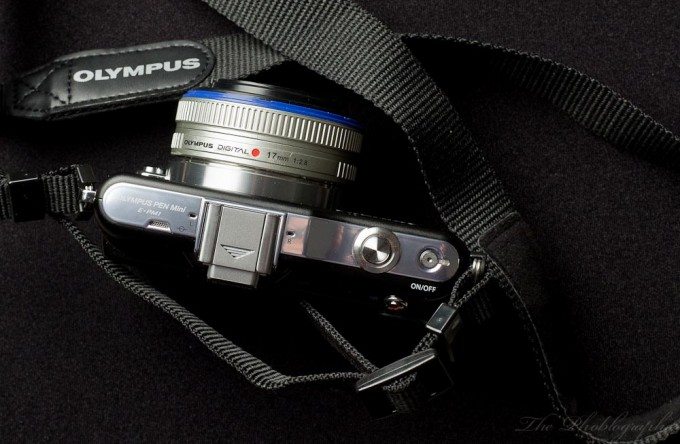
The top of the camera is cleanly styled with nothing more than a hot shoe, on/off button, and focusing button. Plus, you’ve got microphones on the camera’s top as well.
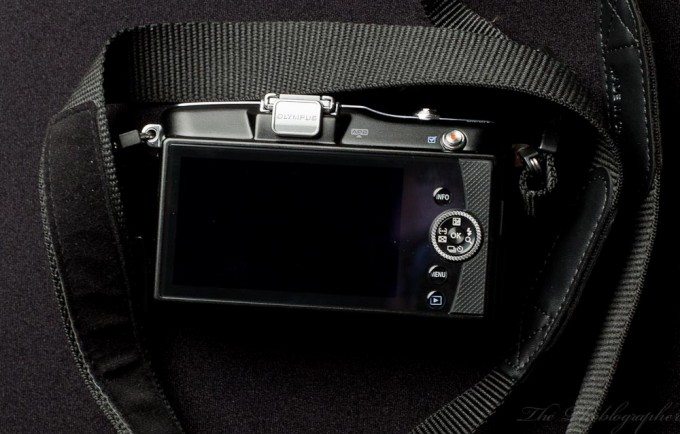
The back is dominated by a giant LCD screen that isn’t as high quality as I’d really like it to be. The back also features a video recording button, info button, menu button, playback button, dial, and directional setting buttons. The right side also has a textured grip panel to it for easier holding.
Autofocus
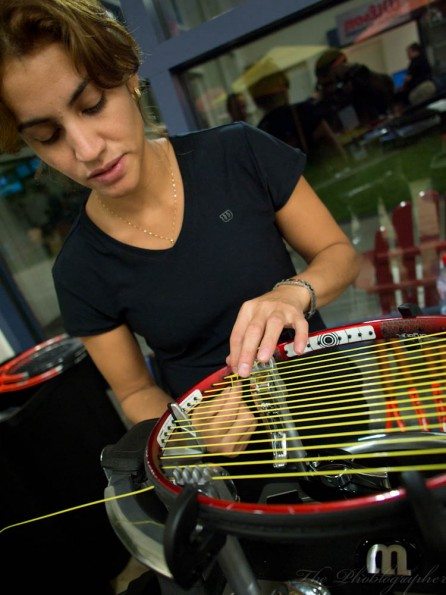
The EPM1’s autofocus is the same as the Olympus EP3s. By that, I mean that it has the new MSC system that works with the processor, sensor and lens to achieve super fast focusing. Indeed, it can achieve the same focusing speeds as the EP3. During my time at the US Open with this camera, I felt that the continuous focusing wasn’t smart enough to keep up with the fast moving tennis players. By that, I mean that I would focus on the tennis players, and the camera would track them; and it sure did track quickly. However, they sometimes moved so fast that the camera eventually thought that something else (like the wall behind them) was what it was supposed to track.
It it absolutely worth it to note though that in low light, and with the 12mm f2 lens that I reviewed very favorably, the focusing was still spot on and lightening quick. With the other MSC lenses, it always will be quick. The moment that you slap an older lens on there, like my 17mm f2.8, the focusing will be slow. We demonstrate this in the video above, but this also happens with the Olympus EP3.
Image Quality

The EPM1 renders skin tones very accurately in my opinion, though sometimes it has the tendency to render images more towards the cooler side of the spectrum. Don’t even try to custom white balance with this camera.
For the audience that this is targeted towards, they’ll be happy with the image quality and most people may not even think about inspecting the image at 100% at all.
Then I thought about that statement again: what if a student wanted to purchase this camera?
If a student wanted a camera, they should go with the EPL3 instead. Or, if they could, spring for the EP3.
Like other Olympus cameras, it really shines in good, natural light. In the dark, the noise can be a bit much but is easily fixed. I showed this with the EP3 in a previous post.
High ISO Images
During the review of the EPM1, both Belinda and I didn’t often shoot images above ISO 1600. But here are my findings:
– For the most part, the ISO rendering is like the EP3’s. However, the EP3’s is a bit better.
– Fixing the noise requires you to first turn off noise reduction in the camera. Then in post-production, you should edit accordingly in order to retain the most detail but get rid of that nasty image noise.
Will the audience that is using this camera mind? They probably would unless they apply the noise filters. Additionally, they will probably be shooting JPEGs for the most part. And this camera has a great JPEG output. The people using this camera, once again, won’t look for the most minute of details for the most part.
Ease of Use
For the ease of use test, I put this camera through the ultimate of trials: my mom. My mother is from a third world country and grew up on a farm and in a time where the technology around was very close to what America had back in the 1870’s. However, she was always an avid hobbyist photographer and owned an Olympus OM77 which we still have around the house. To this day, she mourns its loss because the shutter became sticky and jammed.
Putting this camera in her hands and trying to walk her through it was quite an experience. Normally, she can barely even figure out how to print something correctly let alone figure out the television remote. And no, I’m not kidding. My sister and I always have to retrain her how to do things.
When I put the camera in her hands:
– I asked her to turn it on. She had to get her glasses to do so. She is 54 at the time of the publishing of this story and her eyes are getting bad. When she put her glasses on, she figured out how to turn the camera on. (Olympus may want to work on having bigger print for the visually impaired. They did this with the Olympus E-520 DSLR back in the day.)
– When the camera was turned on, the back told her to unlock the lens. She looked all around the camera until I told her to remember that the camera said that there is a lens issue. Then by analyzing the lens, she unlocked it.
– Then the screen was all black. She looked at the lens and was able to figure out that the lens cap was still on.
– And now to take a photo. She straight up pressed the shutter release without really letting the camera focus. I can tell, because the photo she tried to take of me was very blurry. Then I told her to lightly press the shutter button to let the camera Autofocus. She noted that the green box always seemed to follow my face.
Then she tried taking the photo again and it was a success.
– Now to view and play the image back: I told her to think about the symbols that she had used to enable a video tape to play on a VCR. She looked around the back of the camera, but her eyes focused more towards the center dial and with the way she gripped the camera, she couldn’t really see the playback button. Then she saw it and was able to view my photo.
And to get to the next image, she thought that she needed to press playback again. Unfortunately, that returned her to the shooting screen. She pressed playback and this is where I aided her to show her that she needed to turn the back dial to see the next photo. Olympus could have done a better job by instead making this button/dial seem more like a fast forward or advance button.
– And then I asked her to change a lens, as she happily remembered how to do that. First off, she forgot that she needed to press a button to release the lens. However, she did remember that when putting a new lens on, one must line up the red dots to do so.
If I didn’t tell her to turn the camera off before changing the lens though, she wouldn’t have remembered. These people must be educated to do this lest their sensors become dirty. To be fair, Olympus’s cleaning system is top notch.
Conclusions
In the end, can I recommend the Olympus EPM1? I’m still not so sure. When in the hands of a seasoned veteran, it’s best to just leave the camera in aperture priority and shoot to your heart’s content. However, it does seem to underexpose the images a bit.
The user interface and menu just screams out, “Don’t open me.” Indeed, it is much like the older Sony NEX system cameras, though the interface has improved with the NEX 5N, NEX C3 and the NEX 7 (which I have also tested.) Most people that try to use this interface will perhaps just give up. When I wanted to display the rule of thirds grid, I asked the reps how to do it. I eventually found it, but even they noted that one really needed to dig into the system to find it.
Will a pro or serious hobbyist be impressed by the image quality? In most cases, yes. In the high ISO dept., the Fuji X100 spoils it for everyone; with a co-worker of mine even noting that the high ISO images were better than his Nikon D700. Shoot in JPEG though, and if the correct settings are in place, you’ll be fine. Also, if you know how to edit Olympus files, you shouldn’t have too much of a problem.
The focusing is good enough for most people. For all except professional applications and those demanding the best focusing capabilities, the EPM1 will do well.
This is a camera that us camera geeks can probably give to the less tech savvy members in the family providing we don’t mind wanting to play the role of tech support specialist. For the younger user that actively makes a camera a part of their life, they’ll become smitten with this camera. For the older generations, I’m not too sure what to say. My mother did figure it out when I walked her through it, but ended the session with, “Next you need to show me how to upload the photo to the computer.”
In a case like this, the Eye-Fi card will work wonders. It is also one of the reasons why it is my absolute favorite SD card out there.
If you want to pick up the EPM1, you can get yours over at Amazon or B&H Photo by clicking the according links.
Questions on the review? We’d like to hear from you in the comments below. Also be sure to follow Belinda’s channels!
Please Support The Phoblographer
We love to bring you guys the latest and greatest news and gear related stuff. However, we can’t keep doing that unless we have your continued support. If you would like to purchase any of the items mentioned, please do so by clicking our links first and then purchasing the items as we then get a small portion of the sale to help run the website.


