
There are tons of tutorials out there for photographers who want to get started in low light. We think that much of that stuff can be easily found in our archives, on YouTube, or in books. Seriously, we recommend that every photographer get their hands on books because that’s still the ultimate way to experience images. Drawing on that thought, there aren’t many tutorials for more experienced photographers. So you might know everything basic when it comes to the technical stuff; but what about the creative stuff. Here are low-light photography tips for experienced photographers.
This article is brought to you in partnership with Tamron.
Our Favorite Lenses
- 17-70mm F/2.8 Di III-A VC RXD: A fantastic option for Fujifilm and Sony APS-C mirrorless photographers. Read our review.
- 20-40mm F/2.8 Di III VXD: A wide-to-normal field of view that’s very useful. Read our review.
- 28-75mm F/2.8 Di III VXD G2: The perfect companion for most photographers in various situations. Read our review.
- 35-150mm F/2-2.8 Di III VXD: The ultimate lens for the working photographer. Read our review.
Shoot Like a DSLR, Sort Of
If you ever shot with a DSLR, you’d know you had to select the autofocus point yourself before the scene detection came around. Well, unless you’ve been maintaining your lenses, the autofocus performance can degrade if you’re just using looser autofocus points. If you’ve got a specific creative vision in mind that requires tack-sharp focus, then use a focusing point that’s between medium and small-sized.
Sure, scene detection can work in low light. But why possibly lose the shot?
Arguably, one of the best lenses for photographers who shoot gigs regularly is the Tamron 35-150mm F/2-2.8 Di III RXD. This range is insanely useful, and you’ll probably never have to swap lenses,
Not Everything Has to Be Tack Sharp
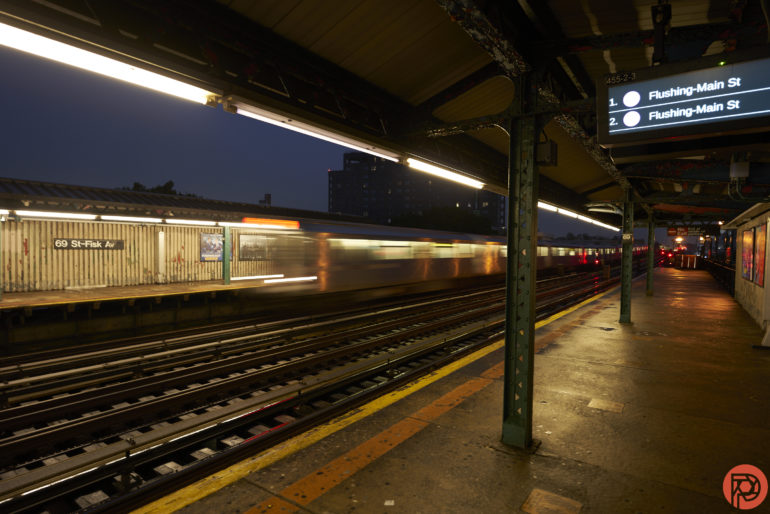
Try this! Beginners are often told to raise their ISO to get a faster shutter speed and capture a tack-sharp moment. But not everything has to be track-sharp. This is one of our favorite low-light photography tips! Lower your ISO, stop the lens down a tad (maybe), and slow the shutter speed down. Then, wait for something to move through the frame and make a photograph. Luckily, Tamron’s lenses are lightweight, and you often don’t need to worry about camera shake — especially with the Tamron 17-70mm F/2.8 Di III-A VC VXD as there’s Vibration Compensation inside.
Not everything in the scene needs to be ultra-sharp. And a little bit of motion can help you make a more intriguing image.
Play Around
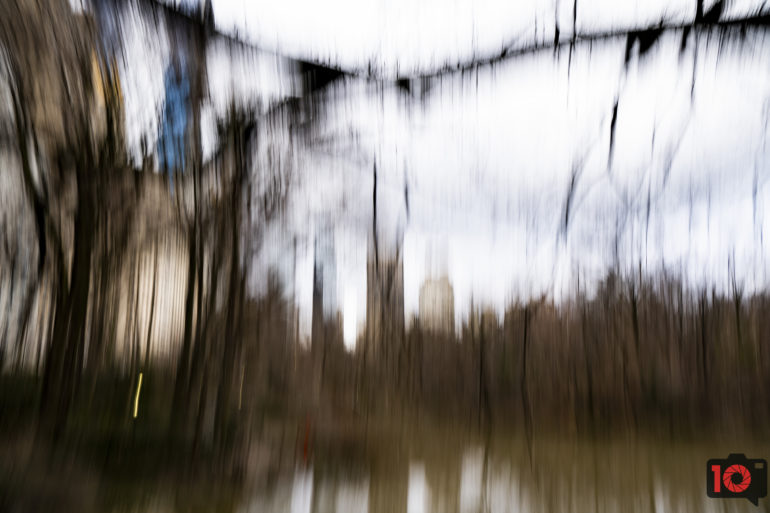
One of our favorite things to do is in-camera movement imagery. This is when you stop the lens down, slow down the shutter, and lower the ISO. Then you intentionally move the camera to create the look of a surrealist painting. And for that, we really like what wide-angle lenses do for us. The photo above was shot with the Tamron 17-70mm F/2.8 Di III-A VC RXD.
Wide-angle lenses give you the most image stabilization while also making every scene look like an old landscape painting. That’s especially the case with Tamron’s lenses too as the colors are often quite vivid.

Image by Olivier Wong, used with permission from Tamron.
Turn off the Live View Setting Effect
Lastly, turn off the Live-View Setting Effect, otherwise known as exposure preview. It slows down the autofocus on every single camera and lens while also draining the battery. If you’re shooting with Sony cameras, try the Shot Result Preview mode instead.
Get rid of the ads!
Did you enjoy reading this article as much as we enjoyed writing it? There's a way to support us and our reporting, getting ad-free navigation and more as a bonus. Subscribe to us for less than a coffee per month —just $3.99— or take advantage of our yearly subscription with a hefty discount for only $25.- An ad-free experience
- A free mystery box for Lightroom or Capture One
- All the books in our store
- 20% discount on Capture One
- 30% discount on Imalume Photo Theft Protection
- 20% off Herbs and Kettle Tea Company.
- 20% off your order from MPIX printing services.
- 5% off Viltrox Products via their eCommerce store.
- 10% off all film developing, printing and scanning services from Blue Moon Camera and Machine
- 15% off 7Artisans products: The lens and accessory maker is offering a sweet discount for Phoblographer's readers.