I guess Capture One Pro is feeling the heat from all of the many Adobe AI updates to Photoshop and Lightroom over the past year. Photographers have switched to Capture One’s software, citing better color processing science, but of late, Adobe has been making headlines with various AI-enabled tools. All of these were designed to make your post-processing and editing much quicker and easier. Capture One hasn’t ridden a massive AI wave yet, but I’m certain they’ll want to be seen doing so soon. The latest update to Capture One Pro 23, coming on October 25th, 2023, has some notable additions in this regard.
Table of Contents
Gear Used
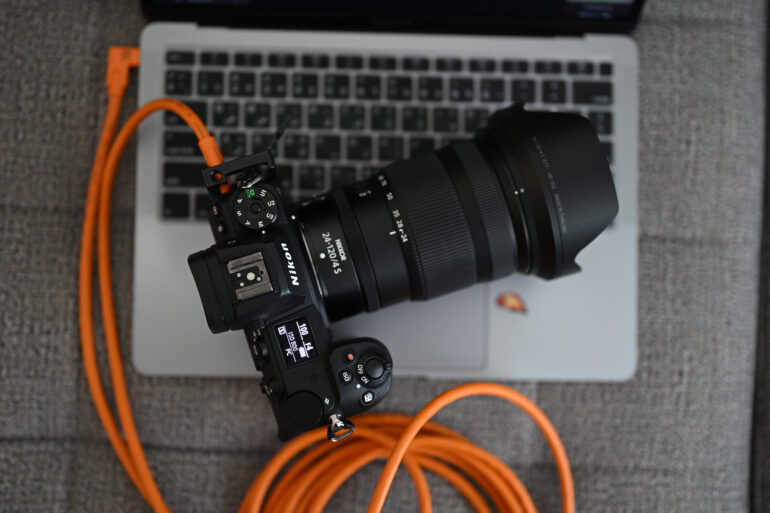
We tested the beta version of Capture One Pro 23 (16.3.0 – Beta 2) on my M1 Macbook Air. New features were tested using raw and jpg files from various Nikon cameras of mine. A Tethertools 15-foot right-angle cable was also used.
What’s Coming Up In Capture One Pro
In addition to various UX and performance improvements, there are a total of 6 new features being introduced in the upcoming Capture One Pro edition:
- AI Masking
- ReTether
- Snap-to-eye in Focus Tool
- Capture One Live: Share multiple collections (Sessions only)
- Capture One Live: In-app comments
- Publish to Glass (Mac)
AI Masking
Adobe introduced something similar a few months ago in Lightroom Classic. Adobe Photoshop had this even earlier, I believe. Capture One Pro now has three different ways of using AI to make subjects and other parts of your photographs. These are found in the Layers and Masks tool.
Subject and Background Masking
When you select an AI masking tool, expect about 5 to 10 seconds of AI pre-processing to be done before you can use the tool to create a new mask. This might seem like a counterproductive way of doing things at first. Adobe users would be more familiar with creating a rough mask selection before waiting for the AI to do its magic. Capture One Pro seems to have split the AI processing into two sections.
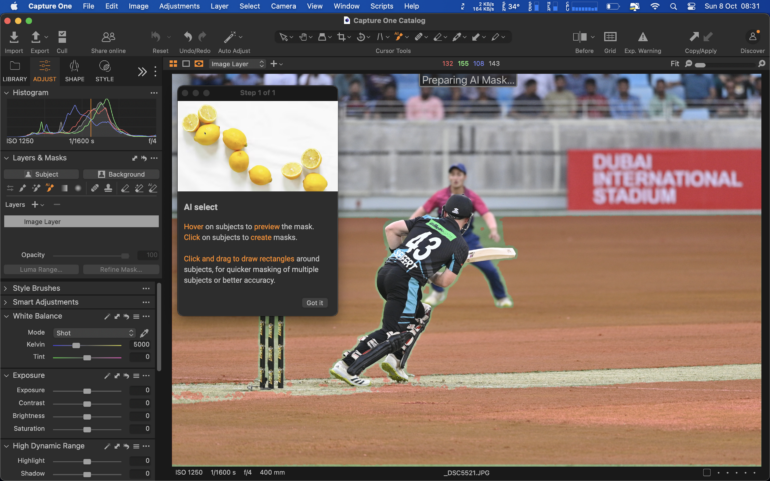
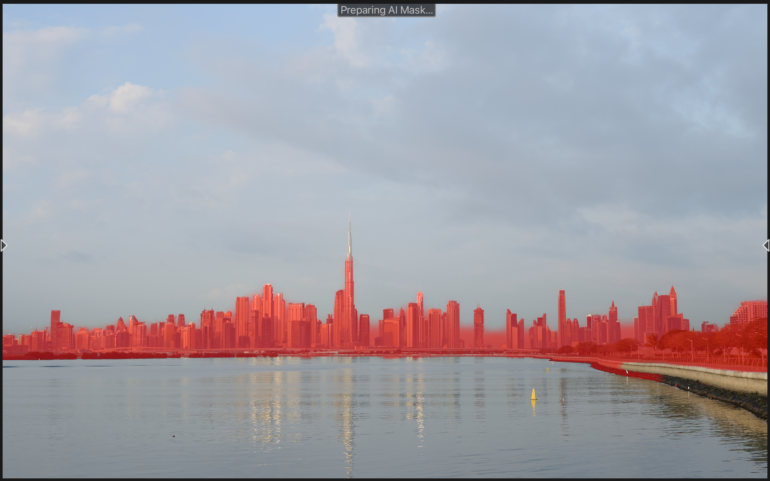
Choose an AI masking tool such as the AI Select brush. Once the Preparing AI Mask message disappears, draw a square or rectangle over the subject you’d like the AI to mask. You can also hover over a subject or a section of a subject to see if the AI can recognize it. In the above image, you can see the batsman has been almost cleanly selected (the fielder’s cap in the background has also been masked) by the AI mask tool. The mask has been saved to a separate layer.
Yes, Adobe had something like this for many years now even in the form of content awareness masking. But now, it’s even more refine. And Capture One is catching up.
It Does A Pretty Good Job
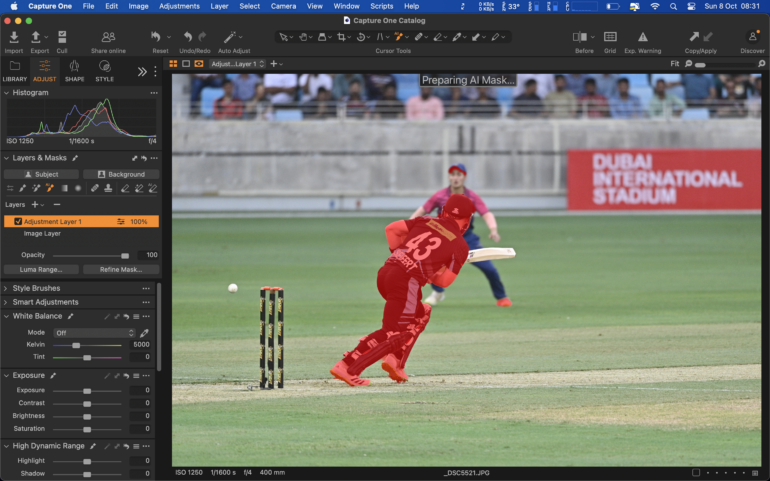
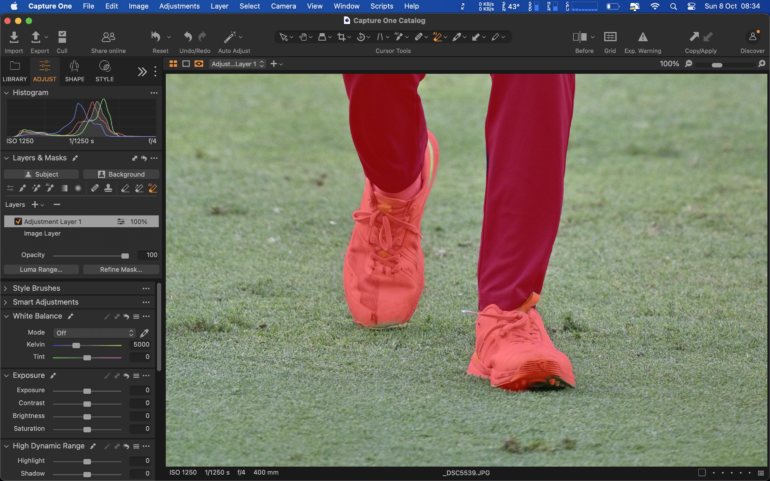
Here’s an image of a player against the cricket ground. Some years ago, masking him out in Capture One would require a rather painstaking effort. With the new AI masking tools, he’s almost cleanly selected. I say almost because his green laces seem to have been left out.
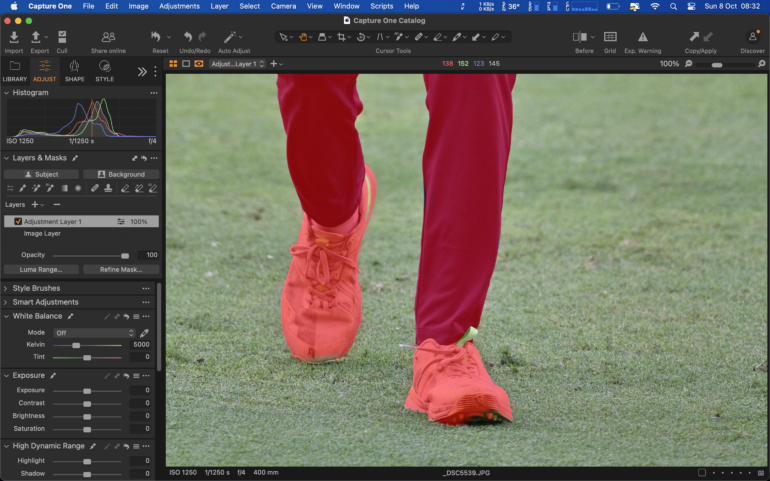
Also, the gap between his right arm and his vest was masked over
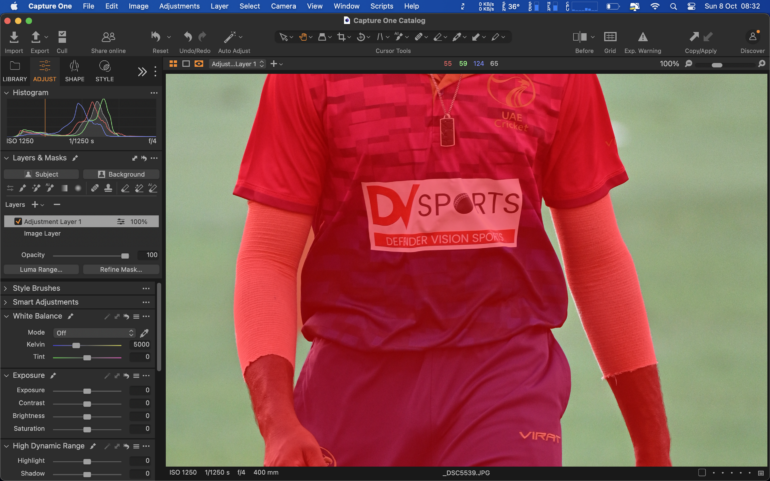
The rest of it looks very well masked, but the perfectionist in all of us will undoubtedly want to clean this up. Click on the AI select brush again, and hold down the Command key on your Mac. This inverts the masking capabilities, acting as a mask eraser now. Hovering over the gap showed me that the AI couldn’t cleanly identify the gap at first.
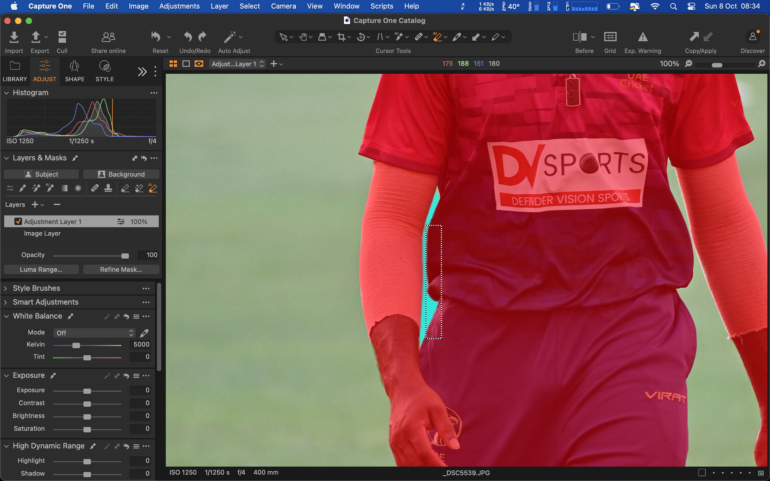
I had to do a series of 2 to 3 selections before the masking over the gap was finally removed.
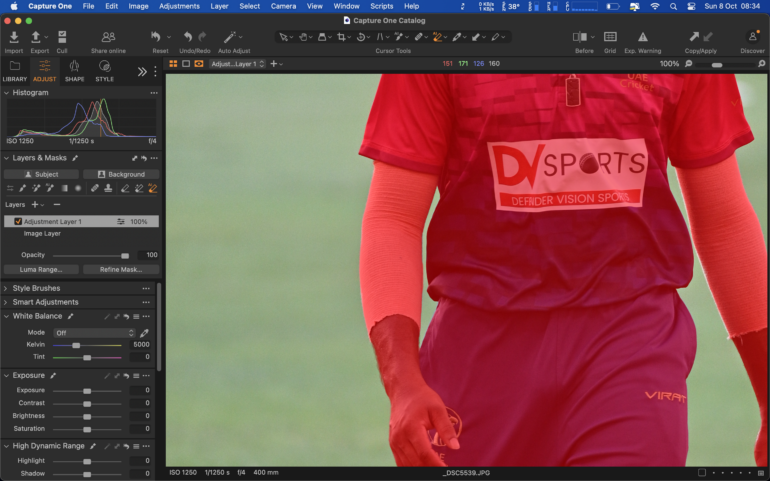
The laces were also easily masked over this way
AI Subject Auto Selection
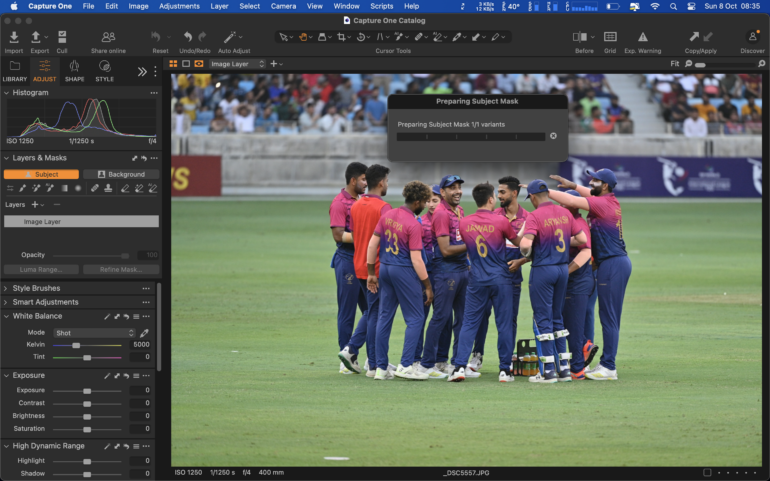
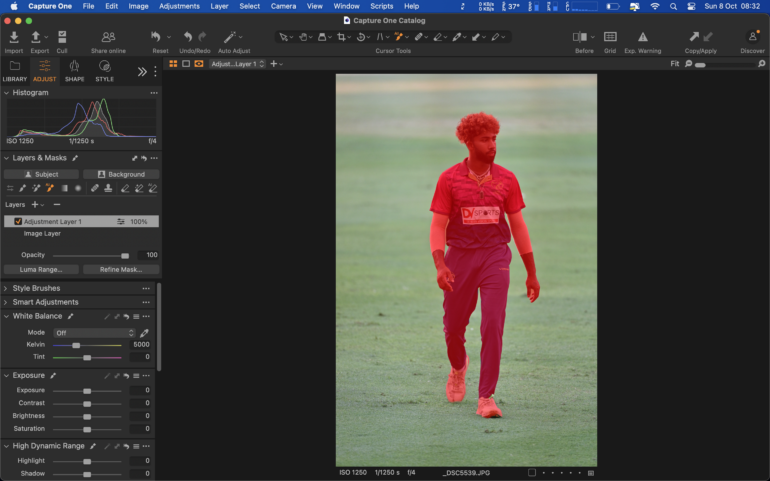
In this image, I wanted to see what the Capture One Pro AI would select as the subject if I clicked on the Subject button. This could take up to 20 seconds depending on the image you’re using this on. Also, remember that I’m doing this with a newer M1 Apple chip. Your computer’s results may vary accordingly.
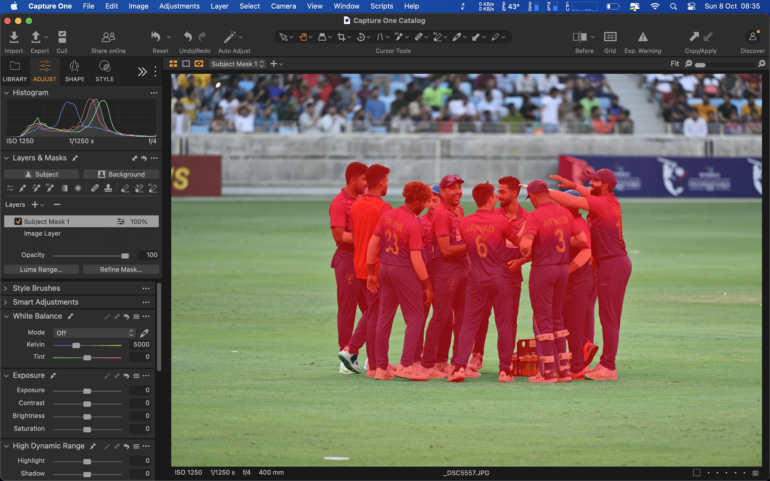
To my surprise, the AI subject auto-selection tool did a great job of picking out all the players. It only missed out on a pair of shoes and added a bit of the advertising board in the background.
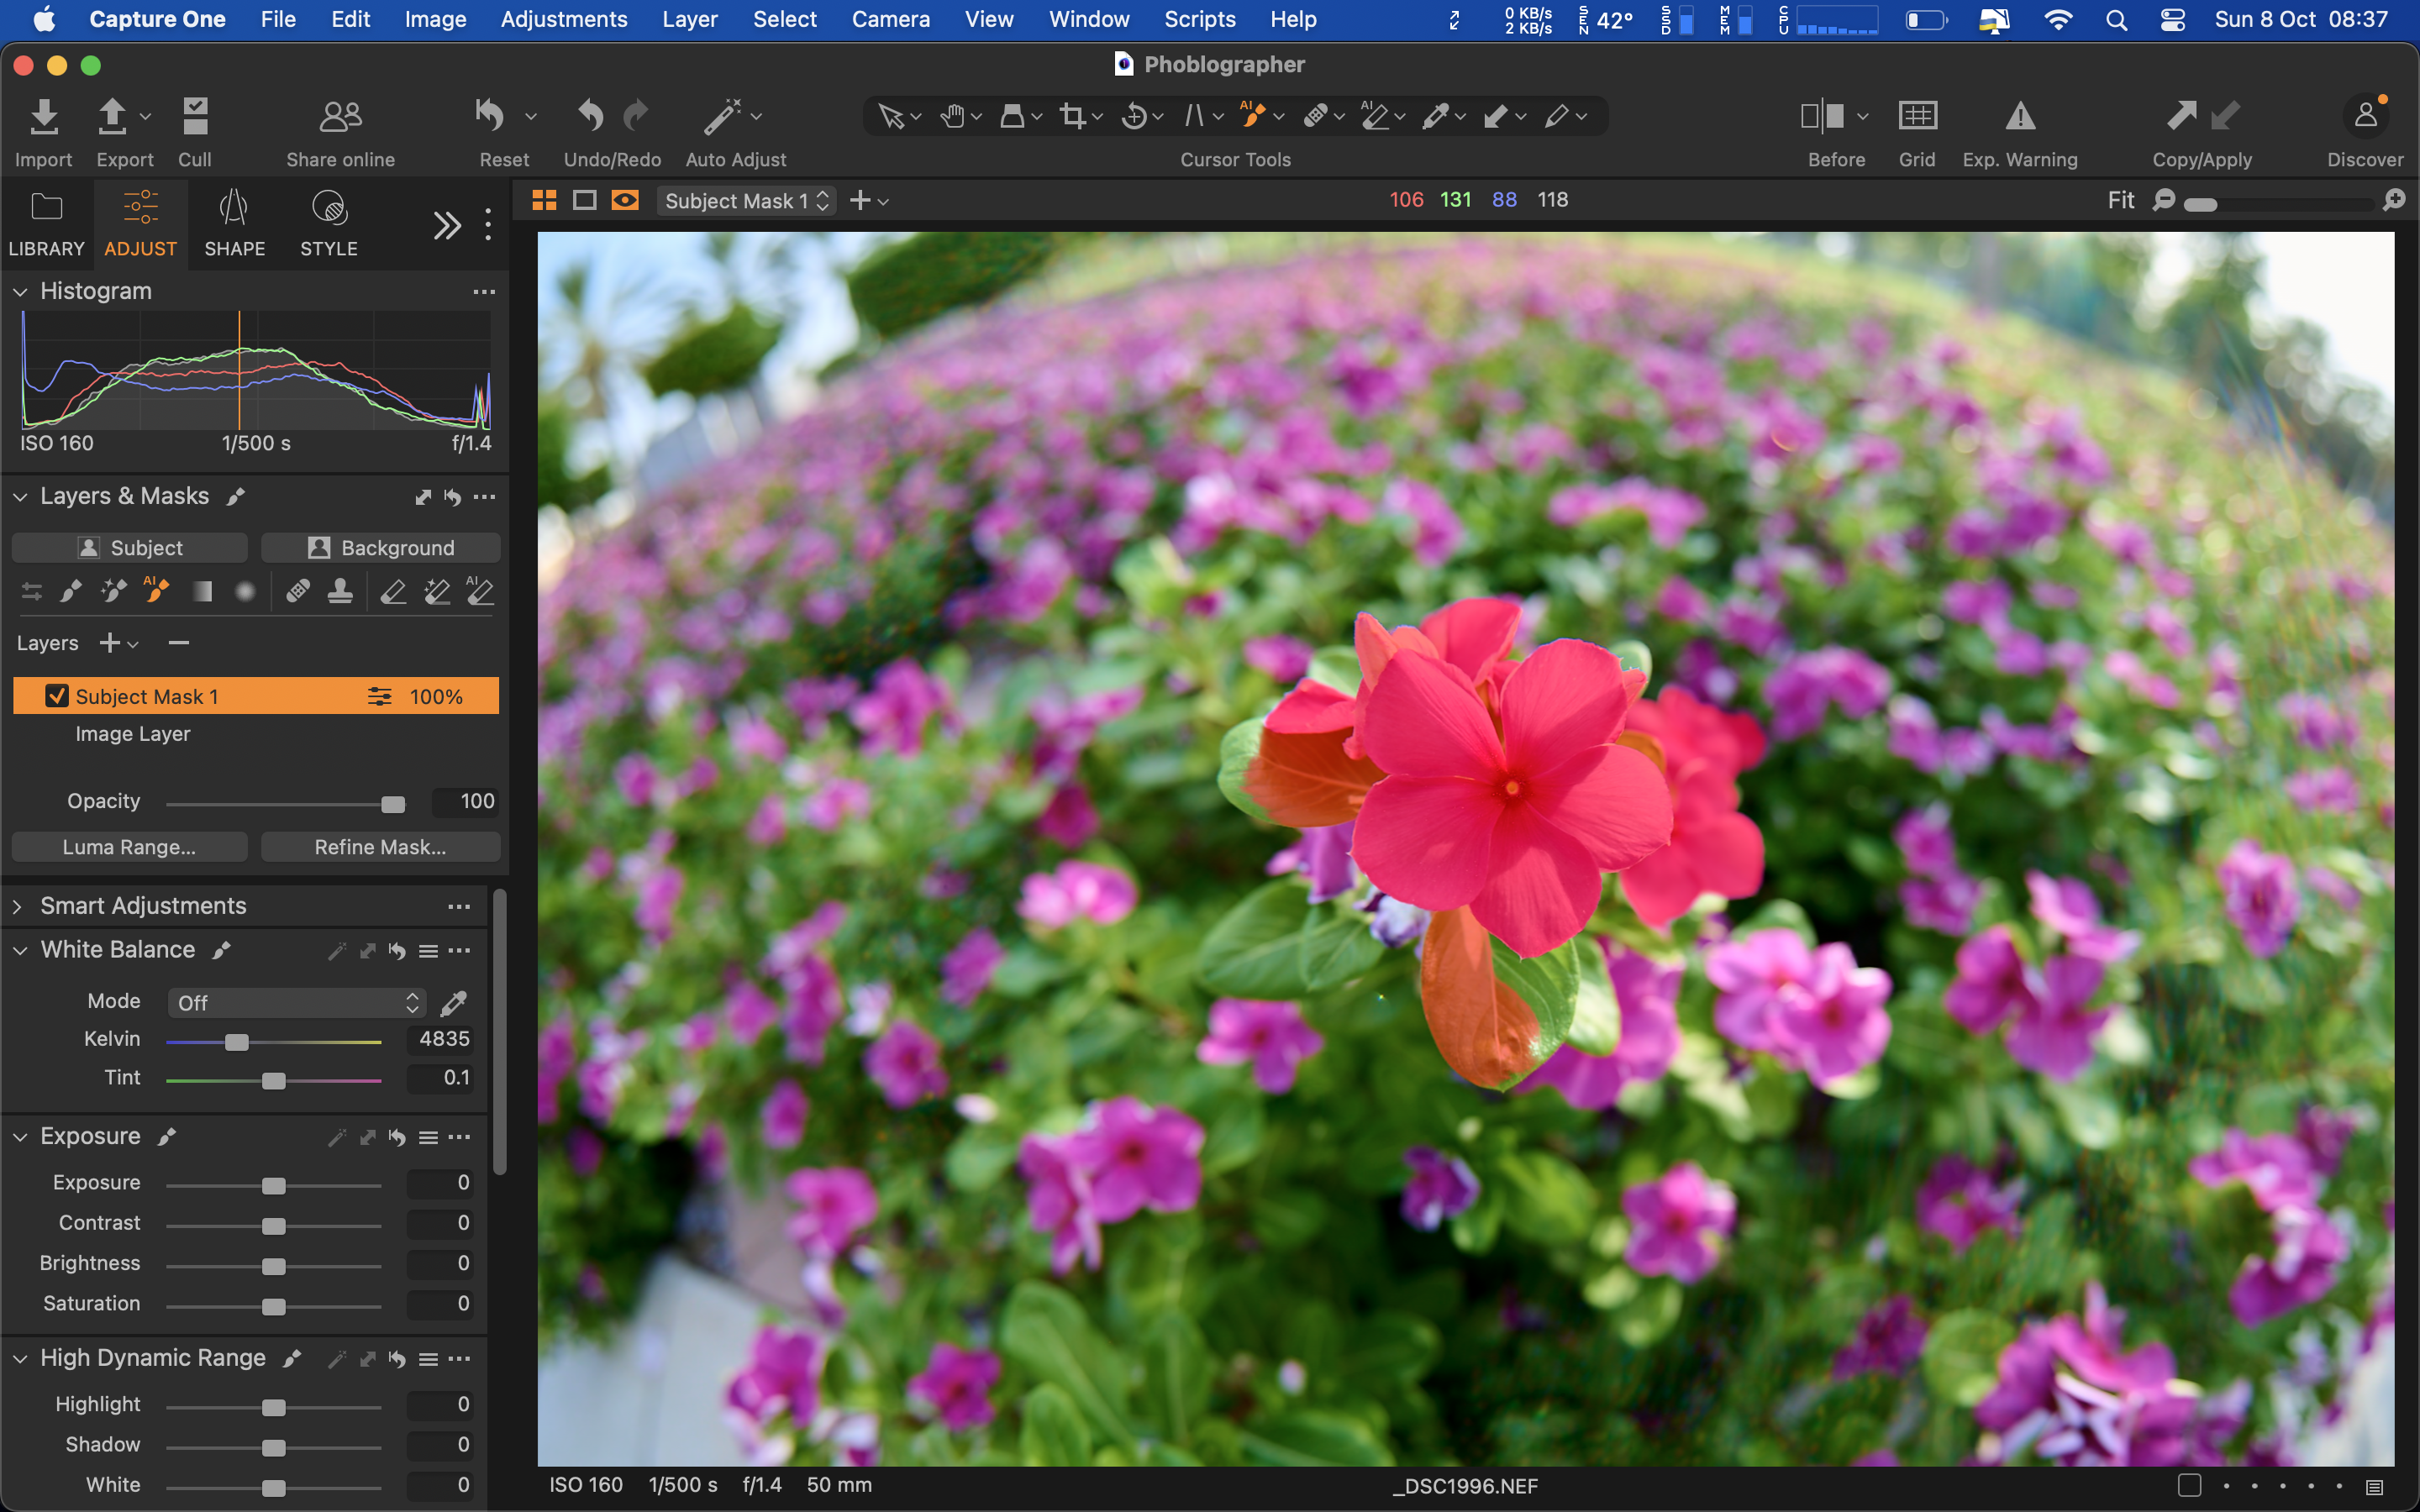
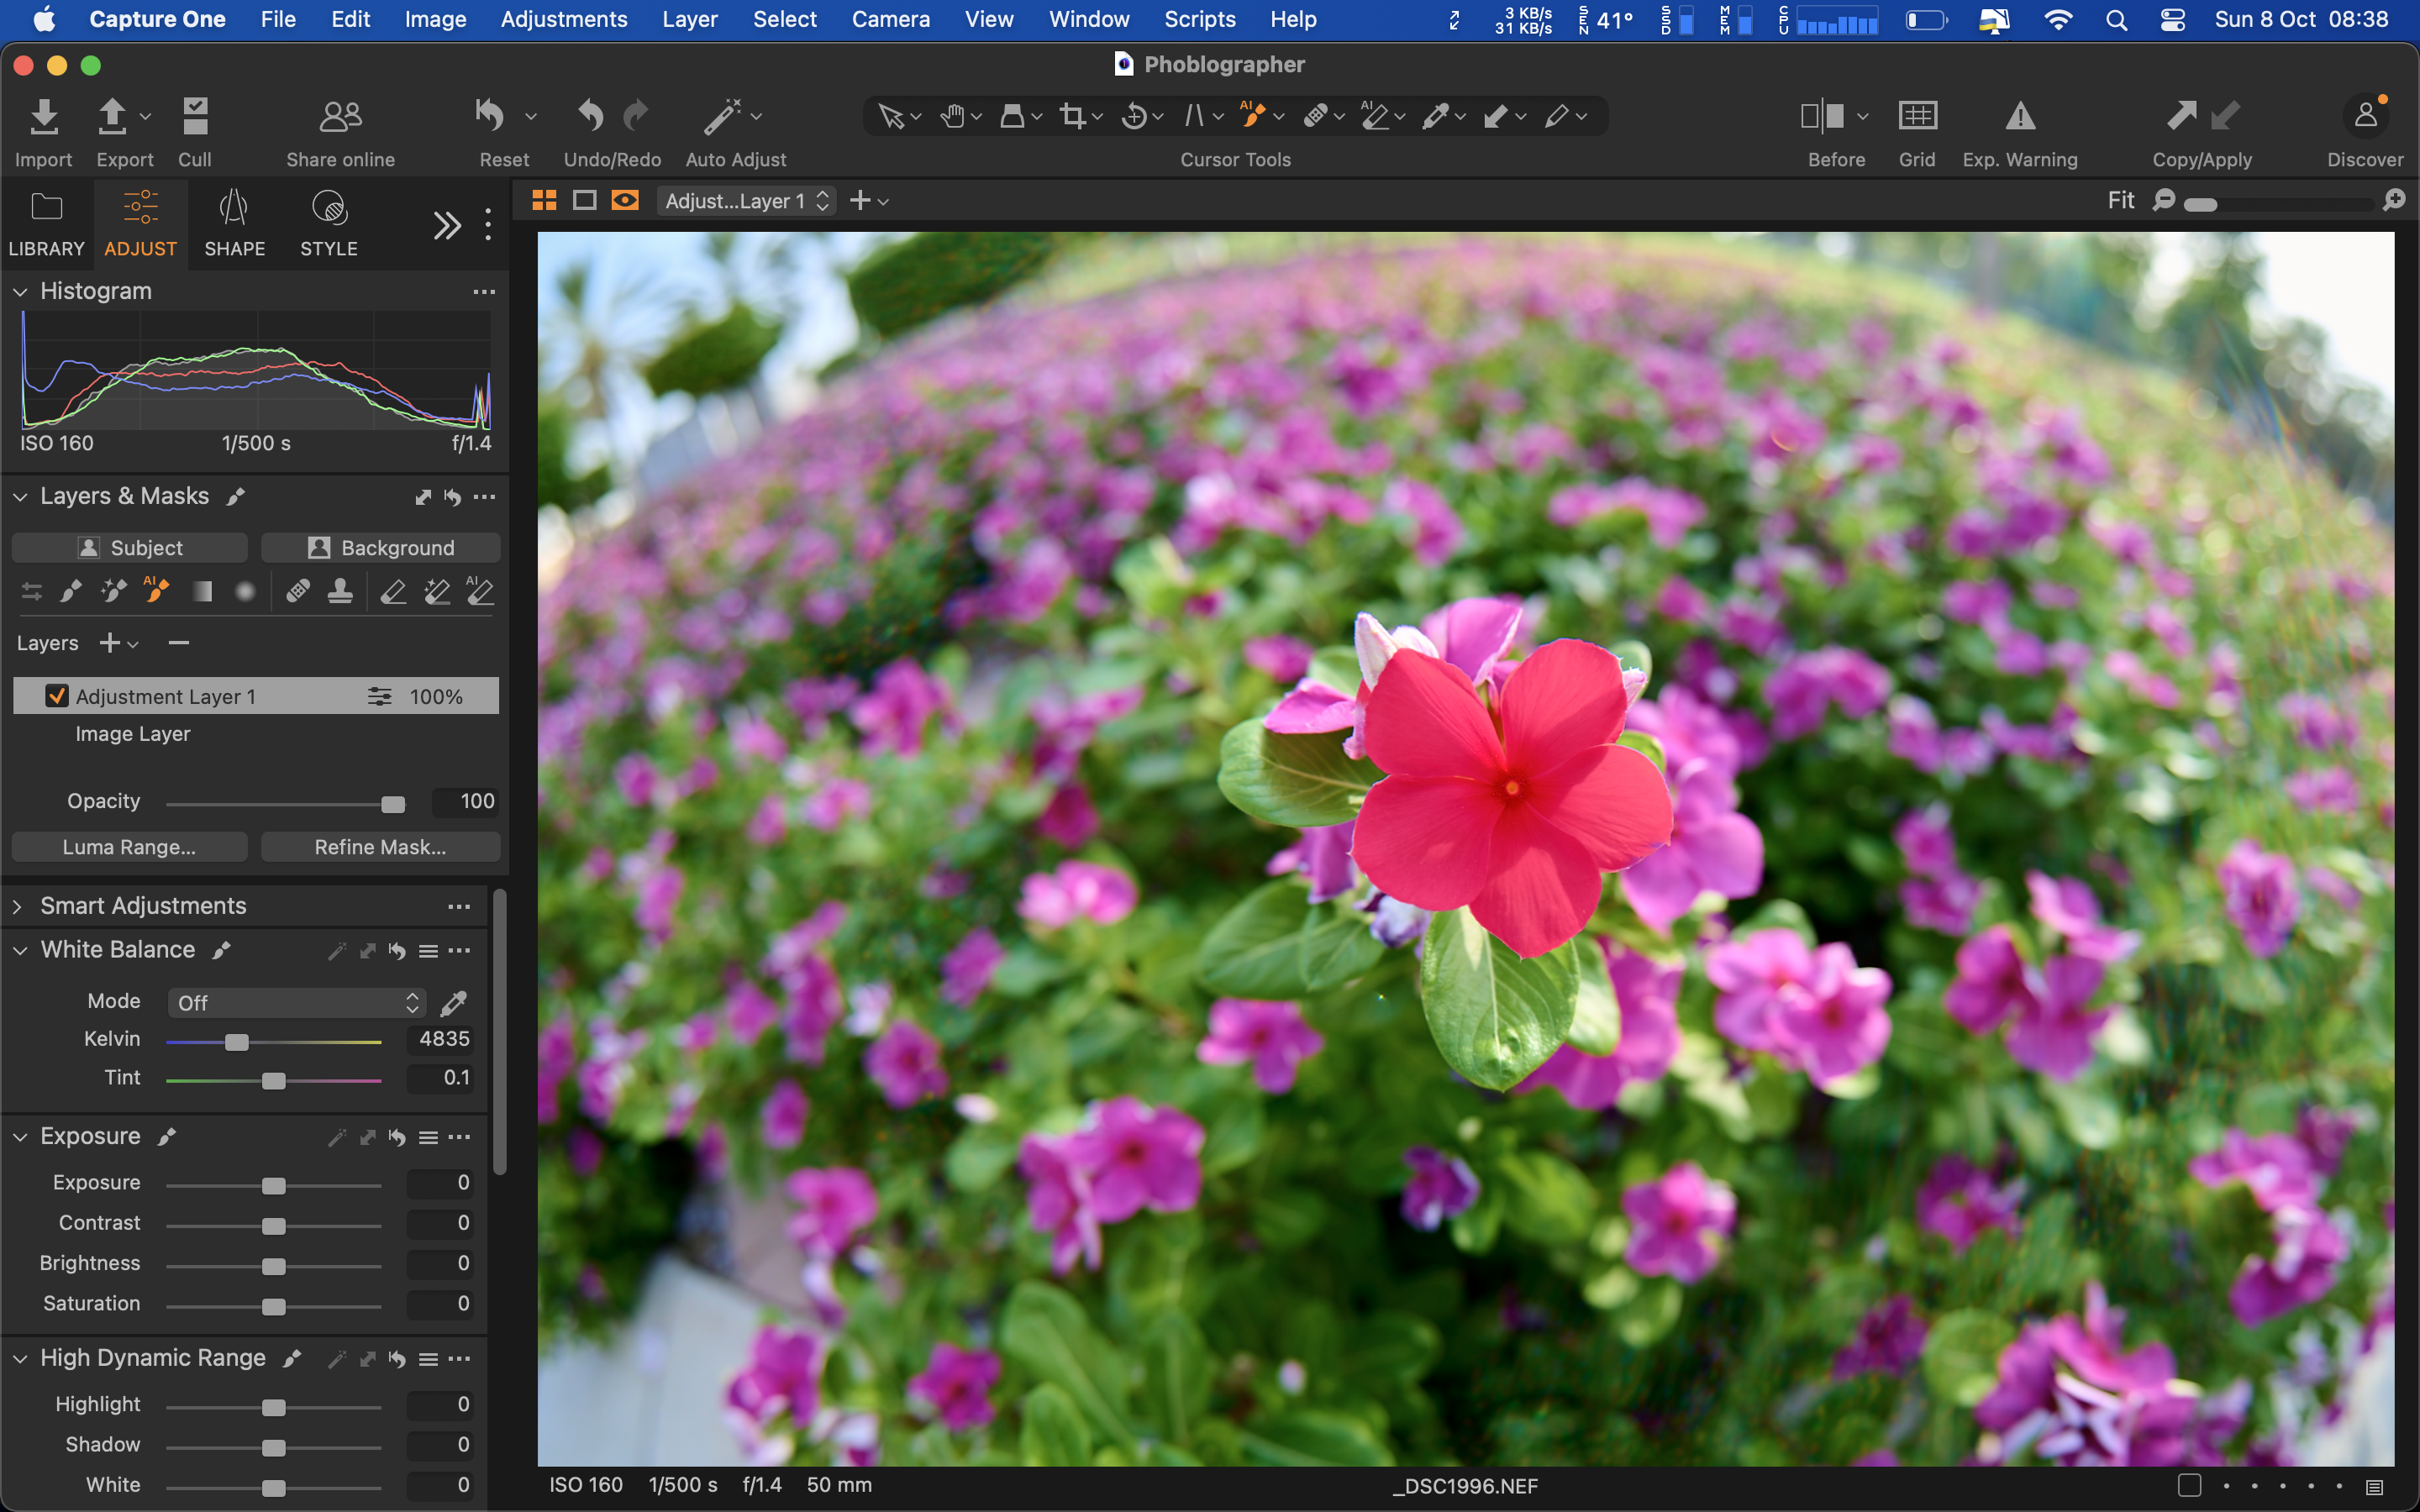
AI Subject auto-selection doesn’t seem like the best choice for now. Firstly, the AI mask generation takes a lot longer than if you were to select the AI mask brush. Secondly, it doesn’t always seem to generate the cleanest mask. You can compare the two images above using the slider to understand what I’m trying to say. In the first image, the AI subject selection identified the flower, but the mask also spilled over to a leaf on the left and some flowers behind. When I chose the AI select brush and drew a rectangle over the same, it clearly masked over just the main flower, which was in focus.
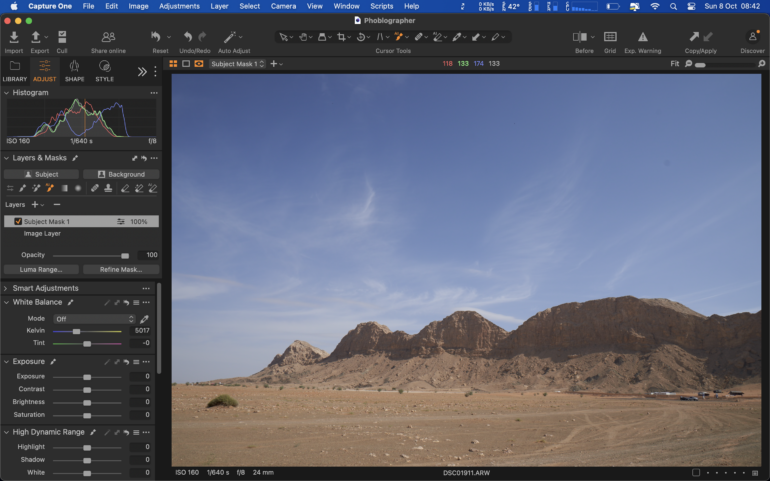
There’s no clear subject in the above photo, and I can’t see where Capture One Pro applied the Subject AI mask. I hope they add more subject selection modes, like Sky, Face, etc, in the coming releases, as this would help immensely, especially for landscape photos. Adobe Lightroom can now selectively AI mask parts of your face, like your beard or your eyes if you choose them from the presets provided, so Capture One Pro really does need to catch up here.
AI Mask Eraser
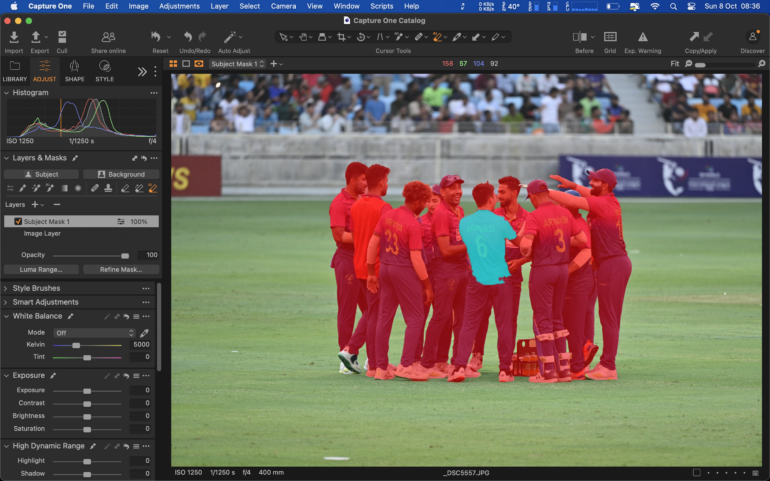
Click on the AI eraser tool and hover over any already applied mask. You’ll find the subjects or part of the subjects coming up in a green tone. This is to easily distinguish it from the existing applied red mask. One-click over player 6’s jersey with the AI eraser, and it was unmasked.
AI Background Mask Tool
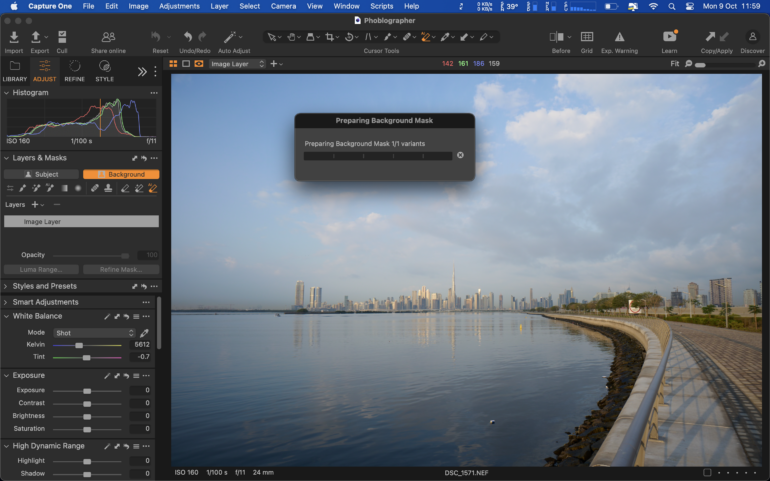
I would assume, like many, I hope, that the background being selected here would be the sky.
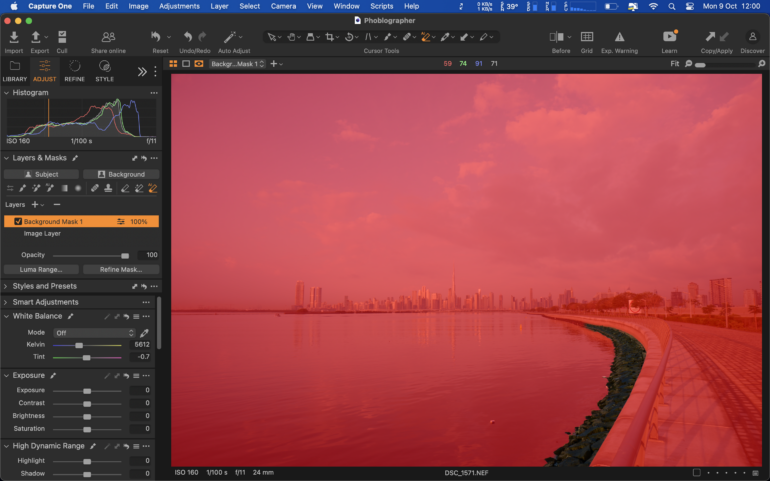
Unfortunately, it just masked everything except the banks of the creek in this photo. It’s not exactly a very useful mask selection.
If you manage to still manually remove the sky using the AI eraser, you’ll notice it hasn’t done a very clean job here. It looks like the AI needs an obvious subject-to-background separation to do a good job.
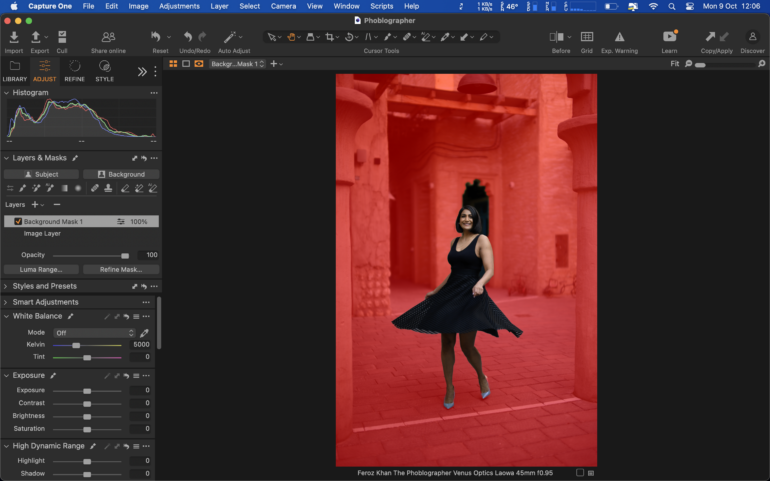
This image was shot at f0.95. Since there was a very sharp falloff between the subject and the background, Capture One Pro’s AI background mask was able to mask this very well.
At least for now, I feel the AI select rectangle brush method is the best way to selectively mask subjects or parts of subjects. AI masking is an excellent addition to Capture One Pro, but it needs improvement and definitely needs more subject selection options. Adobe is really outdoing them here already.
ReTether
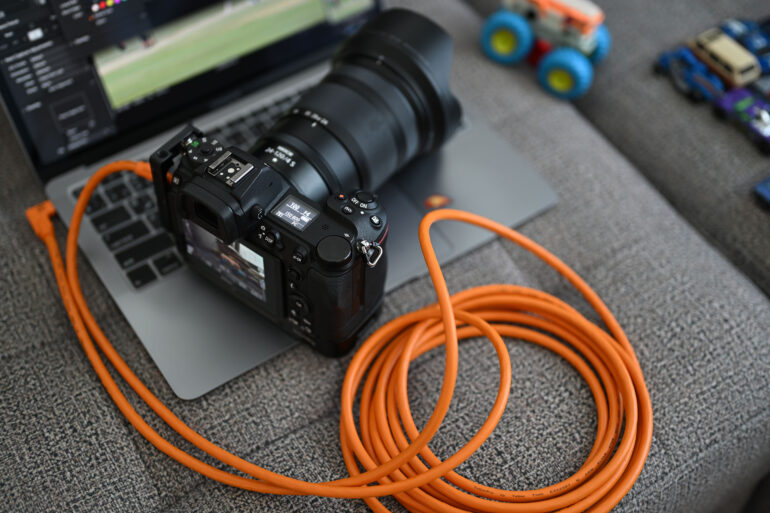
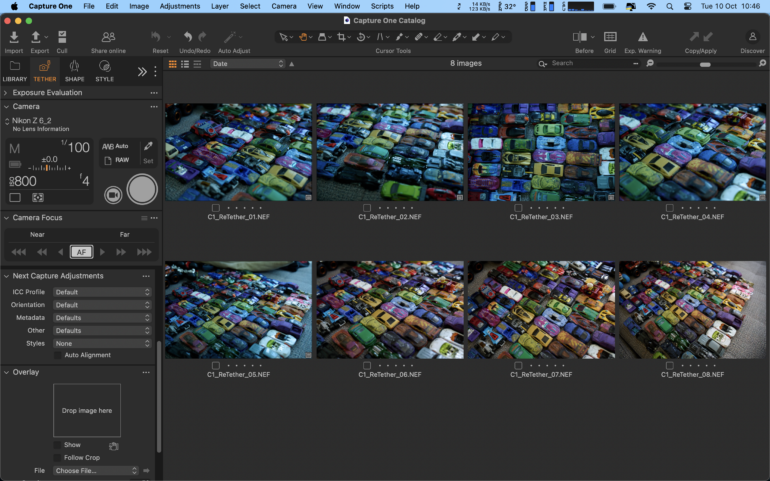
The name might sound a little confusing because it’s basically a new feature that gives you some tethered capabilities even if you’re not tethered all the time. ReTether gives you hands-free image importing, and file naming (Next Capture naming) without having your camera physically connected to the computer with a cable. Currently, this works for Canon and Nikon cameras.
There are many benefits of tethering your camera to Capture One Pro on a computer, aside from the near-instant file transfer to your system. C1 imports the images based on the settings you’ve selected. It also renames them accordingly. Let’s say you’ve shot a few images with your Canon or Nikon camera while tethered to Capture One Pro. You then decide you need a little freedom of movement, disconnect the camera from the cable, and continue photographing. When you reconnect your camera to the cable, ReTether works its magic. It begins to automatically import the images, starting with the first one taken after the camera was disconnected. This works for images shot up to 2 hours after disconnection.
You can also continue to shoot tethered while ReTether works in the background. This is a handy feature as you don’t need to take a timeout while 2 hours’ worth of images are imported. Capture One Pro recommends shooting no more than 300 images while using ReTether.
Tethering Issues With Memory Cards On Capture One Pro
Once again, I faced issues when using tethering on Capture One Pro with a memory card in the camera. Capture One does seem to acknowledge this as an issue. Their FAQ page states, “Remove any CF or SD cards from the camera – their presence often confuses the computer on which method to connect to the camera.”
Now, this might be confusing. If I can’t shoot tethered with a memory card in the camera, how does ReTether work? It’s supposed to work after I reattach the camera to C1 Pro and then import the images I took while I was disconnected, right? So, if the software doesn’t recognize me being connected in the first place, the tether session wouldn’t be active to start with. I had to delete (I didn’t format) all images on the 16GB card I was trying to use before the software could detect that a camera was tethered to it. I then started a tether session and took 5 images while tethered. Once I disconnected, I took 3 more. With the camera still on, I reconnected the USB tether cable. After a couple of seconds, the 3 images were imported into the tethering session and renamed in accordance with the settings I’d put.
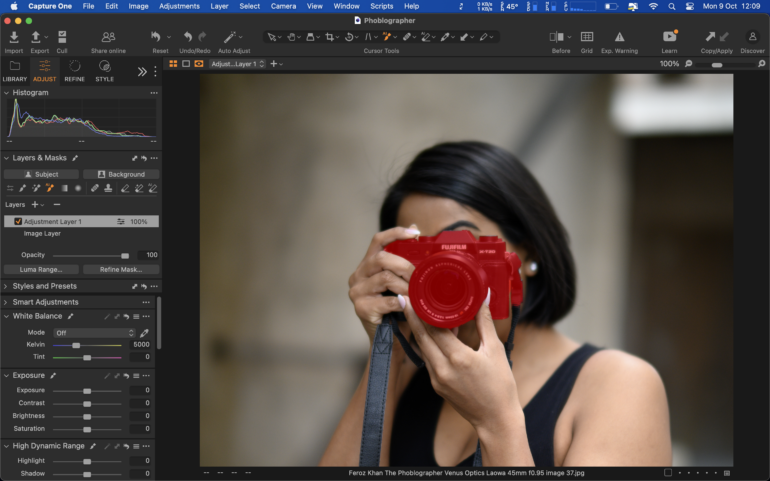
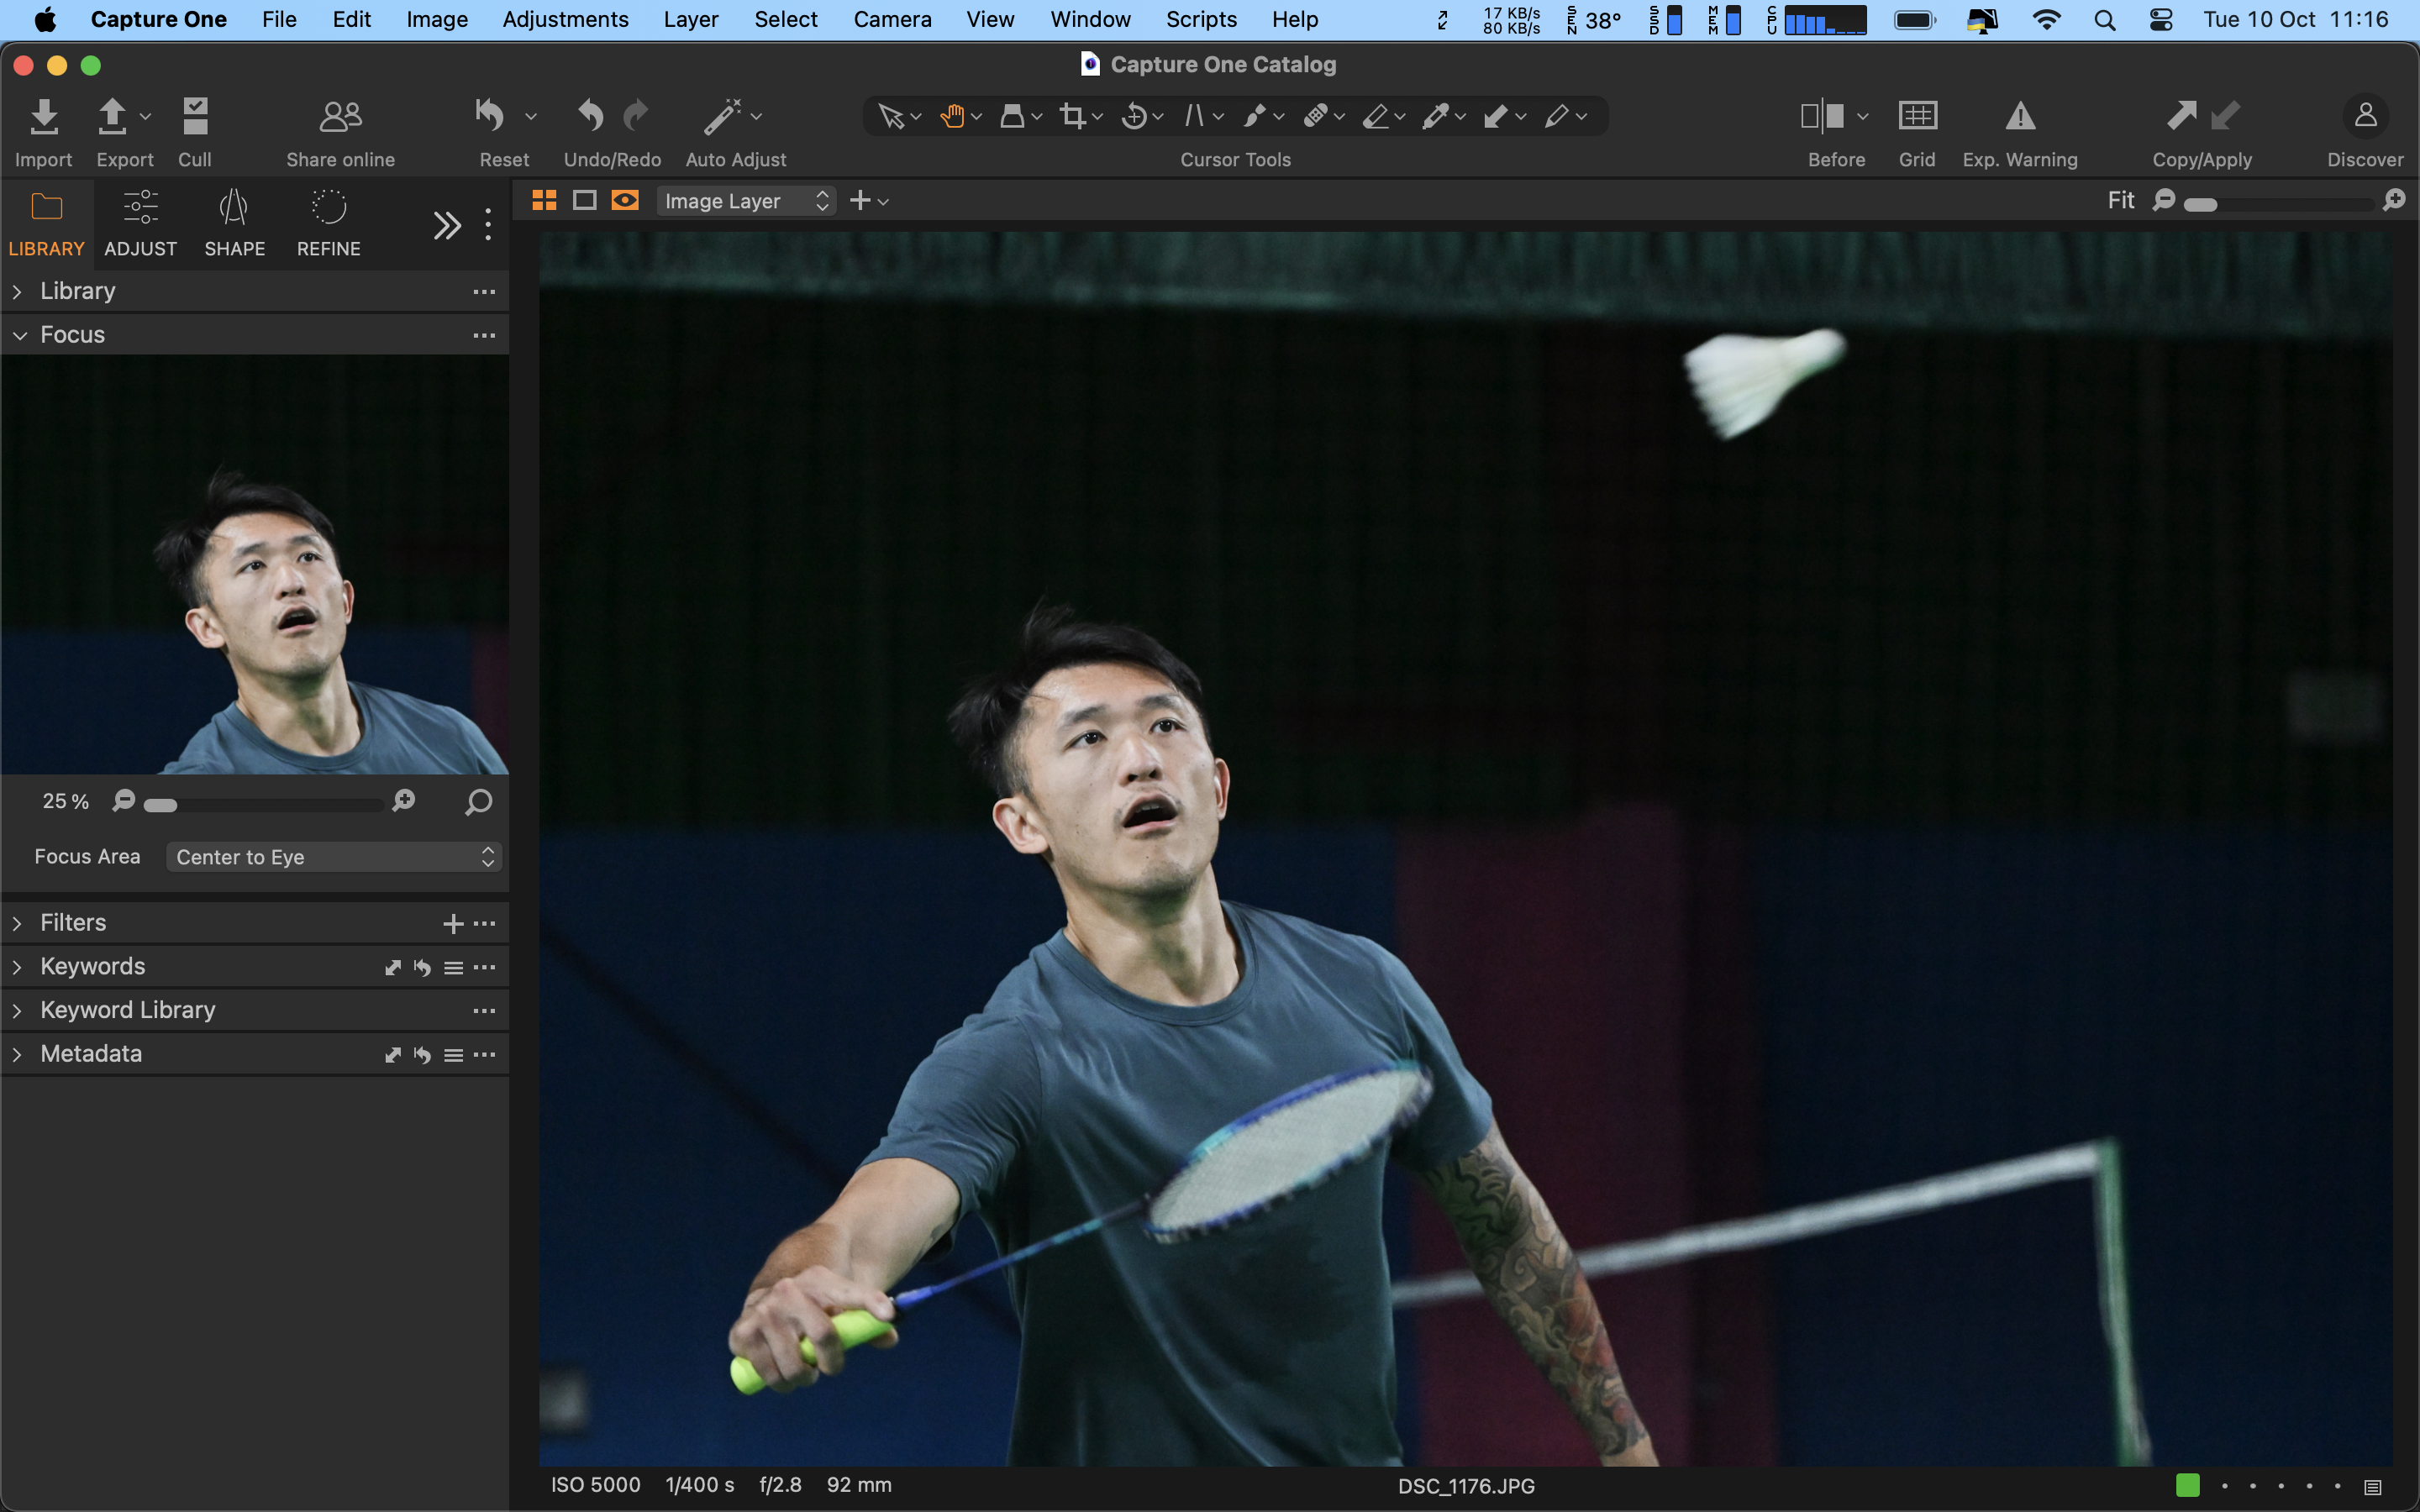
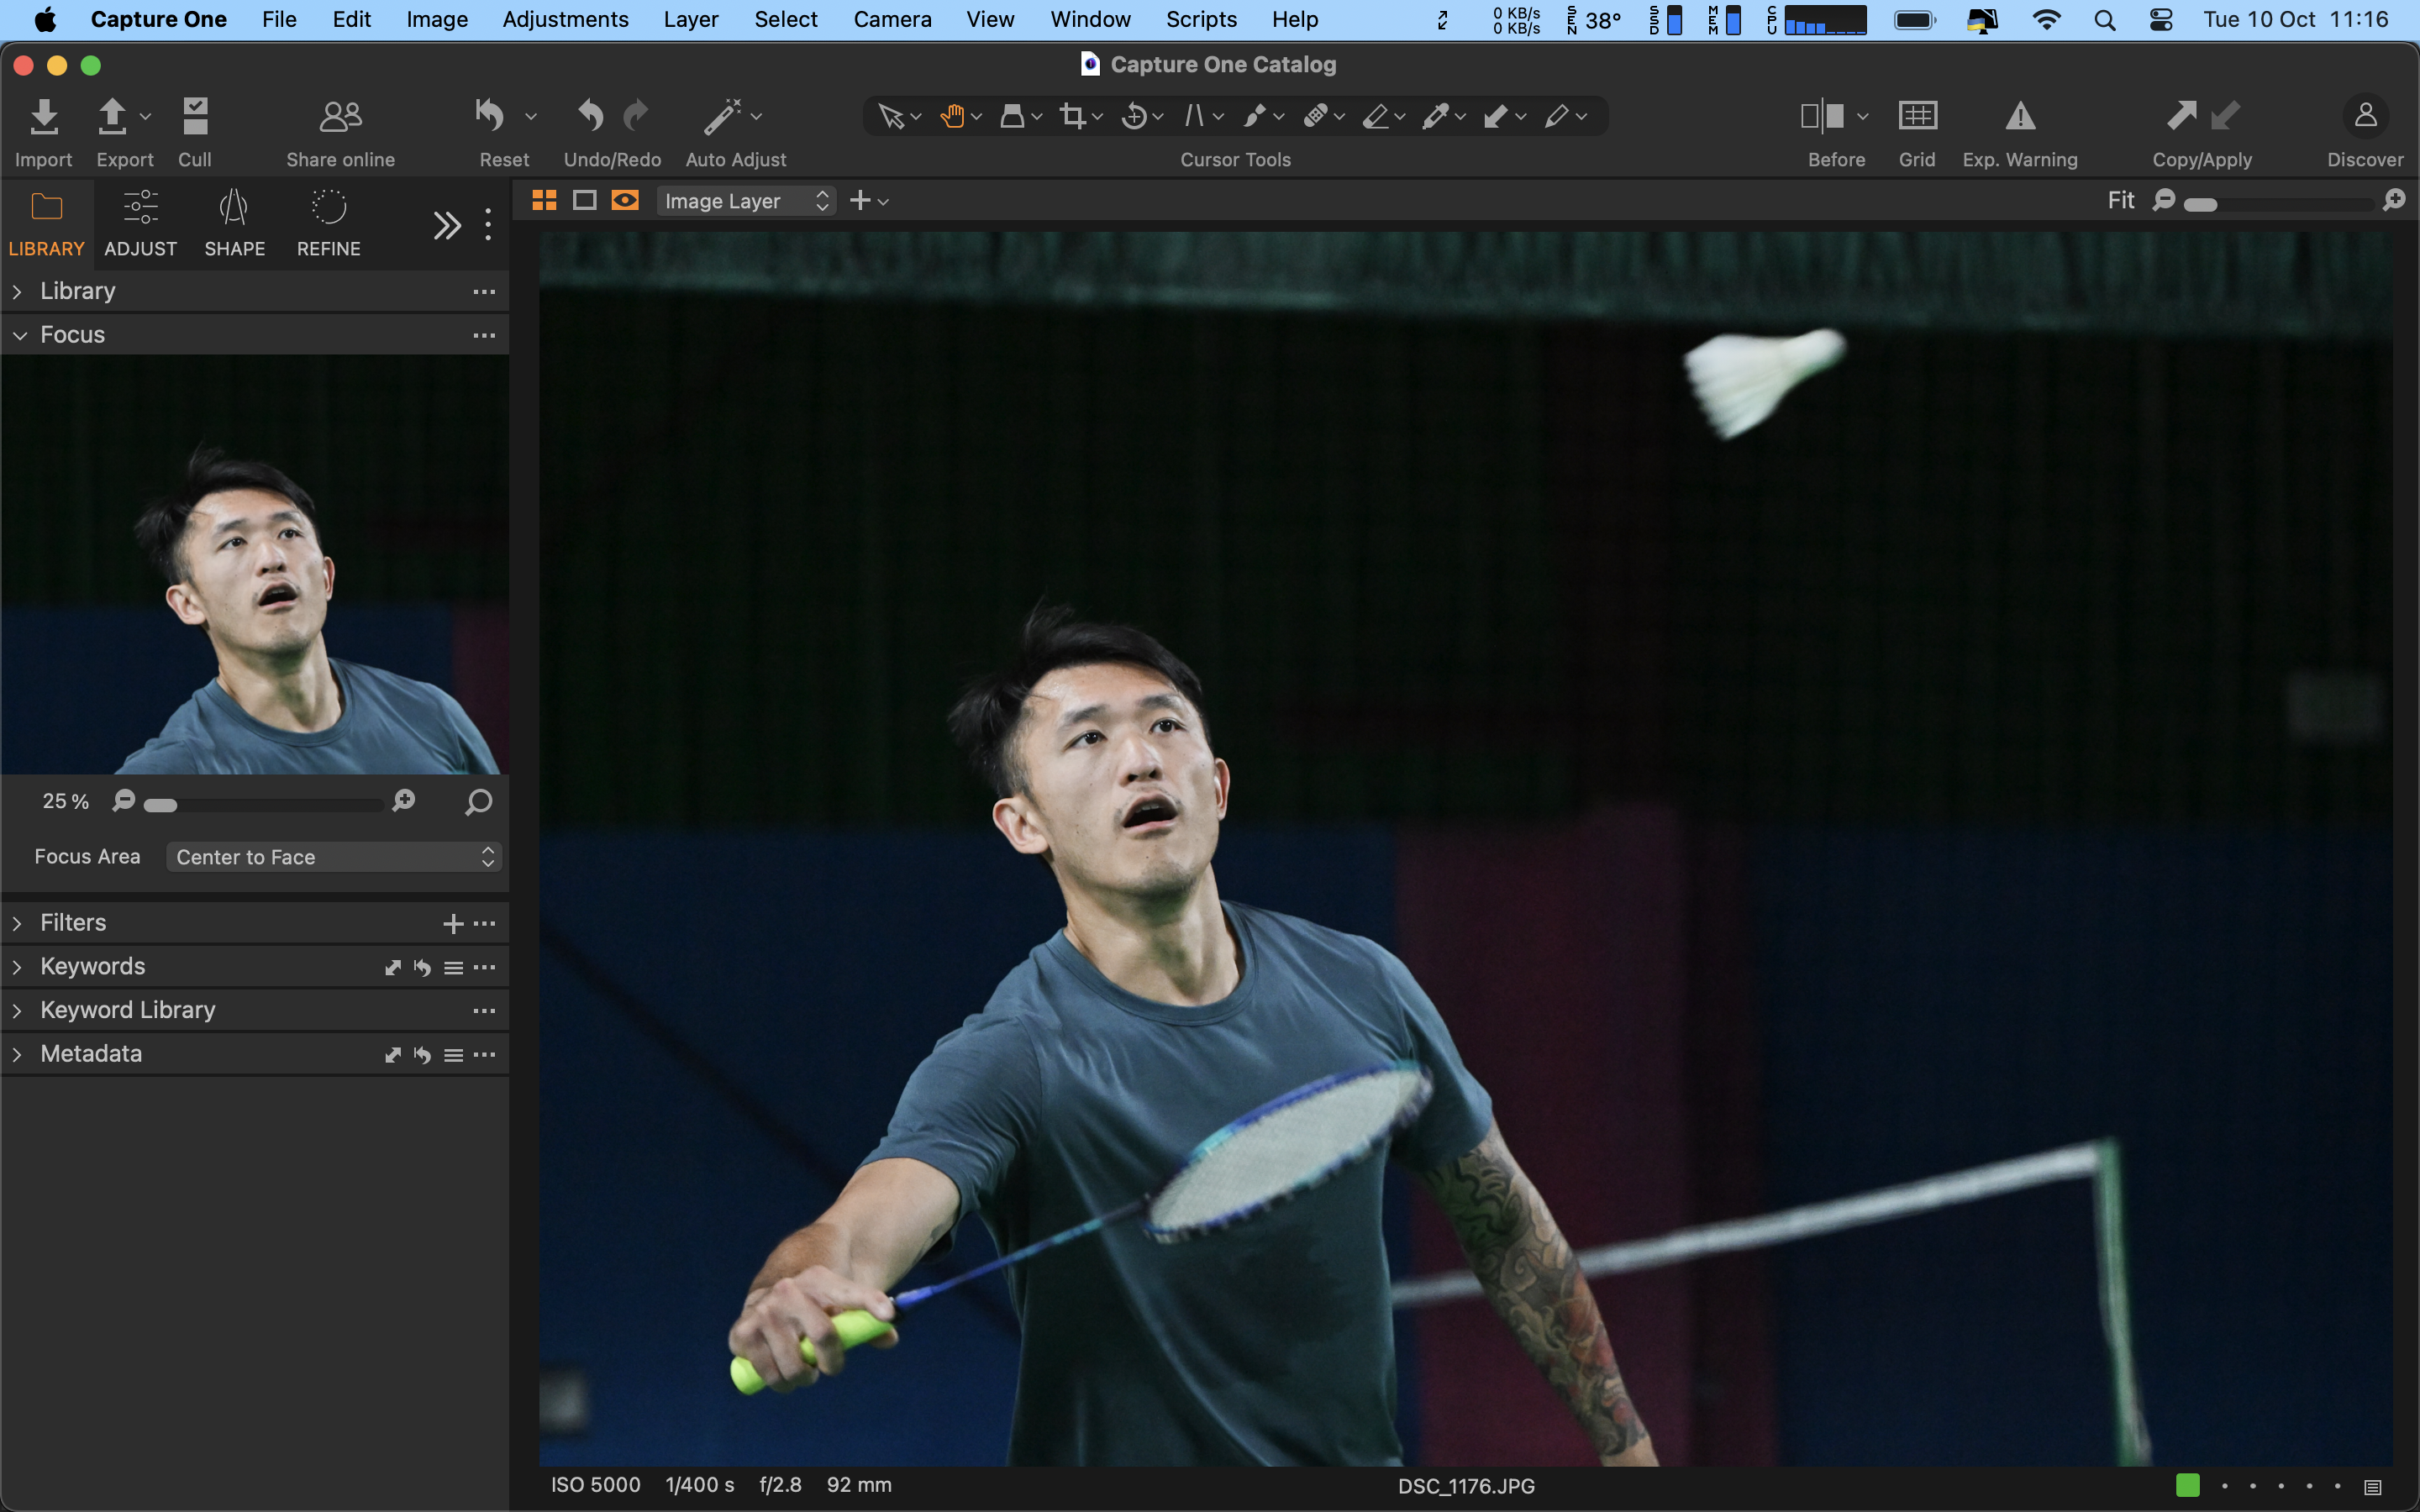
Snap-To-Eye
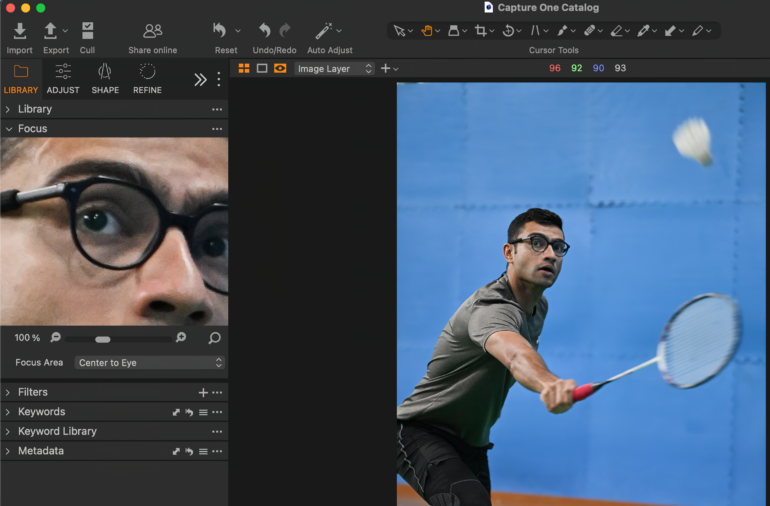
The Focus Tool in Capture One Pro is now AI-enabled. The software is trained to automatically detect faces to focus on in you’re Browser tab. This is great for checking your focus, especially for portrait shots, when you need to quickly cull images. It comes in three options:
- Center to Eye: This shows you the portion of the image on the closest eye
- Center to Face
- None: This keeps the zoomed focus on the same position as the previous image
In the case of multiple images in the face, C1 will focus on the largest face in the image, assuming that it’s the closest one. By default, the zoom level is set to 100%. You can manually change this anywhere between 25 to 1600%. The image comparison below will showcase the minor differences you can observe between Center-to-Eye and Center-to-Face settings at 25%.
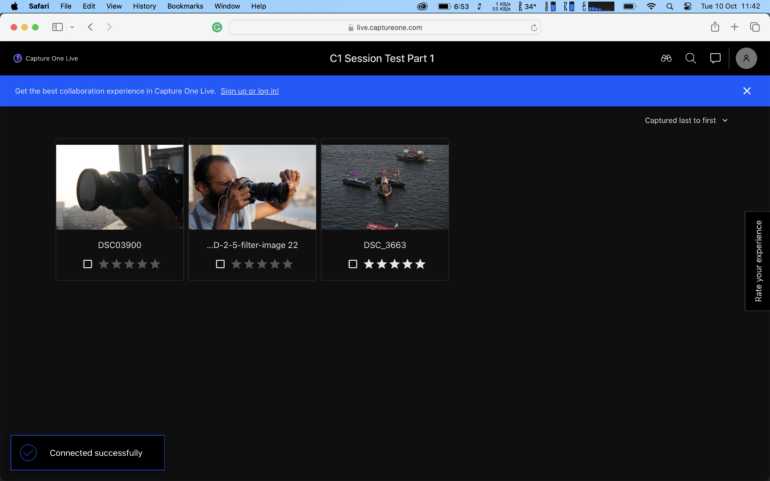
Capture One Live: Share Multiple Collections
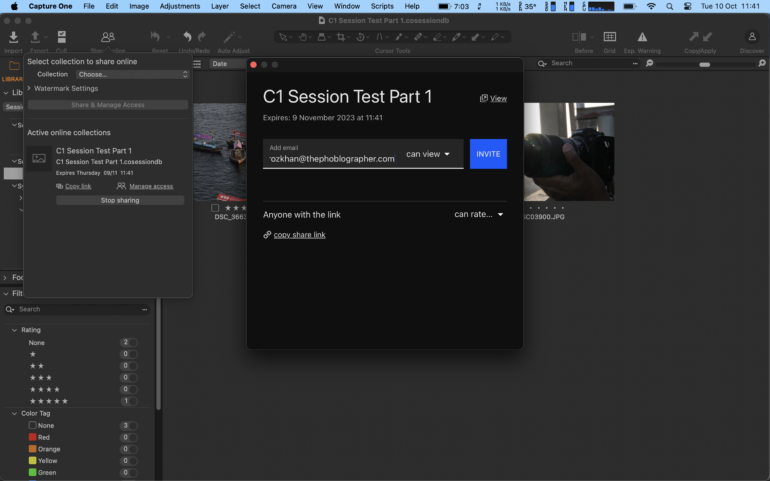
You can now share multiple collections of images from Capture One Pro, for reviewing by clients or collaborators using a single link. These need to be shared either as all Session Favorites or all Session Albums.
Capture One says a new navigation system was added for collaborators, but I couldn’t notice anything in the browser window.
Capture One Live: In-App Comments
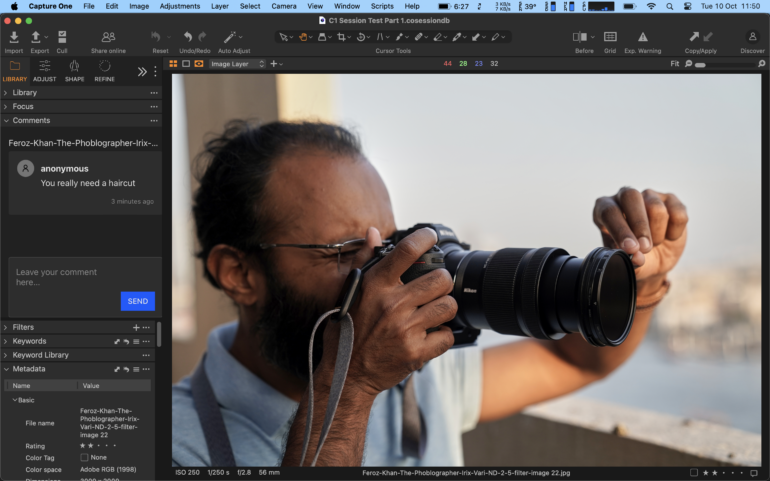
Session collaborators can now leave comments on your images. The Library tool will also display icons when someone leaves a comment on an image in the shared collection. You can also see an icon under the images in the Browser when comments have been left on them.
You’re supposed to be able to delete a comment if you want to, but I couldn’t do this in the beta version we tested. The Comments feature will also be coming to Capture One Mobile in the near future.
Publish to Glass (Mac)
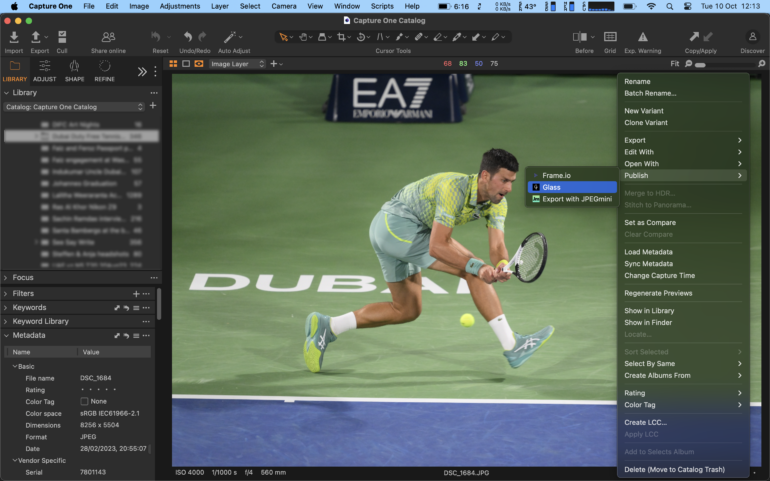
If you have a Glass account, you can now share your photos from Capture One Pro directly there using the Publish option.
User Experience & Performance Improvements
The following have been listed by Capture One as new improvements. We haven’t explicitly tested them.
- Improved browse, zoom, and pan performance
- Improved Previews
- Smoother brushing (Mac)
- More reset options (including Speed Edit)
- New shortcuts
- Duplicate Layer
- Brush-erase toggle
- Luma Range dialog behavior change (Windows)
- Capture One Live: System notifications (Mac)
- Feedback notifications
- Discover panel
Capture One is making slow but steady progress in its AI race. Adobe is clearly leading the pack here, but hopefully, Capture One too can make more significant strides soon. I hope a denoising AI tool makes its way to Capture One in the next release.
Overall, Capture One Pro is making some tremendous new changes. But there are still lots of improvements to be made. Surely, they’ll be working on making these improvements as time goes on. Capture One’s biggest advantage right now is the better RAW processing. But Adobe has a whole lot of other advantages over it.
We’re giving the latest version of Capture One Pro 4/5 stars.
: Enough to Leave Adobe for Good?")
Get rid of the ads!
Did you enjoy reading this article as much as we enjoyed writing it? There's a way to support us and our reporting, getting ad-free navigation and more as a bonus. Subscribe to us for less than a coffee per month —just $3.99— or take advantage of our yearly subscription with a hefty discount for only $25.- An ad-free experience
- A free mystery box for Lightroom or Capture One
- All the books in our store
- 20% discount on Capture One
- 30% discount on Imalume Photo Theft Protection
- 20% off Herbs and Kettle Tea Company.
- 20% off your order from MPIX printing services.
- 5% off Viltrox Products via their eCommerce store.
- 10% off all film developing, printing and scanning services from Blue Moon Camera and Machine
- 15% off 7Artisans products: The lens and accessory maker is offering a sweet discount for Phoblographer's readers.