
Last Updated on 08/09/2023 by Hillary Grigonis
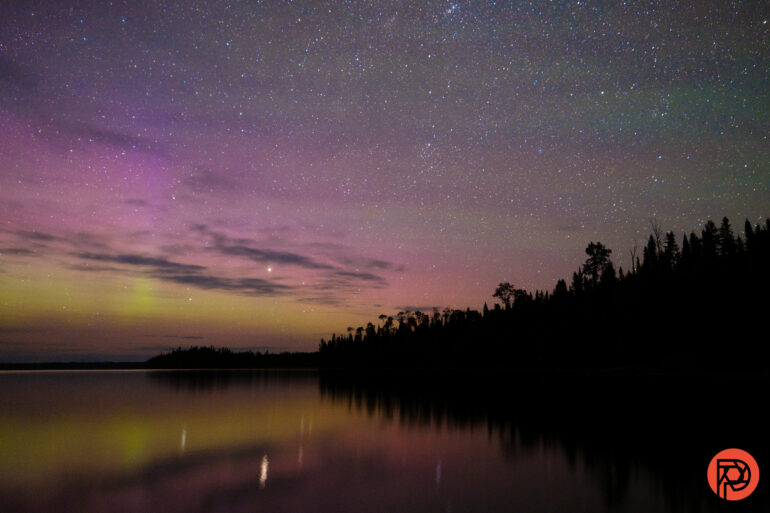
The first time I photographed the Northern Lights was entirely by accident. I had set out to photograph the stars but realized when I turned my camera north that the sky had a green and purple glow. Fast forward a few years, and I’ve spent a better part of the summer chasing the Northern Lights from rural Ontario. If there’s anything that I’ve learned in the process, it’s that chasing the Aurora Borealis is unpredictable and exhausting — but one hundred percent worth it. After going from accidentally photographing the lights to confidentially dialing in my settings, I wanted to share what I’ve learned on how to photograph the Aurora Borealis.
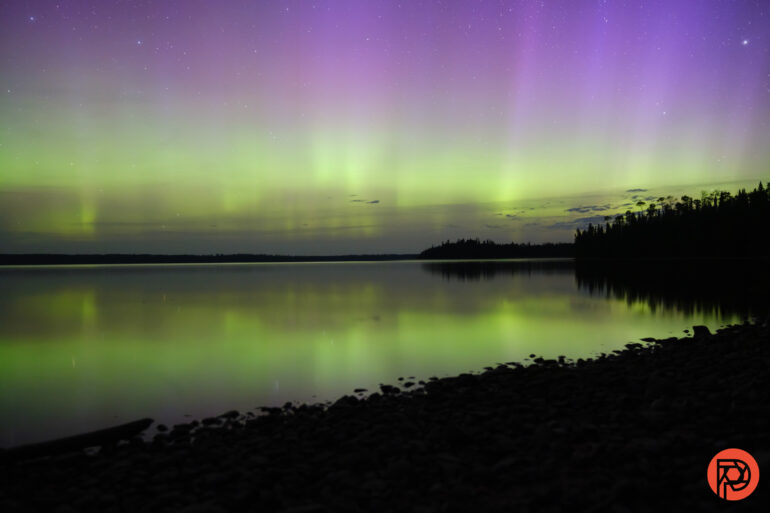
Perhaps one of the best reasons to photograph the Northern Lights is this — the camera will see them sooner and with more color than the human eye. The eye cells responsible for seeing in the dark aren’t very receptive to color. That means that, while a camera will capture the wavelengths or color the lights give off, the aurora appears more gray than colorful to the naked eye. That makes a camera one of the best tools for chasing the Aurora Borealis.
Table of Contents
The four must-have conditions to see the Northern Lights
Chasing the Northern Lights is an adventure that doesn’t always end in success. That’s due, in part, to the fact that four different conditions must be met in order for the lights to be visible. There could be a great light show, but if you are sitting under heavy cloud cover or that solar activity hits at noon, you won’t photograph a thing.
A dark sky
The sky must be completely dark to see the Northern Lights. You can get the biggest possible solar storm but see nothing if that storm hits at noon. The skies must be dark. True darkness doesn’t typically hit until well after sunset after the sun has set and the blue hour is over. Depending on how far north you are, true darkness may come an hour after sunset or may even take two hours. While traveling north tends to increase the odds of viewing the lights, during the summer, the farther north you travel, the shorter the night is. That’s why travelers heading north in winter are more likely to see the aurora than those that travel in the summer.
Like photographing the stars, light pollution from cities will also reduce the visibility of the Northern Lights, and, in many cases, new chasers have often confused the green glow of light pollution with that of the Northern Lights. The farther you are from cities, the better. Photographers can use a dark sky map to gauge where the darkest skies are in the area. Similarly, the lights will appear brighter during a new moon and dimmer during a full moon. Photographing the lights during a full moon is still possible, but they won’t appear as bright.
Visibility
Many aurora shows are ruined by clouds. Clouds will block the view of the lights, making photographing them impossible on a fully overcast night. With partial clouds, you may be able to get lucky if the break in the clouds is to the north.
Similarly, it’s difficult to photograph the Aurora in the middle of the forest. Locations that allow you to see for miles to the North are the best spots to photograph the lights. Consider shooting from the top of a hill or try a lake or meadow with fewer trees to block the northern horizon.
Location
The further north you travel, the more likely you are to see the lights. In the northern most latitudes, even minor solar storms can create lights that are still strong enough to photograph. Use a solar activity map, like the ones available from NOAA, to get an idea if the solar forecast will produce lights to the north or directly overhead of your location.
Solar Activity
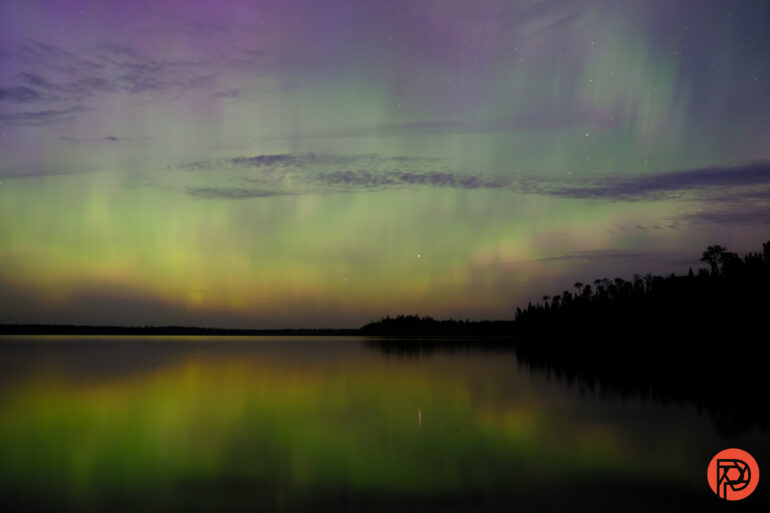
The Northern Lights are created during coronal mass ejections when the sun emits large gas bubbles that head toward’s earth magnetic field and interact with the gases in the Earth’s atmosphere. This solar activity is measured on a KP scale from zero to nine, with nine being the strongest. A KP score of under two is not very active and appears very dim, even at northern latitudes. A 3-5 KP will be visible at certain latitudes; these are often the storms that create great photographs but remain hard to see with the naked eye unless you are very far north. Above those scores are even better, with a KP 6-7 often visible from the Northern U.S., and an 8-9 can even be viewed directly overhead from northern states and on the northern horizon from states further south.
That said, KP scores are a bit like the weather — sometimes, the predictions are wrong. Only the forecasts for three or fewer days out are based on actual solar activity; data farther out is simply based on previous years. Even then, predicted solar activity can be stronger or weaker than the forecast. These forecasts can also be delayed, where a night that was previously forecast to have good odds suddenly drops because the solar activity will now reach Earth during daylight hours instead.
I photographed the Northern Lights when the KP score suggested I had a zero percent chance of seeing the lights. For this reason, I’ll sometimes head out if the skies are clear with the goal of photographing the stars, so I’m not terribly disappointed if the KP forecast is indeed correct and there are no lights to be seen. After all, the conditions and locations that are great for viewing the Northern Lights tend to be fantastic for star gazing as well.
What you’ll need to photograph the aurora borealis
- A camera with battery and SD card
- A wide-angle, wide-aperture lens
- A tripod
- Patience and willingness to lose some sleep
Step 1: Monitor solar activity and the KP Levels.
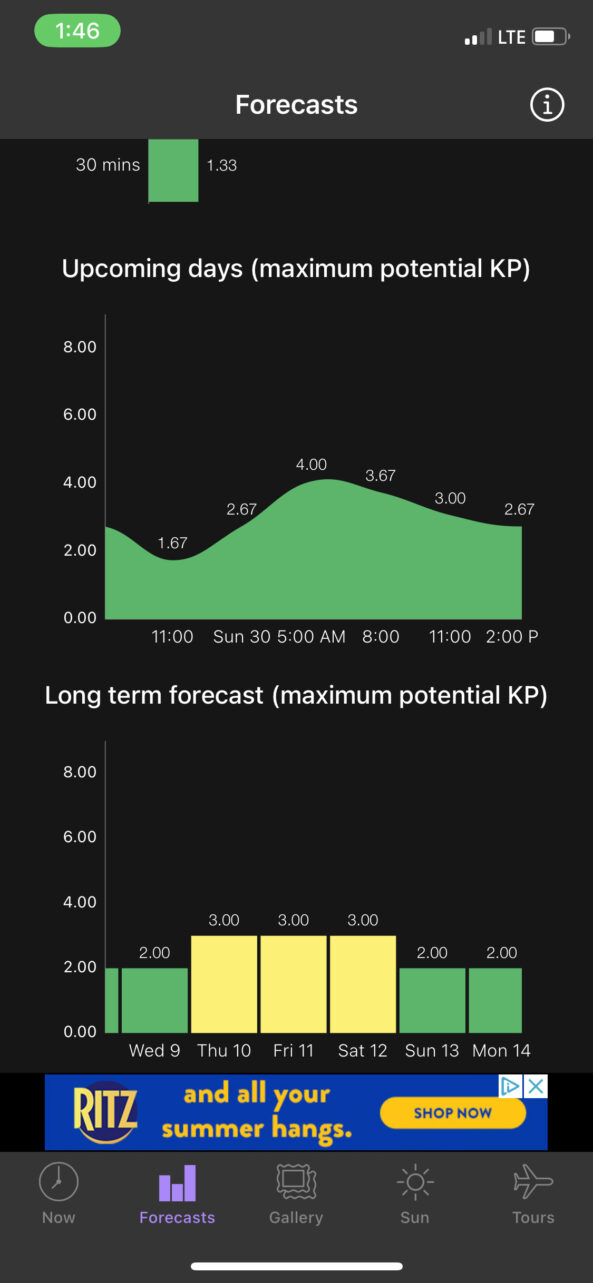
Start your Aurora chase by monitoring the KP scale and solar activity. NOAA is a great resource for forecasts. However, you can also use mobile apps. My Aurora Forecast is the free app that I use to easily check the KP numbers. The app can also be set up to send push notifications if the Aurora is visible in your location. However, those push notifications are usually only sent when the Aurora could be visible with the naked eye — I’ve photographed the Aurora many times at KP numbers that weren’t quite high enough to create an alert from the app. While it’s a helpful tool, you’ll miss opportunities if you rely solely on the app’s alerts.
Step 2: Choose a location with clear skies, northern visibility, and low light pollution.
If the solar activity looks high, plan where you will shoot from. Check the weather to see if the skies will be clear or almost clear of clouds. Besides looking for the pretty views that make great photographs, pinpoint a location that has limited light pollution. Use a light pollution map to see what areas closest to you have the darkest skies. Ensure the location also has visibility to the north, without the horizon being blocked by trees or mountains.
Step 3: At dark, set up a tripod facing north.
If you go outside, spend two minutes looking at the northern horizon, decide you don’t see anything, and then go back to bed, you may miss your chance to photograph the Northern Lights. The camera is going to see the lights before you can, unless you’re in a large enough solar storm to see them directly overhead. Once the skies are fully dark, set up a tripod facing north. Of course, if you’re in the middle of a big solar storm and can see the lights directly overhead, you’ll have more freedom to compose your shots besides simply facing north. But, if your eyes haven’t picked them up yet, set your camera up pointed to the north.
Photographing the northern lights requires a slow shutter speed, so a tripod is a must.
Step 4. Dial in your camera settings for the northern lights.

When photographing the northern lights, I typically start with the aperture as wide as the lens allows (or possibly stepped down just a bit for sharpness). I set the shutter speed to 20 seconds. The ISO I will set at or above 800 when I’m using my 18mm f1.4 lens. If your lens has a narrower aperture, start with a higher ISO, like 1600 or 3200.
However, in a larger solar storm, a 20-second exposure may be too long. When the lights were powerful enough to be seen overhead and pulsing quickly, I dropped my shutter speed significantly to help freeze the pillars.
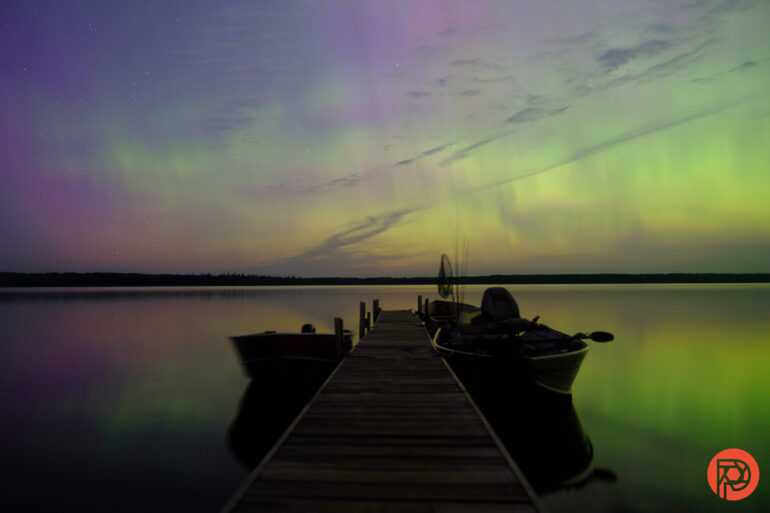
There’s no hard and fast rule for the exact camera settings for the Northern Lights — but your shutter speed will likely be anywhere between 2 and 20 seconds long. If you are photographing the Northern Lights with people as silhouettes, for example, you may want a faster shutter speed compensated with a higher ISO because it’s difficult to stay still that long. If the lights aren’t very strong, you may need a longer shutter speeed. If your lens doesn’t have a very wide aperture, you’ll need to bump the ISO up. The only real “rule” I use while photographing the Northern Lights is to keep the shutter speed at or under 20 seconds. That’s because the rotation of the earth will blur the stars if you use shutter speeds slower than that.
Step 5: Focus manually.
Cameras may see more colors in the dark than the human eye, but the autofocus system often fails completely in the dark. Turn the camera to manual focus mode. Then, manually focus until the stars appear sharp. Or, if you are photographing a person or another subject with the lights only in the background, manually focus on your subject. Use focus peaking and magnification as an aid to get sharply focused.
Step 6: Shoot.
Even if you don’t see the lights with your eyes, take a shot — the camera will see them before you do. Turning on the self-timer to avoid bumping the tripod and adding blur can also be a good idea.
Then, take a look at your photos and adjust from there. If the photo looks pretty dark, bump up the ISO. If you did capture the Northern Lights, but there are white spots in the aurora, you’ll need to lower your exposure instead by reducing the ISO.
Tip: Try the interval timer.
One of the challenges of photographing the Northern Lights is getting the timing right — especially when the lights are there but too weak for your own eyes to capture. But, I’ve discovered the cheat code for photographing the lights as they increase or decrease intensity over the night: the interval timer. Most modern cameras have a built-in interval timer, which is essentially a mode that takes a series of photos for you. Using the interval timer, you’ll choose how often to take a photo, such as every 30 seconds or every minute or five minutes, and the camera will take the photos automatically with that preset time.
The interval timer is designed for creating time-lapse videos — and time lapses of the Northern Lights can be pretty spectacular. But even if you only want the still photos, the timer is still helpful here. Once the timer is set, you can sit back and let your eyes adjust to the darkness without your night vision being ruined by the camera’s electronic viewfinder or LCD. If you’re lucky enough to be in a location where you don’t have to worry about your gear being stolen, you could even leave your camera going when you’re finished aurora gazing. It will continue taking photos while you sleep.
Chasing the aurora is full of highs and lows — I’m still kicking myself for the night my neighbors photographed the lights directly overhead, but I slept through it because the forecast had initially called for clouds. But seeing those spectacular colors pop up on the camera for the first time makes all the misses and sleepless nights worth the chase.
Get rid of the ads!
Did you enjoy reading this article as much as we enjoyed writing it? There's a way to support us and our reporting, getting ad-free navigation and more as a bonus. Subscribe to us for less than a coffee per month —just $3.99— or take advantage of our yearly subscription with a hefty discount for only $25.- An ad-free experience
- A free mystery box for Lightroom or Capture One
- All the books in our store
- 20% discount on Capture One
- 30% discount on Imalume Photo Theft Protection
- 20% off Herbs and Kettle Tea Company.
- 20% off your order from MPIX printing services.
- 5% off Viltrox Products via their eCommerce store.
- 10% off all film developing, printing and scanning services from Blue Moon Camera and Machine
- 15% off 7Artisans products: The lens and accessory maker is offering a sweet discount for Phoblographer's readers.