
Photographers for years have used and relied on Drobo to make backups easy for them. Their BeyondRaid system made it reliable until it created a massive problem. Drobo hadn’t been doing too well over the past few years. And last year, they filed for bankruptcy. They even went as far as sending out a message to customers using Apple devices. It went something along the lines of not guaranteeing support in future operating systems. This lead me to stick way too long with an older Apple OS until I finally switched. But trust me, the switch to the Synology DS1522+ was a painful and annoying process. Once it was all set up though, it was pretty smooth sailing.
The Problem
So if you’re reading this, you’re probably thinking about doing the exact same thing. You’ve read a lot of pieces about photographers who use Synology and never went back. But unfortunately, there’s a lot of tech heads who tout it and not enough photographers that don’t care about all the major tech. Instead, we just want our images protected and backed up. And the idea here is that something like the Synology DS1522+ is probably the best bet.
Here’s a list of things you need to know:
- The Synology DS1522+ doesn’t work like a Drobo. Where Drobo lets you input drives and set them up while mixing and matching, Synology requires you to micro-manage things unless you properly set up the system the first time around so you can forget about it later.
- With Synology, it’s recommended that you fully saturate the disk station with drives before you go about adding more in later on.
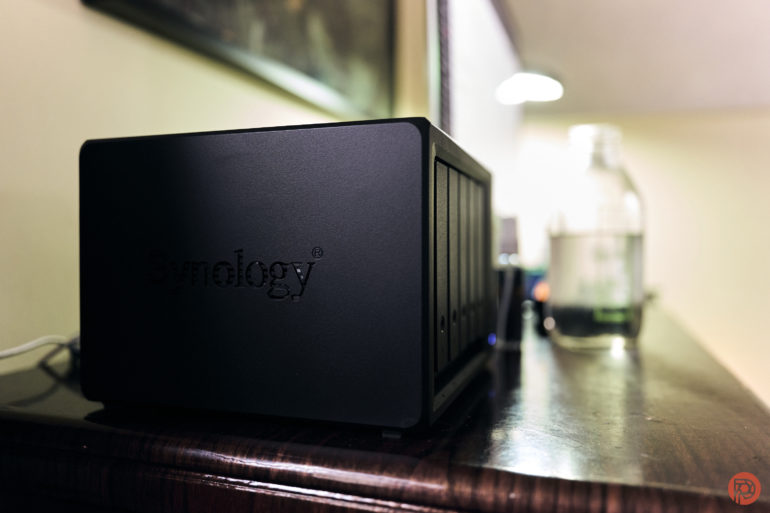
- This is a NAS. A NAS is basically a hard drive system connected to a home network. So to connect it to your computer, you’ll need to do that through your router. It’s best to have the router, your computer, and the disk station in the same room. In my case, it’s all in my office. My router is hooked up to my iMac for 1GB of up and down speeds. The router is also hooked up to my Synology DS1522+. It isn’t hard connected to my computer the way that my Drobo was.
- The Synology DS1522+ has USB 3.0 and eSATA connections. It won’t do USB-C to the iMac. To recap, it’s all going to go through your router.
- You can secure the device with passwords.
- You’ll interface with your Synology device through your web browser, and eventually, when it’s fully set up, you’ll be able to access it accordingly through Finder.
- No, this isn’t a sponsored post by Synology. I indeed tried to work with them when they messaged us asking about switching over from Drobo. But we couldn’t agree on a good idea. Instead, I worked with the folks at Adorama who provided us with a discount on this and drives. The Phoblographer has a long-standing relationship with Adorama and we’ve got a big amount of trust in them. Their ethics are also better than B&H Photo’s in our eyes.
Moving From Drobo to the Synology DS1522+
F
We’ve previously reviewed Synology devices, but from a very techy standpoint. Most of us photographers aren’t amazingly techy. And beyond cameras, lenses, and lights, I really just want stuff to work without much fuss or maintenance.
This was a headache for sure. First off, I had to buy the Synology DS1522+ and all the drives. After this, I proceeded to huddle into the corner of my office and cry at all the money I just spent but that needed to be done. Once I stopped my tantrum, I hooked the disk station up to the same iMac that my Drobo is hooked up to. Then I went online, typed in my model number, etc. It told me that the station wasn’t connected to my internet, so I manually connected it via an ethernet cable. There is a way to do 10GB ethernet with this, but I didn’t.
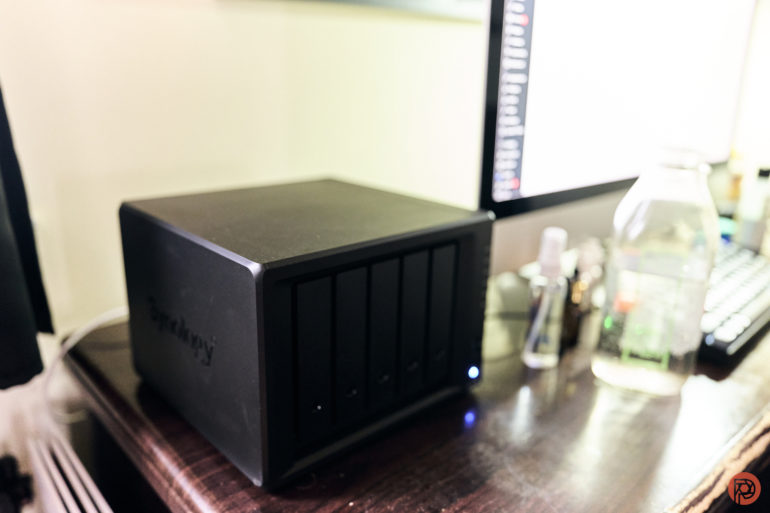
Then I inserted the drives into the Synology deck and set it to Raid 5. This was based off recommendations from friends and internet research. It allows you to add more drives later on. But in some cases, the understanding I gathered is that the station might want to format everything you have. That’s why I fully saturated it in the first place with the five drives that it can store. Specifically, I set all the drives into one volume; but that works for my needs.
Once that was done, it needed to format and initialize the drives. This process alone took a few days because of a few things going on.
Next, I started the process of moving the contents of my Drobo over to the Synology DS1522+. This took another few days because I’ve got around 14 TB of data on there. Once that was done, I ensured that all the data could be easily accessed without the Drobo. So I safely powered off the Drobo, disconnected it, and tried to access everything from the Synology DS1522+. It worked! There are a few things that I need to get used to like boot times. But overall, it’s a very painless experience.
Once I made sure that everything worked, I formatted all the drives in my Drobo, disconnected it, and continued on with my photography operations.
Make no mistake, this is. grueling process. But in the end, it’s all worth it. When this was done, I was finally able to update my iMac to Ventura. And everything works pretty seamlessly as it did before.
T
S
Get rid of the ads!
Did you enjoy reading this article as much as we enjoyed writing it? There's a way to support us and our reporting, getting ad-free navigation and more as a bonus. Subscribe to us for less than a coffee per month —just $3.99— or take advantage of our yearly subscription with a hefty discount for only $25.- An ad-free experience
- A free mystery box for Lightroom or Capture One
- All the books in our store
- 20% discount on Capture One
- 30% discount on Imalume Photo Theft Protection
- 20% off Herbs and Kettle Tea Company.
- 20% off your order from MPIX printing services.
- 5% off Viltrox Products via their eCommerce store.
- 10% off all film developing, printing and scanning services from Blue Moon Camera and Machine
- 15% off 7Artisans products: The lens and accessory maker is offering a sweet discount for Phoblographer's readers.