
X-Rite’s ColorChecker Passport Photo 2 is a reliable and valuable tool for photographers working with accurate color workflows.
Most modern digital cameras do an excellent job of reproducing the colors of the real world. However, there is arguably still some room for improvement. Most modern sensors only record red, green, and blue, and must interpolate the rest of the colors. Certain workflows, such as those implemented when photographing products or fashion for high-end commercial clients, demand accurate and consistent colors. This is where the X-Rite ColorChecker Passport Photo 2 comes in. The X-Rite ColorChecker Passport Photo 2 works with their ColorChecker Camera Calibration software. They claim it to be a reliable tool to help photographers create accurate reference images under any lighting condition. But here’s the big question: do you really need it?
Pros and Cons
Pros
- Lightweight and low profile design
- Essential for photographers with shooting color-critical work
- Affordably priced
Cons
- No Capture One plugin currently available
- Not practical for photographers who work in different locations all the time
Gear Used
We tested the X-Rite ColorChecker Passport Photo 2 using a Sony A7R III, Capture One Pro 12, and X-Rite’s own ColorChecker Camera Calibration software.
Tech Specs
Tech Specs for the X-Rite ColorChecker Passport Photo 2 taken from X-Rite’s official product page.
Gray Balance Target
Set exposure with an in-camera or handheld meter.
White Balance Target
Create custom in-camera white balance for a consistent white point across a set of images with no need to correct each individual image later.
Classic Target
Industry standard 24-patch color reference target for creating custom camera profiles and for visual color assessments.
Creative Enhancement Target
Neutralize and create your look with enhancement patches. Check and evaluate shadow details and highlight clipping. Control color shifts.
Camera Calibration Software
Create custom camera profiles based on your individual camera/lens/lighting combinations for both DNG and ICC workflows.
Lightroom® Plug-In
Create custom camera profiles directly in Adobe® Lightroom® Classic and Lightroom® Classic CC.
Portable Protective Case
Adjusts to accommodate multiple positions so you can easily incorporate the target(s) into any scene. Also includes a handy lanyard so your Passport is always close by.
3rd Party Support
ColorChecker Classic target is also supported by these 3rd party software solutions:
-
Hasselblad Phocus
-
Black Magic DaVinci Resolve
-
3D LUT Creator
Ergonomics
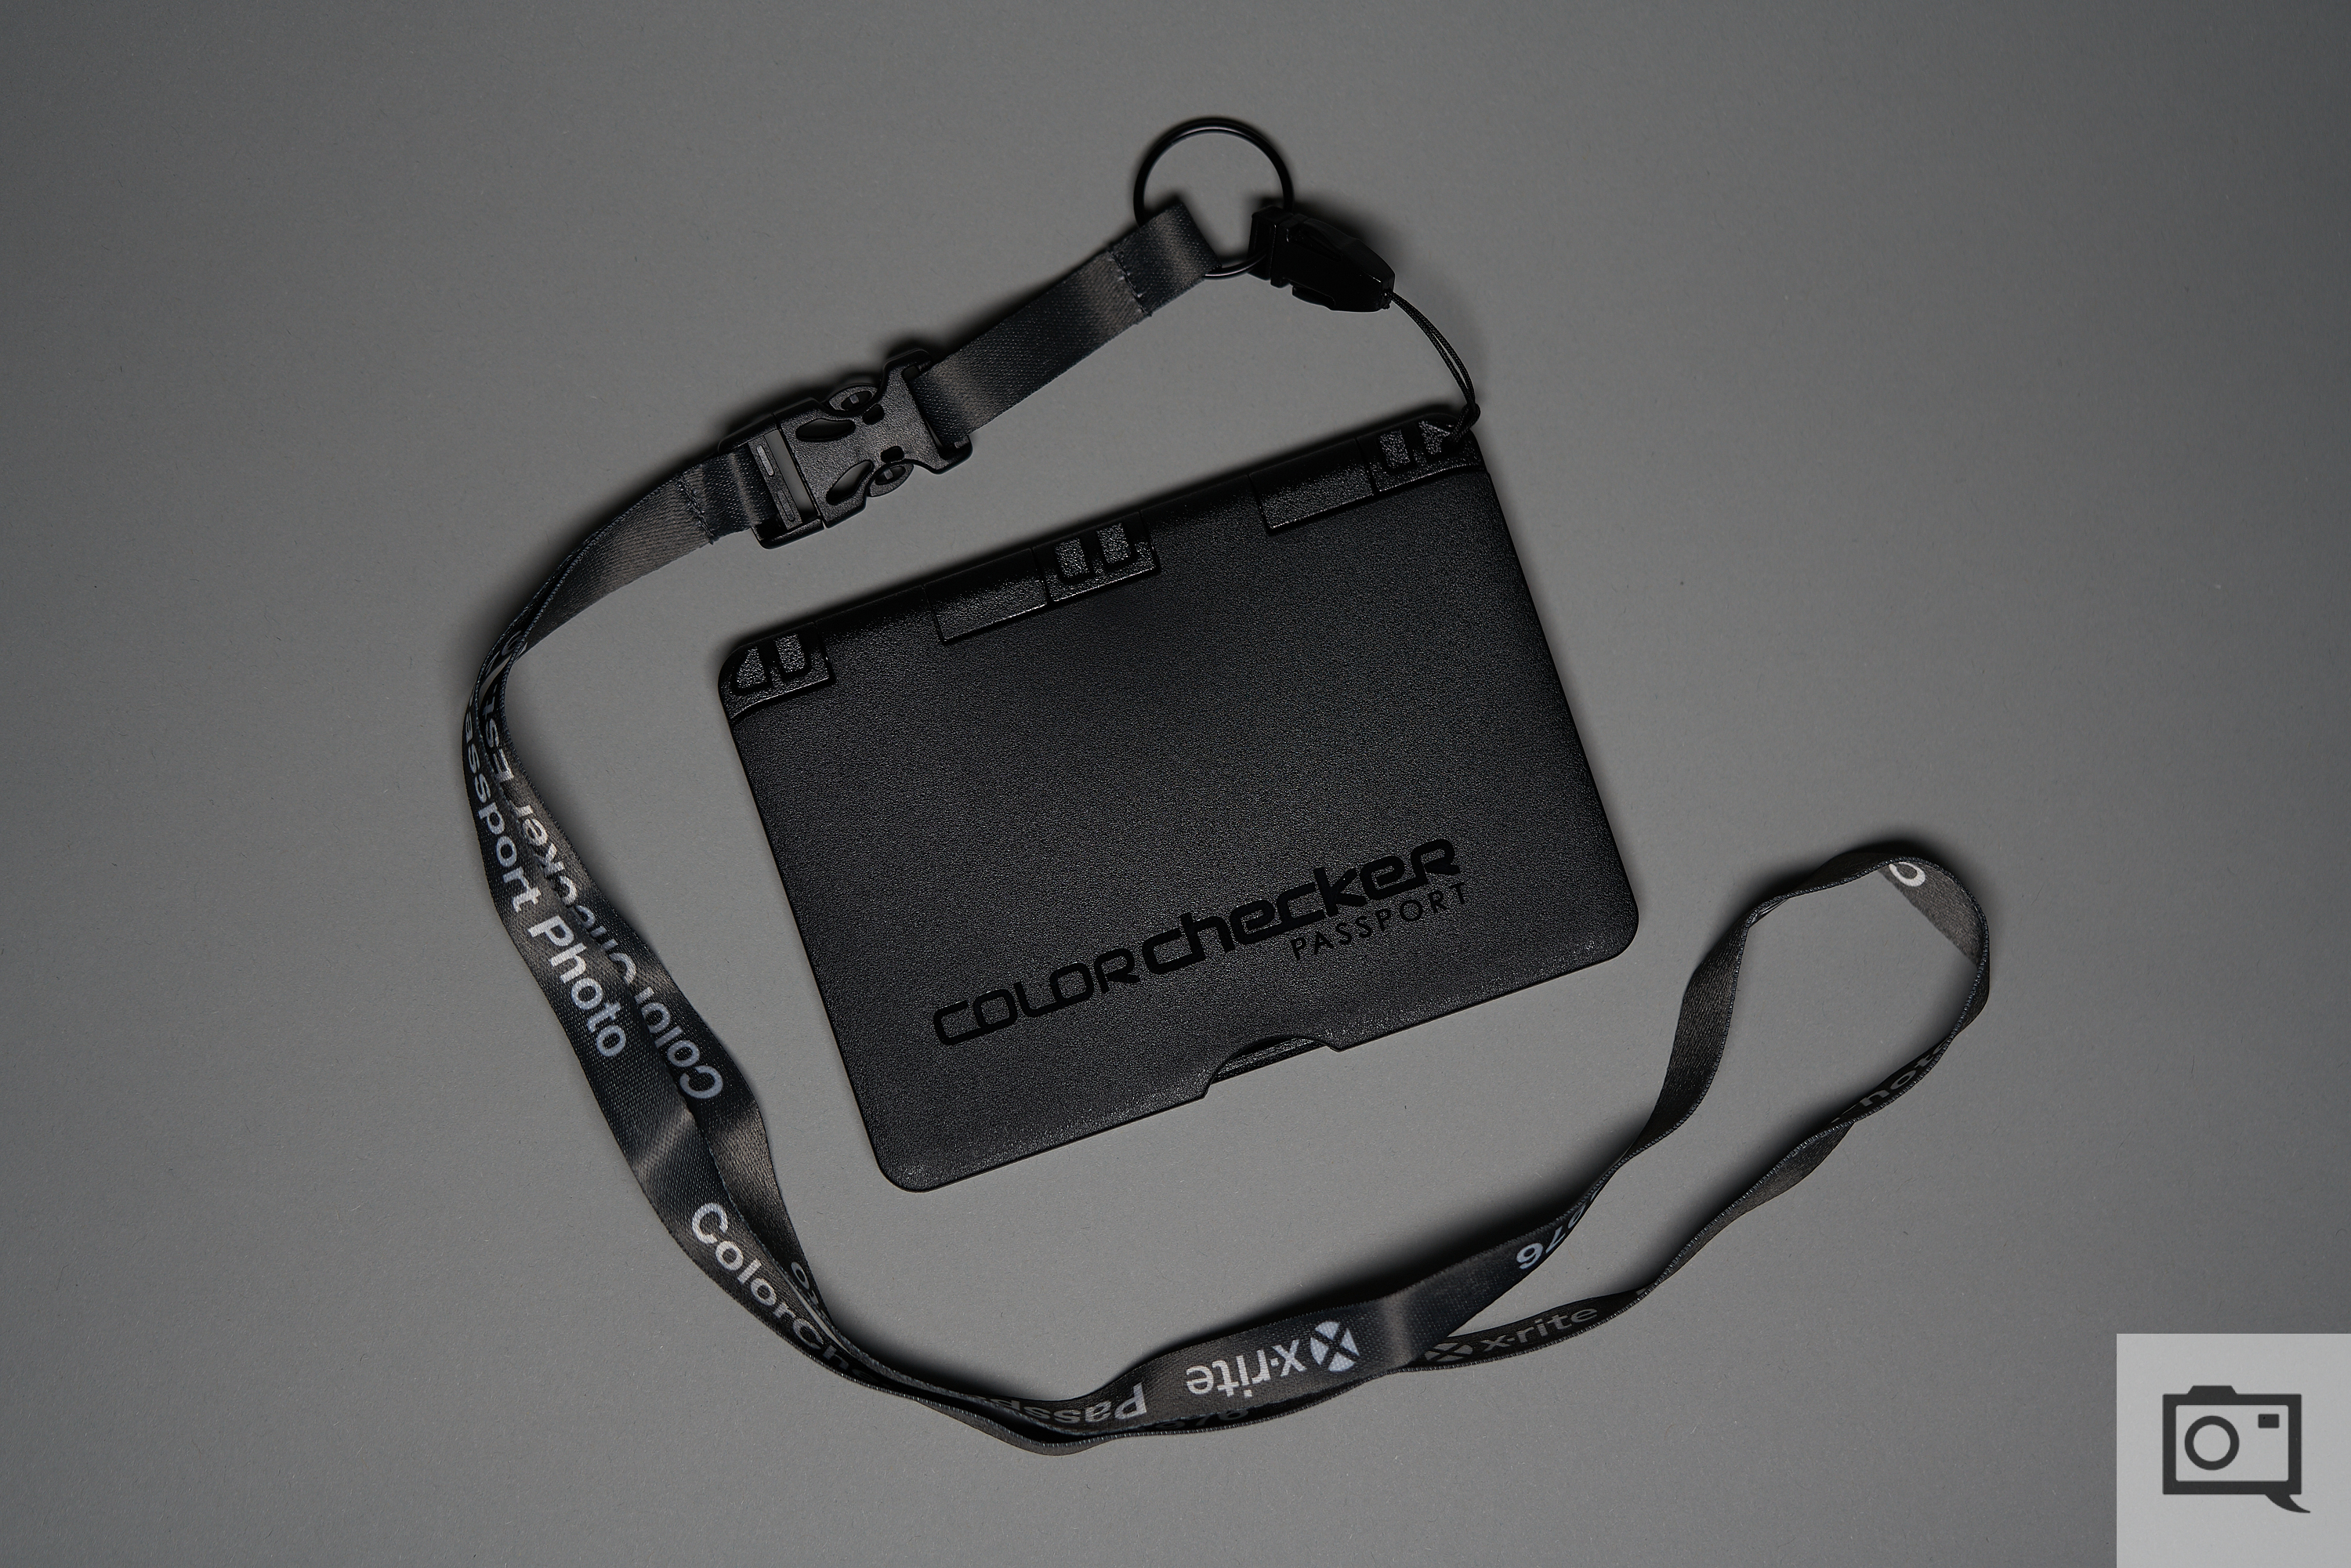
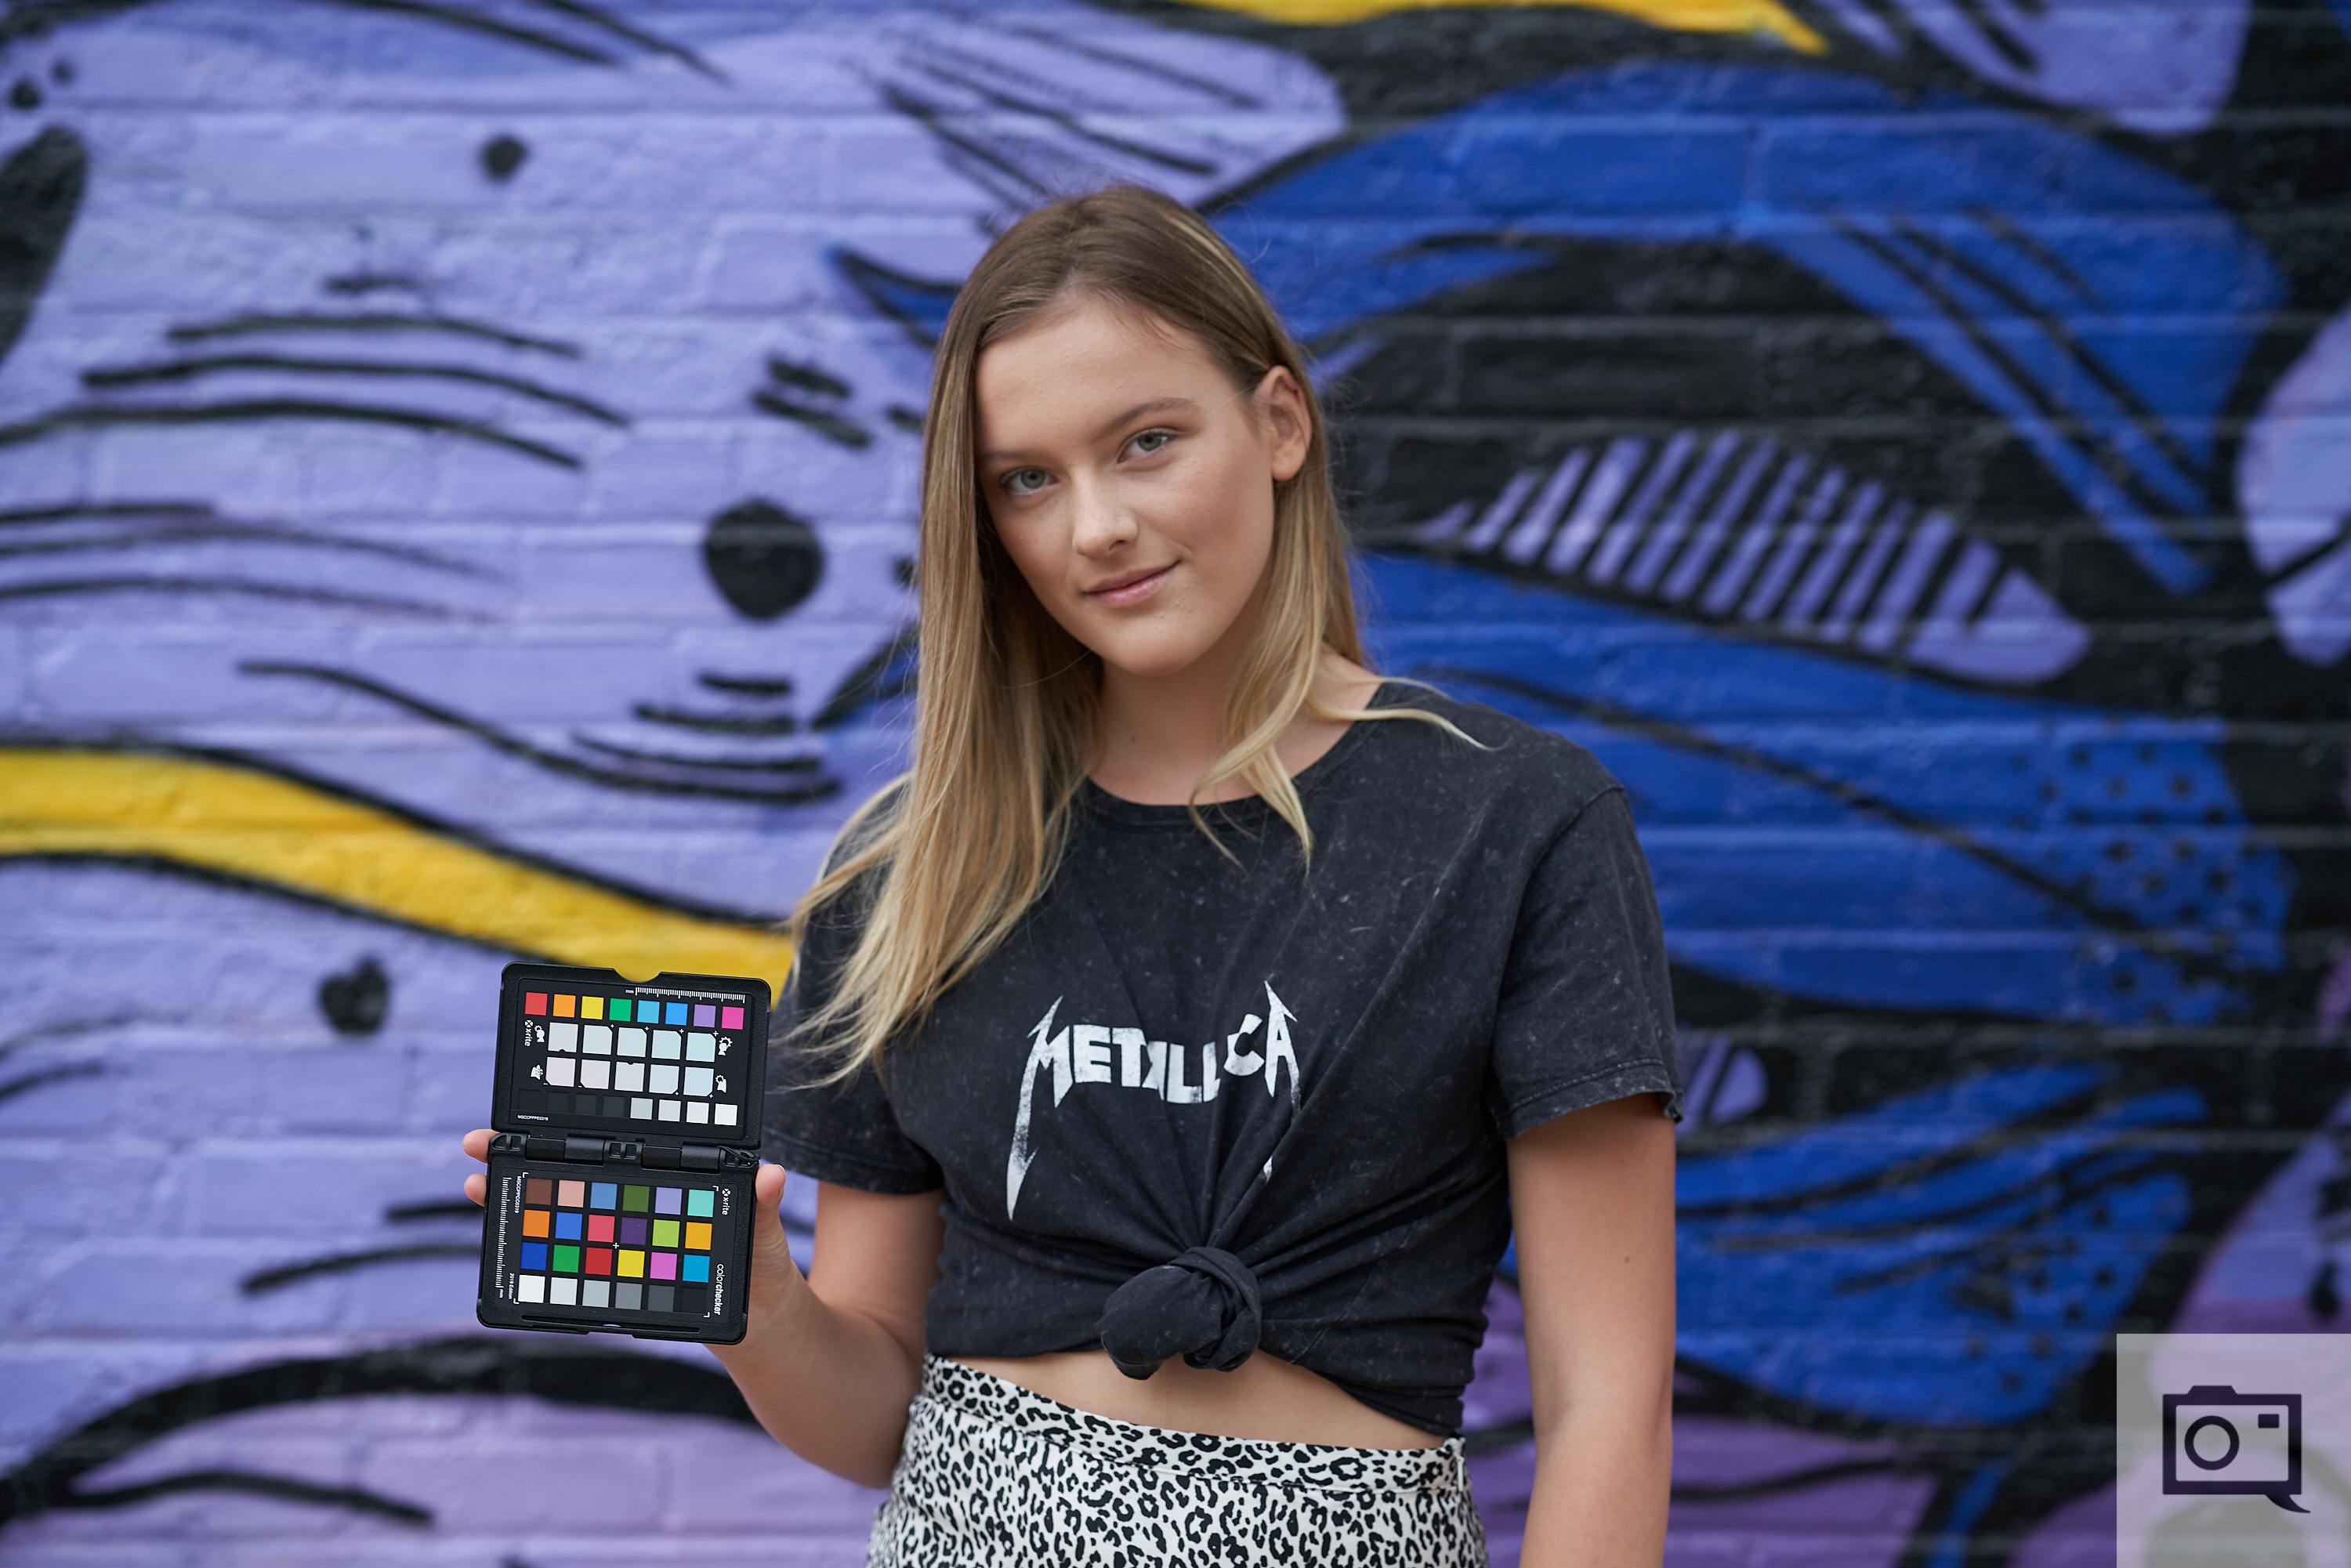
The X-Rite ColorChecker Passport Photo 2 comes in a self-contained plastic hardcase that’s roughly the size of two decks of cards placed side by side that helps to minimize any wear and tear on the four different calibration targets found within. A lanyard with a detachable buckle is included with the ColorChecker, allowing you (or an assistant) to wear it around your neck or hang it off of a light stand while working on location.
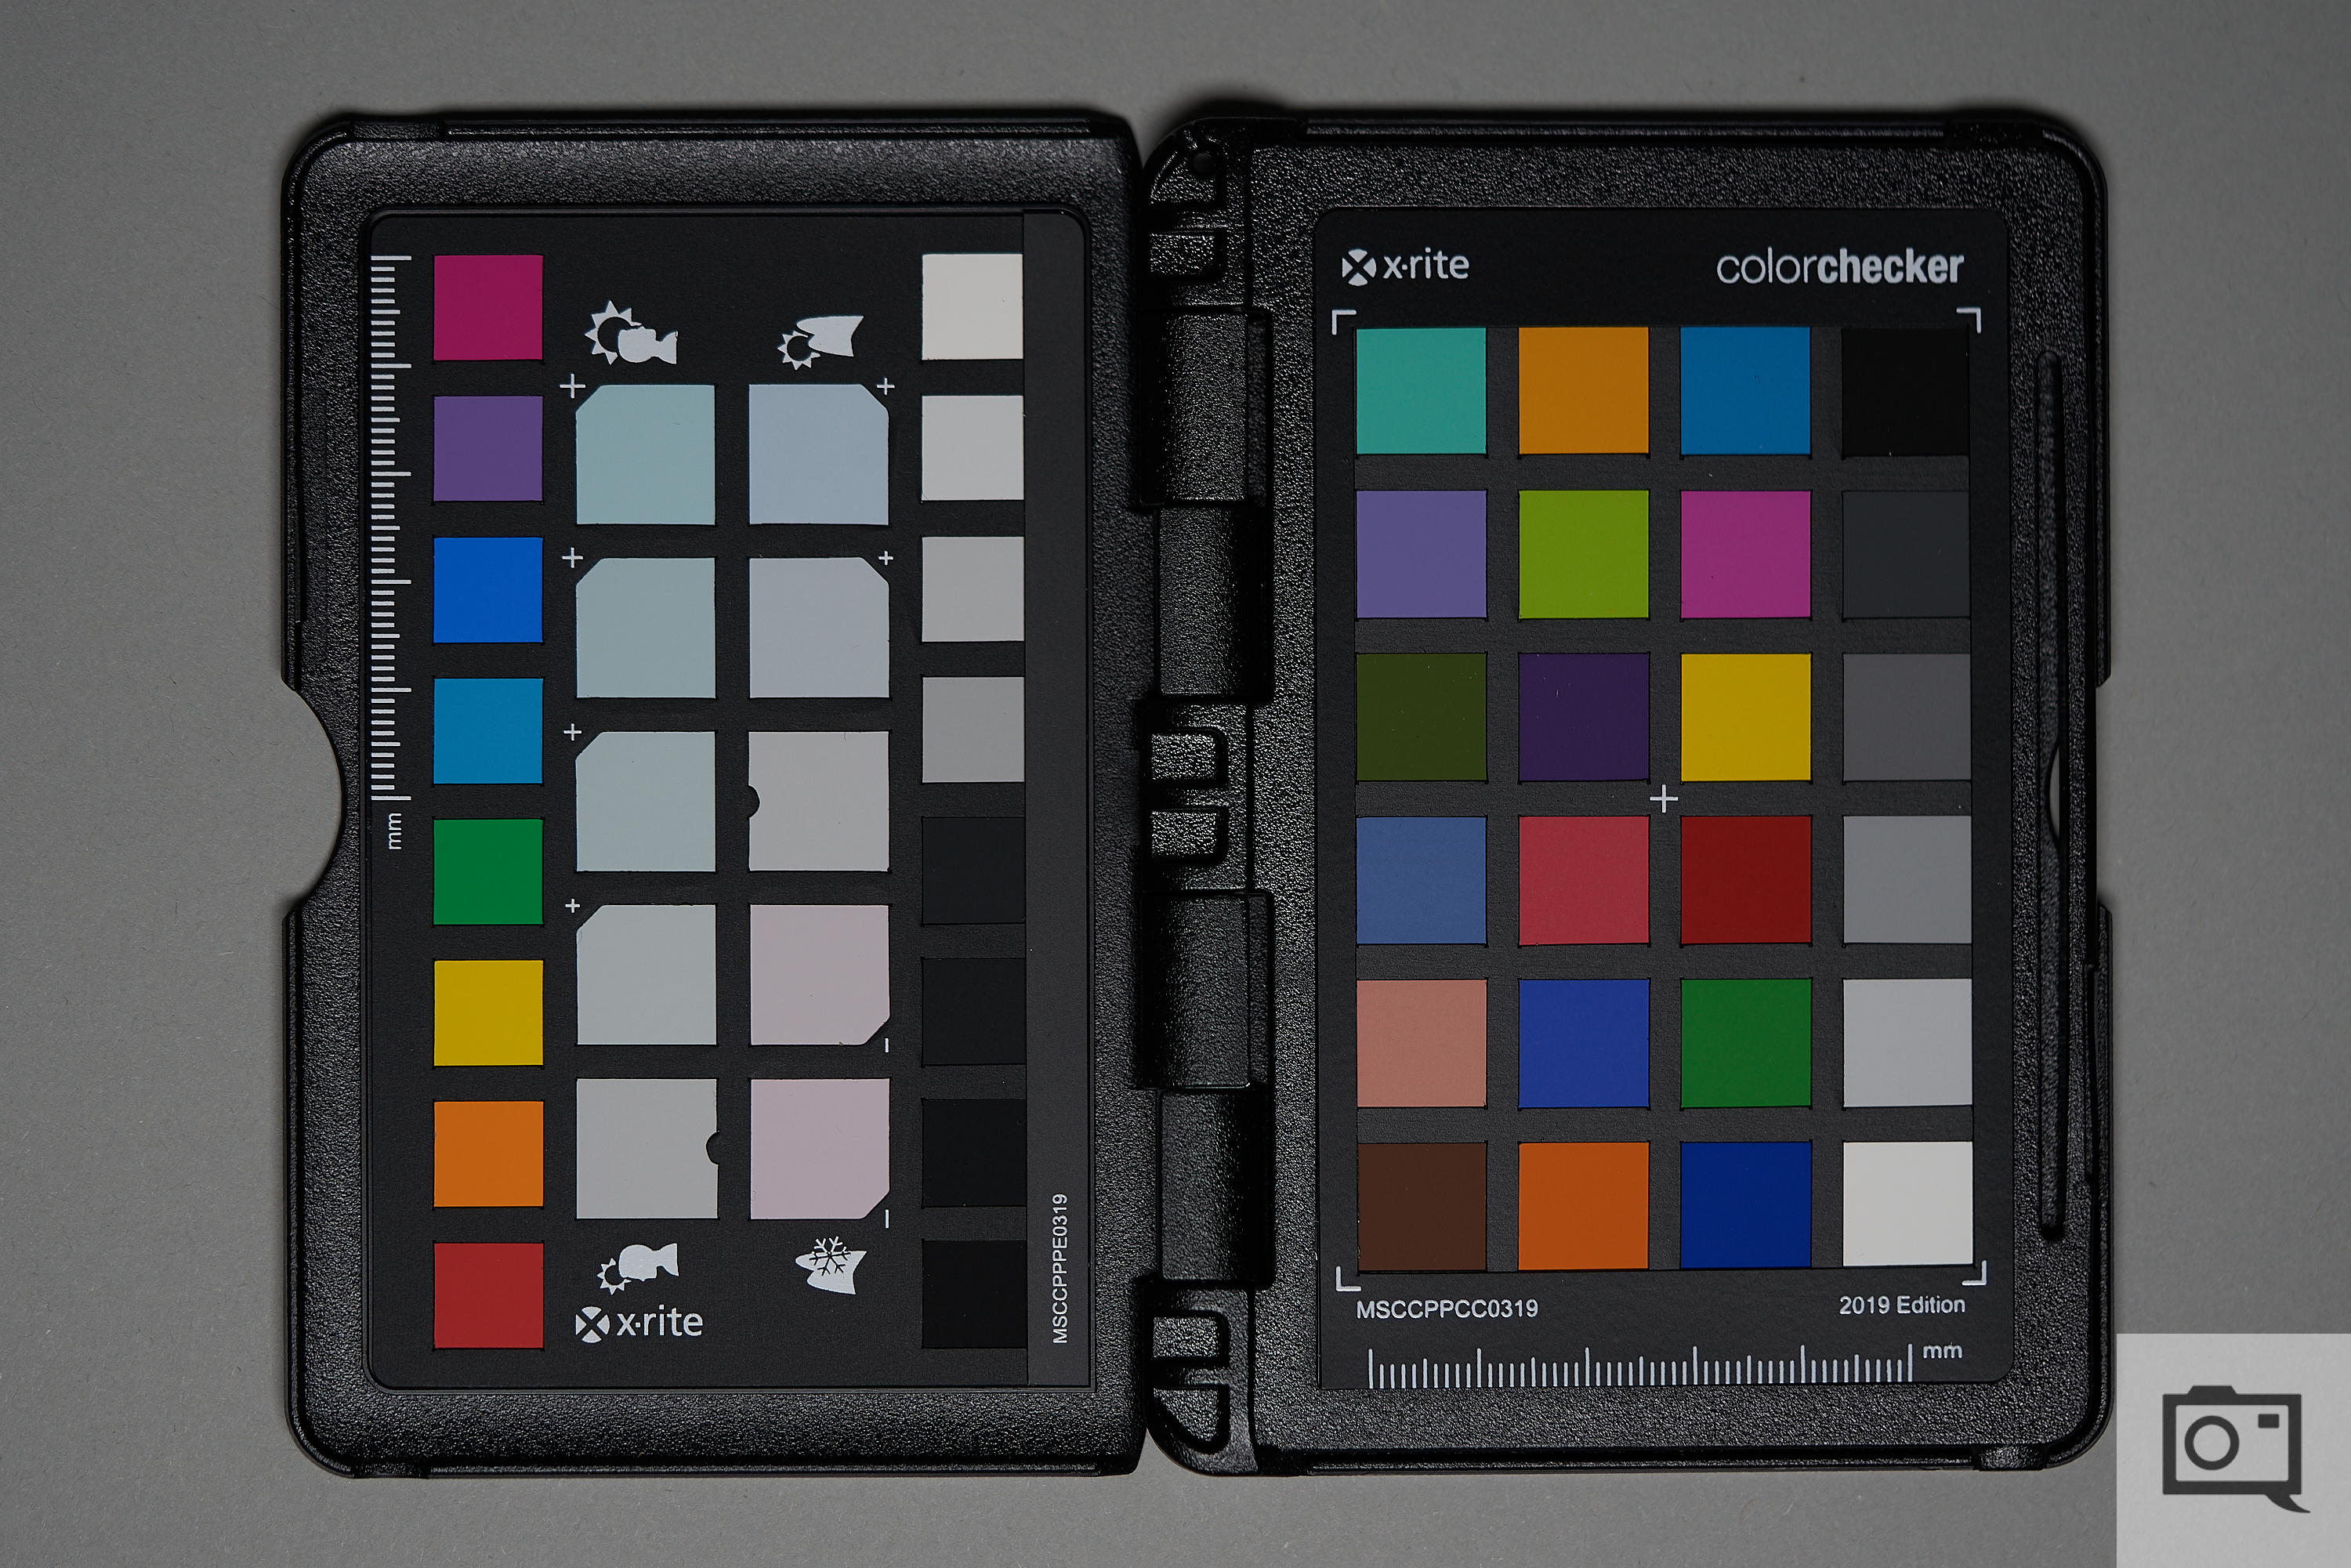
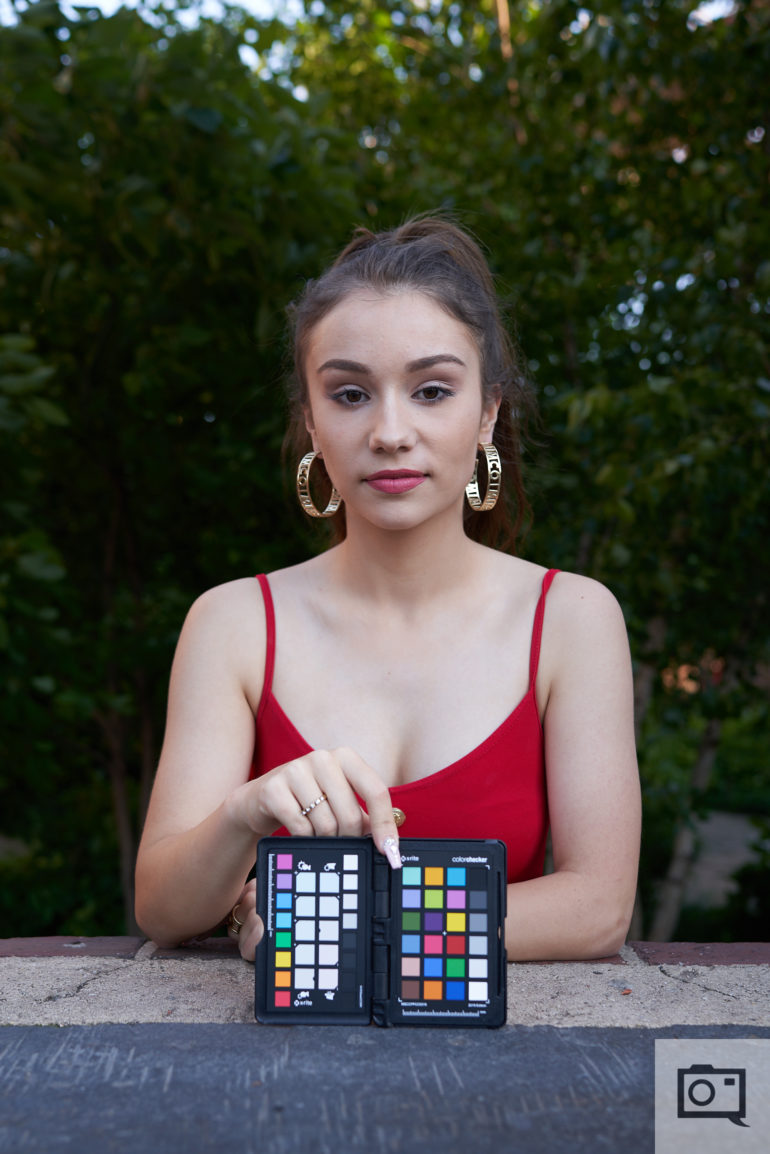
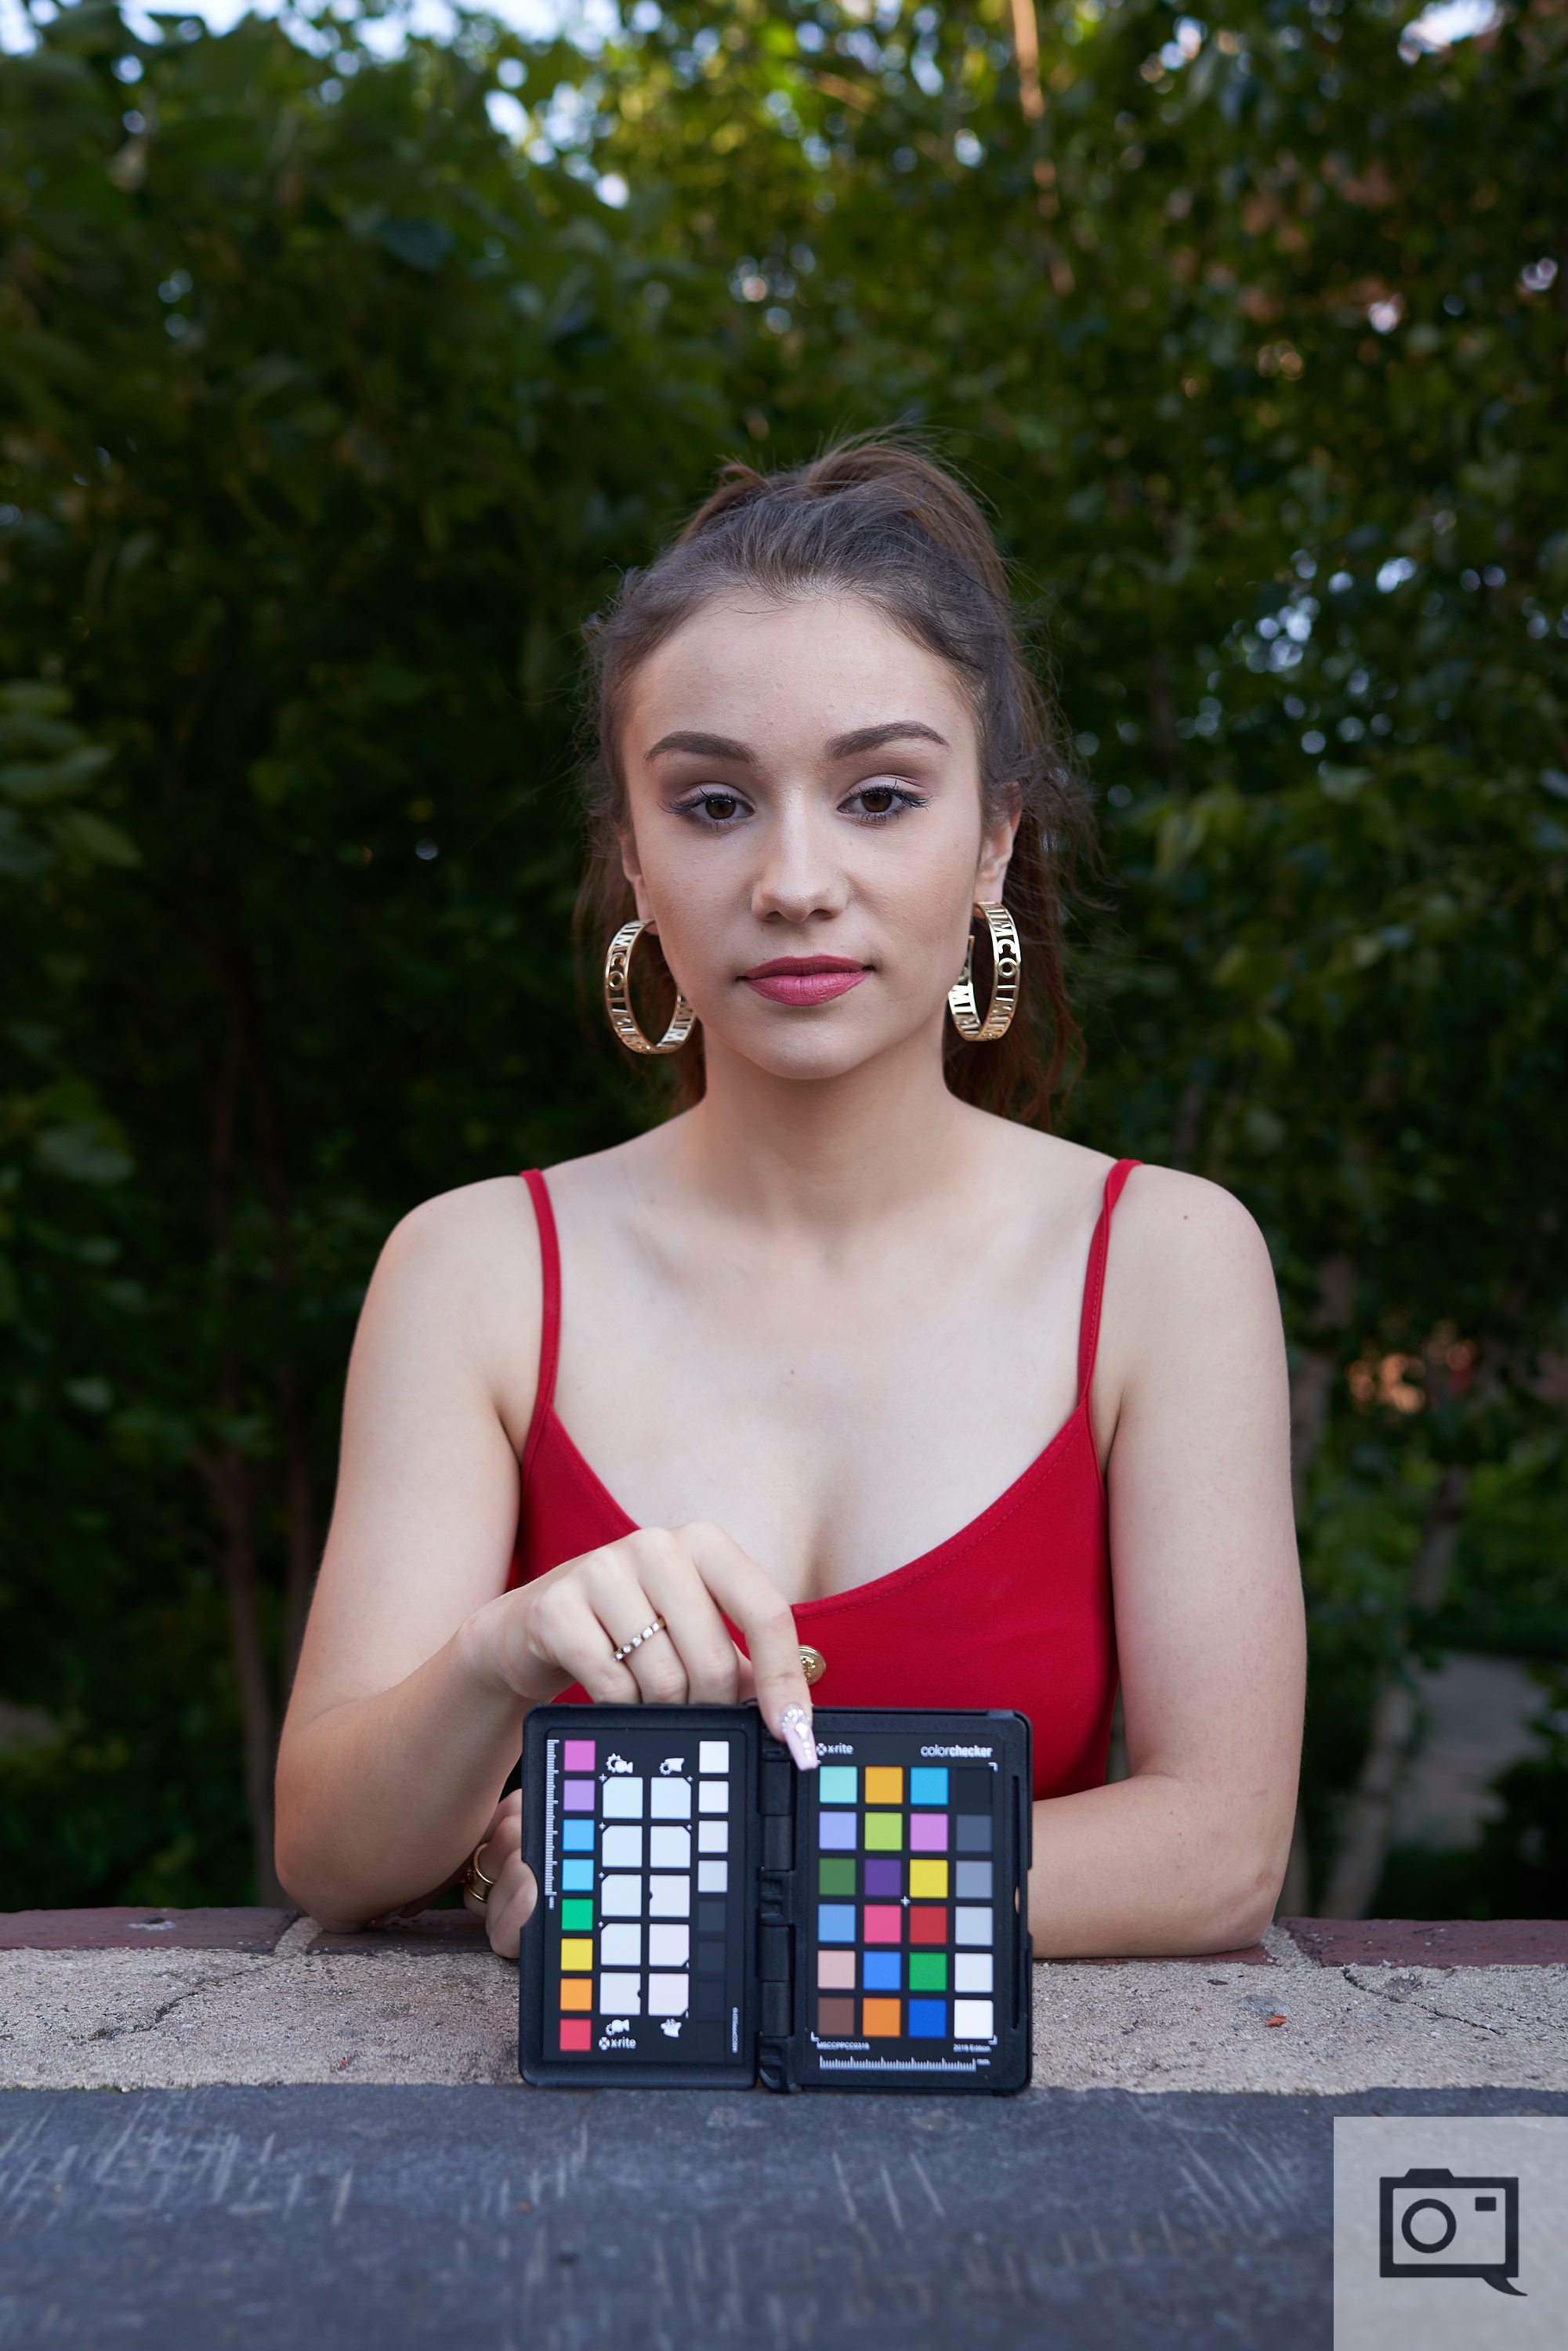
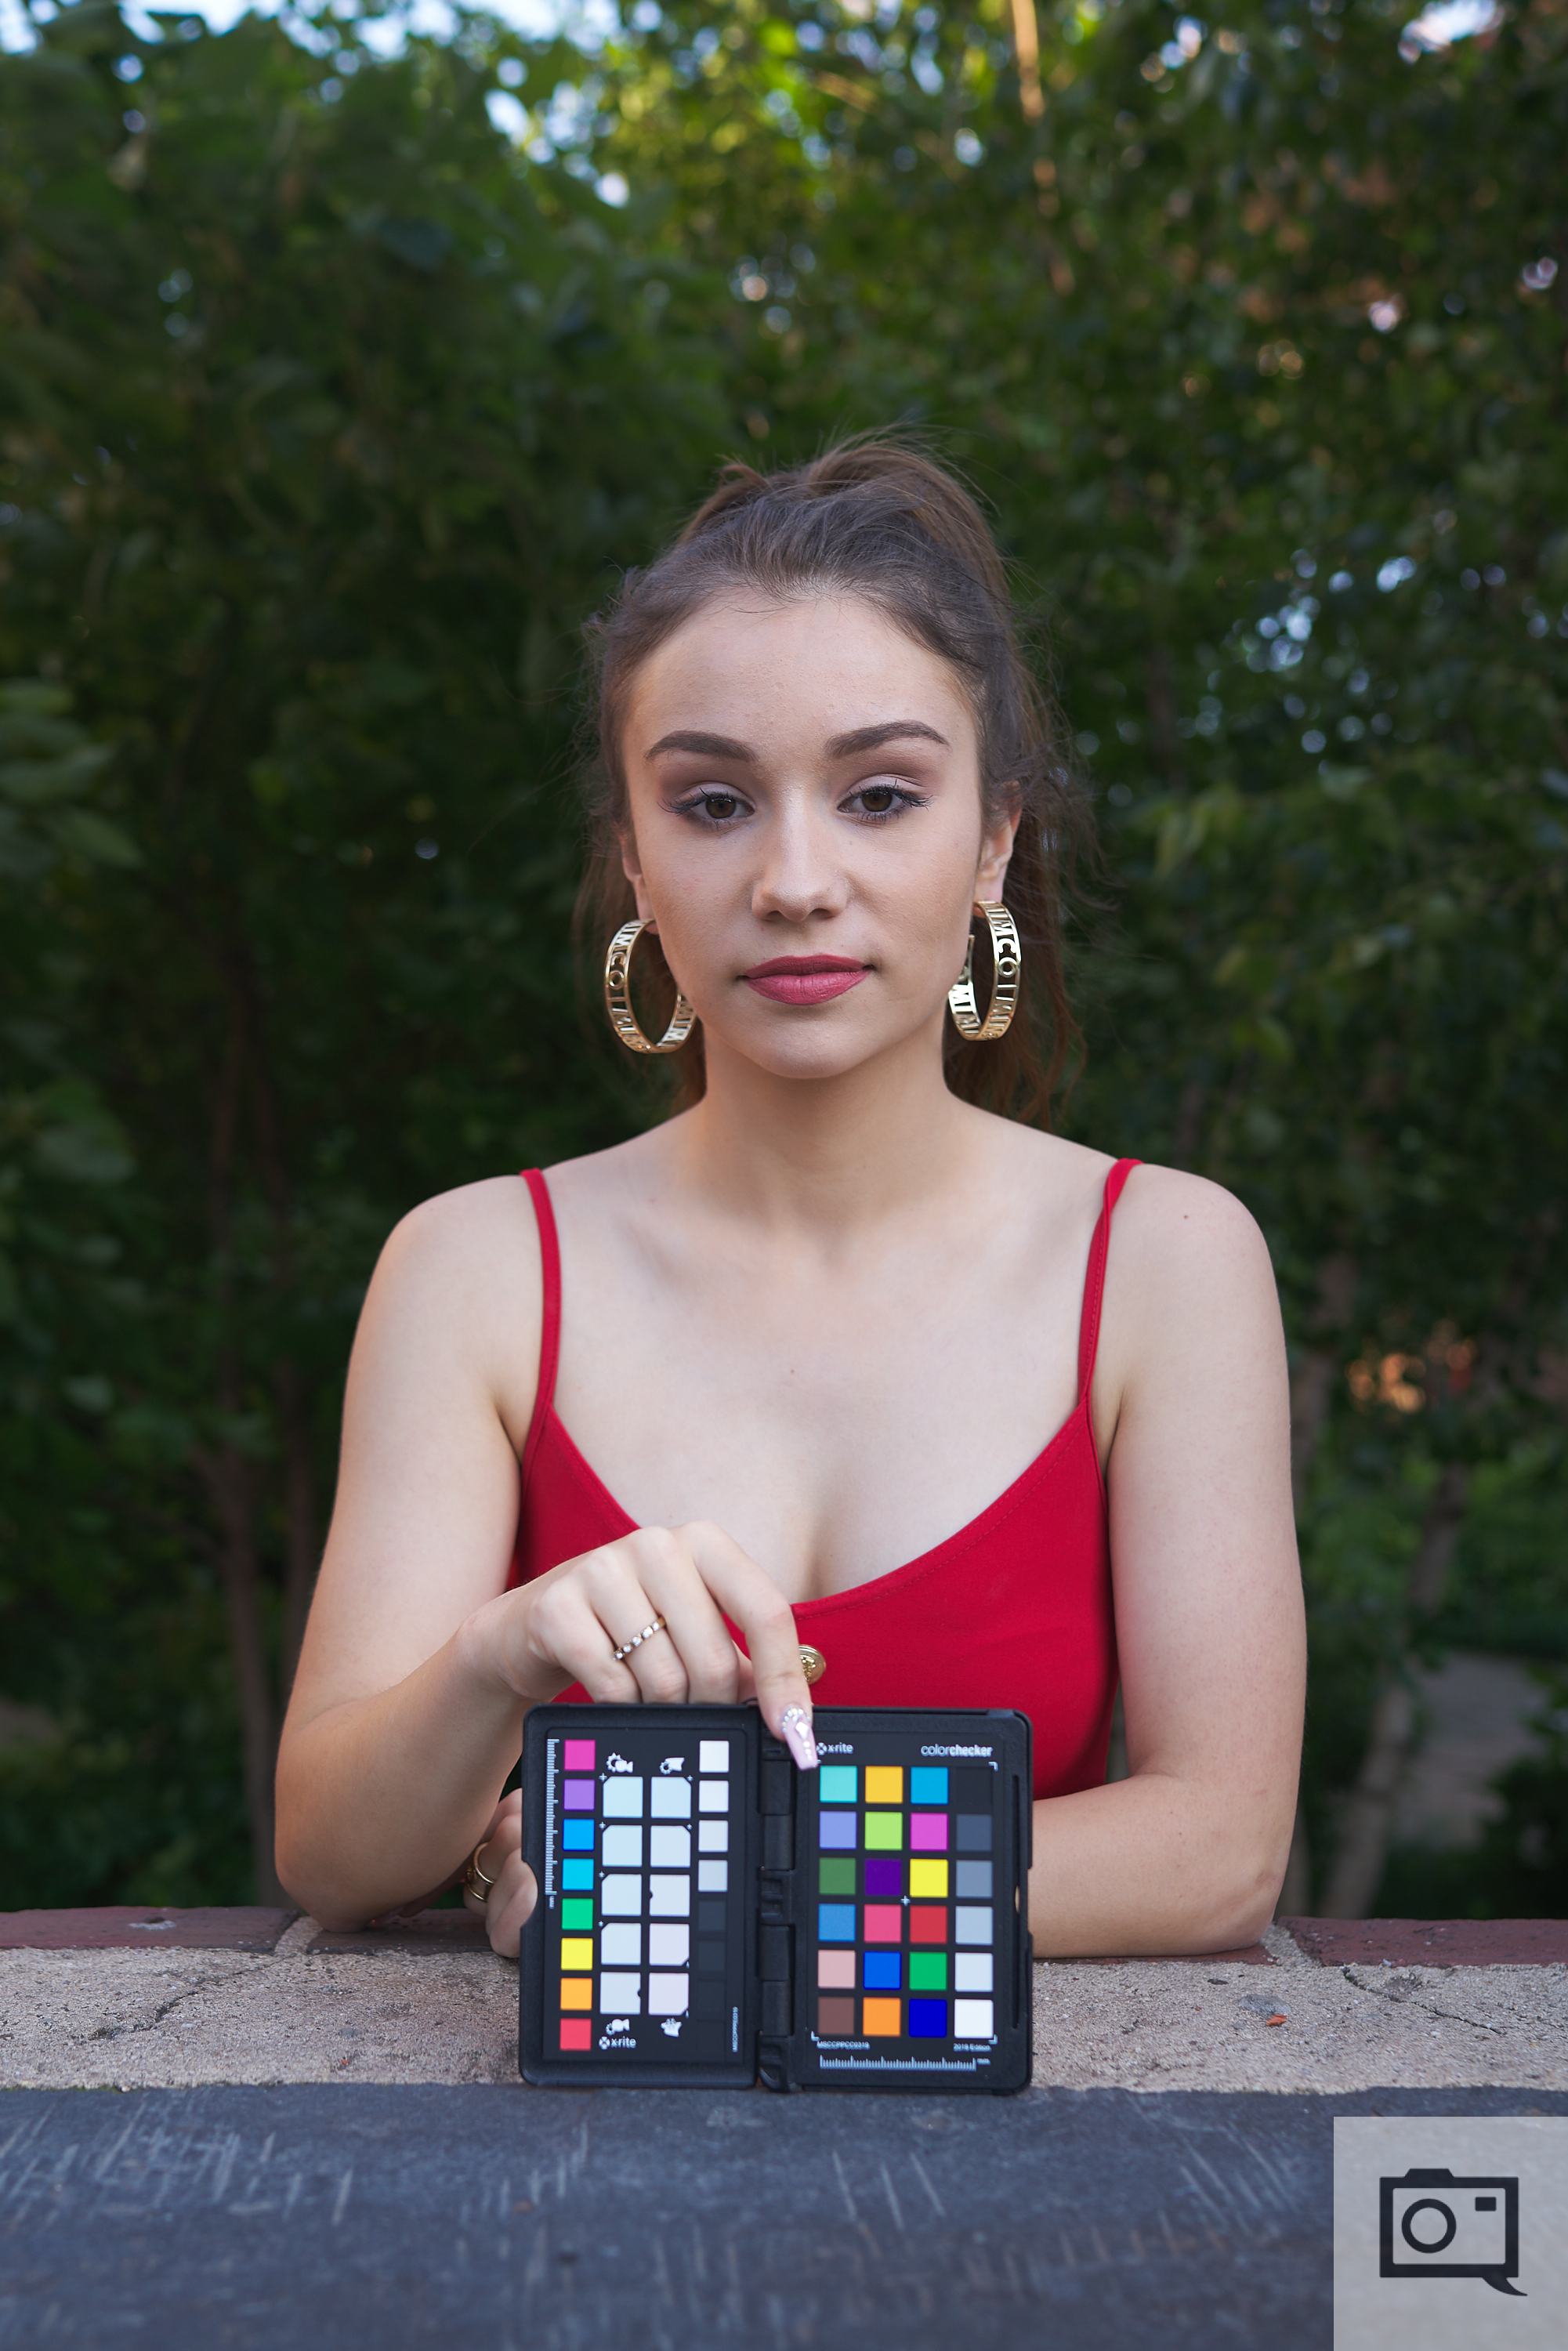
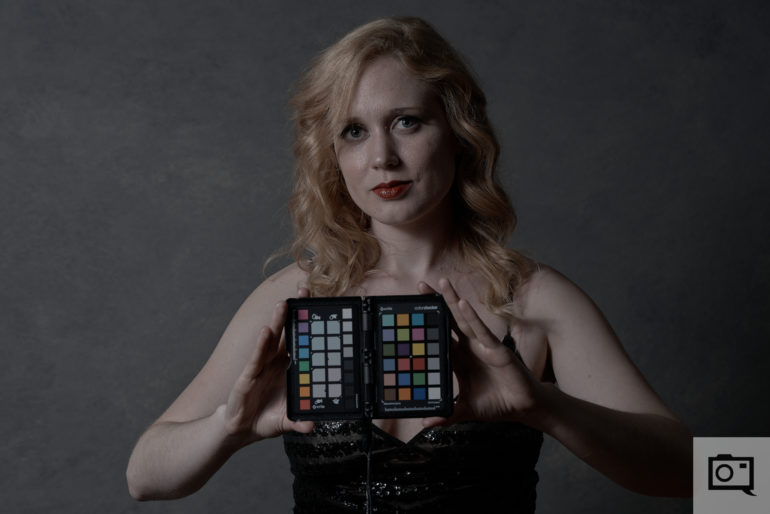
The ColorChecker Passport Photo 2 opens up like a book, and the first two “pages” you’ll see are the Creative Enhancement (left) and Classic (right) Targets. X-Rite’s ColorChecker Camera Calibration software uses the 24 color reference patches found on the Classic Target when creating custom camera profiles.
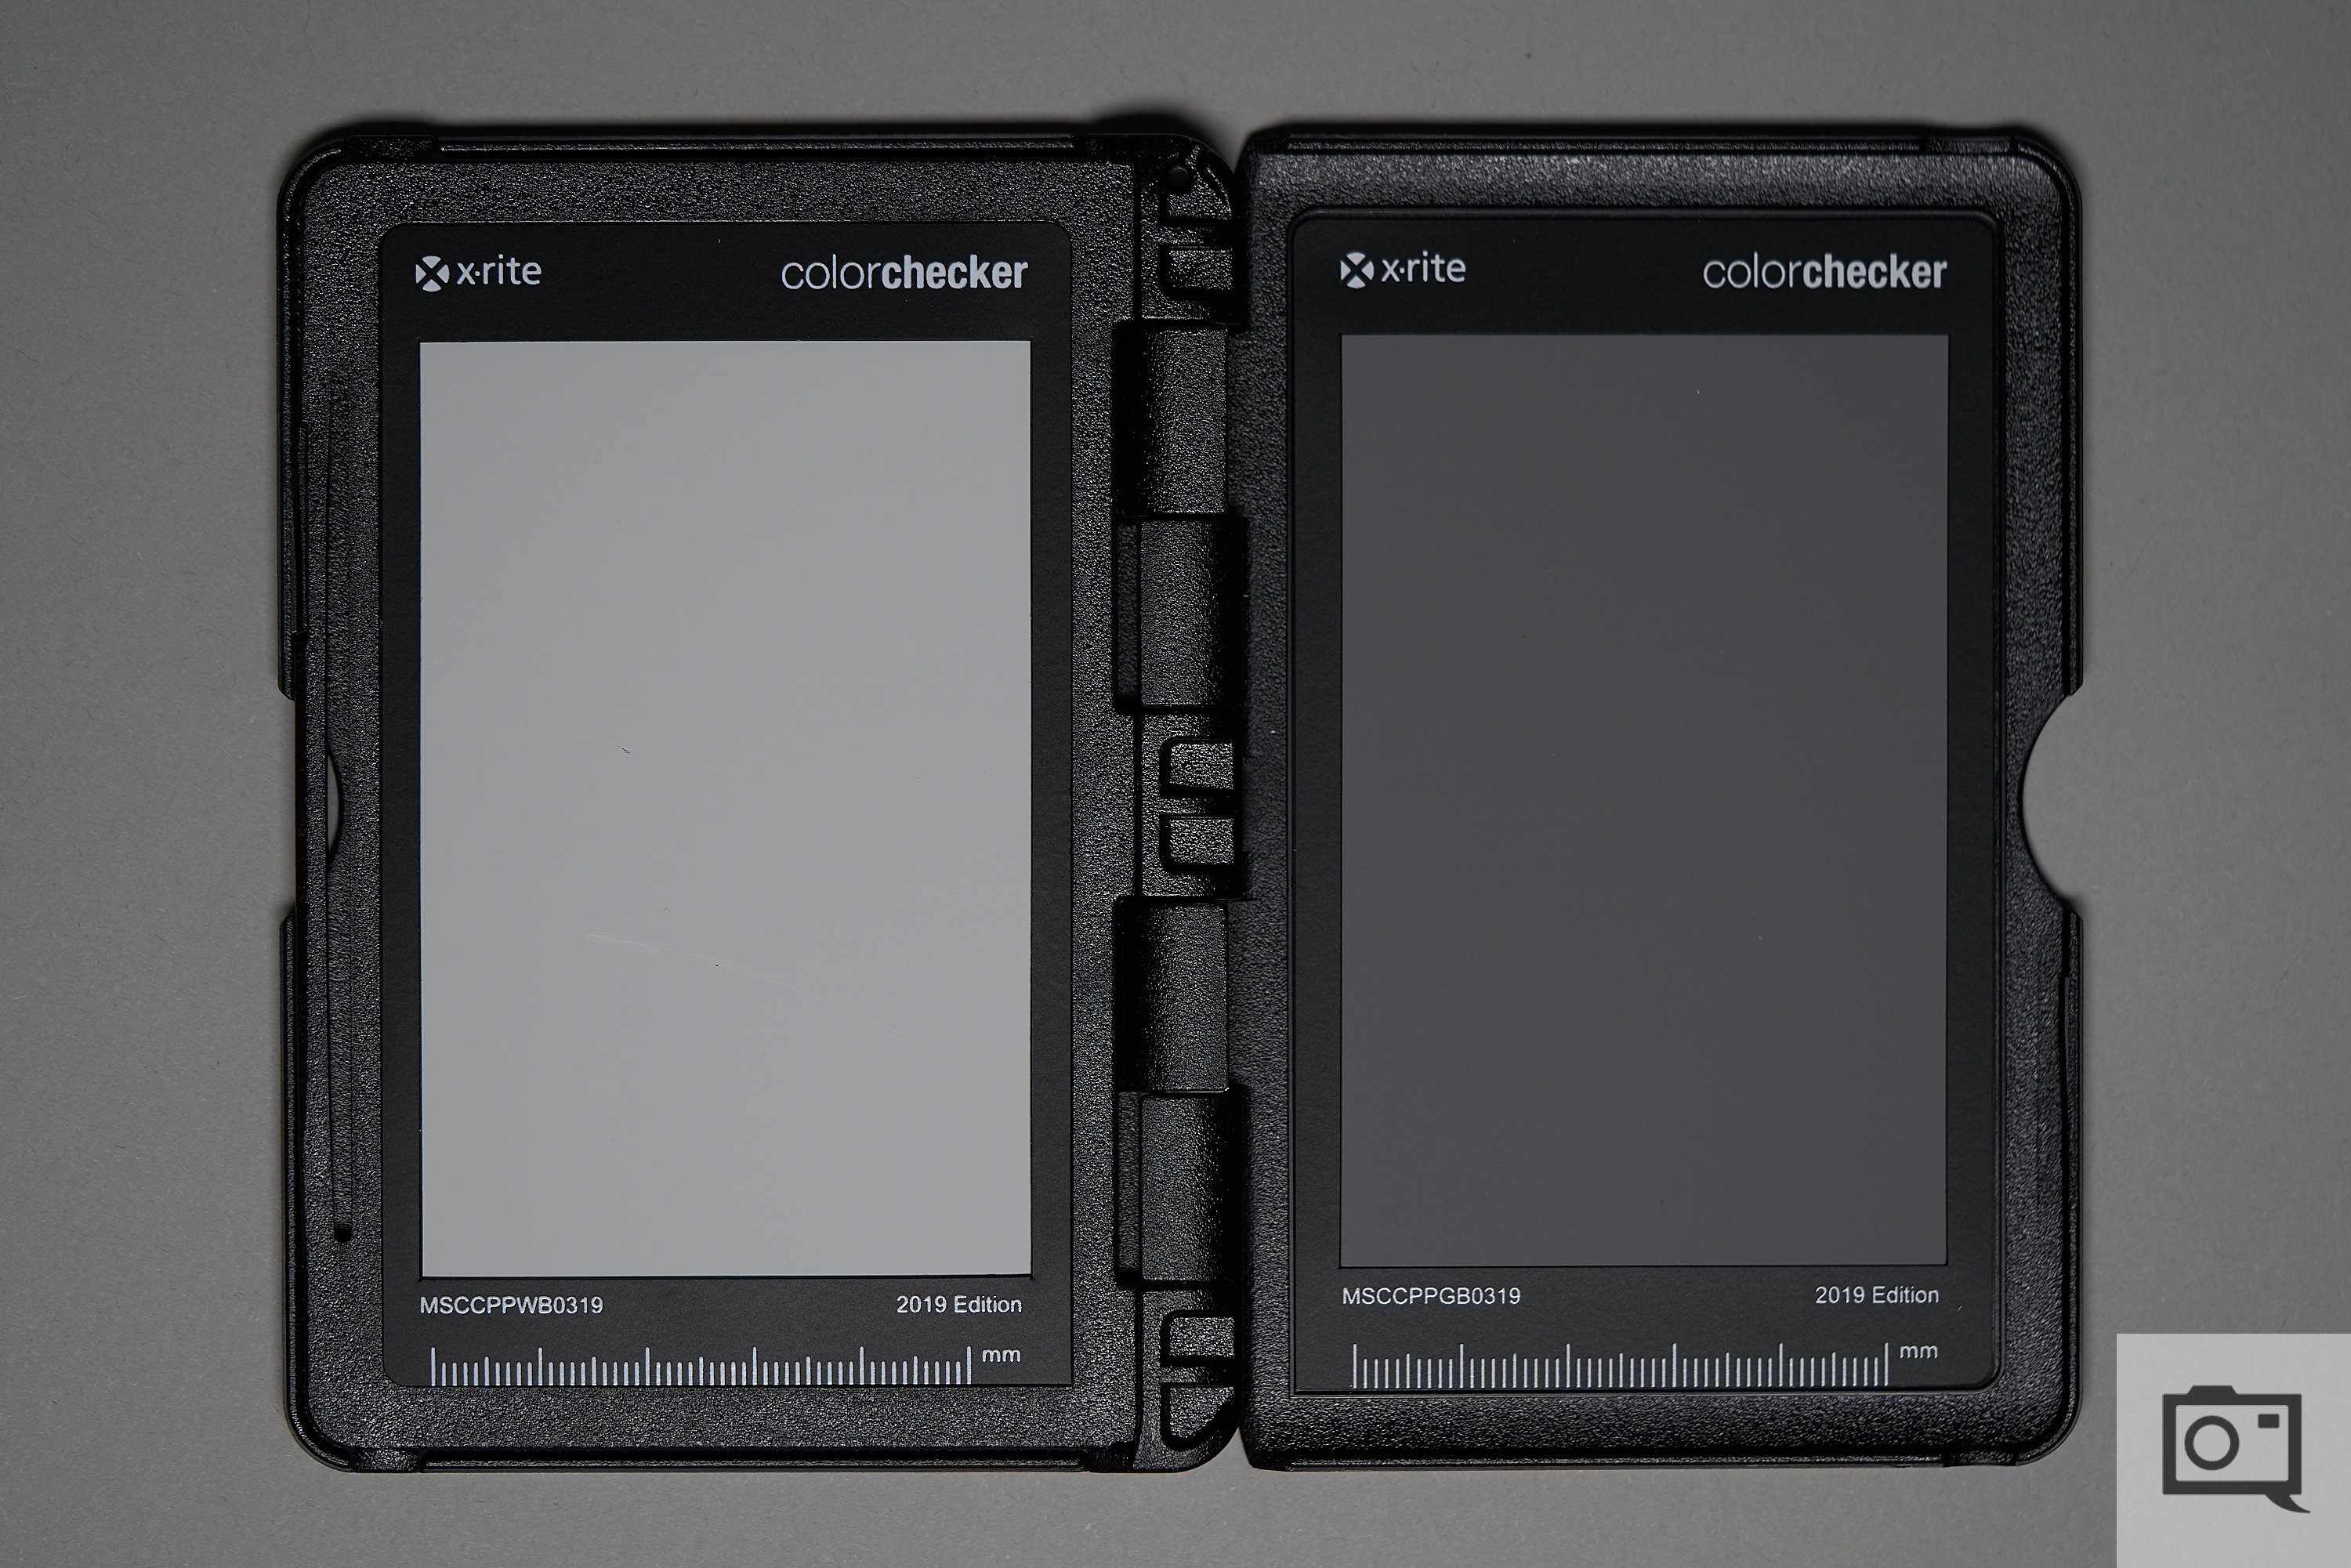
Flipping onto the next “page,” you will find the White Balance (left) and Gray Balance (right) targets whose purposes are self-explanatory.
Build Quality
The hard plastic case of the X-Rite ColorChecker Passport Photo 2 helps keep the different targets and color patches from being damaged during use as well as when transporting from one set to another. Unless you’re purposely trying to bend the exterior of the ColorChecker beyond 270 degrees, or doing something obscene like throwing it off of the roof of a building or running it over with tank treads, I’m confident it’ll serve you well for years to come.
Ease of Use
“While X-Rite has included straight forward and easy to follow instructions within the software on how all three types of color profiles can be created, it would be much better to see X-Rite releasing a dedicated plugin for Capture One that can create profiles using raw files within the program without having to rely on a standalone software.”
For the photographers still trapped in their loveless marriages to Lightroom, X-Rite has a calibration plug-in available that allows you to create profiles within the program. Having made a clean break from Lightroom for over two years now, I installed X-Rite’s standalone ColorChecker Camera Calibration software instead since Capture One is my raw converter/editor of choice. The ColorChecker Camera Calibration software allows you to create DNG, Dual Illuminant DNG, and ICC-TIFF color profiles. For this review, we’ll be focusing on the ICC-TIFF color profiles since that is compatible with Capture One. X-Rite’s software explains how all three types of color profiles can be created quickly. But a dedicated Capture One plugin that can create profiles using raw files would be a preferred route. This would dramatically help streamline the color calibration workflow involved.
Further, we should note that this is a long, tedious, and antiquated process. During the editing process for this article, we found several potential issues–the least of which is monitor calibration. Other problems we discussed include the practicality of doing this in modern times when most images are seen on the web via mobile devices with similar color calibration. Plus, the management of various ICC color profiles can be a headache in the long term. Last but not least, the need to convert to TIFF instead of working directly with the RAW files is also an antiquated process.
Using the Software with Capture One
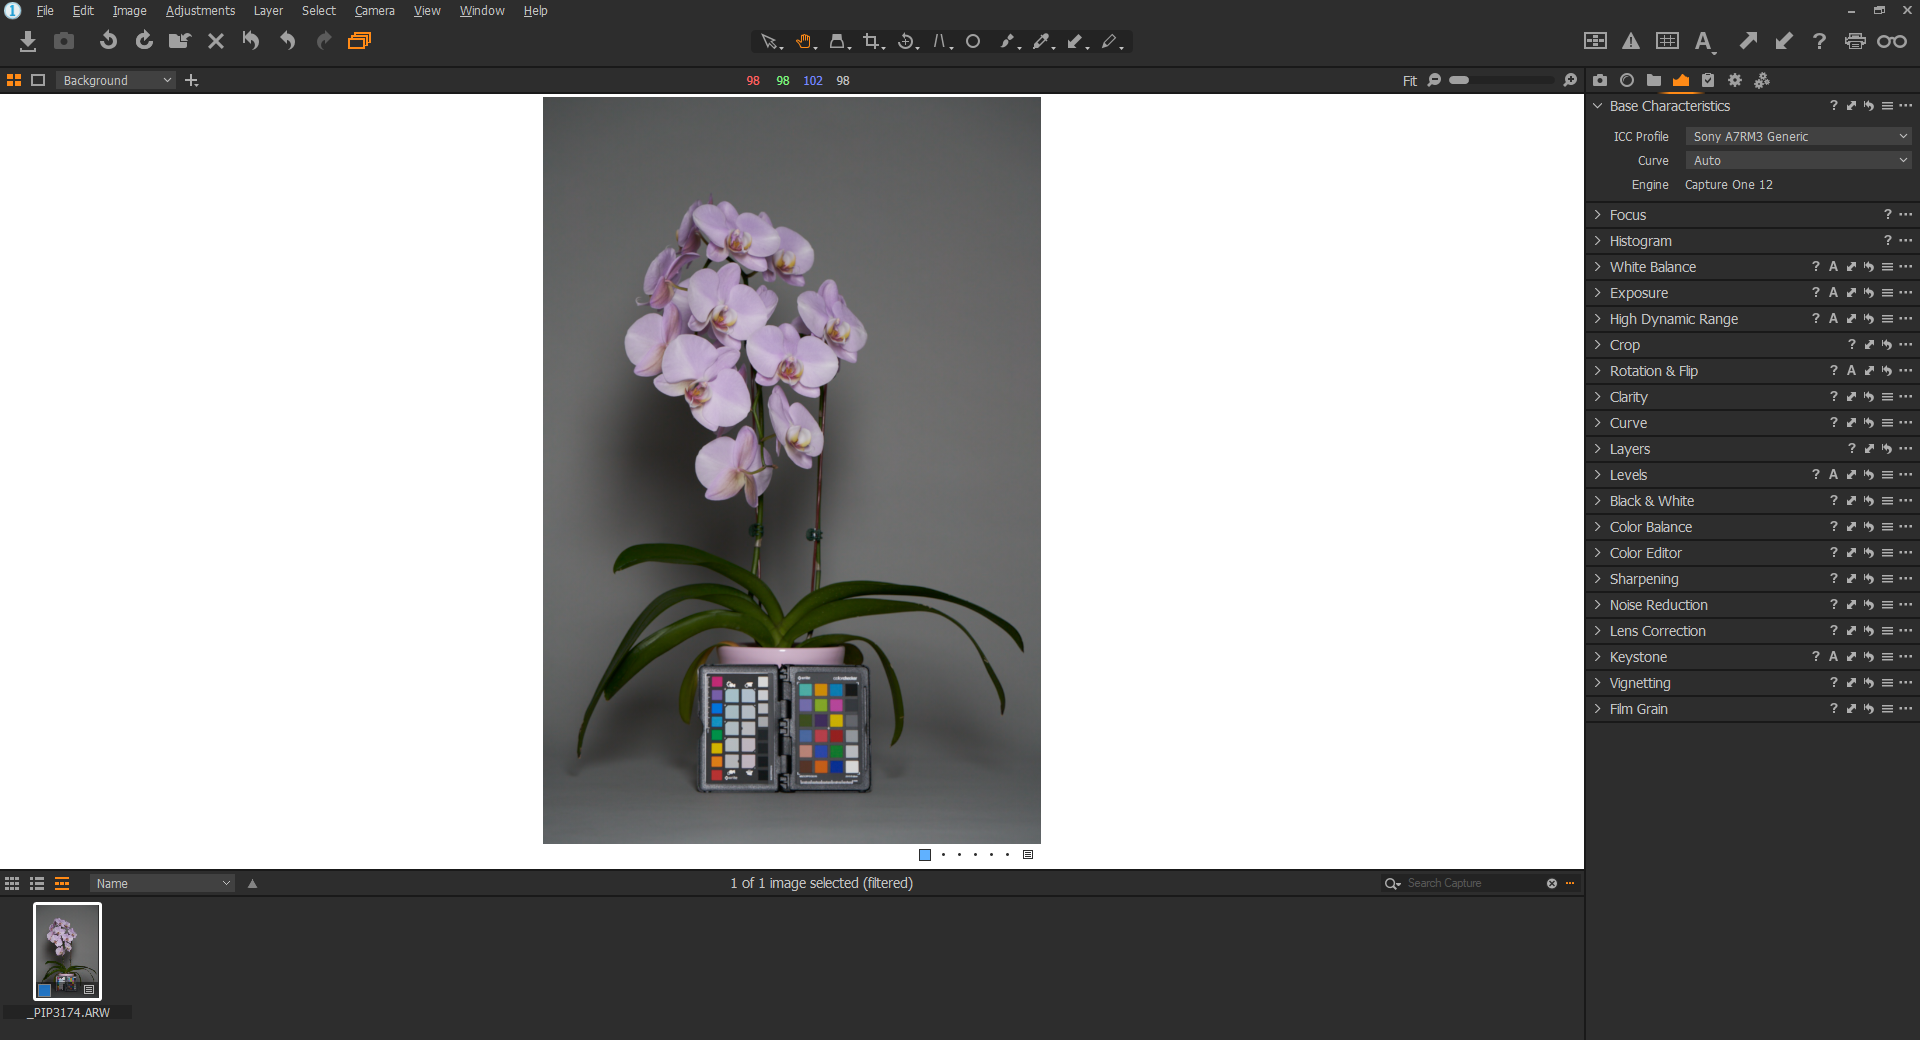
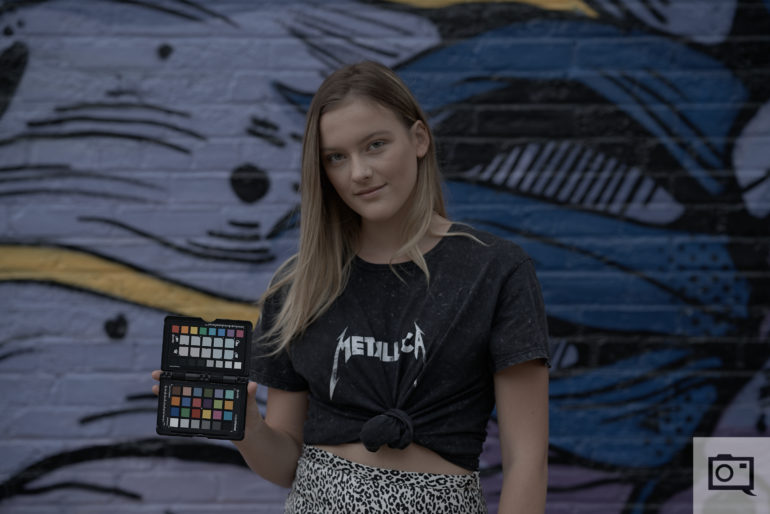
To begin, take an image of your subject with the ColorChecker Passport Photo 2 clearly visible within the frame. I have my client hold the ColorChecker Classic Target up while I take a test shot at the start of a shoot or during a wardrobe or lighting change to create reference photos. Then I can create color profiles for each setup. The same applies when I’m photographing products. Here’s an example of a reference photo I captured using a Sony A7R III that was imported into Capture One Pro 12. Note that Capture One has applied the generic A7R III color profile along with an Auto curve by default.
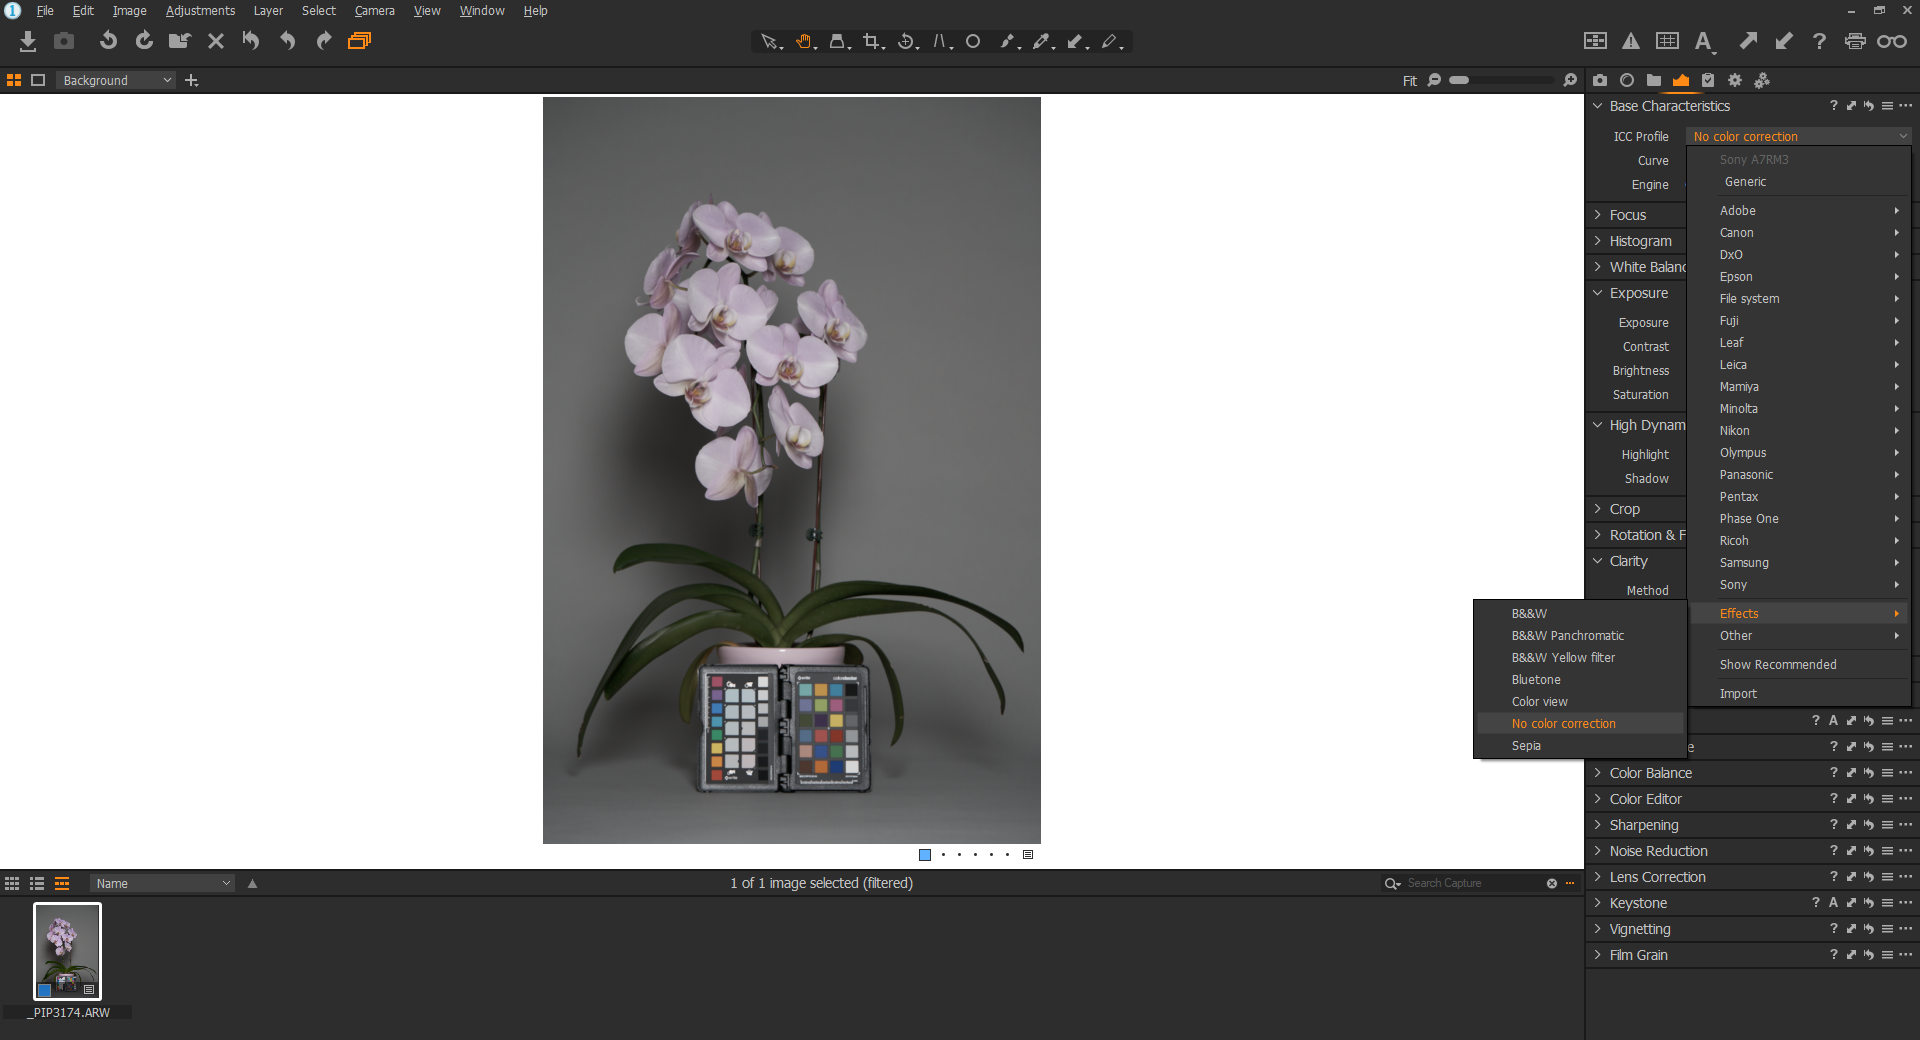
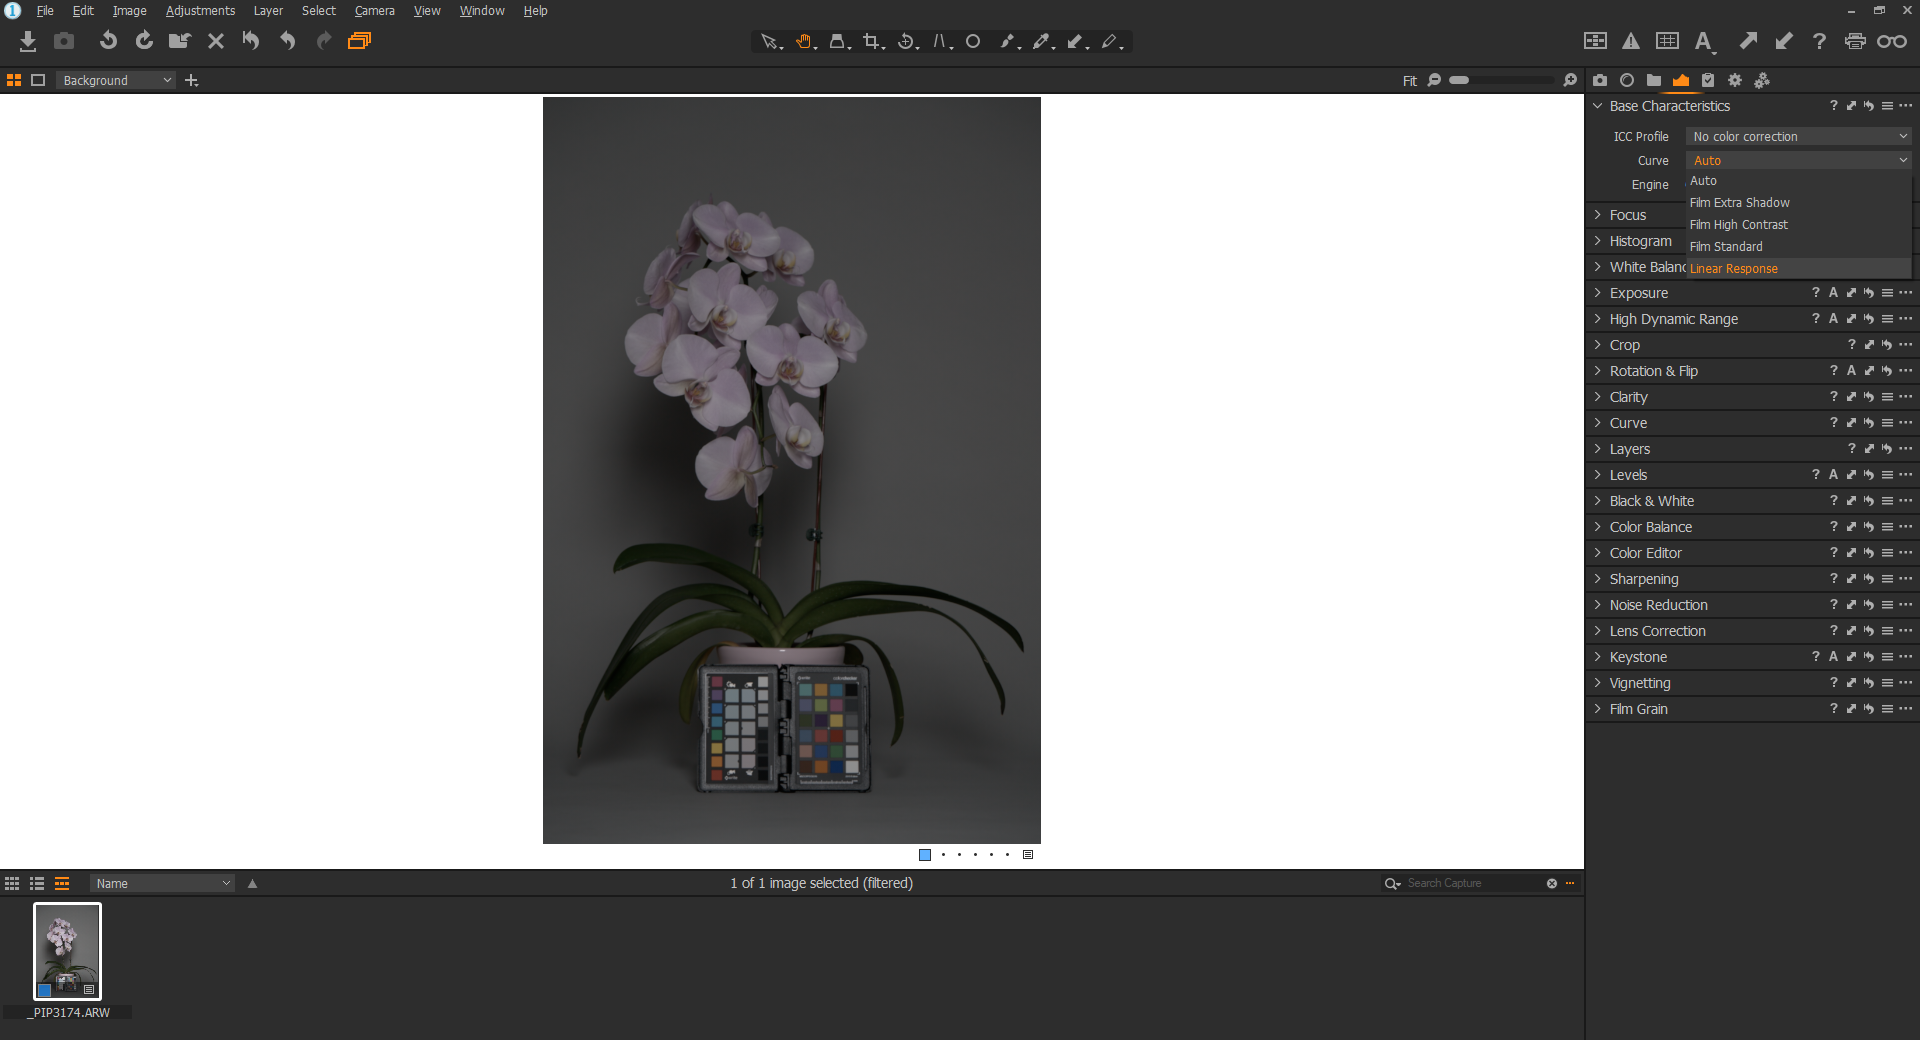
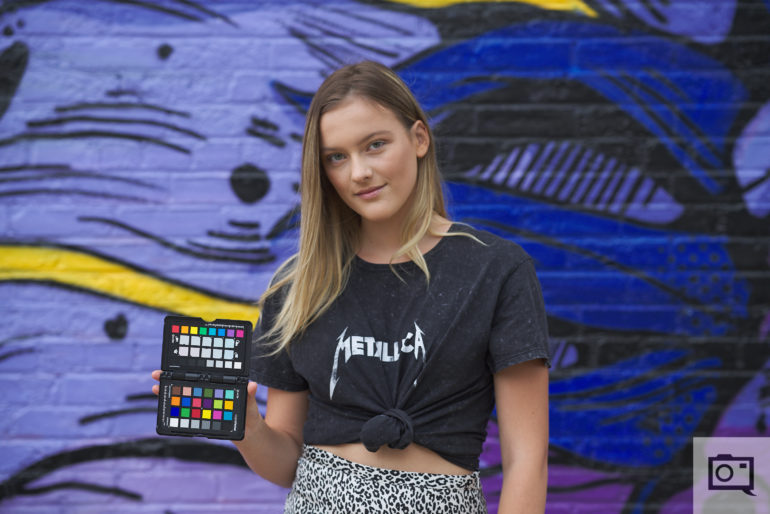
While the colors in the image look good with Capture One’s default settings, the point of the software is to make sure that all of the colors are accurate. To create a calibrated color profile, we’ll need to export a flat TIFF image that can be imported into X-Rite’s ColorChecker Camera Calibration software. Begin by setting the ICC profile in the image you want to export to No color correction. Remember to adjust the image’s Curve to Linear Response as well. Notice how much “flatter” the image looks with the auto adjustments removed.
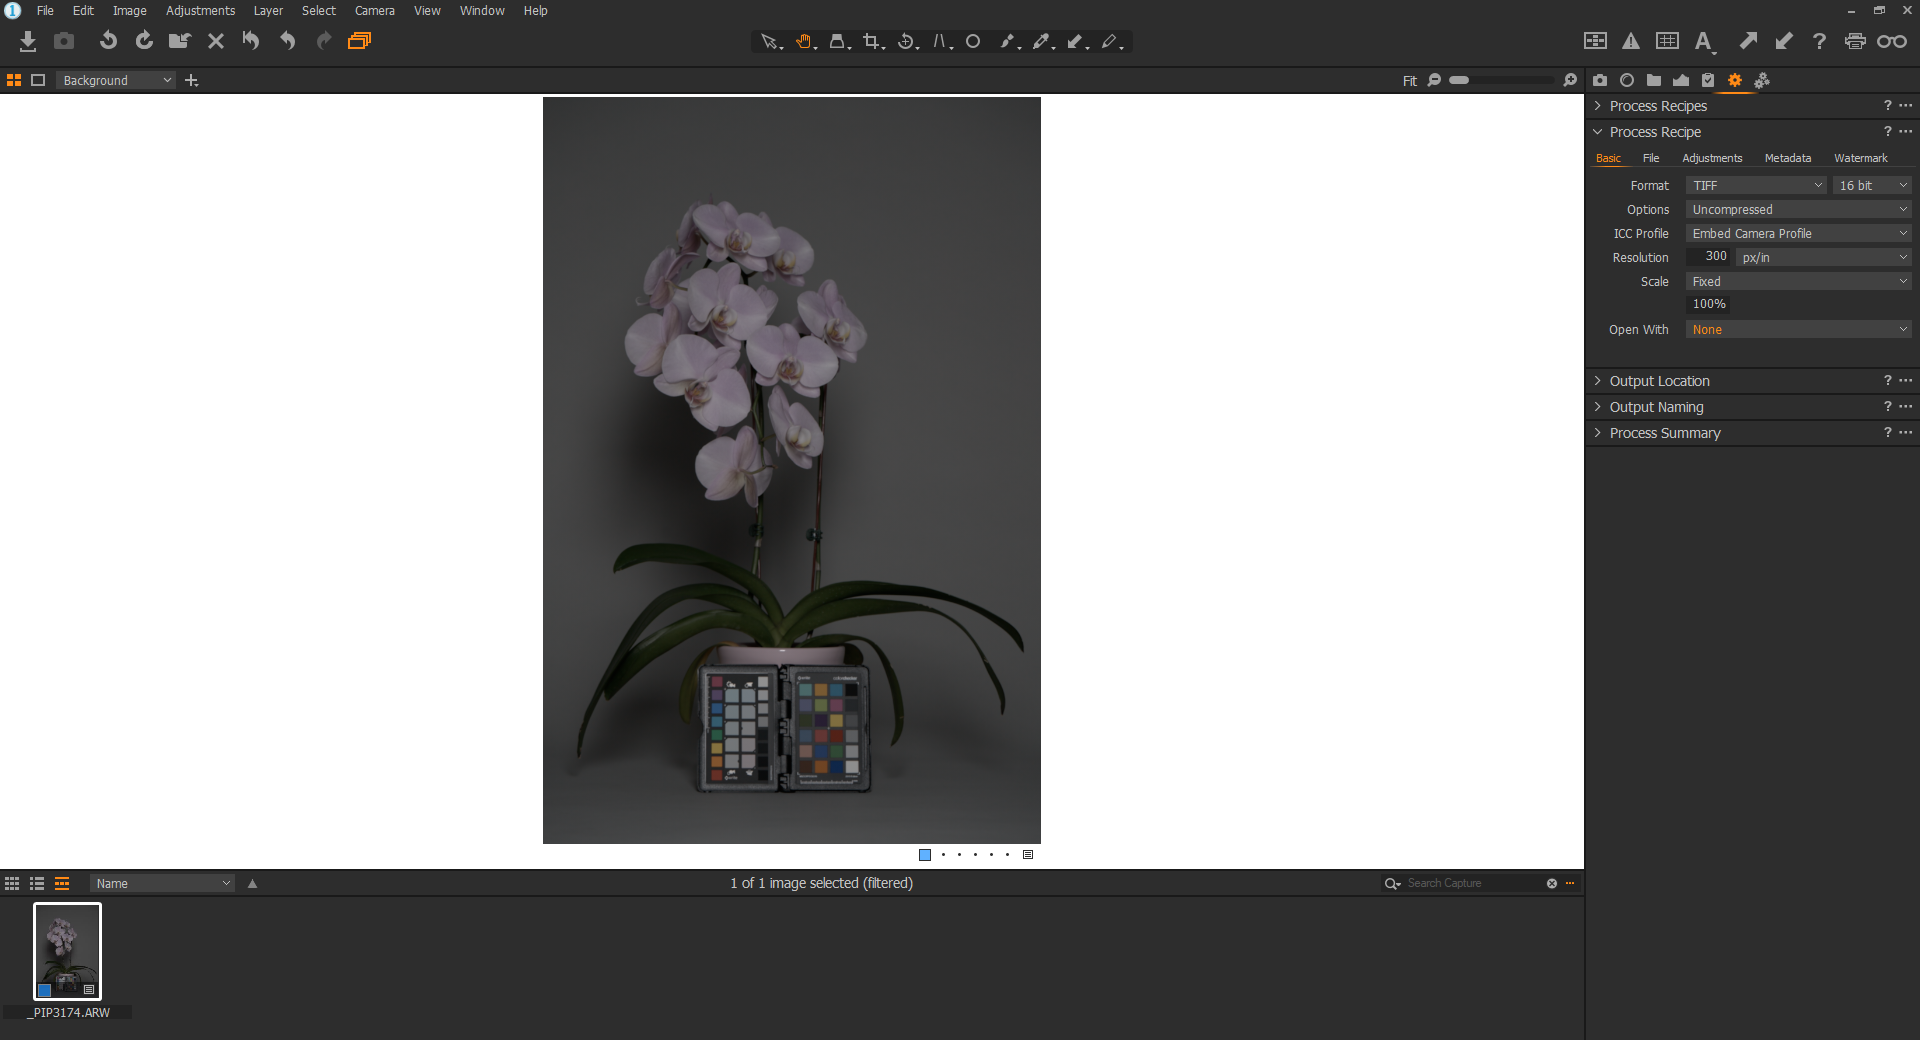
Having made the necessary adjustments to the image’s ICC profile and Curve, we are ready to export the file for import into the calibration software. Export the image as an uncompressed, 16 bit TIFF file with the camera profile embedded (see above screenshot for exact settings). After the TIFF has been exported, make sure to exit out of Capture One (more on this shortly).
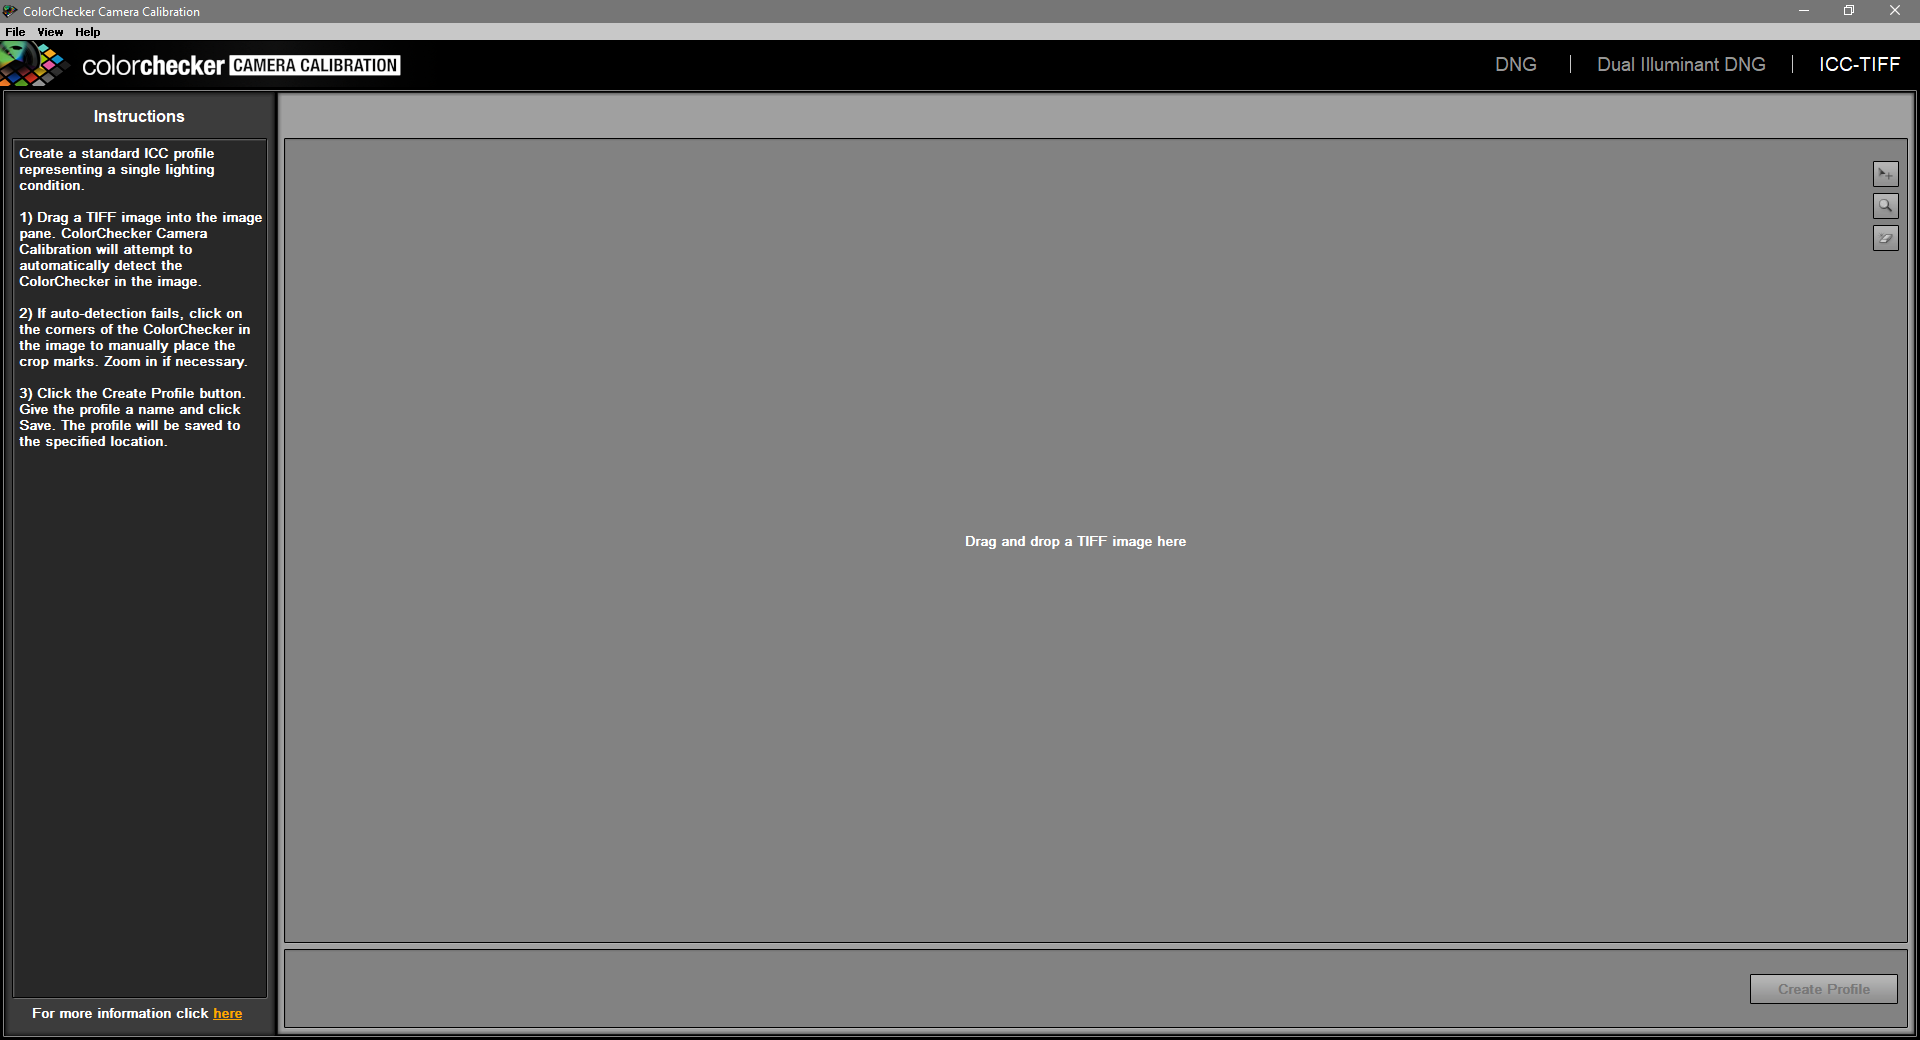
With the flat target TIFF exported, we can fire up X-Rite’s ColorChecker Camera Calibration software. Ensuring that “ICC-TIFF” is selected in the upper right, and simply drag the flat TIFF that you’ve exported from Capture one into the calibration software’s main window.

Once you’ve dragged the flat TIFF into ColorChecker Camera Calibration, the program will automatically detect the Classic Target within the image. Depending on your computer, this may take a few moments. Throughout our testing, Camera Calibration was able to successfully detect the Classic Target in every reference TIFF that we threw at it. If the detection is off, you can manually line up the green targets so that they line up correctly with each of the 24 color patches in the Classic Target.
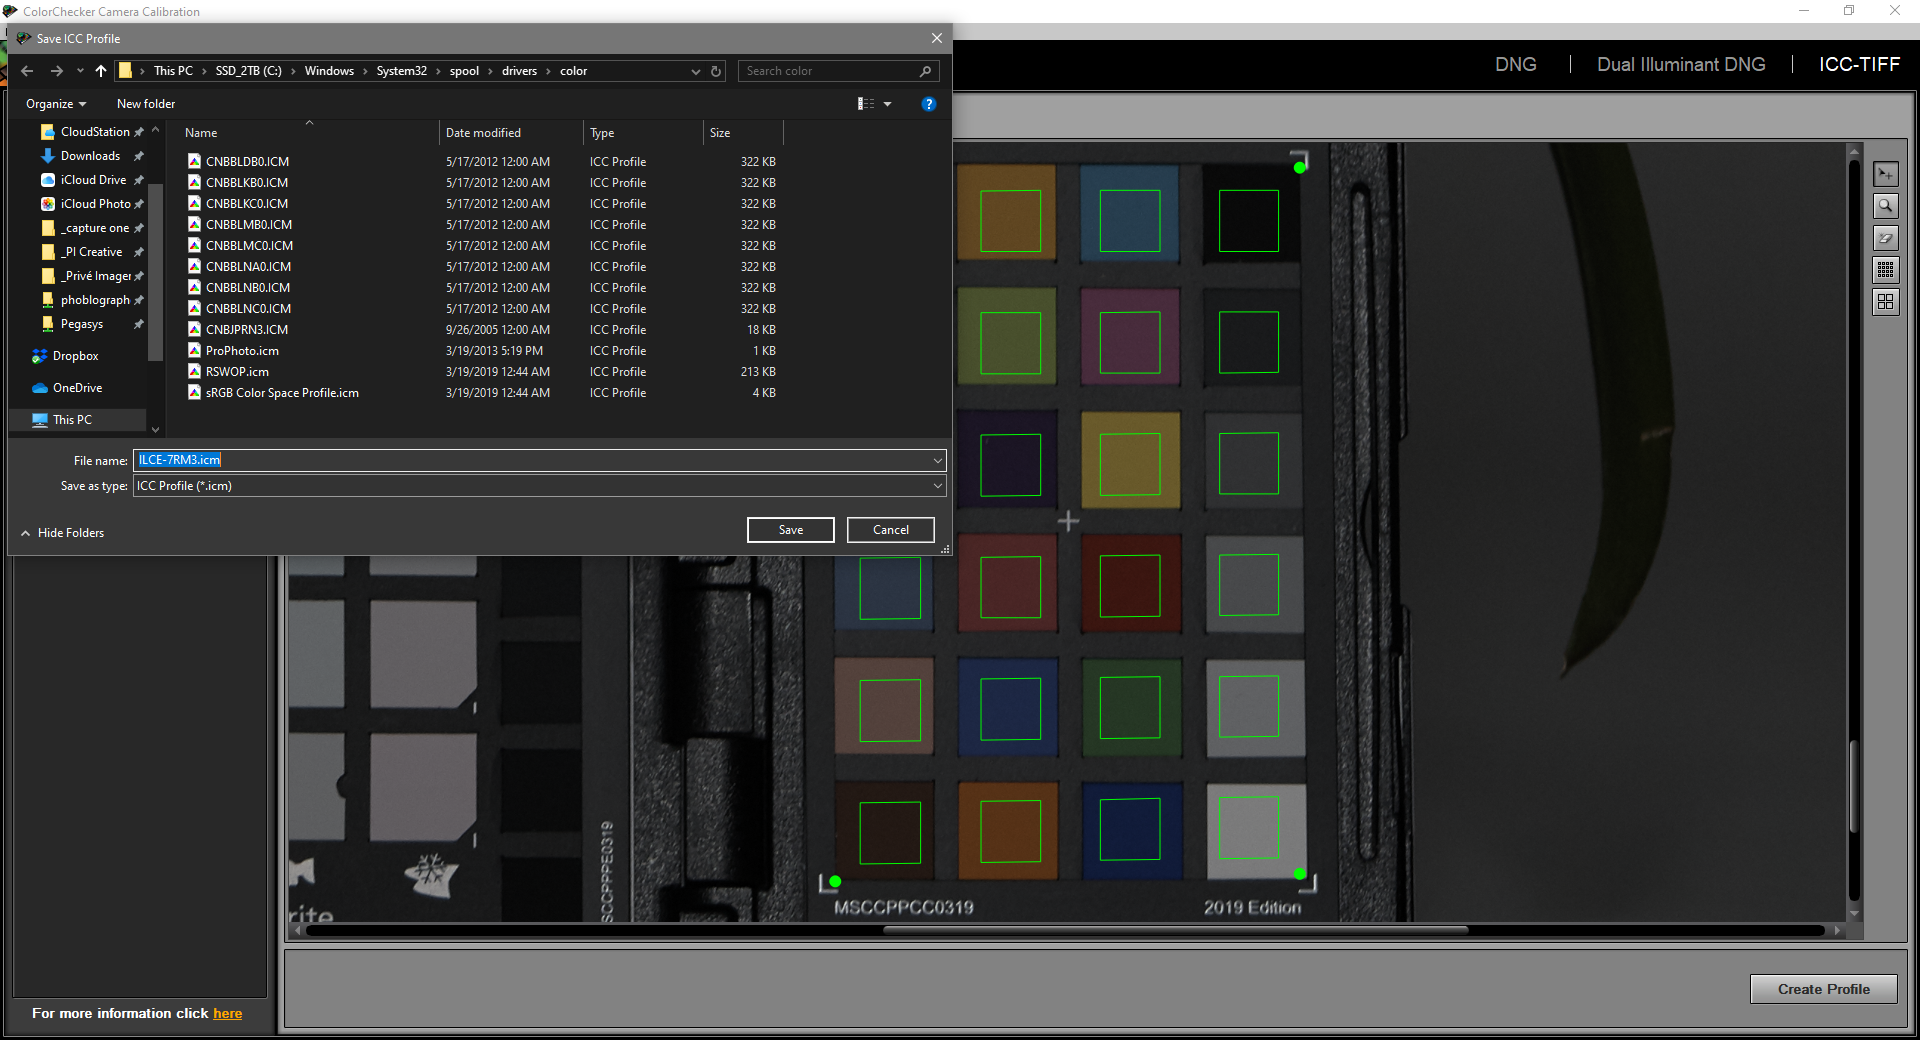
Once the software has successfully detected the Classic Target, click “Create Profile” on the lower right. A dialog box will prompt you to save the newly created ICC profile into your computer’s default color profile folder. By default, the new profile is named after the camera that captured the reference image, “ILCE-7RM3” in this case for Sony A7R III. You may opt to rename the profile to something easier to identify.
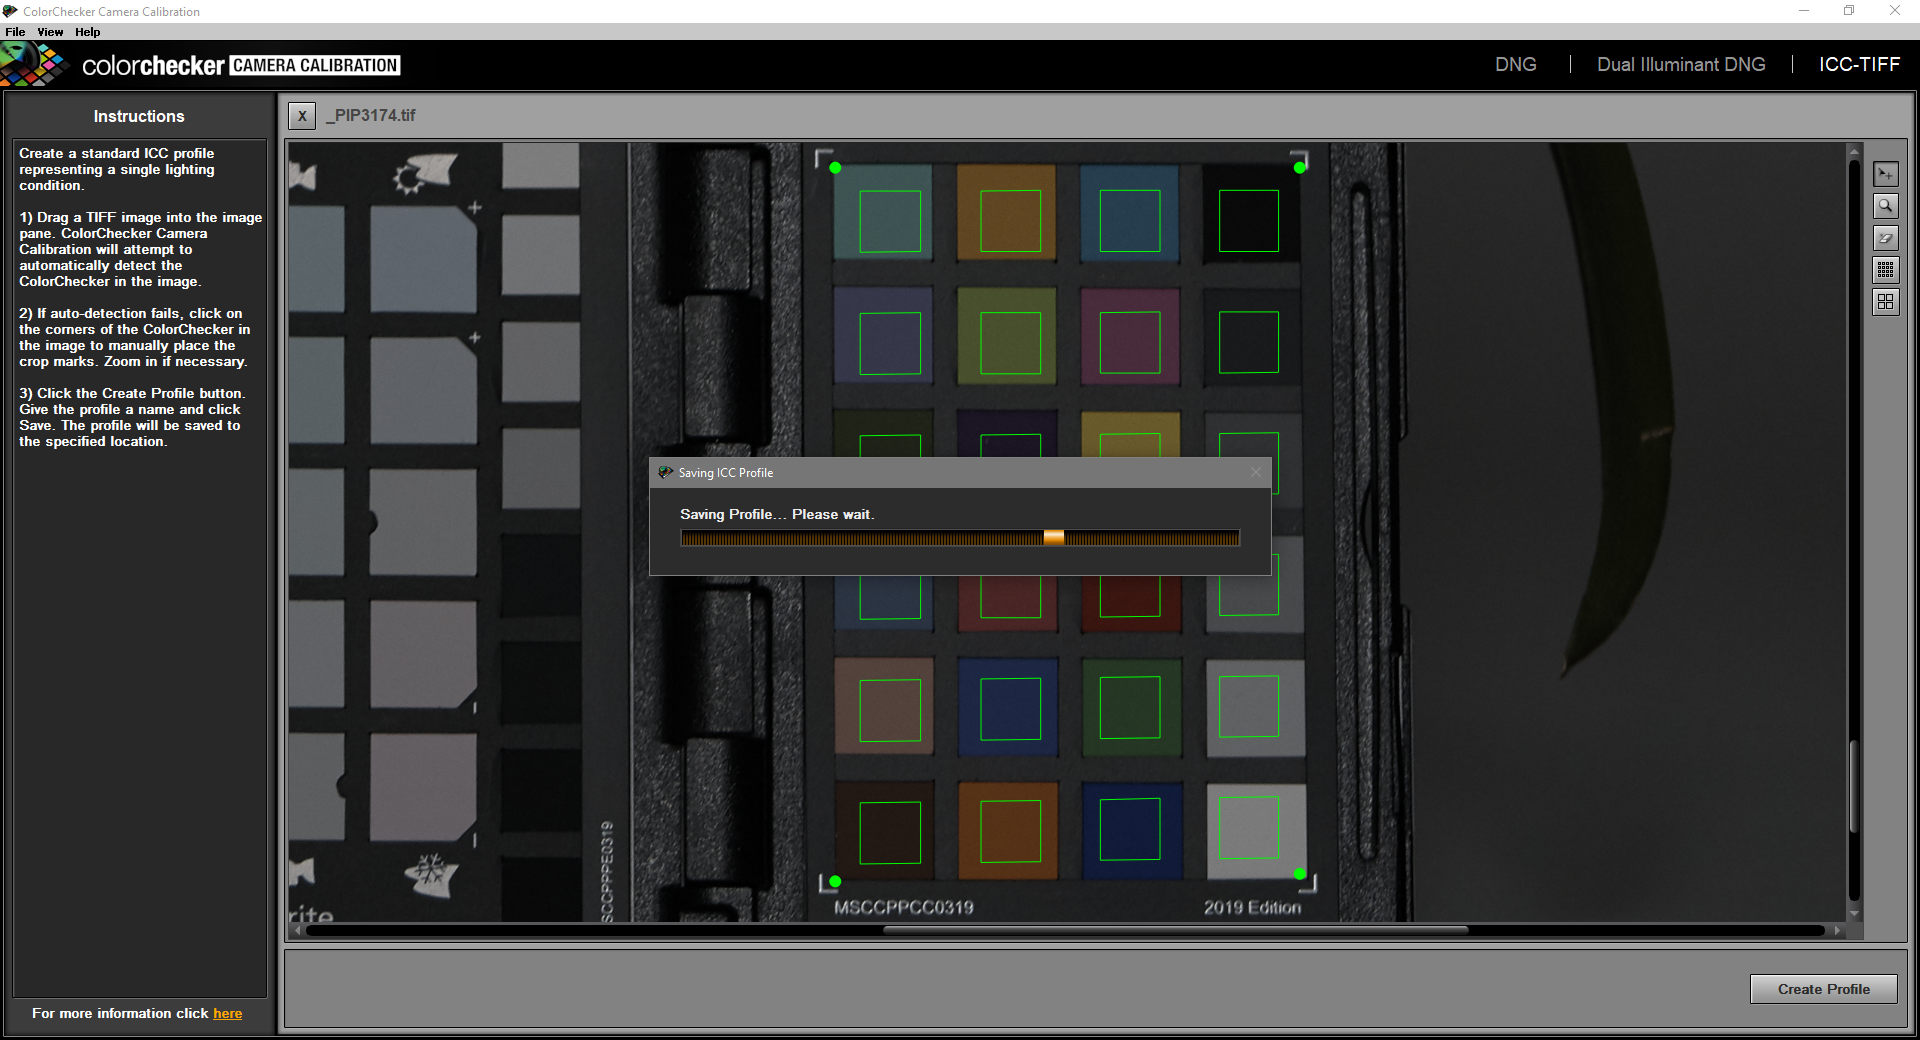
Give the program a few moments while it creates the new ICC profile.
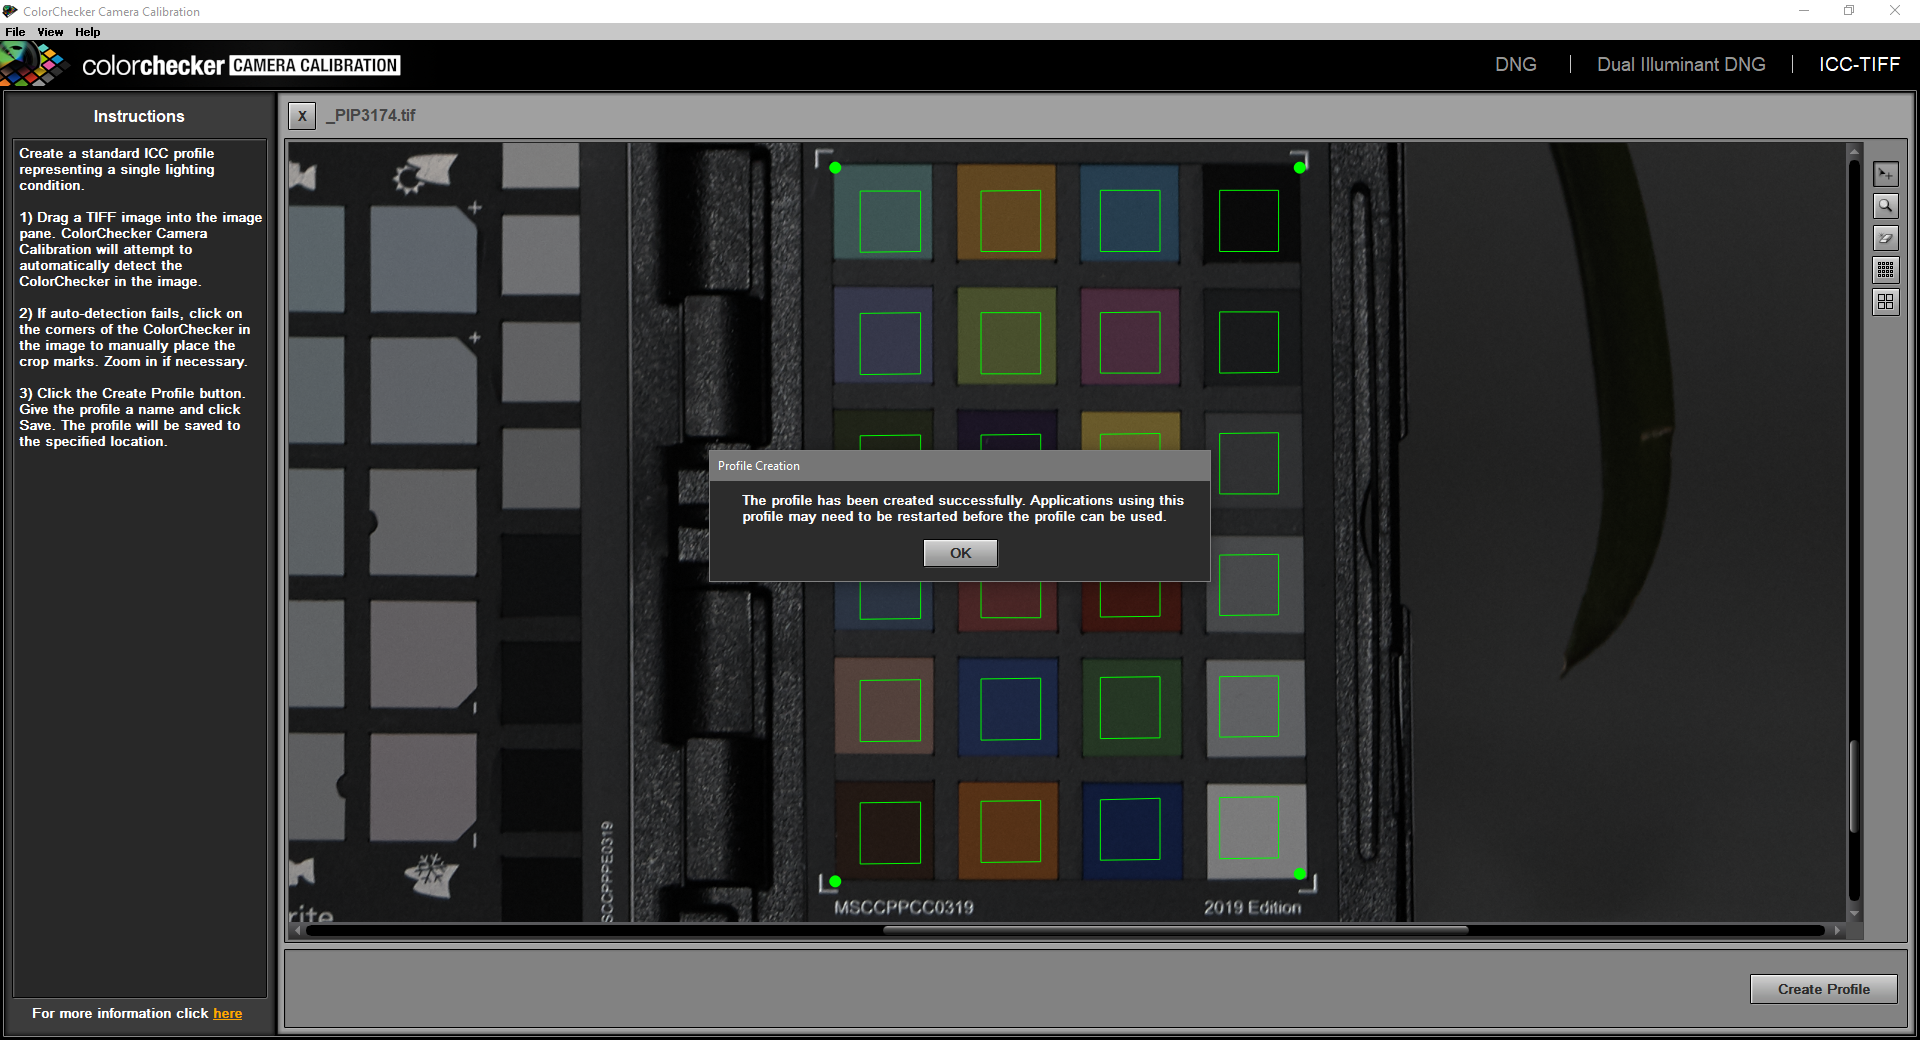
A prompt will pop up notifying you when the new ICC profile’s been successfully created.
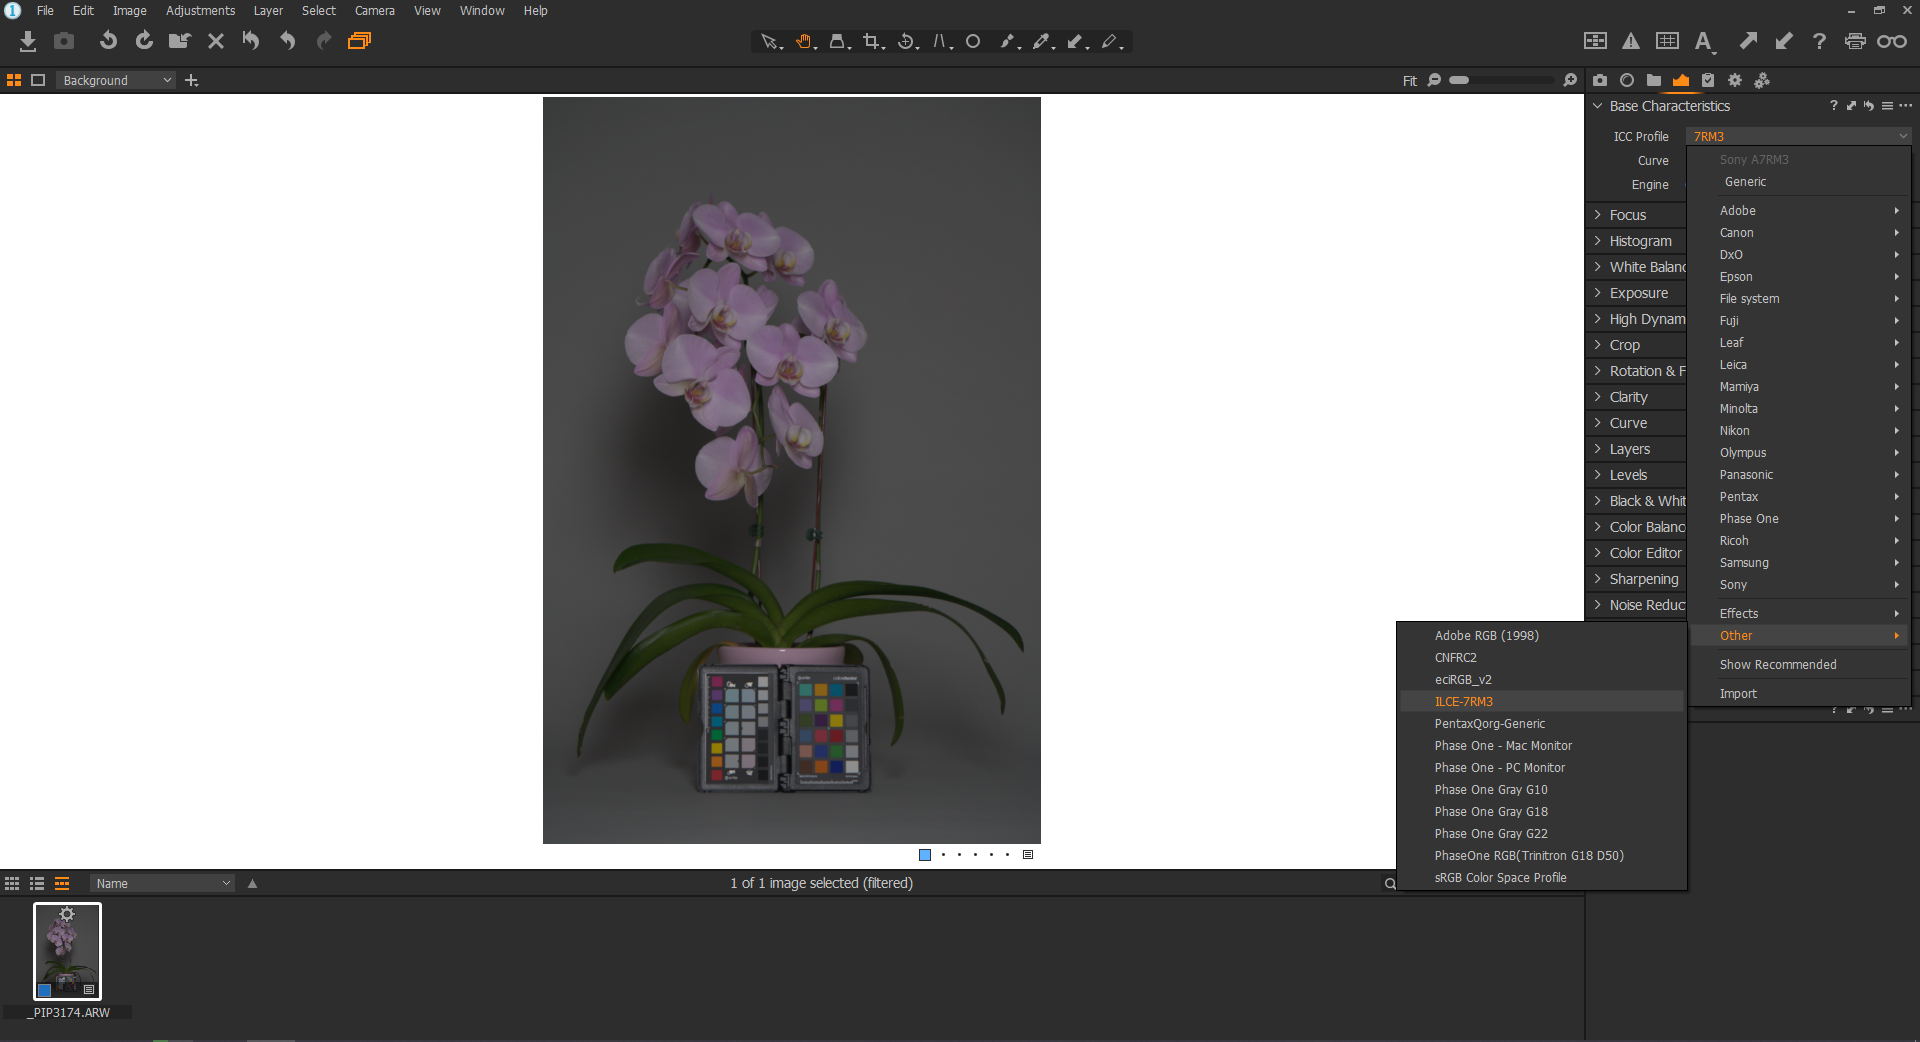
Now that you’ve got a new ICC profile using the flat TIFF that we’d previously exported, fire up Capture One again. The reason I told you to exit out of Capture One before is that it loads all of the color profiles on your computer at launch. The color-calibrated ICC profile should be located under “Other.” Click on it to apply the profile to your image and you can proceed with whatever edits you need to make to your image. Unless you’re shooting in a studio environment using consistent lighting setups, you’ll need to create new reference profiles whenever your environment changes. This can become quite a hassle because you’ll end up having to create (not to mention manage) a ton of color calibration profiles. For people like myself and the other editors at The Phoblographer who regularly shoot with different cameras and lighting equipment in a variety of different setups and locations, creating a color calibration profile for each permutation isn’t practical.
Sample Images
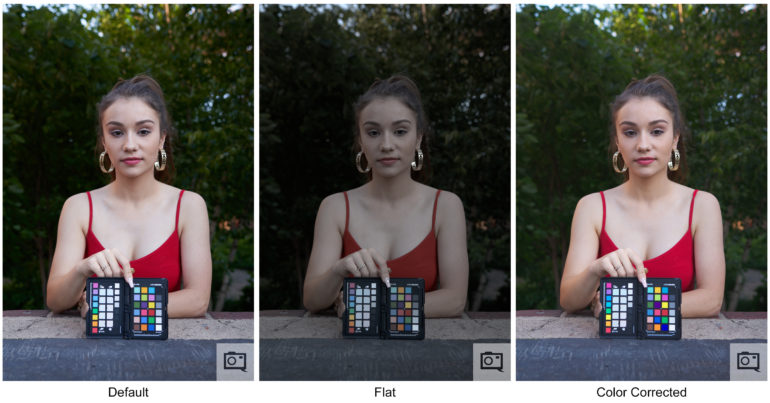
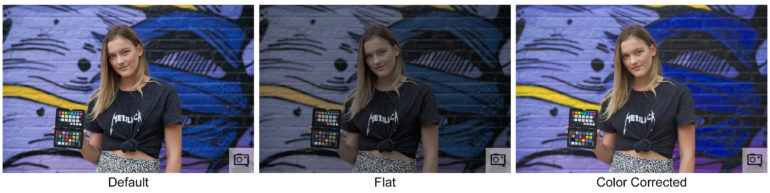
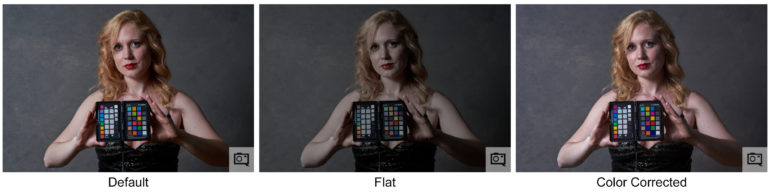
Here are some additional X-Rite ColorChecker Passport Photo 2 reference images I captured using my Sony A7R III. As a matter of ethics, none of the sample images seen within this review have been retouched. You can find standalone reference images towards the bottom.
- Sample Image #1

- Sample Image #2

- Sample Image #3
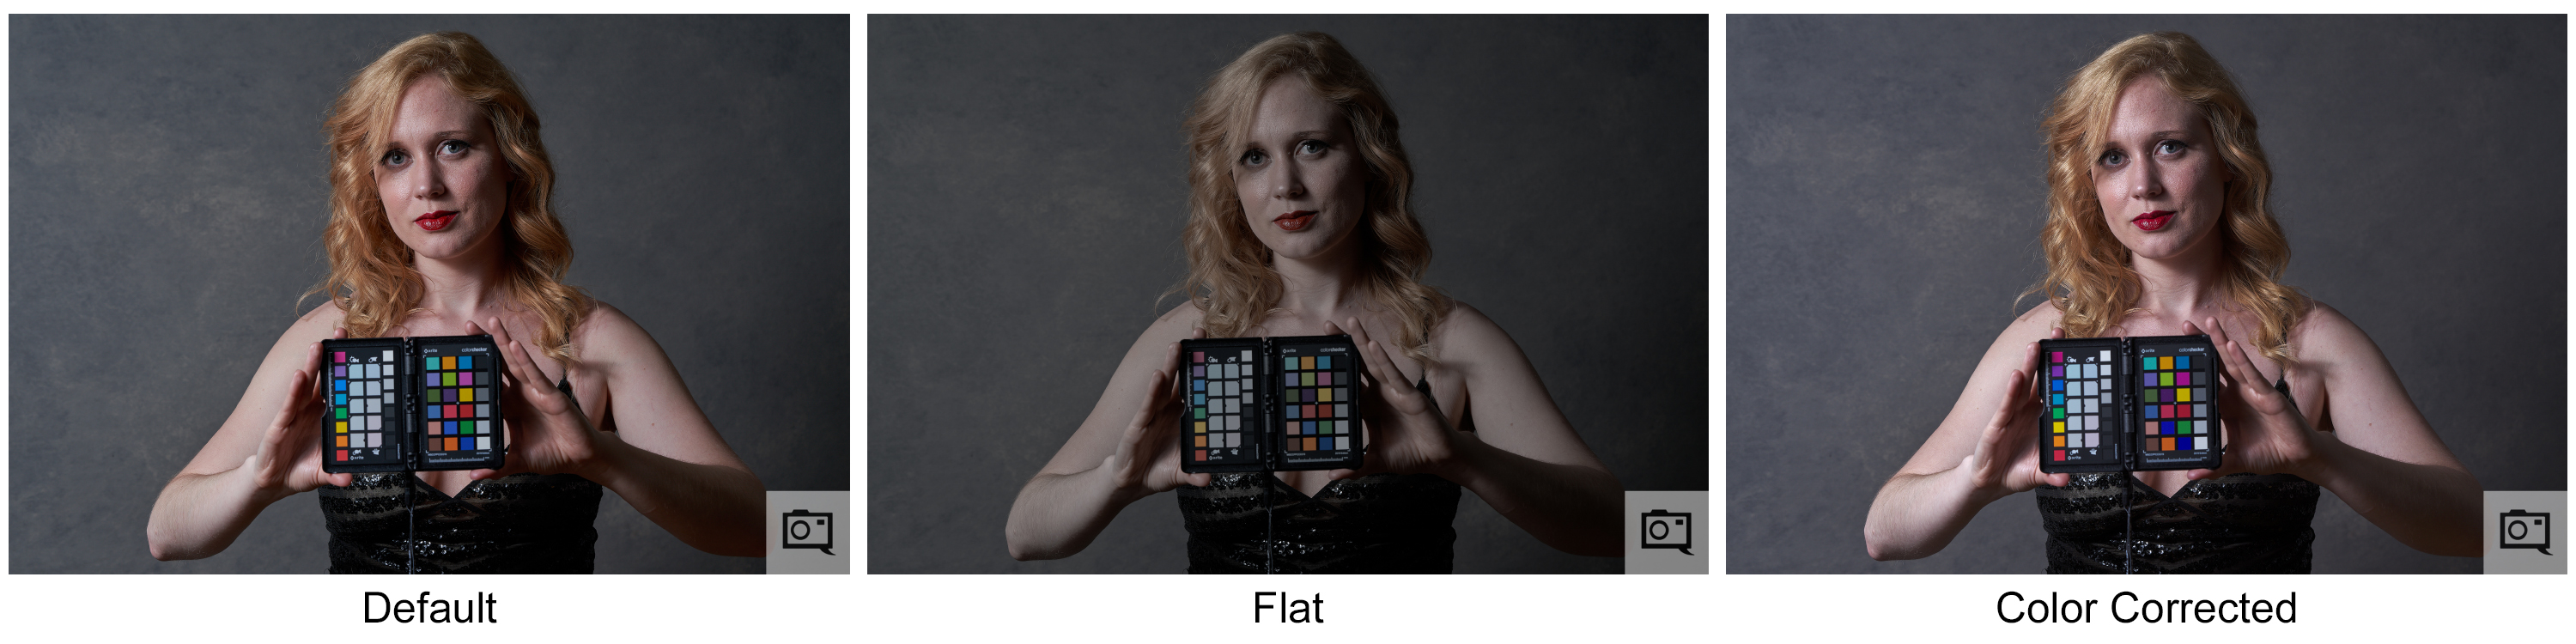
- Sample Image #1: Default
- Sample Image #1: Flat


- Sample Image #1: Color Corrected

- Sample Image #2: Default
- Sample Image #2: Flat

- Sample Image #2: Color Corrected


- Sample Image #3: Default
- Sample Image #3: Flat


- Sample Image #3: Color Corrected
Conclusions
Likes
- Small footprint makes it easy to keep with me at all times
- Solid hard plastic case keeps it from being easily damaged
- Straight forward operation
Dislikes
- Being able to calibrate within Capture One using a plugin instead of using the standalone calibration software would be great
- Using the ColorChecker to create custom profiles for every different lighting condition just isn’t practical for anyone not shooting strictly in a controlled studio environment
For photographers shooting high-end commercial work like catalogs, cosmetics, products, fashion, etc., being able to produce images with reliably consistent color accuracy is paramount. X-Rite’s ColorChecker Passport Photo 2 certainly helps to ensure that. Studio photographers dealing with high volume workloads will appreciate the ability to create custom color-calibrated profiles that can easily be applied to large batches of images in one fell swoop rather than having to color grade every picture individually. For most photographers, though, especially those who regularly shoot on location under a variety of different lighting conditions, the workflow involved in creating unique calibration profiles for each situation is too much of a hassle.
Further, a strong argument can be made for the need of a Passport being pretty null when the proper methods are taken in-camera. A photographer can lock their Kelvin or manually white balance and set up the lighting to be consistent. With lighting from folks like Profoto and a few others, your colors will always be consistent.
For most photographers, the colors their cameras are able to capture will be more than satisfactory and it isn’t practical for them to invest the money or time in a ColorChecker. This is particularly the case when most images today are being consumed on uncalibrated screens like phones and tablets which are beyond the photographer’s control to begin with. If X-Rite can develop a plugin that can seamlessly analyze raw files within Capture One and render obsolete the current workflow (having to export a flat TIFF into their standalone software to generate camera profiles every time), then that would be revolutionary.

X-Rite’s ColorChecker Passport Photo 2 receives four out of five stars. You can pick one up for only US$119 over at Adorama. The ColorChecker Camera Calibration software is available as a free download on X-Rite’s official website.
Get rid of the ads!
Did you enjoy reading this article as much as we enjoyed writing it? There's a way to support us and our reporting, getting ad-free navigation and more as a bonus. Subscribe to us for less than a coffee per month —just $3.99— or take advantage of our yearly subscription with a hefty discount for only $25.- An ad-free experience
- A free mystery box for Lightroom or Capture One
- All the books in our store
- 20% discount on Capture One
- 30% discount on Imalume Photo Theft Protection
- 20% off Herbs and Kettle Tea Company.
- 20% off your order from MPIX printing services.
- 5% off Viltrox Products via their eCommerce store.
- 10% off all film developing, printing and scanning services from Blue Moon Camera and Machine
- 15% off 7Artisans products: The lens and accessory maker is offering a sweet discount for Phoblographer's readers.