
Last Updated on 05/20/2019 by Mark Beckenbach
If you’re the type to often shoot at 35mm or wider, then a 50mm lens could be ideal for portraiture.
Photographers who often reach for 35mm or 28mm lenses can make a great case for using the 50mm lens for portrait photography. At times, an 85mm lens can feel too long, but modern 50mm lenses like a Canon RF 50mm f1.2 L USM can render a look like much of what’s on the market today. As one of its biggest advantages, it lets you frame your scene in tighter locations and also keeps you within a closer physical working distance to the subject. Best of all, due to the f1.2 aperture, the lens lets you seriously isolate your portrait subject in a way that only most 85mm lenses can.
How Close Should You Be with a 50mm Lens?

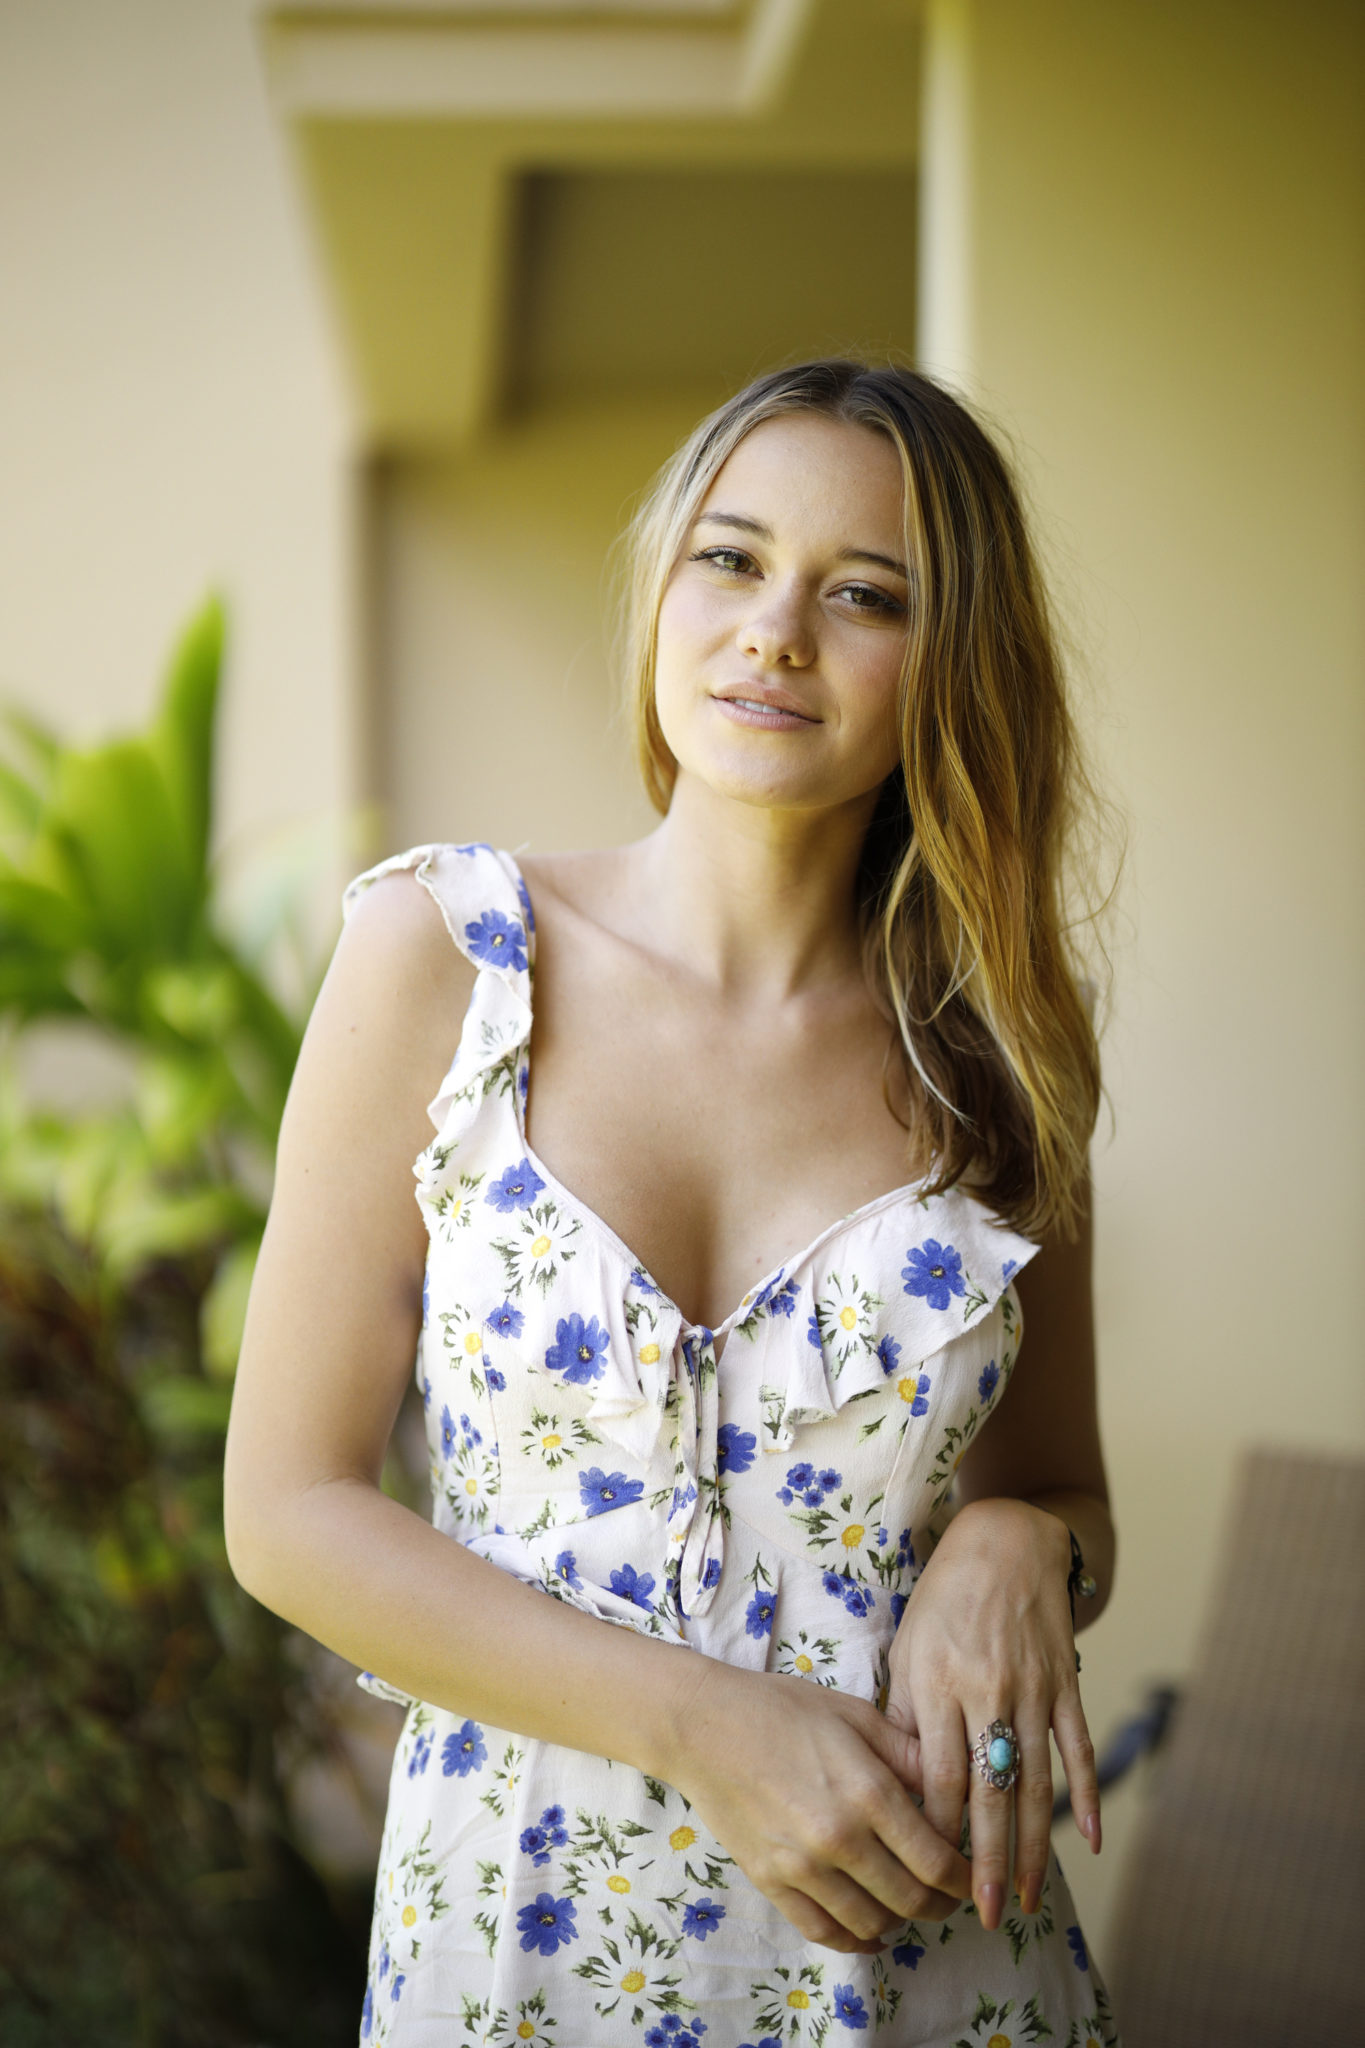
Though the issue of distortion is mostly solved in either post-production software or within the camera and lens’ peripheral correction algorithms, perceptual distortion is something the laws of physics just can’t get around. The mentality behind working with most wider angle lenses is to get closer to your subject. But with a more normal ranged focal length, you’ll need to take a few steps back. The design of a modern 50mm lens like a Canon RF 50mm f1.2 L USM lets you flawlessly photograph around 1/2 to 3/4ths of an average person without getting into a perceptual distortion range. If you’re specifically photographing a model, you can afford to get closer.
“In general, the larger and closer the light source is to your subject, the softer the light will be. Soft light can deliver a shadowless look but shadows can also add a specific mood to the scene synonymous to a painterly look.”

To further add to working with a 50mm lens for portrait photography, consider the main light source and its distance from your subject. In general, the larger and closer the light source is to your subject, the softer the light will be. Soft light can deliver a shadowless look but shadows can also add a specific mood to the scene synonymous to a painterly look. A great starting point is working with an off-camera flash and an umbrella to the side and in between you and your subject. Your umbrella should be larger than the area of your subject that you’re photographing. To clarify that statement, if you’re working with a 40 inch umbrella, that area is larger than the subject’s head–and so that entire area will be delivered soft light. But 40 inches isn’t larger than their overall figure, and to that end the light will be harsher once you get into photographing your subject from a further distance away (though the face and other parts will still remain soft). Then consider your distance from the subject when using a 50mm lens for portrait photography. The Canon RF 50mm f1.2 L USM has overall great image quality, and I like to say that it’s difficult to make a bad portrait with it.
“…with a more normal ranged focal length, you’ll need to take a few steps back. The design of a modern 50mm lens like a Canon RF 50mm f1.2 L USM lets you flawlessly photograph around 1/2 to 3/4ths of an average person without getting into a perceptual distortion range. “
Composition: Landscape vs Portrait Orientation

I genuinely feel that not enough educators talk about the importance of composition when it comes to doing portraiture. With a 50mm lens, you have to be a bit more creative, and that’s why it’s sometimes seen as a more difficult optic to work with. My general rule: leave limbs out of the edges as much as you possibly can. The reason for this is because around the edges is where any lens will start to show distortion and you therefore will be doing an injustice to your subject. However, the Canon RF 50mm f1.2 L USM keeps that all under control. As a guide, the rule of thirds dictates that you’re supposed to compose your scene based on the intersecting lines of the frame. (You can activate these in a camera like the Canon EOS R.) They’ll come in handy with a lens like the Canon RF 50mm f1.2 L USM. Where this gets even more complicated is with your orientation.
“My general rule: leave limbs out of the edges as much as you possibly can.”
If you’re shooting in portrait orientation, the tendency (that results from what this focal length is) is to get really close to your subject. But you don’t need to because this is a normal focal length and it’s going to render your subject pretty accurately. The bigger problem: you’re bound to get limbs in the edges of the photo. It’s very difficult to prevent that and sometimes asking your subject to squish themselves into the center of the frame doesn’t produce flattering results. So here are some tips:
- Use a wider aperture to blur out any blemishes or parts of the scene that may look distorted (f2 or anything faster works). Luckily with the Canon 50mm f1.2 L USM RF you can shoot at an even wider aperture.
- Ask your subject to stand straight at you.
- Take careful note of what their higher shoulder is.
- Adjust them accordingly to flatten their profile.
- To keep the profile flatter, have them adjust where they’re throwing their weight.
Eye and Face Detection in Portraiture

Face and eye detection in autofocus has been around for years, and doing it with a lens that shoots as wide open as the Canon RF 50mm f1.2 L USM is something that greatly aids in the typical flow of a portrait shoot. With this setting activated on the Canon EOS R, and then used in conjunction with the Canon RF 50mm f1.2 L USM, all you need to do is ensure that the lighting on the subject is exactly what you want, then autofocus and shoot. If you’re working with a model, it means that they can change up their positions and poses to give you variety in your portraits. All you’ll need to do is give them a bit of direction and continue shooting.
Composing by Color (and Setting Your White Balance!)
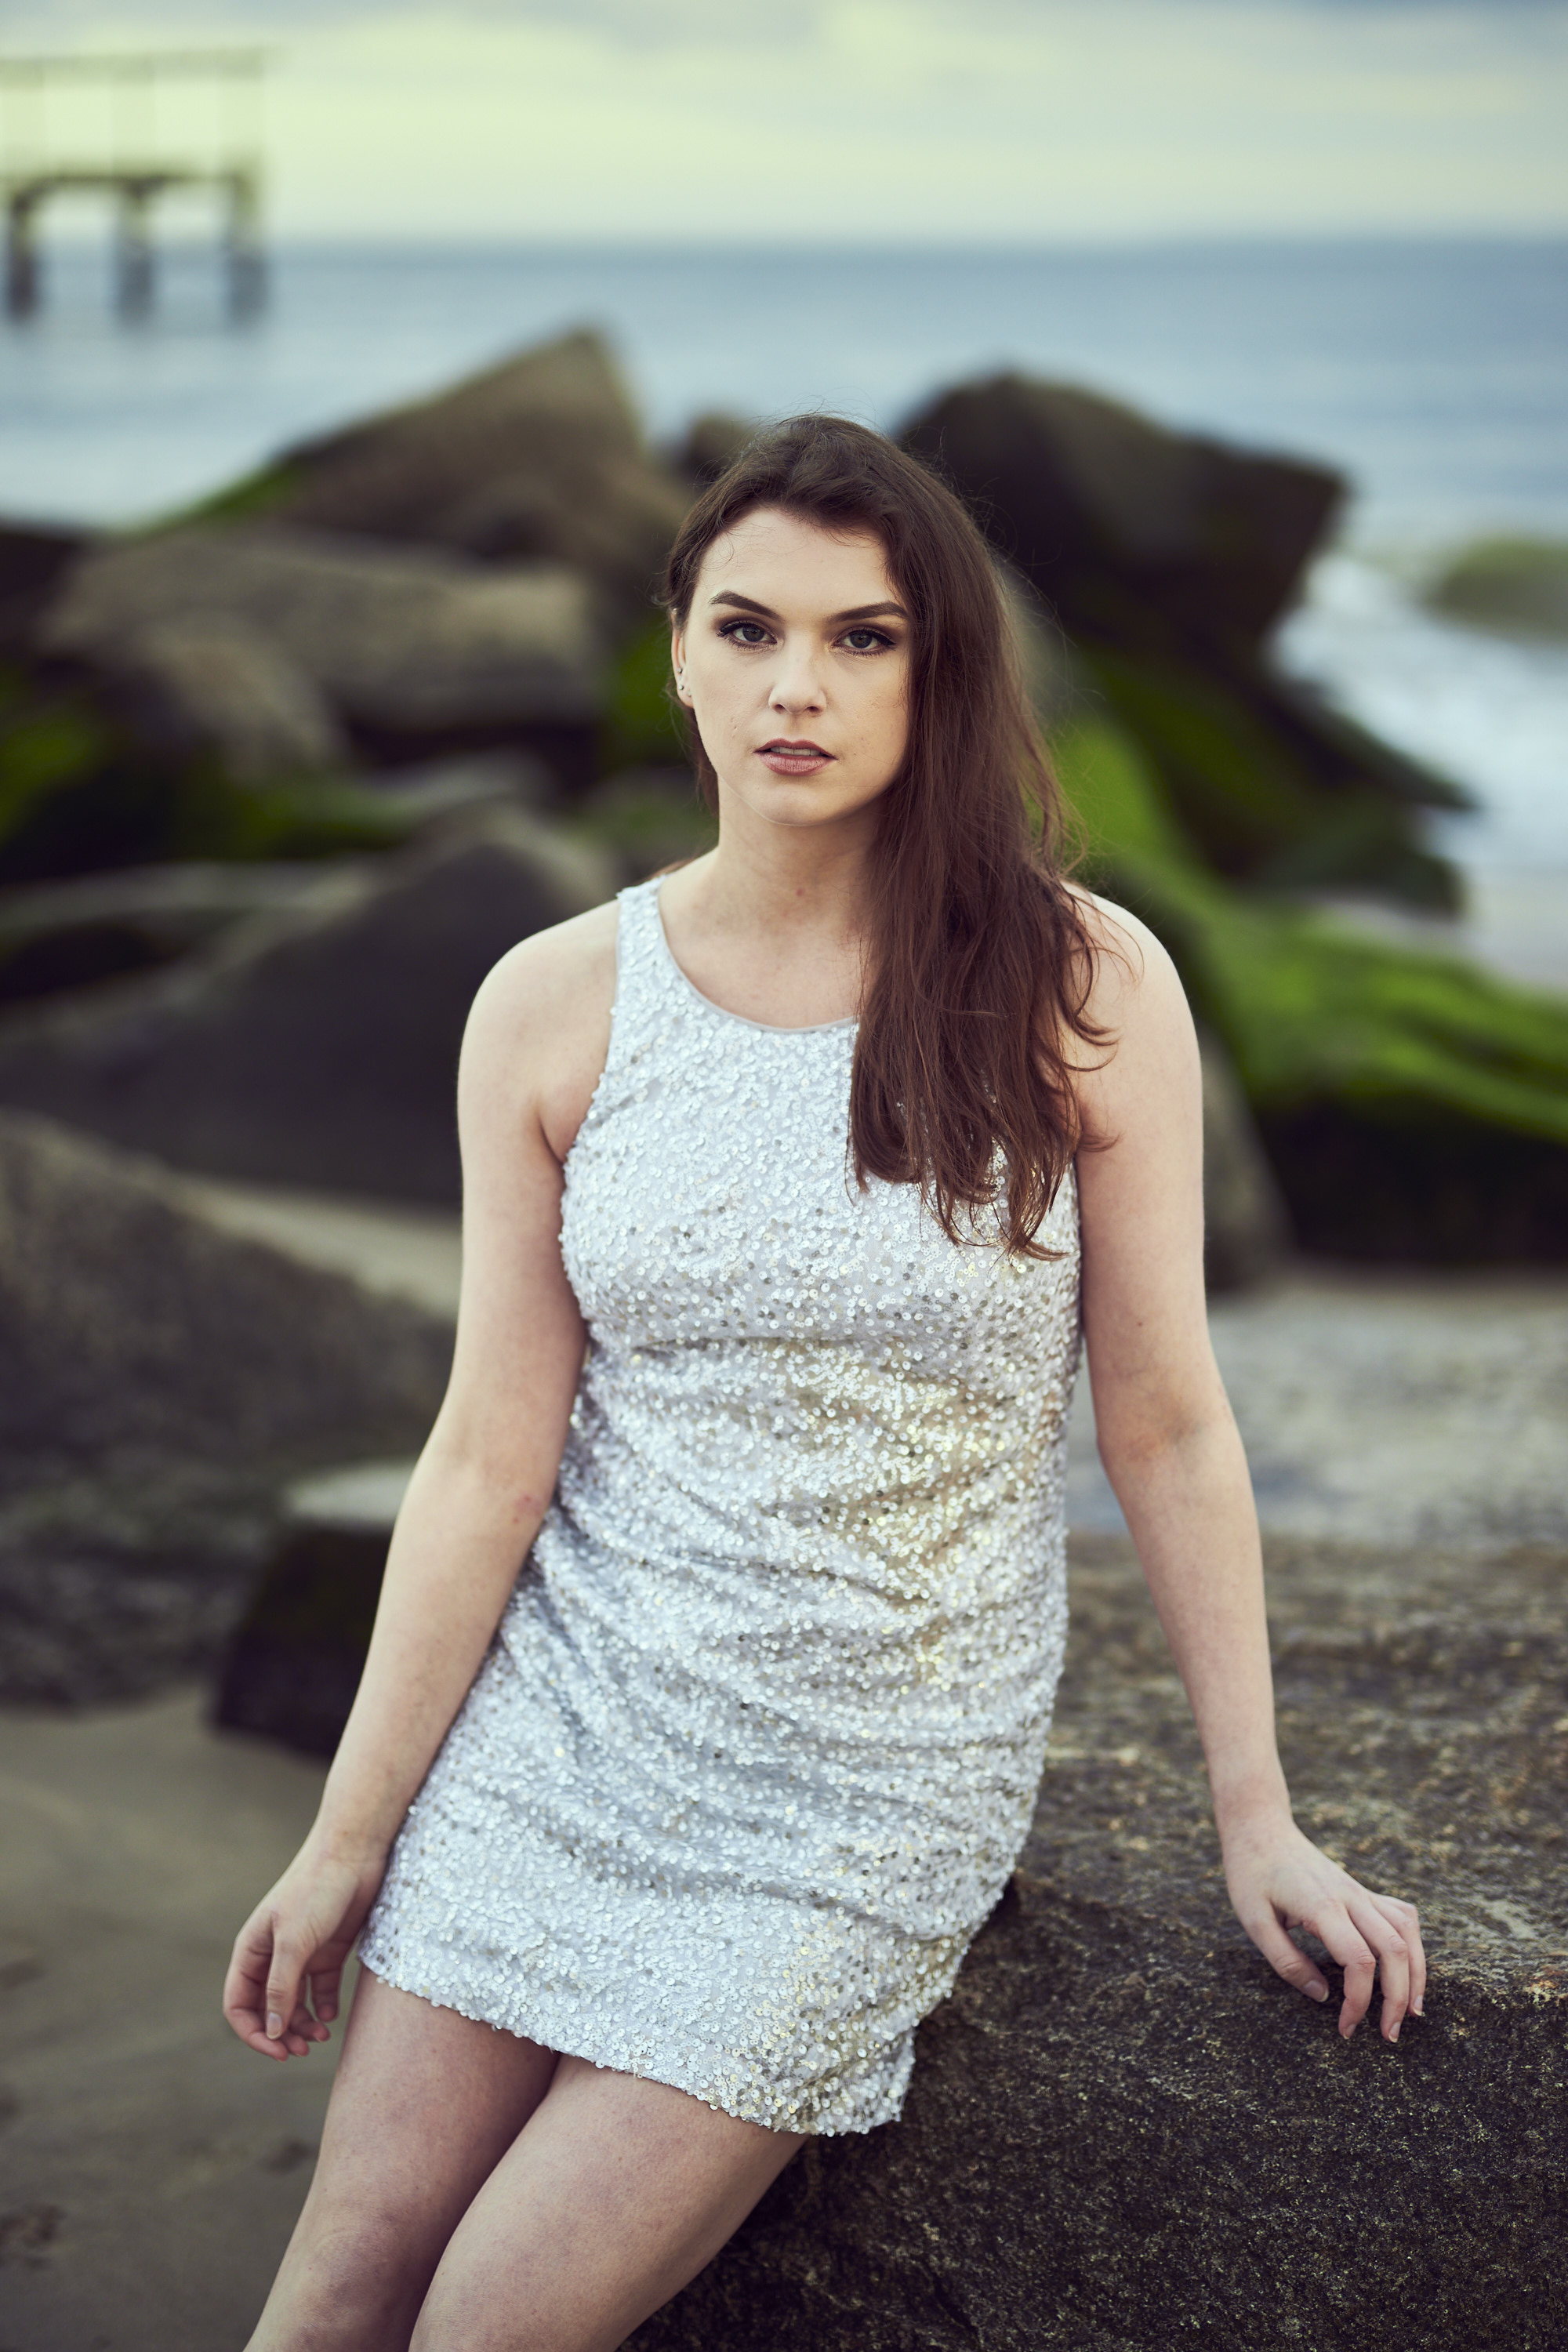
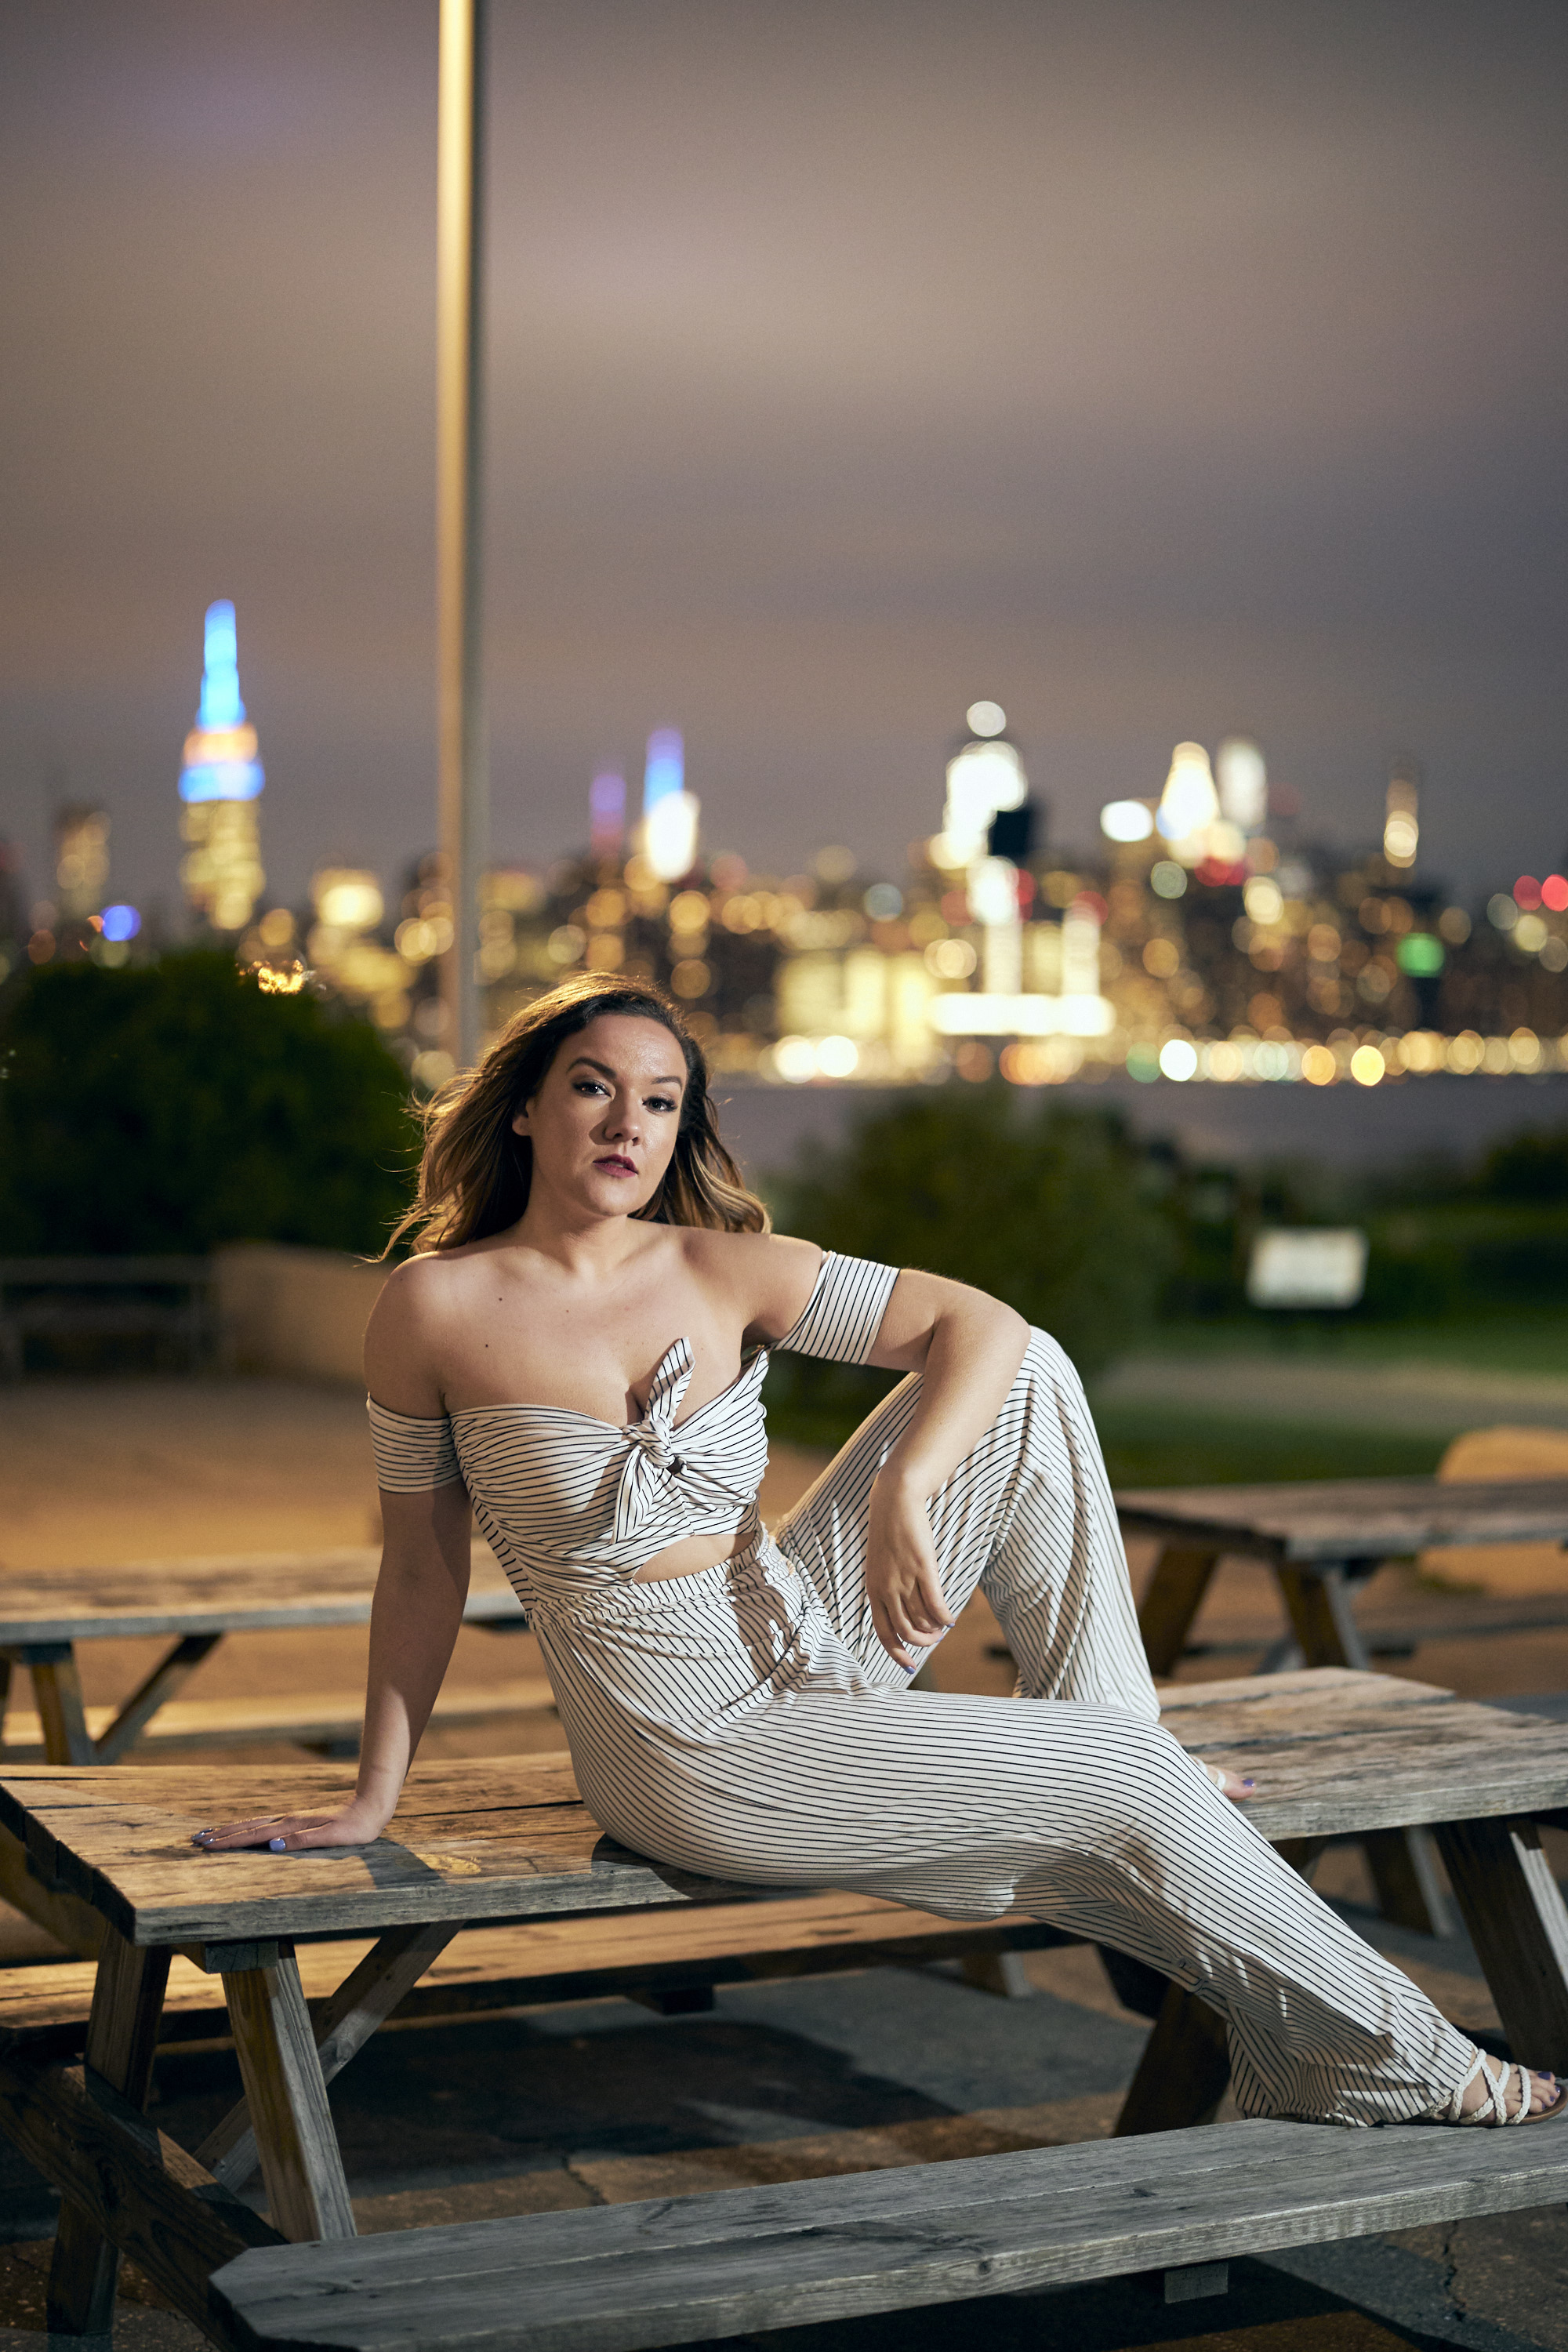
Composing a photo with the elements within the scene is one way of doing it, but also very important is the idea of composing a scene by color. Let’s make this simple by starting out with three primary colors in the photo. When you look at the ROYGBIV spectrum, try to have different elements of the scene be different colors so that they don’t blend into one another. That can be seen in the images within this section. The above image shows the model bathed in a blue light against an otherwise orange background. To get this look we adjusted the white balance. Though auto white balance on the Canon EOS R does a great job by most photographer’s standards, I’m a firm believer in using every tool available and maximizing your time. To that end, a good starting point is working with a manual white balance of 5200K (daylight) or 3200K (tungsten). These are old school film white balances and work well with the Canon RF 50mm f1.2 L USM‘s shallow depth of field when shooting wide open to deliver a filmic look. For reference, the above photo was shot at 3200K.
“Use a wider aperture to blur out any blemishes or parts of the scene that may look distorted (f2 or anything faster works). Luckily with the Canon RF 50mm f1.2 L USM you can shoot at an even wider aperture.”
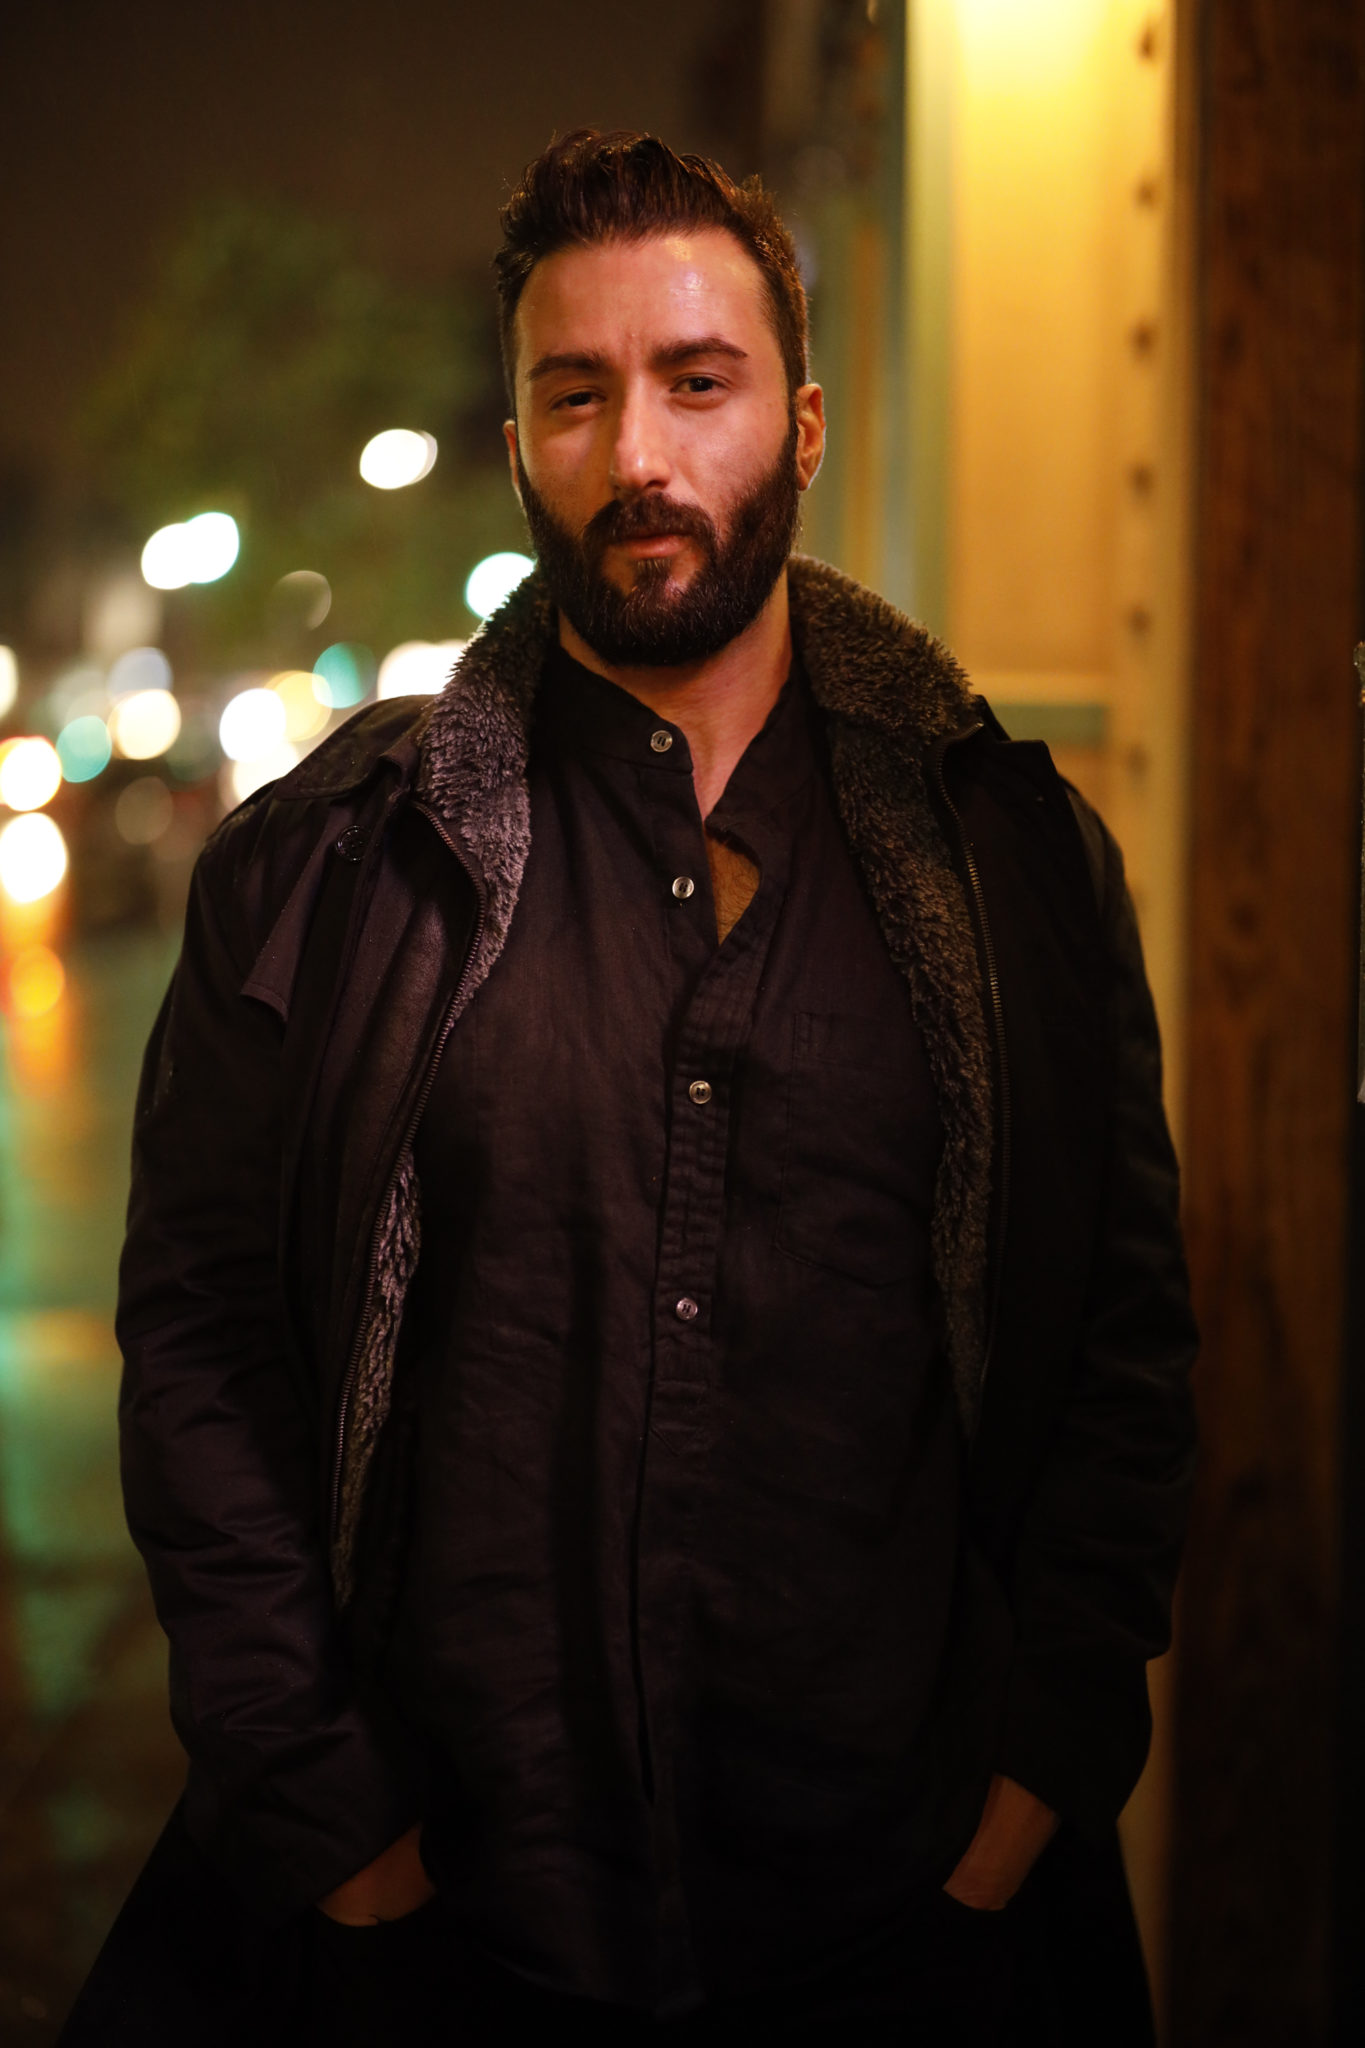
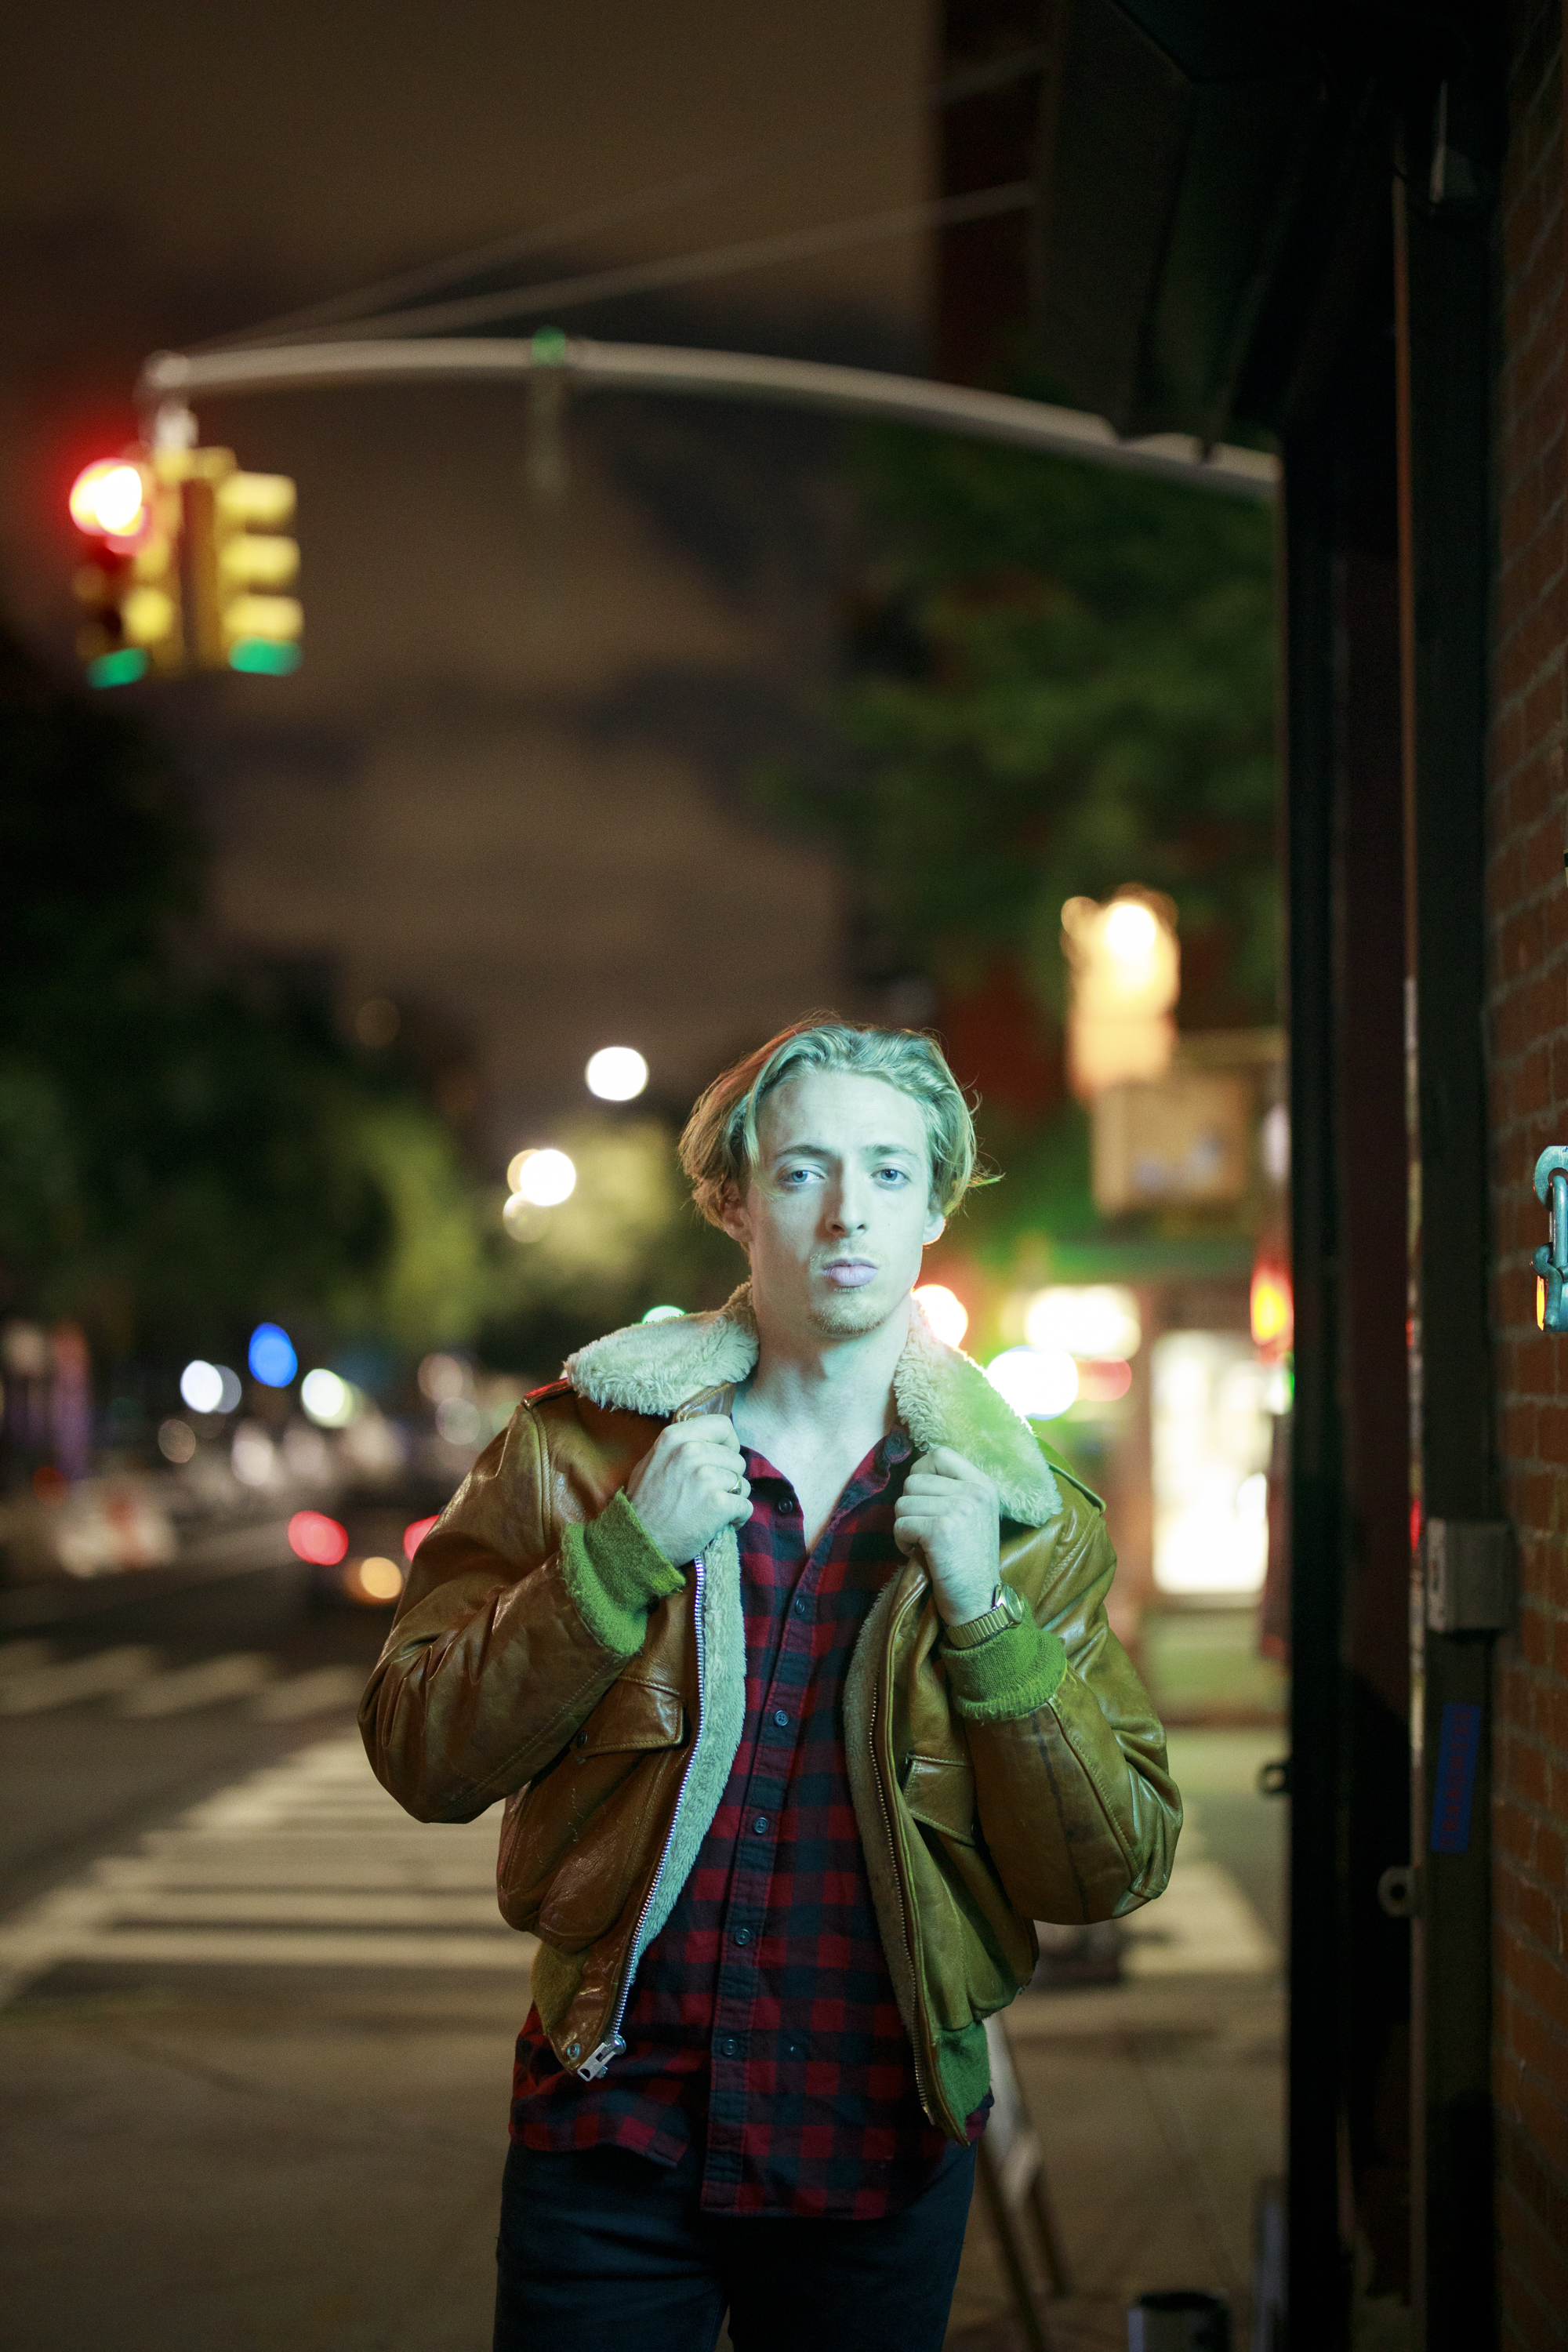
In this photo, the subject was shot at 5500K daylight. The light on the side is more orange and red. Notice how to it makes him look more red to therefore then blend into the scene. If that’s your creative vision, then I encourage you to embrace it. But when it comes to composing a scene by color, this is a poor example of how to do it. While he may be outlined by brighter orange and green, he’s still blending into the scene overall in terms of color
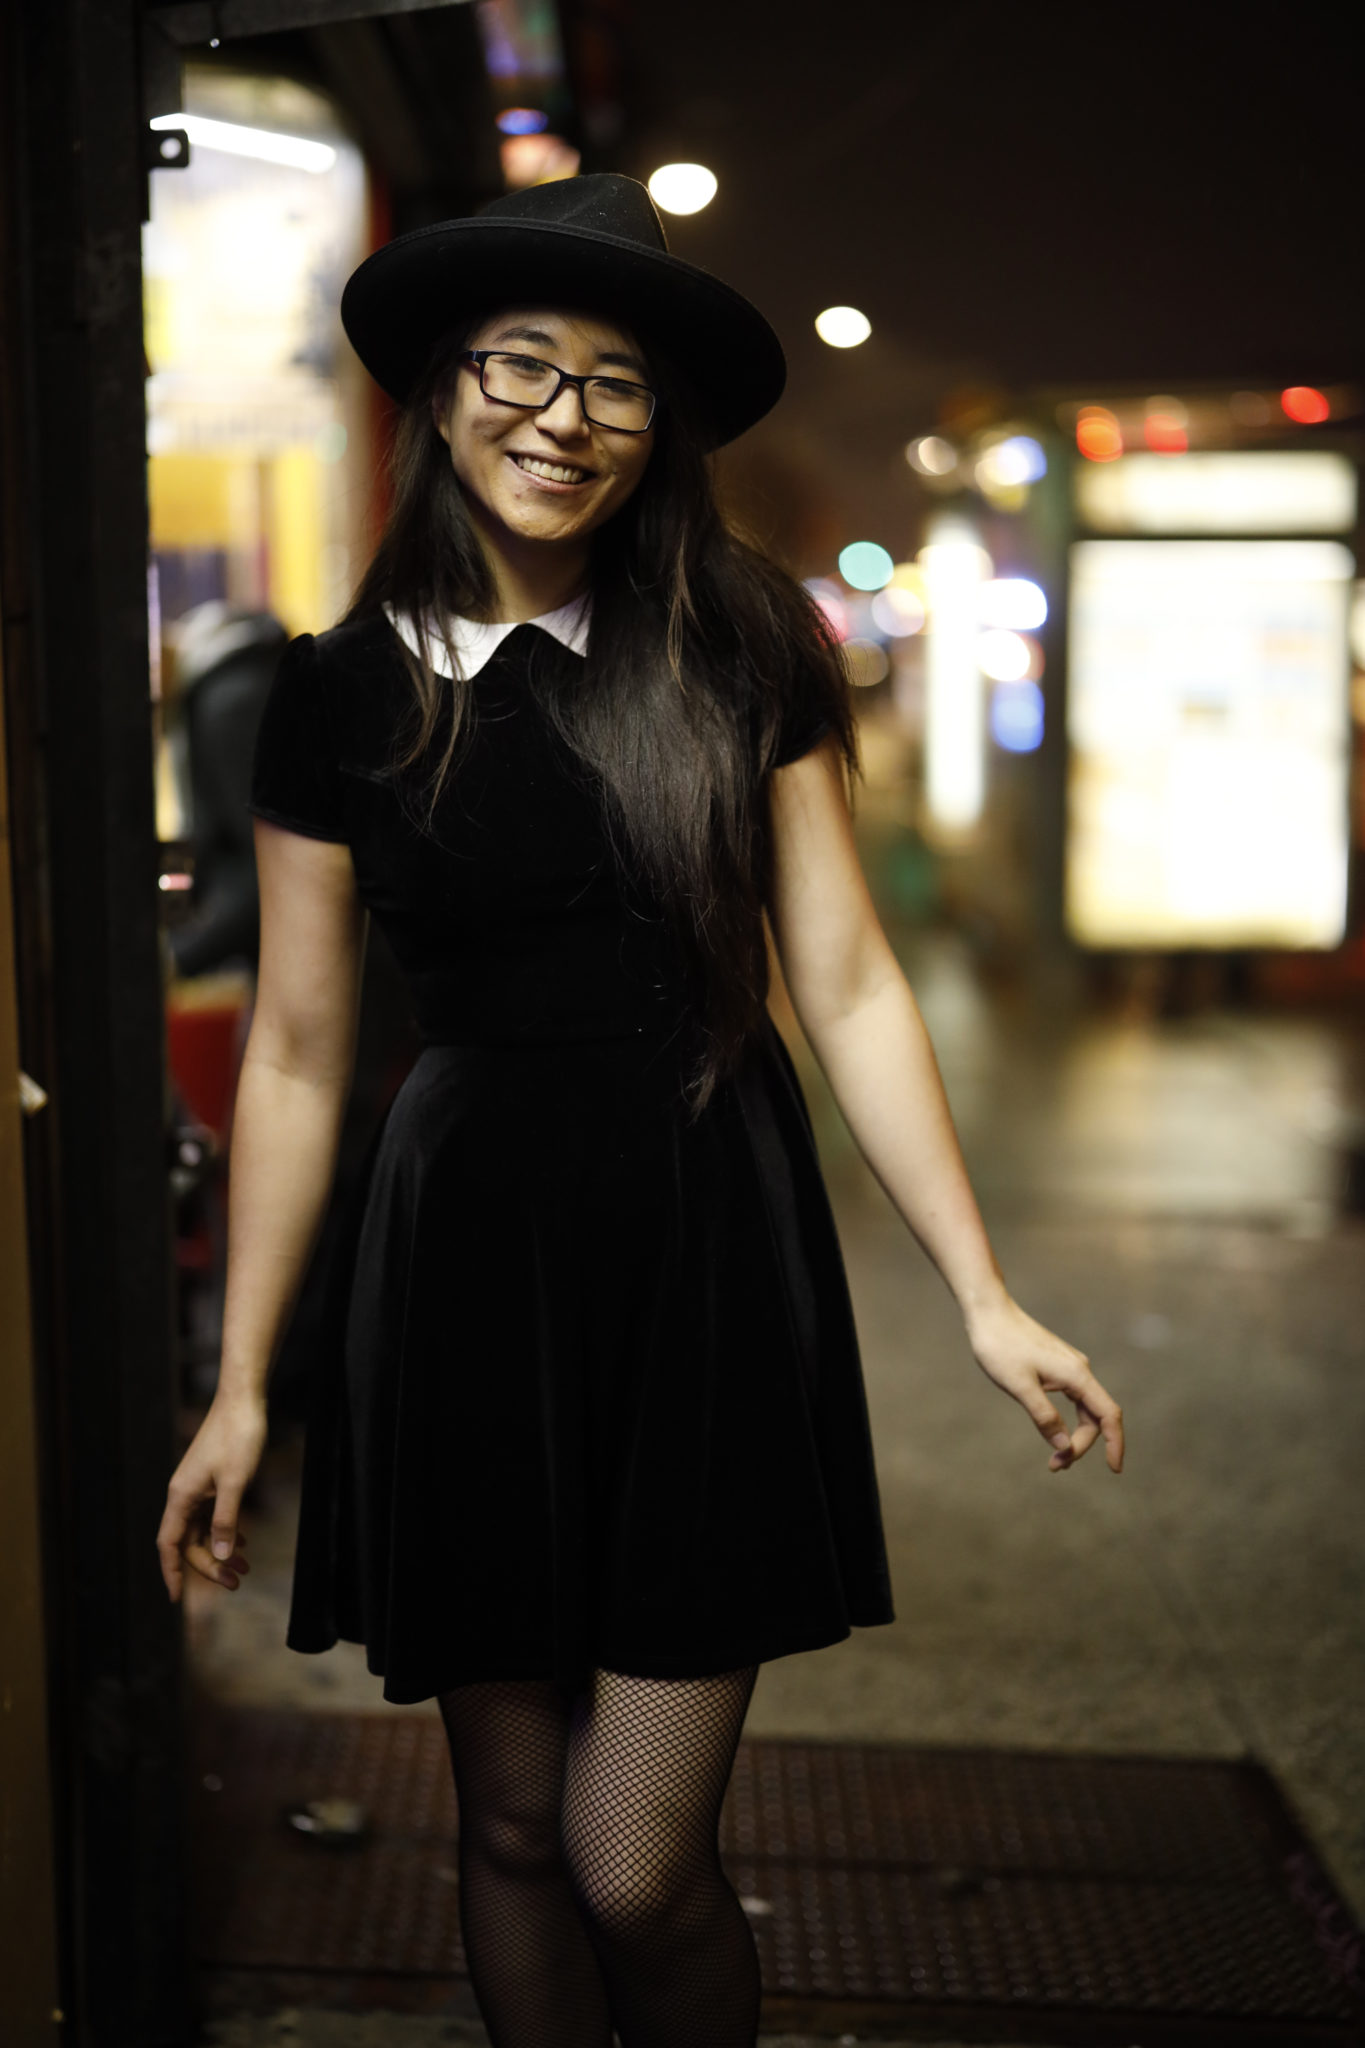
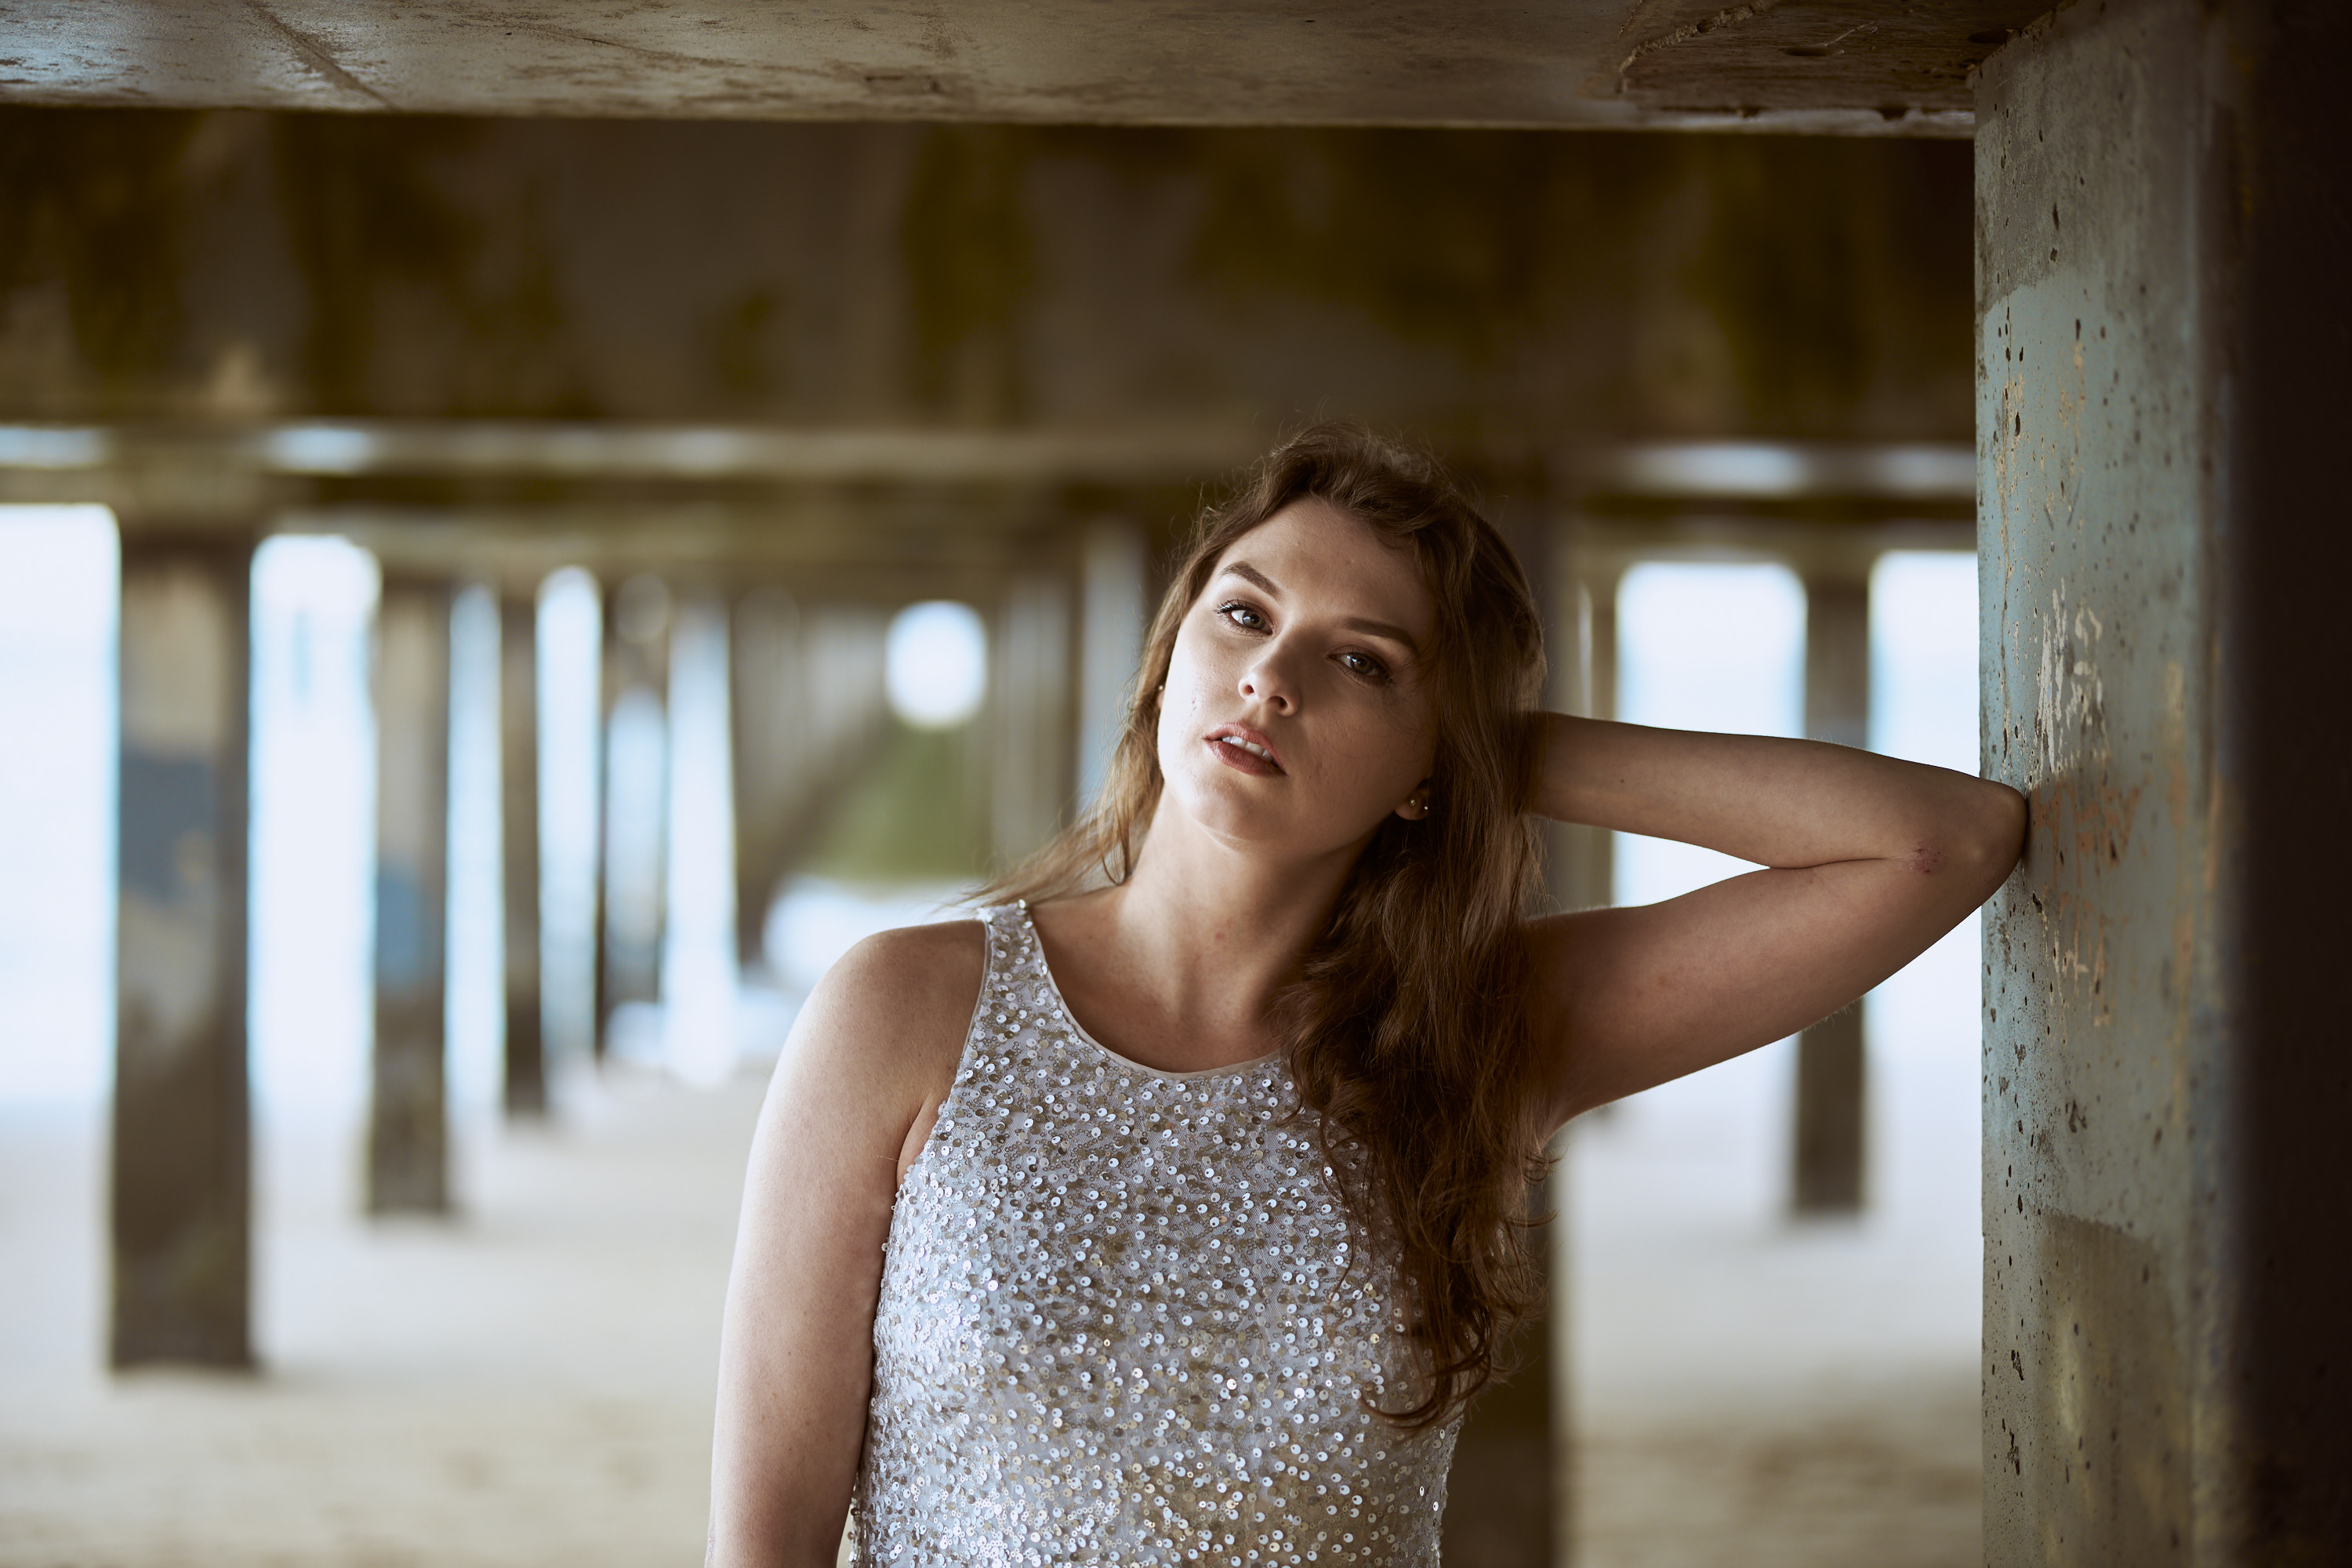
In this image, we used similar lighting but changed the white balance. Notice what it does:
- She stands out in the scene as a normalized color.
- When using the depth of field effect offered by the Canon RF 50mm f1.2 L USM, she is able to pop by not only by color but by use of the bokeh.
- Her outfit, though simple, contrasts from the rest of the scene.
Pro Tip: Work with three colors: the outfit, the background, and the skin tones. Use lighting to make each of those stand out from one another.
The Reciprocal Rule of Shutter Speeds and Portraiture
To compensate for camera shake, we recommend using a trick called the reciprocal rule of shutter speeds. When combined with the light gathering abilities of a fast 50mm lens like the Canon RF 50mm f1.2 L USM, you can guarantee that your image will be devoid of camera shake. With a 50mm lens, you’ll need to shoot at 1/50th. You’re also bound to be shooting at a wider aperture with a lens like this, so you don’t need to make your ISO output go into a higher range. However, in our testing, we’ve made 17×22 inch prints with the the Canon EOS R at ISO 6400 and got great results. To make the most of a higher end lens like this and get the most sharpness, we’d still recommend adding the specularity that only an off-camera flash can deliver.
“If you’re using a 100mm lens on a full frame 35mm sensor/film body, then you need to shoot at at least 1/100th to produce an image that contains no camera shake when shooting handheld.” – From Do You Know the Reciprocal Rule of Shutter Speeds?
Editor’s Note: This is a sponsored blog post from Canon. In complete transparency, the Canon RF 50mm f1.2 L USM is one of Chris’s favorite lenses.
Get rid of the ads!
Did you enjoy reading this article as much as we enjoyed writing it? There's a way to support us and our reporting, getting ad-free navigation and more as a bonus. Subscribe to us for less than a coffee per month —just $3.99— or take advantage of our yearly subscription with a hefty discount for only $25.- An ad-free experience
- A free mystery box for Lightroom or Capture One
- All the books in our store
- 20% discount on Capture One
- 30% discount on Imalume Photo Theft Protection
- 20% off Herbs and Kettle Tea Company.
- 20% off your order from MPIX printing services.
- 5% off Viltrox Products via their eCommerce store.
- 10% off all film developing, printing and scanning services from Blue Moon Camera and Machine
- 15% off 7Artisans products: The lens and accessory maker is offering a sweet discount for Phoblographer's readers.