Last Updated on 02/28/2019 by Chris Gampat
Creating the Photograph is an original series where photographers teach you about how they created an image with minimal use of post-production and all about their lighting. The series has a heavy emphasis on teaching readers how to light. Want to be featured? Here’s how you can submit.
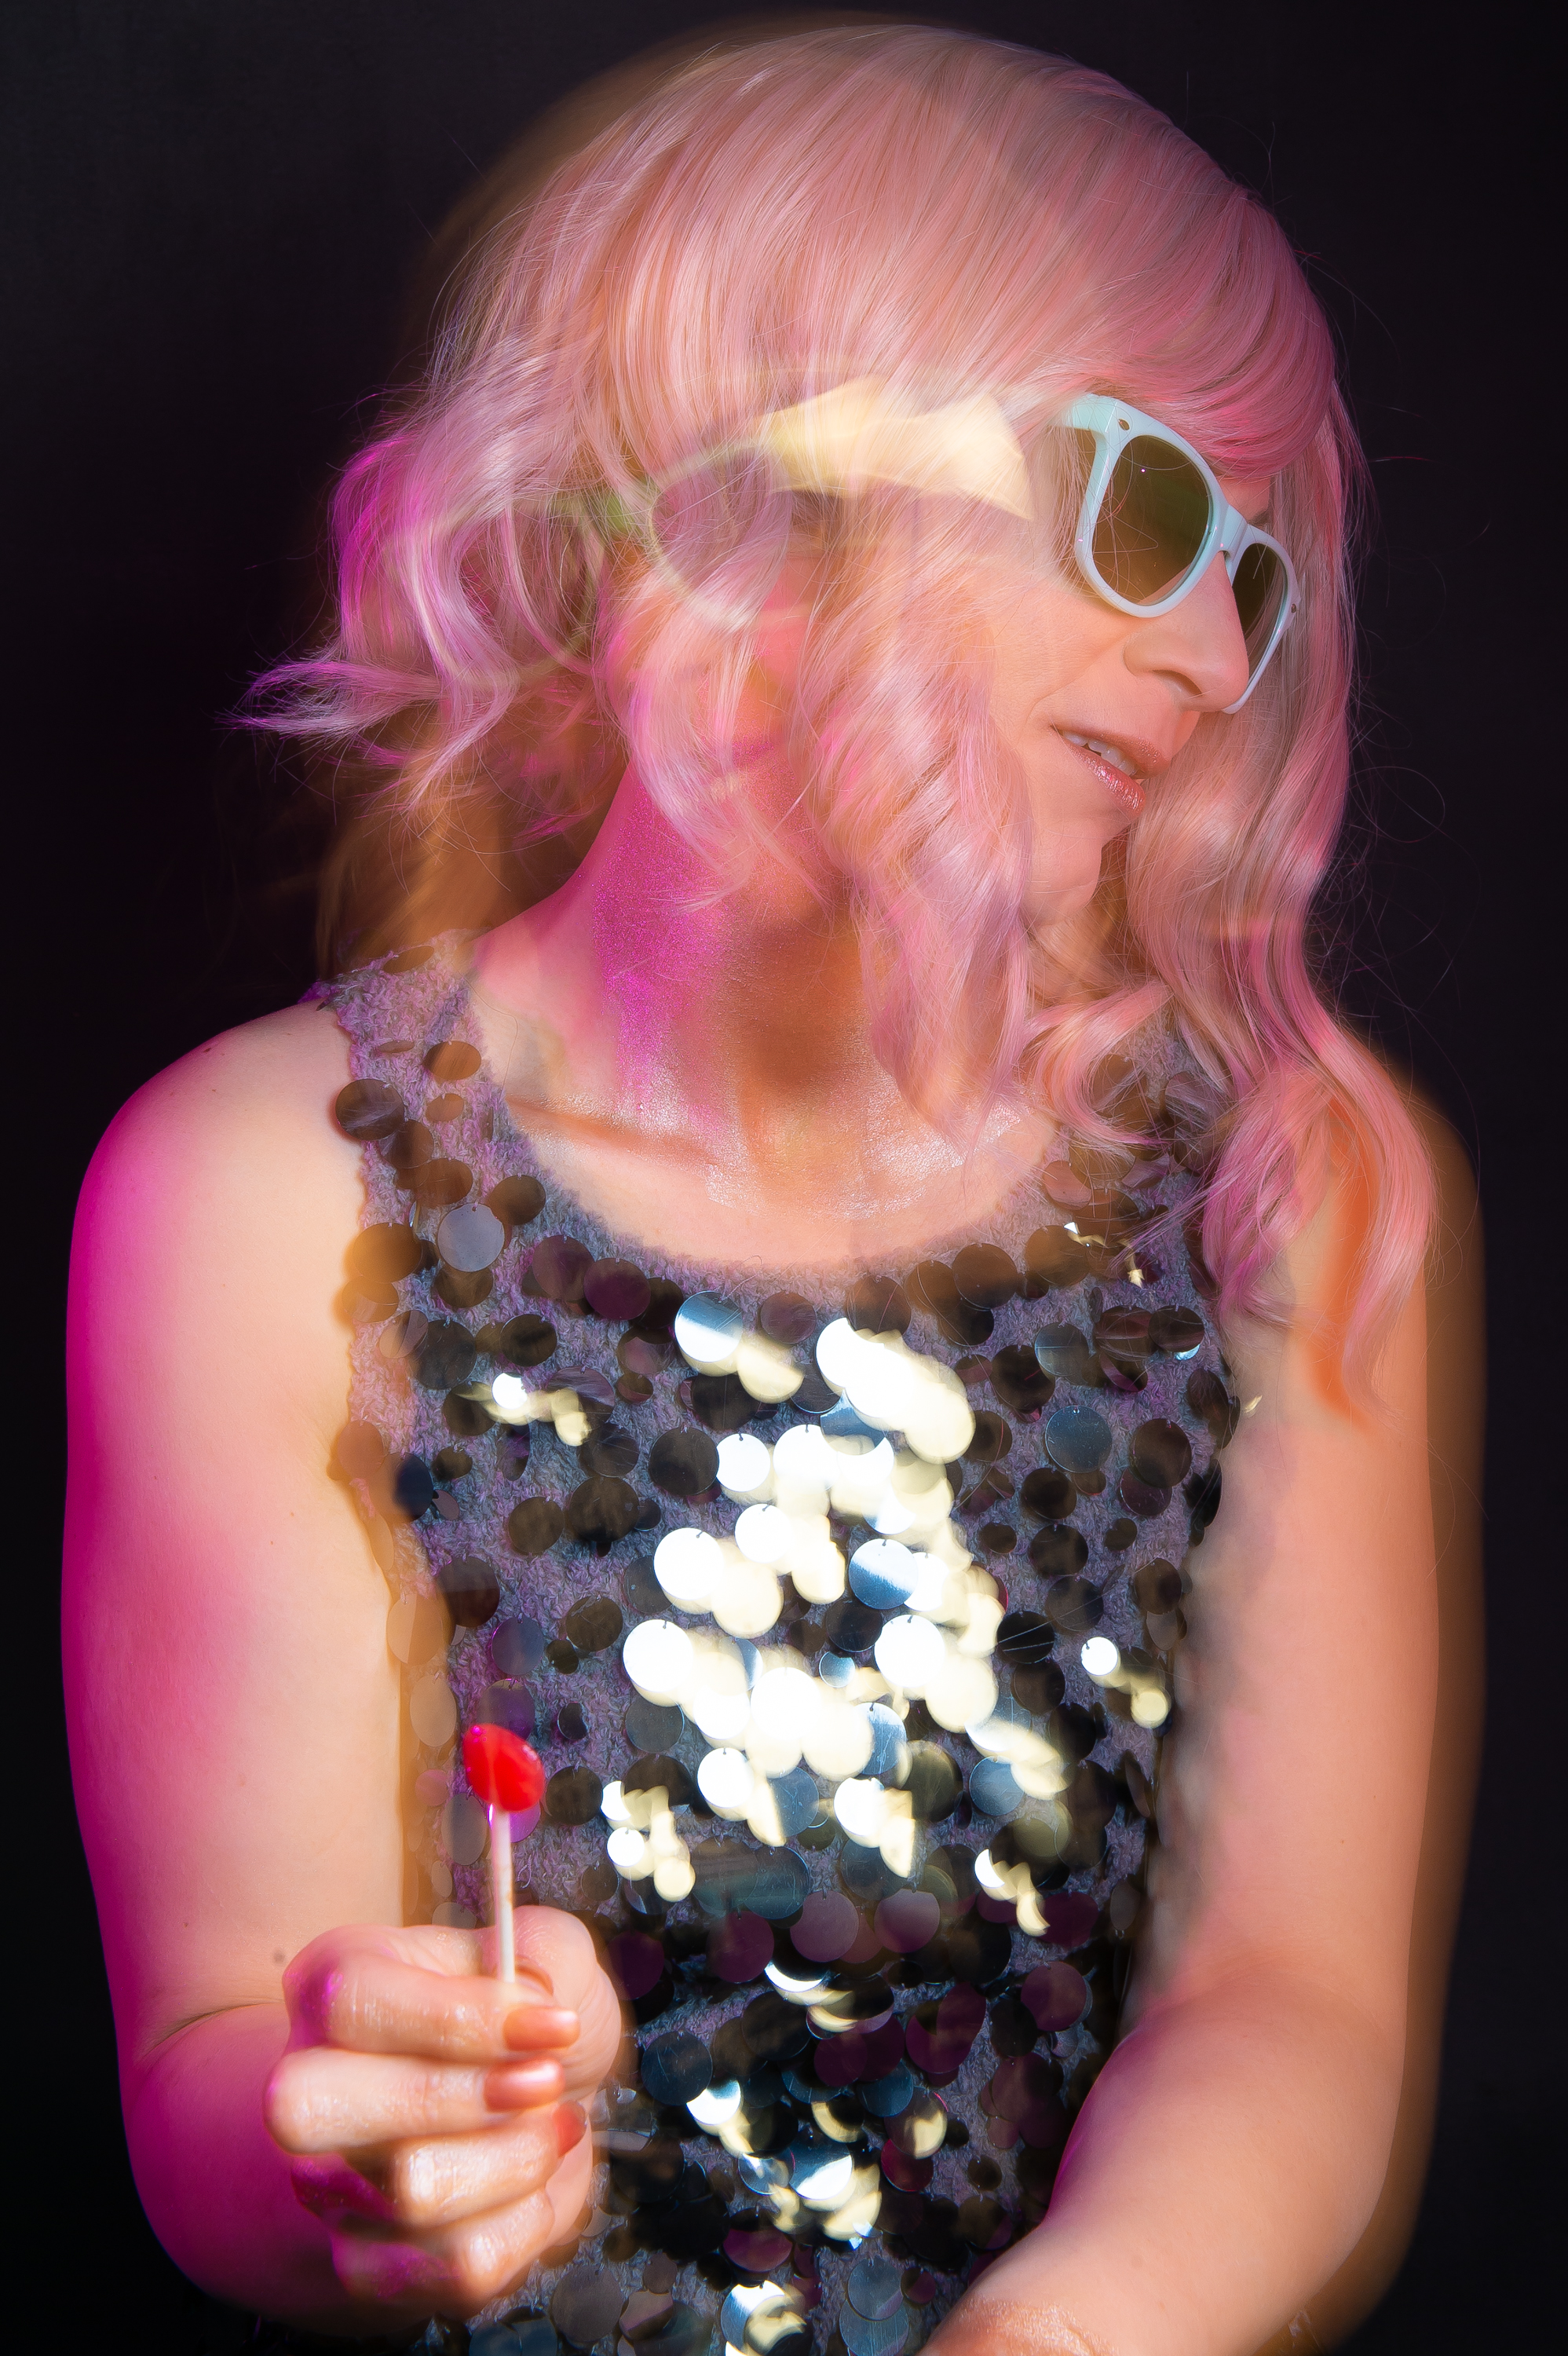
Photographer Mary Ann Wamboldt is an Ontario based creative who shoots weddings, portraits, and a number of other things including travel photography. She’s been published a number of times and has won even more awards for her work. So when she submitted “Pink Kiss” to our Creating the Photograph series, we were very intrigued. The photo doesn’t have a whole lot of post-production and instead focuses more on in-camera techniques and lighting to get the look we see. There isn’t any sort of post-production trickery or layer upon layer–instead there is just Mary Ann’s own creativity and technical know how. Here’s how she got the shot.
Table of Contents
The Concept
When I first took an interest in photography, I had no idea what I wanted to photograph. I was passionate as most new photographers are but lacked focus or direction. After seeing some of the incredible works of Annie Leibovitz and Joey Lawrence, I found myself gravitating more towards portrait photography.
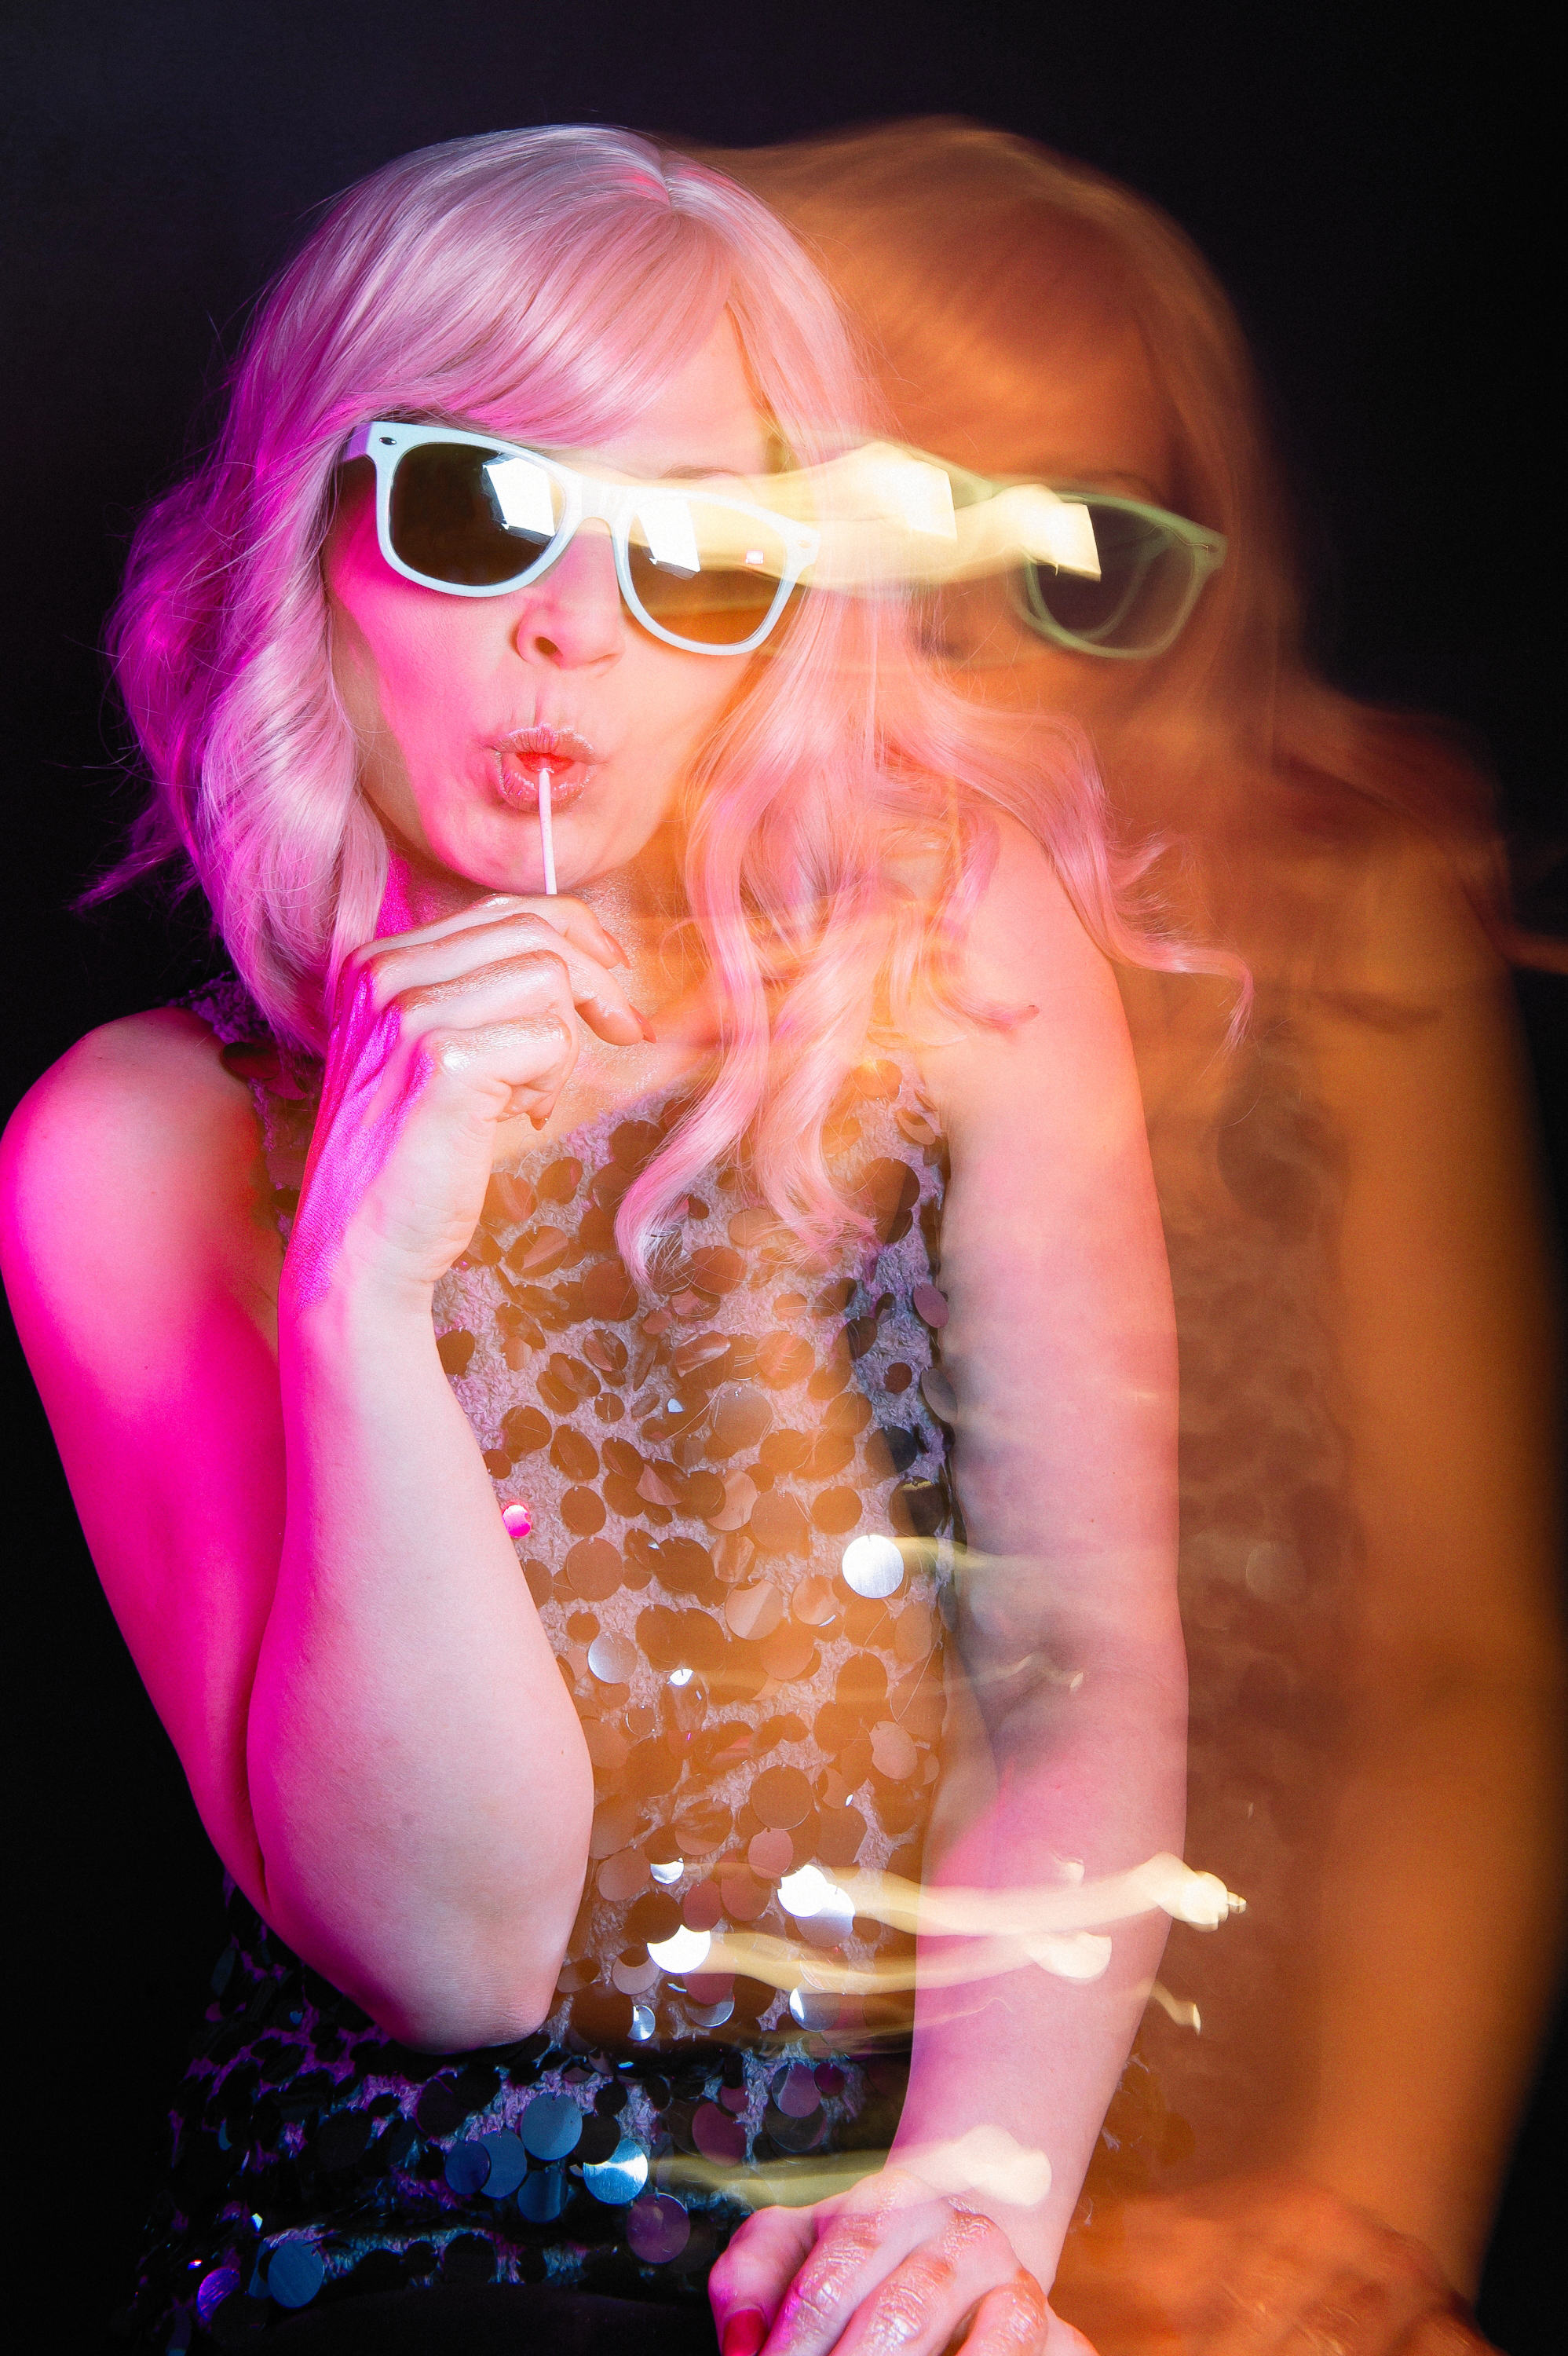
Many of the shoots I put together often start with something that I found at the second store and a desire to create something. I spent my childhood sifting through racks at the Salvation Army looking for clothes with my mother and grandmother. My grandmother was a real bargain hunter and believed in the value of making a dollar stretch as far as it could go. The idea for this shoot started with a sequined top that I found at the second-hand shop. I was attracted to the larger sequined disks on the top and considered how it would reflect light. From there I added in some shiny sunglasses from the dollar bin and a pink wig from Amazon. The total cost of the outfit was about $50.
The Gear
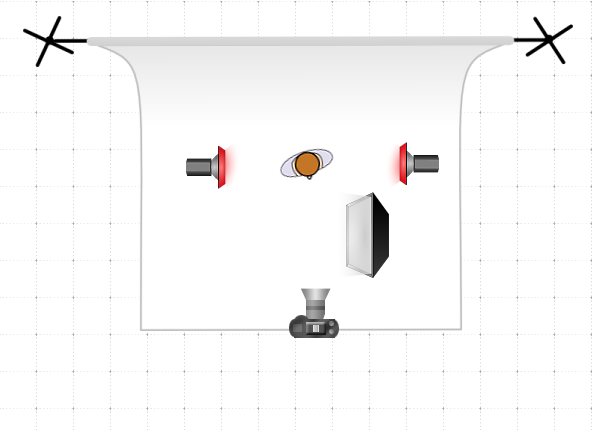
- Nikon D4
- Nikon 24mm – 70mm f2.8
- 24 inch softbox
- Neewer C-800 strobe
- Nikon SB 700 Speedlight x2
- Pocket Wizard PlusX
- Hand-painted, dark grey, canvas backdrop
The Shoot
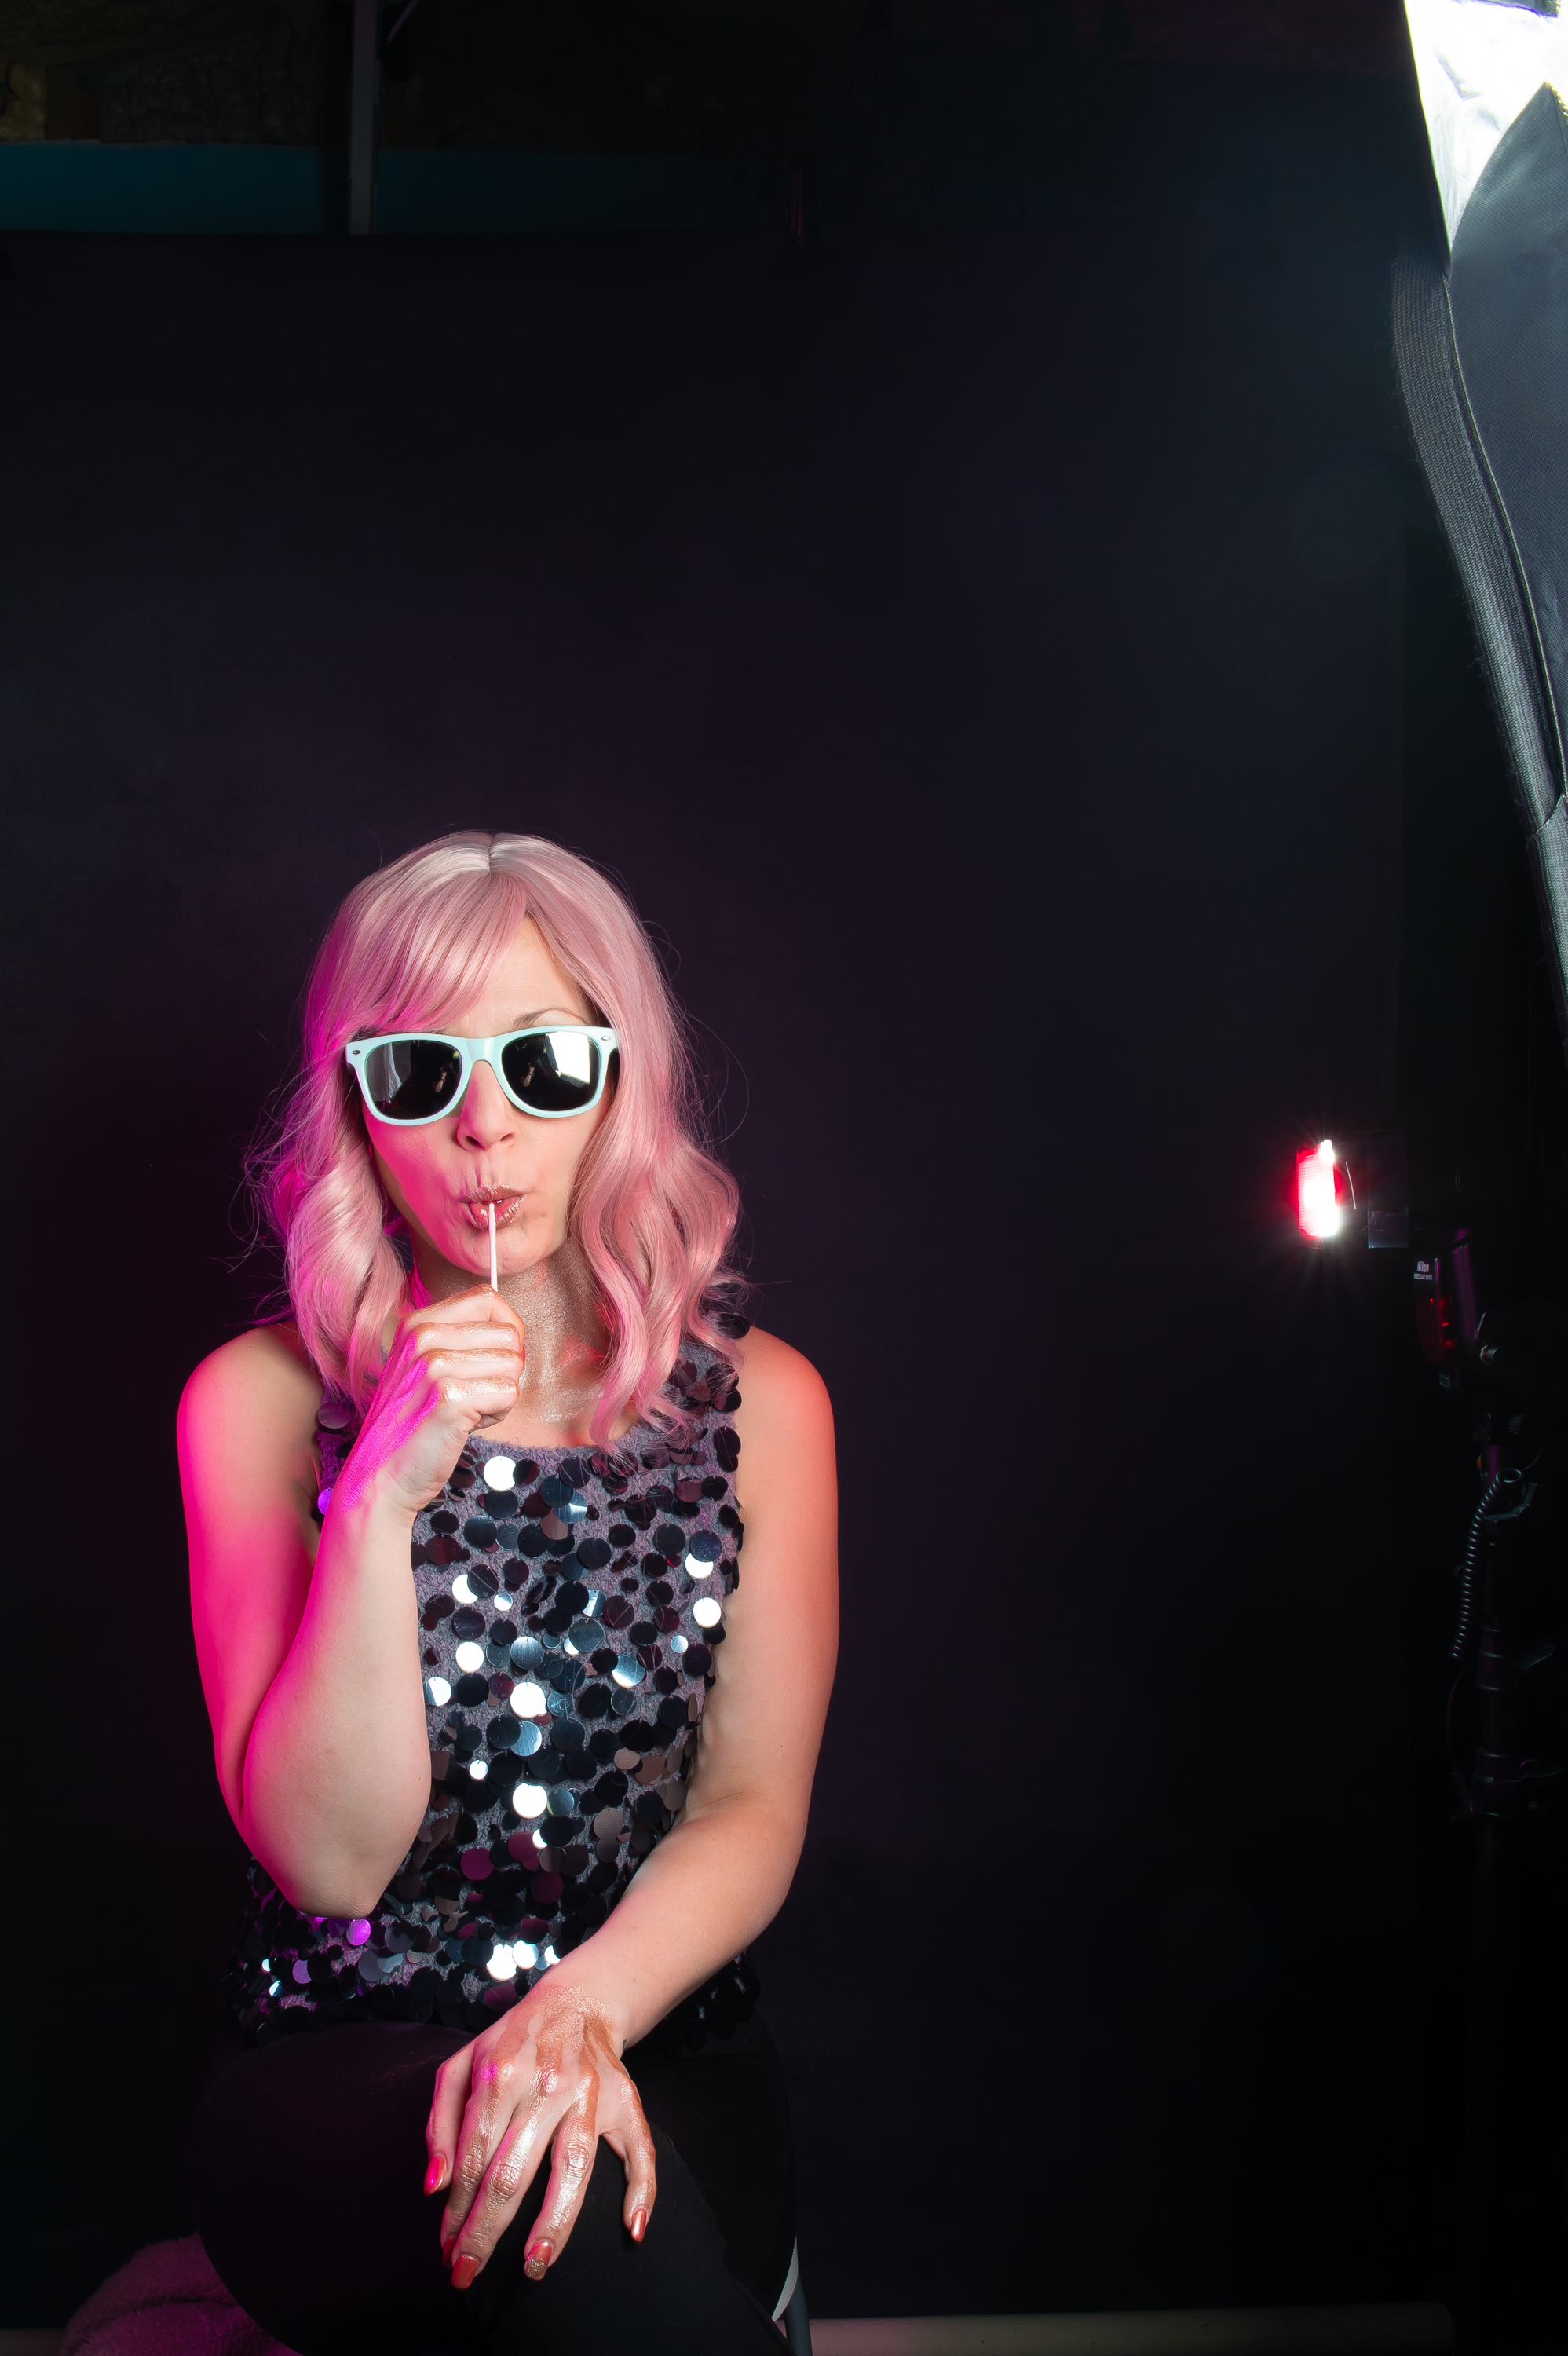
The shoot was a fairly simple setup put together in my home in Kingston, Ontario. Makeup was mostly done by Danni herself with the addition of liquid gold highlighter around her neck and hands. While Danni is not a professional model, she has a good sense in front of the camera and is able to generate posing that suits the style of the shoot. I like letting a model explore their own style to see what they can bring out of a shoot while providing guidance as needed. We incorporated a bright red sucker to add to the playfulness of the shoot and to give Danni a prop to work with.
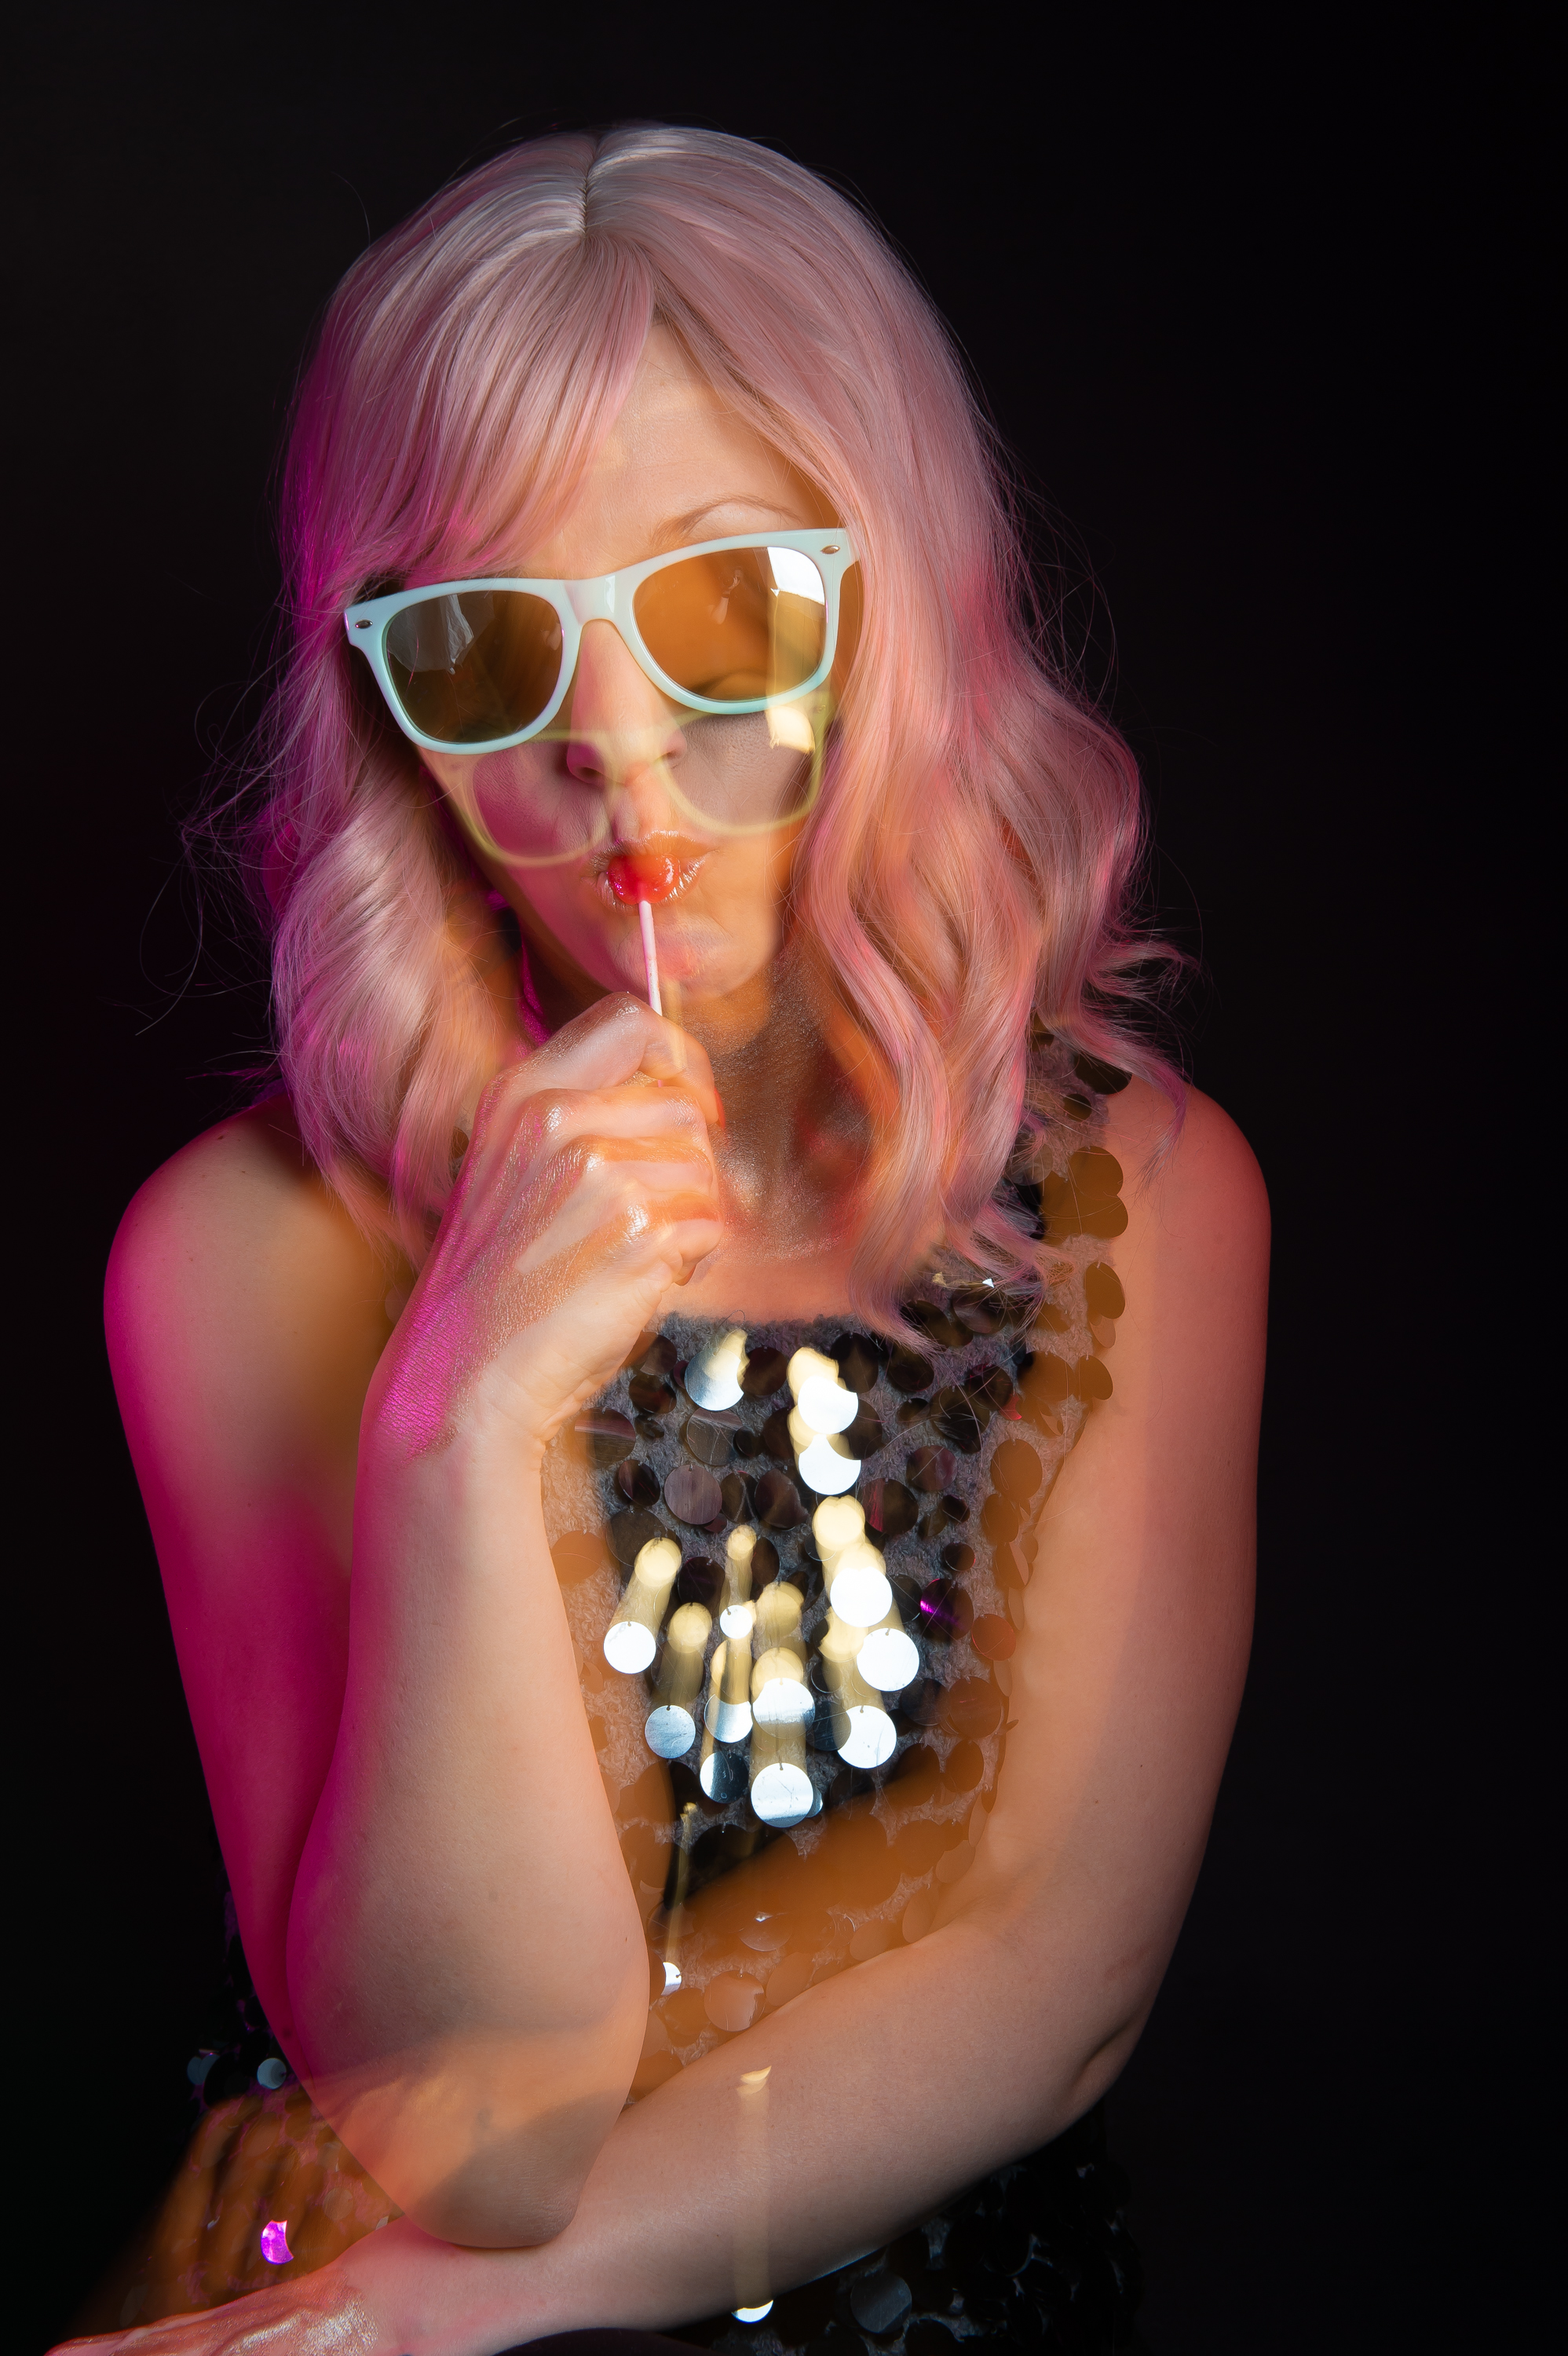
A single 24-inch softbox was set up between myself and Danni to feather the light rather than have it hit her directly. I set up two speedlights on either side of Danni with red and pink coloured gels. I used my dark grey, hand-painted, canvas backdrop behind to keep with the moody look we were trying to generate. I set my camera to rear flash for these shots so that the flash would fire at the end of the exposure freezing the subject while still capturing the movement. I slowed the shutter speed down to 1 second and used slow sweeping movements and zoomed in slowly while the shutter was open creating different light trail effects for each of the photos.
Post Production
I always upload my images to Lightroom, not just for minor adjustments but also to organize my work from a shoot. I brought the image into Photoshop to remove marks and unwanted reflections that became apparent in post. From there I exported the image to Alien Skin Exposure X2 to add a pop of colour with a Kodak Ektachrome 100VS film preset. I love the look of the film and I find the Alien Skin Exposure is the best for emulating that look without overdoing it.
Before and After

Credits
Model – Danni B.
For more of Mary’s work, but sure to check out her Instagram and website.
Get rid of the ads!
Did you enjoy reading this article as much as we enjoyed writing it? There's a way to support us and our reporting, getting ad-free navigation and more as a bonus. Subscribe to us for less than a coffee per month —just $3.99— or take advantage of our yearly subscription with a hefty discount for only $25.- An ad-free experience
- A free mystery box for Lightroom or Capture One
- All the books in our store
- 20% discount on Capture One
- 30% discount on Imalume Photo Theft Protection
- 20% off Herbs and Kettle Tea Company.
- 20% off your order from MPIX printing services.
- 5% off Viltrox Products via their eCommerce store.
- 10% off all film developing, printing and scanning services from Blue Moon Camera and Machine
- 15% off 7Artisans products: The lens and accessory maker is offering a sweet discount for Phoblographer's readers.