
Last Updated on 01/30/2019 by Mark Beckenbach
Working with the HSL panel to edit your images is the best way to go about it.
RAW photo editing gives you near limitless possibilities to fine-tune the White Balance, Exposure, HSL (Hue, Saturation, and Lightness/Luminance), as well as a myriad of other values, allowing you to create a final image that matches your unique aesthetic and vision. Most photographers begin by working with just the basic adjustments panel. But in recent years, photographers have been working with the other options that are afforded to them. Ever seen an image that looks like it’s duotone? Well, chances are that the HSL panel helps that happen in some way or another when combined with other tweaks.
This Will Work for You
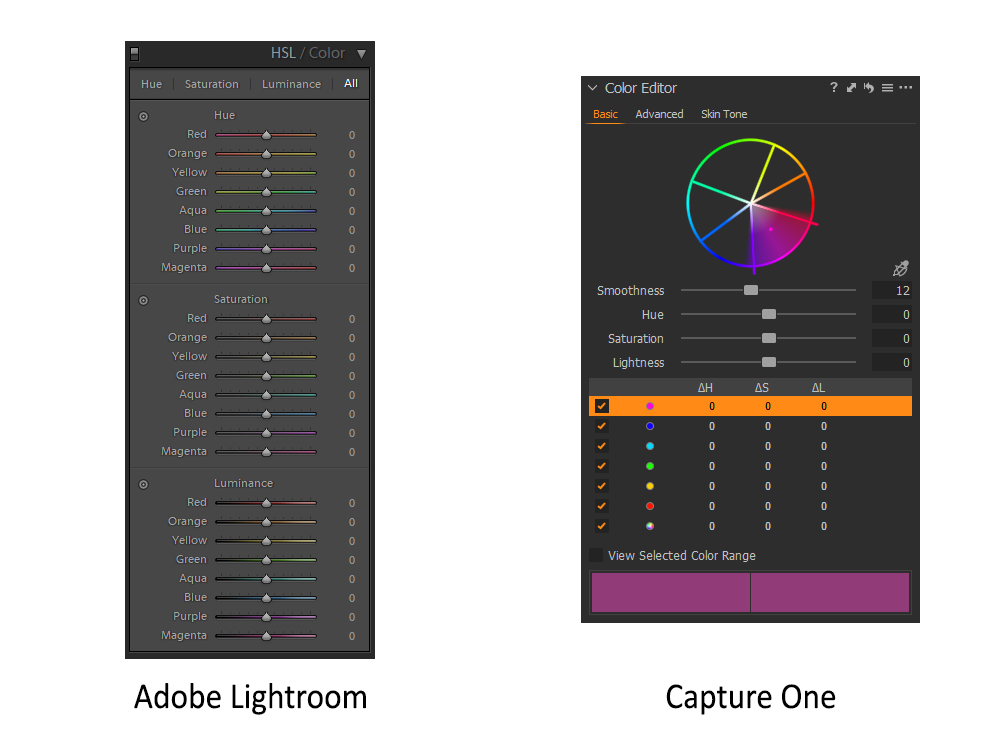
While this tutorial was created using Capture One Pro 12, which is the RAW editor of choice for all members of The Phoblographer staff, the steps outlined within this tutorial should be functionally identical for the most part regardless of whether or not your RAW editor of choice happens to be Adobe’s Lightroom, Phase One’s Capture One, or some other program altogether. HSL stands for Hue, Saturation, and Lightness in Capture One, whereas in Adobe Lightroom, HSL stands for Hue, Saturation, and Luminance. The image above shows you the difference between the HSL adjustments within Adobe Lightroom and Capture One’s interfaces.
To quote Michael Keaton from 1989’s Batman, “You wanna get nuts? Let’s get nuts!”
What Is HSL?
Before diving too deep into the editing process, let’s first define what Hue, Saturation, and Lightness (Luminance) are. Hue is synonymous with color, and measures the tonal values present within a particular image. While Adobe Lightroom and Capture One behave fundamentally different in how they process your RAW files algorithmically, HSL adjustments operate in pretty much the same way within both programs, allowing you to adjust or modify how colors appear by shifting their values along the tonal range.
Saturation is the measurement of how intense a particular hue is within a particular image. As you increase the saturation of a particular hue, it’s vividness will increase accordingly within the image, while the more you decrease the saturation of a particular hue will result in said hue appearing increasingly dull and flat. If you completely de-saturate all of the hues within an image, you will end up with a grayscale image.
Lightness is the most straightforward value of the three, measuring how bright or dark a particular hue is. It is important to remember that a particular hue’s saturation and lightness are relative to neighboring hues, and a solid foundational understanding of color theory will be tremendously helpful in creating images that are pleasing. More advanced color manipulation is possible for photographers wanting more specificity when it comes to colors by using the Advanced Color Editor within Capture One as well as the Picker tool found within Adobe Lightroom’s HSL panel. You can get really creative or funky by experimenting with these adjustments.
-
Hue is synonymous with color, and measures the tonal values present within a particular image.
-
Saturation is the measurement of how intense a particular hue is within a particular image.
-
Lightness is the most straightforward value of the three, measuring (*surprise!*) how bright or dark a particular hue is.
HSL in Real Life Practical Use
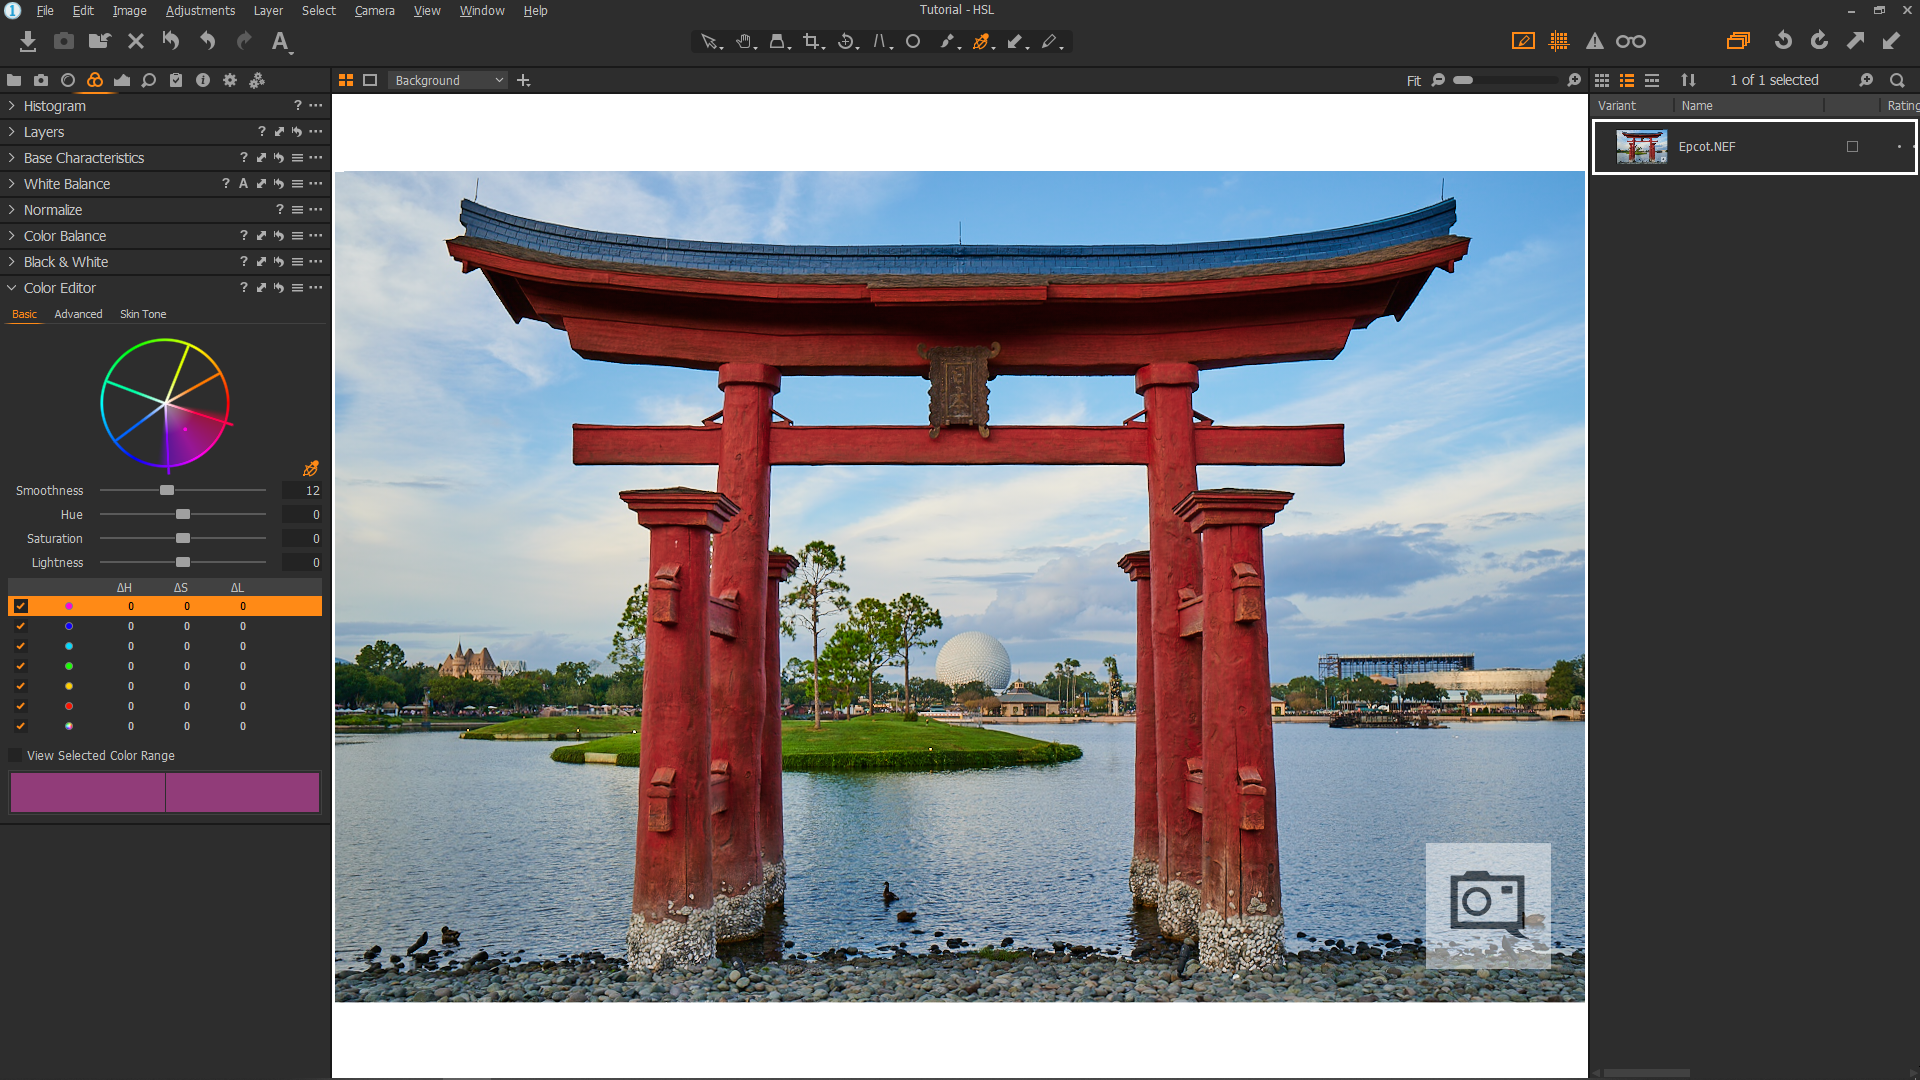
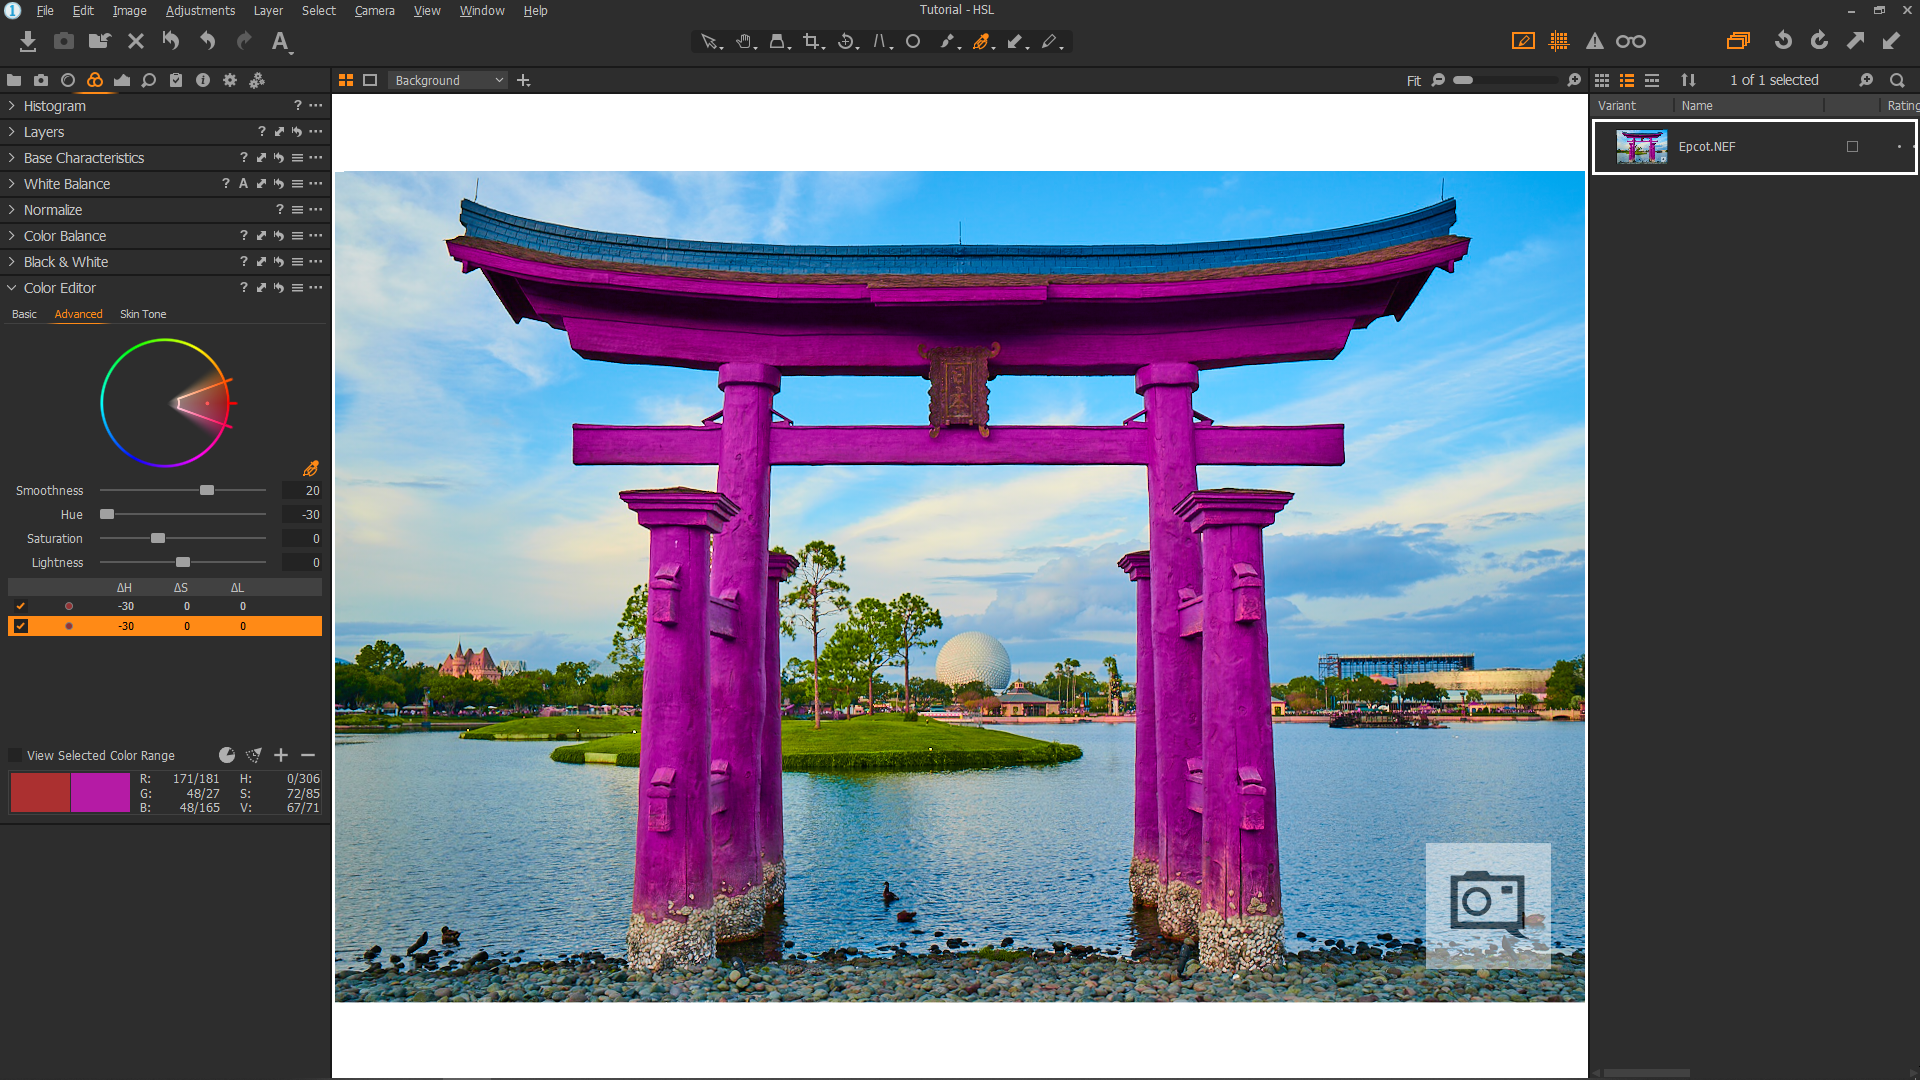
Here’s an image of the Torii gate, located within EPCOT’s Japanese Pavilion, that I captured during a recent trip to Walt Disney World. While I like the composition and exposure of the image, it doesn’t really reflect the stunning majesty of the actual structure when seeing it in person. The colors within the image definitely lean towards the duller side, much duller than what I saw when I captured the image in the first place. This is partly due to how the human eye perceives a much higher dynamic range than what current cameras are capable of capturing, but this is where HSL adjustments come in.
- The Problem: The colors are dull. We need to fix this.
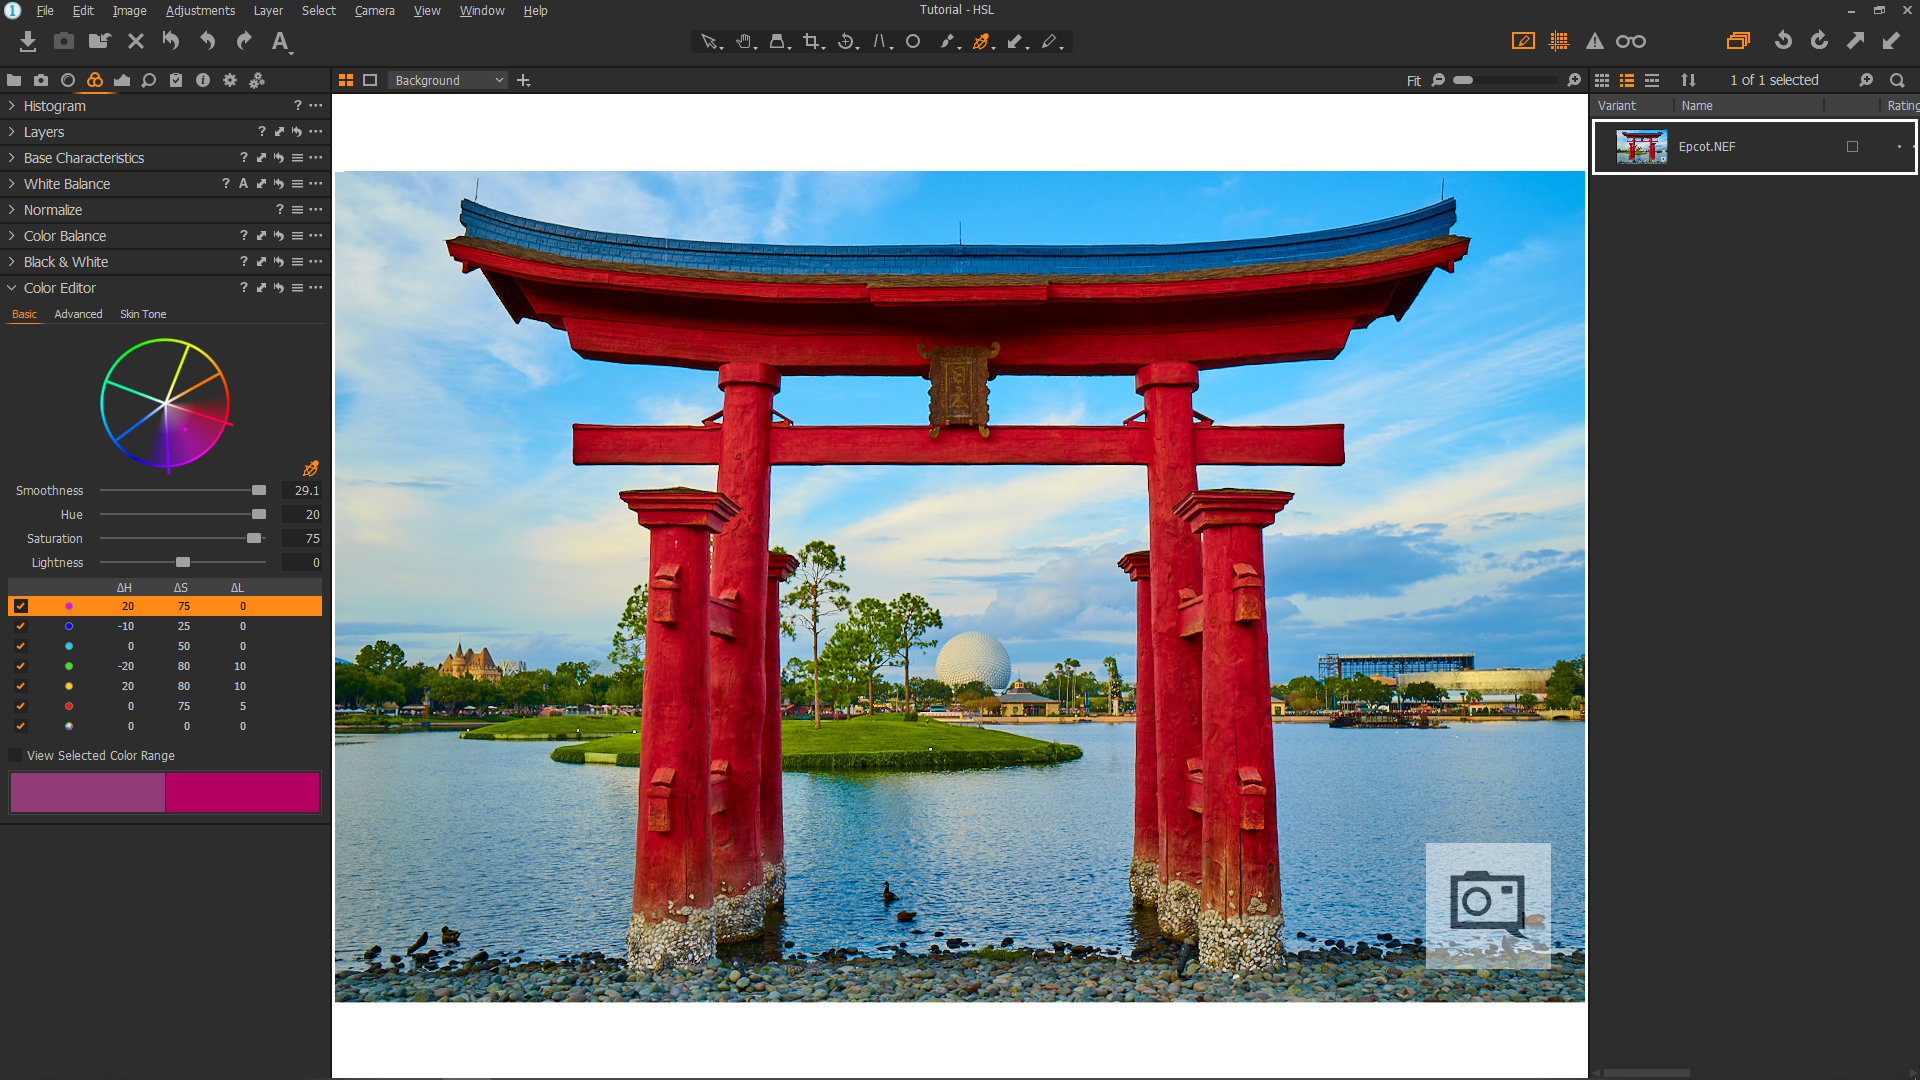
- Notice the HSL adjustments.
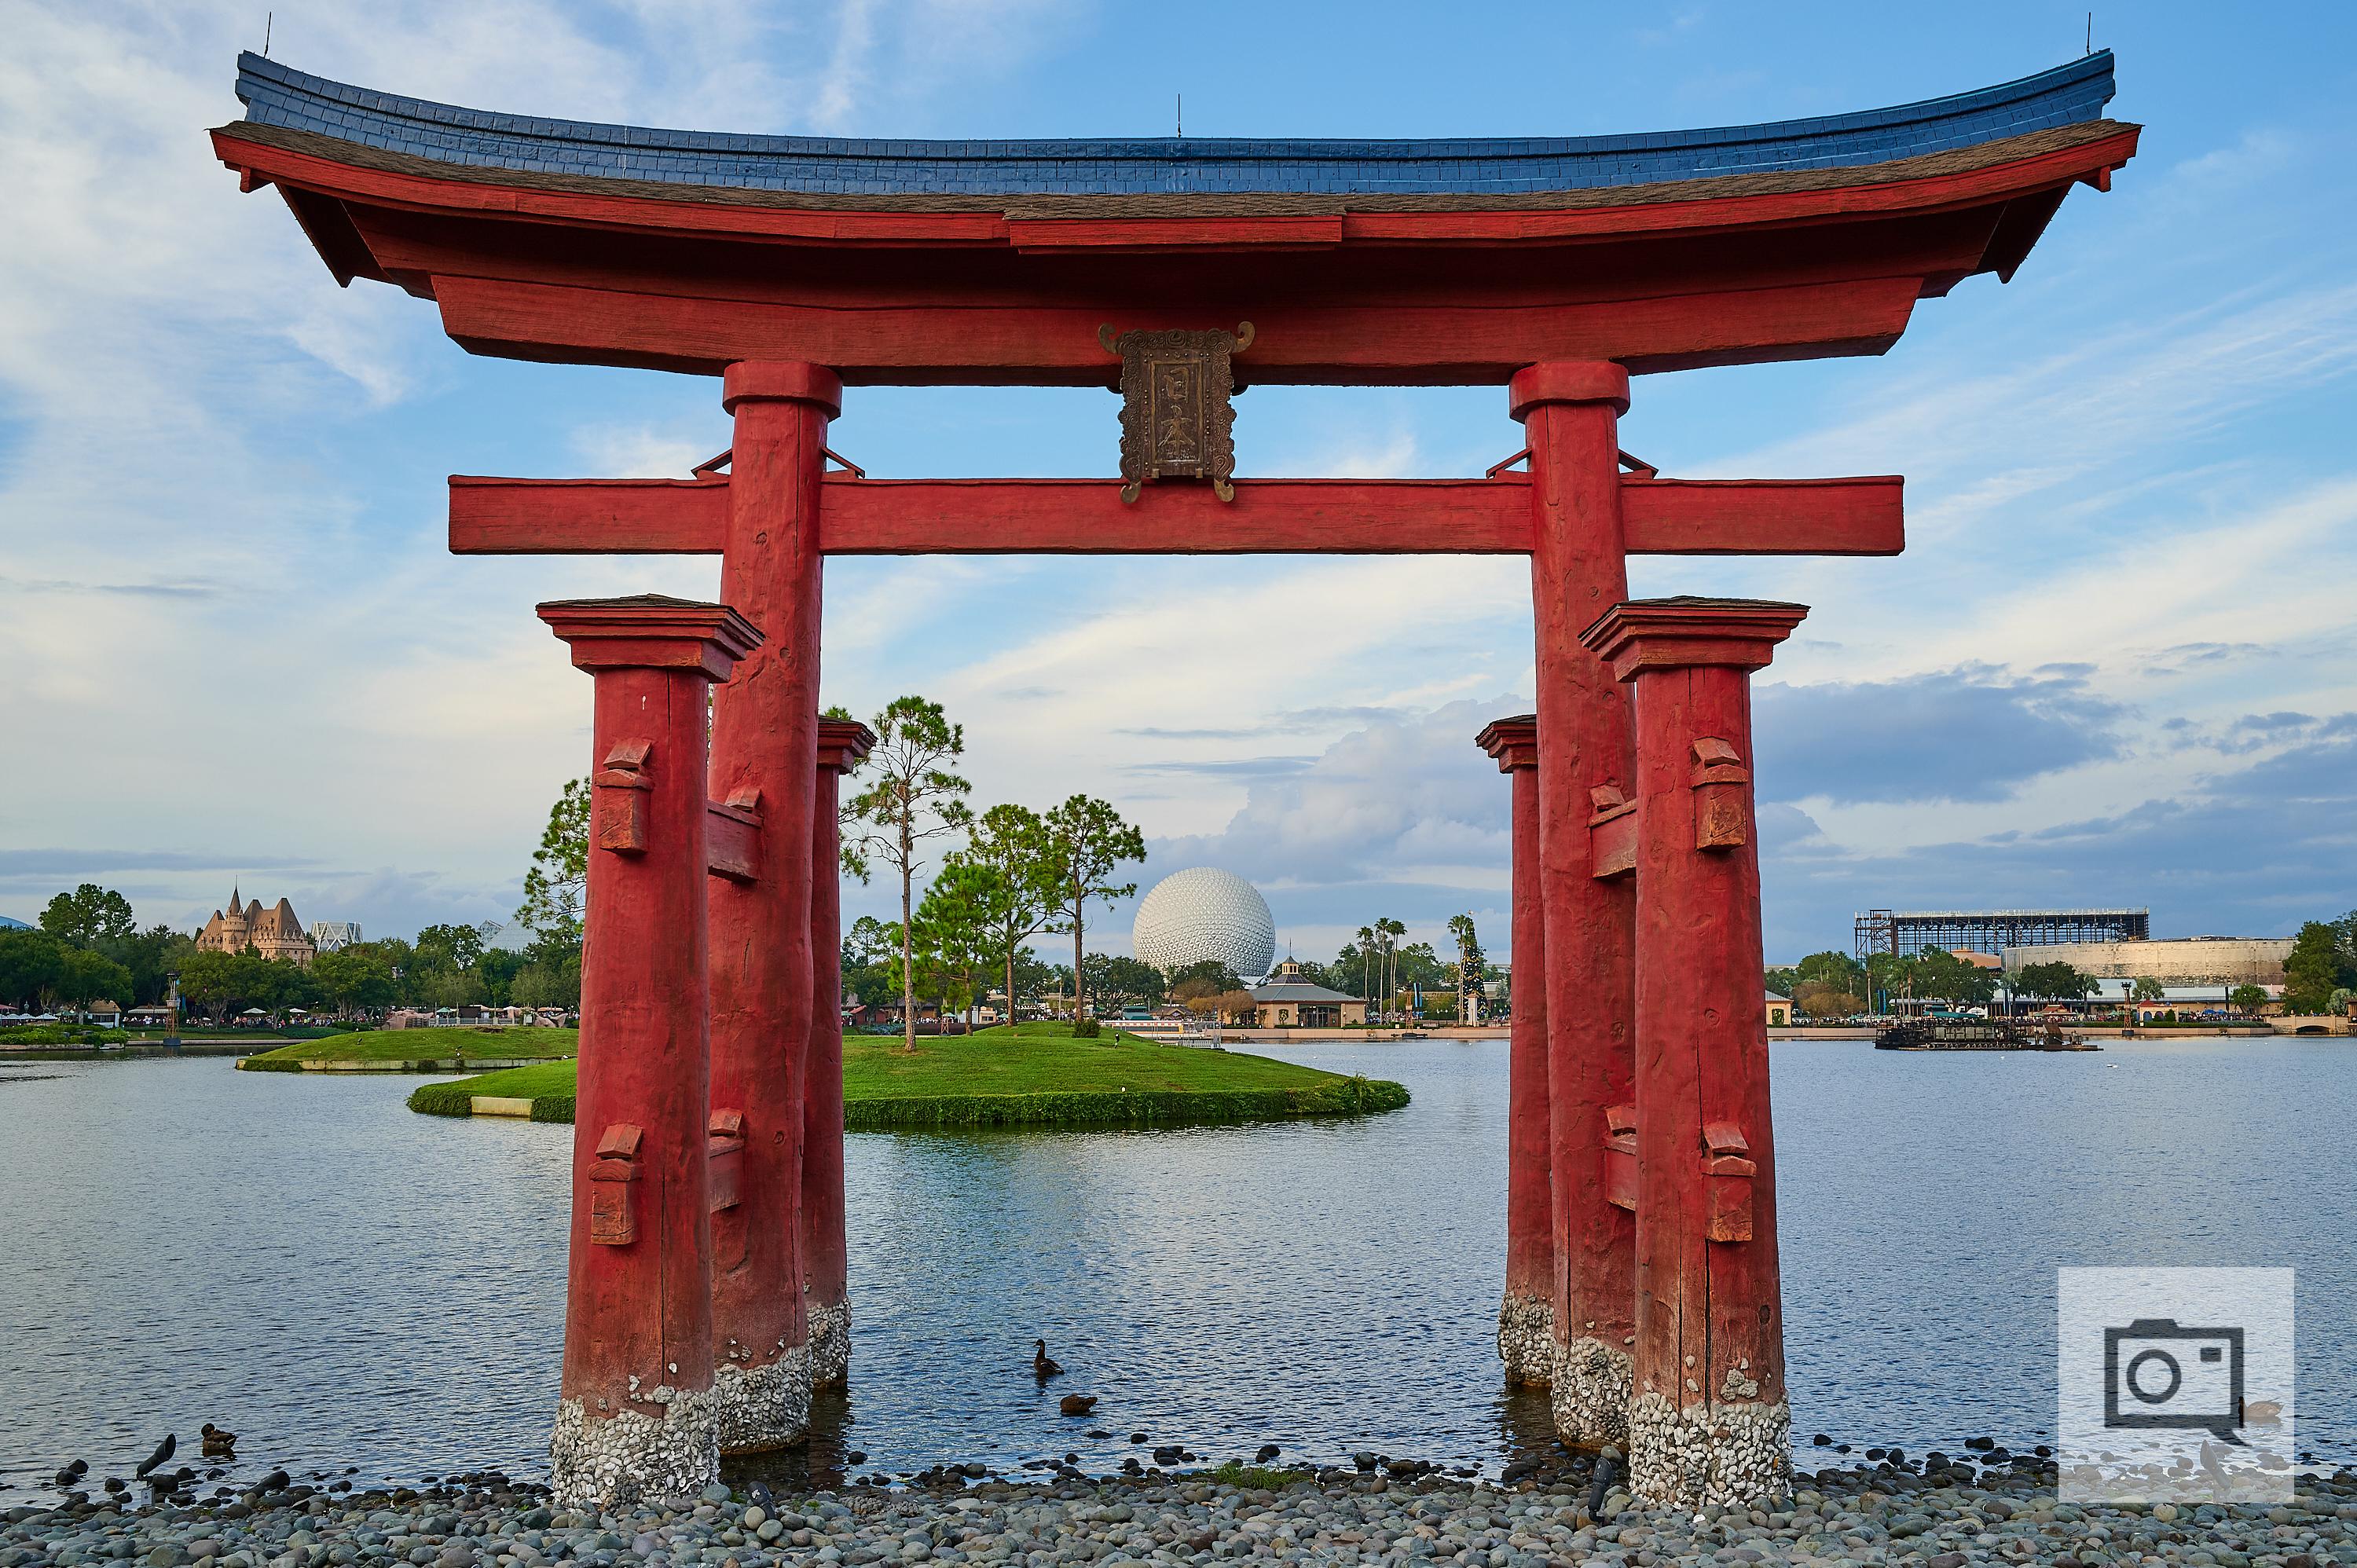
Voilà! Here you can see the same image of EPCOT’s Torii gate after some basic Hue, Saturation, and Lightness adjustments have been applied. In order to demonstrate the effects of the HSL adjustments for the purposes of this tutorial so that they will be immediately apparent, I cranked up the saturation of the various hues to make them extra vibrant. While I do like to give my images that pop of color when the situation calls for it, I’ve always erred on the side of subtlety. A little goes a long way when it comes to HSL adjustments, and it’s very easy to get carried away when editing your image.
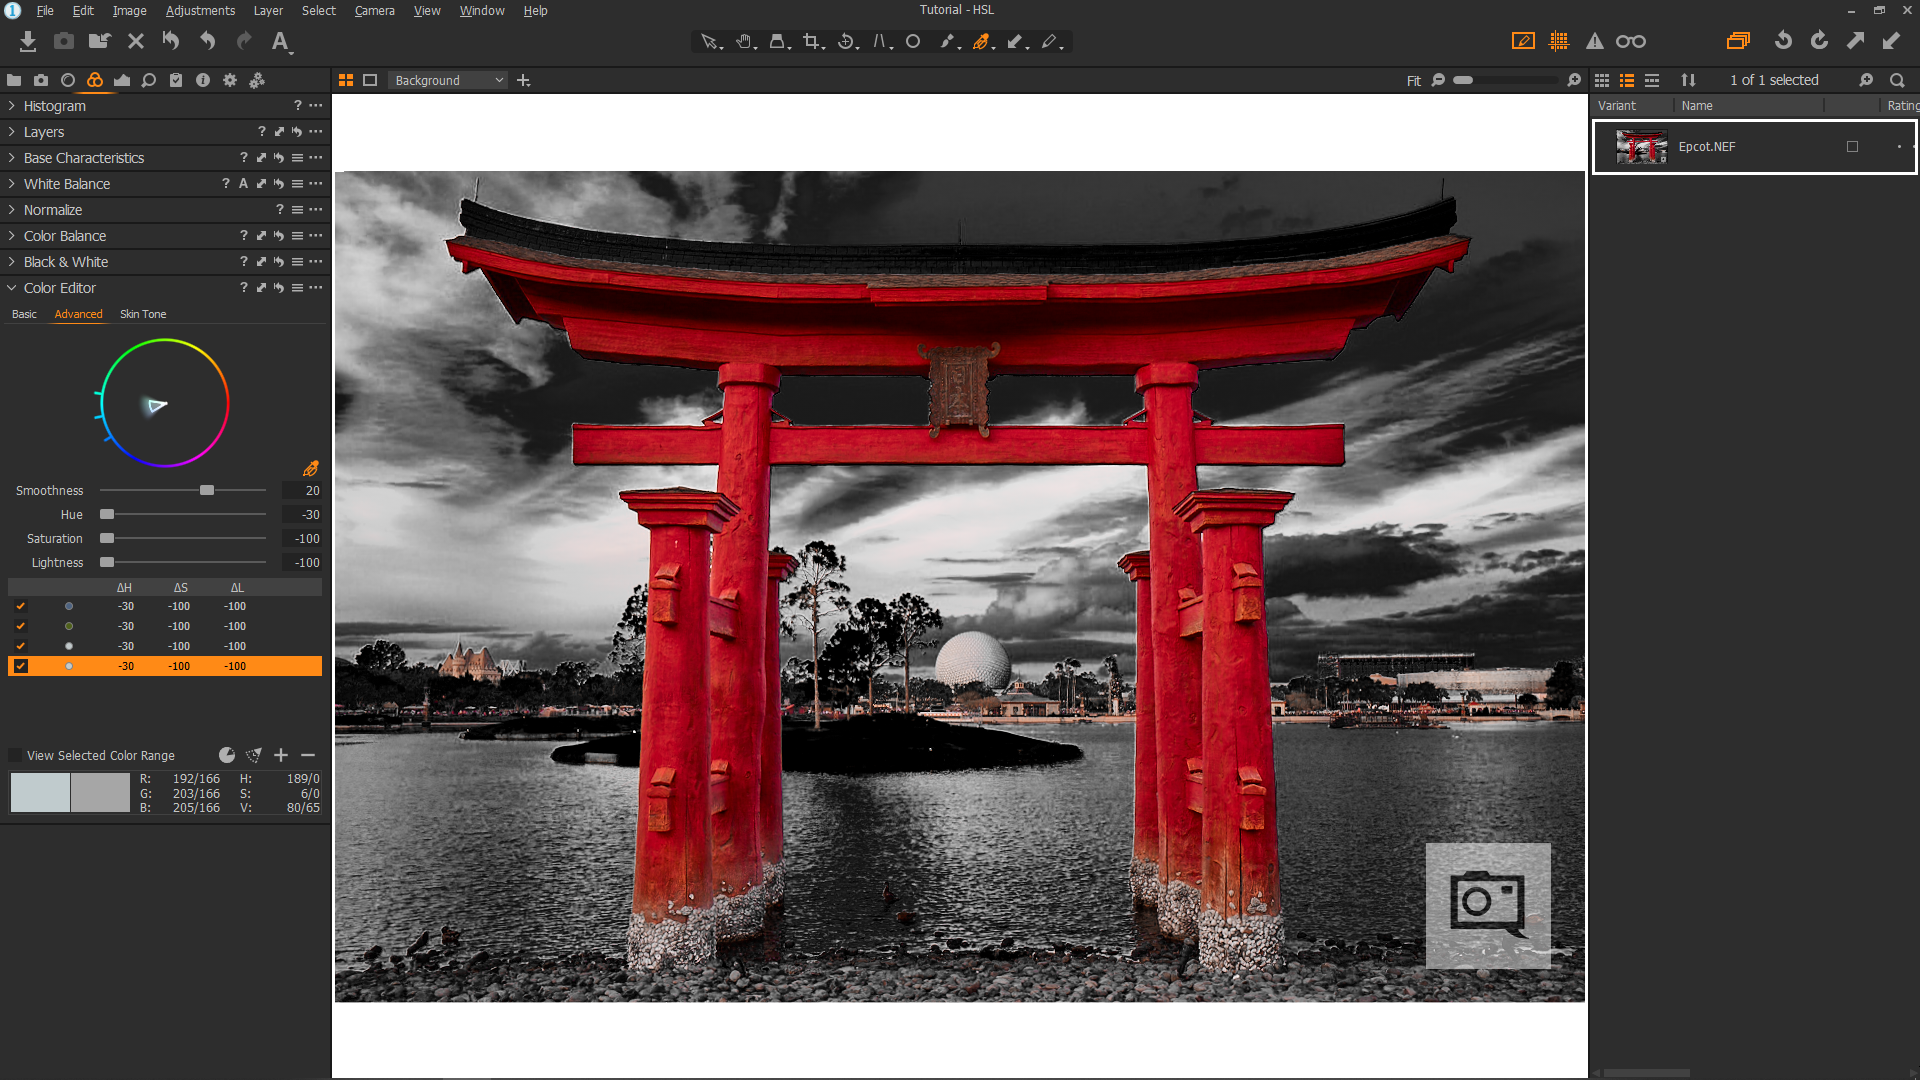
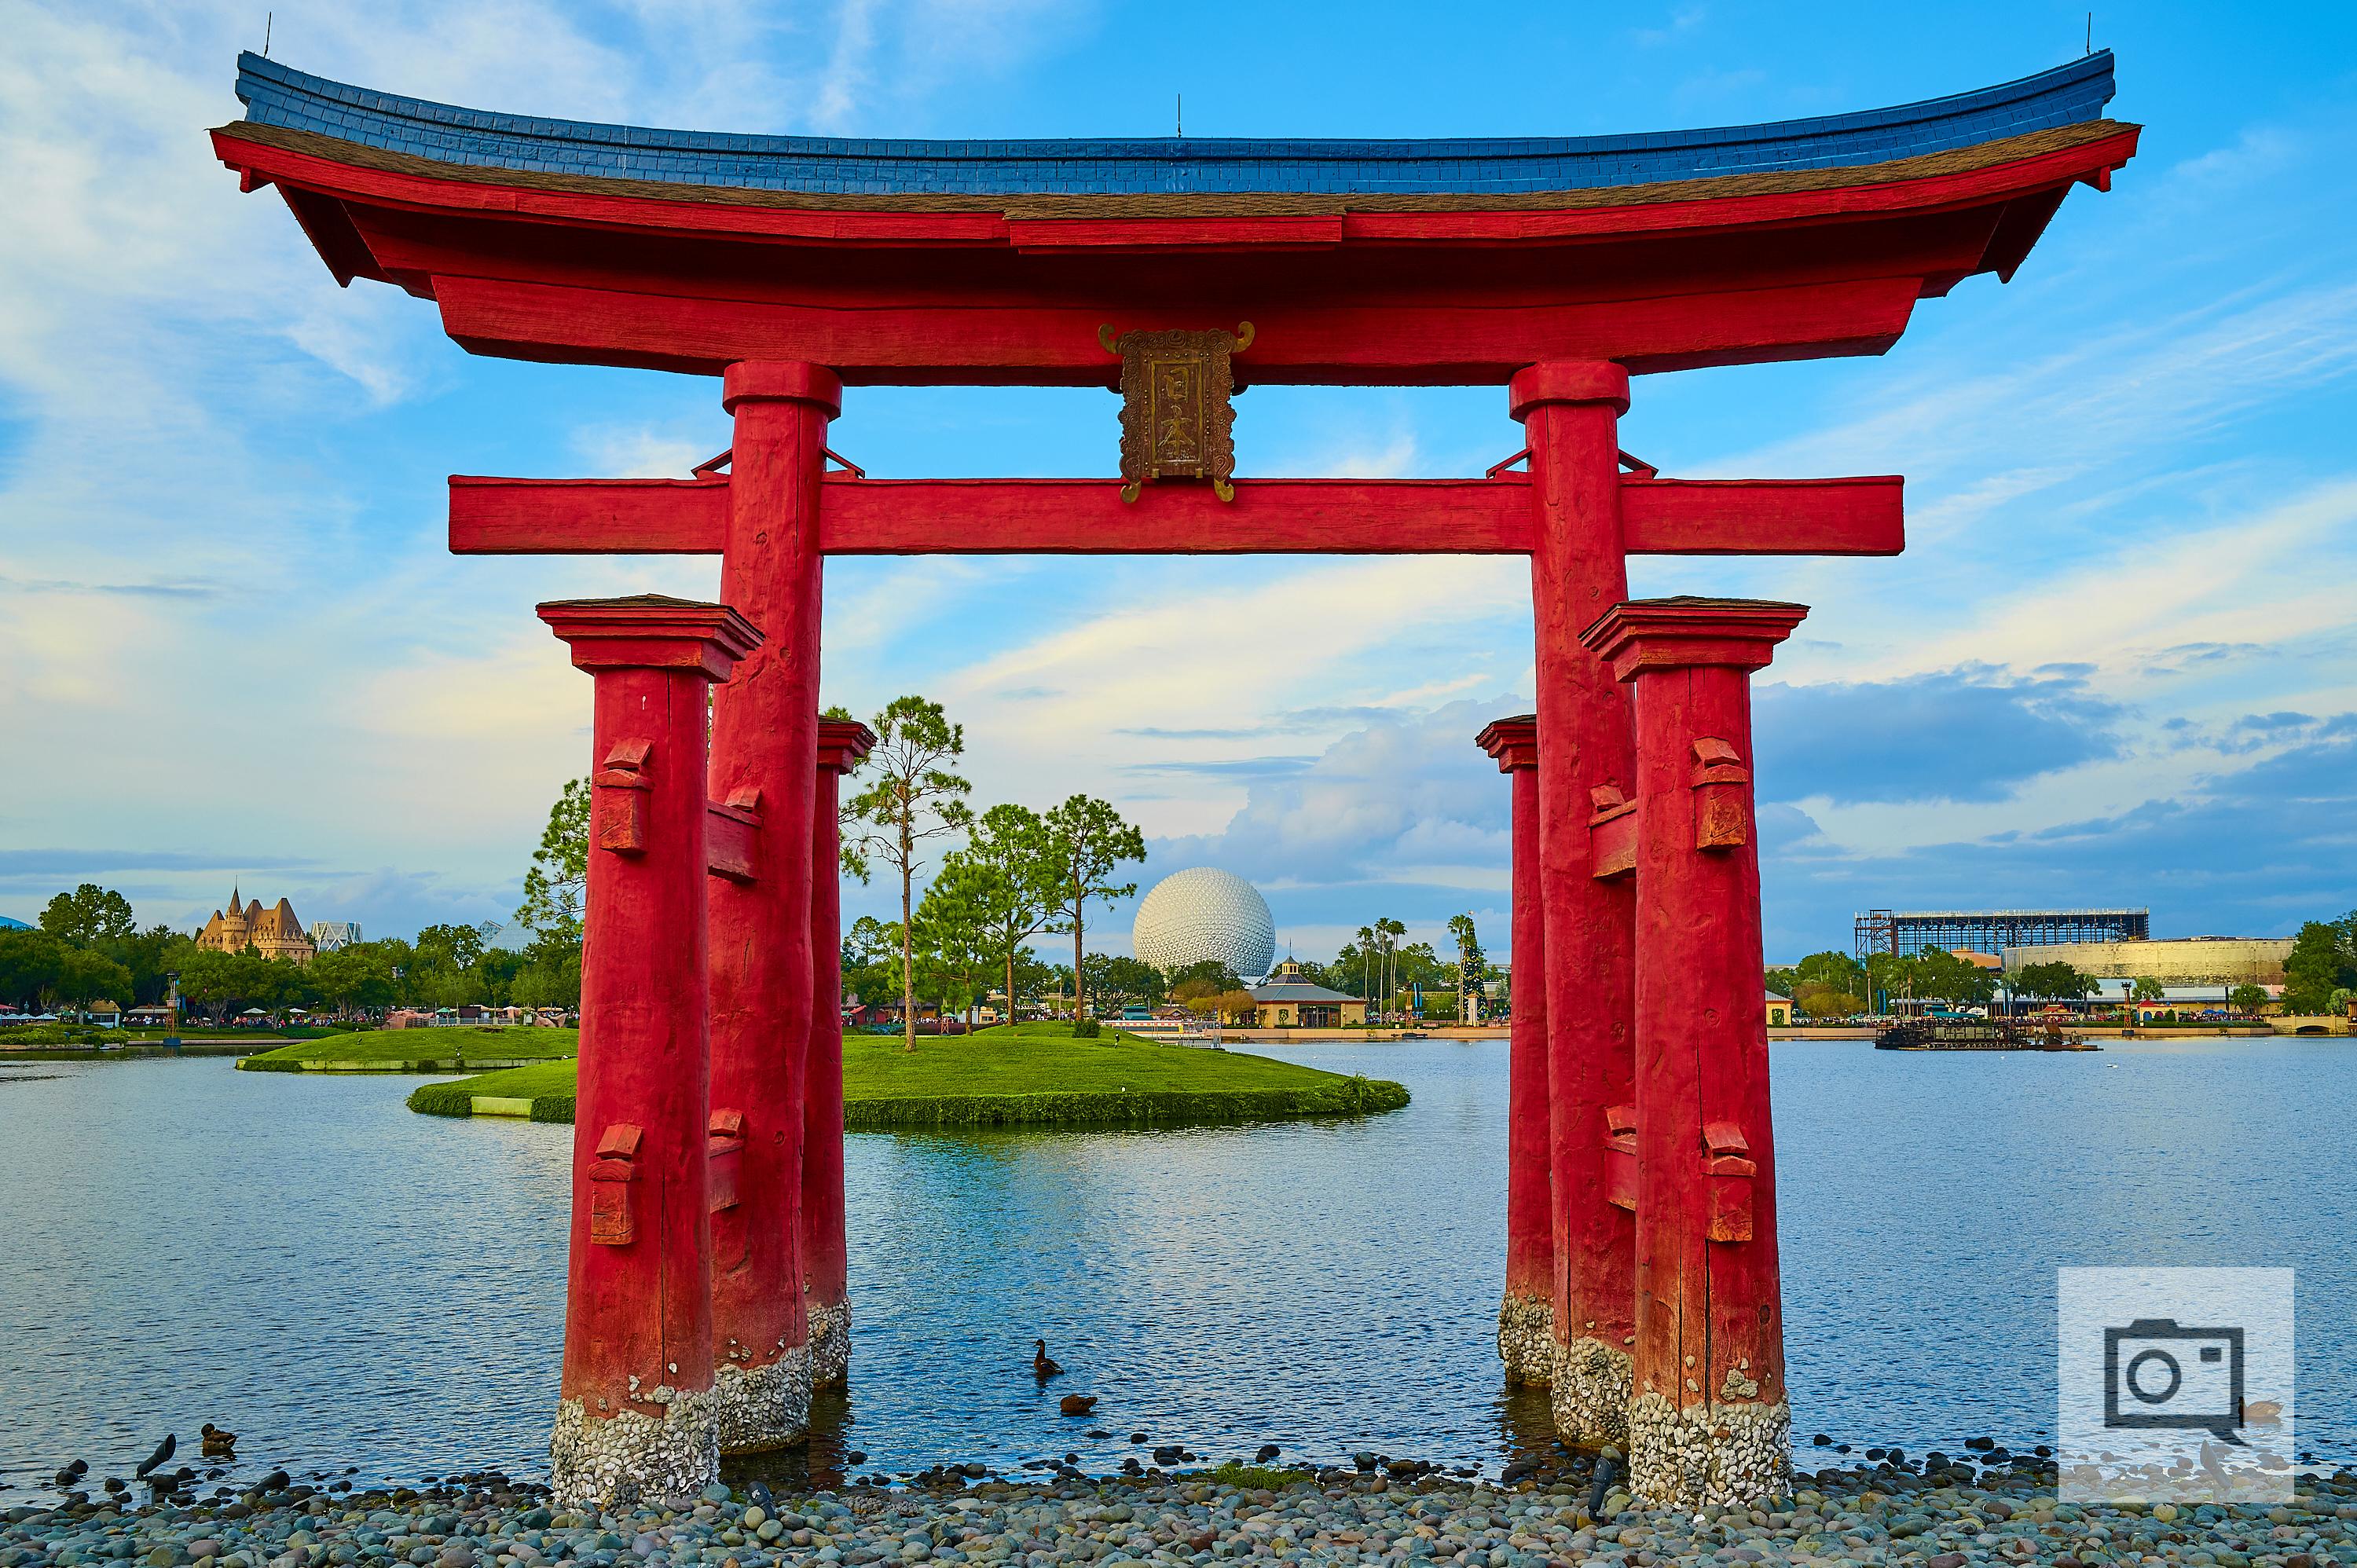
Here’s another edit I made of the same image using just HSL adjustments. It’s quite the departure from the previous example, isn’t it? Color isolation in photography can be point of contention among photographers, and while it’s an editing style I generally avoid, there’s a time and a place for it (a la the little girl in the red coat in Shindler’s List). It’s easily achievable with a couple of simple saturation adjustments if this is your cup of tea.
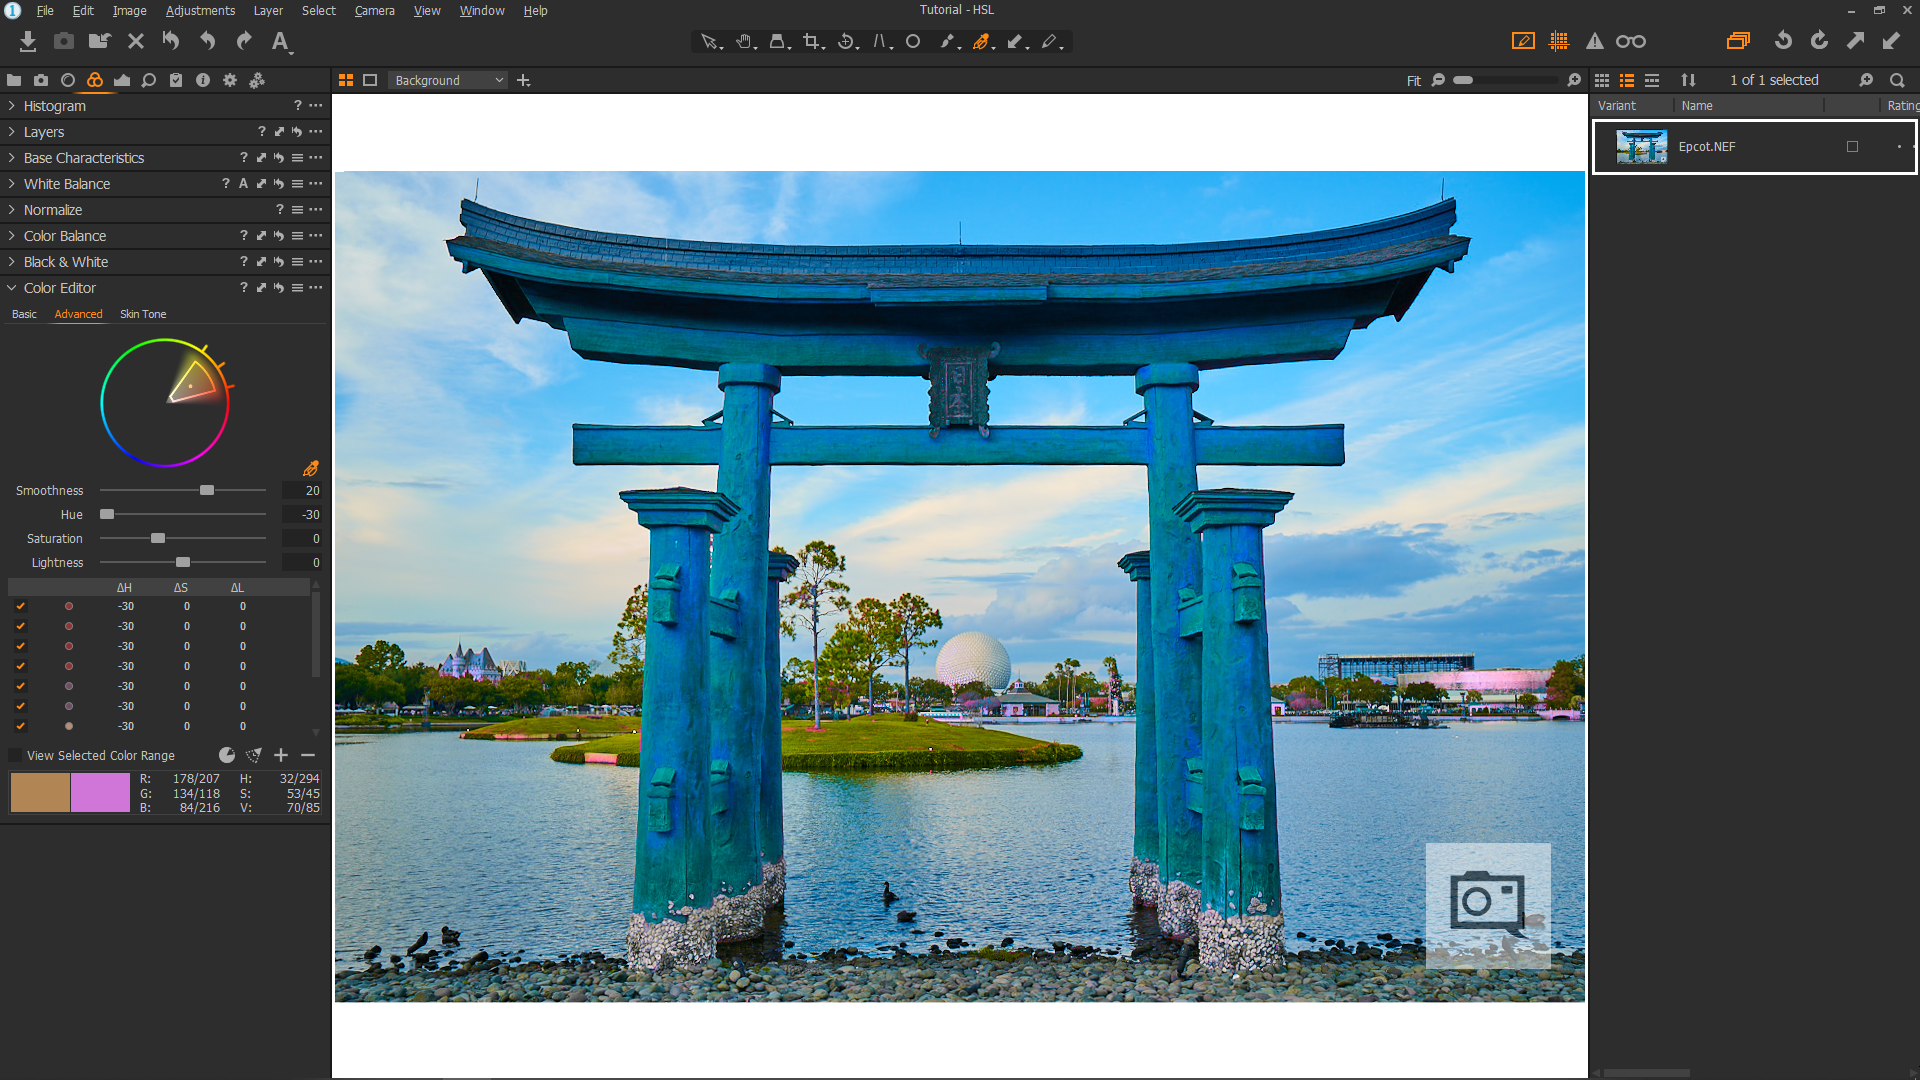
Here’s another edit made using just HSL adjustments, and as you can see, the results can get some rather interesting if you’re not careful.
But why stop there? To quote Michael Keaton from 1989’s Batman, “You wanna get nuts? Let’s get nuts!”
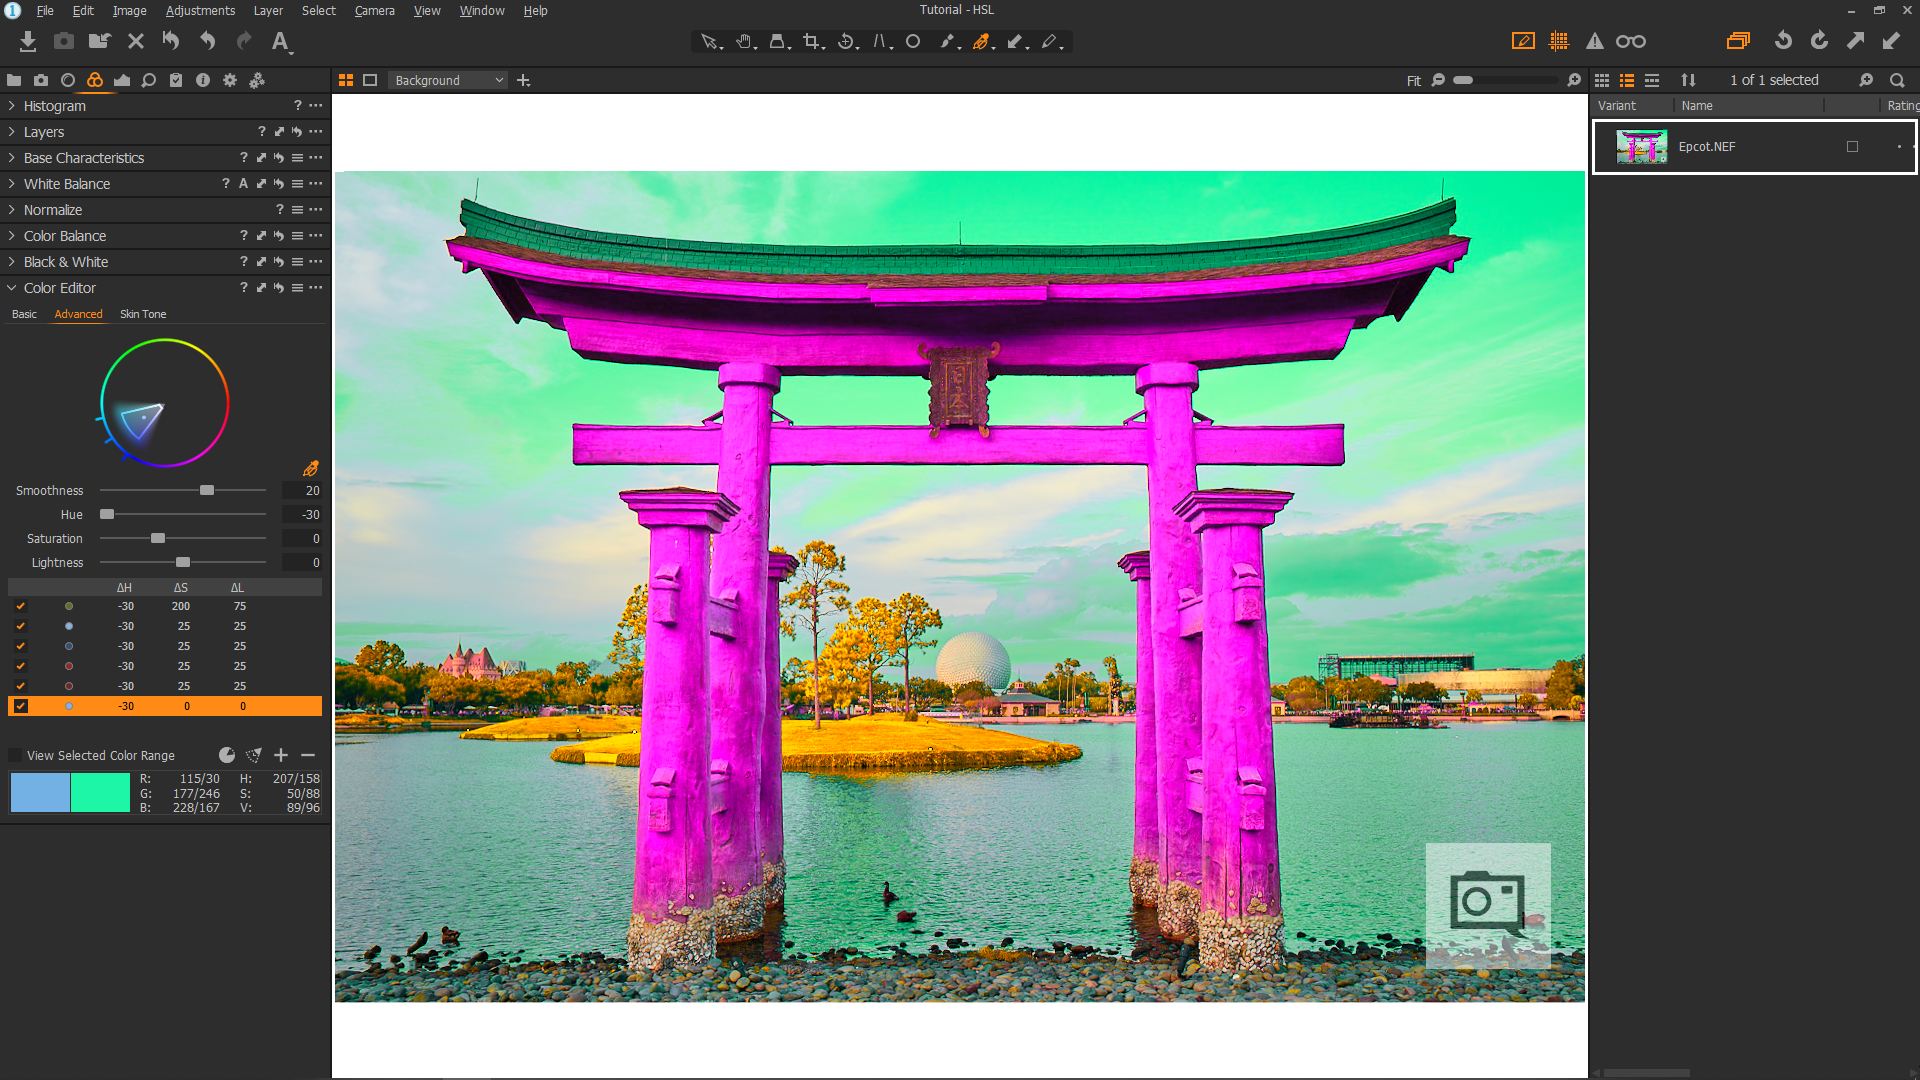
And this is what happens when HSL adjustments get out of hand. We’ve managed to turn EPCOT into a unearthly DayGlo colored acid trip. This is why we can’t have nice things…
In Conclusion
The mastery of Hue, Saturation, and Lightness adjustments is an invaluable tool for photographers looking to develop and breathe life into their images to deliver maximum visual impact. Having witnessed the extent to which HSL adjustments can dramatically alter the look of an image, it’s important to remember that a little goes a long way. You don’t always have to crank things up to 11 when making HSL adjustments. Since the human eye has a greater dynamic range than any consumer camera currently available, just a few small tweaks to the HSL values will help breathe life into otherwise flat RAW images. This restores the vibrancy that’s missing so that your final image matches what you actually saw. Next time you’re editing your photos, after you’re done making basic white balance, exposure, and composition adjustments, give the HSL sliders a go and see what you can do with your images.
Get rid of the ads!
Did you enjoy reading this article as much as we enjoyed writing it? There's a way to support us and our reporting, getting ad-free navigation and more as a bonus. Subscribe to us for less than a coffee per month —just $3.99— or take advantage of our yearly subscription with a hefty discount for only $25.- An ad-free experience
- A free mystery box for Lightroom or Capture One
- All the books in our store
- 20% discount on Capture One
- 30% discount on Imalume Photo Theft Protection
- 20% off Herbs and Kettle Tea Company.
- 20% off your order from MPIX printing services.
- 5% off Viltrox Products via their eCommerce store.
- 10% off all film developing, printing and scanning services from Blue Moon Camera and Machine
- 15% off 7Artisans products: The lens and accessory maker is offering a sweet discount for Phoblographer's readers.