
Hi everyone,
This is just a quick news post to tell everyone that we’ve updated our Canon EOS M5 review. When we were initially testing the camera’s image quality output, we only ran it through Lightroom. For a while now, I’ve chosen to stop working in Lightroom as I feel many of the same issues that many of you speak of.
Capture One Pro 10 announced its latest update yesterday though, and things have changed.

You see, in Adobe Lightroom you tend to immediately get very saturated tones right out of the box here especially at higher ISO settings. Capture One is a bit more neutral and also gives you better noise rendition.
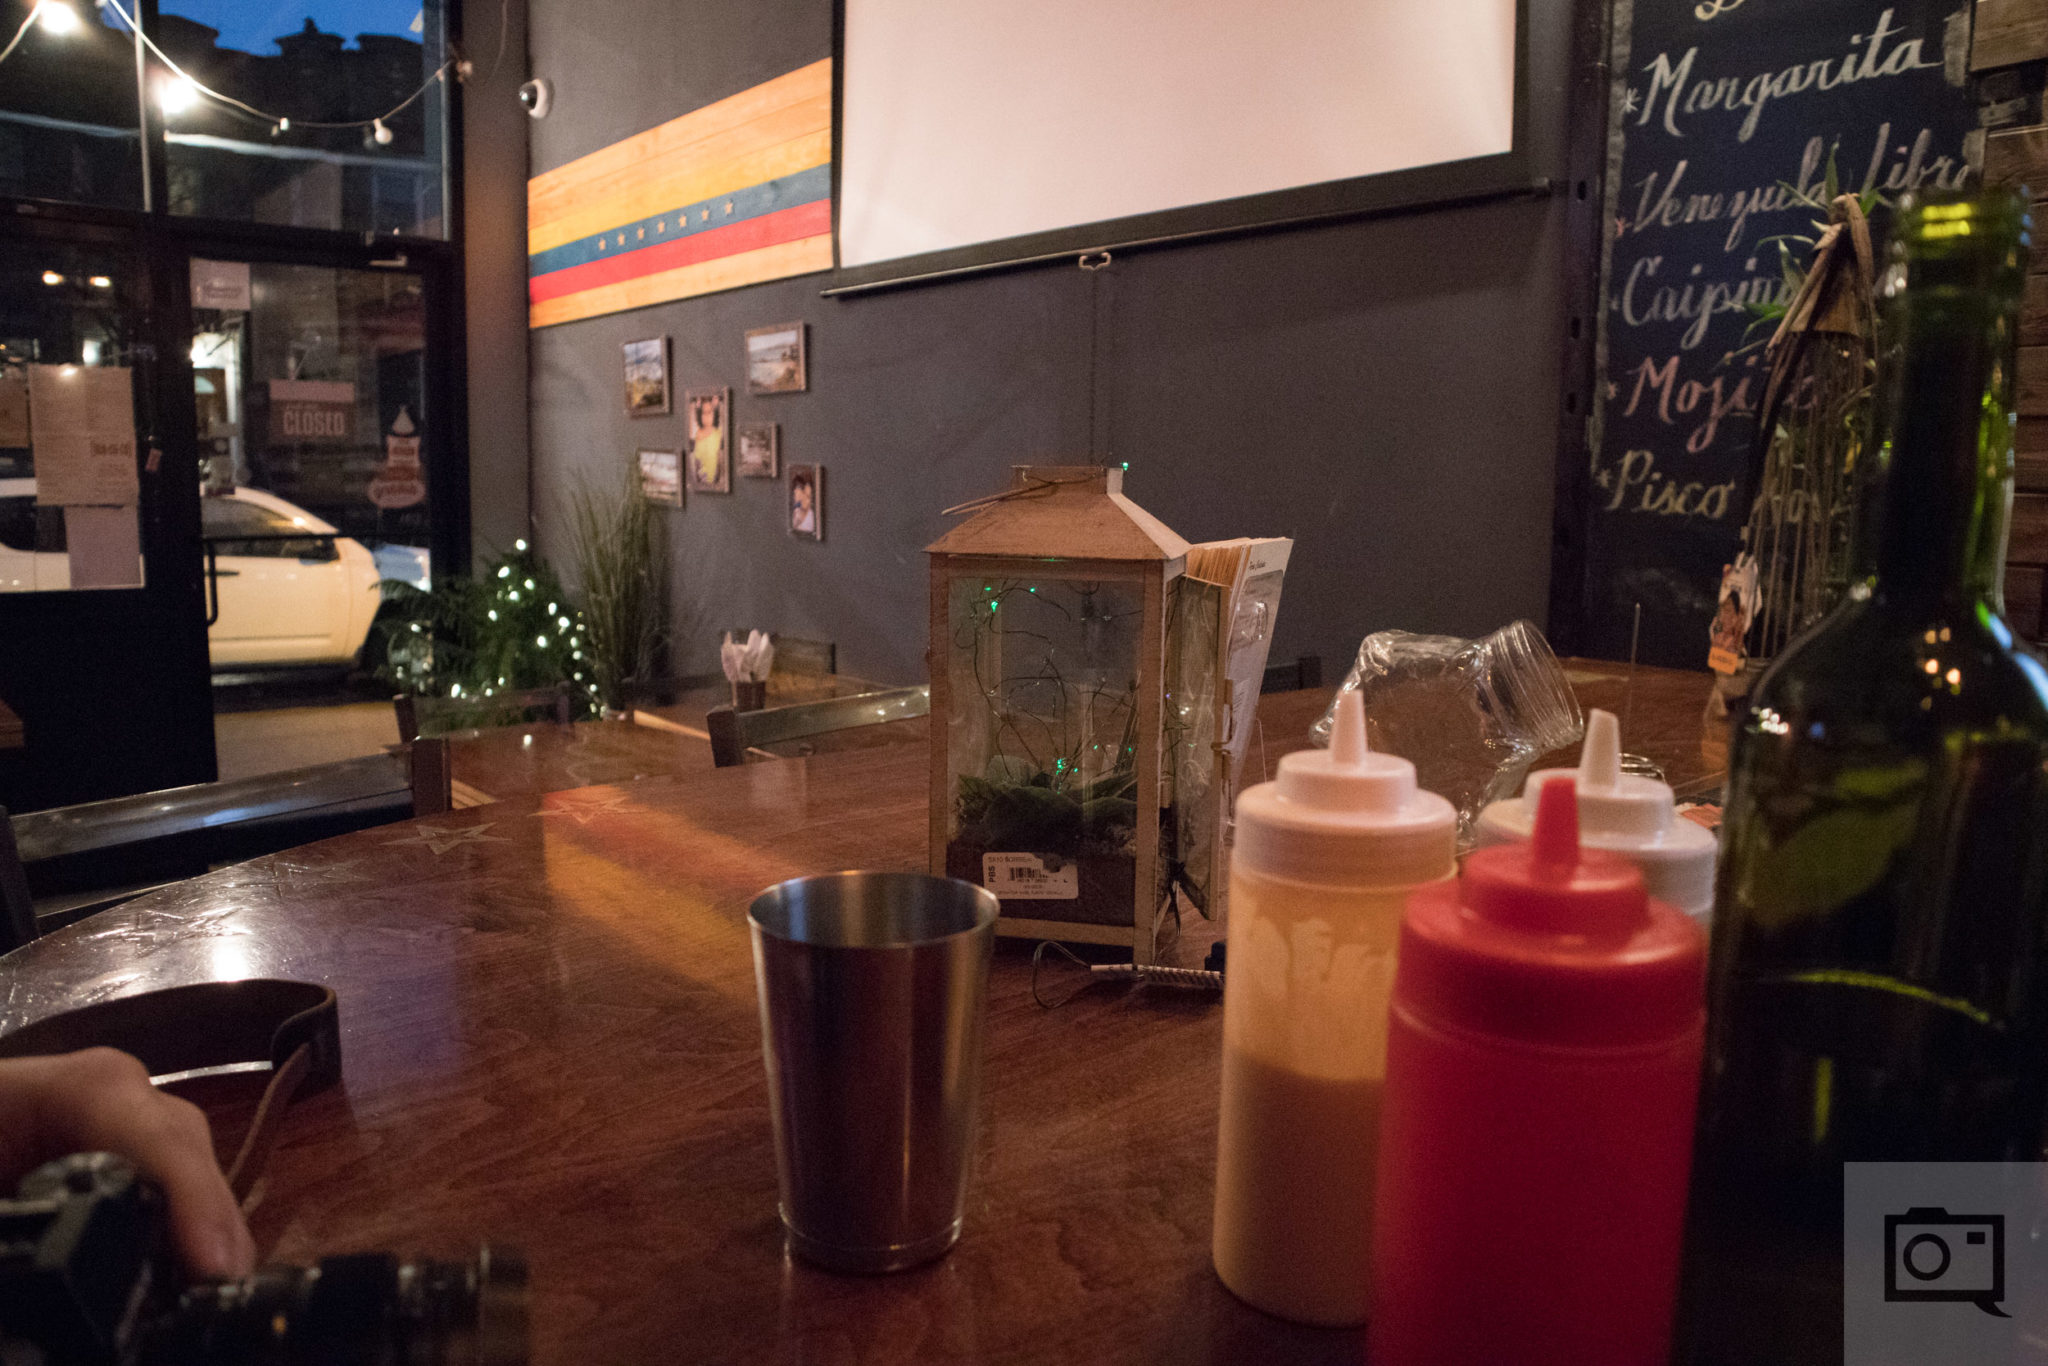
Look at:
- The orange/yellow sauce bottle
- The painting on the wall
- What Capture One Pro 10 immediately does with the rendition to work with the lens profile especially around the corners
- The color of the sky outside
- The tone on the lantern
Judging by this, I’d most likely want to work in Capture One Pro 10 when trying to get the best colors and skin tones because I also have much more control there. However, I completely understand that I’m in the minority of photographers that knows how to do this and truly understands it. Most people in Lightroom tend to work with just the adjustment panel despite this website having tutorial after tutorial and tutorial on how to get better skin tones. Here’s just one video we did:
You see Capture One can do something similar but it does so in a much different way. It isn’t as easy to do in Lightroom, but it gives you much more fine tuned control and makes you think about your images in a different way when it comes to editing them.
This video is going to have its own dedicated post soon, but I may as well show you all here. This is how I edit in Capture One Pro 10.
Either way, be sure to check out our Canon EOS M5 review as it has been updated.
Get rid of the ads!
Did you enjoy reading this article as much as we enjoyed writing it? There's a way to support us and our reporting, getting ad-free navigation and more as a bonus. Subscribe to us for less than a coffee per month —just $3.99— or take advantage of our yearly subscription with a hefty discount for only $25.- An ad-free experience
- A free mystery box for Lightroom or Capture One
- All the books in our store
- 20% discount on Capture One
- 30% discount on Imalume Photo Theft Protection
- 20% off Herbs and Kettle Tea Company.
- 20% off your order from MPIX printing services.
- 5% off Viltrox Products via their eCommerce store.
- 10% off all film developing, printing and scanning services from Blue Moon Camera and Machine
- 15% off 7Artisans products: The lens and accessory maker is offering a sweet discount for Phoblographer's readers.