Last Updated on 08/21/2015 by Chris Gampat
Editor’s Note: This blog post was originally published on Jenna Martin’s Blog. It is being syndicated here with permission.
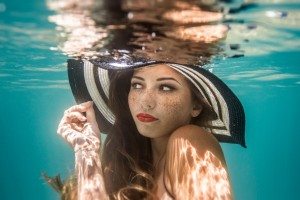
My brain is officially underwater.
Photographically, that is.
I see everything in terms of underwater. A friend shows me the gorgeous wedding dress she picked out, and I wonder what it would look like in a pool. My mother-in-law shows me a new chair she reupholstered and I wonder how well the color would hold up if it got wet. I’ve even made the mistake of approaching a potential model with an opening line of, “Excuse me, how well do you sink in water?”
Creepy…I know.
I’ll admit though, starting out in underwater photography was pretty intimidating. I couldn’t afford my own housing, so I built my own, and it actually worked fairly well in the beginning.
I was still scrambling in every other aspect though, as I couldn’t find any decent information online that wasn’t primarily geared toward photographing fish or plant life. So starting from scratch, I slowly began exploring the world of underwater portraits…and making every single mistake along the way.
If there’s anything I wish I would’ve known in the beginning (besides the fact to never ask a stranger how well they sink in a pool) this would be it.
1.) Have An Open Mind
Everything is different under the water. Lighting, for example, follows different principles and patterns. Lights need to be about 6 times stronger than on land (roughly, depending on depth and distance to your subject), and since dealing with radio signals can be a huge pain underwater, your lights usually need to be either constant, ambient light or strobes that are connected directly to your camera.
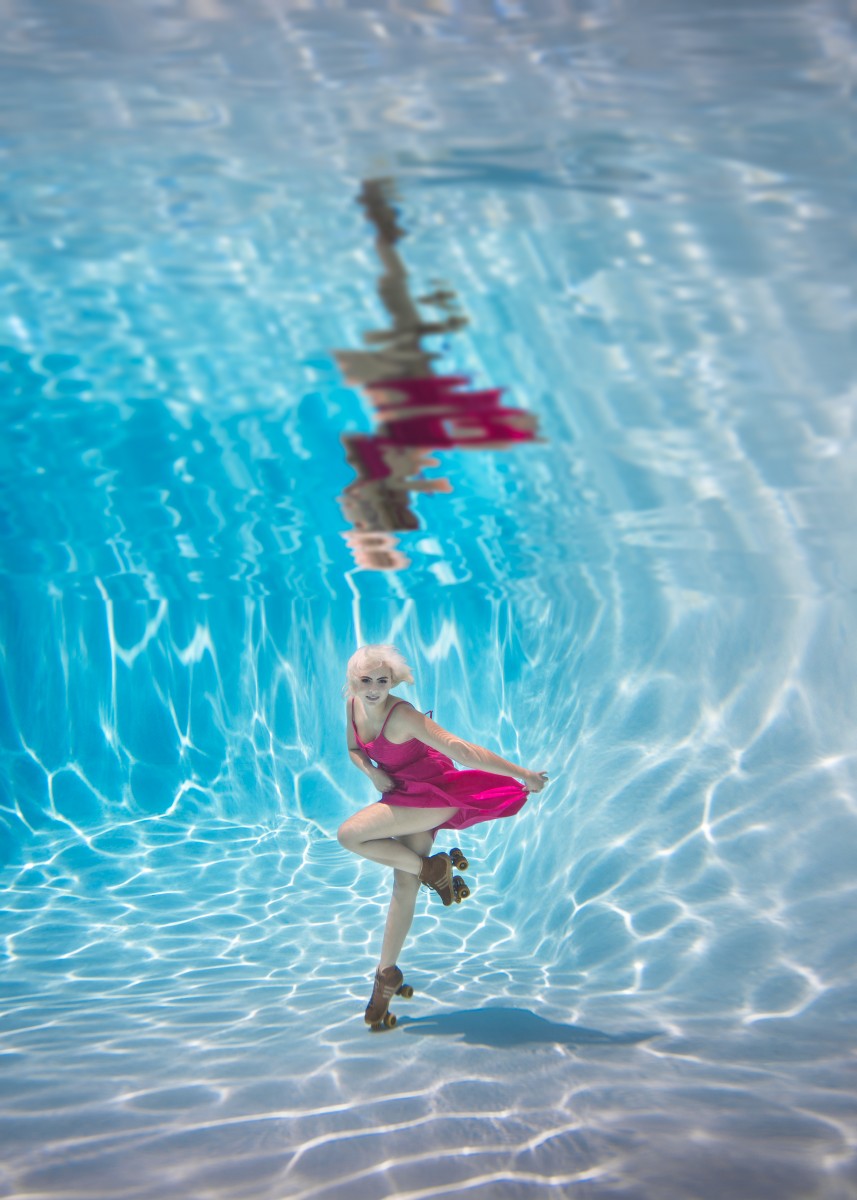
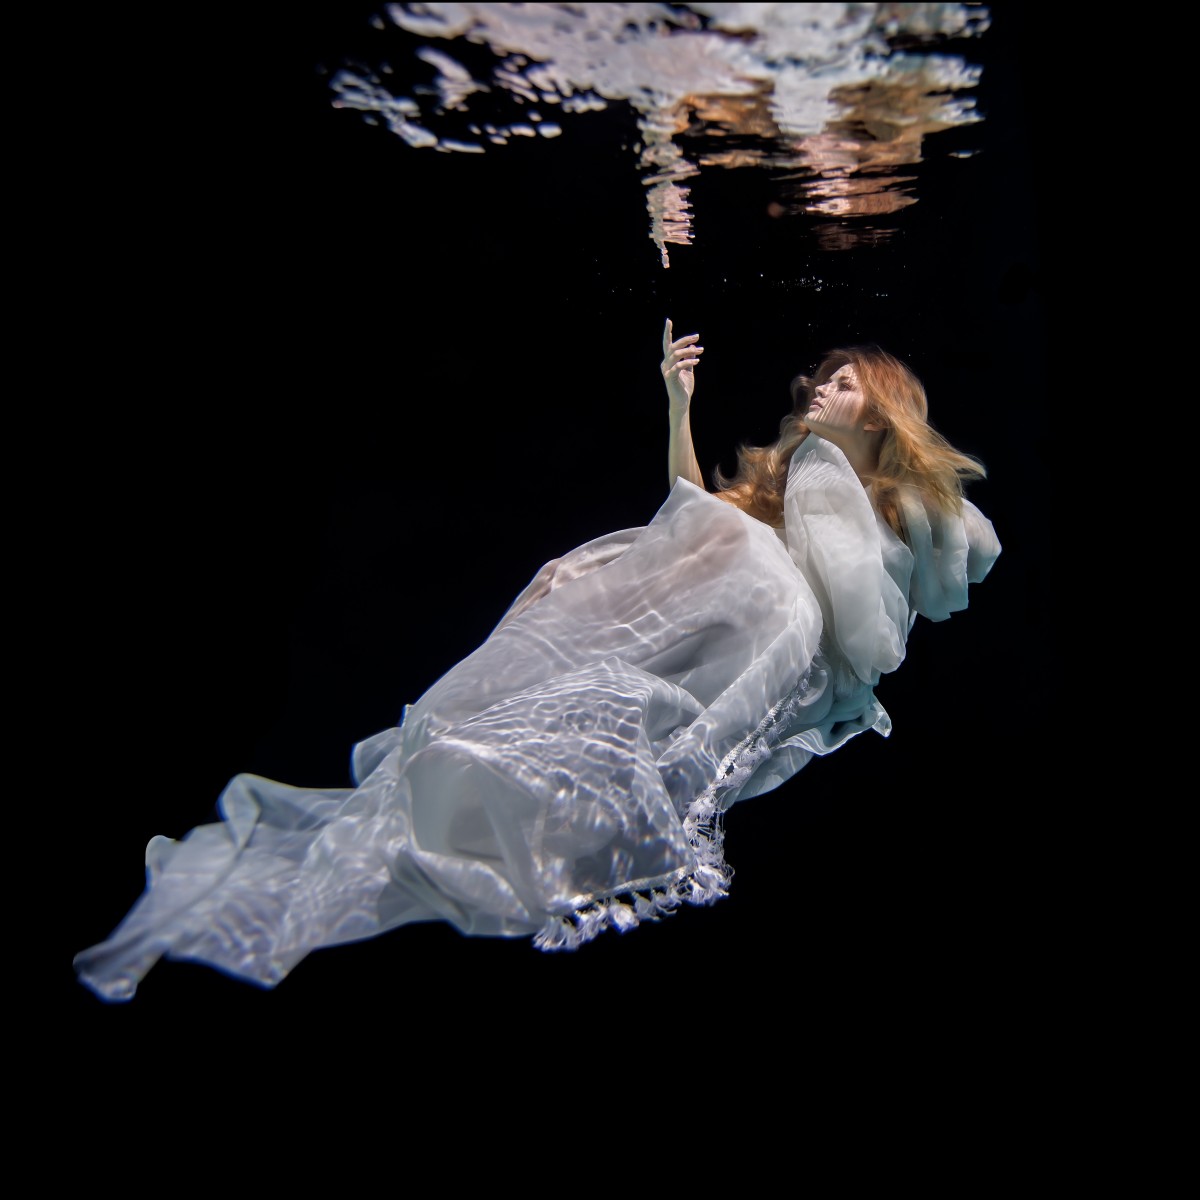
That’s not all though; you and your models need to adapt to shooting in a near zero-gravity environment. Your props and wardrobe will act differently as well – a gorgeous, flowing dress on land could be a tangled, transparent mess underwater, and a prop you thought would be a fantastic idea might be downright dangerous after it gets wet (I learned this the hard way with a fur coat and a pair of roller-skates).
No matter how long you’ve been shooting, you’re about to enter into a field that will make you feel like a novice all over again – which is incredibly exciting! But if you go into it with a rigid idea of how photography works, you’ll quickly find yourself frustrated and discouraged. So keep an open mind and be prepared to see things in a whole new light.
2.) Buy The Right Housing
Sorry to say, but underwater photography housing is no place to be pinching pennies. When you’re putting thousands of dollars’ worth of gear in an environment that could easily destroy it with just the tiniest of leaks, you need to know it’s going to be taken care of.
I only wish I would’ve known this earlier. At the time, I didn’t really know if this was something I was going to be actively pursuing, so I didn’t want to make a huge investment. After using my own housing for a while though, I knew I was hooked. So I started the process of upgrading, all while trying to spend as little money as possible.
Big mistake.
I ended up going through three different brands of cheap underwater bags, housing specifically made for underwater video and various hard housings. The bags all leaked at one point or another, the underwater video housing was NOT ideal for photos and the cheap hard housings were large and awkward. It was a mess.
Now, I use underwater housing from Ikelite, and for the life of me wish I would’ve just gone to them sooner. I could’ve saved myself a lot of time, money, stress and one very unfortunate, doomed 5d Mark II.
My advice – if you’re just looking to have some fun, consider renting some gear or buy a GoPro. Take some pics and see how you feel. If you decide underwater isn’t for you, at least you can return the gear or use a GoPro for literally anything else, and if you do decide this is something you want to pursue, sit down and have an honest look at the kind of underwater work you want to produce and the gear you’ll need to produce it.
3.) Know Not All Water Is Equal
Our cameras see light very differently than we do. A heavily chlorinated pool may seem clear to you, but it’s a hazy mess according to your camera. If you’re shooting in a pool that looks clear, but you’re images are turning out cloudy and useless, there might be an abundance of chemicals in the water that you aren’t seeing, but your camera is.
In my experience, I’ve found there’s really nothing better than a clear, freshwater lake, followed by clear saltwater, followed by a saltwater pool. I’ll avoid shooting in a chlorinated hotel pool at all costs.
There are also other factors that come into play as well. Oceans have currents and potentially dangerous animals, like jellyfish. Freshwater lakes here in Montana are insanely clear, but they’re also freezing. There’s always a tradeoff.
4.) Embrace Wide Angle Lenses
To cut down on the amount of water between your subject and your camera, you’ll want to shoot as close to your subject as possible. I mostly shoot at a focal length right around 25mm. Any longer and I have a hard time keeping my subject entirely in the frame, and I started running into additional focusing and clarity issues. Any wider and there is too much image distortion.
Not to say you shouldn’t break the rules a little bit though! If I know I’m shooting in an environment where outer distortion doesn’t matter (say on a completely black background), I’ll shoot with something as wide as an 8mm, and for close-up portrait work, I’ll shoot closer to 40-50mm. I’ve also taken my 85mm underwater to because, well, why the hell not?
5.) Learn To Sink
The key to staying underwater is not to hold your breath, but rather to let all your air out. The less air in your lungs, the less buoyant you are, and the easier it is to maneuver down there. It seems quite terrifying at first, but soon you’ll learn to work with the residual air in your lungs, and the more you do it the longer you can stay down. It’s not uncommon now for me to sink down 15 or 20 feet for the angle I need, while the model goes through a couple cycles of posing.
For some people though, the thought of letting all their air out before diving down is just too much to take, and in this case you can use weights or even dive equipment. If you’re having trouble, a great tip is to take a 25lb hand weight, wrap it in bubble wrap and then black felt (if you’re shooting in a pool, this helps to protect the liner), than hook your toe under it and pull yourself down. The model can do the same if she’s having a hard time sinking as well.
6.) Be Patient With Your Models
Underwater modeling is incredibly difficult. They’re modeling in completely new conditions, with water going up their nose almost the entire time. They also can barely see the camera – it’s mostly a blurry black blob to them. Plus, since you can’t talk underwater, they don’t even know if what they’re doing is what you’re looking for.
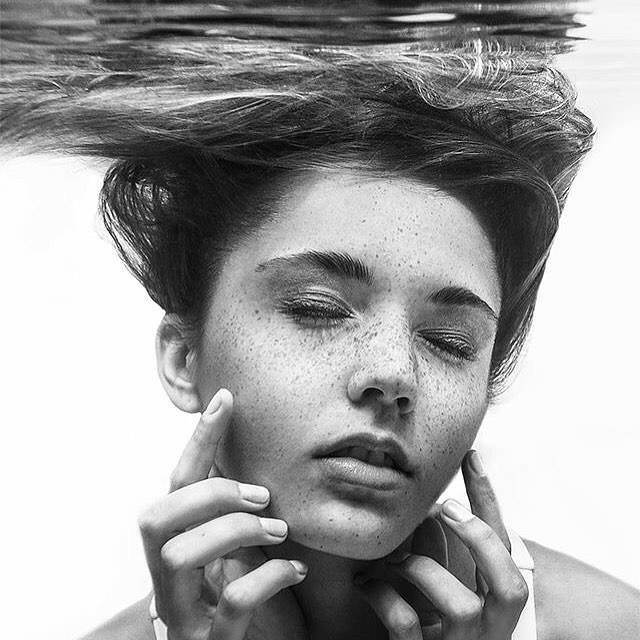
So give them plenty of time to figure this all out. For most models, first they need to practice letting their air out and sinking. Once they get the hang of this, turn your focus to facial expressions. Most people naturally make a variety of unattractive facial poses underwater, like squinty eyes and nostrils, chipmunk cheeks or “fish lips” (what I call the underwater version of the “duck face”).
After they learn how to keep their face looking natural and relaxed, move onto body poses. Reiterate soft hands, pointed toes and a long neck.
I try to give my models a list of poses before the shoot so they can practice them on land before going underwater, and then during the shoot I slowly walk them through the process, suggesting small movement changes a little at a time.
It’s also important that you are fully aware of the conditions your models are in. Personally, I never, ever wear a wetsuit. I certainly could, considering Montana water is more than cold enough to warrant one, but then I wouldn’t have any idea how my model felt. By being in the exact same conditions my models are in, I’m able to better gauge what is appropriate to ask of them given the current conditions.
7.) Learn to Shoot Fast
Even if the water isn’t even that cold, a long day of shooting will quickly wear on both of you. Your model will have water going up her nose and in her ears as she tries to move into different poses, and you’ll because exhausted from trying to maneuver that camera around underwater. You’ll both be swallowing plenty of water and will both feel sick at some point (I like to keep a few bottles of freshwater nearby, as well as a box of crackers to help combat water sickness).
From a photography standpoint though, shooting fast is important because things change underwater, primarily makeup and skin texture. Fingers become pruney, makeup will run and fade and skin will take on an unattractive dimpled, dead texture, which you definitely don’t want…unless you’re going for a zombie look or something.
So this is where good planning will come in. If everyone knows exactly what you want before you even get into the water, things will naturally move much faster. If you have a huge shoot coming up with a new model, meet her a few days before and do a kind of rehearsal shoot so she can practice. Some models pick it up in a heartbeat; some need 3 or 4 shoots to begin even looking somewhat comfortable in the water.
8.) Have Plenty Of Assistance
Any extra hands on an underwater shoot will not go unused. If you have lighting or other equipment that’s on land just out of reach, for example, it’s much easier to have an assistant adjust it for you while you do a test shot, rather than have to get out of the pool and move it yourself until you finally get the look you’re going for.
Plus, underwater shooting can be a little dangerous at times, especially when the model is not wearing something they would normally wear underwater. Large dresses can become tangled, props can become heavy or the model can become disoriented while trying to hit certain poses. Extra hands on deck help make your job easier while keeping everyone safe.
9.) Embrace Post-Processing
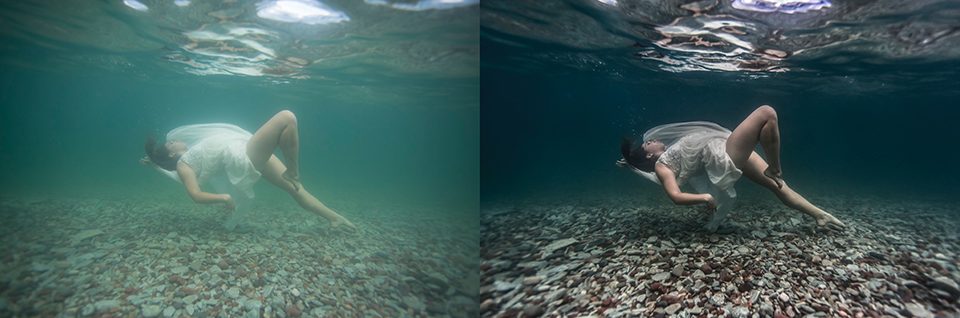
Water is a medium, and anytime you shoot through a medium, you’re going to run into some issues. All of those brilliant underwater photos you see on the internet, even ones by Bruce Mozert, are not entirely straight out of camera.
Shooting through water takes away image clarity and sharpness, adds a lot of background stuff to clean up (bubbles, backscatter, light reflections), not to mention that pesky blue cast that takes some dealing with (you could use filters to try and combat the blue cast, but personally I feel they cause even more of a headache).
If your images look less than stellar straight out of camera, don’t get frustrated. You don’t need to go out and buy a few thousand dollars in lighting equipment; you most likely just haven’t put them through the proper post-processing techniques yet.
10.) Understand This Takes Time
To be blunt – underwater photography is not easy. It’s physically exhausting, time-consuming and potentially very expensive. When I first started I was coming home waterlogged and sick, with red, itchy eyes, ringing ears and about 10,000 images to sort through…and only 2 would make the cut. But even then, I was completely addicted.
Don’t be too hard on yourself in the beginning. There are a lot of components that need to come together to make a successful photograph, and it takes a lot of practice to get to that point. Take it one day at a time, and you’ll be there before you know it!
And of course, if you’re interested in a hands-on underwater portraiture course, don’t forget to check out my workshops next year in Greece and Bali, and make sure and SUBSCRIBE for more posts like this, and follow me on Facebook,Instagram & Twitter :).
Get rid of the ads!
Did you enjoy reading this article as much as we enjoyed writing it? There's a way to support us and our reporting, getting ad-free navigation and more as a bonus. Subscribe to us for less than a coffee per month —just $3.99— or take advantage of our yearly subscription with a hefty discount for only $25.- An ad-free experience
- A free mystery box for Lightroom or Capture One
- All the books in our store
- 20% discount on Capture One
- 30% discount on Imalume Photo Theft Protection
- 20% off Herbs and Kettle Tea Company.
- 20% off your order from MPIX printing services.
- 5% off Viltrox Products via their eCommerce store.
- 10% off all film developing, printing and scanning services from Blue Moon Camera and Machine
- 15% off 7Artisans products: The lens and accessory maker is offering a sweet discount for Phoblographer's readers.