Want more Useful Photography Tips? Click here.
You know that you’ve all had this problem–you shoot in RAW, but the image looks nowhere as good as the JPEG preview on the back of your camera’s LCD screen. So you go through the basic adjustments panel in Adobe Lightroom and with lots of disappointment, realize that you can’t make the image look like the JPEG.
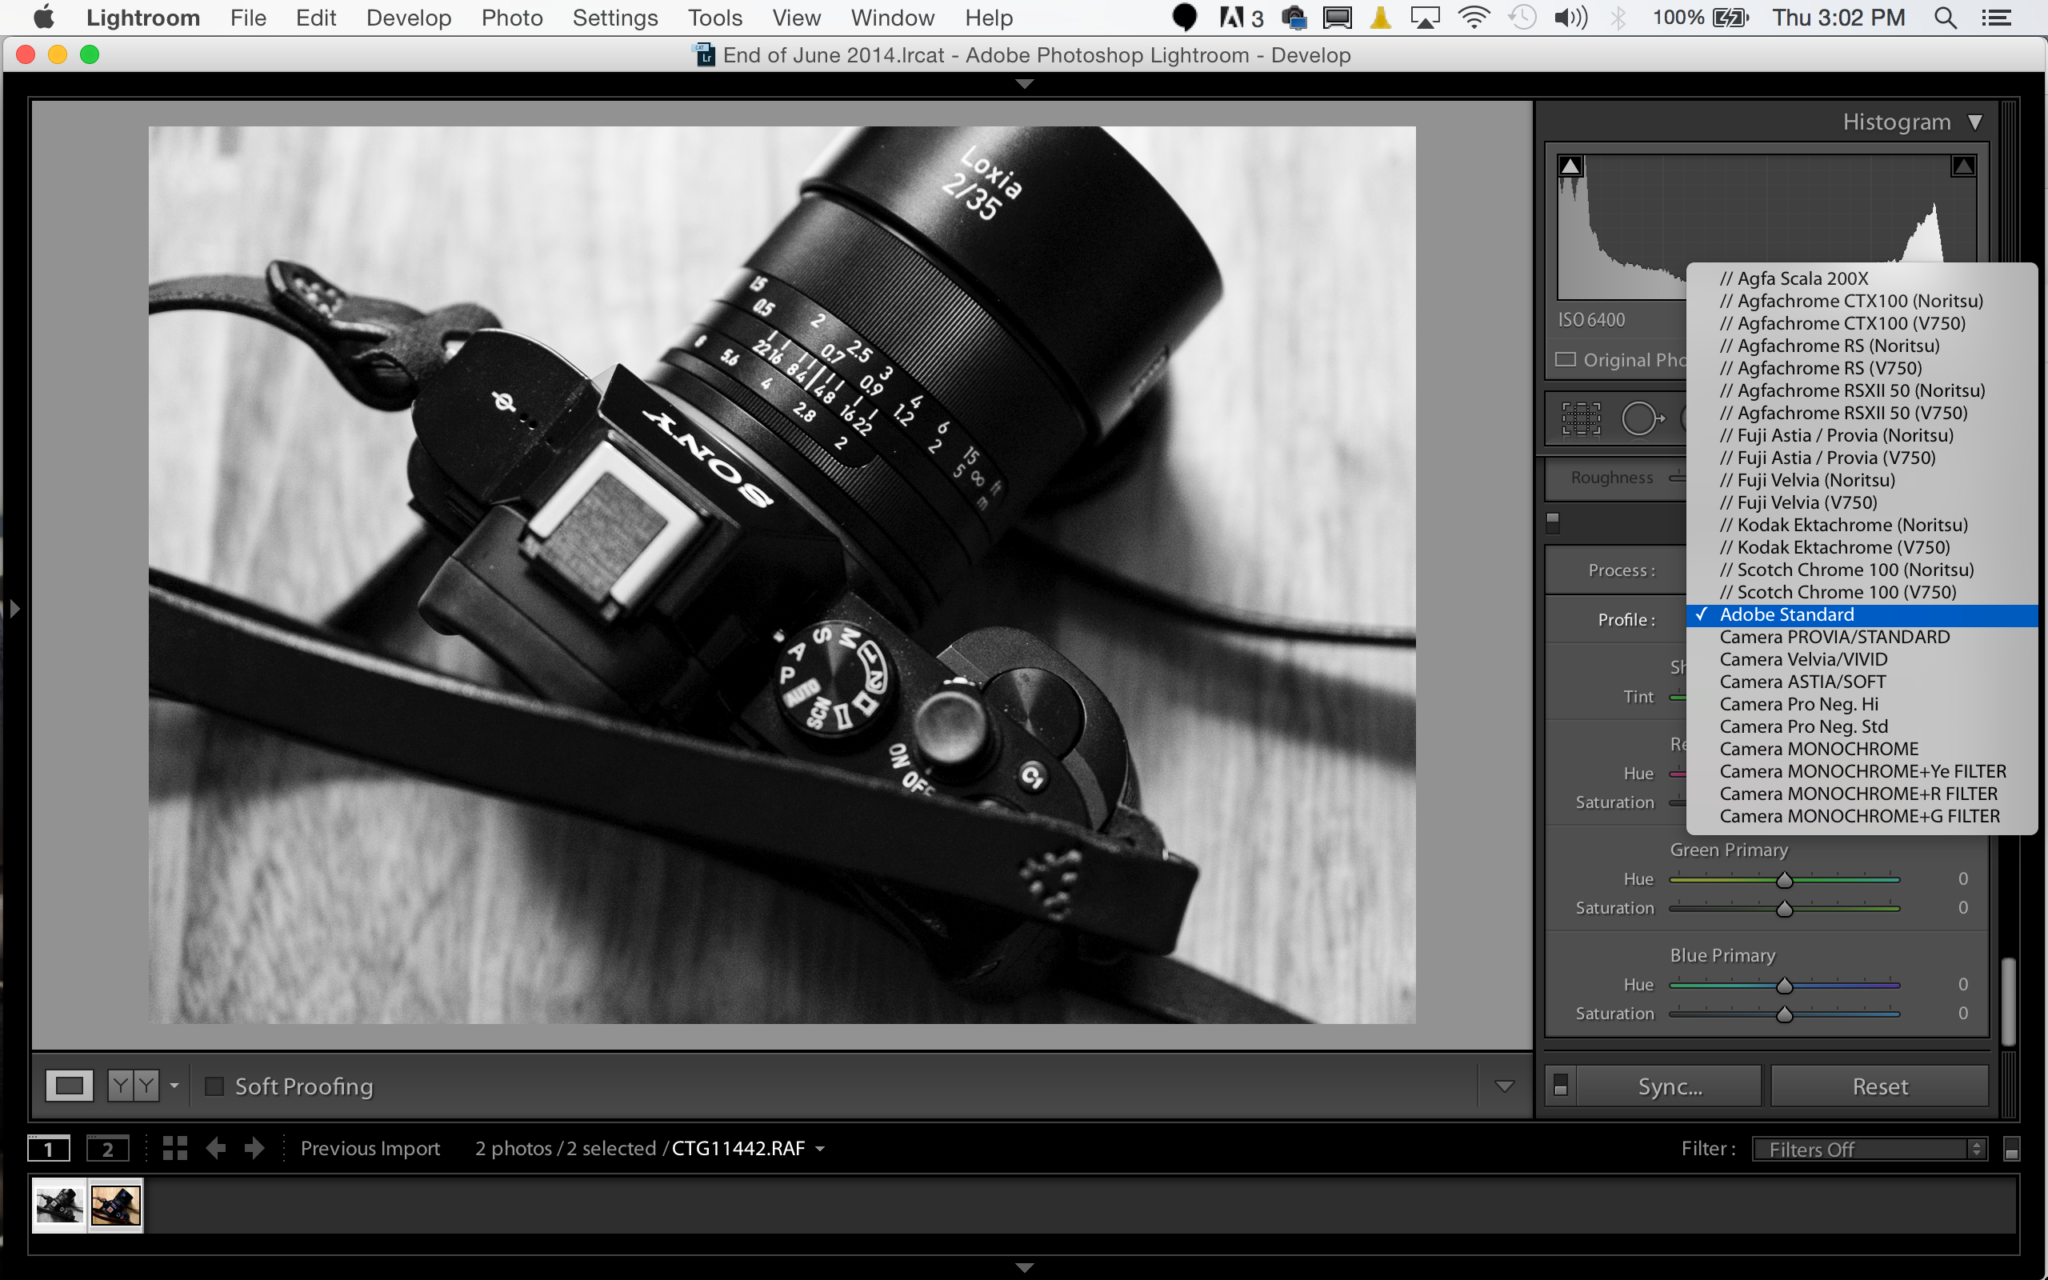
We’re not going to tell you to shoot in JPEG (though there is no real problem with that) so what you should do is scroll down the the Camera Calibration section of Adobe Lightroom’s Develop panel and click on Profile. When you do this, you’ll get the camera profiles and even some of your own if you’ve bought them.
Own a Fujifilm camera? Velvia and Astia are finally yours…digitally that is!
But that’s not the end. You need to go in and sharpen the image, maybe kill some image noise, add a bit more contrast, boost the clarity and maybe mess with the exposure a bit. Then you’ve got an image that’s ready to go.
Go give it a shot.
Get rid of the ads!
Did you enjoy reading this article as much as we enjoyed writing it? There's a way to support us and our reporting, getting ad-free navigation and more as a bonus. Subscribe to us for less than a coffee per month —just $3.99— or take advantage of our yearly subscription with a hefty discount for only $25.- An ad-free experience
- A free mystery box for Lightroom or Capture One
- All the books in our store
- 20% discount on Capture One
- 30% discount on Imalume Photo Theft Protection
- 20% off Herbs and Kettle Tea Company.
- 20% off your order from MPIX printing services.
- 5% off Viltrox Products via their eCommerce store.
- 10% off all film developing, printing and scanning services from Blue Moon Camera and Machine
- 15% off 7Artisans products: The lens and accessory maker is offering a sweet discount for Phoblographer's readers.