Want more Useful Photography Tips? Click here.
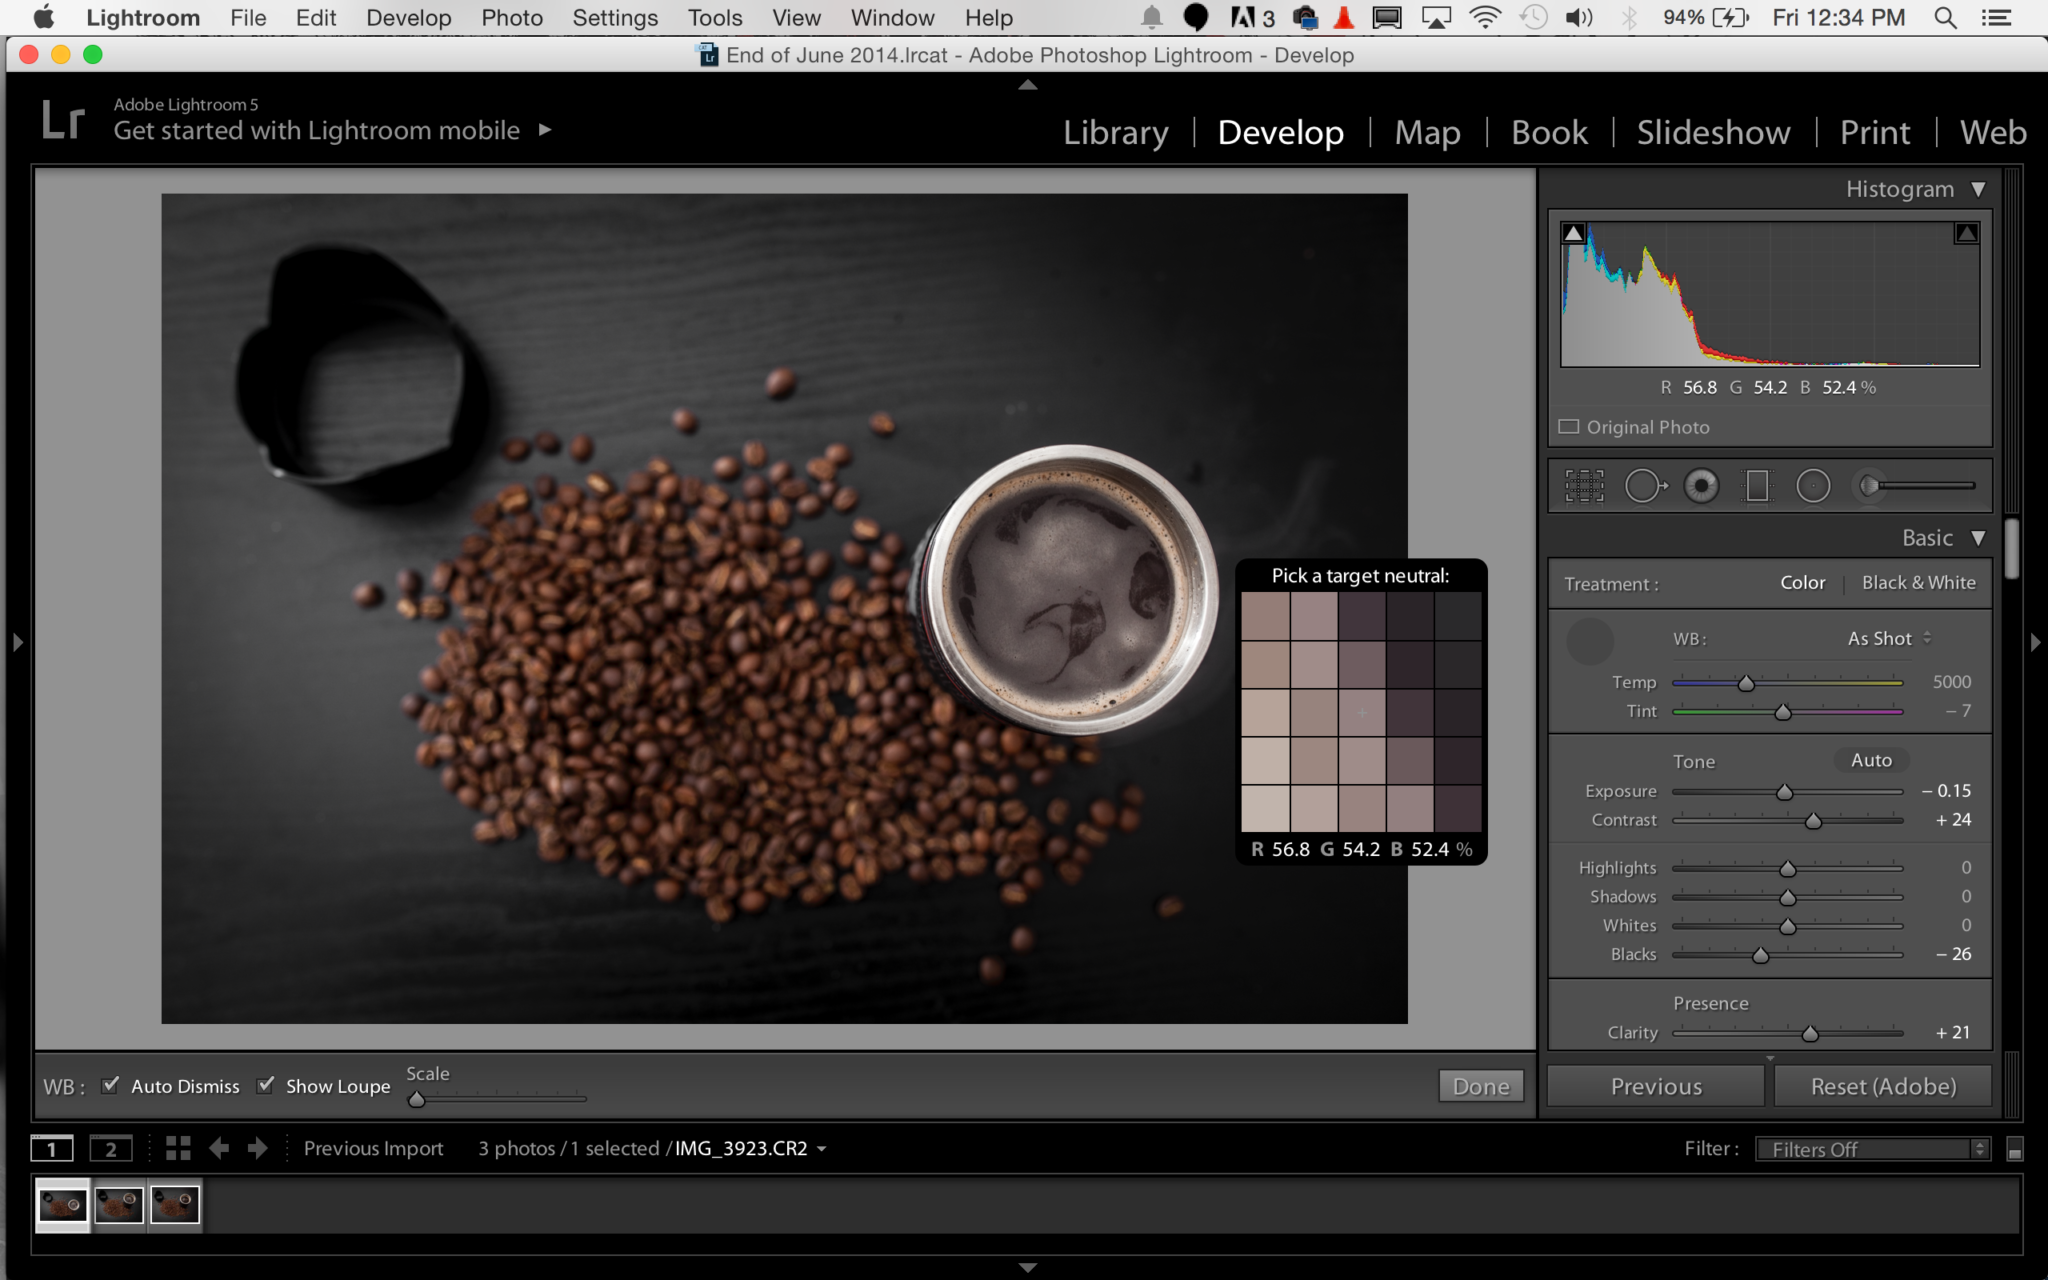
While you can manually white balance in the camera with the aid of something like the ExpoDisk, you might not always have the time to do so during a shooting situation. Providing that you’ve shot in RAW, you can still get a great deal of latitude in the editing process. To get the best white balance though, you should start a very neutral point. The way to do this is to start with something along the lines of what’s known as middle gray.
Start by using the eyedropper tool next to the white balance sliders in Adobe Lightroom and scrolling it over the image. You’ll need to find the pixels that are the closest to 50% in the RGB sections, which you can see as you scroll over the areas. In order to save time, try looking at the areas where the darkest blacks meet the whites in the image if that’s possible. Once you have something close, select those pixels and you’ll get something near to a neutral white balance.
From that point, you can manipulate the image to be either warmer or cooler and set your tint levels accordingly to how you want them to be.
Give it a shot. Then when you’re done with this, check out our tips on how to get better color.
Get rid of the ads!
Did you enjoy reading this article as much as we enjoyed writing it? There's a way to support us and our reporting, getting ad-free navigation and more as a bonus. Subscribe to us for less than a coffee per month —just $3.99— or take advantage of our yearly subscription with a hefty discount for only $25.- An ad-free experience
- A free mystery box for Lightroom or Capture One
- All the books in our store
- 20% discount on Capture One
- 30% discount on Imalume Photo Theft Protection
- 20% off Herbs and Kettle Tea Company.
- 20% off your order from MPIX printing services.
- 5% off Viltrox Products via their eCommerce store.
- 10% off all film developing, printing and scanning services from Blue Moon Camera and Machine
- 15% off 7Artisans products: The lens and accessory maker is offering a sweet discount for Phoblographer's readers.