Last Updated on 09/25/2014 by Julius Motal

When it comes to working with raw files, much of what’s been available from cameras for the past five years has been incredibly versatile. With that said, getting better color in Adobe Lightroom while editing has to do with running down the development panel in the right order. For starters, there is a reason why Adobe placed the most basic adjustments at the top and the more complicated ones further down.
And believe it or not you should pretty much ignore the saturation and vibrance sliders. Working with these two sliders are the biggest way to screw up a photo’s color. So here’s how to begin getting better color in Lightroom.
The Basic Adjustments

To start, you’ll begin by working with the very basic adjustments at the top of the development panel. We recommend that here you tweak your white balance, exposure, contrast, black levels and clarity all accordingly. However, this part is SUPER SUBJECTIVE and so you’ll want to tweak them accordingly to how you think the image looks good.
Keep in mind that you’ll also want to be conservative about how you tweak the image at this point and don’t push it too much. The reason why is because you’re going to be working more in depth with the colors later. Additionally, the way you white balance and tint the image will affect how the colors are worked with later on.
What you should also remember is that tweaking the contrast of the image can make the image look sharper than it really is when you’re boosting contrast, but it can also make some colors pop more than others. Again though, you’ll need to work with this individually with each image you work with.
But whatever you do: DON’T TWEAK THE SATURATION AND VIBRANCE SLIDERS! They will screw up the entire image. Instead, you’re going to need to work with the individual color channels and work with specific colors. By working with the saturation and vibrance sliders otherwise, you’ll be affecting the performance of the overall image.
At this point, it’s also worth it to note that we used the Canon 5D Mk II and Sigma 85mm f1.4 for this image. The camera’s sensor and the lens are more than good enough to help you create a better image in post-production.
Fine Tuning of Colors

To start working with the colors of the image, we highly recommend that you scroll down to the specific color channels that allow you to work with the saturation and luminance. Saturation determines more or less how wet and vivid a color looks while the luminance determines how bright that color is. Again, you’re going to need to work with the color channels specifically to see how the tweaking works. Part of this will be based on how you white balanced the image. If you’re first starting out, we recommend moving the sliders back and forth and seeing how the colors get affected.
Like before, this is SUPER SUBJECTIVE. In fact, editing an image overall is super subjective. In the image above, I edited it to emphasize more purples than greens in the tint because that’s just how I liked it. So obviously working with the purple slider in the luminance and saturation areas will affect it accordingly.
Again, this will also vary from image to image. If you’re shooting a nice green landscape with a perfectly blue sky, the dominant images may be blues and greens–and so tweaking those sliders accordingly will affect the image.
Once you think you have what you want, it’s time to sharpen the image.
Modest Sharpening Techniques
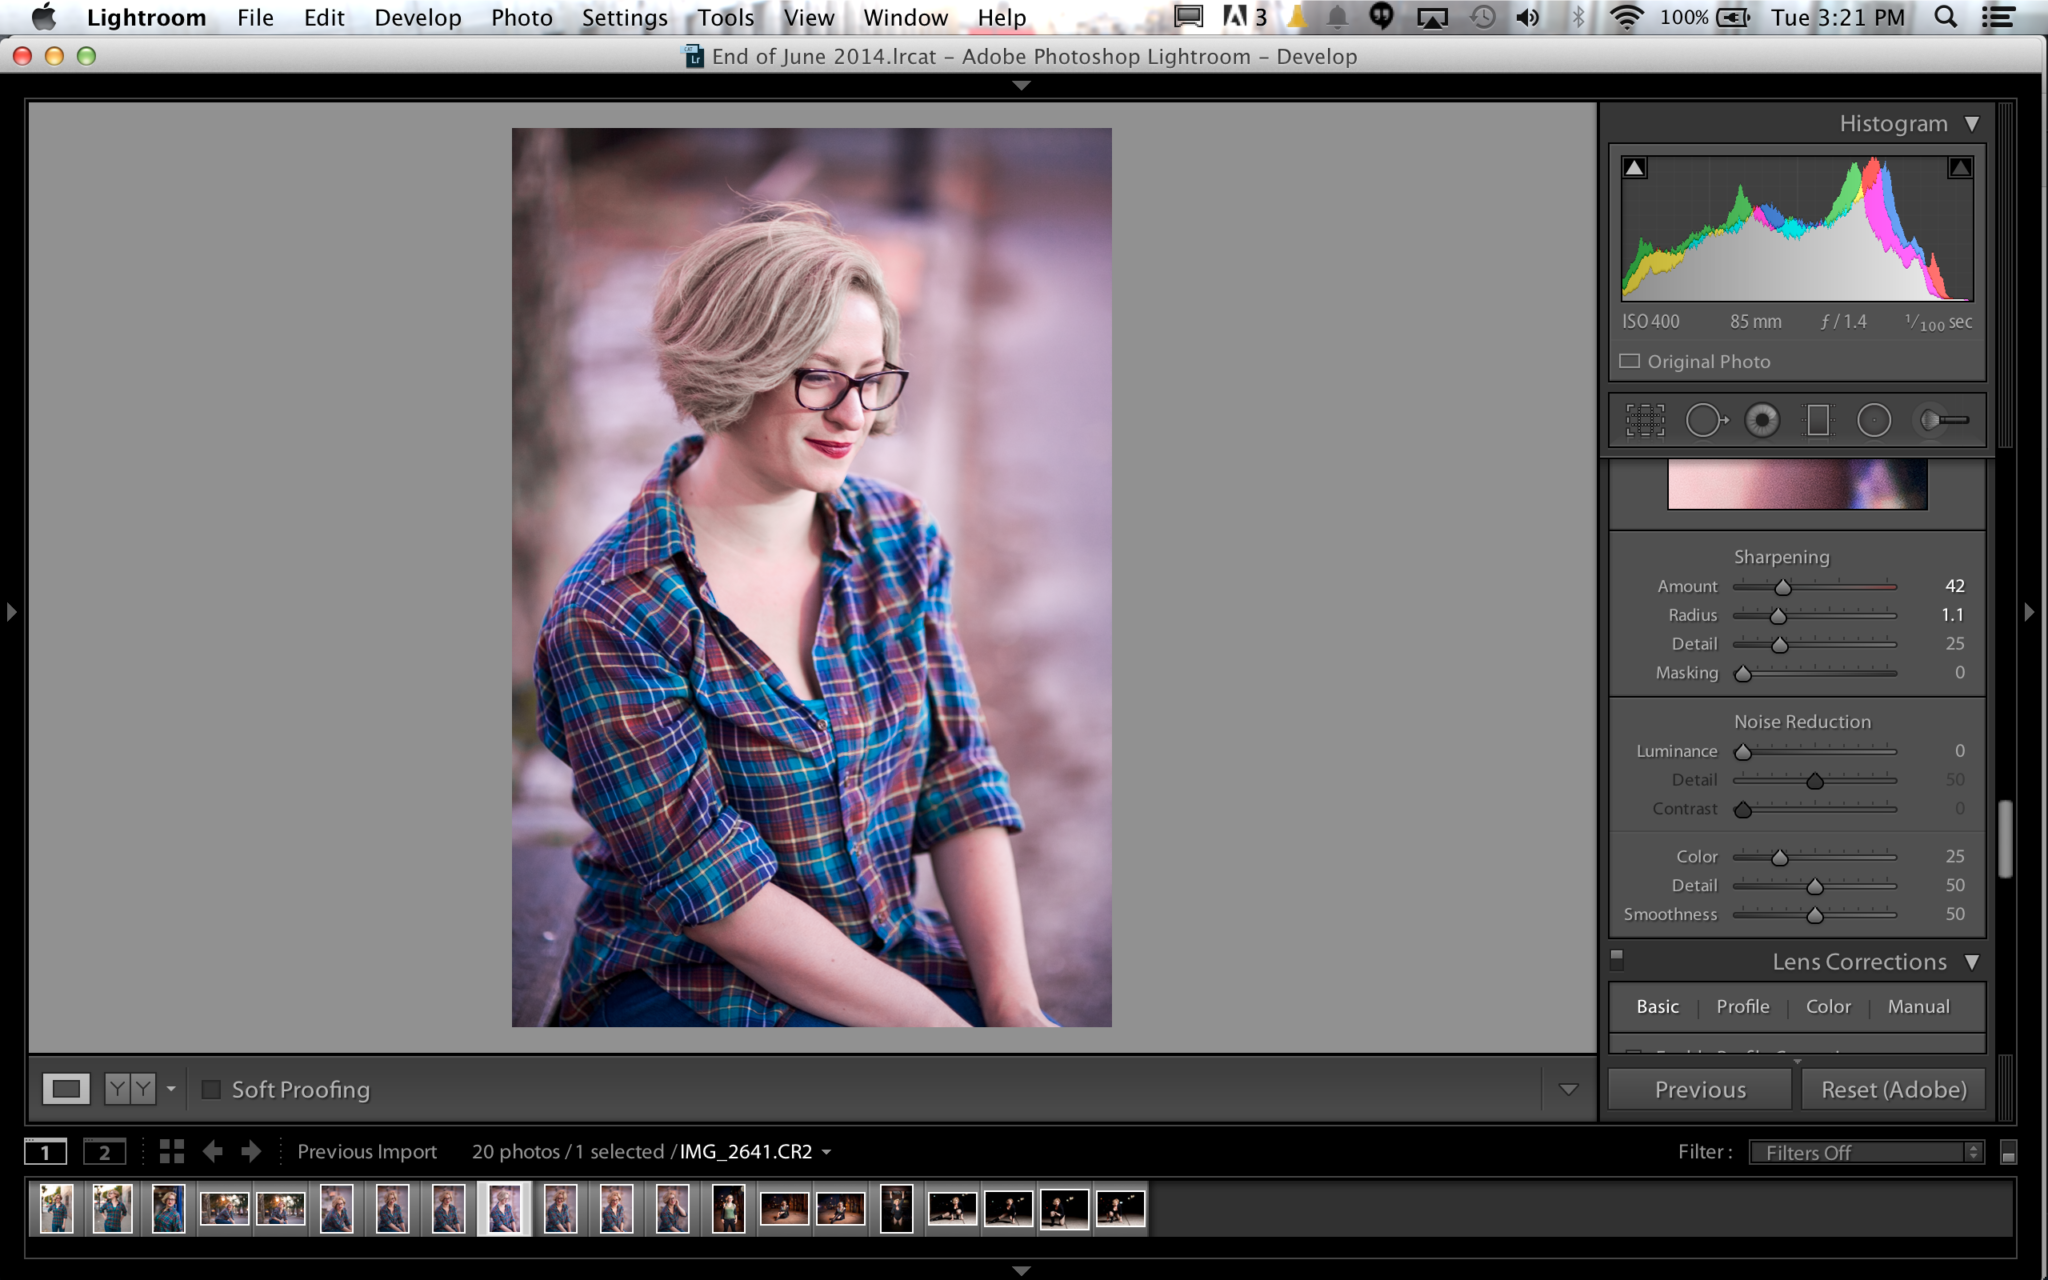
Next, what you’re going to do is tweak the sharpening just a bit. Considering that you tweaked the contrast, clarity and specific colors just recently, you’ll only want to bump up sharpness modestly because of the way that the human eye sees colors and images. Basically, the deeper the black levels, the sharper that the human eye will perceive an image to be because the brain basically ignores the blacks and focuses on that one area. Additionally, there are clear separations from one area to another when looking at an image as a whole and our mind’s eye sees the separations usually done by blacks.
Of course, that isn’t always true–so tweaking the sharpness, clarity and contrast accordingly will help enhance the image too.
Returning to the Basic Adjustments
Lastly, you’ll go back to the basic adjustments on the image. and look at how your tweaks can continue to improve the image. You may want to tweak the white balance, tint, black levels, and contrast a bit more and see how it affects the image. Again though as always, this is extremely subjective to how you want the final image to look.
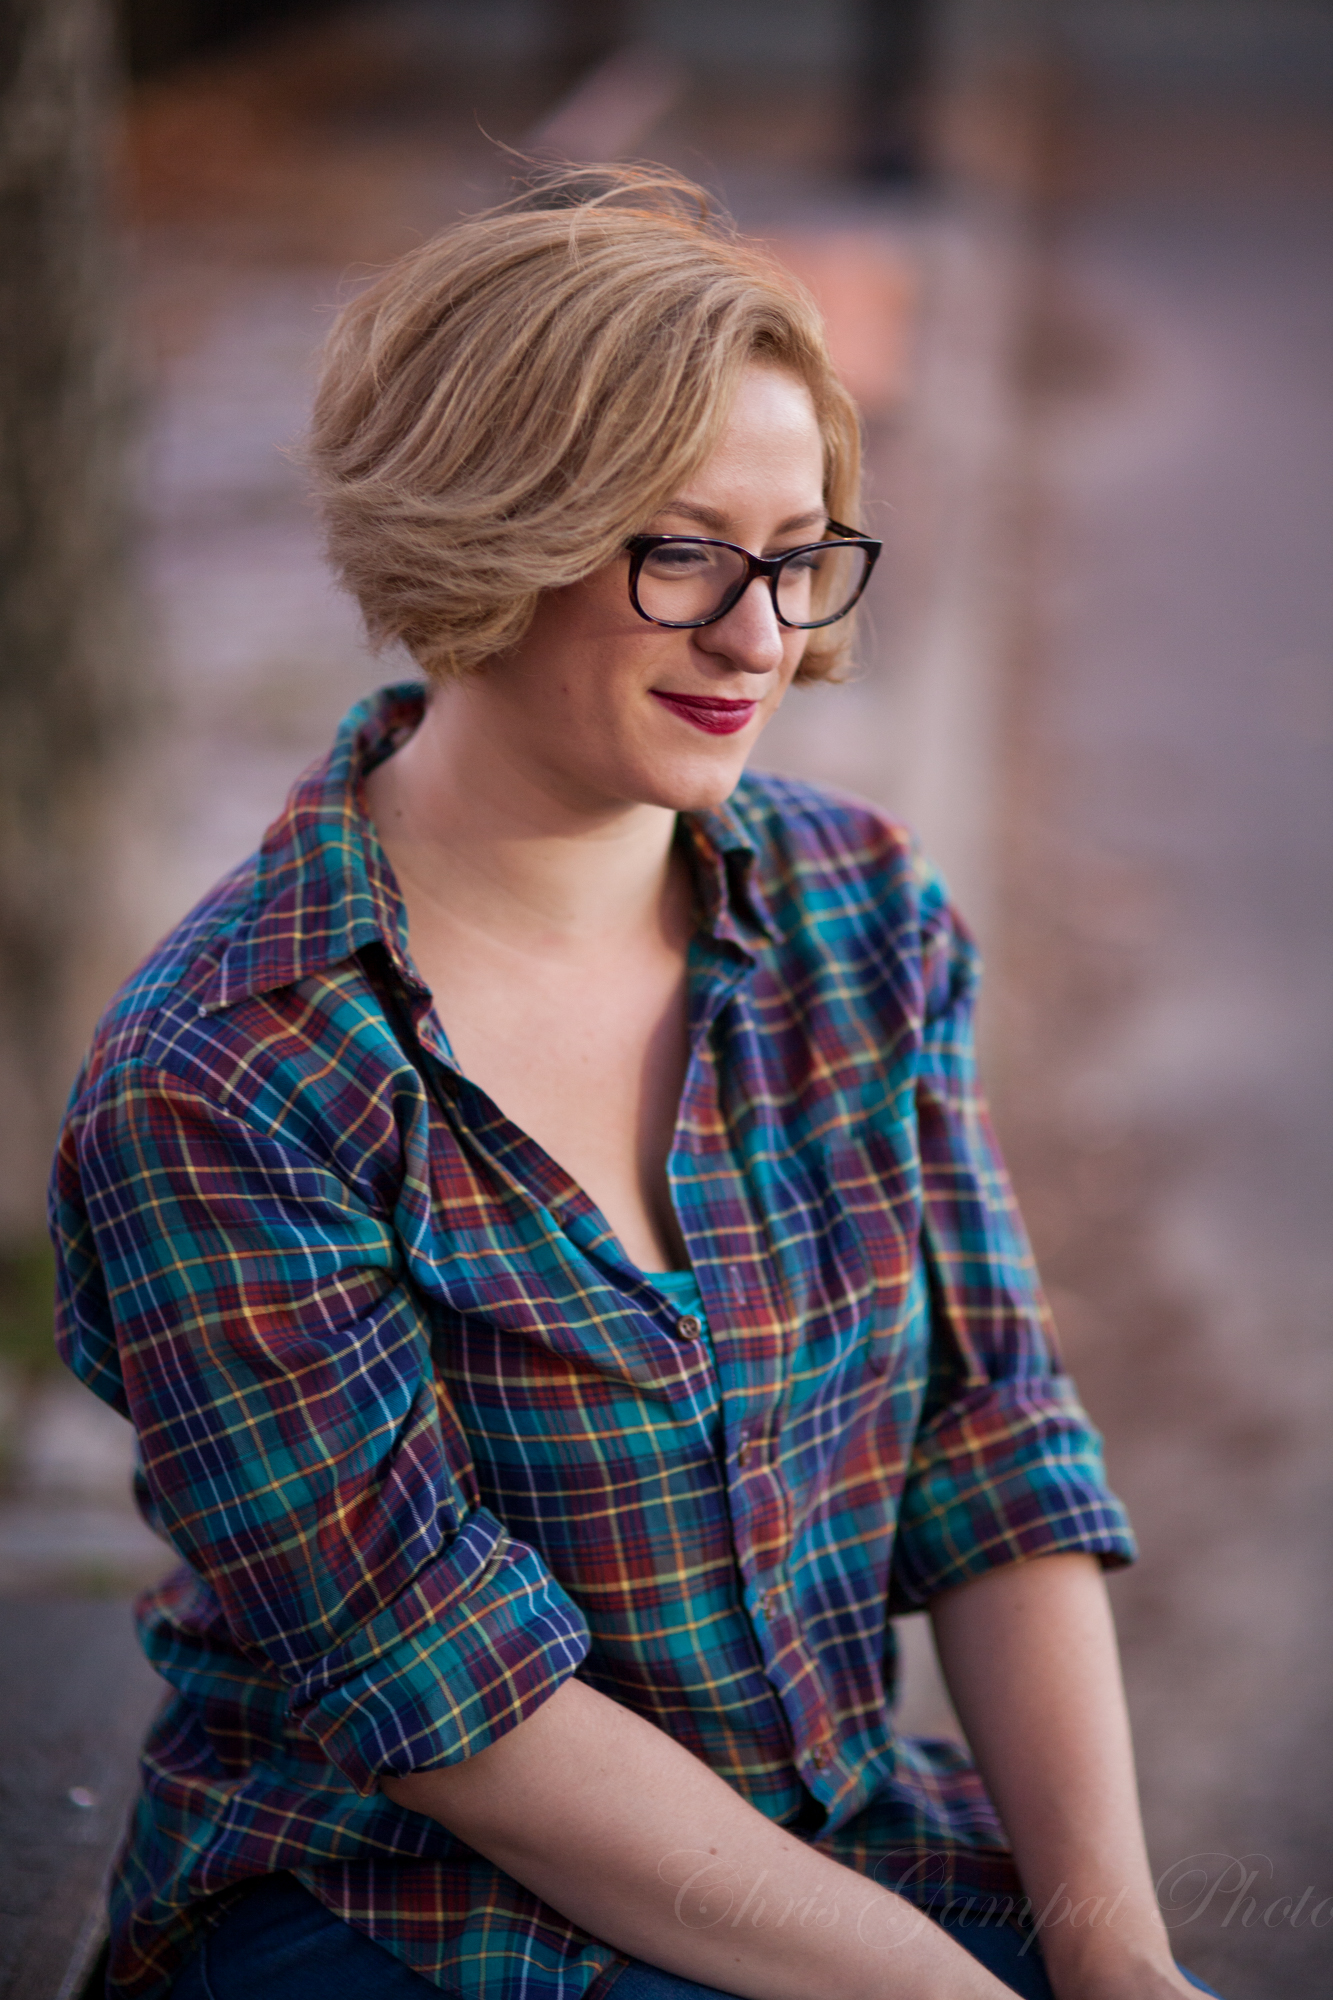
In the image on the left, I chose to give it a bit more of a neutral color balance but emphasize the warmth a bit more to work with the natural end of the golden hour and Amanda’s skin tones and hair. Then I decided to make the image a bit less purple by working with the tint and shifting it towards the greens a bit more. After this, I raised the contrast a bit more–which in turn made the colors of her shirt pop a bit more.
Then by working with the black levels, I was able to make the details of her face pop out even more and give a faux sharpness to her glasses. But because I worked with the blacks a bit too much, it have her unflattering shadows. And so to fix this, I boosted the shadows a bit more to lighten them up.
Lastly, I didn’t really like the image being that contrasty and instead wanted a bit more of a medium format Kodak Portra type of look so I scaled it back a bit more. The result is highlights that aren’t so deep and shadows that aren’t very deep either–yet still balance the black levels enough to place enough emphasis on just the right areas. When this is working in conjunction with the sharpness and the clarity, it adds a bit more extra pop on Amanda despite the fact that the bokeh and compression from the lens is already doing a great job of this.
Further–the warm tones of the image also seem to add a glow around Amanda which helps to separate her and her clothing even more from the rest of the scene which is otherwise mostly one color. And in a situation like that, this edit works.
Get rid of the ads!
Did you enjoy reading this article as much as we enjoyed writing it? There's a way to support us and our reporting, getting ad-free navigation and more as a bonus. Subscribe to us for less than a coffee per month —just $3.99— or take advantage of our yearly subscription with a hefty discount for only $25.- An ad-free experience
- A free mystery box for Lightroom or Capture One
- All the books in our store
- 20% discount on Capture One
- 30% discount on Imalume Photo Theft Protection
- 20% off Herbs and Kettle Tea Company.
- 20% off your order from MPIX printing services.
- 5% off Viltrox Products via their eCommerce store.
- 10% off all film developing, printing and scanning services from Blue Moon Camera and Machine
- 15% off 7Artisans products: The lens and accessory maker is offering a sweet discount for Phoblographer's readers.