Last Updated on 10/22/2014 by Julius Motal

This problem occurs for so many different photographers: a publication or company approaches them and wants to use an image. But in many situations, the photographer has no idea what to do. After all, they just create images!
Now here’s the thing: if someone wants to use your work, you shouldn’t give it away for free unless the cause absolutely justifies it. Instead, you’re doing them a favor and they should be rewarding you in kind. If everyone just gives away free images, then the companies and folks with the money will never pay for them and will try to push photographers who rely on that income around more and more.
So to get license your images, you need a couple of things in place.
The Contract
We’ve been approached by loads of companies for images: Ricoh, Thrillist, HowAboutWe, etc. What you always absolutely need is a contract in place to make everything clear about the image and their use. You should specifically define:
– How the image is used: if you’re offering them the chance to use it however they’d like, then say that in the contract but also be sure to charge them accordingly.
– Exactly what you are giving them: I even go as far as the file name and whether the image is a TIFF or JPEG. This also protects your images from unlicensed use.
– Describe who exactly is receiving the license and who is issuing the license.
– How long they can use it for
– The price for the image(s).
– That you’re allowed to still use the images in your portfolio and for marketing yourself.
– That you still own the copyright to the image(s)
The American Society of Media Photographers has a more in depth explanation. Here is a very short contract example. Personally, mine is much longer (a couple of pages at least)
Lastly, create an area for the buyer and you to sign.
Metadata and Keywords
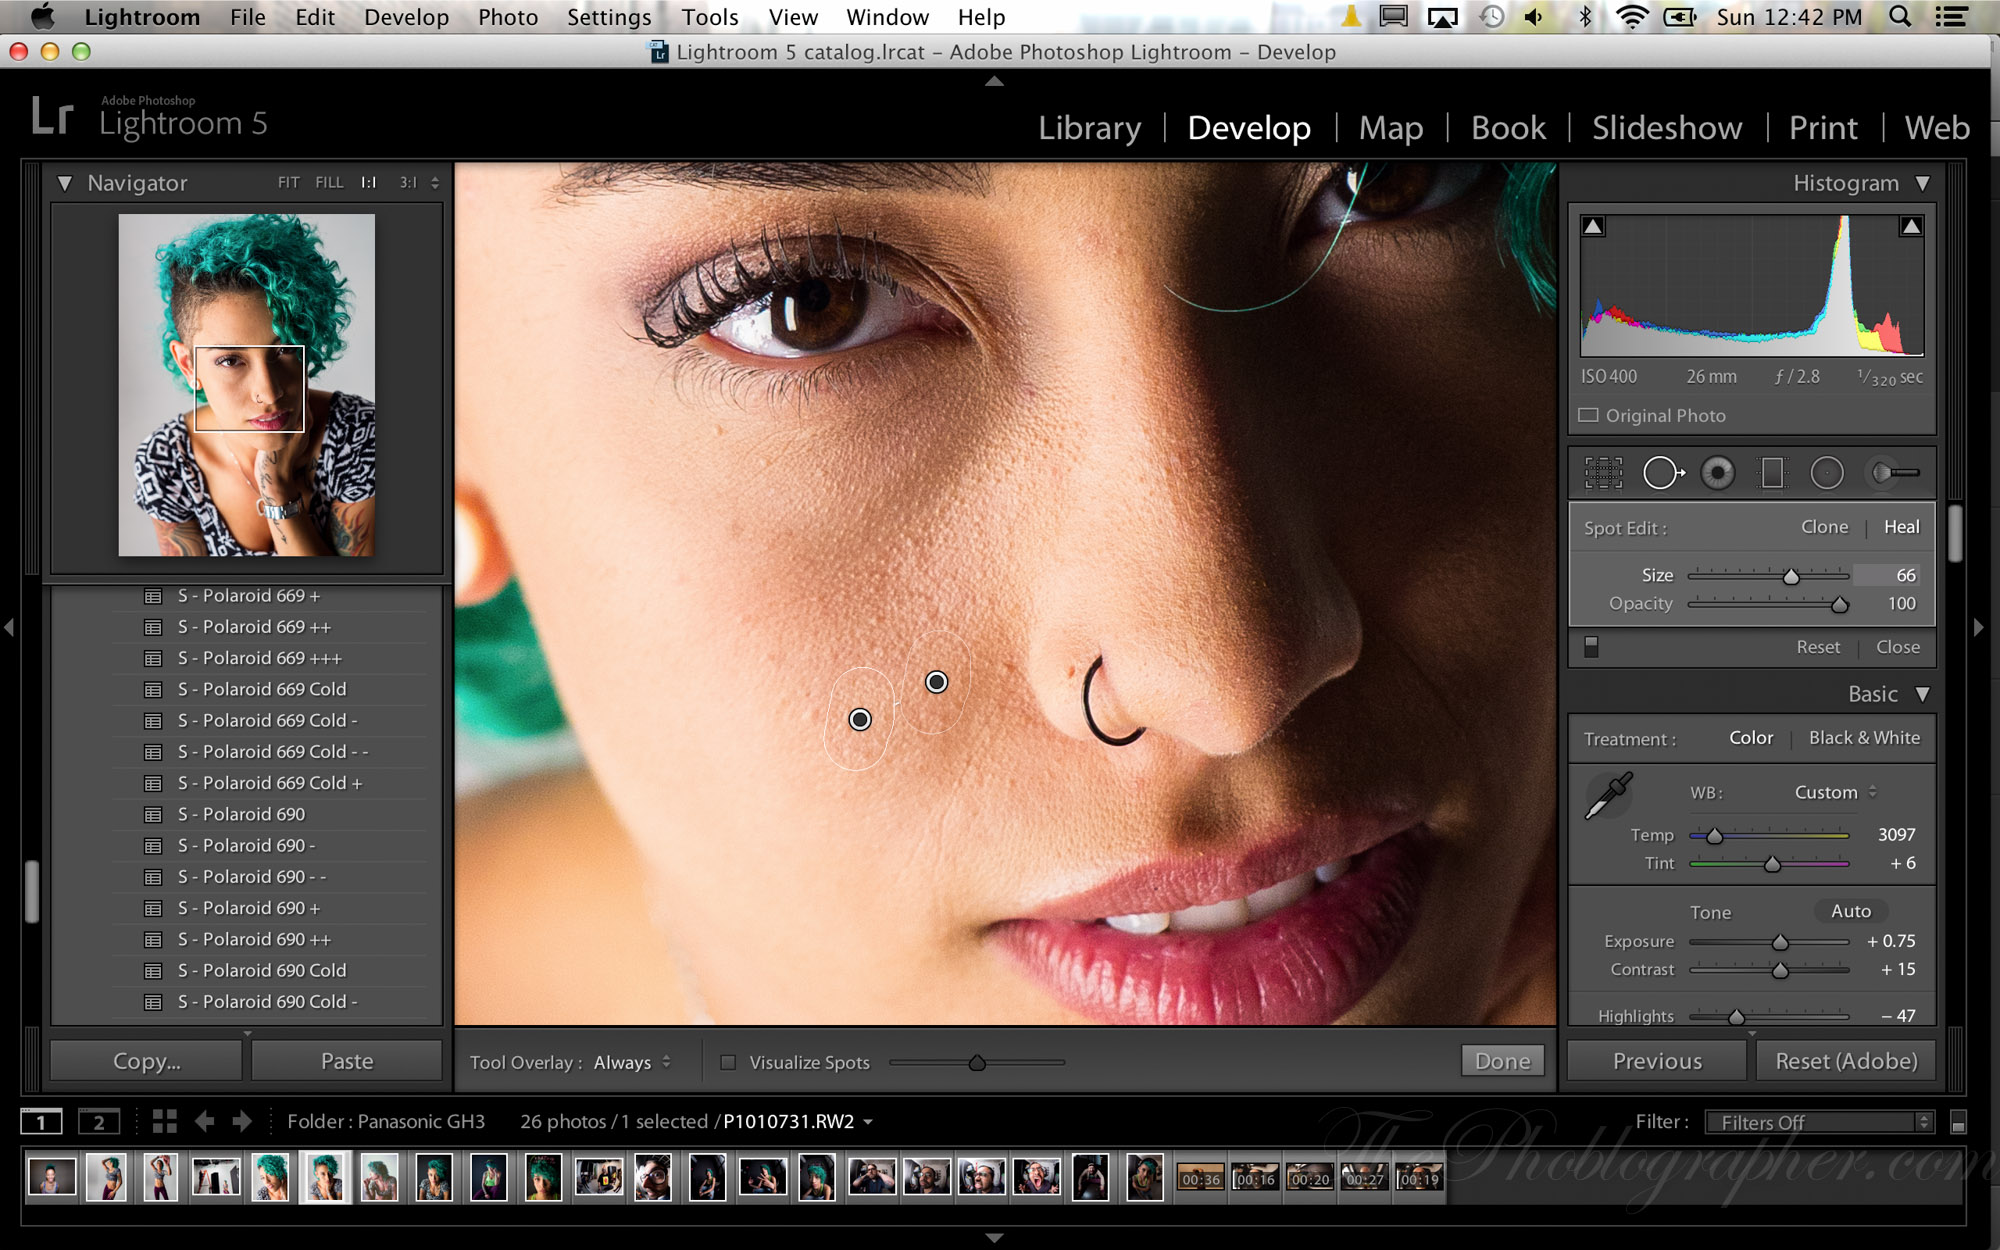
For starters, we strongly recommend running the image through Adobe Lightroom. In Lightroom, you can easily add metadata and make naming much easier by working in the Library panel. Specifically, you should add keywords into the keywords area that makes the image much more searchable. Then make sure that you are the copyright owner, creator, and that the image is copyrighted.
Why do you want to do all of this? Essentially, it’s backup. If certain parameters get taken out of the image, then you can have backups of those parameters somewhere else in the image to make it more trackable for you.
So what do we suggest that you fill out?
– Keyword tags
– Title
– Copyright
– Copyright status
– Creator
– Caption
By doing this and thinking about how you can potentially track the image on the web later on, you’ll make your life a lot simpler if something gets screwy.
Writing the Invoice
Of course when you license the image, even though they know what the price is according to the contract, many companies still need an invoice. Generally, what you’ll want to do is include:
– Your name and address (hopefully your company’s name too)
– The company purchasing the items along with their address
– A specific contact name if possible
– Both your phone number and the buyer’s
– A list of the goods that they are purchasing (be specific. Again I use file names)
– An invoice number
– The cost of each good
– The final price
– A method for them to pay you (checks usually)
– A due date. Usually many companies abide by NET30 terms, but I’ve seen some photographers tack on an extra amount to be paid if the payment isn’t delivered by a certain date.
The Export and Final Package Delivery
Once you do all of this, you should export the image and give it a proper file name. What I usually do is add my name, the name of my company, the name of the company that the image was sold to, and what the image is. It is usually exported as a TIFF in my case. Then everything is bundled together and sent off. This includes:
– The contract signed by the seller first then me for their records.
– A w9 tax form
– An invoice for the amount owed
– the image
These days, I usually bundle it altogether in Dropbox and ship it off to the client.
Get rid of the ads!
Did you enjoy reading this article as much as we enjoyed writing it? There's a way to support us and our reporting, getting ad-free navigation and more as a bonus. Subscribe to us for less than a coffee per month —just $3.99— or take advantage of our yearly subscription with a hefty discount for only $25.- An ad-free experience
- A free mystery box for Lightroom or Capture One
- All the books in our store
- 20% discount on Capture One
- 30% discount on Imalume Photo Theft Protection
- 20% off Herbs and Kettle Tea Company.