About one year ago, the only local lab to offer medium format scans started giving me a 2 week turnaround time for medium format scans. The rollers in their Noritsu 120 carrier had gone bad and the replacement was too expensive with their current volume. All 120 had to be sent 90 minutes away to Dubai for scanning.
This motivated me to find a scanner. After a few weeks of searching, I found a Microtek Artixscan M1 for 200 AED ($55USD) listed for sale locally. Once I got it home and tried my first few rolls, I realized how seemingly hard it can be to get quality scans. First I attempted to use VueScan, but could not get it to work with my scanner. Again I tried Silverfast, but did not like the results. I then decided to remove all automation and try to do everything myself with LR4.
This is a guest blog post by Tommy Ryan. Tommy is an American engineer from New Orleans living in Abu Dhabi, UAE. He is a photography enthusiast and you can visit his Flickr page here.
The Benefits of Home Scanning
- Home scanning you have complete control over the image. Oversharpening, oversaturation, and incorrect white balance are the most common issues I see in lab scans
- Resolution
- Excellent Labs: ~5,000 pixels on the long side.
- Good labs: 3,000 pixels on the long side.
- Bad Labs: 1,024 pixels on the long side.
My scanner produces scans with images with 11,000 pixels on the long side (645 format). Not often will you need this many pixels though. The true resolution of the scanner lens is probably less also.
- Over the long term, scanning at home is much cheaper. The lab was charging 10 AED ($2.70USD) per roll. I was in the green after 20 rolls.
The Downside of Home Scanning
- It is more time consuming than lab scans.
- Having endless Post Processing options can take away some of the charm of film. One thing I loved about film when I first started using film was that the pictures looked great straight from the lab without any added effort on my side.
I started scanning my Black and White film myself, while still sending the color stuff to Dubai. Once I got comfortable with scanning black and white, I started to move into color. The workflow I developed is not the only one. There are plenty of other workflows that are more automated and hands off. Some are simpler (one program: auto scanner settings in Silverfast or VueScan) or more complicated (4 programs: using ColorPerfect which requires Silverfast, Photoshop, and Lightroom).
Scanning
Scanning Color Negative Film is more difficult than Black and White film due to the added color corrections required; however, it’s not too hard once you get the hang of it. In this tutorial I’ll show you how to get a near uncorrected scan and perform the corrections yourself in Lightroom.
I have my local lab develop my C-41 film and sleeve it. This is how I receive it.
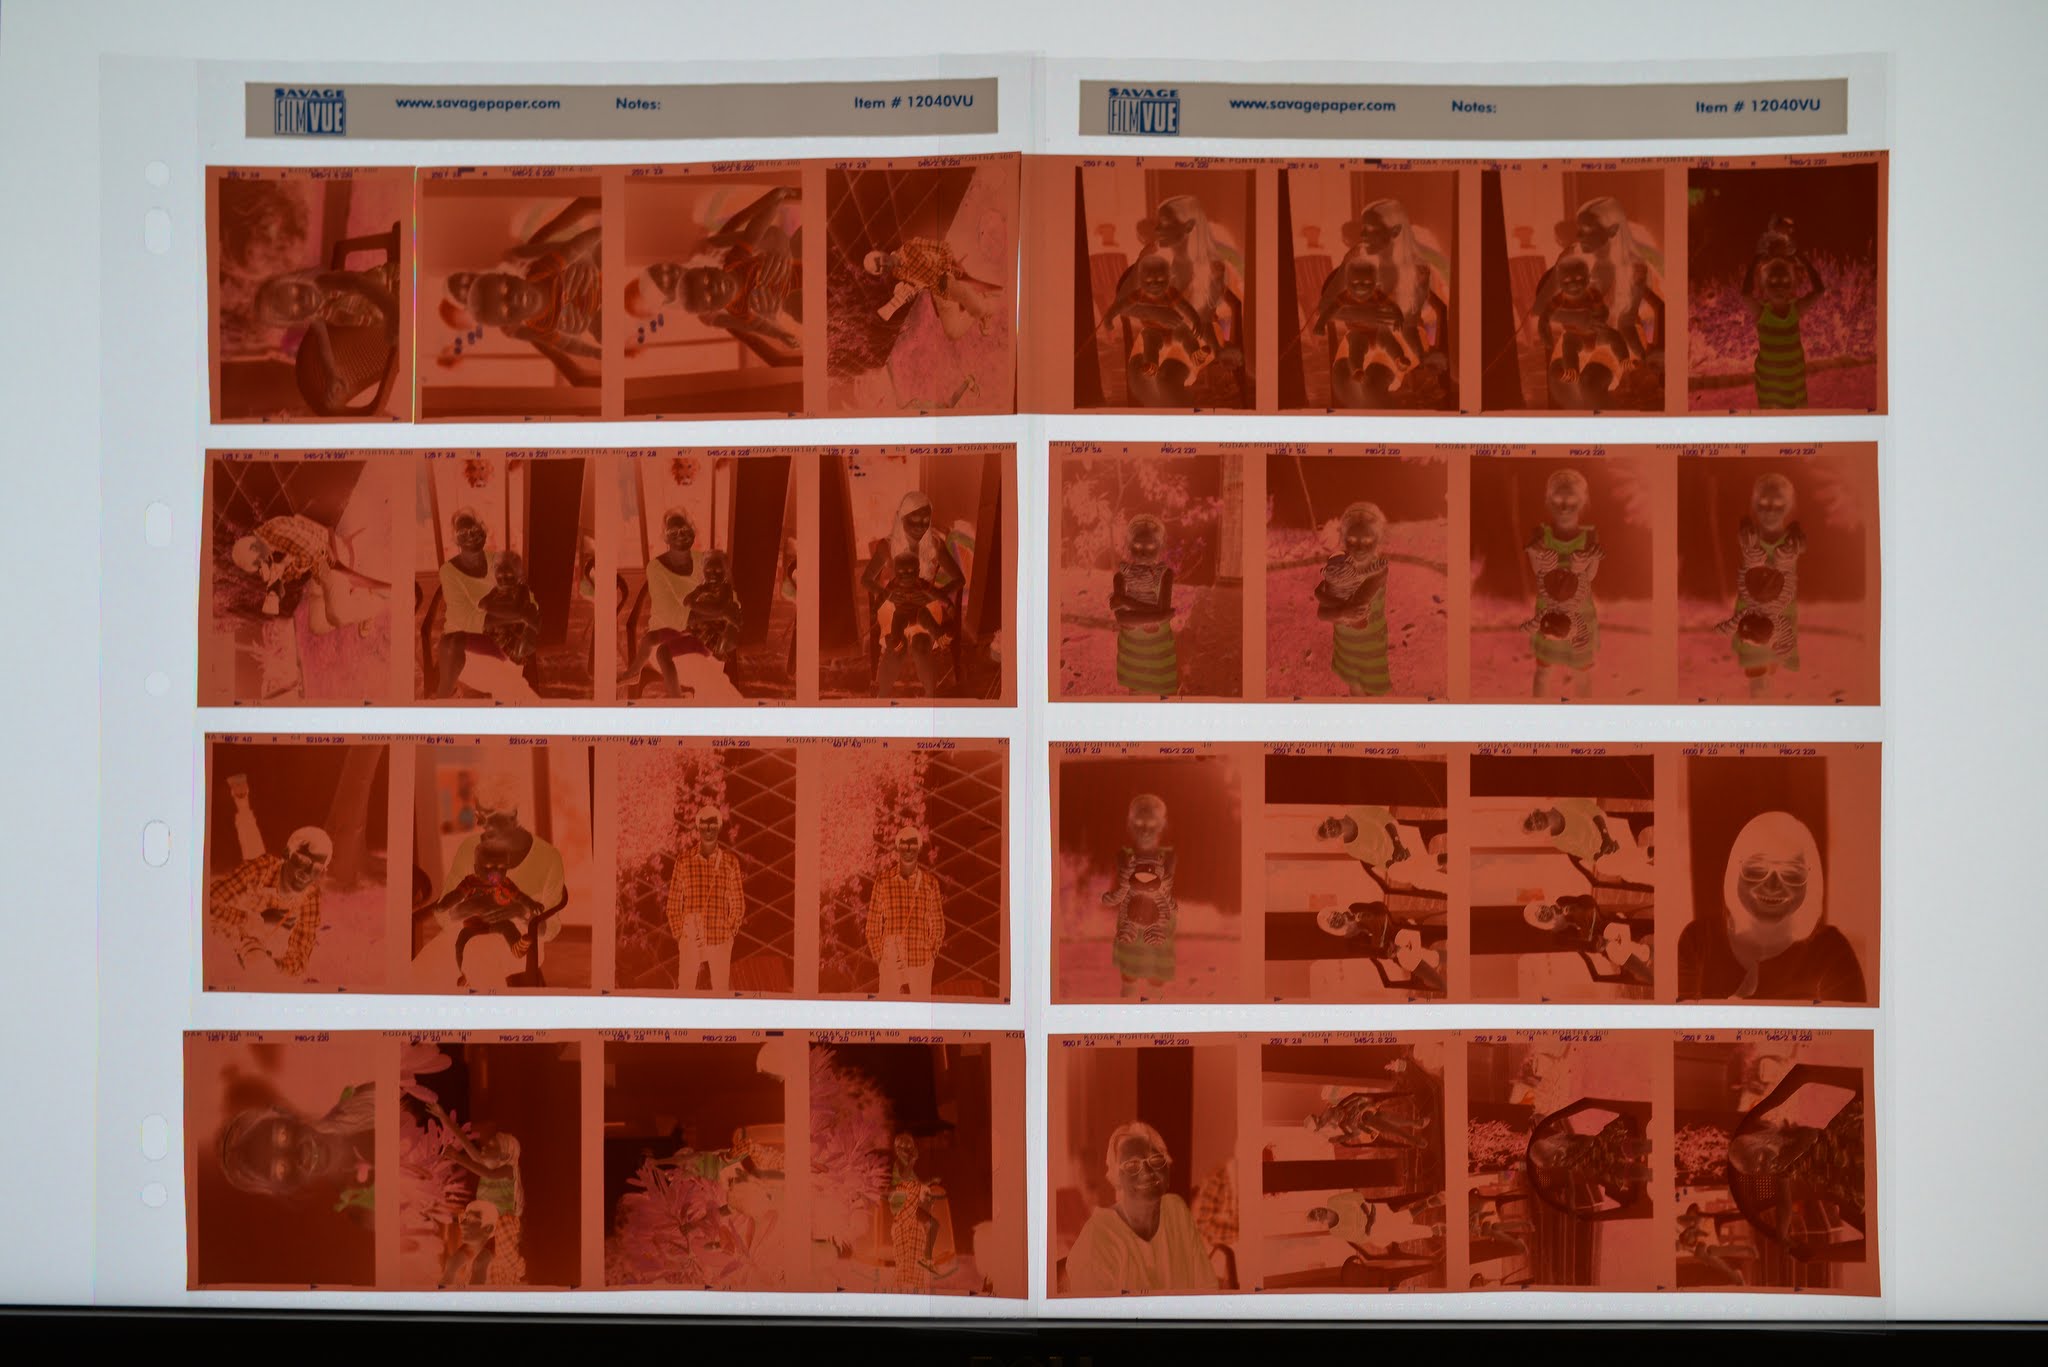
220 Portra 400 roll photographed with my DSLR against my monitor

Inverted to make a digital contact sheet
After developing your film load it up into your scanner. Use a rocket blower or compressed air to minimize the dust. The M1 has a film tray with negative holders. I try to get the negatives as flat as possible.
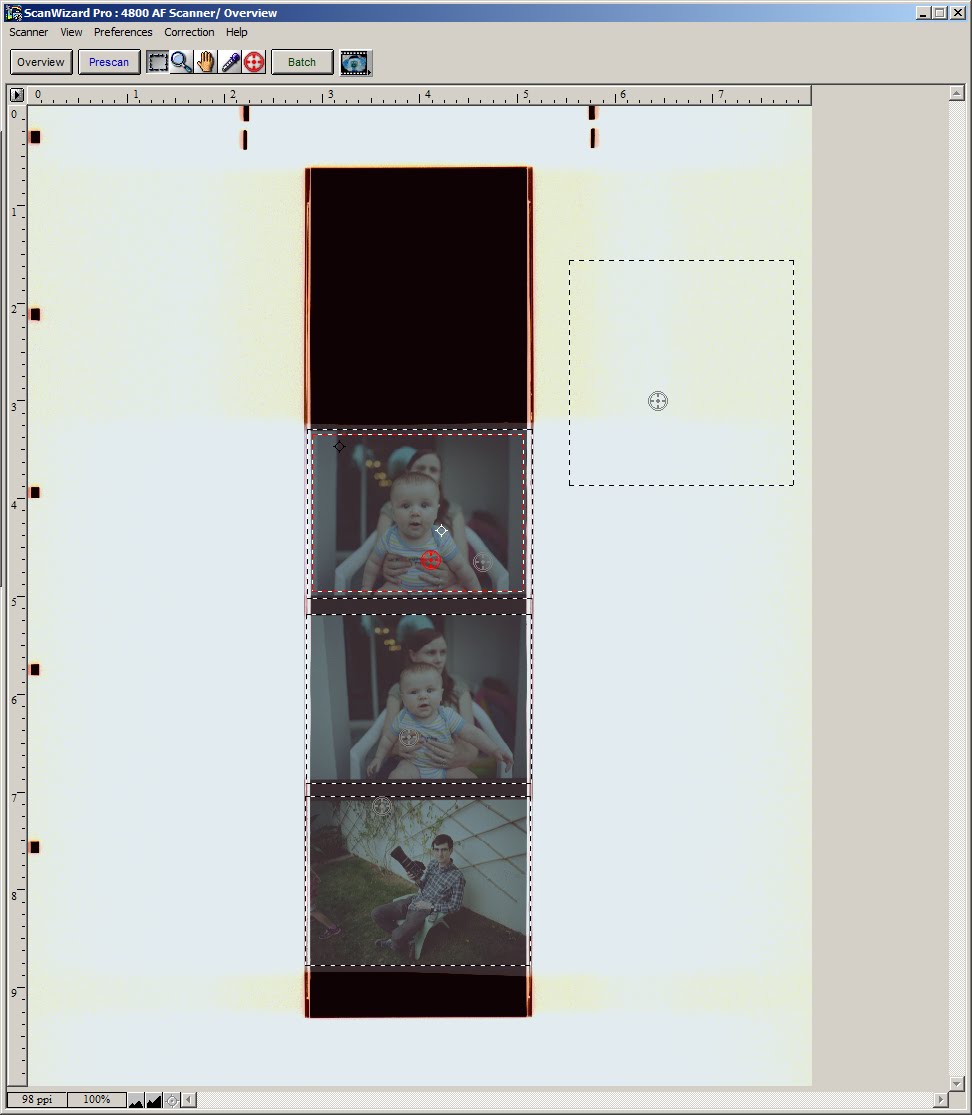
This is the overview scan view in Microtek’s Scan Wizard Pro
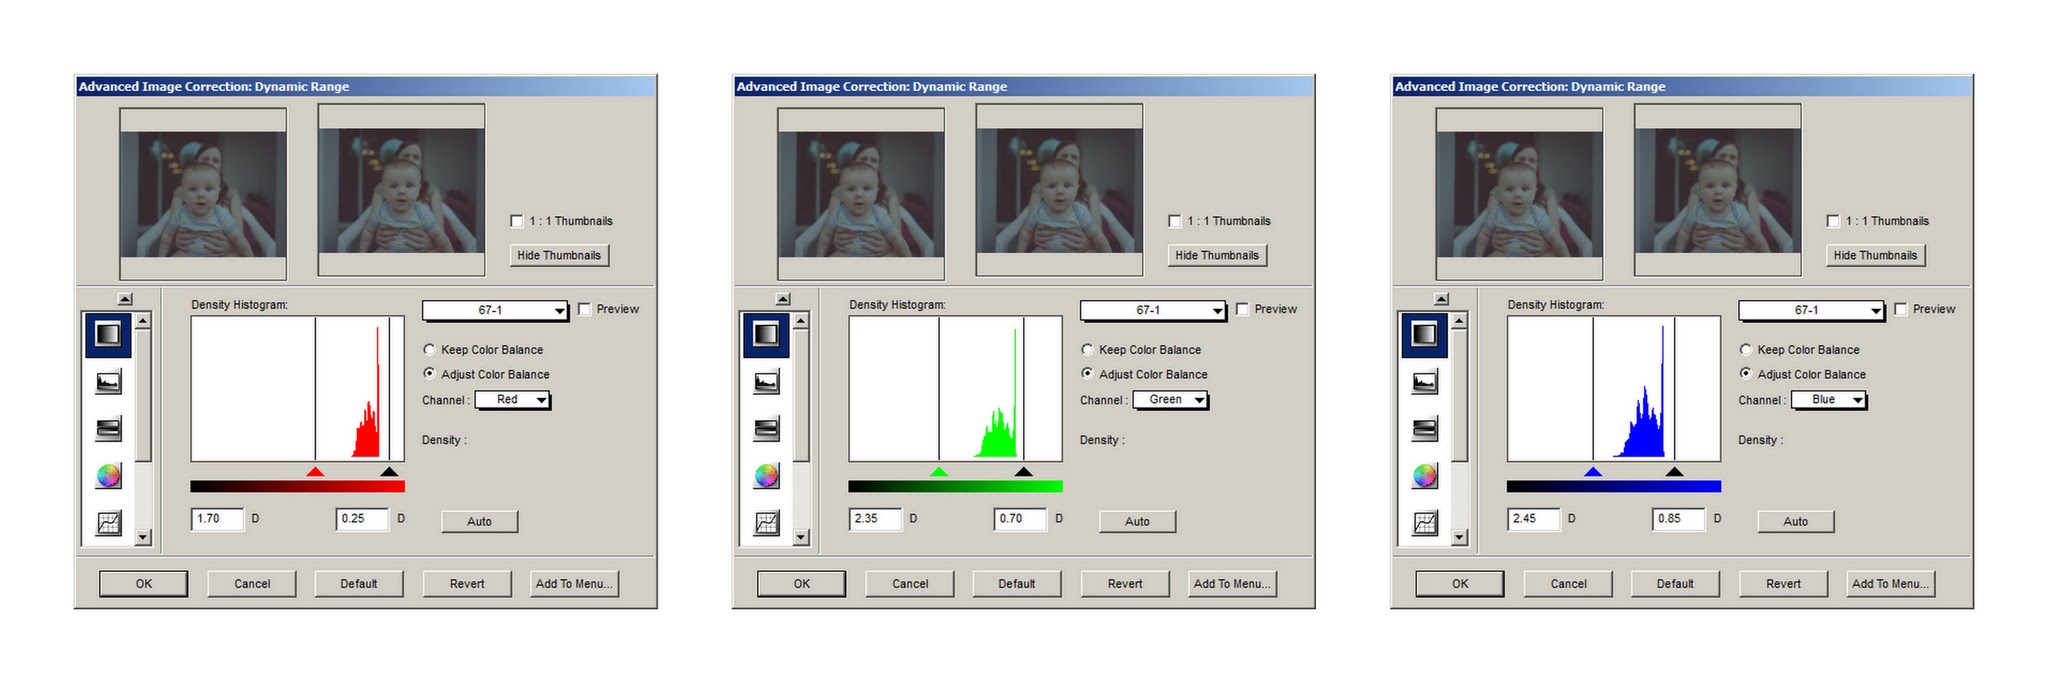
The screenshots below are with the Microtek bundled software. If you are using different software, which is likely, read the instructions on how to get a .tiff file output and turn off all the auto settings.
Make sure to turn off
- Auto Dynamic Range/Auto Exposure
- Auto Brightness / Auto Contrast
- Auto Tone Curve Correction
- Auto Black and White Points
- Auto Sharpening
- Auto Color Correction / Color Cast Removal
- Auto Cropping (I like to scan a little extra and crop in Lightroom)
- Turn all filters off
With Black and white film, I scan using the entire dynamic range of the scanner. With Color film, I found that the resulting negative had excess wasted space on the histogram with the full dynamic range. Initially I would optimize the dynamic range for each roll of color film. I now have a broad setting that works well enough on most film stocks and eliminates that step in the process. Also the cut points are different for each color. This removes some of the bias from the film base (red/orange in the negative, blue in the positive). This gets the image nearly there, and only minor adjustments are required in white balance (otherwise the color curves tool is required).
I have developed a dynamic range preset that I use for all my color negative film. Having a consistent scan setting is essential for syncing the Lightroom adjustments later on.
Now define the area of each frame, and hit the batch scan setting. Repeat until everything is scanned.
Post Processing with Lightroom
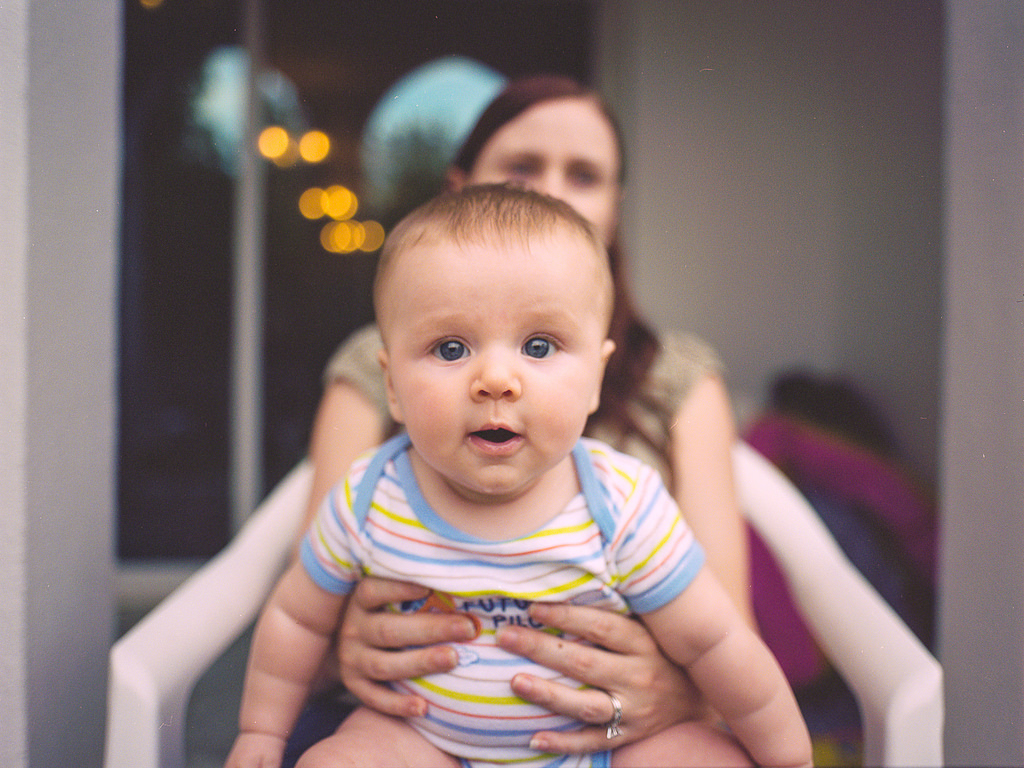
Now import the pictures into lightroom. You can see that the pictures are very low contrast and dull looking. They look like digital RAW files only worse.
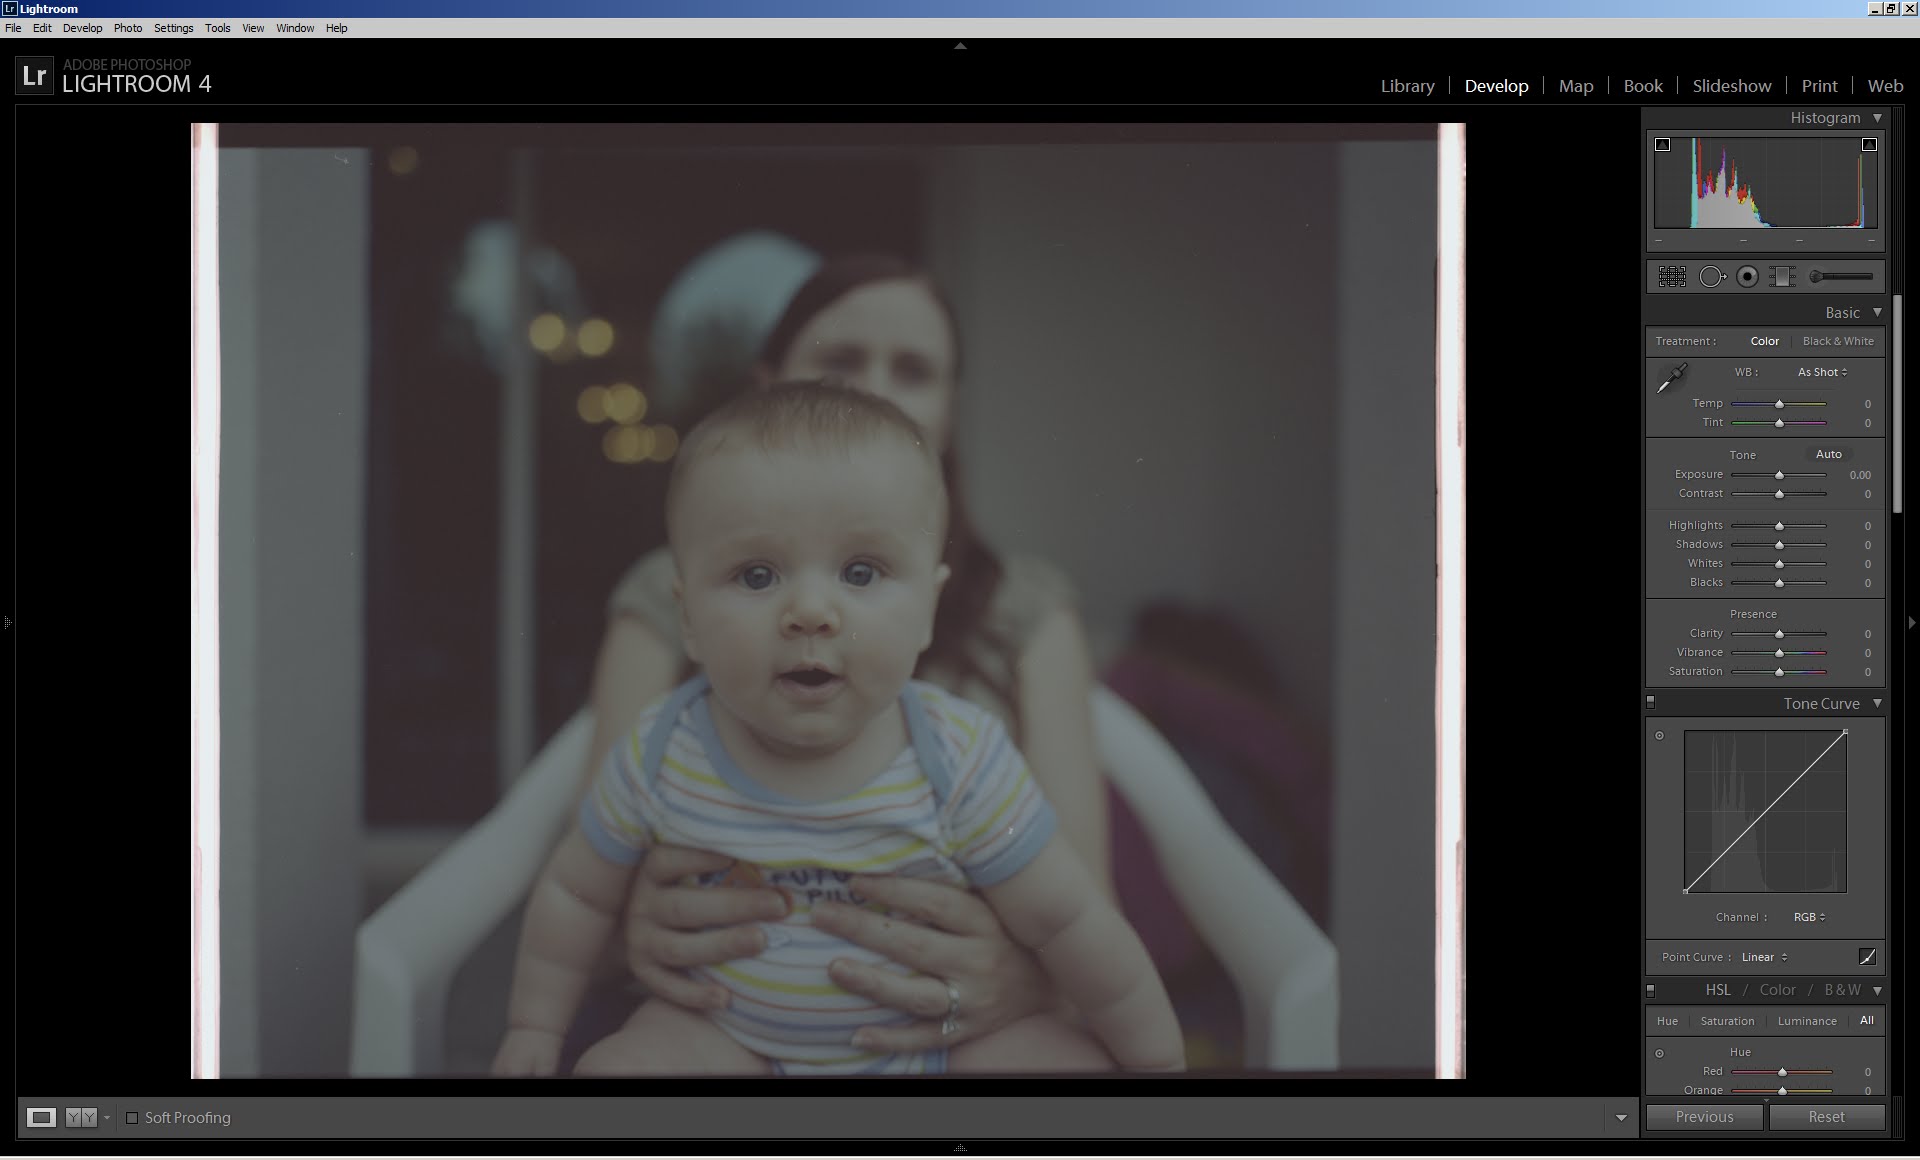
Untouched Scan Import
First adjust the black and white points of the picture with the Tone Curve. I turn on the color flags to make sure that I am not clipping anything.

Black and White Points set
I then crop the image. I crop all my 645 frames at 3×4 and all my 67 frames at 4×5 to keep it consistent.
Next I set the white balance. I select something neutral in the frame with the eyedropper tool. Sometimes the whitebalance tool is not powerful enough to remove the color cast from the film base. If that happens you have to use the color curves tool to white balance, which takes longer.
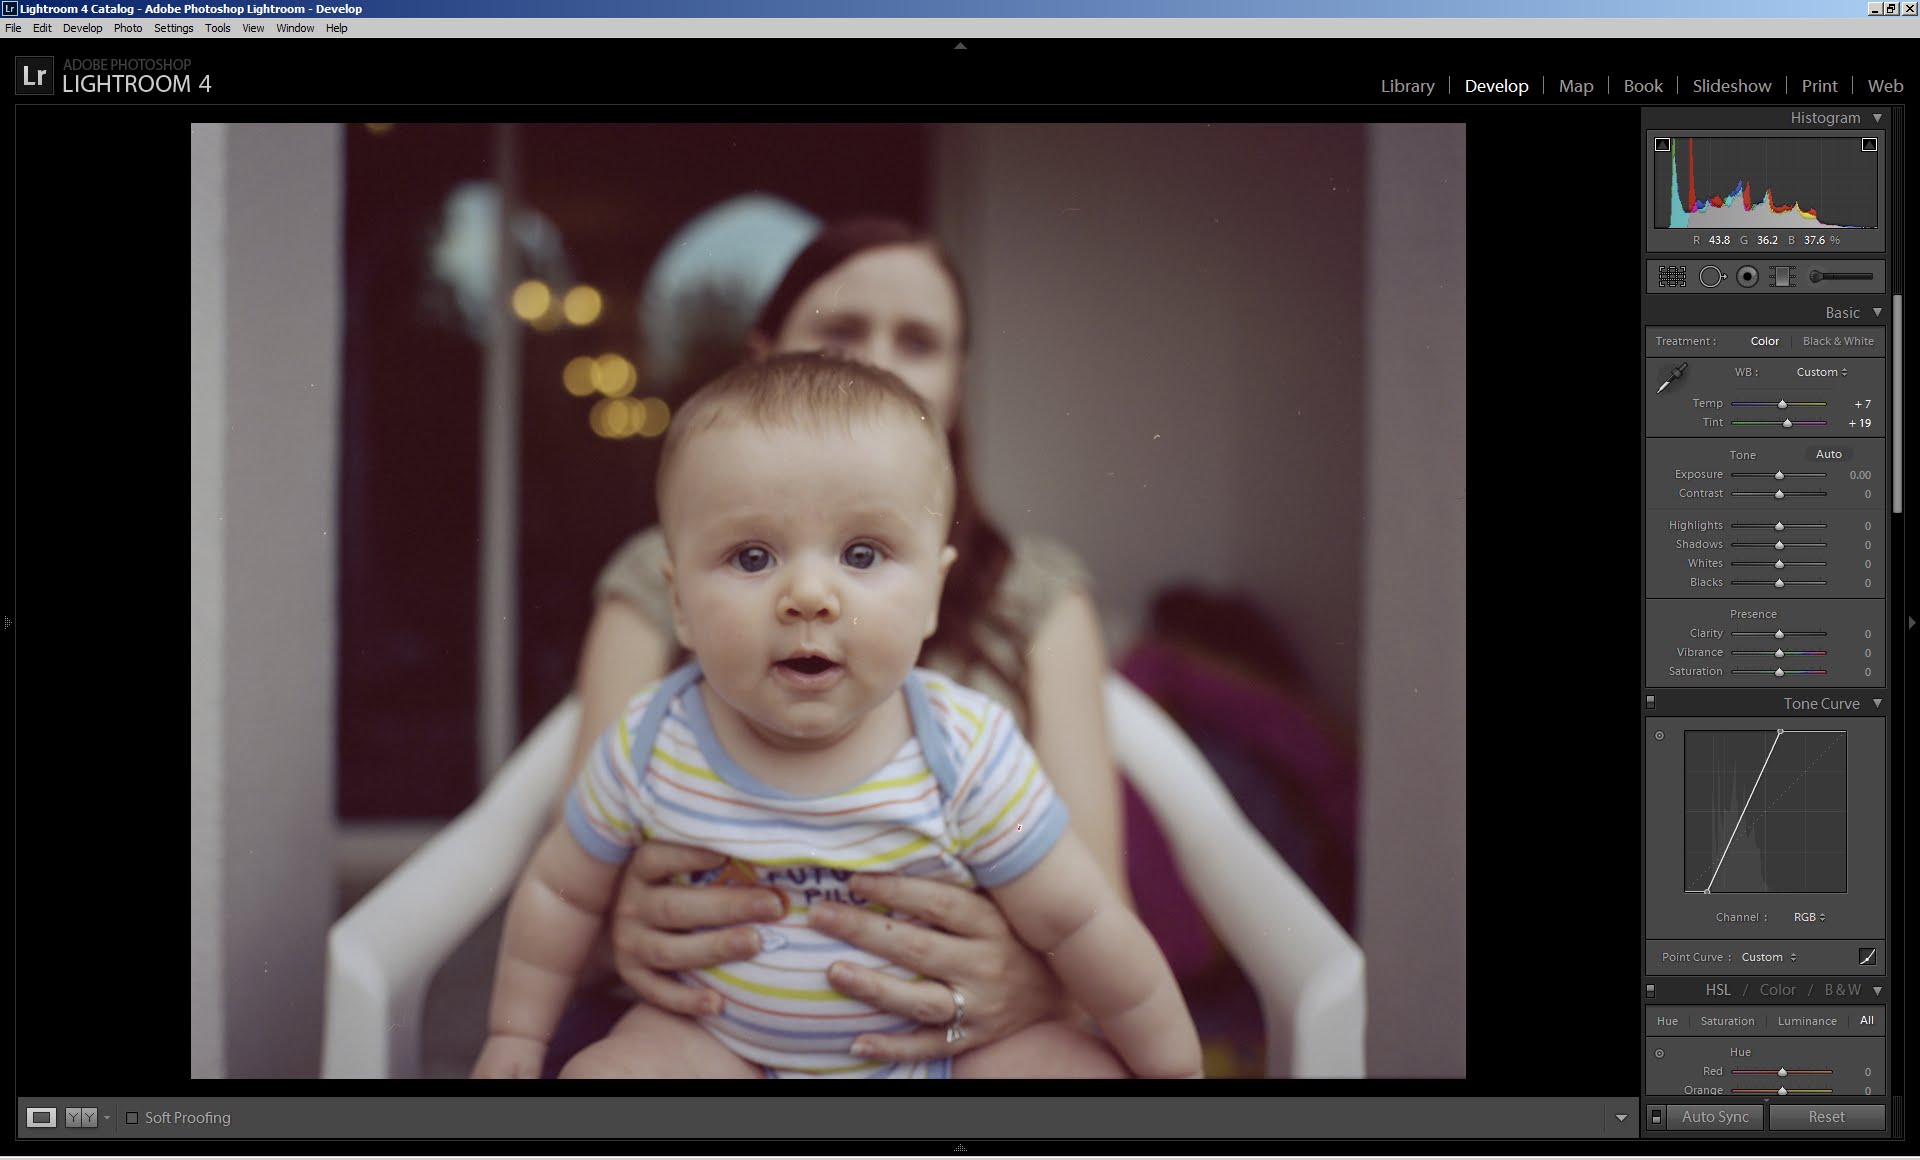
Cropped and white balanced
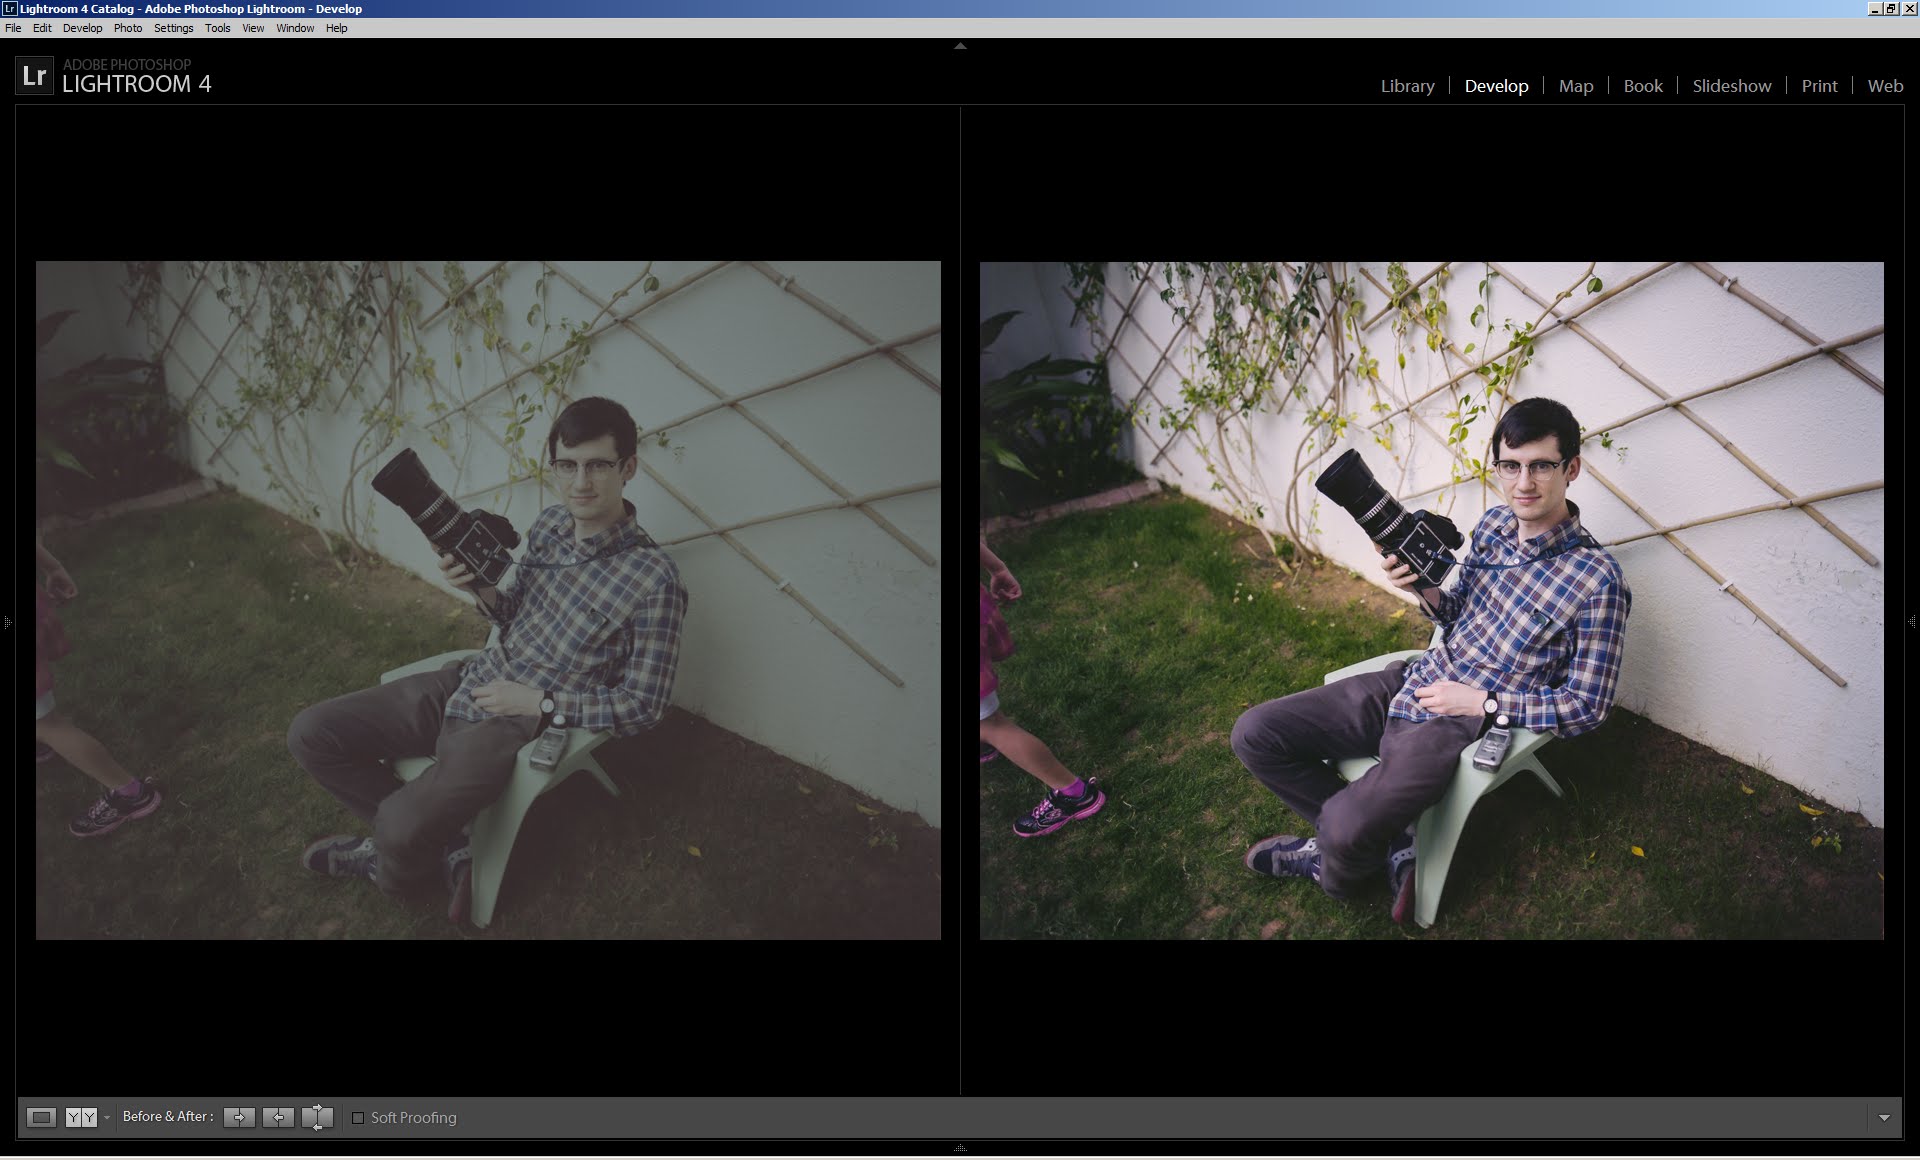
Fine Tune the Tone Curve to taste. I try to retain as much of the film’s dynamic range.
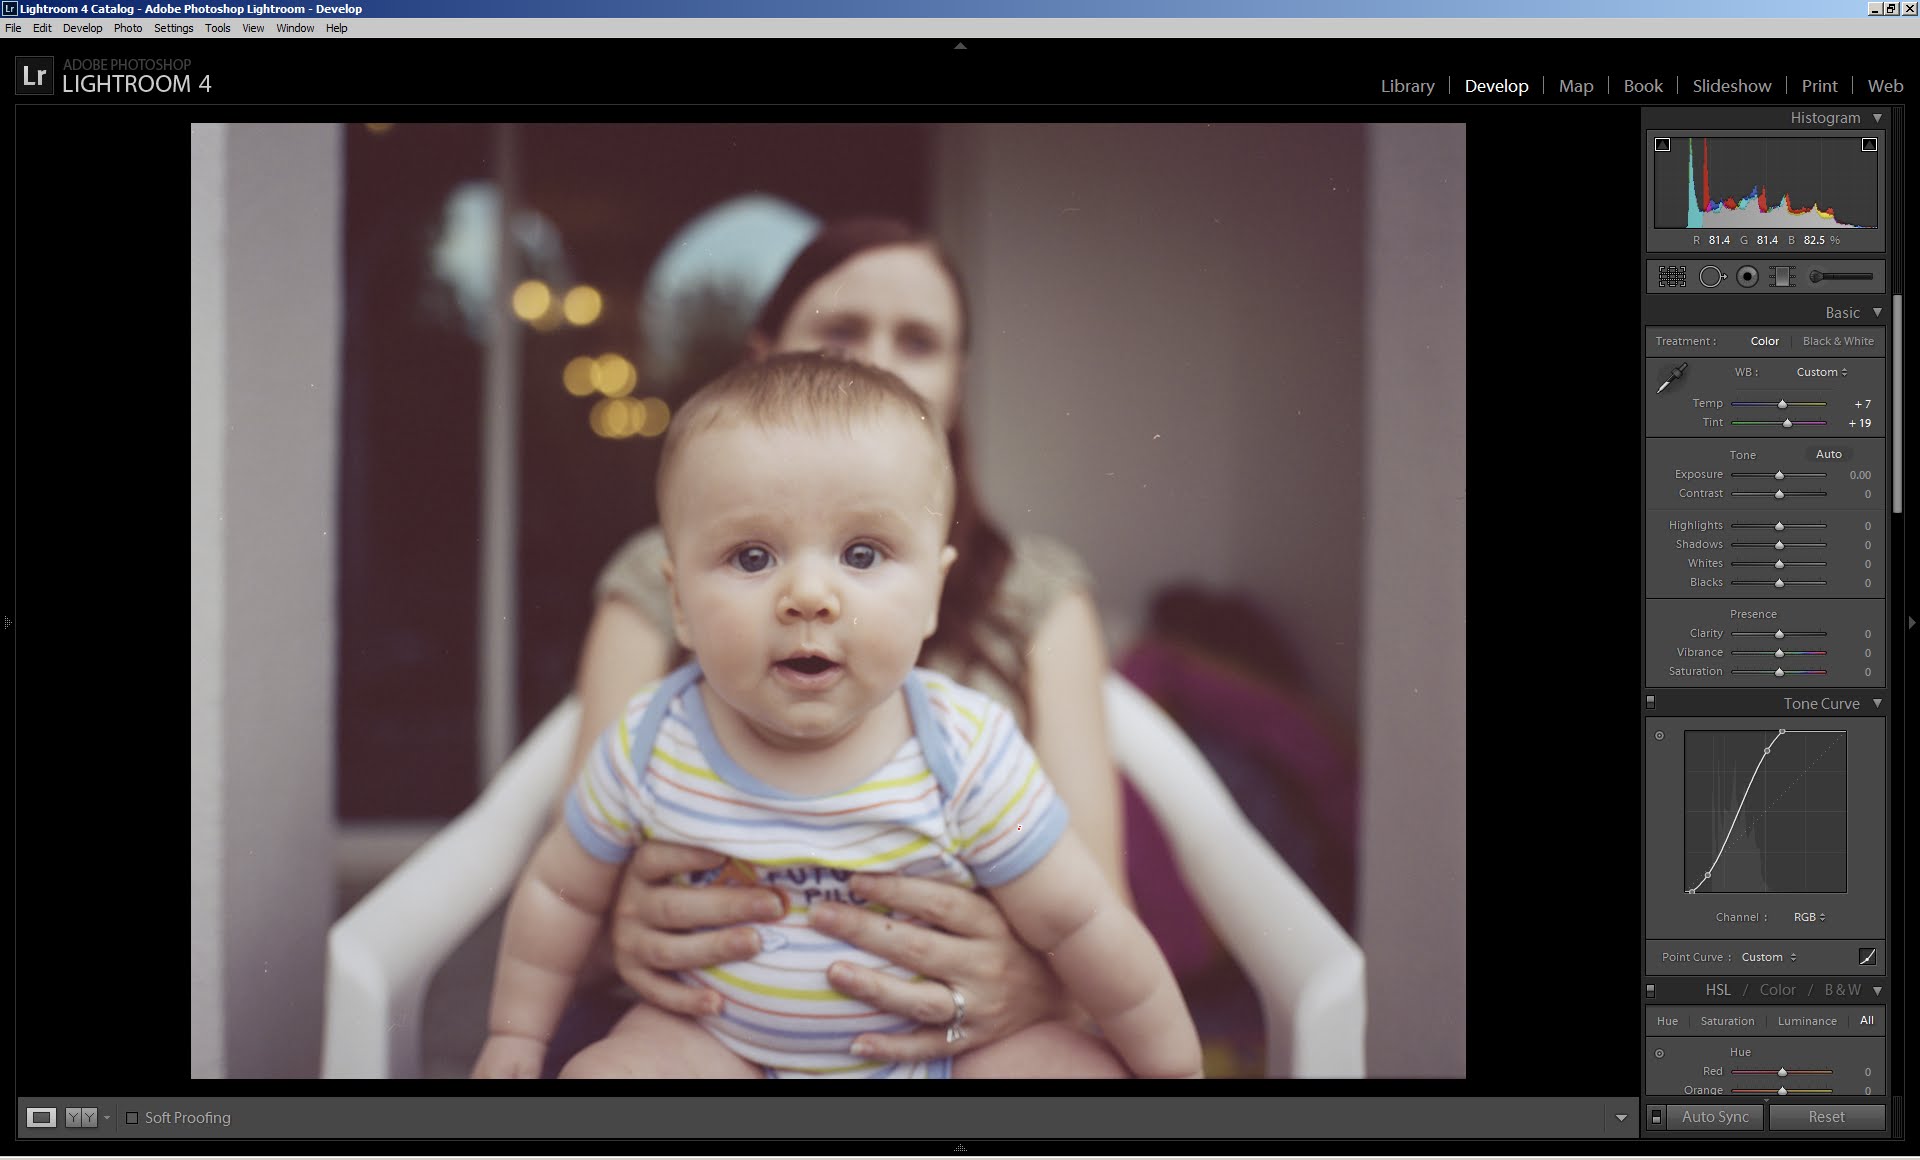
Adjusted Contrast
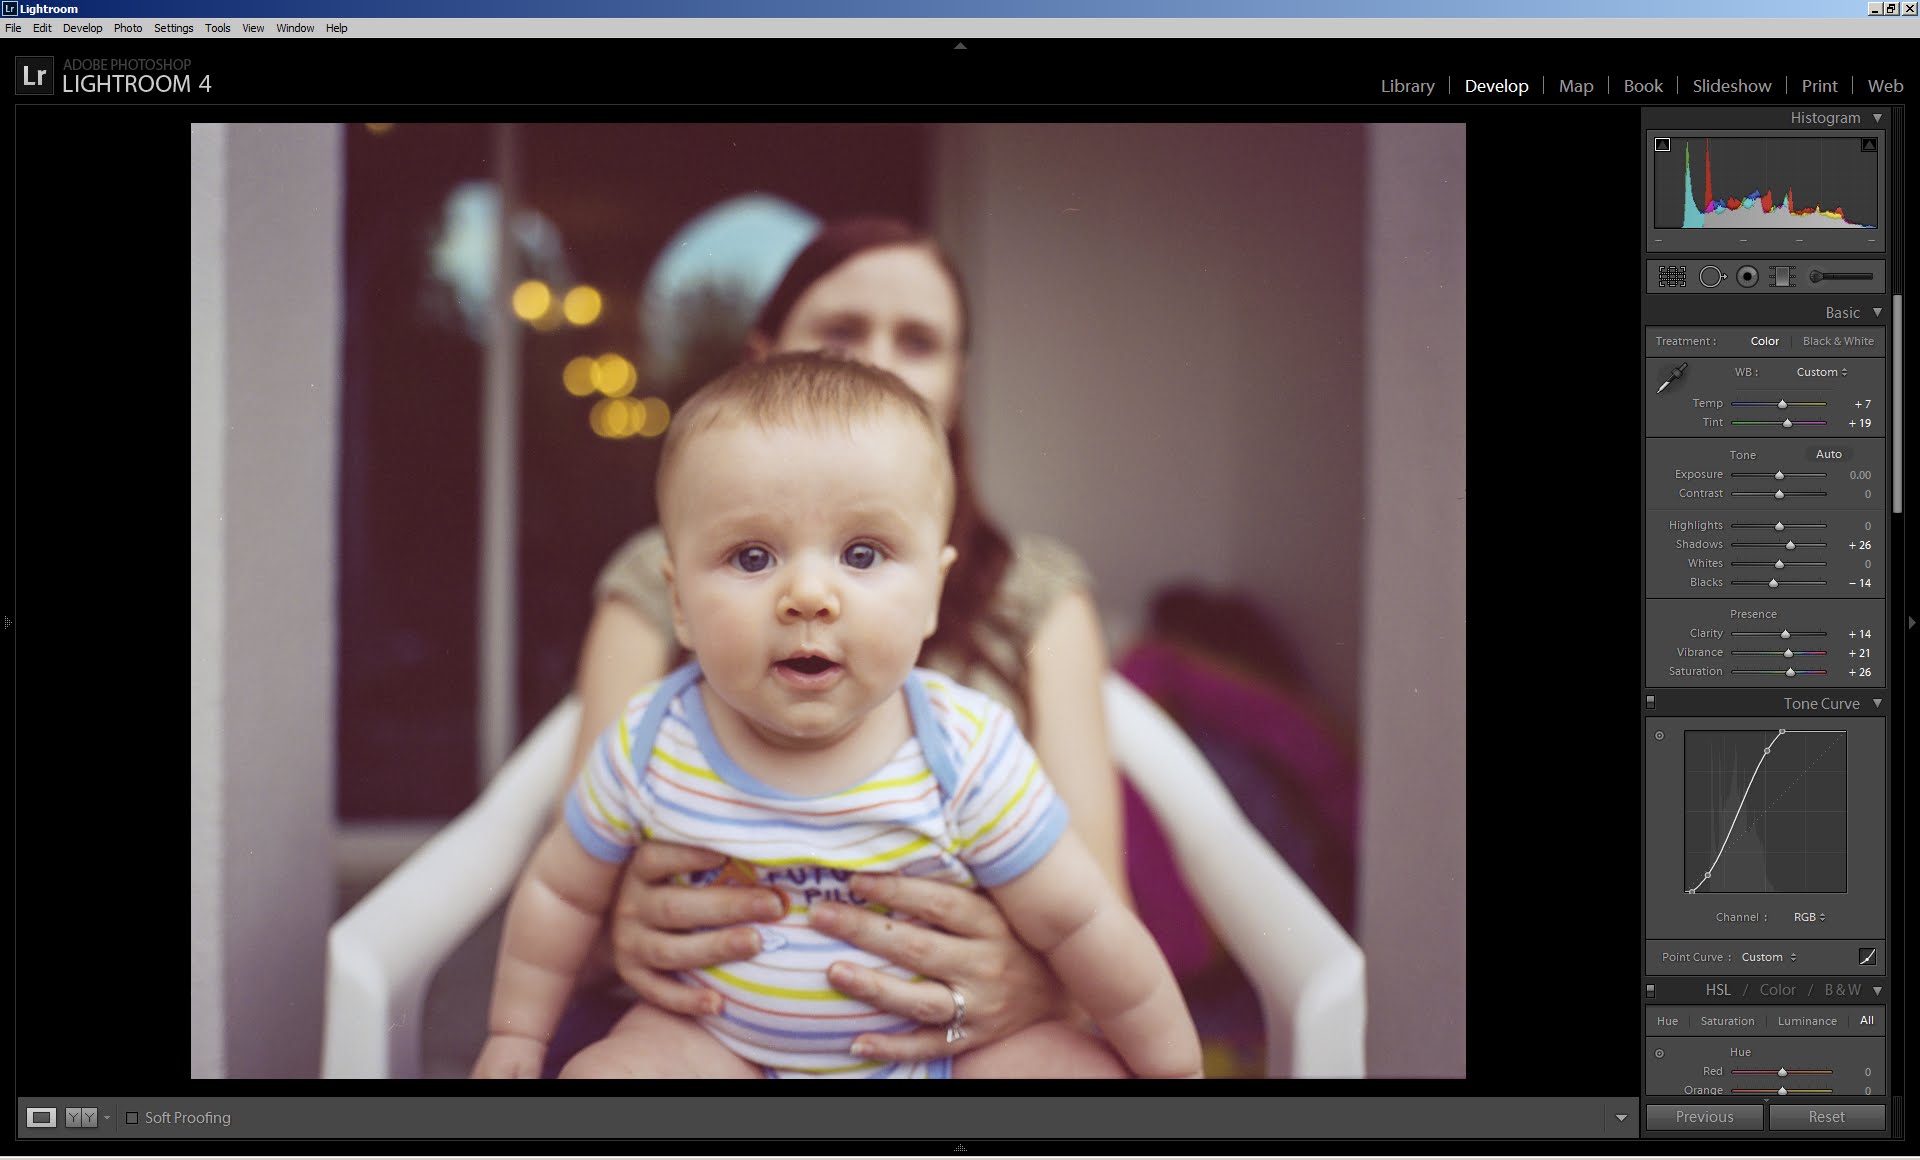
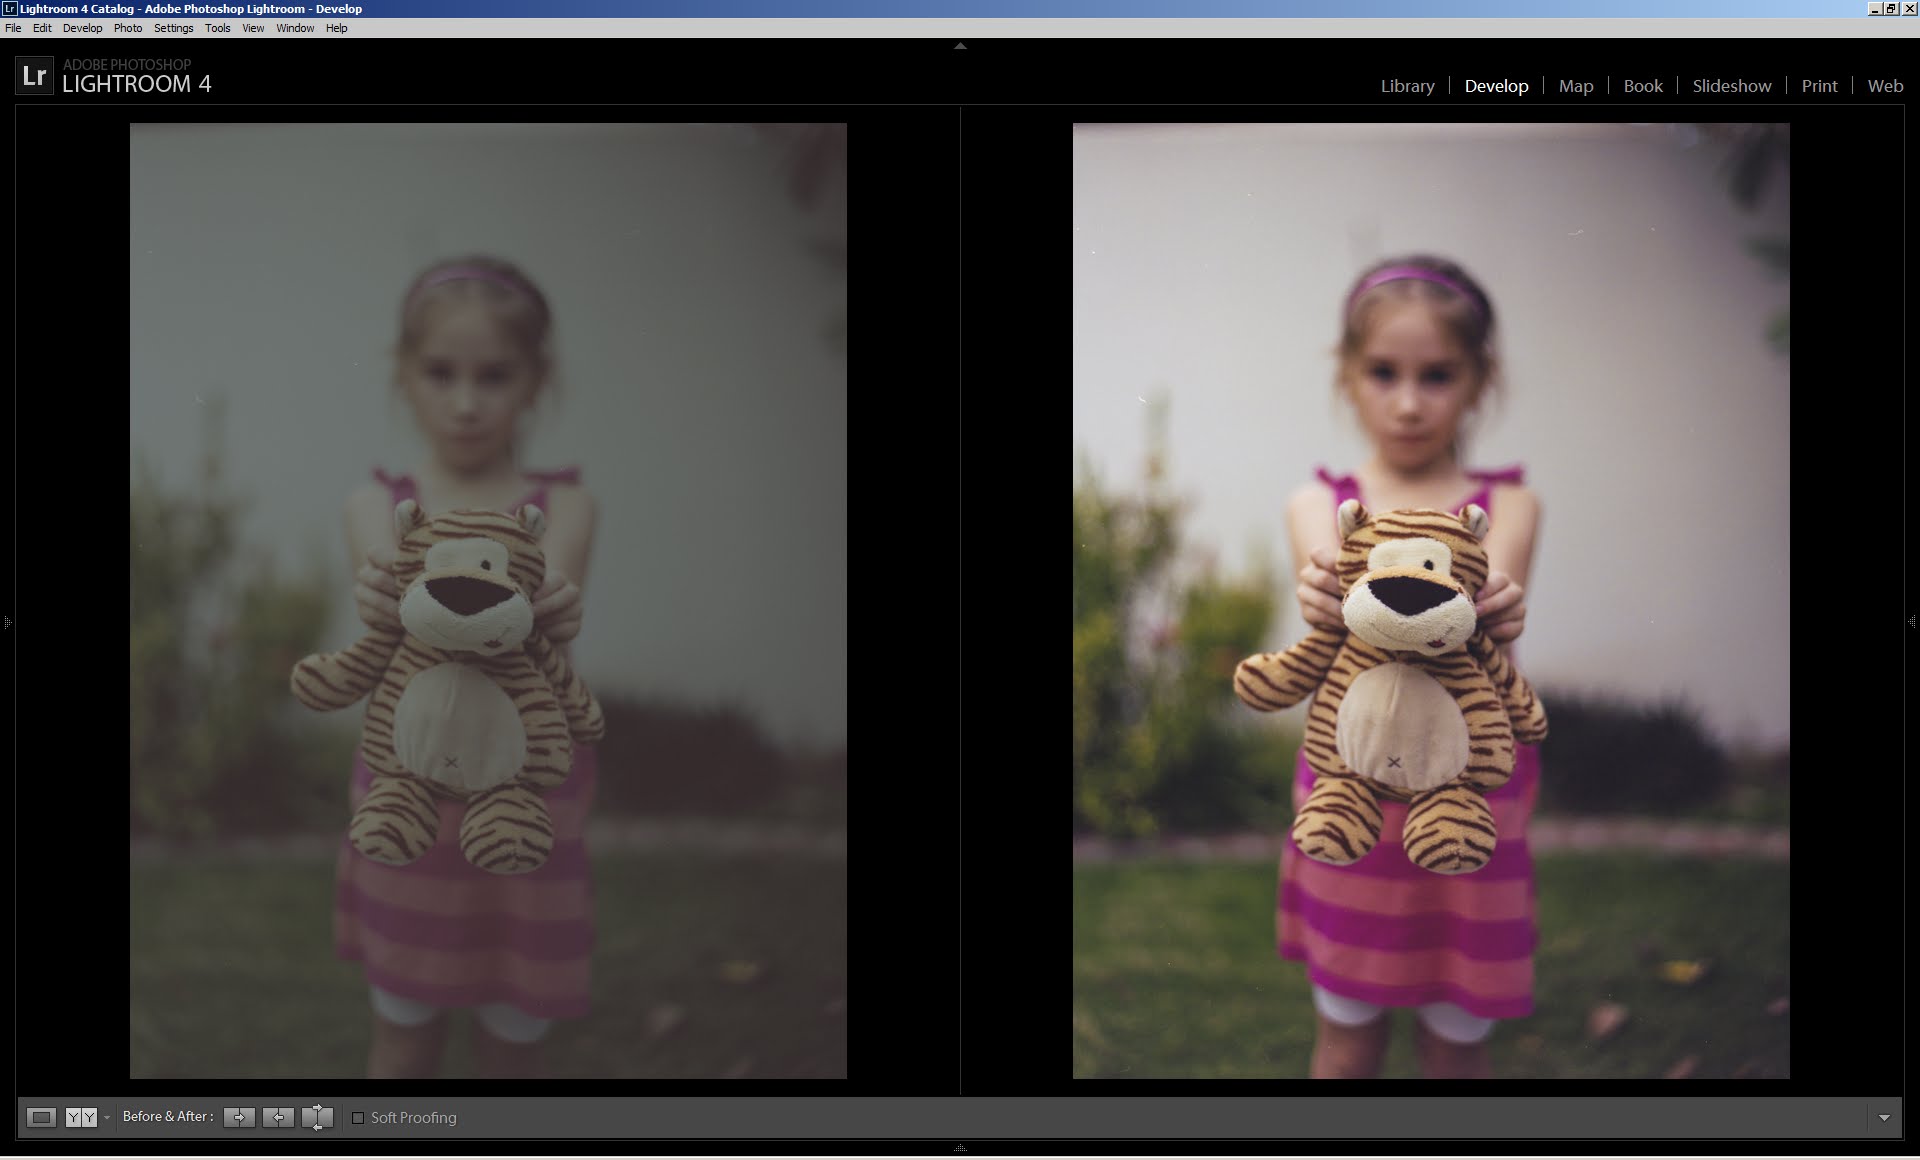
Use the Spot Removal tool to remove distracting dust and fibers.
Next I sharpen the Image. Sharpening in Lightroom is far superior to the auto sharpening found on lab scans. In lightroom after you have sharpened to your taste, hold down the ALT Key and adjust the MASK Slider until only the details you want sharpened highlighted.
Oversharpening is big problem with many lab scans, in particular oversharpening of the Bokeh. Some confuse this with grain, but it is not grain. You shouldn’t see grain on low speed films with medium format pictures. Many times I see people talk about the grain of Ektar shots, when in reality what they are looking at is oversharpened bokeh which looks like big grain. You can avoid sharpening of the bokeh with the MASK Slider in Lightroom.

Dust Spots Removed and Sharpened
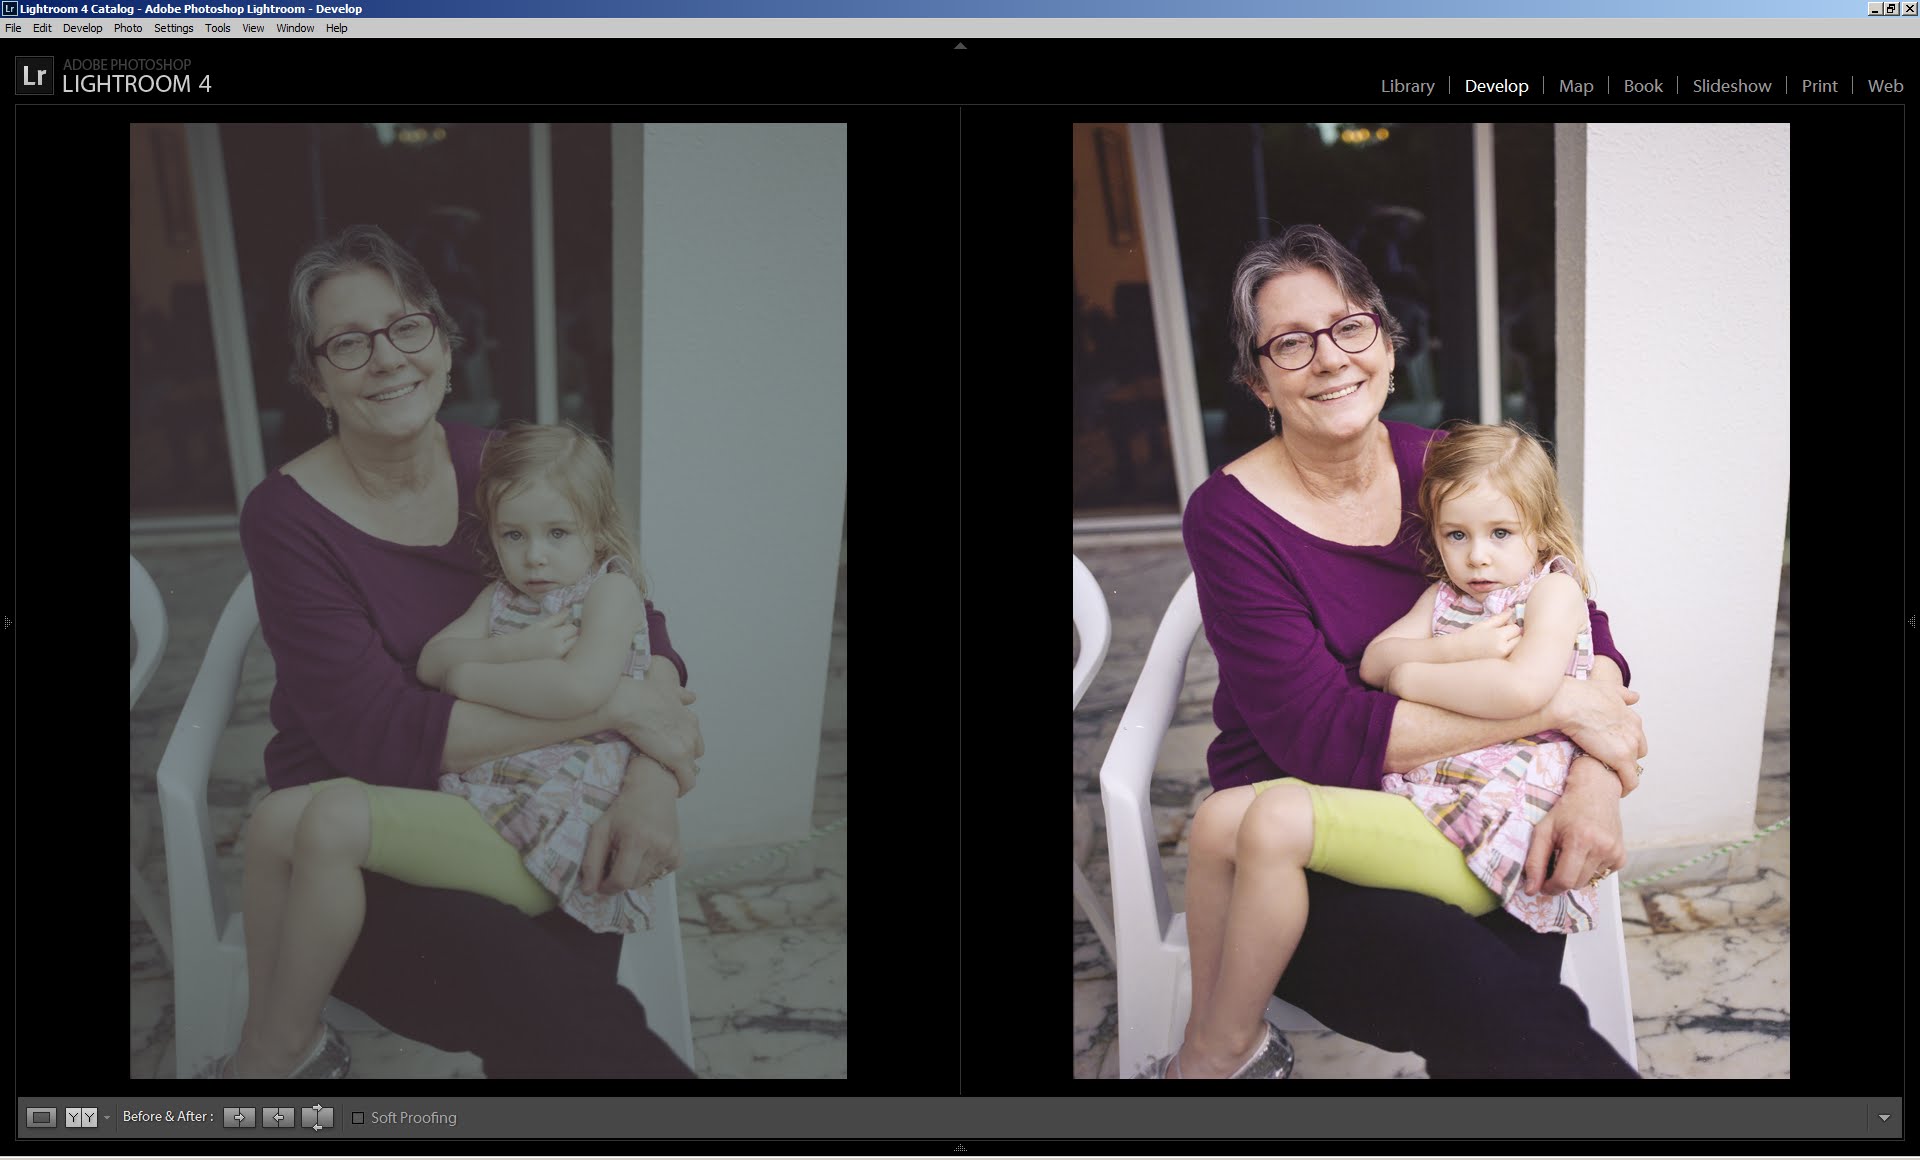
Then make adjustments to the tone sliders and the Clarity, Vibrance, and Saturation sliders. Sometimes Lab scans come back highly saturated. It is hard to desaturate lab jpegs without making the picture look even worse. Fine tuning the Saturation is another advantage of home scans over lab scans.
Now I notice that there is a red color cast in the shadows. I fix this using the Red Color Tone Curve.

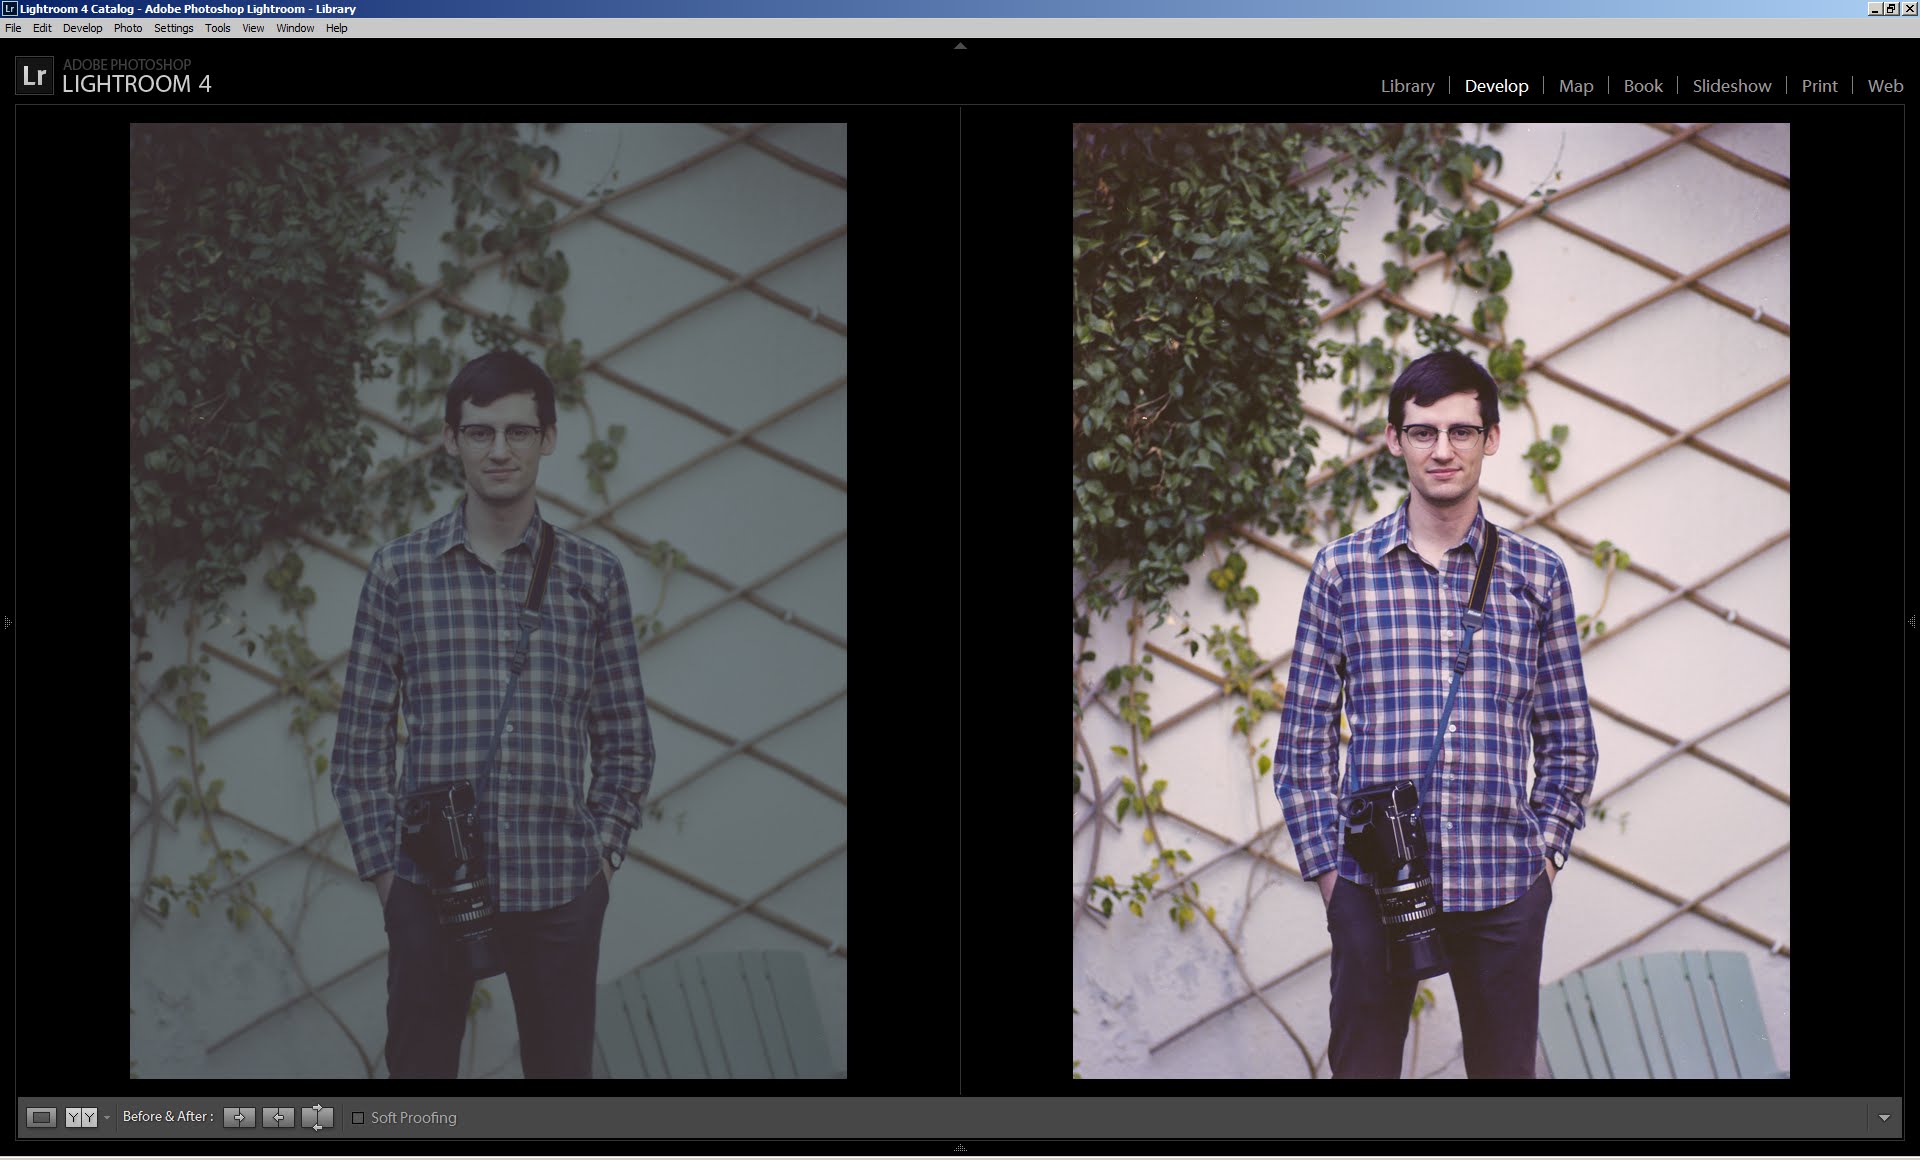
Now I can sync this pictures settings with all the other frames on the roll. You now have the 90% answer for all the remaining frames. Minor adjustments will need to still be made for changes in exposure, WB, and sharpening. This saves substantial time when compared to opening each frame in lightroom, exporting to photoshop, color grading with ColorPerfect, and then reimporting to Lightroom, etc. for each frame.
Here are some other pictures from the same roll synced with the settings of the first image. You can save this as a preset and use it as a starting point for the next roll of film from the same film stock.
With fewer and fewer options when it comes to labs that can scan you film well, I hope this tutorial will help you become self-sufficient when it comes to digitizing your film.
For more, please follow us on Facebook, Google+, Flickr and Twitter.
Get rid of the ads!
Did you enjoy reading this article as much as we enjoyed writing it? There's a way to support us and our reporting, getting ad-free navigation and more as a bonus. Subscribe to us for less than a coffee per month —just $3.99— or take advantage of our yearly subscription with a hefty discount for only $25.- An ad-free experience
- A free mystery box for Lightroom or Capture One
- All the books in our store
- 20% discount on Capture One
- 30% discount on Imalume Photo Theft Protection
- 20% off Herbs and Kettle Tea Company.
- 20% off your order from MPIX printing services.
- 5% off Viltrox Products via their eCommerce store.
- 10% off all film developing, printing and scanning services from Blue Moon Camera and Machine
- 15% off 7Artisans products: The lens and accessory maker is offering a sweet discount for Phoblographer's readers.