Last Updated on 05/18/2013 by Chris Gampat
Editor’s Note: Creating the Photograph is a new series that we’re starting where we interview photographers all about the photo that they shot and talk to them about how it was achieved. The results are some knowledge passed onto you. Want to be featured? Email chrisgampat[at]thephoblographer[dot]com
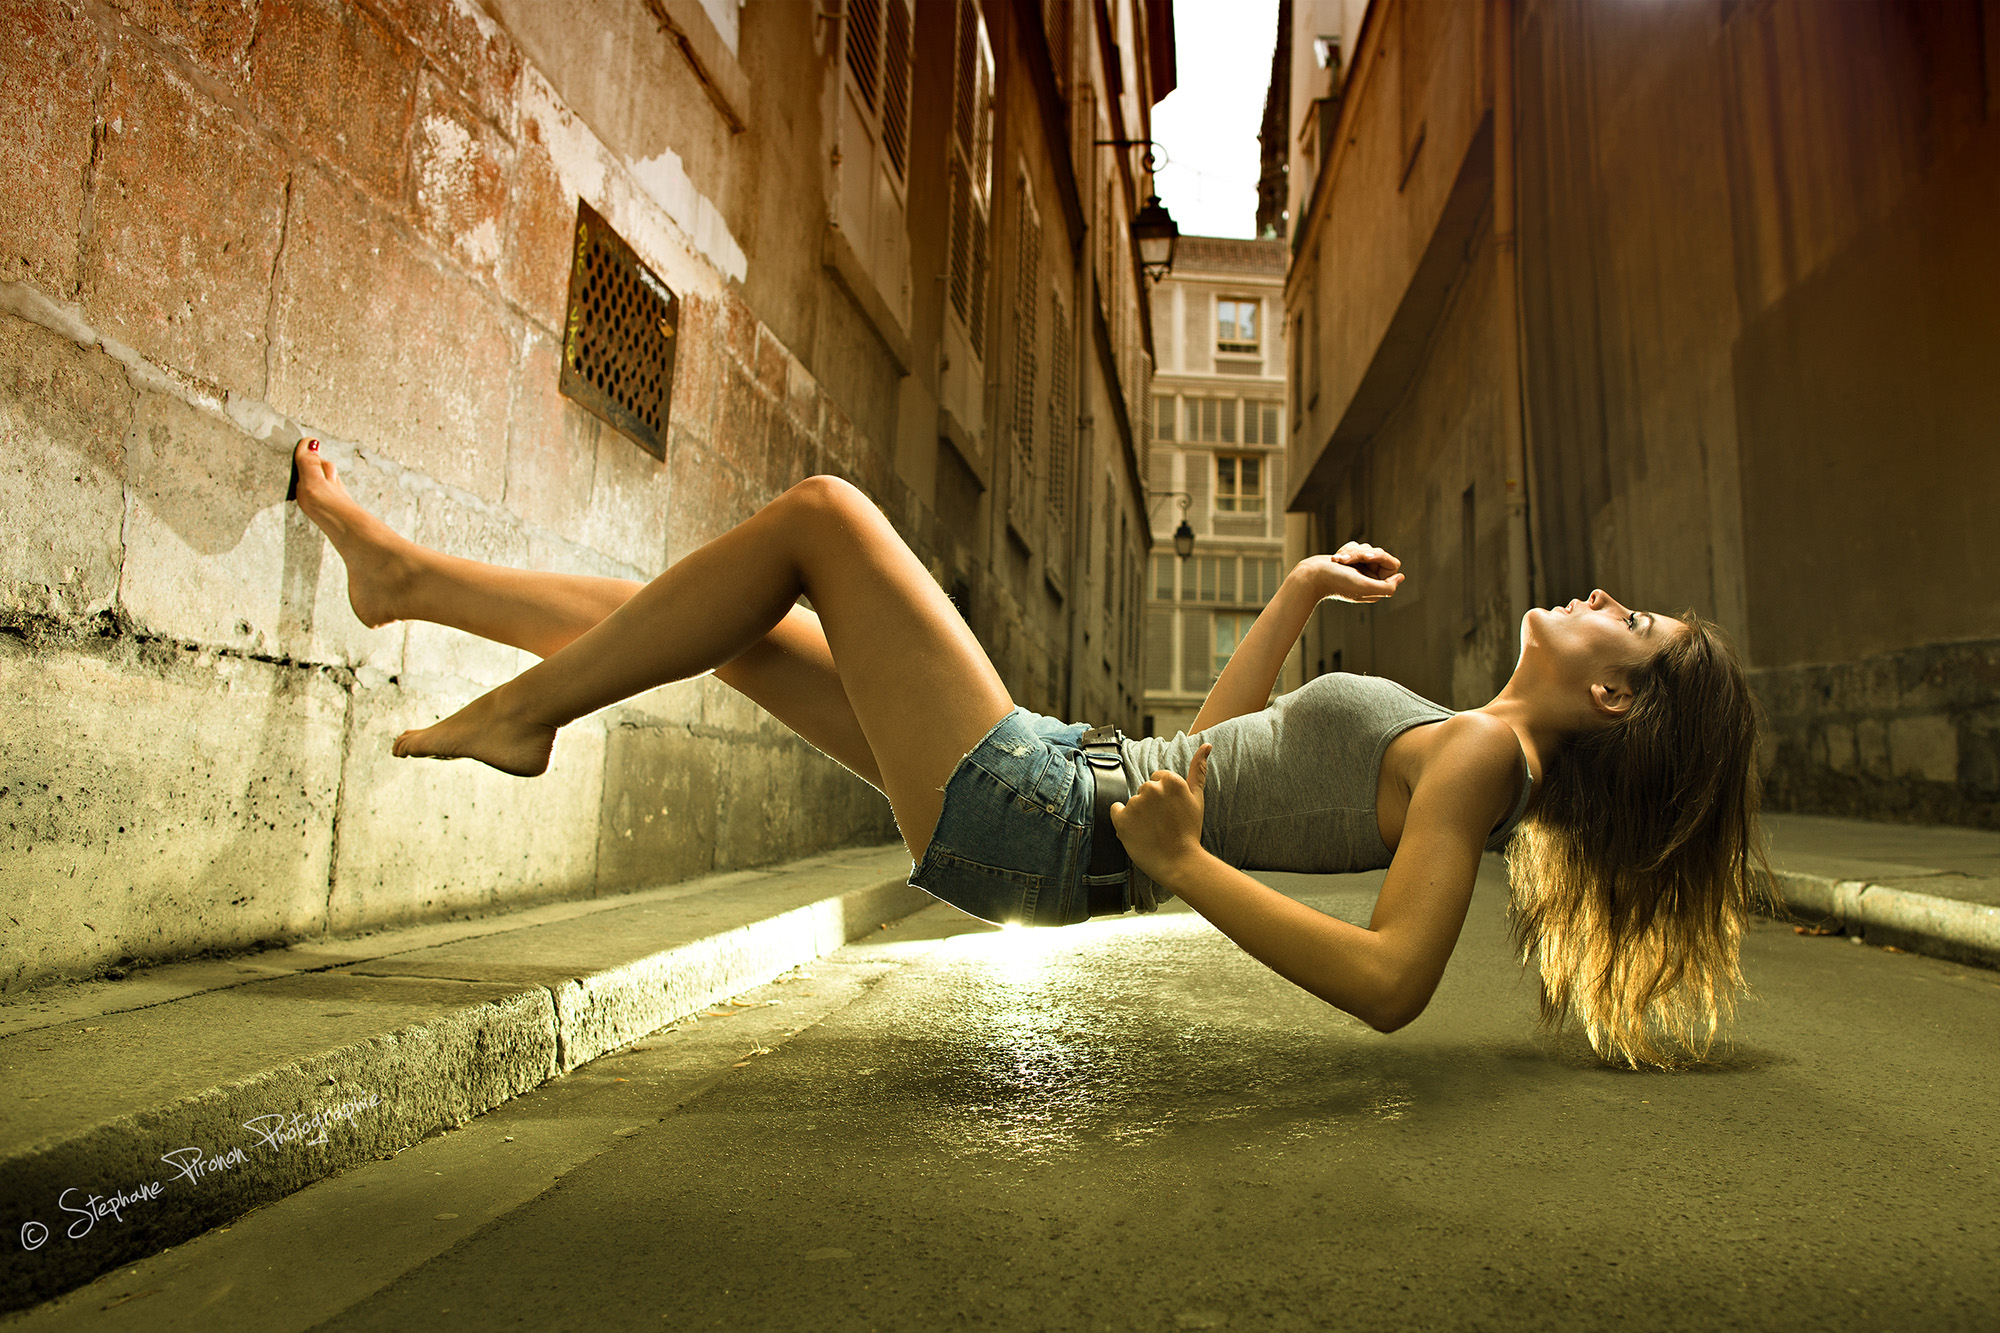
We’re doing this series twice this week because we missed last week. Sorry folks! Anyway, there are some photos that are a heck of a lot more clever than we ever thought. Then when we find out how they were done, we say to ourselves, “Why didn’t I think of that?” Upon searching for the word, “Strobist” on 500px, I came across Stéphane Pironon’s “Weightlessness.” The image looked so simple but I couldn’t totally figure out how it was done. He did this photo when he was a member of the Strobi team, Stéphane is quite a photographer himself and has some excellent fashion work along with other photographs.
Here’s his story. And if you’re interested check out more in our Creating the Photograph series.
The Concept
When I shot that picture I was a member of a photographer team you can find on Strobi. Every month the members have to deliver a new photograph based on a theme chosen by each team members (12 themes per year); last October 2012, the theme was Levitation!
One year before, I already created levitation photos.
Gear
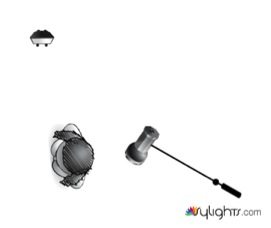
2 flashs Yongnuo YN-560
1 GF Lightsphere
1 Celine’s Arm (to take the flash+lightsphere up to Sophie’s face)
Photoshop CS5
NickSoftware Color FX Pro 4
The Shoot
I had a portrait photo shoot planned with Sophie, a model I regularly shoot with. I also had Celine for the makeup, but this time I had her holding a flash to illuminate Sophie’s face.
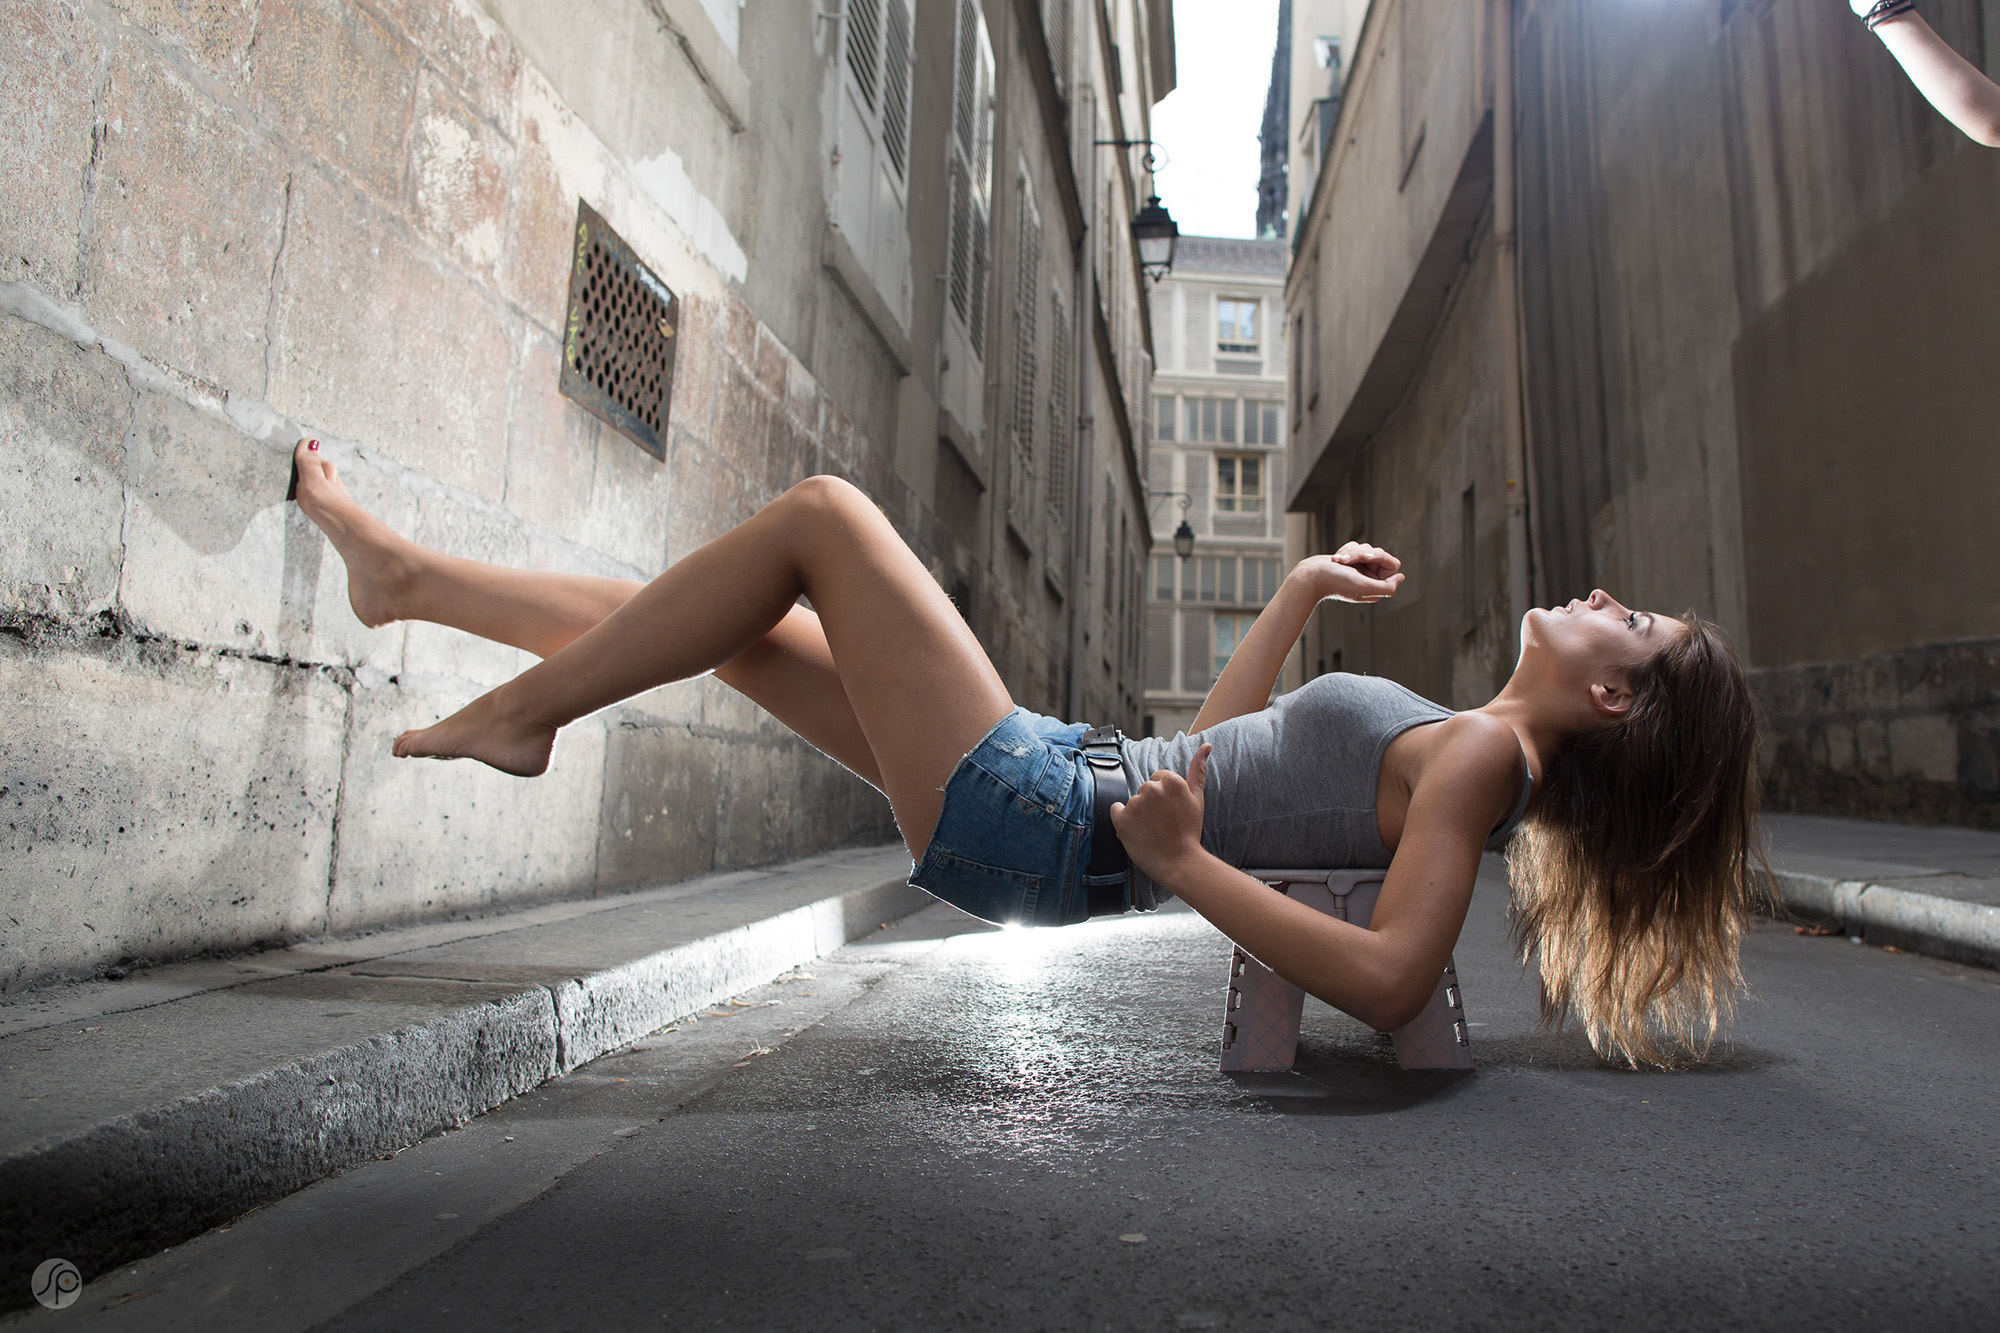
At the end of the portrait shoot, we decided to test some levitation effects. I initially made some attempts with Sophie positioned vertically in the street. Those didn’t work out so well so Sophie suggested to test it horizontally! We needed to put a ladder under her to prop her up.
And with that we made her climb the wall I used my 24mm lens to keep a wide angle and have the most of the scene I could.
For this picture, I used two flashes: one was to light Sophie’s face/chest/legs and a second put directly on the street asphalt behind Sophie. This makes a cool rim light that shapes her body and lights her hairs.
To make Sophie levitate, pretty easy, we positioned a small foot step under her chest; after she put her abdominal muscles at work.
Post Production
To delete the ladder, I used a second photo of the street alone and cloned that in.
To give more visual impact to this image, I also applied two color filters using Color Efex Pro 4. I usually use a NiK Software plug-in to finalize my photo retouches. This gives me a quick view of different possibilities. Sometimes when the Nik Software plugins do not deliver what I want, I go back to a manual retouch in Photoshop! It takes more time!
I finalized the image with contrast and sharpness adjustments using curves+mask and high pass filter.
Before & After
Be sure to visit Stephane’s website, portfolio page, flickr, and tumblr.
Please Support The Phoblographer
We love to bring you guys the latest and greatest news and gear related stuff. However, we can’t keep doing that unless we have your continued support. If you would like to purchase any of the items mentioned, please do so by clicking our links first and then purchasing the items as we then get a small portion of the sale to help run the website.
Also, please follow us on Facebook, Flickr and Twitter.
Get rid of the ads!
Did you enjoy reading this article as much as we enjoyed writing it? There's a way to support us and our reporting, getting ad-free navigation and more as a bonus. Subscribe to us for less than a coffee per month —just $3.99— or take advantage of our yearly subscription with a hefty discount for only $25.- An ad-free experience
- A free mystery box for Lightroom or Capture One
- All the books in our store
- 20% discount on Capture One
- 30% discount on Imalume Photo Theft Protection
- 20% off Herbs and Kettle Tea Company.
- 20% off your order from MPIX printing services.
- 5% off Viltrox Products via their eCommerce store.
- 10% off all film developing, printing and scanning services from Blue Moon Camera and Machine
- 15% off 7Artisans products: The lens and accessory maker is offering a sweet discount for Phoblographer's readers.