
Editor’s Note: Creating the Photograph is a new series that we’re starting where we interview photographers all about the photo that they shot and talk to them about how it was achieved. The results are some knowledge passed onto you. Want to be featured? Email chrisgampat[at]thephoblographer[dot]com
Some photos have such a beautiful and simple look to them, but most people have absolutely no idea how they were lit. Upon searching for, “Strobist” on 500PX, I came across the work of László Nagy. He curates loads of awesome photos on his Tumblr, and is also a hobbyist photographer–these two combine to give him quite the eye for details. The way he created the photo above is quite simple in one way but that also utilizes a trick that many of us sometimes forget.
Here’s his story. And if you’re interested check out more in our Creating the Photograph series.


The Concept
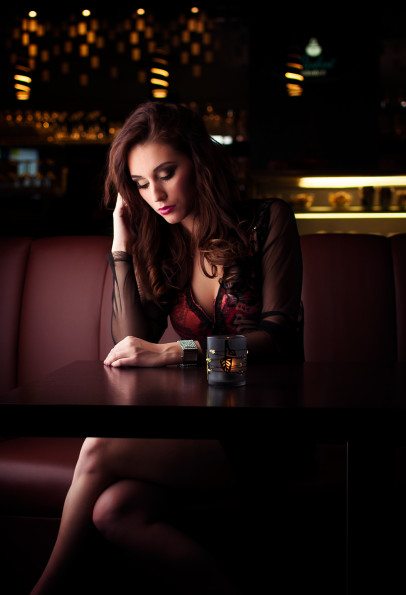
One week before this shoot I bought a 48 inch Octobox, and this was the first time I used it. The main concept was to shoot an indoor portrait with a soft light, mixed with a bit of shallow depth of field. I wanted to create a slightly low key scene. After I found my model (Nati), I still had trouble finding a location. Then she suggested a local coffee shop. Fortunately she knows the manager, so we could take pictures taking up half of the café. I’d like to thank two people, the hair dresser, and make up artist, (Thank you Judit & Tamas !)
Gear Used
Yongnuo 462 Speedlite (Gn 33.)
48 inch Octobox
Blazzeo radio trigger
The Shoot

We started the shoot in the late afternoon, it was in autumn, so there wasn’t any natural light from outside–just the enviroment lights of the café. I used a Nikon AF-S 35mm f1.8 G on a Nikon D90 body. Then I set the shutter speed to 1/200, and the aperture F2.2. These conditions lead to an underexposed picture, which is good for me because only the lights spots are visible and rest of the background goes dark.
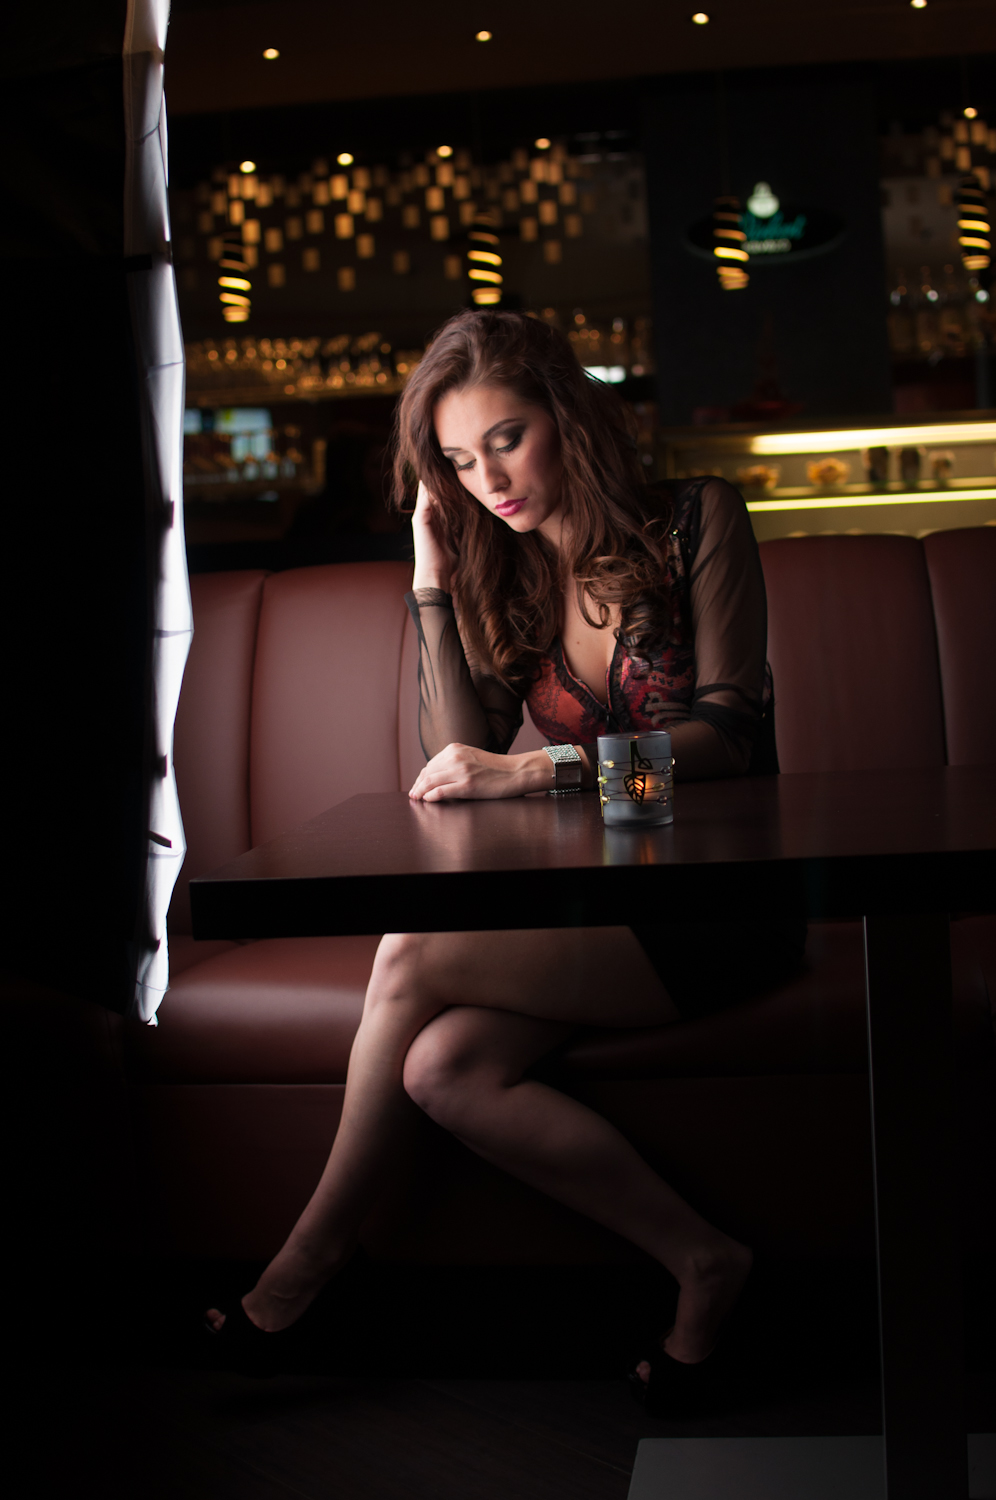
Now I placed the Octobox next to her (camera left) and I turned on the speedlight (Yongnuo 462 Gn 33.) It has manual control, so started to increase the power, and taking shots until I find the correct exposure. I was not satisfied with result, the right side of her face was too dark. Therefore I placed a 40 inch white reflector on camera right, and the lights became complete.
Post Production
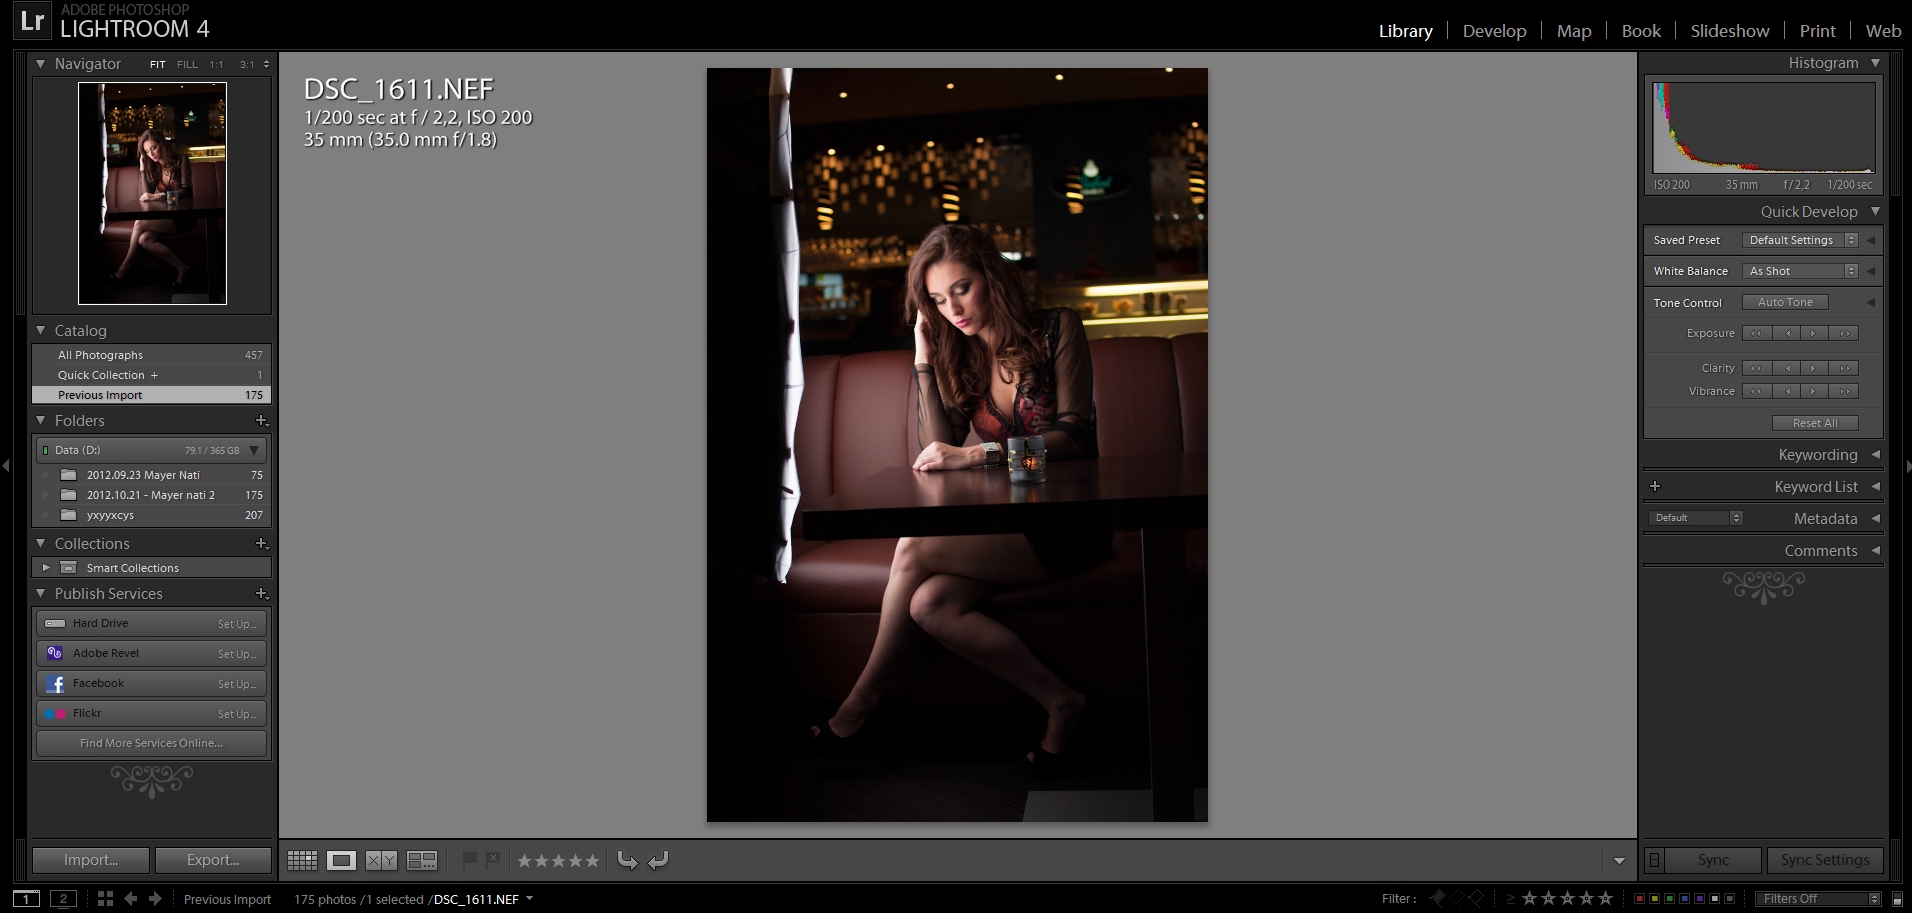
I always shoot in Raw, then usually open it in Lightroom, and do the basic adjustment: profiles, lens correction, white balance, then play a little with colors and saturation. I rarely touch the Contrast/Exposure settings, only if needed, I much prefer to do it in Photoshop with different layers and layer masks. I also do the cropping in Lightroom, because I like to shoot a bit wider and crop later in the Post production. Here you can see the octobox on the left.
In Photoshop retouched a skin slightly first. (Fortunately that was easy she has a nice skin). I looked at the picture, and the environment seemed too bright for me, so I made a dark vignette around her.
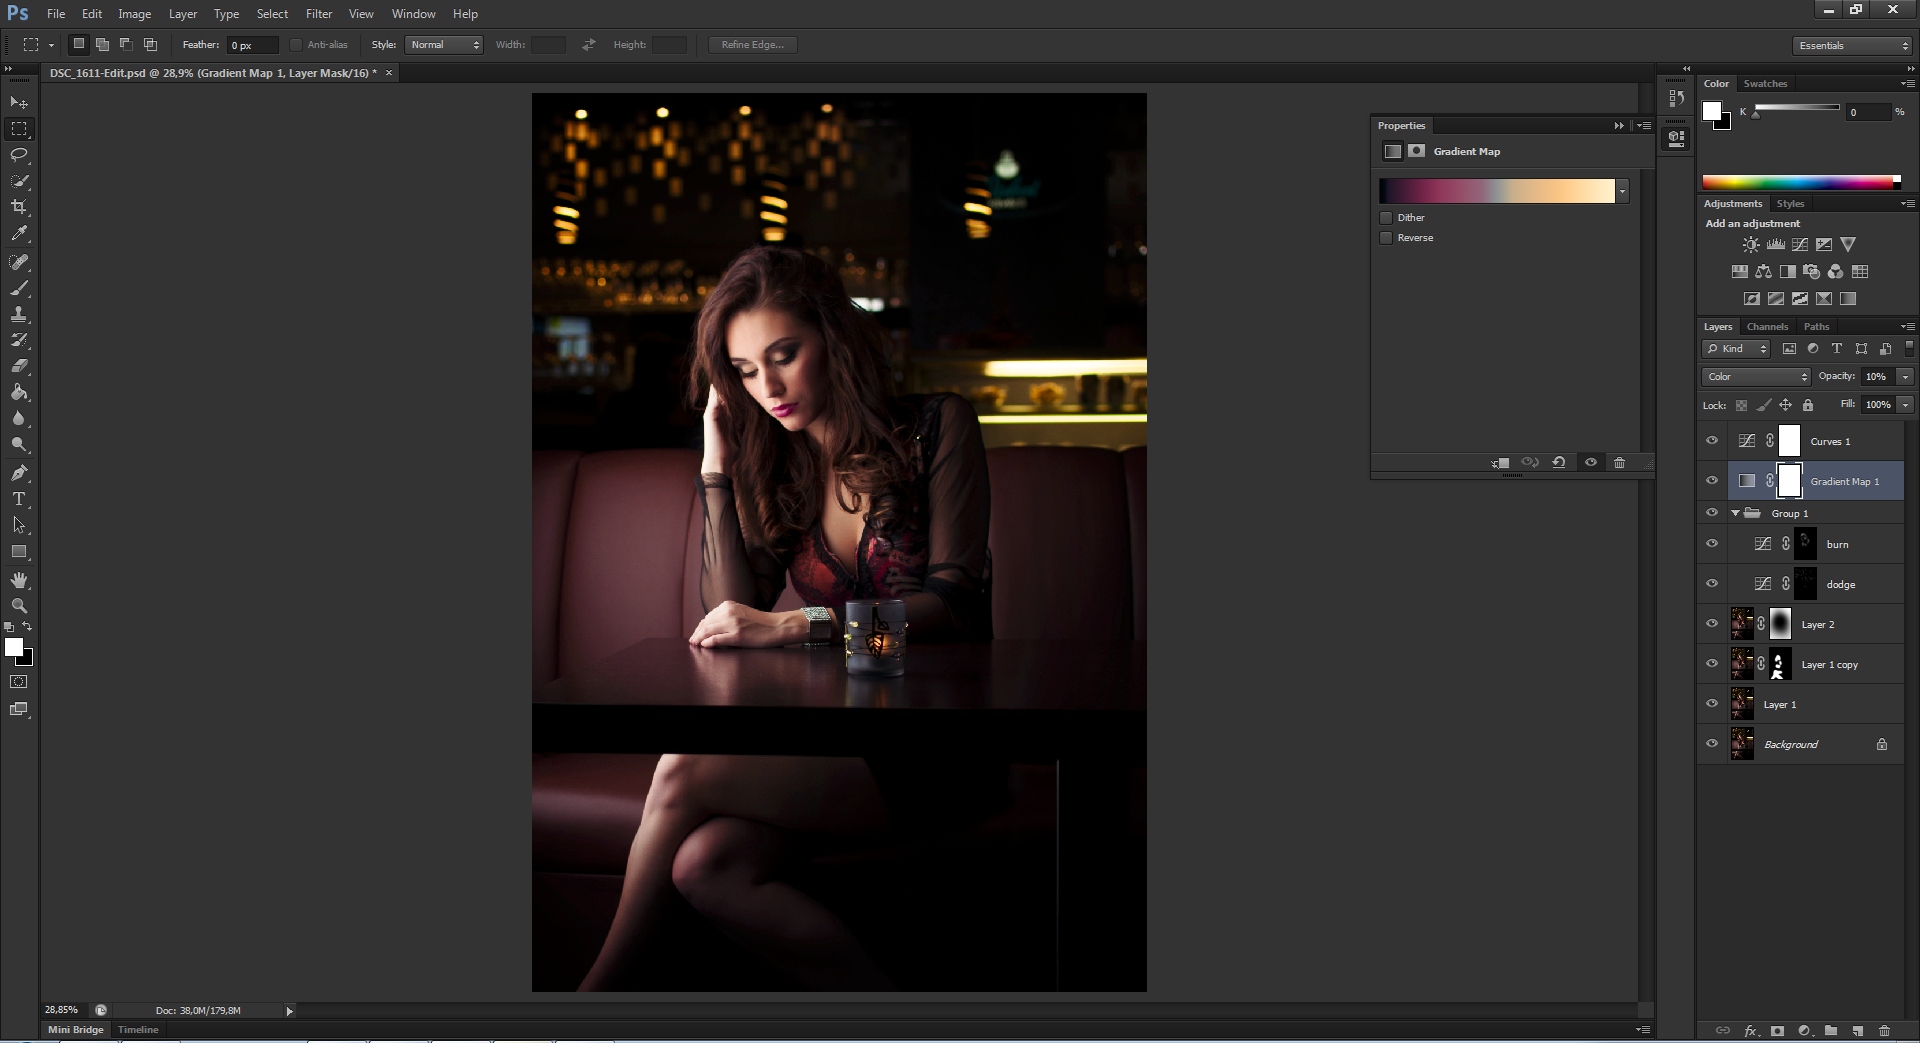
Then I made two Curves layer for dodge and for burn, and I started to paint to enhance her makeup. The next step was to add gradient map (Gold-Copper), set blending mode to color, opacity 10% that boosted the colors, but not too much. And Finally more contrast have added.
Before and After
Please Support The Phoblographer
We love to bring you guys the latest and greatest news and gear related stuff. However, we can’t keep doing that unless we have your continued support. If you would like to purchase any of the items mentioned, please do so by clicking our links first and then purchasing the items as we then get a small portion of the sale to help run the website.
Also, please follow us on Facebook, Flickr and Twitter.
Get rid of the ads!
Did you enjoy reading this article as much as we enjoyed writing it? There's a way to support us and our reporting, getting ad-free navigation and more as a bonus. Subscribe to us for less than a coffee per month —just $3.99— or take advantage of our yearly subscription with a hefty discount for only $25.- An ad-free experience
- A free mystery box for Lightroom or Capture One
- All the books in our store
- 20% discount on Capture One
- 30% discount on Imalume Photo Theft Protection
- 20% off Herbs and Kettle Tea Company.
- 20% off your order from MPIX printing services.
- 5% off Viltrox Products via their eCommerce store.
- 10% off all film developing, printing and scanning services from Blue Moon Camera and Machine
- 15% off 7Artisans products: The lens and accessory maker is offering a sweet discount for Phoblographer's readers.