Last Updated on 12/26/2012 by Julius Motal

We’ve been testing Adobe Premiere Elements 11 for a couple of months now and it’s been an interesting and sometimes frustrating experience. The program in general, however, is really quite straight forward and we believe that it will make editing easier for all those that only need to do the very basics with a little bit of extra power. Premiere Elements has changed drastically from earlier versions, and I still believe that 8 may have been the best one. Unfortunately, it can’t handle all of the more powerful codecs that today’s cameras can output.
Here’s a quick summation of our findings over the past couple of months.
Pros and Cons
Pros
– Affordable solution for anyone looking to edit videos
– Relatively simple interface
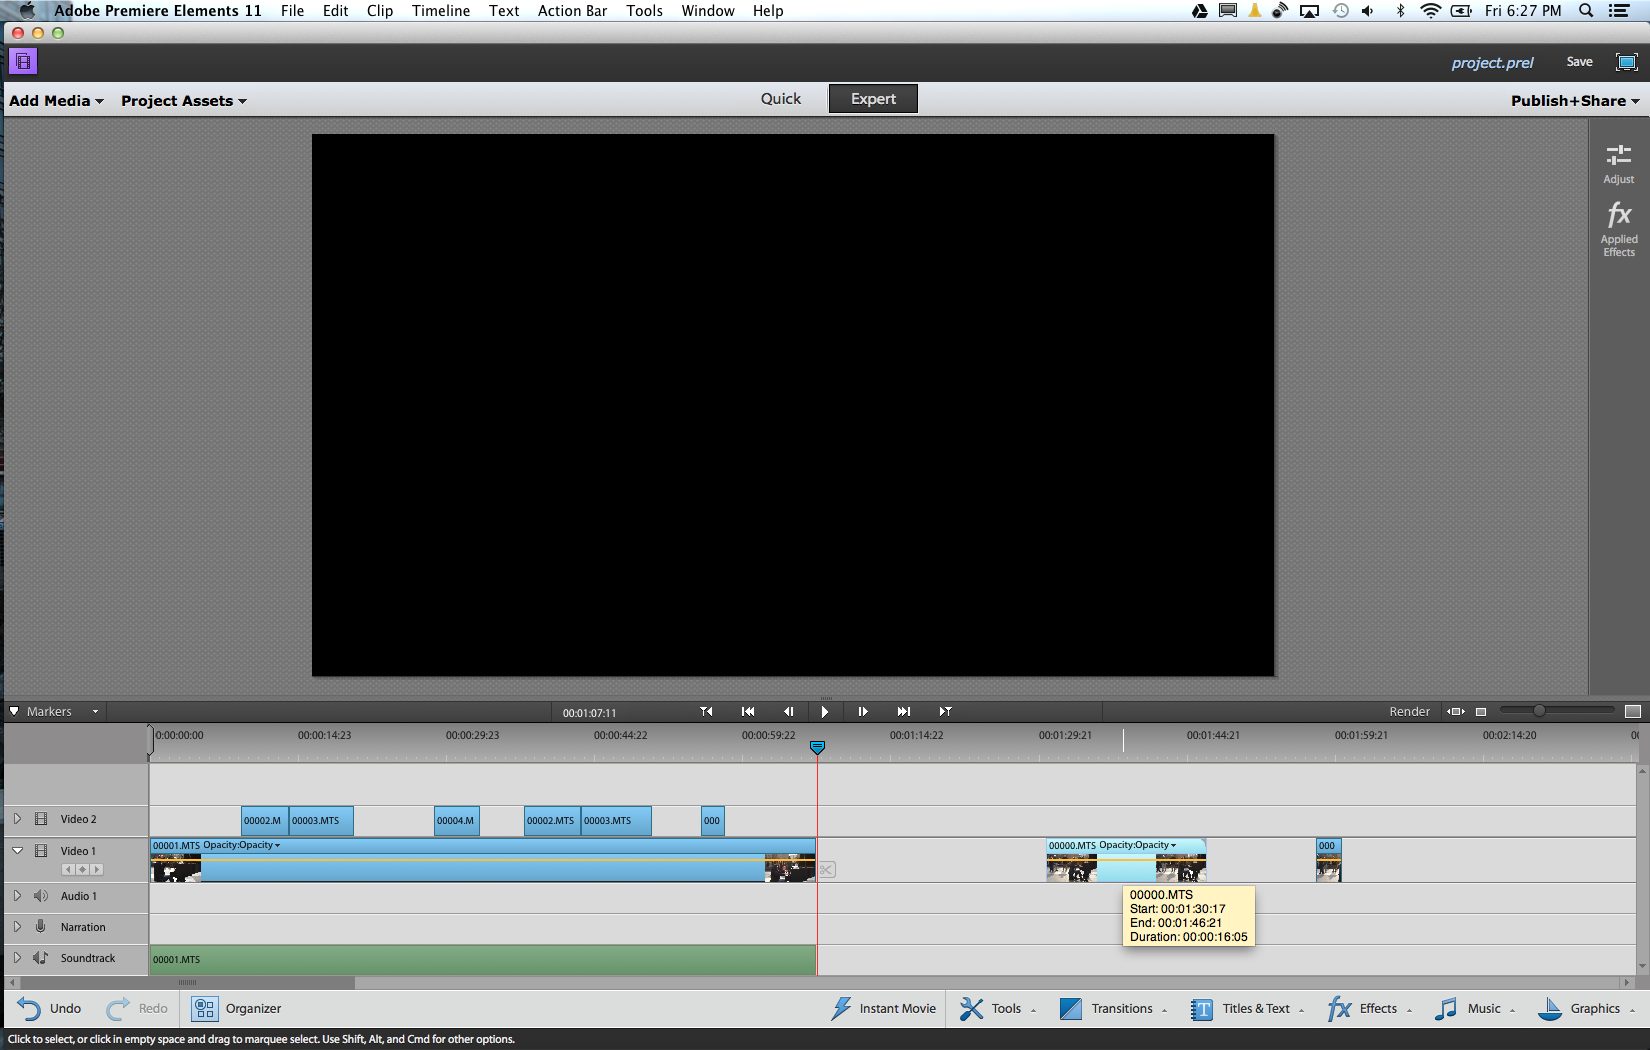
– Multi-layering of videos is an excellent way to edit for beginners as long as they can keep their tracks synced
Cons
– Doesn’t play so well with a MacBook Retina Display
– Porting settings from a normal Macbook over to Retina was quite clumsy and caused lots of errors
– Cutting clips and snapping them seems tougher to do now.
Gear Used
For this test we used Adobe Premiere Elements 11 on a regular Macbook. Later on, we upgraded to a Macbook Pro 13 Inch Retina. After shooting footage with the VG900, 24-70mm f2.8, A99, and 50mm f1.4, we then imported the footage for editing.
Main Features and Updates
– New organizer function
– New presets and effects
– Newer interface
– New fast and slow-motion effects
– New sharing features for a faster workflow
Ease of Use
Perhaps it is because I haven’t used the program intensely for a very long time, but Premiere now seems strange. Back in college, I was a video editor and cinematographer; and having used Premiere, Sony Vegas, and Final Cut, I was very happy with the offerings back then but leaned more towards Premiere. My familiarity was with both Elements and Pro.
Believe me, Elements has come a long way and is very much changed. This review began back in September where I tried editing video footage from the Sony VG900 camcorder. Organizing, laying out, cutting, snapping, splitting, and all the basic joys that video editors go through was all very simple and in a period of around an hour or so, I was able to learn the program and create a video that I was very happy with, sans tweaking the sound to what I really wanted it to be. Unfortunately, if you’re out near the ocean with lots of wind, Premiere Elements doesn’t have much of an editor for sound to cut down on the whirling that strong winds can give you. So instead, you’ll need to ensure that you get that right in the camera or you export your audio to another program for editing. Separating the audio from the video though is still very simple to do.
At this point though, I’d be remiss if I didn’t mention that Premiere Elements was not designed for this, though I could surely see how a multimedia journalist would want that feature without having to upgrade to Premiere Pro.
For a while, I went back and forth between that one movie to edit and in the end didn’t get something I liked unfortunately.
Then the Sony A99 showed up at my door. Around the same time, I also migrated my old Macbook (at this point 5 years old) settings and programs over to my new one (13 inch Retina display.) My display was setup for Lightroom 4 and with the latest updates it works awesomely with a Retina display computer.
At the time of writing this post though, Premiere Elements 11 was not setup to work with the Retina display and the company refuses to disclose any information to me about a future update. Indeed, when I was in the HiDPI setting, snapping a video to the timeline enlarged the timeline and made it difficult to edit overall. In order to edit, I needed to scale down to normal settings. That’s quite a pain when most of my work is done in Lightroom 4 (for photos) and then when I need to edit content together I need to change my display setting.
One alternative that I’ve created is mirroring my display to my HDTV via my Apple TV. That gives me a little bit of lag in the editing process but it solves the display issues.
What’s really nice about Premiere Elements now is the versatility it gives you over editing footage–specifically exposures, highlights, contrast, shadows, etc. However, I’d love to be able to save my exposure corrections to presets and quickly apply them to all pieces of footage selected or in a timeline and then render the work area right over again for smoother playback. Premiere Elements, sadly, cannot do this.
Additionally, Premiere Elements has a slo-mo effect; which I honestly thought to be too gimmicky for me. Instead, I opted to right click a piece of footage and interpret it. That way a 60p video can be slowed down to 24p with no problems.
When you’re done, you’ll need to click on the publish+share button. This isn’t the typical videography language, which uses “Export” instead.
Again, Premiere Elements gives you lots of customization over the file type, compression settings and all.
Real Life Applications
Here are two videos we edited with Premere Elements 11:
[youtube https://www.youtube.com/watch?v=W64BQ1o-dZk?list=UU26cla3LY2I_bnYsayT_-bA&hl=en_US]
[youtube https://www.youtube.com/watch?v=K4mZJ9BoKJA?list=UU26cla3LY2I_bnYsayT_-bA&hl=en_US]
Conclusions
Adobe Premiere Elements 11 is able to accomplish most of what some professionals dabbling in video and enthusiasts need and does so in a very user friendly manner. Admittedly, it will take some time to wrap your head around it all and Premiere Elements has more tools than most people will really use. At the price point though, one really cannot beat this editor, and it will only get better with full Retina display support.
Please Support The Phoblographer
We love to bring you guys the latest and greatest news and gear related stuff. However, we can’t keep doing that unless we have your continued support. If you would like to purchase any of the items mentioned, please do so by clicking our links first and then purchasing the items as we then get a small portion of the sale to help run the website.
Also, please follow us on Facebook, Flickr and Twitter.
Get rid of the ads!
Did you enjoy reading this article as much as we enjoyed writing it? There's a way to support us and our reporting, getting ad-free navigation and more as a bonus. Subscribe to us for less than a coffee per month —just $3.99— or take advantage of our yearly subscription with a hefty discount for only $25.- An ad-free experience
- A free mystery box for Lightroom or Capture One
- All the books in our store
- 20% discount on Capture One
- 30% discount on Imalume Photo Theft Protection
- 20% off Herbs and Kettle Tea Company.
- 20% off your order from MPIX printing services.
- 5% off Viltrox Products via their eCommerce store.
- 10% off all film developing, printing and scanning services from Blue Moon Camera and Machine
- 15% off 7Artisans products: The lens and accessory maker is offering a sweet discount for Phoblographer's readers.