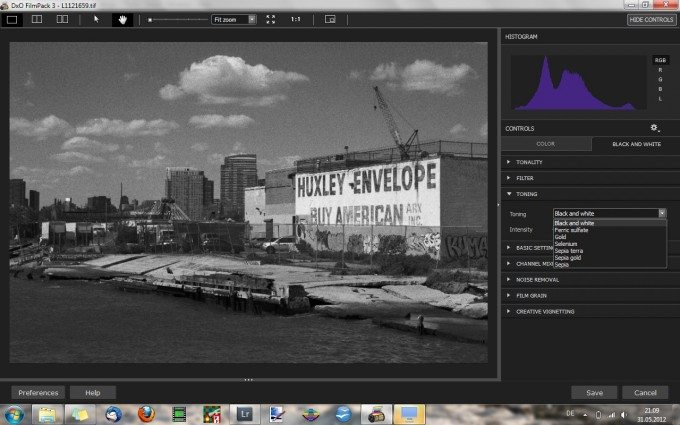
DxO FilmPack 3 is the latest iteration of DxO’s film emulating software that processes digital images to look like they were taken with a particular brand of photographic film. The software comes as a stand-alone version as well as a plug-in for Lightroom and Photoshop, and is able to emulate a couple dozen different color slide, color negative and black-and-white films. In this review, we take a look at what the software has to offer, and compare it to similar products from other developers.
If you’re interested in a quick and easy solution to give your pictures a unique look, without the need of extensive knowledge in post-processing, then read on after the jump.
If you think this stuff is only for hipsters and show-offs, then please skip this article and go directly ahead to Is The Film Revival Just Another Fad?
Why Emulate The Look Of Film In Digital Captures?
There are some among us who just cannot accept that progress happens, and who cling to the old times like a baby orangutan to its mother. People that won’t accept the fact that digital has won over film a long time ago. These are mainly elderly people, and some poor misled creatures called, “hipsters”. These people believe that things from the past are better than things from the present, and thus strive to bring back the, “good old days”. What usually happens when people from the present try reviving the past, is that they cannot really detach from their acquired modern lifestyle.
So, instead of using actual old-school film cameras and running actual old-school film through them (yeah, you can still buy that crazy stuff!), they try to mimic the look of film in their digital captures. Crazy, isn’t it? It’s like taking the innards of a modern-day Ferrari and dressing it in the bodywork of a Model T. Or like wearing clothes from the 70’s. Who does that?

But let’s be serious. Film has something magical to it. It can give a very special, unique look to an image. And there are (well, used to be, anyway) so many different varieties of positive and negative, color and black-and-white films, and each one of them has its own distinct signature, its own distinct look. While some films are more suited to portraiture, others work better for landscape photography. In this day and age of digital photography, however, pictures taken with one-and-the-same camera tend to look all the same. Heck, sometimes it seems all digital photographs look the same. Hence the desire to give your pictures a more unique look. But since not everybody enjoys the fact that each roll of film has to be paid for separately, that each roll has to be processed and that each picture needs to be printed properly in order to convey its full potential, what we do instead is giving our digital pictures a unique look by processing them with filters that try to emulate that “wonderful aesthetic look that film of all types can lend to an image” (Jonathan Eastland). And this is where softwares like DxO FilmPack come in.
The Problem With Digital Filters
What DxO FilmPack is, is essentially a collection of algorithms that will emulate the look of a specific positive or negative film in a digital image. Basically, what you do is that you open a picture (the software supports JPEG and TIFF files), select a film base that you would like to be emulated, let the software do the calculations and then you’ll be presented with a picture that looks like it was taken on film. Or at least that’s the idea. However, there’s kind of a drawback to it — and this is that each camera’s output already has a distinct signature that is a combination of the properties of the lens used (you have that with film, too) and the sensor. So while camera A might render especially nice greens and yellows, camera B might render stronger reds and purples. Since DxO applies its filters to the data it is fed, the result is always a mix of the inherent properties of the image plus DxO’s added algorithms. Thus, it’s not necessarily anything close to the look of the film you tried to emulate.

The other thing is that the look of a film depends to a certain degree on the way it is processed. You can push film if you deliberately underexposed it, but it will become grainier. Color film will develop a different color signature. You can pull film if you deliberately overexposed it, but it will make the pictures less contrasty, and the colors might look different again. Then, not every batch of film is exactly the same, and when you store it for too long, it will look different from a roll fresh from the factory. Then, there’s the question of which developing chemicals to use, or whether to have it processed in a lab or not… there are a thousand ways how one particular type of film can look totally different on two differently exposed and differently developed rolls. So, what do you base your conversion algorithms on? The fact that different companies have different ways to proceed in this matter became quite obvious to me when I compared DxO FilmPack 3 to Nik ColorEfex Pro 3 and SilverEfex 2. The results I got with the same preset chosen in each software sometimes were lightyears apart.
A Closer Look At DxO FilmPack 3
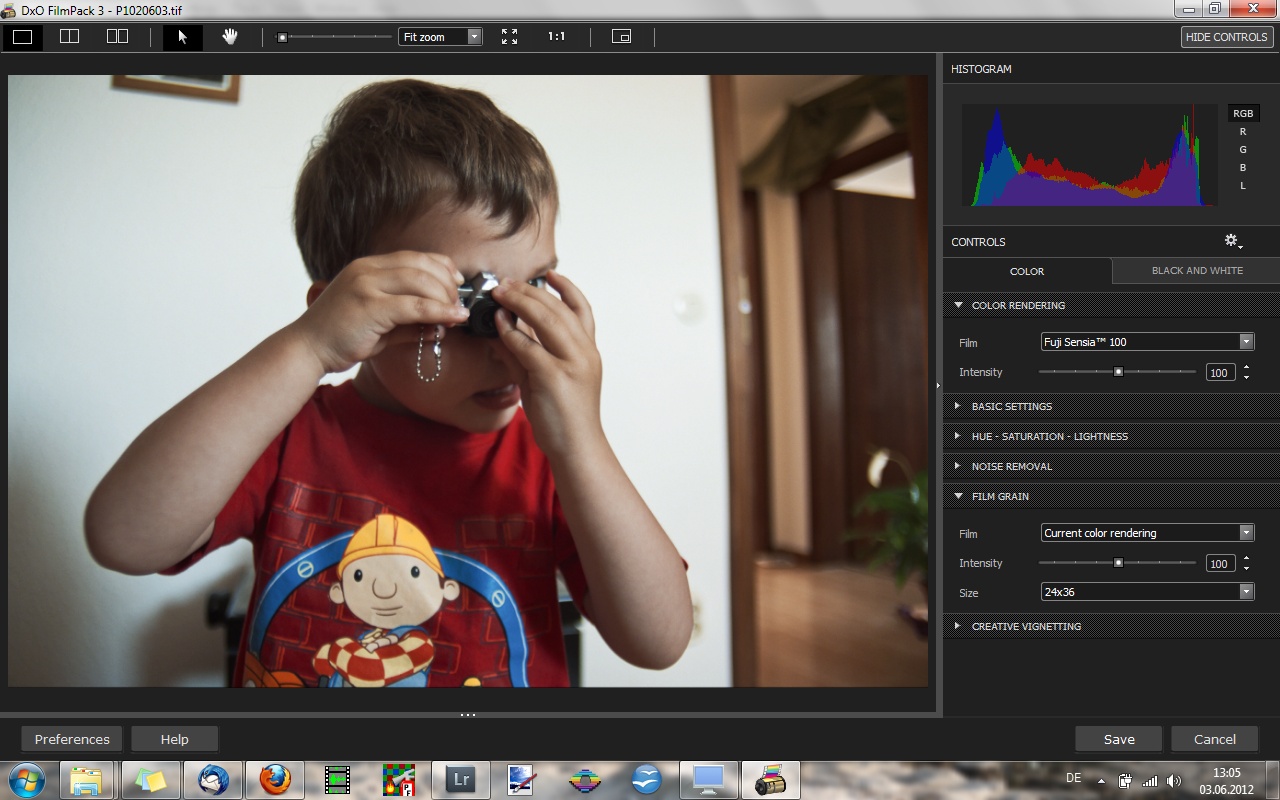
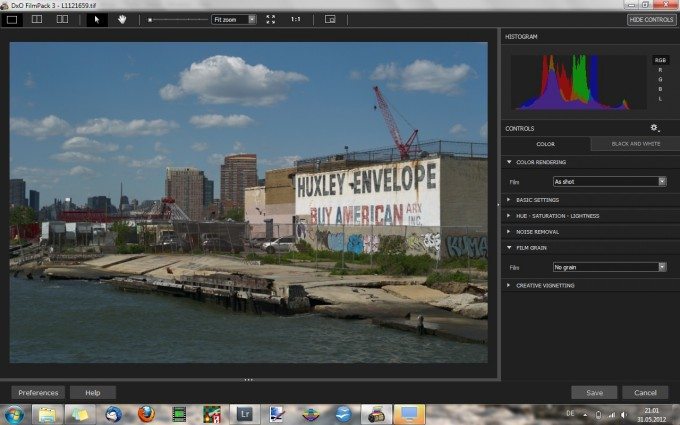
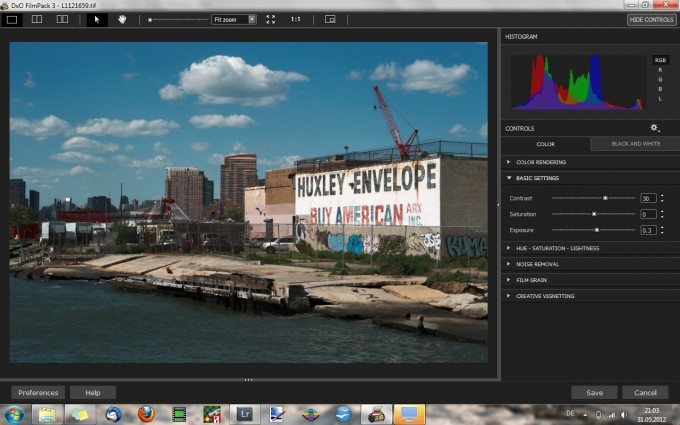
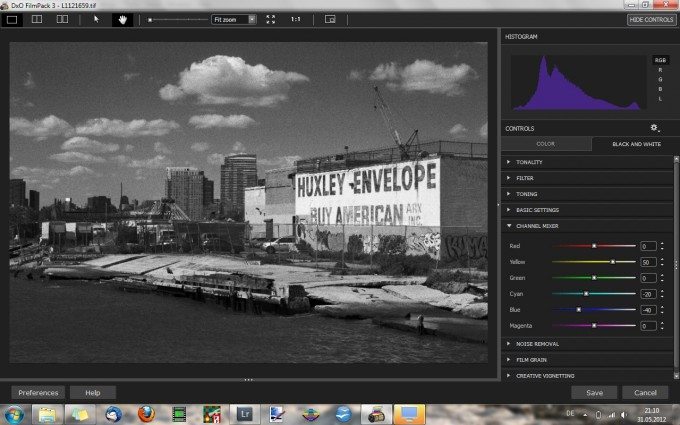
But first, let’s concentrate on the software at hand, which is DxO FilmPack 3. The software’s interface is pretty straightforward, and the only difference between the stand-alone version and the plug-in version is the lack of a menu bar in the latter. On the main screen, you can choose to show or hide a toolbar on the right hand side, showing everything DxO has to offer. Here you will find a histogram and extensive controls for color and b&w processing. (Click each image to show a full-size version.)
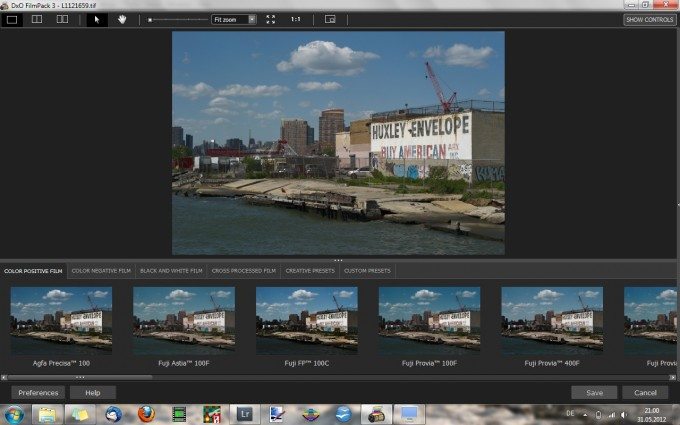
By default, however, DxO FilmPack 3 starts with a different view, where the toolbar is hidden and a film preset preview bar is displayed at the bottom of the window. Personally, I found this preview bar to be of no particular use, but your mileage may vary. I preferred the layout with the toolbar on the right, which is similar to that of Nik ColorEfex (which I also use.)
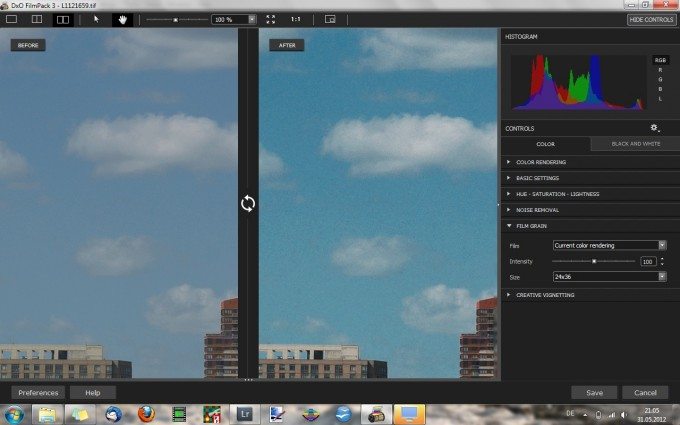
When working on an image, you can choose to preview either the full image, zoom into the image, or show a before/after display with either one image (with a slider in the middle to quickly extend the before or after version) or two images side-by-side.
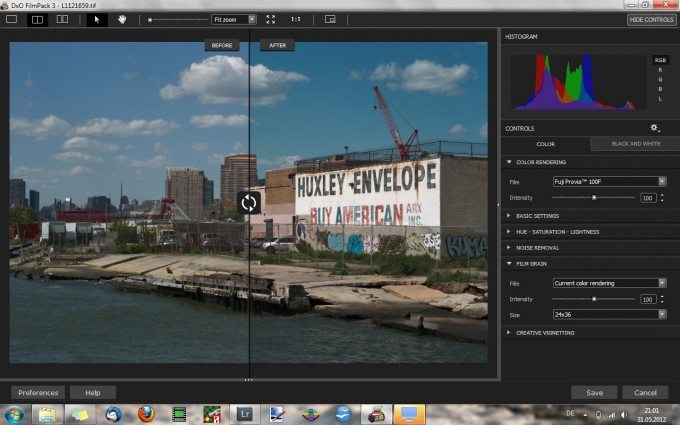
The toolbar on the right hand side has a number of different collapsible menus with a lot of options to choose from. In the “Color Rendering” menu, you choose the film type you would like to emulate. The “Intensity” slider lets you choose how strongly the filter should be applied to your picture.
The “Basic Settings” menu has sliders for contrast, saturation and exposure correction, which can come in handy if you’re using the stand-alone version and do not wish to further manipulate the image in another application.
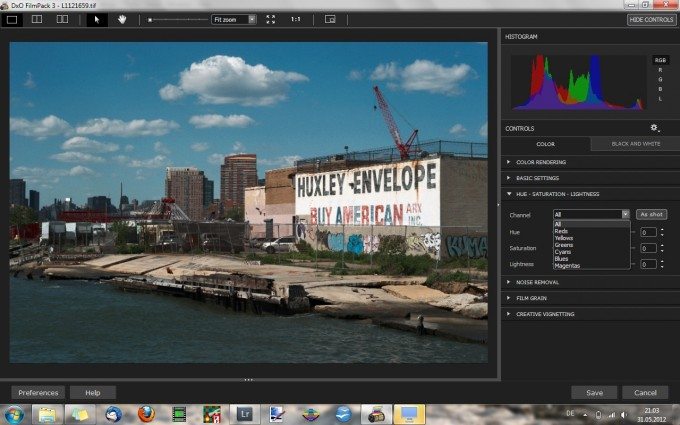
The “Hue – Saturation – Lightness” menu shows exactly that: sliders for hue, saturation and lightness. Each of these values can be tweaked individually for six different color channels. Neat!
The “Noise Removal” menu is pretty self-explanatory I guess. Here you can choose to reduce any residual chroma and luminance noise. I never used this menu as I do my noise reduction in Lightroom.
The “Film Grain” menu lets you select a grain pattern to be added to the picture. You can choose to either use the pattern of the currently selected film type, or that of a different type of film. You can also tweak the intensity of the grain as well as a film size to emulate: 35mm (24×36), medium format, large format or a custom format.
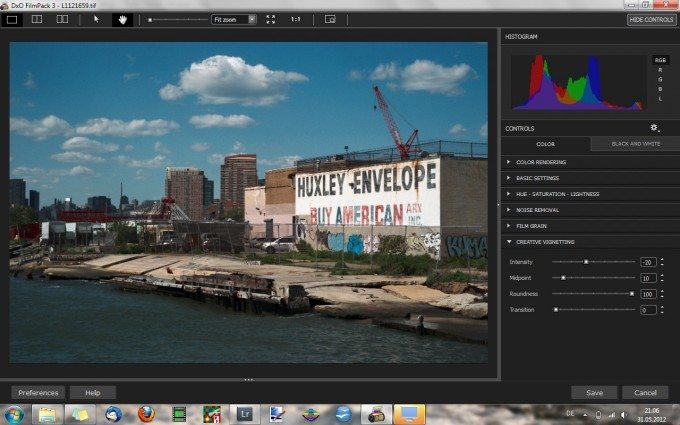
Finally, the “Creative Vignetting” lets you add either a light vignette or a dark vignette, with pretty much the same options you will find in Lightroom.
In b&w mode, similar menus will appear, only with options for b&w processing. Additional menus that are not present in the color mode are the following:
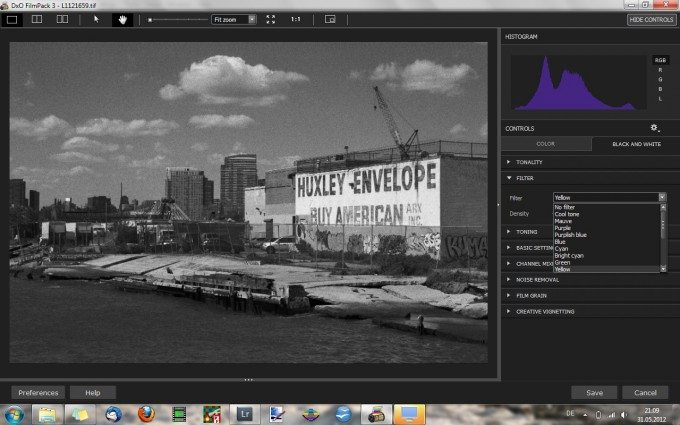
The “Filter” menu lets you select a color filter that adds an effect similar to what you would get with actually placing a colored filter in front of your lens when using b&w film (or b&w mode in digital photography).
The menu, “Toning” lets you color tone the image. The toning has no direct effect on the b&w conversion, but rather displays the monochrome image with colored hues instead of hues of gray. If you like the sepia look of old b&w prints, this is where you can add such an effect.
Finally, in the “Channel Mixer” you can selectively brighten or darken different color channels to directly manipulate the way different colors are converted into shades of grey. For example, by brightening the yellows and greens and darkening the blues and reds (as I did in the example above), you can add a more dramatic and more contrasty look to your image.
Using The Film Presets: Are They Any Good?
Now that we have established the scope of functions implemented in DxO FilmPack 3, it is time to see what the film presets look like when applied to actual digital captures. As I already mentioned in the beginning, the problem with digital emulations of analog films is that there are thousands of scenarios that can lead to one and the same film emulsion looking entirely different in two different applications. This means of course that the makers of DxO had to select one scenario (or a mean value of a number of scenarios) when they created the presets.
While my general impression was that the overall look of the presets comes pretty close to the look of the actual film emulsions, at least considering the emulsions that I have actually used and/or seen myself, when comparing the results to those I get with Nik ColorEfex and SilverEfex, the differences become pretty obvious.
Let’s take one the photography world’s most iconic (and probably most used) films ever, the Kodachrome 64 color slide film. DxO FilmPack 3 offers two KC64 presets, and here already the differences are pretty strong.

The color rendering with this preset is pretty muted and on the reddish side. From what I have seen so far, this seems to be more characteristic of Kodachrome 25. Now compare this to the preset that DxO call “Generic Kodachrome 64”, which looks entirely different:

This presets renders colors much more vivid. Also, the overall color balance is much more neutral, if not a bit on the greenish side. Finally, this is how Nik ColorEfex Pro 3 renders Kodachrome 64:

The Nik software renders the colors totally different than either of the DxO filters. In this version, the colors are much more vivid, and the overall color balance is shifted toward bright yellows and greens and dark reds. I have never used Kodachrome 64 myself (I only started using film seriously when KC64 was already discontinued), but I believe this is much closer to what well-exposed and well-processed pictures taken with this film looked liked (please correct me if I’m wrong.) I wonder especially how DxO came to the two entirely different renderings in their Kodachrome 64 and Generic Kodachrome 64 presets. But as I stated in the beginning, treating one and the same emulsion differently can lead to different results, and KC64 had an especially complex developing process that was much more prone to variation than most modern processes. So maybe DxO simply based their emulations on differently processed KC64 slides than Nik did.
A film where I feel that DxO came pretty close to the actual look is their emulation of Fujifilm Provia 100. Again, this is a very popular slide film, and being a modern E6 film which is processed in the same way everywhere, there is not as much leeway for variation as with Kodachrome. Still, their presets called “Provia 100F” and “Generic Provia 100” are — again — entirely different looking. However, from my own experience and comparing to the results from Nik ColorEfex Pro 3, I believe that the “Generic” presets comes much closer to the actual thing.


The color rendering of the these two Provia 100 filters is quite different, but what both softwares manage is to emulate the slightly saturated and contrasty look of Provia. Which version is more accurate I can’t tell. Also, in this case I have no clear favorite as both version look pretty accurate and pretty nice.
DxO FilmPack 3 In Black&White Mode
Finally, I compared the results of DxO FilmPack 3’s black-and-white presets with the results I would get with Nik SilverEfex 2. Here once more I found the differences to be … in lack of a better term, crass. The most glaring difference I found in the way the two softwares emulate Fuji Neopan 1600, which was a very popular high-speed b&w film while it was still produced. Sadly, Fujifilm discontinued the emulsion. However, I was able to obtain a few rolls, so I have some experience with it. Neopan 1600 has rather strong contrast when exposed and developed at 1600 ISO, and while its grain is obvious, it is not too rough or disturbing. This is what Neopan 1600 looks like according to DxO FilmPack 3:
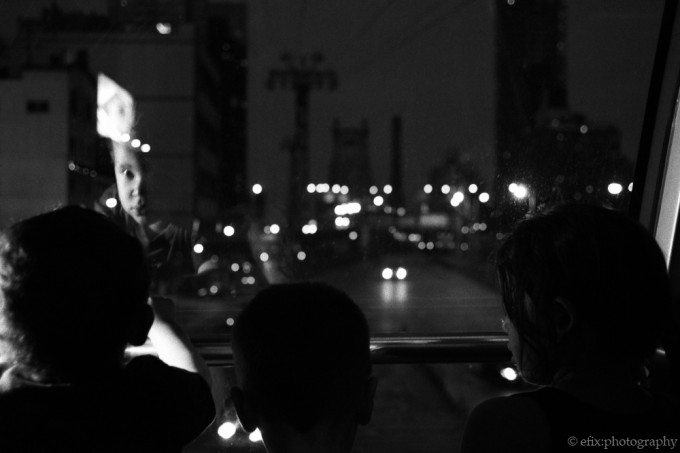
The above conversion is very contrasty, and the darker parts of the image are entirely black. This is pretty close to what Neopan 1600 actually looks like. However, it lacks the grain. Now the version processed with Nik SilverEfex Pro 2:
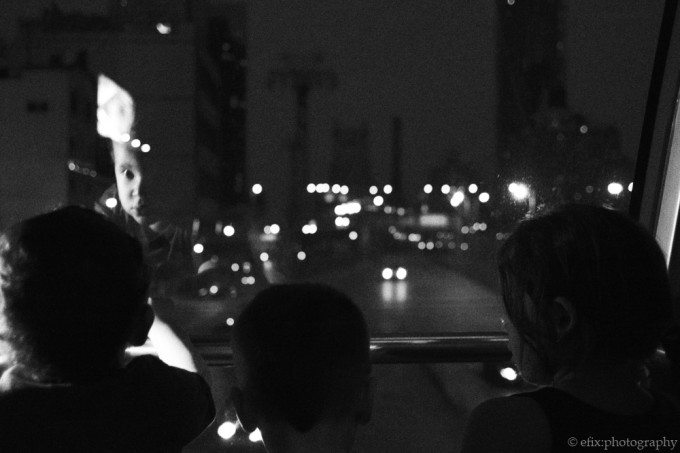
The Nik-processed version of this picture shows much more pronounced grain than the DxO version, which comes closer to what I can observe in my pictures shot on Neopan 1600. However, the SilverEfex 2 filter lacks the strong contrast of the film. In this case, it’s a draw: DxO comes closer in terms of overall contrast, whereas Nik comes closer in terms of grain.
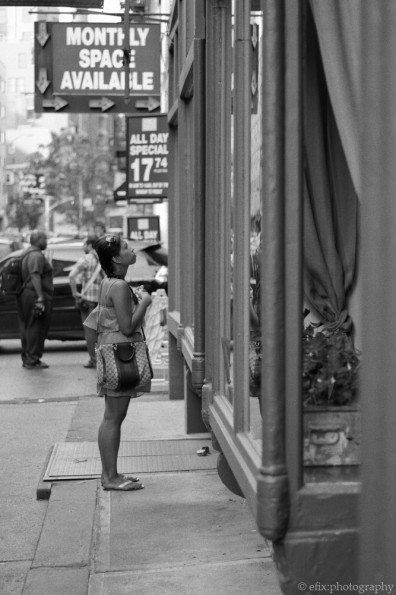
Finally, I compared the two software’s interpretations of another all-time iconic film, namely Kodak Tri-X 400. This particular emulsion has been the choice of all kinds photographers and has been around for many decades. It still has many fans, and is considered to be the high-speed b&w film per se. I have only used it once, and here again I have to note that the way the film is exposed and processed will lead to entirely different results. Inhowfar the two softwares are accurate or not in their rendering of Tri-X I cannot really comment on. However, they do no seem to be too far apart from each other.
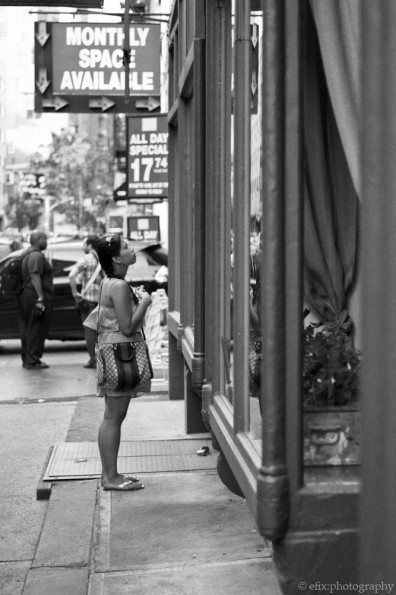
Objectively, DxO’s rendering of this particular image looks a bit flat, while the Nik-processed version has much more defintion — which is due to the different color balance of the two presets. Also, SilverEfex’s slightly stronger grain seems to come closer to the actual look of Tri-X — if exposed and developed at 400 ISO under the correct conditions. So while the Nik version is my personal favorite here, I leave it to the experts to judge which software does a better job — or if they do any job at all.
Conclusion
So, what is my final verdict on DxO FilmPack 3? Well, despite all the obvious differences to its counterparts from Nik, one has to keep in mind that FilmPack is much more affordable. The Expert Edition, which comes with all the filters and the complete functionality, offers a number of different color and black-and-white film presets for just about a hundred bucks. For approximately the same amount of film simulations, you need to buy two products from Nik Software that will both set you back about $ 160 — which makes $ 320 total, and $ 240 still when you buy them bundled. Then again, the Nik softwares do offer a lot more extended functionality than just film simulations.
Anyway, for what it is, DxO FilmPack 3 is a fun software that does a great job at giving your pictures a unique look — if that’s what you’re looking for. I, for my part, enjoyed using it very much. The interface is pretty straightforward, and there are a lot of options for fine-tuning the various film presets and for further enhancing the look of the processed image.
Verdict: A nice product that is fun to use and delivers enjoyable results. Compared to the more advanced contenders in this software genre, it does lag behind a bit, though.
Purchase DxO FilmPack 3 from B&H Photo
Purchase Nik Creative Efex Collection from B&H Photo
Please Support The Phoblographer
We love to bring you guys the latest and greatest news and gear related stuff. However, we can’t keep doing that unless we have your continued support. If you would like to purchase any of the items mentioned, please do so by clicking our links first and then purchasing the items as we then get a small portion of the sale to help run the website.


