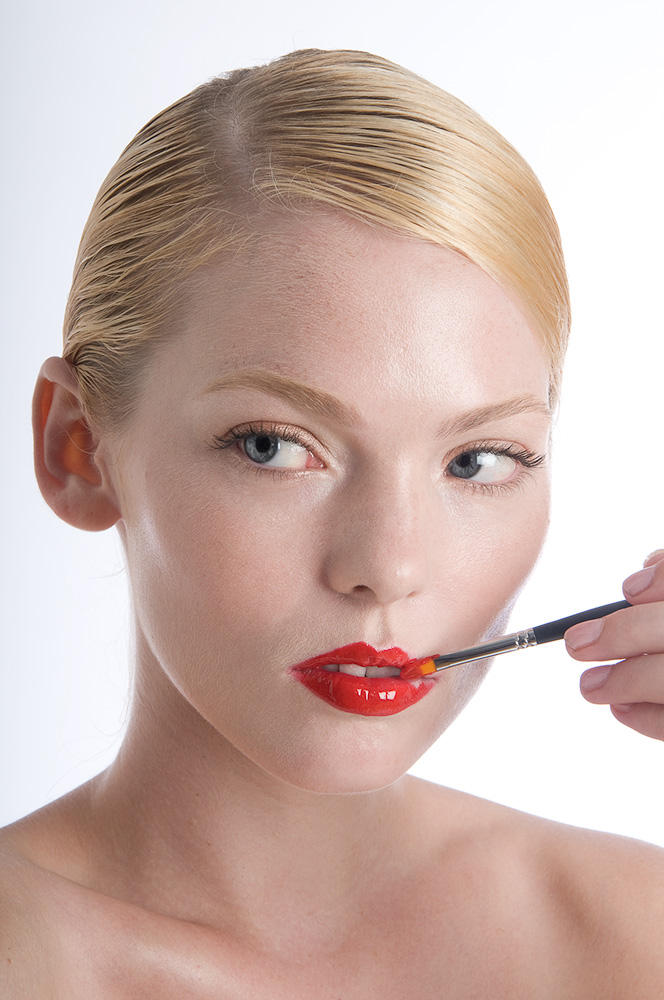
There are several different ways to sharpen your image in Photoshop. The best way is also the least known, which is to use a High Pass filter. Here’s a quick tutorial on how to use it to get more finished looking images.
Sharpening should always be the last thing you do in your post-production, just before it goes out for print or exported for web. If you do it any earlier it will enhance defects. You should always do it, but always keep it subtle enough that it’s not obvious that its’ been done.
Why is High Pass the best way?
- You have greater control over how much to sharpen
- Your sharpening lives in its own layer so if you need to do more retouching later you can remove it and reapply
- High pass does not affect the original image
Duplicate Your Layers
When you’re finished with all other retouching, select all your visible layers and drag them down to the “Create a new layer” icon (second from last in your layers pallette).
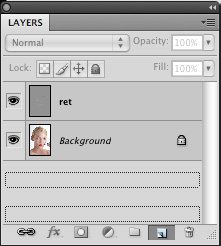
Merge Your Copies
While the new duplicates are still selected, right-click (or ctrl+click) on them and select “Merge Layers” Be careful you don’t accidentally select “Merge Visible” or you will effectively flatten your image.
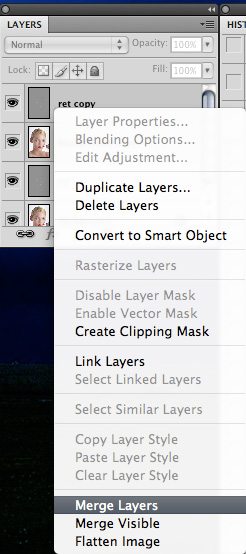
You now have one layer. Double click on the name to rename it to something you will remember. Sharpen, High Pass or even just Hi – as long as you remember it’s your high pass/sharpening layer.
Apply the High Pass
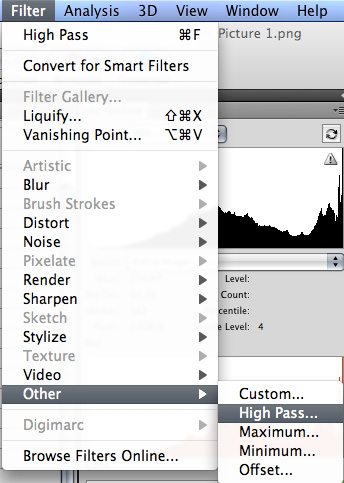
Under Filter > Other you will find High Pass. Even if it was the last filter you used (say on a previous image), always select it from here because the amount you apply is different for every image.
Your image will now become gray, with certain details darker or lighter. How much detail is visible depends on the radius, and this is what becomes “sharper.” You want to find a radius that shows as much of the important detail as possible while showing little or none of the undesirable details (such as pores on skin, or highlights on a product that you just worked to minimize)
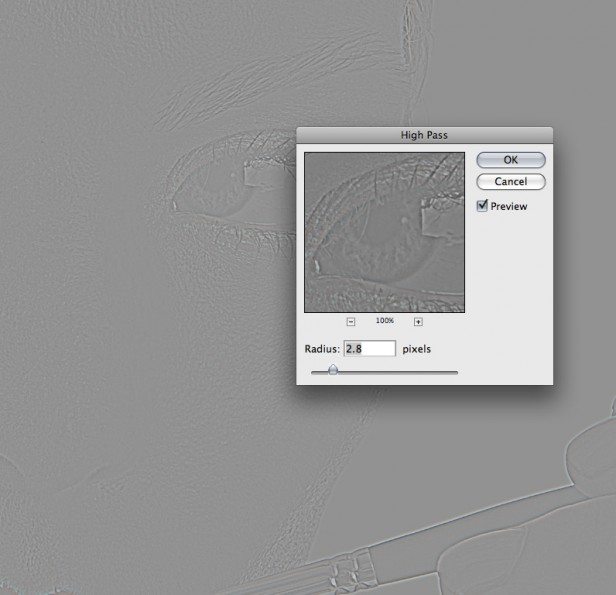
When you get it close, click ok.
Change the Layer Mode
Now change the Layer mode. You can use “overlay”, “soft light”, “hard light” or “vivid light” for different results. Nearly always Soft Light works best for people, while Hard Light often works well for objects and scenes – but there is no rule that always applies here.
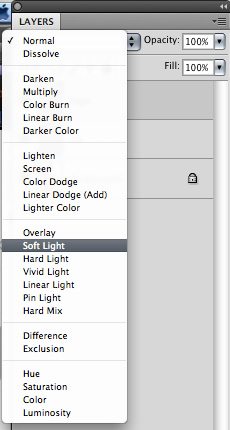
The effect should be subtle
If the change is dramatic you probably used too high a radius or selected the wrong layer mode. If you zoom in on something like an eye and show or hide the layer you will see it get crisper, but when zoomed out to full screen it should be barely perceptible. If you can really notice it on screen then it will likely bring out unwanted details when printing. If this happens, go back a few steps and try a lower radius.
If you make changes, start over
If at any point you have to do more retouching or change anything about the image period, delete your high pass layer, make your changes, and go back to step one.
Please Support The Phoblographer
We love to bring you guys the latest and greatest news and gear related stuff. However, we can’t keep doing that unless we have your continued support. If you would like to purchase any of the items mentioned, please do so by clicking our links first and then purchasing the items as we then get a small portion of the sale to help run the website.


