Last Updated on 06/19/2011 by Chris Gampat

Professional retouching is a closely guarded industry secret but the most important part of it is not that difficult to learn and you probably already have most of the things you need to do it. A properly retouched photo gives that finished magazine look to an already great photo and can salvage an otherwise unacceptable one.
What you’ll need:
- A computer – I’m using a Macbook Pro
- Adobe Photoshop – Photoshop Elements works for this as well
- An image you want to retouch
It Helps to Also Have:
- A Wacom tablet
- A calibrated monitor
- Adobe Lightroom
- The original image in RAW format
The last thing you’ll need is time. While this technique is not hard to learn it is very time consuming.
While I put the Wacom tablet in the optional section because you don’t need one to learn and practice the techniques you will have difficulty mastering this without one. You won’t get the same accuracy with a mouse or a trackpad, and neither of those have pressure sensitivity. For this tutorial I am using a Wacom Intuos 4 tablet, but a Bamboo will work fine if you’re not doing serious retouching work. I like the pencil tip personally for the extra friction it provides but I encourage you to try them all out to see which one works best for you. I have also programmed the buttons to the functions I need for this task since it is nearly the only thing I use my tablet for.
Onto the Editing!
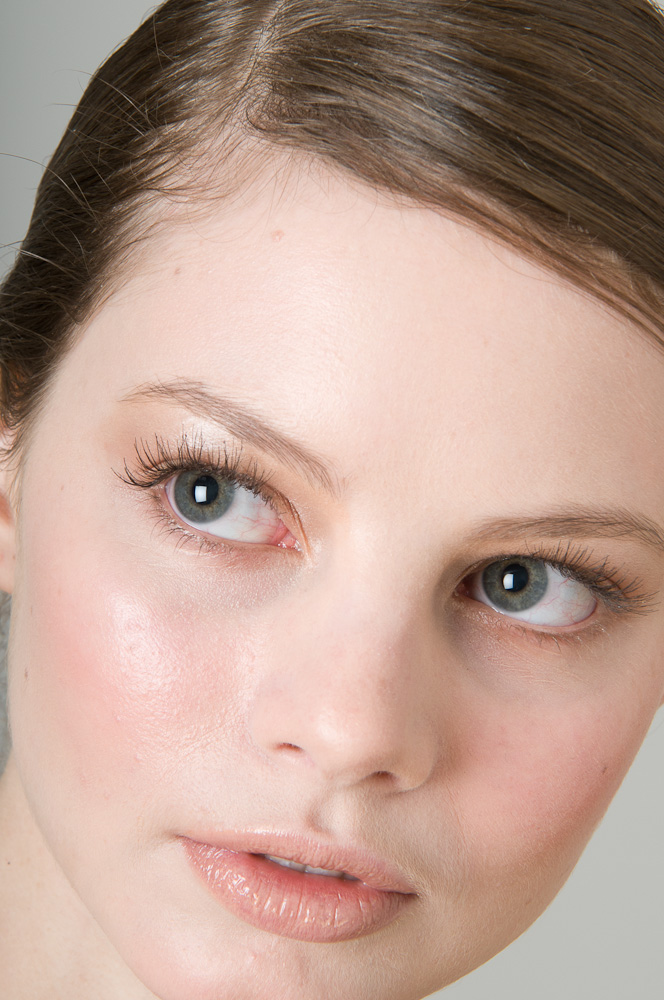
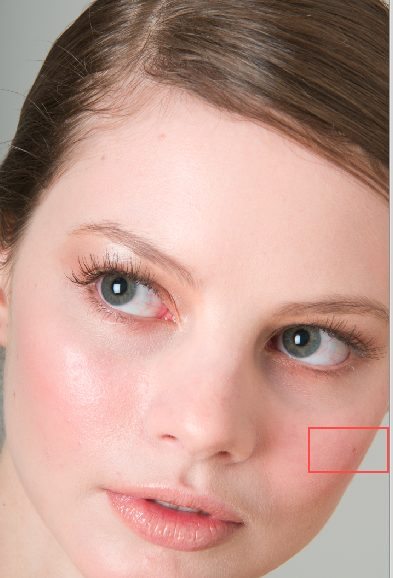
For this example I selected a closeup shot, both because it’s easier to see the differences and because closeups are where this type of retouching is most needed. Because it was shot with a large light source it’s already pretty good but you can still see some dark circles, blemishes, and cracks in the lips. It’s not yet finished.
I do all my basic work in Lightroom first. What this means exactly depends on the image but will commonly include white balance, exposure and tone. This preserves the original file and ensures that you can change the settings later if needed. When I have these things where they should be, I press command+E (ctrl+E in Windows) to open it in Photoshop. If you don’t use Lightroom you can edit these settings in the raw dialog in Photoshop or using Adjustment layers if you shot the original in Jpeg.
The technique we’re going to use to fix these flaws is called Dodge and Burn. It hails from the days of film and darkrooms but it can be done in Photoshop too. Dodging is the art of selectively increasing the exposure in specific areas of the photo to lighten it, while Burning decreases the exposure of an area to darken it. They can be used either creatively or to fix undesirable flaws in the image.
The Setup
There are two reasons you don’t want to dodge and burn directly on the photo. The first is because you don’t want to degrade the original whenever it can be avoided, and the second is because on a color image it causes color shift – so the first thing we want to do is create a new Layer. In this case we want to set some things up right away so rather than clicking the new layer icon in the bottom of the Layers pallette, choose New>Layer from the Layers menu (or type shift+cmd+N/shift+ctrl+N).


In the dialog, name the layer (i use ret because it’s short but reminds me that it’s my retouching layer), select “soft light” for mode and click “Fill with Soft-Light-neutral color (50% gray). Click ok and you’re ready to go.


Note that at this point you won’t see any difference to the image. The soft-light neutral fill is giving you a clean slate to start from – only if you darken or lighten that gray will it change the appearance of the original layer underneath it. We’ll use dodge and burn to do that.
Select the Dodge tool (![]()
 ) from your tools and set a few options. The brush size changes constantly as you work so I have the wheel on my tablet set to change brush size. The range should always be set to midtones because you’re editing the 50% gray layer not the original image—so you’re always working with midtones even if the area of the image you’re looking at is very bright or dark. Exposure can vary with taste—higher numbers will work faster but can overdo it if you’re not careful, where lower numbers can really slow you down. Usually somewhere in the range of 7%-12% works well—I use 11% so that I don’t have to press the pen hard while I work as it makes me less tired, but before I used a tablet I had to work around 7% or 8% because of the lack of pressure sensitivity. Airbrush is unchecked and Protect Tones is checked. Remember these settings because you will want exactly the same ones when you use the Burn tool.
![]()

Before you go to the next step, double check that the retouching layer created before is selected. It should be but just make sure.
Skin Blemishes
Now choose a visible blemish on the skin and zoom right in on it. Notice how when you’re zoomed in it just looks like a darker area:

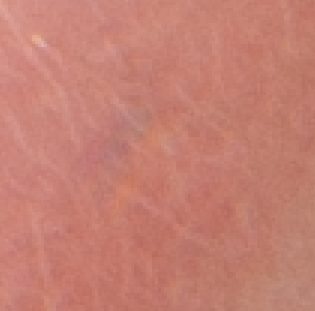
Set your brush size to the size of the dark area or a bit smaller and scribble on it. When I say scribble that’s exactly what I mean—you want to work quickly and without too much precision: if you overdo it with the Dodge tool you can always use the Burn tool to go back a bit and vice versa. When you get it to the same range as the skin around it (don’t worry about slight color shifts, this is normal.) zoom back out and you will see that it is gone. Do this for every unwanted blemish in the photo.
For dark circles under the eyes or other unwanted shadows you can use a larger brush at first with broad strokes before zooming in for detail work. This can save time but look out for areas that show up as white spots which you will have to burn in again later.
Burning works in exactly the opposite way, darkening areas that are too bright.
3D flaws – Lips, acne, wrinkles
Of special note are lips, acne and sometimes wrinkles. In these cases there will be both a light area and a dark area. This is because these flaws are three dimensional and what appears in the photo are highlights and shadows. The larger your source of light relative to the subject, the less visible such flaws will be, but they are always there to an extent. You will need to dodge the dark area and burn the light area before it will disappear.


This all looks very abstract when doing it, and how far you take it depends on the results you prefer, but you can get the skin and lips as smooth as your tastes require and your patience allows.
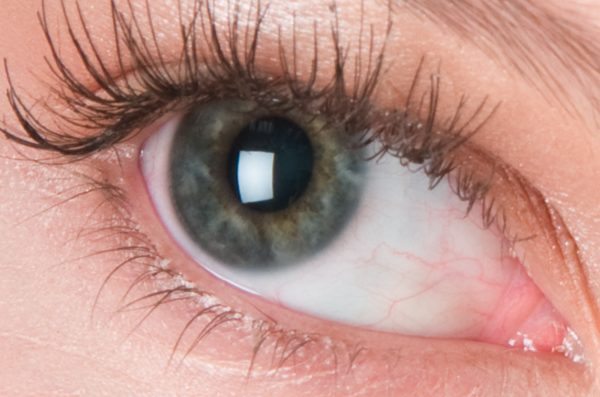
With the Eyes, do the opposite
After you’ve finished the skin and lips, turn your attention to the eyes. You want the eyes to pop and draw attention so you want to do the opposite of what you did with the skin. Dodge the whites of the eyes and the key light reflection to make them whiter (but don’t overdo it or it will look very unnatural) as well as the lighter areas of the iris. Burn the dark areas of the iris, the pupil, and the eyelashes.

When all is said and done (and throughout the process if you’d like) you can hide and show the retouching layer to see the differences and make sure you’re satisfied with them.
The result
Here is my final image—more could be done to it if I wanted to but I prefer an image that still looks natural so this is where I stopped:

Please Support The Phoblographer
We love to bring you guys the latest and greatest news and gear related stuff. However, we can’t keep doing that unless we have your continued support. If you would like to purchase any of the items mentioned, please do so by clicking our links first and then purchasing the items as we then get a small portion of the sale to help run the website.
Also, please follow us on Facebook, Flickr and Twitter.
Get rid of the ads!
Did you enjoy reading this article as much as we enjoyed writing it? There's a way to support us and our reporting, getting ad-free navigation and more as a bonus. Subscribe to us for less than a coffee per month —just $3.99— or take advantage of our yearly subscription with a hefty discount for only $25.- An ad-free experience
- A free mystery box for Lightroom or Capture One
- All the books in our store
- 20% discount on Capture One
- 30% discount on Imalume Photo Theft Protection
- 20% off Herbs and Kettle Tea Company.
- 20% off your order from MPIX printing services.
- 5% off Viltrox Products via their eCommerce store.
- 10% off all film developing, printing and scanning services from Blue Moon Camera and Machine
- 15% off 7Artisans products: The lens and accessory maker is offering a sweet discount for Phoblographer's readers.