
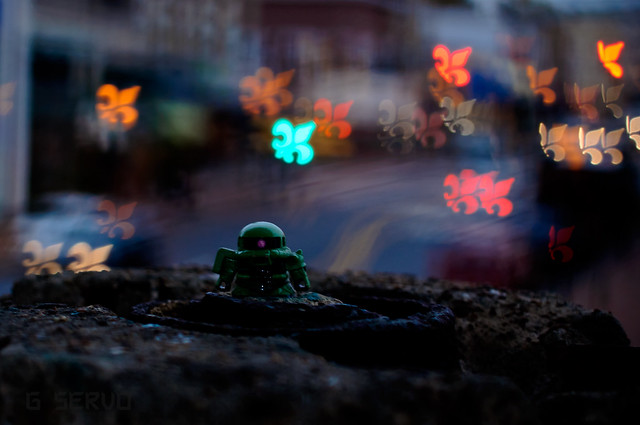
Bokeh is the artistic blur of photography, that dreamy effect. And when done correctly, it can really make images stand out. The Bokeh Masters kit takes this to another level by letting you shape the bokeh into uncanny shapes using Lo-Fi optics. This makes for a very remarkable and creative addition to any photography kit. (Editor’s note: see Day 1)
Testing Gear
Nikon 35mm 1.8 G This lens, not suggested, did not work well there was vignetting.
Nikon 50mm F/1.8D – one of the suggested lenses worked great between f/2.8 and f/1.8
Installation and ergonomics
The Bokeh Masters Kit is very simple to install. Three tabs fold over the lens and are secured by a rubber band. Before installation or while the Bokenator is already on the camera, one can easily slide the provided laser cut bokeh disks in and out. I would not suggest leaving it on the camera, but if you are in a hurry the bokenator will survive being placed into a camera bag while still on the lens. It is durable.
Focusing

I found it best if the focus point was dead center. Any other focus point made it harder for the autofocus to work. Unless there was a strong contrast line to use, the auto focus struggled when not centered. The bigger the bokeh shape, though, the easier it was to focus. Manual focus was actually quicker to use at times. It all depended on the quality and amount of light. The lens focusing of my Nikon 50mm f/1.8D AFwould move the Bokenator out a little but that had no effect and I still got the desired effect. The reason for this is because the lens tends to extend and retract a bit when focusing.
Camera Settings

I was able to get Bokeh between f/2.8 and f/1.8. The effect at f/2.8 was less dramatic but obviously there. The best results came from the aperture being at its biggest size. This is where the quality of the bokeh with the Bokeh master’s kit can become very subjective depending on the viewer.
With the shape of the aperture influencing the bokeh and the right contrasting light in the background, you get clear shapes. I enjoyed shooting with the bokeh masters kit in low light with street lights in the background. The lights really gave defined bokeh shapes to the images. If the ambient light was too dim, raising the ISO or using the flash posed no problems. The bokeh effect still came through.
Post Processing
In post-production images in Lightroom 3 the images started to look even better. I shoot raw and changing the images exposure, white balance, contrast, and/ or brightness did not ruin the bokeh shape or quality. If I was too heavy handed, however, in the post processing, the bokeh could lose some of its detail. Keeping the processing simple was the way to go in order to preserve the natural effects that the kit has on the images.
Please Support The Phoblographer
We love to bring you guys the latest and greatest news and gear related stuff. However, we can’t keep doing that unless we have your continued support. If you would like to purchase any of the items mentioned, please do so by clicking our links first and then purchasing the items as we then get a small portion of the sale to help run the website.
Also, please follow us on Facebook, Flickr and Twitter.
Get rid of the ads!
Did you enjoy reading this article as much as we enjoyed writing it? There's a way to support us and our reporting, getting ad-free navigation and more as a bonus. Subscribe to us for less than a coffee per month —just $3.99— or take advantage of our yearly subscription with a hefty discount for only $25.- An ad-free experience
- A free mystery box for Lightroom or Capture One
- All the books in our store
- 20% discount on Capture One
- 30% discount on Imalume Photo Theft Protection
- 20% off Herbs and Kettle Tea Company.
- 20% off your order from MPIX printing services.
- 5% off Viltrox Products via their eCommerce store.
- 10% off all film developing, printing and scanning services from Blue Moon Camera and Machine
- 15% off 7Artisans products: The lens and accessory maker is offering a sweet discount for Phoblographer's readers.