Last Updated on 07/29/2011 by Chris Gampat
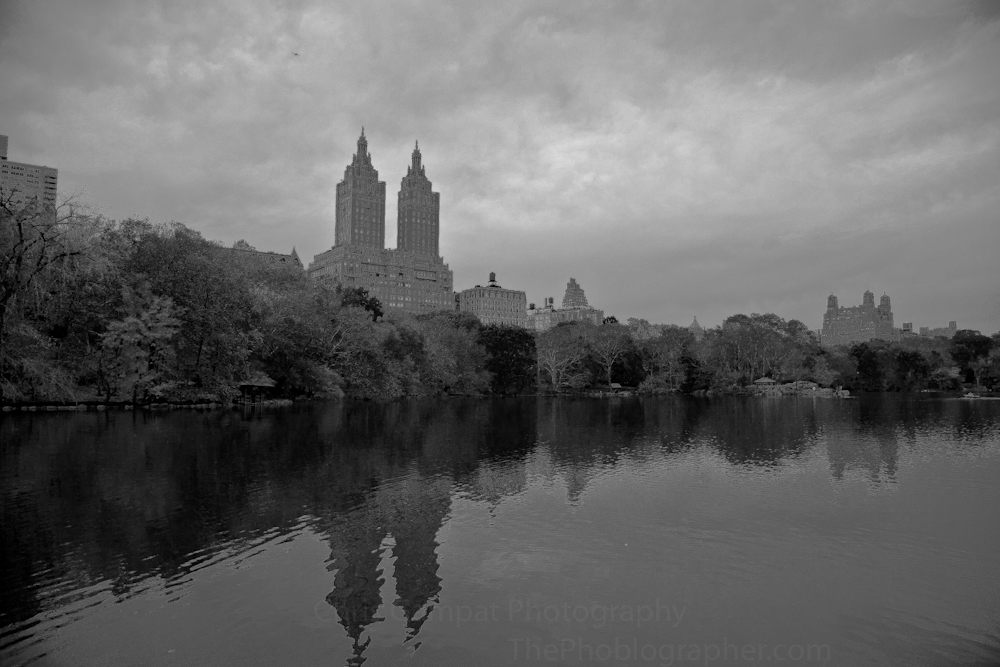
There are a couple of methods to creating Black and White photos in digital photography. Two methods in particular are looked down upon: in-camera settings and using the convert to black and white function in Photoshop. While you may think that the images look really nice this way, often times they are actually very ugly. A more often used way is to desaturate the image in an editing program. While this is better, it still isn’t the best way to get the very most out of your images. While the above image still has some flaws to it, it still looks much better than what those tacky filters will give you. Here’s how to do it.
A major reminder first: shoot in RAW. The image here was shot with a Canon EOS 5D Mark II with EF 24-105mm f/4 L IS USM Lensand editing in Lightroom 3. This could be done in Adobe Photoshop Elements 9
but it is much more complicated to do.
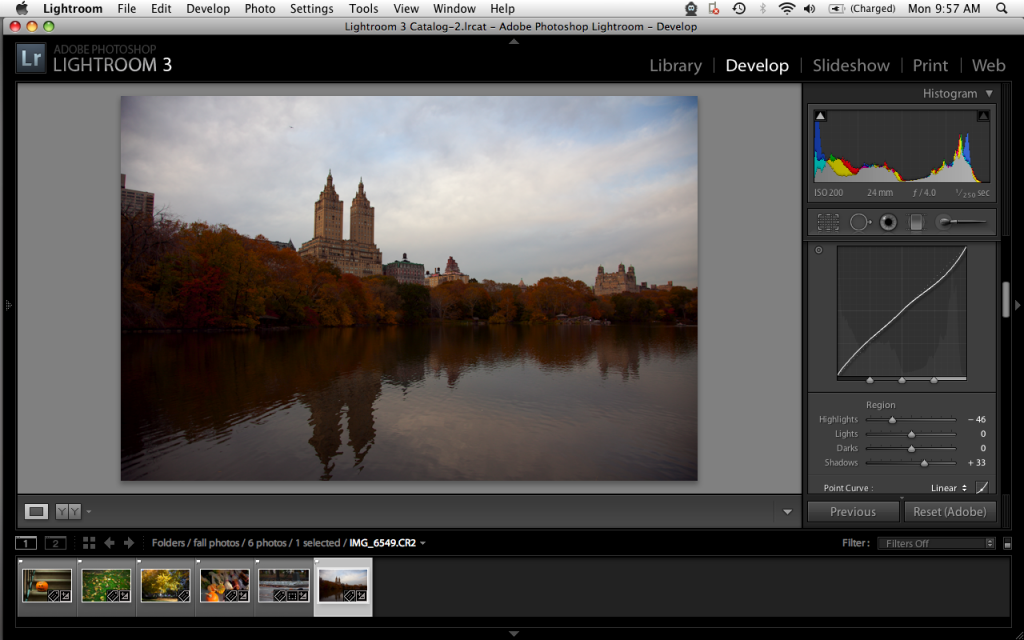
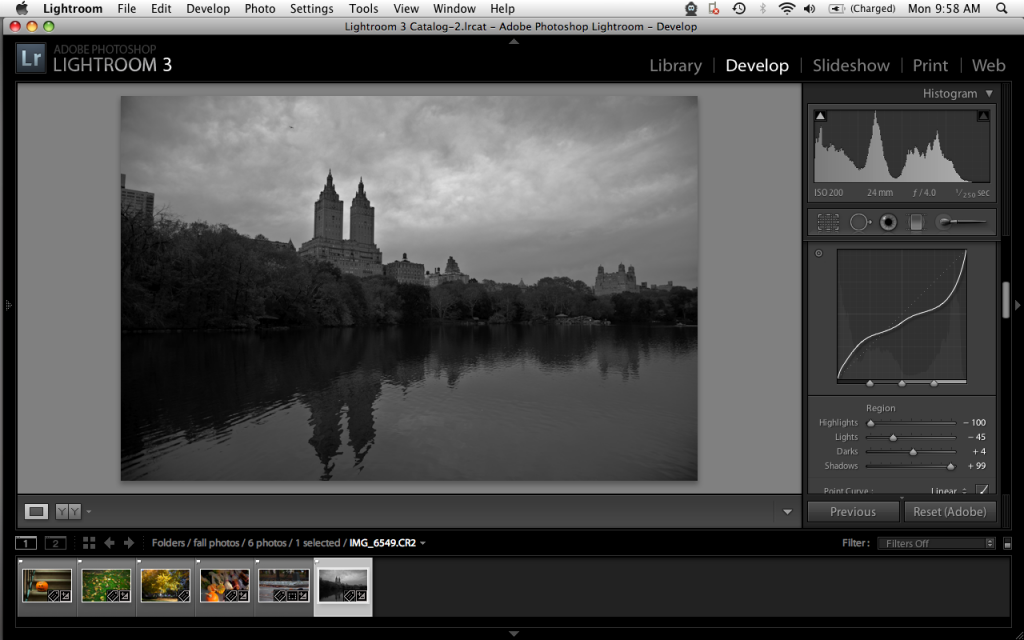
This image first started out in color, it’s something I’m giving to Digital Camera Review for a posting I’m working on for them on how to shoot fall photos. Notice how I went immediately down to the tonal curve on the right hand side. I started out with setting the point curve to linear for a flatter look. This will help give me more versatility later on. FYI: the black and white is not going to DCR.
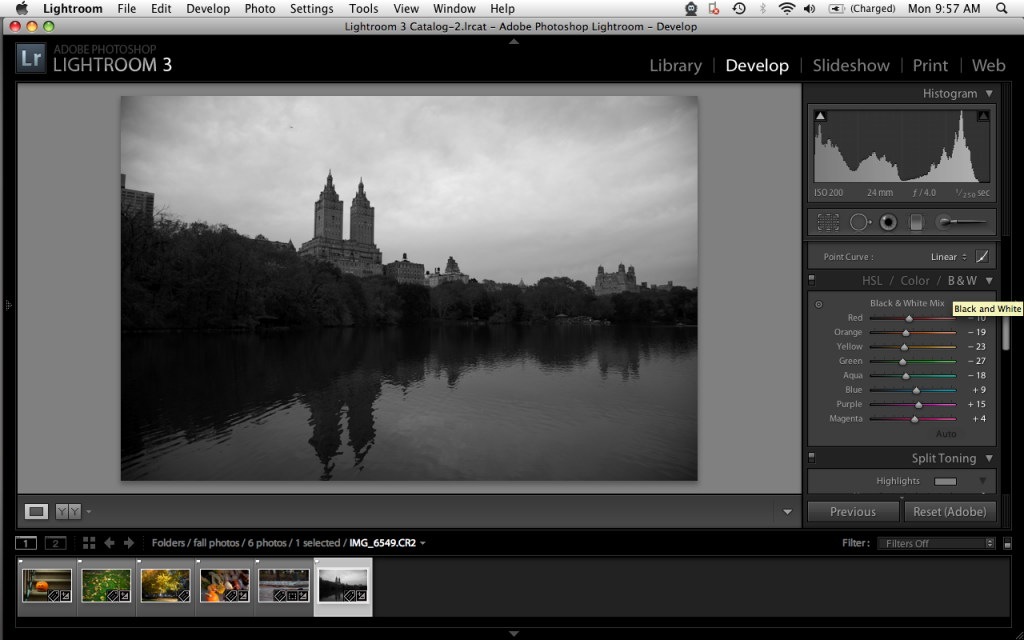
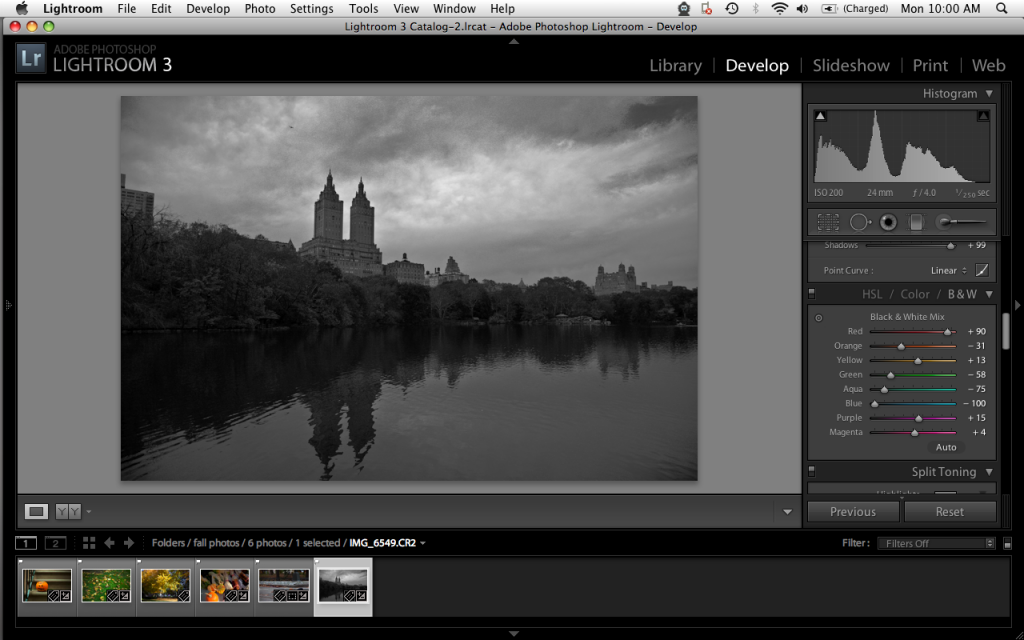
Now I didn’t touch any other setting after that. Instead, I went right below to tonal curve and clicked B&W. The reason for this is because it will allow me to adjust the different tonalities based on the according color. So everything that was red, orange, etc will be easily adjustable now.
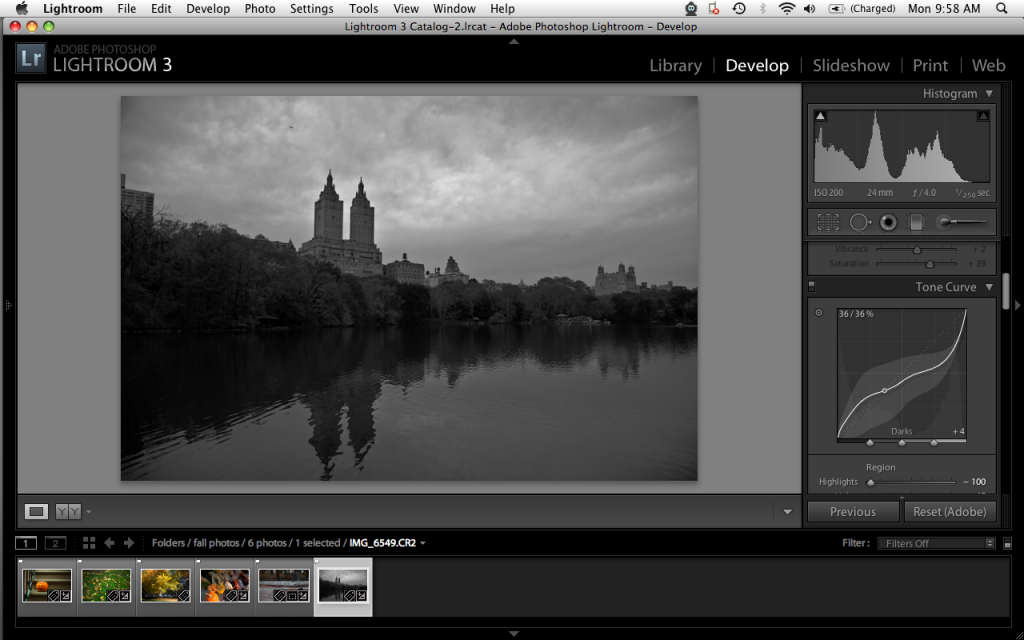
Now I headed back up to the tone curve to adjust the shadows, darks, lights and highlights. Notice how to curve and histogram look now and also how more details in the leaves and sky become apparent.
After some slight tweaking I was fairly happy with the results so I went around and changed more settings.
Now I went back to adjust the various color tones in the histogram in order to get the image to be the way I wanted it. Focusing mostly on the leaves, I was able to reveal more details in those areas. Adjusting the blues for the clouds and water didn’t do too much for me, but I’ll handle that later on.
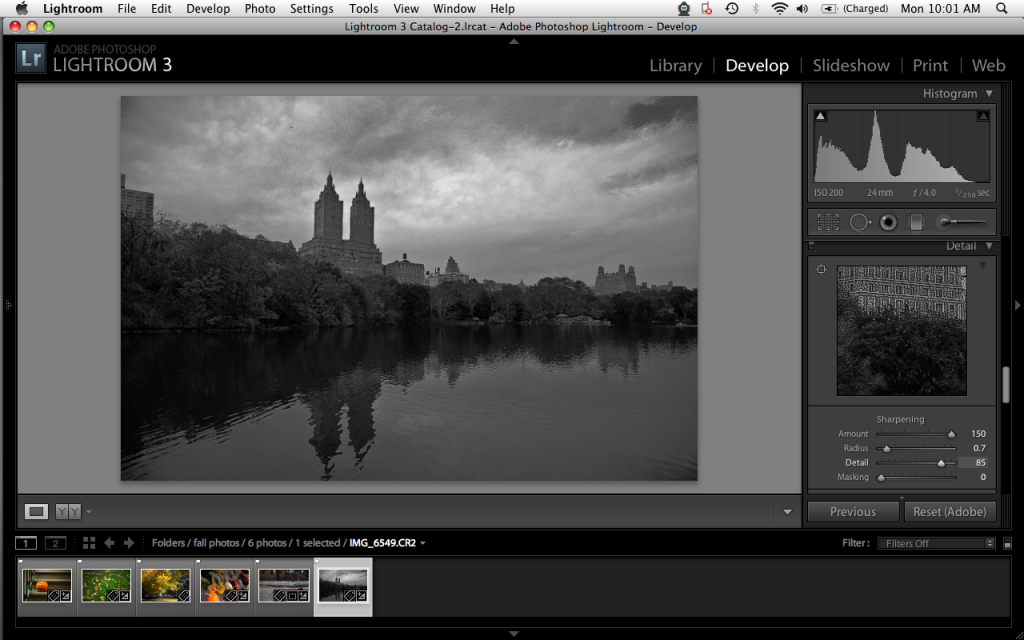
Just for personal preference, I like to sharpen my photos quite a bit on top of raising the detail bar up almost all the way. This is once again a personal preference. Black and white portraits with the detail and contrast turned up all the way tend to look amazing, but I apply to it other images as well.
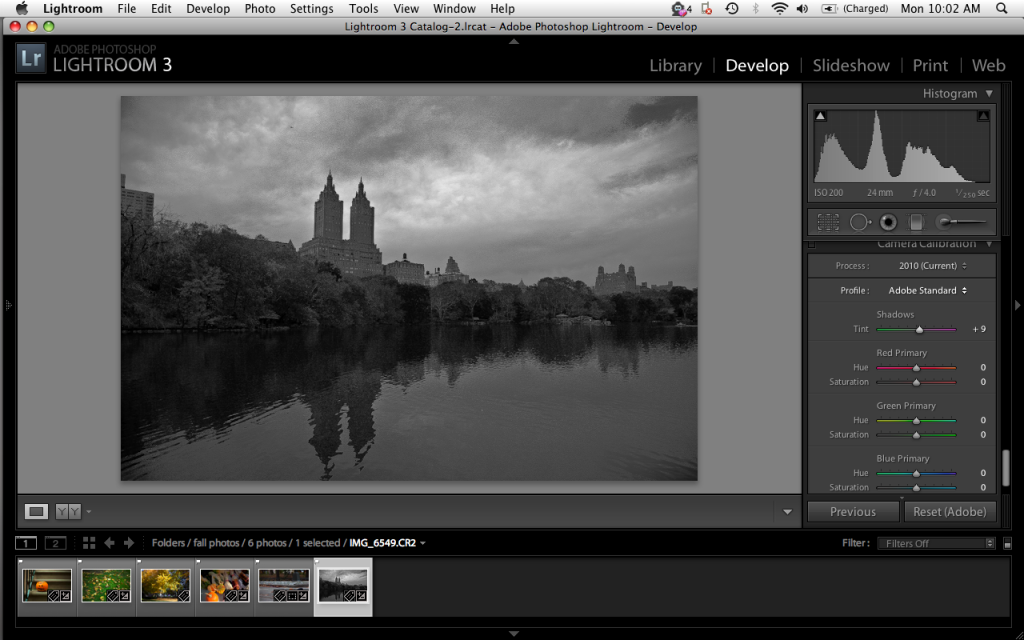
After this, I wanted to experiment a bit more and see what messing with the camera calibration settings did. You probably will not want to mess with the hues as the image won’t be a Black and White anymore. Instead, mess with the saturation levels a bit. You’ll get some interesting effects.
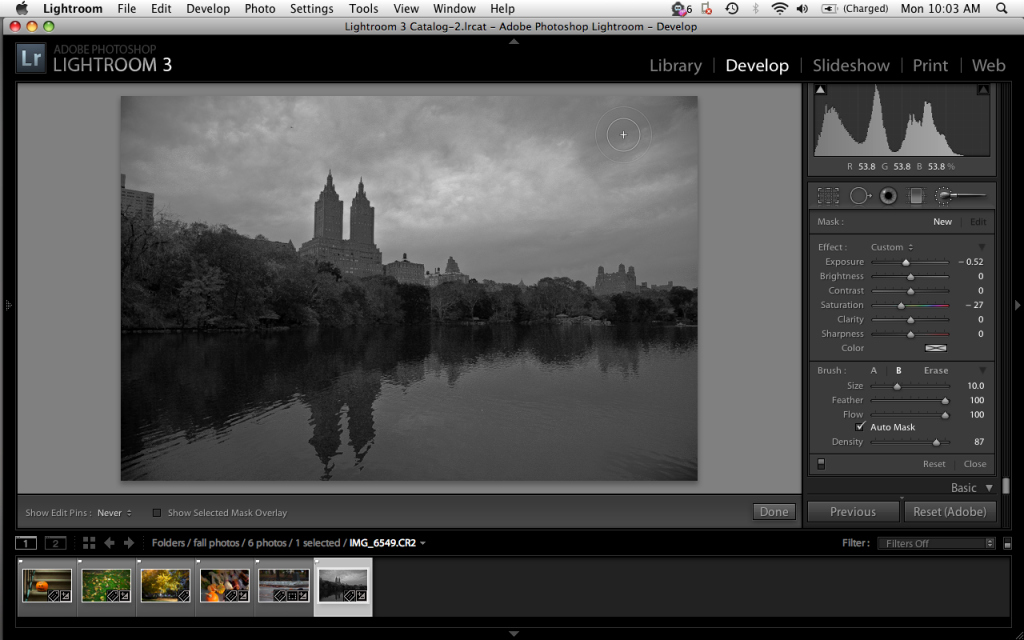
Lastly, I headed up to the top section and messed with the contrast. I still wasn’t totally happy with some of the cloud detail so I used the paintbrush tool and lowered the exposure (burned) some of the areas at the top right. After this, I simply exported the image and got the result that you see in the opening image for this story.
Please Support the Phoblographer
We love to bring you guys the latest and greatest news and gear related stuff. However, we can’t keep doing that unless we have your continued support. If you would like to purchase any of the items mentioned, please do so by clicking our link and then purchasing the items as we then get a small portion of the sale to help run the website.


