


Image file sizes are getting larger. And for many photographers, the number of photos in each photo session is getting more thanks to higher burst speeds, and hard drives are getting filled up as a result. All of this leads to longer editing and post-processing times. Using AI in a good way for your benefit, is the new Assisted Culling tool in Adobe Lightroom Classic, to help you speed up your photo editing.
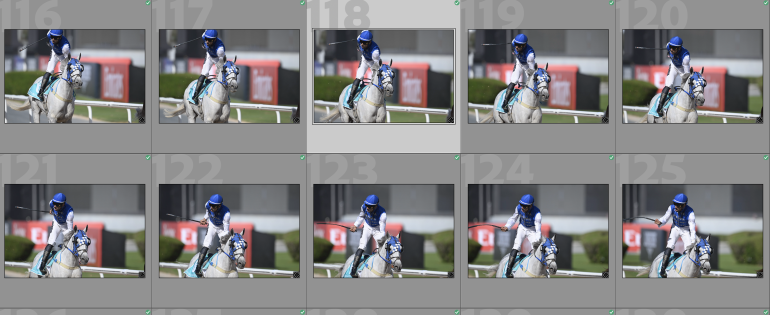
I’m not sure if the Early Access button next to the Assisted Culling tool in my Develop tab on Adobe Lightroom Classic means that I’m one of a few people who have been chosen to try this new feature out. This AI-powered feature was announced at Adobe Max in October last year but has been refined to work better in the latest edition of Lightroom Classic 15.2 (which we used for our tests). I don’t really use Lightroom much these days (outside of my Android smartphone), opting instead for Capture One. For image culling, I use Opticull, something that works real well for me. But when I saw my brother sifting through a pile of pictures while sitting alongside him in the Dubai Tennis Open press room, my interest was piqued. He was using the Assisted Culling tool to quickly select photos and file online in between the matches at the tournament.
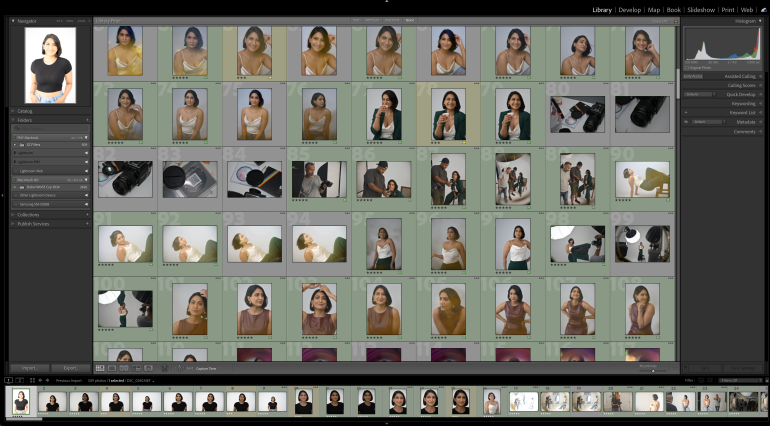
Now, we’re not fans of AI when it comes to the generative slop that a lot of companies, including Adobe have been pushing out. That stuff is built not to help photographers, but to kill careers. But culling is one thing that a lot of photographers can say they prefer not to spend much time on. And photographers these days, for good or bad, end up with way too many images in each burst of shots at photoshoots. So how can Adobe Lightroom’s Assisted Culling help you spend less time on your computer and get your images across to your client faster?
Culling images, at it’s very basic function, is flagging the good and bad images from your photoshoots. Often, that involves some very simple rules when it comes to images with people in them – eyes need to be open, focus needs to be sharp, and the exposure needs to be fairly correct. The first step in culling would be to quickly flag photos that either fall into all or some of these categories. How do you do that though, when you have hundreds of photos in one batch. You can’t quickly browse them all in a matter of seconds to do this job, and that’s probably where Adobe realized there’s a solution to be found.
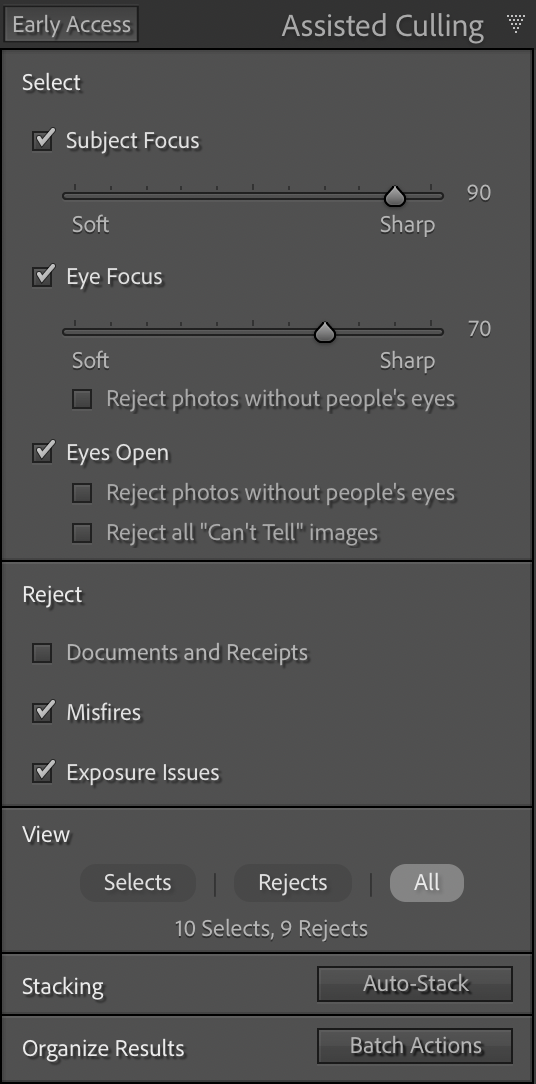
Assisted Culling does all of this for you, and with a good deal of accuracy I’d say. As of now, it seems to be available only on the Lightroom Classic software, not the mobile version. You can choose from the below-seen parameters to determine which photos to choose and reject. Be warned, this tool can use up a lot of system resources (even more than Lightroom is notoriously known for). On my M1 Mac Mini, the CPU temperature shot up to 74°C / 165°F while processing a batch of around 2600 photos.
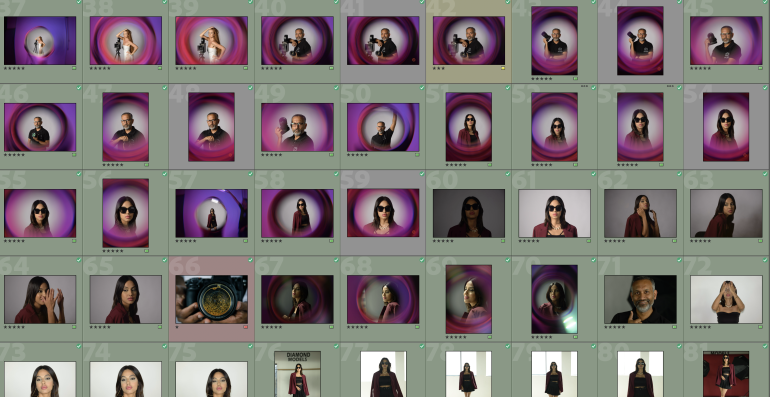
For portraits at least, the AI Culling rejection and success rate seemed fairly accurate. In a batch of 509 photos, I had 117 selects and 392 rejects. A lot of the rejects were due to low / uneven exposure in flash photos, or partially closed or blocked eyes (I was using a few fancy filters on my lens).
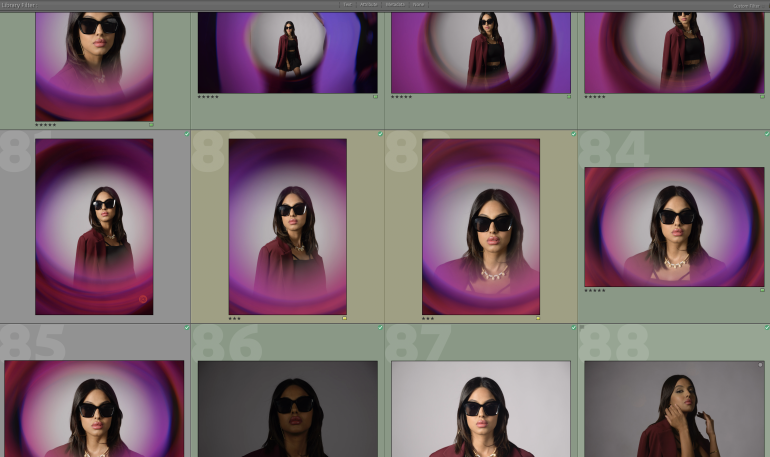
The selected results were a bit of a mixed bag, in a good way, because properly exposed images of my model, even though she was wearing dark sunglasses, came through.
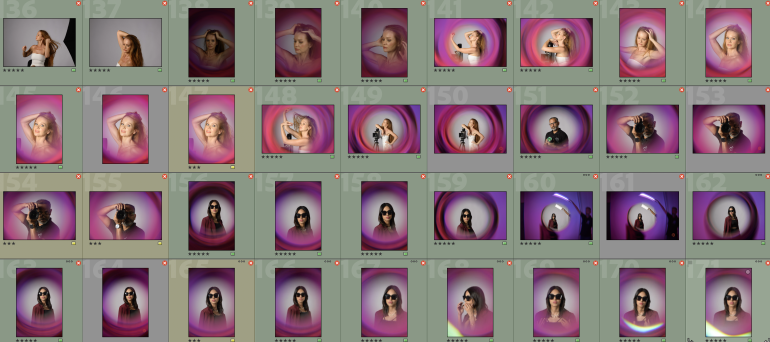
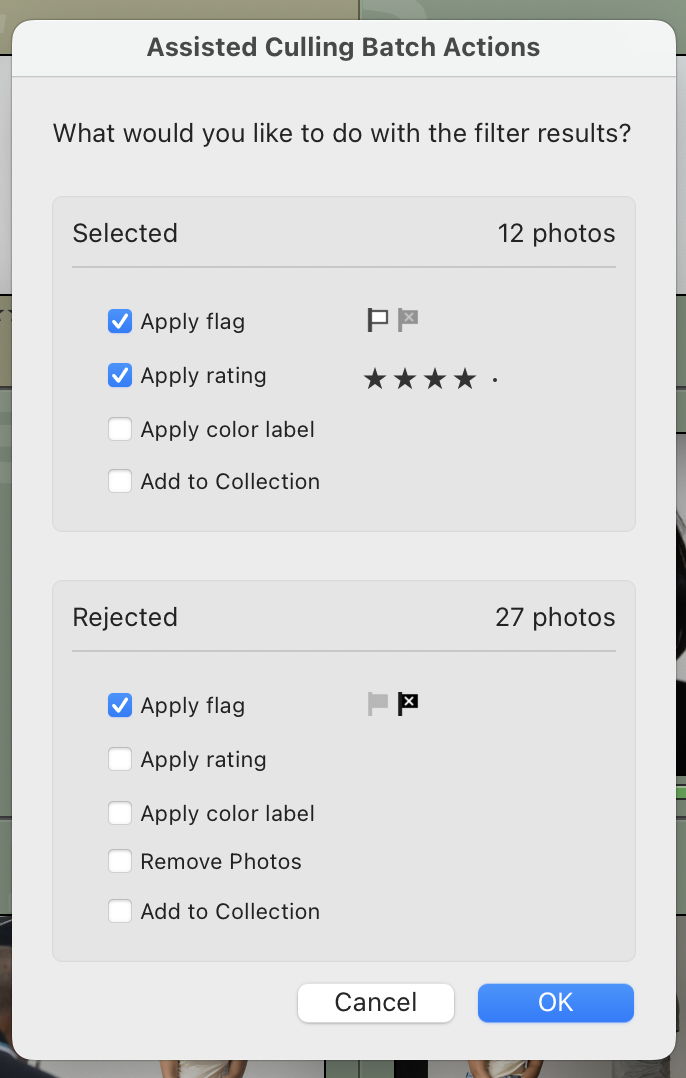
What I like most about the Assisted Culling, are the Stacking and Batch Actions that can be applied once Lightroom has analyzed all the photos in your set. Apply pick / reject flags independently, add star ratings and color labels, remove rejected photos entirely or even add either of the kind to a separate collection. This really helps you sort out photos that you want to edit immediately or work on later.
The slider feature for subject and eye focus helps those who are sticklers for sharpness. Changing the slider settings doesn’t make Lightroom restart the analysis process.
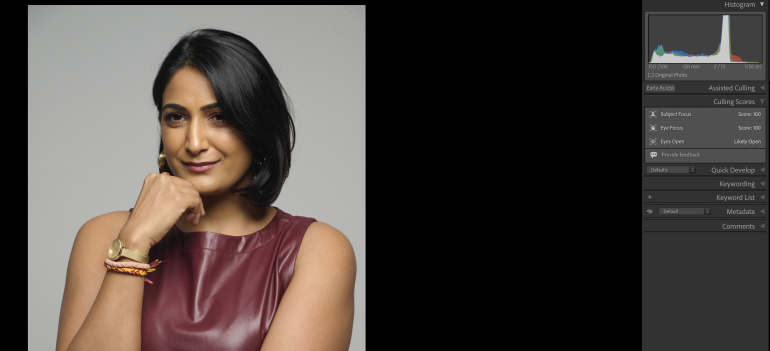
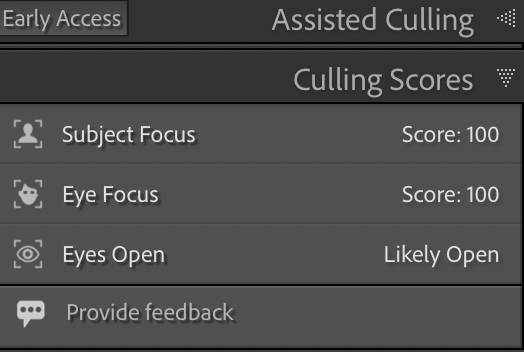
Another cool feature is to see why a photo was rated a certain way. Click on an image in your Lightroom Library tab, and under the Culling Scores you can see what rating the algorithm gave your image under the Subject Focus, Eye Focus and Eyes Open values. Weirdly though, the green ticks (for selects) and red flags (rejects) that are seen on the top right of the thumnbails when in Grid view mode immediately disappear when you click on Culling Scores. An inconvenience but a minor one nevertheless.
This isn’t available as a standalone software, so you have to tell out mega bucks to Adobe for a photography plan or a Lightroom plan, both of which are quite expensive because Adobe keeps wanting to invest in generative AI (Firefly) and make all of us pay for it, even if we don’t care for it. They really should bring a separate non AI plan for those of us who don’t care for it, like I wrote last year. Anyhow, if you’re already a Lightroom user and have the option to use Assisted Culling, you can try it out and give feedback to Adobe on the tool. Hopefully Capture One can bring out a similar feature soon and stop playing catch up to Lightroom all the time.
Get rid of the ads!
Did you enjoy reading this article as much as we enjoyed writing it? There's a way to support us and our reporting, getting ad-free navigation and more as a bonus. Subscribe to us for less than a coffee per month —just $3.99— or take advantage of our yearly subscription with a hefty discount for only $25.- An ad-free experience
- A free mystery box for Lightroom or Capture One
- All the books in our store
- 20% discount on Capture One
- 30% discount on Imalume Photo Theft Protection
- 20% off Herbs and Kettle Tea Company.
- 20% off your order from MPIX printing services.
- 5% off Viltrox Products via their eCommerce store.
- 10% off all film developing, printing and scanning services from Blue Moon Camera and Machine
- 15% off 7Artisans products: The lens and accessory maker is offering a sweet discount for Phoblographer's readers.