
It’s the darndest chore in post-processing. Sifting through hundreds, or possibly thousands, of photos from a photo session and culling them. That task alone can sometimes take hours, keeping you red-eyed and sleepless through the night. Try doing this when you’re on a deadline, trying to file images right after the conclusion of an international sporting event. It’s nerve-wracking, to say the least when you have to find the absolute best handful of photos among so many that you’ve just transferred across from your memory card. And often, when you think you’ve selected the best ones, you realize that the focus is slightly off or the subject’s eyes aren’t fully open. Helping to offload some of that burden from your shoulders is the AI-powered software Opticull.
Table of Contents
The Big Picture
Let’s use AI in the way it should be used – to aid us in doing our jobs better and faster. Opticull is one of the latest software using AI to not just quicken your workflow but also help you cull your images more accurately. As good as we think we are at photography (and we often overestimate our capabilities), let’s be honest. We always have photos from sessions that don’t need to be edited. Then there are also photos that are good but not great. They may need looking at and tweaking, but not right away. And, of course, there’s the crème de la crème of the lot, which needs editing right away.
Opticull from DopeAI harnesses the power of Artificial Intelligence to rapidly scan sets of photos and come back with pretty accurate results that are rated according to how usable they are. You also get to understand what’s wrong with the individual images that don’t make it to the top-tier ratings. What’s impressive about all this is that the sorting and rating are done rather quickly, in a matter of minutes.
There’s still room for improvement in terms of culling and rating accuracy. For now, Opticull gets three out of five stars from us. Many of the impressive AI features are currently available for free. Consider subscribing to their Pro plans to get the real deal from them. If you do a lot of bulk photography and need quick culling, you’ll find Opticull rather handy to use.
Pros
- It’s fast to sift through and sort thousands of photos
- AI-enabled means that it will only improve the more images it gets to work on as the databases improve
- Support for major manufacturers’ RAW file formats
- Currently on discount for the lifetime and annual plans (limited time offer) as of the publishing of this article
- Images that are rated but fall short of 5 stars have clear indicators showing why they weren’t top-rated.
- You get multiple loupe modes that zoom into faces to show you just how much they are out of or in focus.
- Adjustable tolerance levels for images, to decide if you want to sift out duplicate images based on whether they are exactly the same, similar, or resemblant.
- Decide for yourself and set tolerance levels for images that are out of focus
- Options to reject all photos where the subjects have closed eyes.
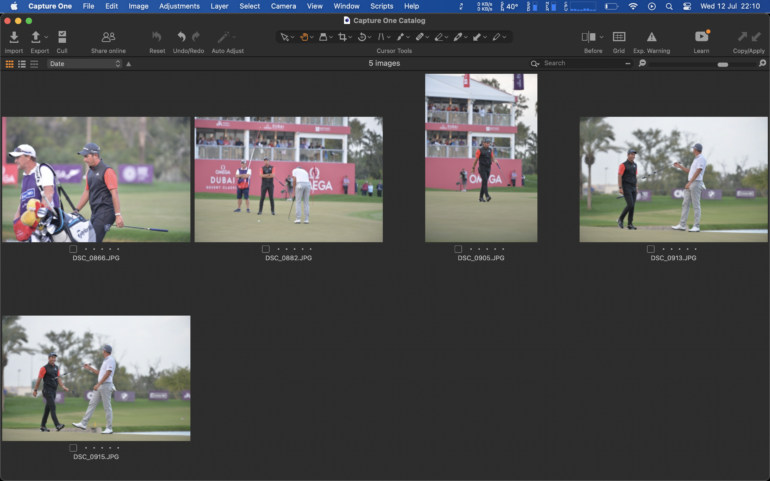
- Quickly move all selected images across to software like Adobe Lightroom, Lightroom Classic, and Capture One.
Cons
- The culling is fairly accurate, but not quite there yet. Occasionally two very similar images would show extremely different ratings even though eyes and focus had identical traits in them. Time will tell how much the AI improves on this.
- Clicking on the exclamation icon that showed up in some pictures did nothing. Some of the images it showed up in were even rated 5 stars.
- I wish it had AI keywording in there as well which would have made life a little easier.
- Right-clicking on images (which you’re used to doing in post-processing software) does nothing. You have to work on your files only through the menu or via keyboard shortcuts.
- If I manually select some images, I can’t seem to export (or, as Opticull calls it, ship) only those images to post-processing software. More on this later.
- Confusing view modes
- Star rating and the color code need to be manually saved to the metadata of the selected files, in order for it to show up when the images are exported to other software like Adobe Lightroom or Capture One.
Gear Used
I tested Opticull v1.0.4 on my M1 Macbook Air (8 GB) and M1 Mac Mini (16 GB). We received a complimentary lifetime license of Opticull for this review.
Main Features
It’s faster than I thought it would be. A set of 5546 images of mine from a year’s worth of sporting event coverage took around 7 minutes for Opticull to analyze. It helps if you have a recent and fast system to work with for reaching this kind of analysis speed.
Projects
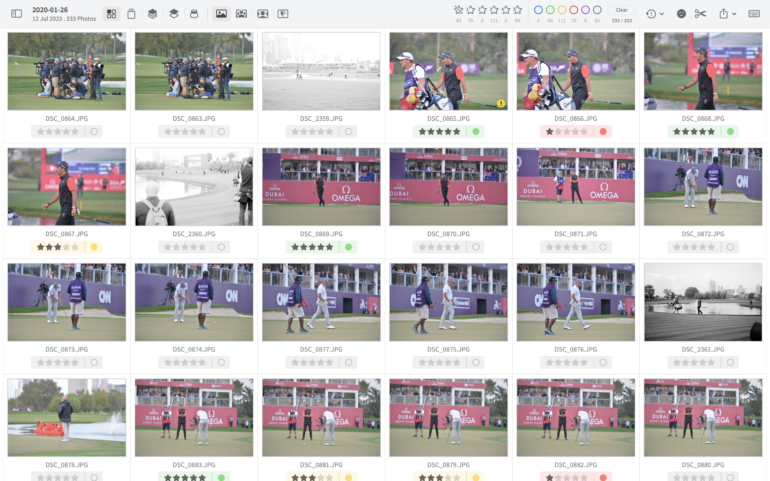
Getting Opticull to analyze your images involves creating projects. These projects and their results are always accessible later as long as the drive on which the images reside is readable. Analysis time varies based on the number of images, but it’s surprisingly quick. Images are then shown in a grid with various view mode shortcuts, rating filters, and other options at the top of the window.
View Modes – Scenes, Scenes Grid, Scenes Survey, Loupe
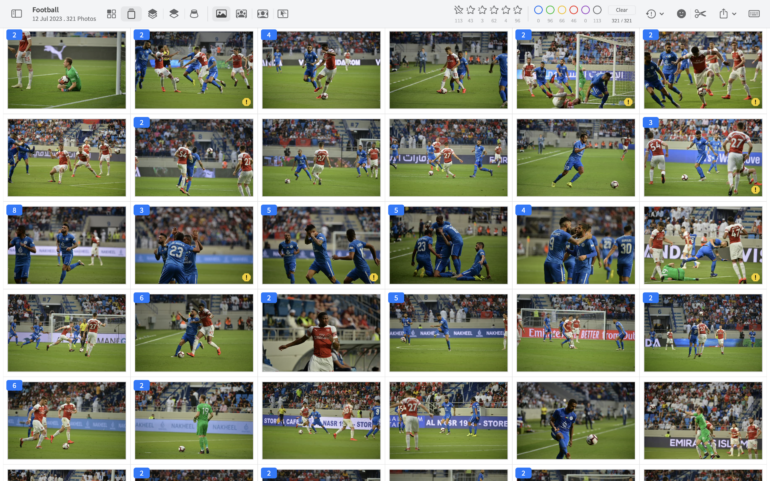
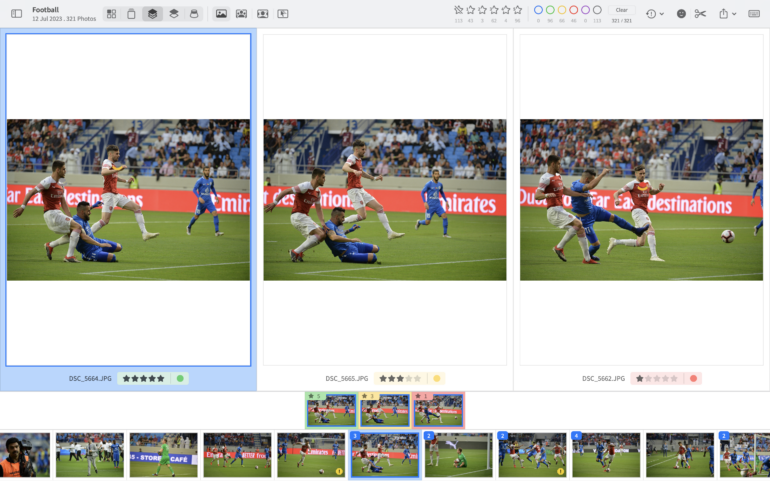
Unlike the regular grid view mode, Scenes Grid shows you a grid with similar images grouped together. A number on the top left shows how many similar images have been grouped per set.
Scenes and Scene Survey mode were confusing. If I was in the Scenes grid mode and a collated set of images was selected, when I moved into Scenes mode, I would see all the images shown above the thumbnails. But if I clicked on any of the thumbnails below that indicated a collection of images together, I would only see the large preview of one of the images above it. I had to click on the Scene Survey icon and back to Scenes mode to see all the previews again.

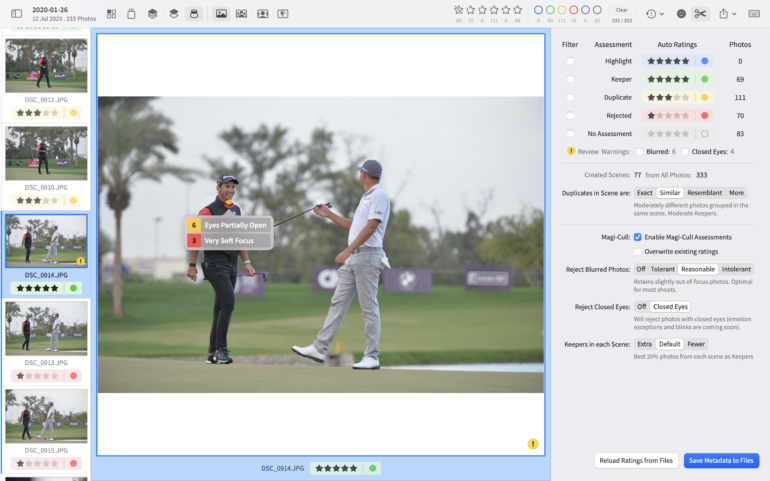
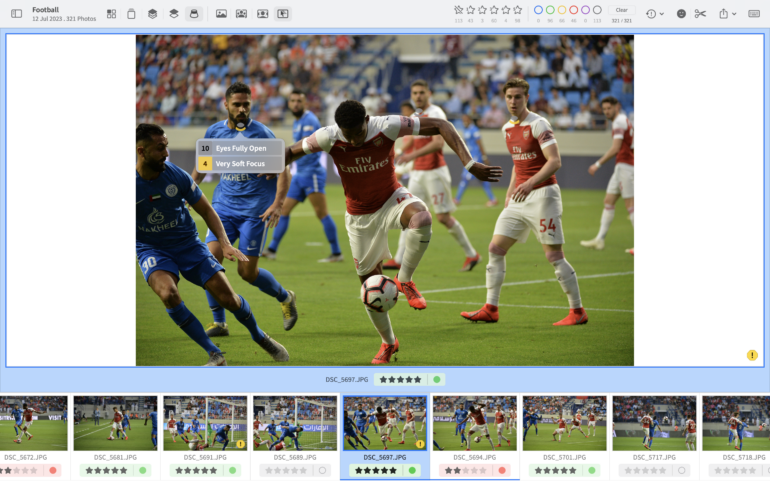
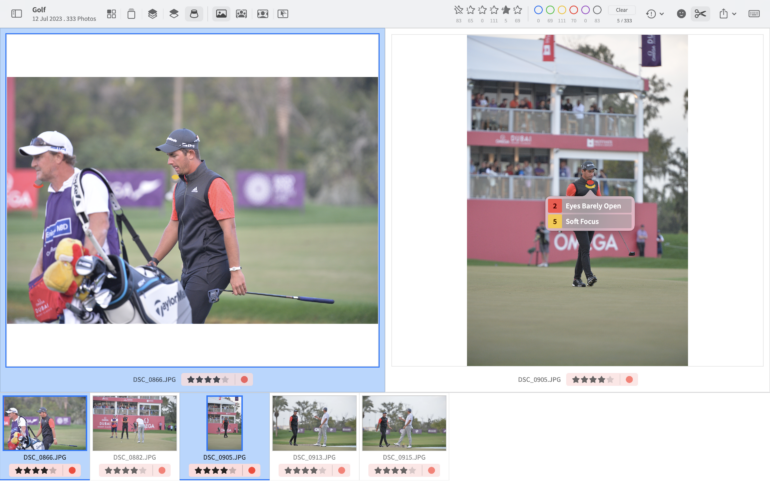
All in all, various view modes’ traits seem to overlap a bit. Find the one that most appeals to your workflow and stick with it. You’ll probably go with the Loupe view mode often. This tells you the ratings for focus softness and subject eyes (depending on how open they are or not).
Tapping the Y key toggles the thumbnail strip between the bottom and the left side of the Opticull window.

You can also use keyboard shortcuts for navigation and rating
Rating Criteria
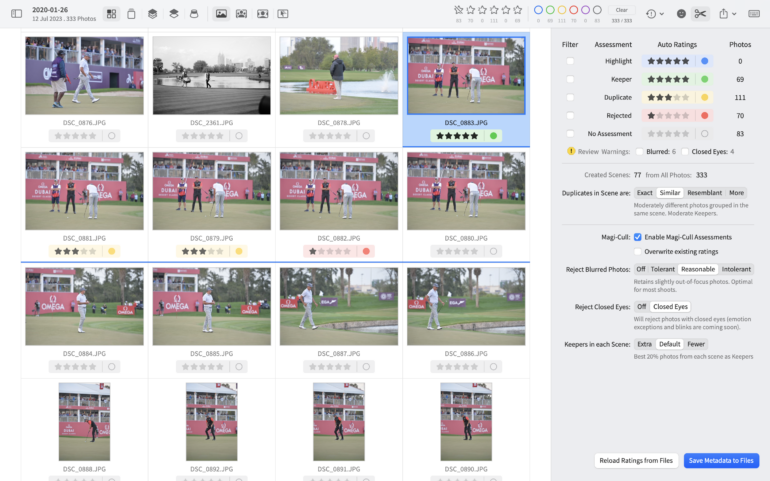
Clicking on the scissor icon at the top right opens up a panel. Here you can tweak the sensitivity of the AI selections.
Filters
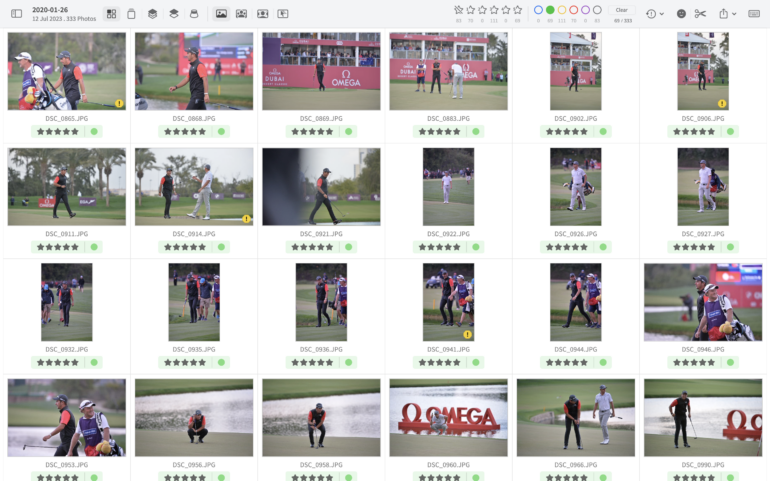
If you’ve used decent editing software, you know what these are. In Opticull, the images that are analyzed are both star-rated and color rated. As a rule of thumb, all 1-star images get a red tag, 3-star images get a yellow tag, and 5-star images get a green one. You can also manually change both star and color ratings.
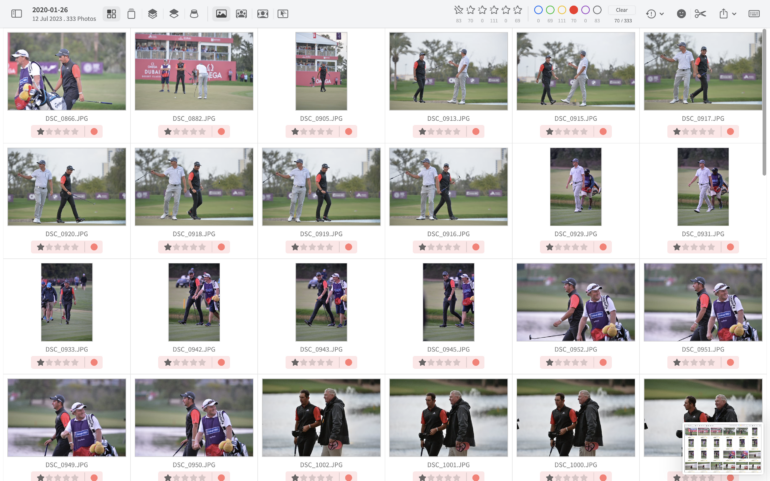
While star ratings range between 0 and 5 stars, you get blue, green, yellow, red, purple and no-color tags to choose from. You can also choose more than one star and/or color filter. Also, feel free to mix colors and star ratings from what the AI chooses them to be. It’s all up to how you want to transfer these ratings to your editing software later.
Filters are dynamic, so any manual change in an image’s rating or color code immediately results in the images being removed from the filter’s display.
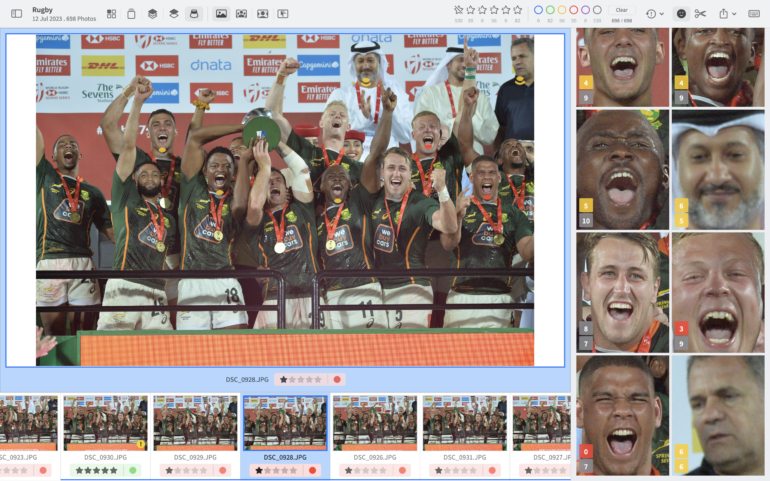
Zoom Modes – Photo, All Faces, Face
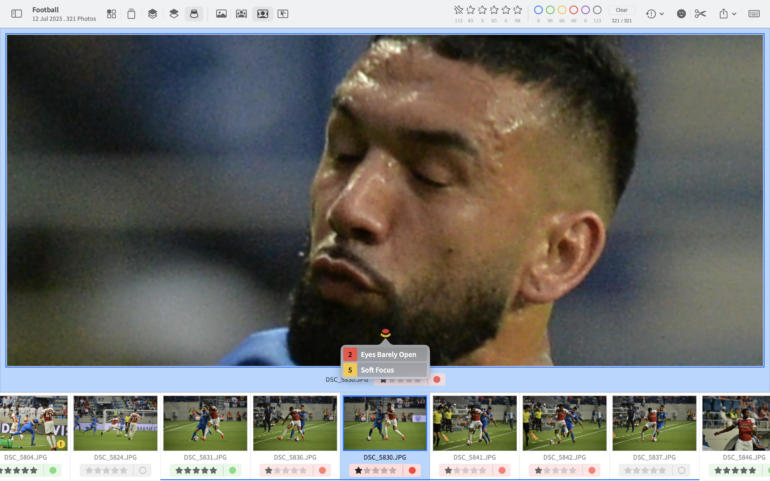
These zoom modes are applicable when you aren’t in any of the grid view modes. They are intended for you to quickly and closely view any faces in the photos you want to sort out manually. It’s similar to the new Face Focus feature in Capture One Pro, except that Opticull has a much larger window to look at the faces close up. All Faces zoom mode shows you just that. Faces zoom mode zooms in on the most prominent face for you to check focus and sharpness. Toggle between the other recognized faces in the same photo using the Q and E keys. In the Custom Zoom mode, you can zoom, pinch and pan using your laptop’s trackpad.
Manual Image Analysis
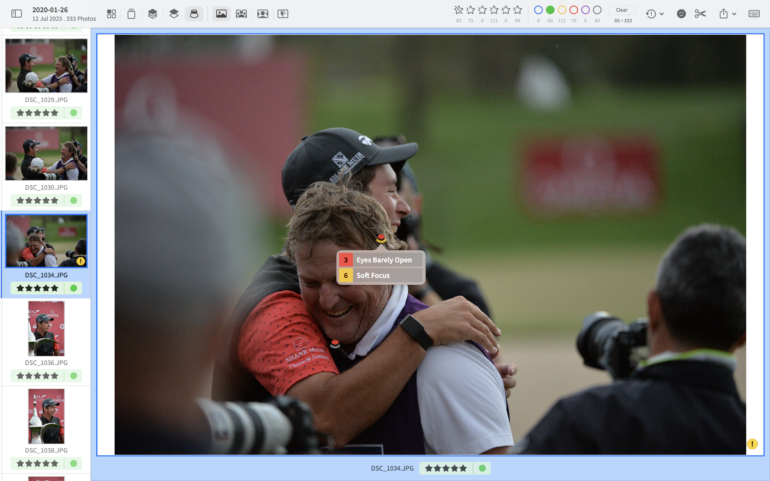
AI in image editing isn’t perfect and may be far from doing so. But it can incrementally get better the more images it gets to work on. As I observed with Opticull, the AI does a really good job for the most part, but it’s only around 75% or so of how accurate I hoped it would be. Many images still get rated lower than 5 stars, even though the AI rated extremely similar ones highly. This is where the zoom modes and the eye and focus ratings can really help us decide if the AI ratings in Opticull need to be modified are not. Because it’s only after you’re done sorting and rating your images will you pick the filter set that needs to be exported across.
AI in image editing isn’t perfect and may be far from doing so.
Click the face icon on the top right to observe the sharpness of all AI-recognized faces inside the images. You can also see the sharpness and eye ratings. Although I don’t know why they have the good ones rated with numbers in grey rather than green boxes.
You’ll need to improve how quickly you can do the manual rating over time. Still, I’m somewhat pleased with how Opticull rated my images across a few projects. As and when it improves, it’ll mean I spend less time manually poring over the ratings to verify them.
Exporting/Shipping
I could only see options to ship all images under a filter. If, for some reason, I didn’t choose a filter on the app and wanted to ship selected images manually, the ship option kept wanting to export all images. This means I can’t ship together images with different ratings unless I opt to ship ALL the images in a project. Or I have to modify the rating for the photos that I want, and then have them fall under a different filter for export.
But that isn’t the way to do it. Sometimes an image might have a 3-star rating, and I’d want to keep it that way but also ship it to my software along with other 5-star rated images. Maybe it was a keeper but not a great image. I should still be able to ship it while keeping its rating. I shouldn’t have to change the rating first in Opticull and then back in Lightroom or Capture One.
A Show Stopper?
There was another issue I encountered here. Being a culling software, I expected the star rating and color coding to also be ported over to other software when exported from Opticull. But as much as I tried and tested it out, these two parameters weren’t showing up in Capture One and Lightroom on the files I shipped over from Opticull.
I dropped a note to the DopeAI team on this. They quickly responded back and informed me that I need to manually save the ratings and colors to the metadata files using a keyboard shortcut. Once this is done, they said these parameters would also show up in the software that the files were shipped to. They assured me that this saving would automatically be done in a future release. I did as they instructed and it worked fine after that.
Things That Can Be Improved
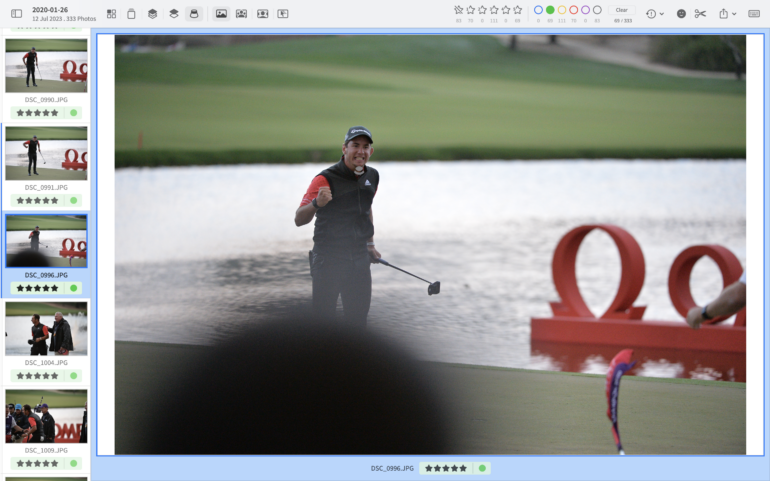
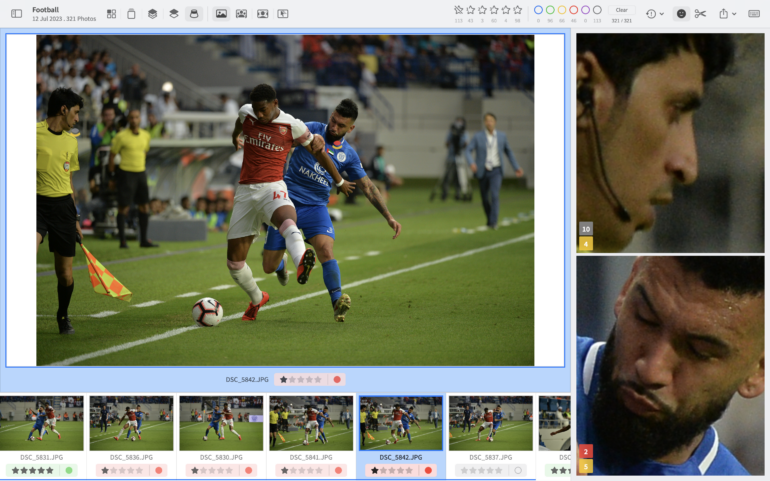
Currently, it looks like the AI rating is based solely on face sharpness and the extent to which a subject’s eyes are open or not. This could be improved upon by analyzing parameters like emotion and scanning the image for obstructions such as the one seen in the above photo.
Clicking on the exclamation mark in the right-hand corner of the images that display it should tell me what’s wrong with the image. This didn’t happen during my review.
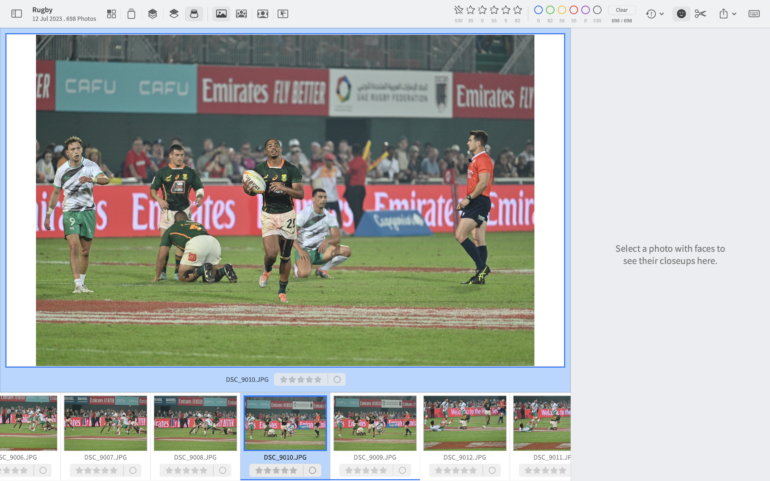
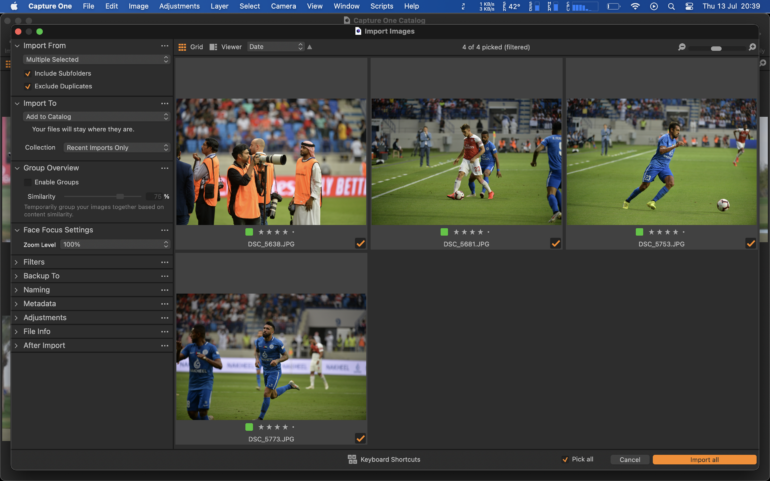
The app works best when subjects aren’t too far from the camera. 530 images from a batch of 698 that I shot at a rugby tournament had no star or color ratings. Even though the faces were sharp and perfectly exposed.
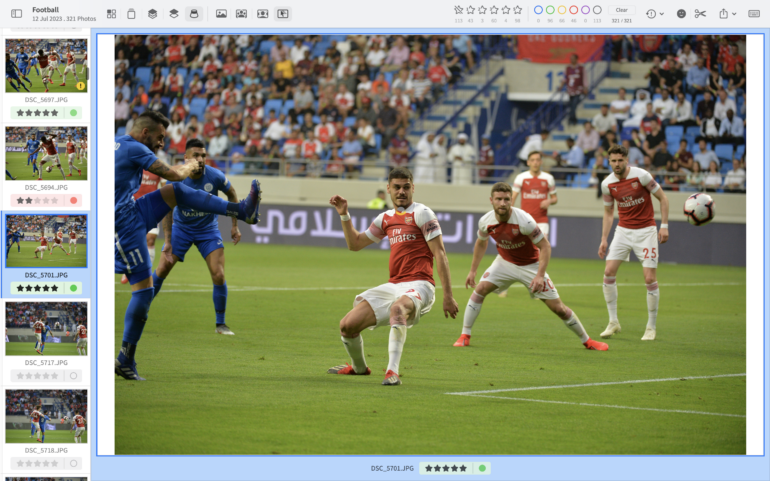
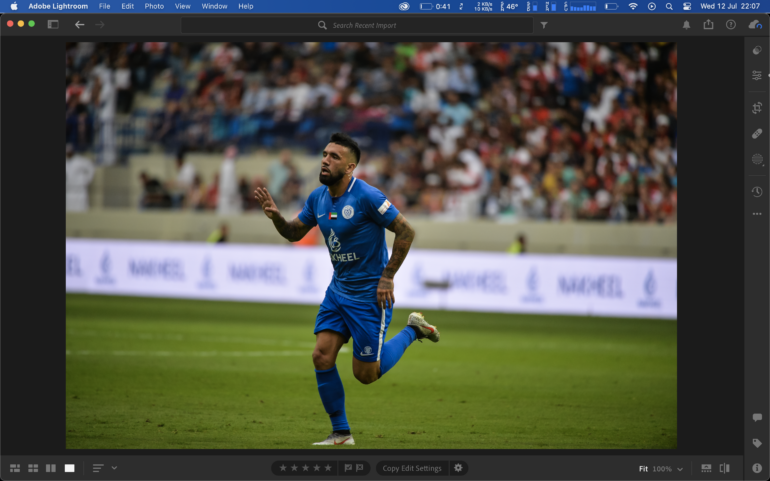
Is the AI racially biased? Not at all. Both light skin and dark skin players in the above photo were passed over by the algorithm. I guess it just needs more training at detecting more human faces in crowded photos.
Who Should Download Opticull?
This would be a great addition to the workflow of photographers that shoot many photos (of people) in a single session. Such as sports and wedding photographers. As of now, Opticull and its AI algorithm do a decent job of rating images for you to easily cull and export them. But a few bugs still need to be exterminated. It’s software that has immense potential.
Get rid of the ads!
Did you enjoy reading this article as much as we enjoyed writing it? There's a way to support us and our reporting, getting ad-free navigation and more as a bonus. Subscribe to us for less than a coffee per month —just $3.99— or take advantage of our yearly subscription with a hefty discount for only $25.- An ad-free experience
- A free mystery box for Lightroom or Capture One
- All the books in our store
- 20% discount on Capture One
- 30% discount on Imalume Photo Theft Protection
- 20% off Herbs and Kettle Tea Company.
- 20% off your order from MPIX printing services.
- 5% off Viltrox Products via their eCommerce store.
- 10% off all film developing, printing and scanning services from Blue Moon Camera and Machine
- 15% off 7Artisans products: The lens and accessory maker is offering a sweet discount for Phoblographer's readers.