
The secret to sharper photos is deeper blacks which make the rest of the scene pop.
When you’re editing a photo, you’ll most likely boost the clarity or the sharpness of the image to make it more appealing. But there’s another trick you may not be aware of. When you edit the black levels of a photo the rest of the scene pops out more. It’s a simple psychology trick that can make someone think the image they’re looking at is much sharper than it really is. Best of all, no one needs to pixel peep your photo. If you’ve got a few minutes, check out our latest tutorial from our YouTube Channel embedded below.
The Science Behind This Method and Sharper Photos
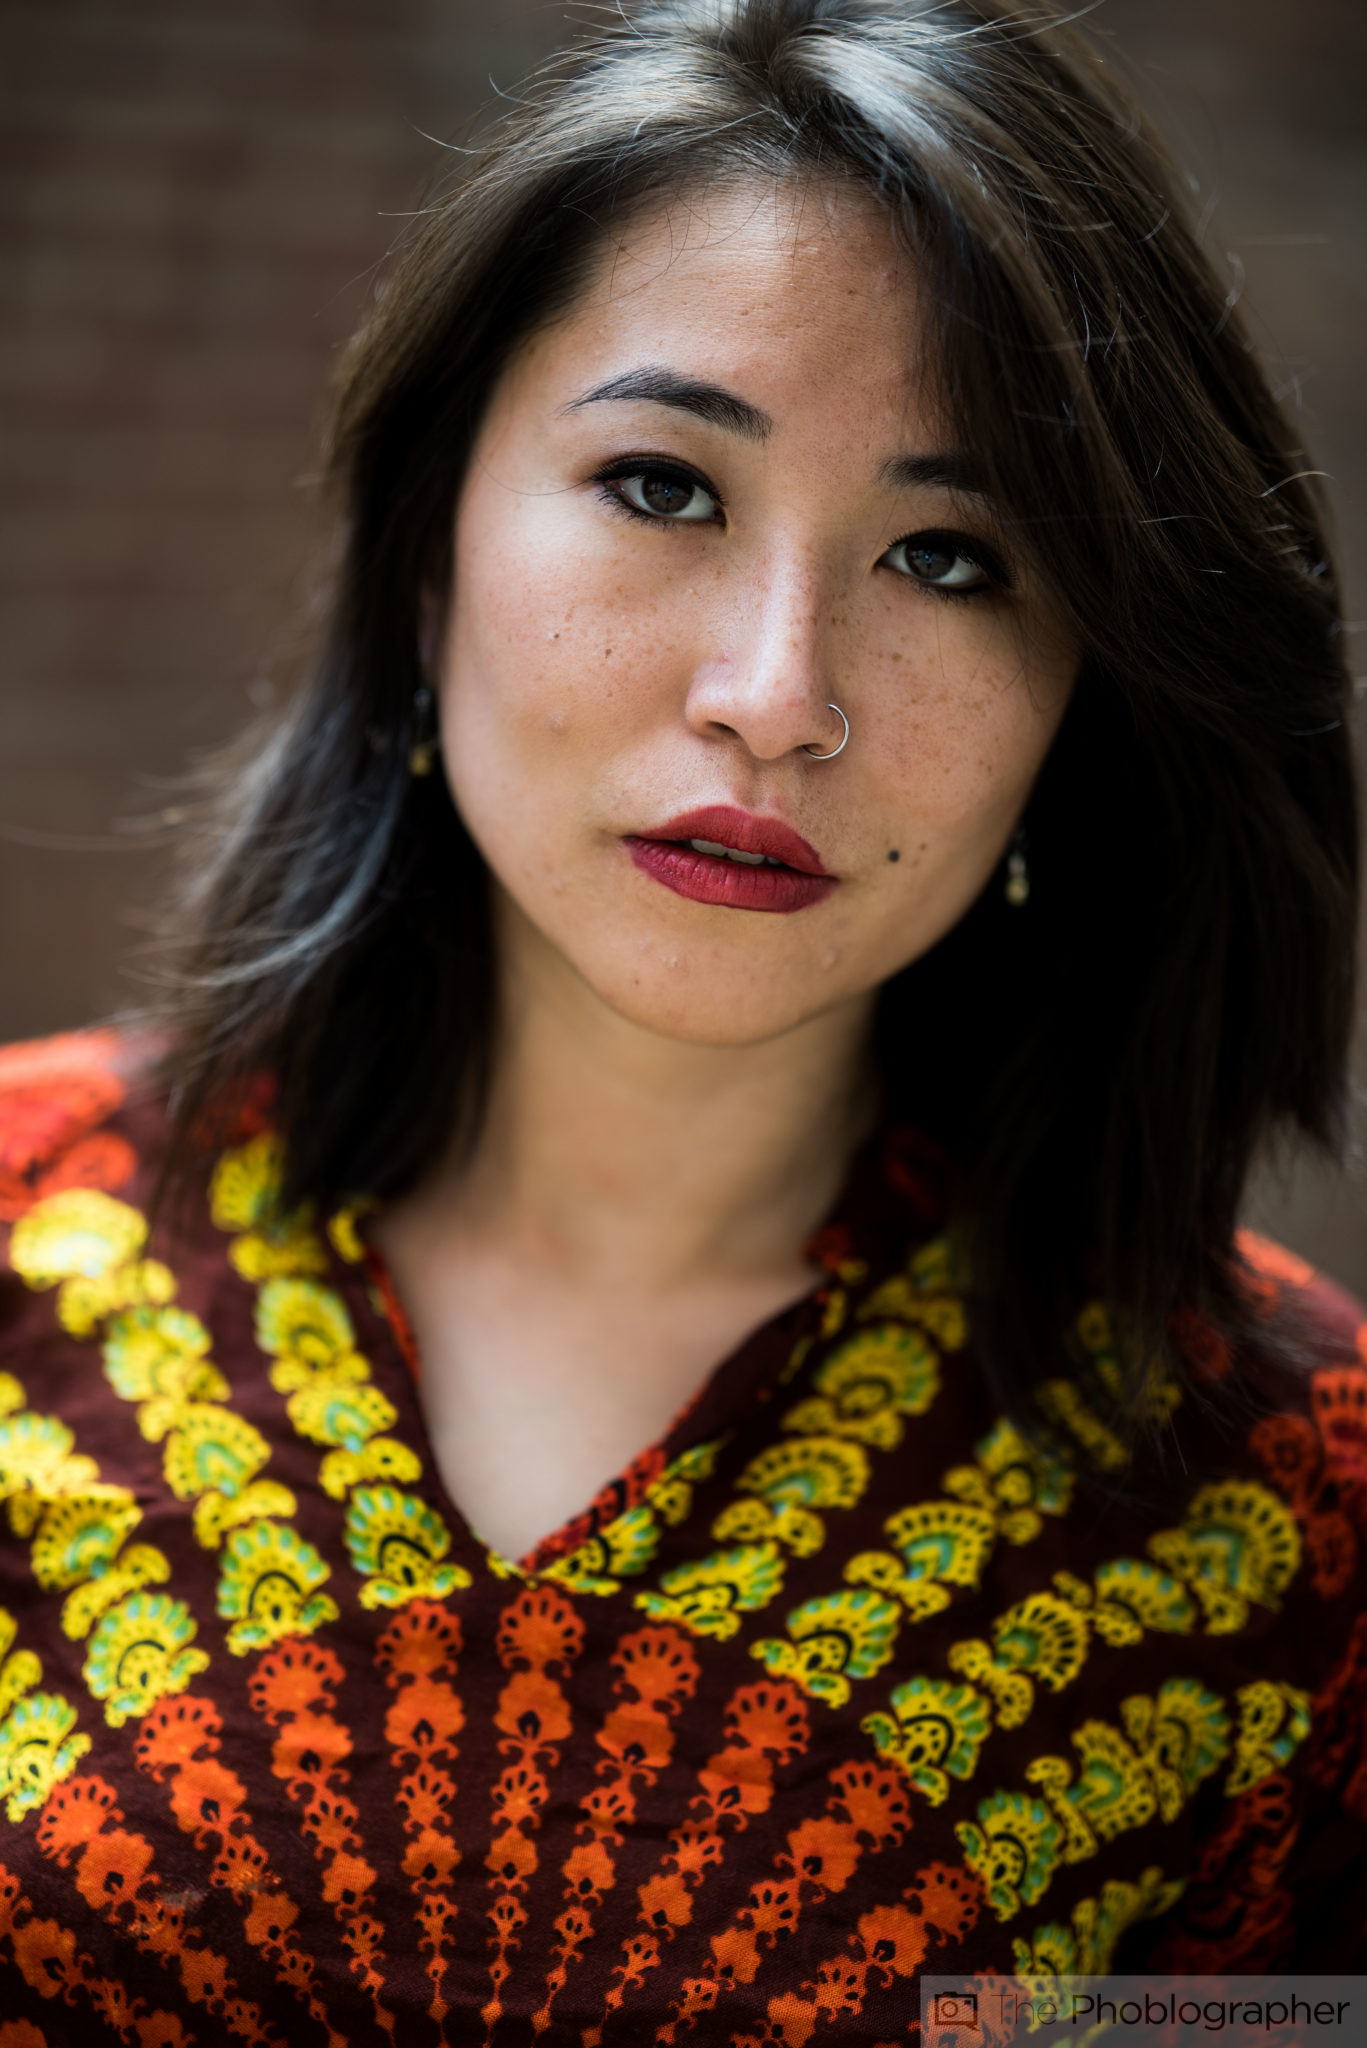
Right now, you’re reading this page, probably in the standard light mode that it’s in (we’re working on a dark mode render). The truth is that you’re probably ignoring all the white space because you’re trained to focus on the text. Images work similarly. When you look at a photo, you’re noticing not only the composition but the bright areas, dark areas, colors, etc. If something is too deep in the black area, then you’re likely ignoring it. In the above photo, we’re talking about the hair. If hair or specific details are too dark, we focus on other details like the face, eyes, hands, lips, etc. Adjustments like this would be done without touching the clarity or sharpness. The idea behind this has a bit to do with the contrast, but contrast increases overall details in the image; we’re focusing on a selected aspect here to get sharper photos.
Combine It with Color Channel Editing
Of course, when you combine this method with editing other color channels, you utilize its fullest potential. Start out by identifying the three primary colors in the scene (typically the wardrobe, skin tones, and background for portraits, but this works with more than just portraiture). After you set your desired white balance, focus on those primary colors, and adjust their luminance, saturation, and hues accordingly. The colors will stand out a lot around the black areas in the scene. With time, you’ll notice you’ve got what appear to be sharper photos.
“Then there are the very unconventional things: to start, I make the black levels darker. The deeper the blacks are, the sharper the eye will perceive them because it focuses more on other areas by default. After this, I boost the contrast. Added contrast is nice because it makes a larger difference between the darks and the lights–which means that your shadows get darker and your highlights get brighter. This is also why I love Sigma and Zeiss lenses; because their contrast is stronger than typical lenses.”
– The Secrets Behind Making Your Images Look Sharper
Go Easy on Clarity and Sharpness
Lastly, go easy on the clarity and sharpness. Clarity adjusts the mid-tones in the image, and many photographers tend to use it as a crutch. Too much Clarity looks unnatural, and too little doesn’t provide the pop that you need. After you edit the color channels and the black levels, you won’t need that much clarity or sharpness.
Get rid of the ads!
Did you enjoy reading this article as much as we enjoyed writing it? There's a way to support us and our reporting, getting ad-free navigation and more as a bonus. Subscribe to us for less than a coffee per month —just $3.99— or take advantage of our yearly subscription with a hefty discount for only $25.- An ad-free experience
- A free mystery box for Lightroom or Capture One
- All the books in our store
- 20% discount on Capture One
- 30% discount on Imalume Photo Theft Protection
- 20% off Herbs and Kettle Tea Company.
- 20% off your order from MPIX printing services.
- 5% off Viltrox Products via their eCommerce store.
- 10% off all film developing, printing and scanning services from Blue Moon Camera and Machine
- 15% off 7Artisans products: The lens and accessory maker is offering a sweet discount for Phoblographer's readers.