
Something that photographers don’t talk about enough is the multiple exposure mode on their cameras. Why? Well, it’s typically because so many of them don’t understand it and it isn’t made easy for them. But in fact, it’s made incredibly easy for them. The truth is that just like flash, manual exposures or anything else, it just takes time to learn. Once you learn this skill, you can use it to artistically express yourself in ways you haven’t done before. In this article, we’re giving you a brief overview on how to use the multiple exposure mode on your camera. And we hope that you’ll give it a shot.
Table of Contents
The Best Cameras for This
We’ve done an article on just this subject beforehand. So you can find our favorite cameras to do the multiple exposue process in this piece here. But here’s more of a primer:
- Canon: The absolute best. It lets you shoot multiple exposure RAWs. You can stack exposures on top of images you already shot too.
- Nikon: Their cameras have multiple exposure modes. But they render the final image as a JPEG.
- Sony: Doesn’t do it. They used to when they still had the Playmemories App store.
- Fujifilm: They have multiple exposure modes built in. It lets you stack it with film simulations, which is really fun. But it renders the final images as JPEGs.
- Leica: Doesn’t do it.
- Panasonic: Used to do it. They haven’t included it in since at least the S5 II.
- OM System: Many of their cameras have this feature, but it’s kind of difficult to find it.
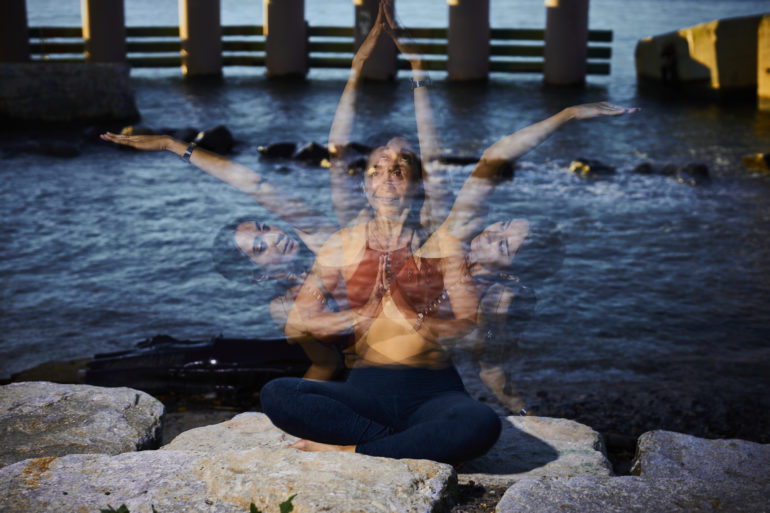
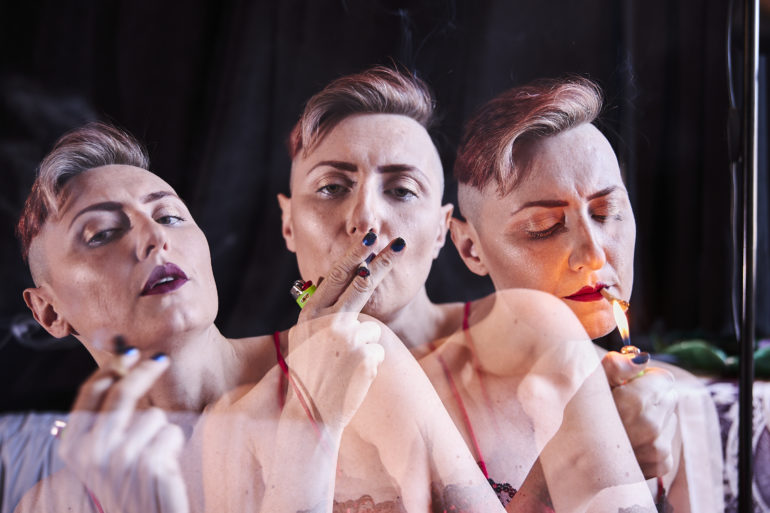
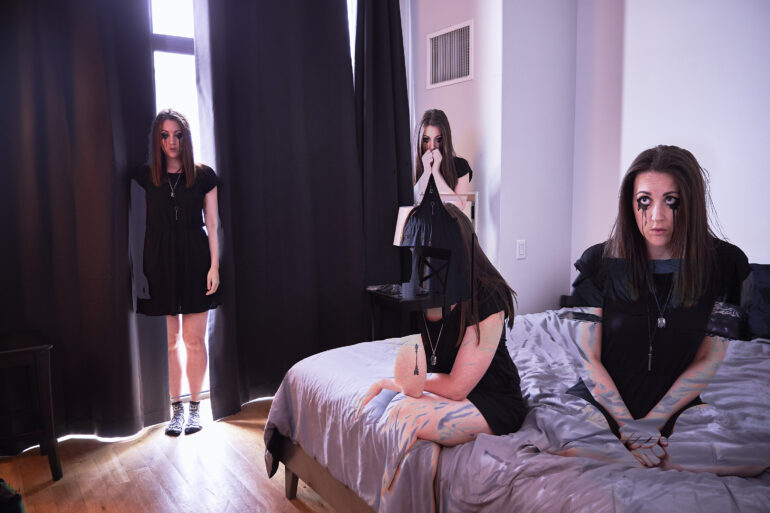
Method 1: The Black Background
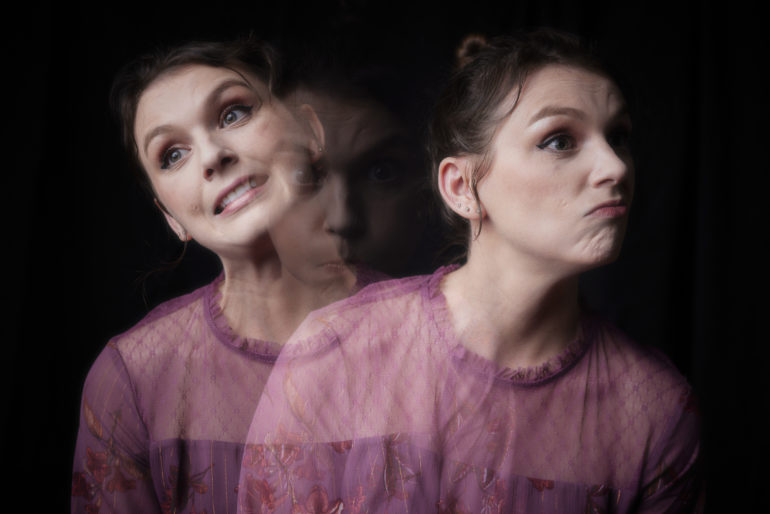
One of the easiest ways to do a multiple exposure image is to have a black background for consistency. If you have that, then you at least have a blank canvas to make images on. For this method, you set the camera down on a tripod of some sort. It also helps to have a consistent light source. Note how I said consistent, and not necessarily constant light. I did all these images using flash.
On your camera, you’ll set your camera’s multiple exposure mode to additive, if it offers that. And then you direct your subject to be in specific parts of the frame and to do very different things. Essentially, here’s where you just have fun and don’t think too seriously about what happens. You also typically want your subjects to be in different parts of the frame.
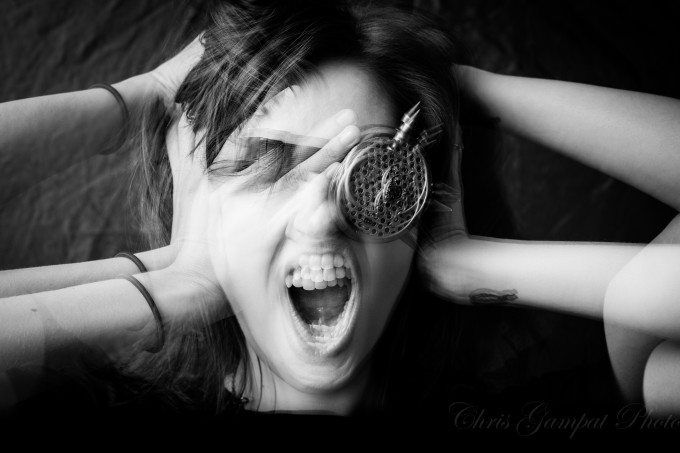
When that consistency isn’t there and when you’re layering subjects on top of one another, you might get results that you’re not a fan of. In my image below, you can see that. Some folks might not like this. But I like to think of this shoot as something where the hero in my photo is disappearing and mourning something. I embraced that creative intent with this shoot and loved what it did.
This isn’t the only method of doing a multiple exposure, however. There’s also the idea of stacking photos.
Method 2: The Multiple Exposure Stack
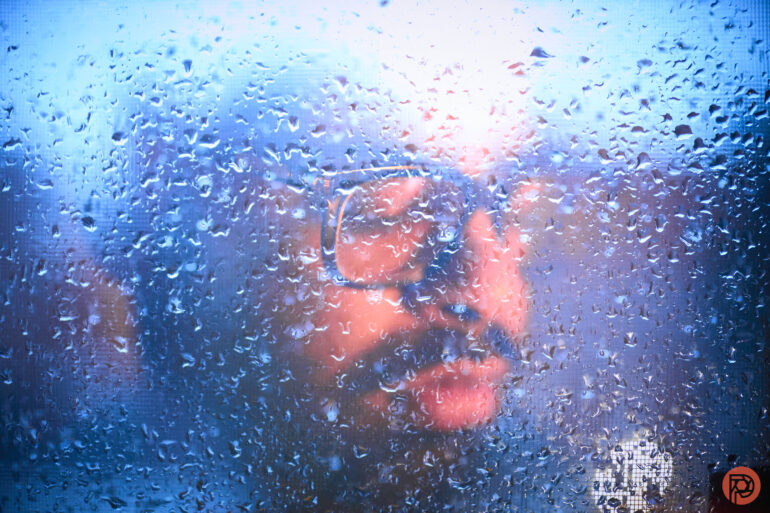
For this method, we encourage photographers to shoot a frame of some sort. Perhaps it’s a self portrait with a specific lighting. Then go to the multiple exposure mode and use that photo as your base. Set the camera to only stack a single photo on top of that. Then find a pattern that you like, adjust the exposure, and shoot. This way you can make a really unique and beautiful image that you’ll be proud of. This specific method is called a double exposure.
We encourage photographers to be imaginative. The camera doesn’t have to see for you — and that’s part of the beauty of photography. You can, and should, make things that the human eye and cameras can’t see.
Get rid of the ads!
Did you enjoy reading this article as much as we enjoyed writing it? There's a way to support us and our reporting, getting ad-free navigation and more as a bonus. Subscribe to us for less than a coffee per month —just $3.99— or take advantage of our yearly subscription with a hefty discount for only $25.- An ad-free experience
- A free mystery box for Lightroom or Capture One
- All the books in our store
- 20% discount on Capture One
- 30% discount on Imalume Photo Theft Protection
- 20% off Herbs and Kettle Tea Company.